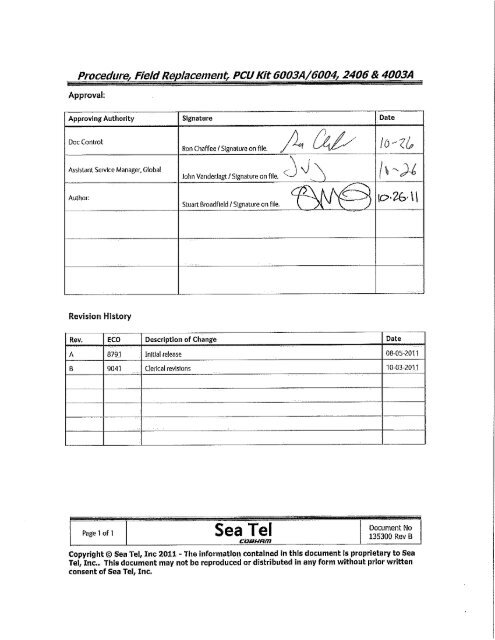
Procedure, Field Replacement, PCU Kit, 6003A/6004, 2406 & 4003A
Procedure, Field Replacement, PCU Kit, 6003A/6004, 2406 & 4003A
Procedure, Field Replacement, PCU Kit, 6003A/6004, 2406 & 4003A

Create successful ePaper yourself
Turn your PDF publications into a flip-book with our unique Google optimized e-Paper software.
<strong>Procedure</strong>, <strong>Field</strong> <strong>Replacement</strong>, <strong>PCU</strong> <strong>Kit</strong>, <strong>6003A</strong>/<strong>6004</strong>, <strong>2406</strong> & <strong>4003A</strong>1. Brief Summary:Troubleshooting document for diagnosing a fault with and replacing the <strong>PCU</strong> assembly on the <strong>6003A</strong>/<strong>6004</strong>, <strong>2406</strong> &<strong>4003A</strong> series antennas.2. Checklist:Verify InitializationN0 ParameterPedestal ErrorTest Motor3. Theory of Operation:The <strong>PCU</strong> motherboard calculates the movement of the vessel based on the feedback from sensors in the level cage anddirectional changes from the vessels gyro compass. The <strong>PCU</strong> uses this data to drive the motor of the relevant axis to anequal and opposite amount of movement to the vessel to maintain stabilization. Along with stability, the <strong>PCU</strong> alsocontrols the antenna dishscan pattern.All tracking, targeting, pointing and polarization commands are sent from the DAC to the <strong>PCU</strong>. These commands arebased on the vessel’s GPS location, targeting calculations or operator inputs. The <strong>PCU</strong> software configures the functionof the pedestal and is calibrated by the N0 parameter. This sets the motor gains for each axis and the dishscan patternbased on the size of the antenna. These settings are all stored as “Remote Parameters”.Should the <strong>PCU</strong> flag a pedestal error, further diagnostics will need to be completed to identify which axis the error islocated in and also the component(s) which are faulty. This document will run through decoding the pedestal error, thenfurther troubleshooting the relevant axis to diagnose which component(s) are defective.4. Verify Initialization:Power cycle the pedestal.1. Level cage drives to its end stop then drives to 45 degrees.2. Elevation axis drives to 45 degrees based on the level cage.3. Cross level axis drives to level based on the level cages horizon reference.4. Limited azimuth axis systems drive clockwise into the azimuth end stop, at 630 degrees of relative.5. Unlimited azimuth axis systems drive clockwise until the home flag and sensor align.If the ACU reports model "xx03" or “xx06”, the <strong>PCU</strong>’s N0 parameter needs calibrating. Refer to the calibrating the <strong>PCU</strong>N0 Parameter section of this document. Failures to complete any of the initialization steps, or a pedestal error, requirefurther troubleshooting.Page 1 of 8Document No135300 Rev BCopyright © Sea Tel, Inc 2011 - The information contained in this document is proprietary to SeaTel, Inc.. This document may not be reproduced or distributed in any form without prior writtenconsent of Sea Tel, Inc.
<strong>Procedure</strong>, <strong>Field</strong> <strong>Replacement</strong>, <strong>PCU</strong> <strong>Kit</strong>, <strong>6003A</strong>/<strong>6004</strong>, <strong>2406</strong> & <strong>4003A</strong>5. Pedestal Error (Error 8):5.1. Decoding a Pedestal Error.When the DAC displays a pedestal error, enter into the remote command window and enter “S0000” then pressEnter twice. The error code will now be displayed in the Remote Monitor screen. Decode the 4 th character of theerror code from the below table:@ None K Ref + LV + CL V Stab Limit + AZ + LVA CL L Ref + AZ W Stab Limit + AZ + LV + CLB LV M Ref + AZ + CL X Stab Limit + RefC CL + LV N Ref + AZ + LV Y Stab Limit + Ref + CLD AZ O Ref + AZ + LV + CL Z Stab Limit + Ref + LVE AZ + CL P Stab Limit [ Stab Limit + Ref + LV + CLF AZ + LV Q Stab Limit + CL \ Stab Limit + Ref + AZG AZ + LV + CL R Stab Limit + LV ] Stab Limit + Ref + AZ + CLH Ref S Stab Limit + CL + LV ^ Stab Limit + Ref + AZ + LVI Ref + CL T Stab Limit + AZ _ Stab Limit + Ref + AZ + LV + CLJ Ref + LV U Stab Limit + AZ + CL5.2. Error Types.The 3 types of pedestal error are....1. Servo Limit – A servo limit error means the <strong>PCU</strong> motherboard is issuing the command to the motordriver PCB to drive the relevant axis harder than it should under normal operation (the servo limit hasbeen reached). This can occur through stabilisation or targeting.2. Stability Limit – A stability limit error means the antenna has mis‐pointed from its desired targetposition by more than half a degree. When a stability limit error is flagged on a VSAT antenna, the DACwill send a TX Mute command to inhibit the transmit function of the satellite modem; It is common tosee the servo limit and stability limit errors together.3. AZ Reference Error – An azimuth reference error means the antenna has a corrupt reading in therelative scale. If the system is limited azimuth it could be caused by it hitting its end stop under normaloperation. If the system is unlimited azimuth it could be caused by the antenna completing a 360degree rotation without the sensor detecting the home flag. Other possibilities are the encoder failingor a physical problem such as the belt slipping on the motor pulley or the pulley slipping on the motorshaft.Page 2 of 8Document No135300 Rev BCopyright © Sea Tel, Inc 2011 - The information contained in this document is proprietary to SeaTel, Inc.. This document may not be reproduced or distributed in any form without prior writtenconsent of Sea Tel, Inc.
<strong>Procedure</strong>, <strong>Field</strong> <strong>Replacement</strong>, <strong>PCU</strong> <strong>Kit</strong>, <strong>6003A</strong>/<strong>6004</strong>, <strong>2406</strong> & <strong>4003A</strong>5.3. Troubleshooting Pedestal Errors – Servo Limit and Stability Limit.1. Reinitialize the pedestal; does it drive correctly or not at all? If none of the axes drive, verify the N0 andmotor gain parameters (N1 = CL, N2 = EL and N3 = AZ) are correctly configured in the <strong>PCU</strong> through theRemote Command window of the DAC. Query by Nx999, where “x” is the axis identifier.2. Verify the balance of the antenna and check for physical restrictions on the pedestal – If the axis isn’tcorrectly balanced the <strong>PCU</strong> will be outputting additional drive commands to maintain the antennaslevel and pointing positions.3. The motor isn’t driving correctly or no motor drive is present, test the motor for faults using the belowprocedure. If the motor is defective replace it and then retest the function of the antenna. If the axis stillfails to drive correctly the defective motor may have damaged the motor driver PCB. Replace the <strong>PCU</strong>assembly.4. Another potential problem could be a damaged or intermittent harness connection. Remove theharness back shells and verify all the pins are seated correctly. Check continuity from pin to pin (end toend) and also across the pins (at each end) to verify there is no short in the connections.5.4. Troubleshooting Pedestal Errors – Azimuth Reference Error.1. If the system is limited azimuth, verify that the antenna drives clockwise to its end stop duringinitialization. If the antenna is unlimited azimuth, reinitialize it and verify that the sensor detects thehome flag as the system drives clockwise. If this step fails, verify if the magnet/sensor is present orattempt to move the sensor closer to the magnet. Failing this, the sensor or its feedback has failed.2. Drive the azimuth axis in 90 degree increments and verify the antenna points correctly and that theDAC displays the correct relative position. Also verify that there is no physical restriction on theazimuth axis such as the belt slipping on the motor pulley or the pulley slipping on the motor shaft.5.5. Test the Motor.1. Check continuity between ground (the motor connector back shell) and the 3 driver outputs on pins 1, 2and 3 of the harness.2. Now check continuity between pins 4, 5, 6, 7 and 8 and the ground (the motor connector back shell).3. Also check between the individual pins 1, 2 and 3 and the rest of the pins (i.e. test pin 1 to pin 4, 5, 6, 7and 8 and so on, not between pins 1 and 2, 1 and 3 or 2 and 3).4. If there is any continuity measured on the steps mentioned above, the motor is defective. If the motorhas drawn excessive current then there is a possibility the motor driver PCB (and potentially the <strong>PCU</strong>motherboard) has been damaged. The antenna’s operation should be verified with a replacementmotor. If after replacing the motor the antenna is still not operational, replace the <strong>PCU</strong> assembly as perthe following procedure.Page 3 of 8Document No135300 Rev BCopyright © Sea Tel, Inc 2011 - The information contained in this document is proprietary to SeaTel, Inc.. This document may not be reproduced or distributed in any form without prior writtenconsent of Sea Tel, Inc.
<strong>Procedure</strong>, <strong>Field</strong> <strong>Replacement</strong>, <strong>PCU</strong> <strong>Kit</strong>, <strong>6003A</strong>/<strong>6004</strong>, <strong>2406</strong> & <strong>4003A</strong>6. Home Flag Offset:If an unlimited azimuth antenna has been installed with an offset from the bow of the vessel, it is possible a Home FlagOffset (HFO) has been stored in the <strong>PCU</strong> to correct the relative position. Before replacing a <strong>PCU</strong>, it is advisable to querythe HFO parameter to verify if it will need to be configured in the replacement <strong>PCU</strong>. When the DAC is showing 000.0relative, the antenna should be pointing to the bow of the vessel. To query the HFO, combine the parameter code “N6”with the query code “999” and enter “N6999” into the remote command window of the DAC and press the Enter button.7. Configuring the <strong>6003A</strong>/<strong>6004</strong>, <strong>2406</strong> and <strong>4003A</strong> <strong>PCU</strong> Software:Part number 121185‐2 is commonly used between a number of Sea Tel antenna models. Out of the box, it is suppliedwith software 123385 for a <strong>6003A</strong>/<strong>6004</strong> pedestal. If this <strong>PCU</strong> is to be used on a <strong>6003A</strong> or <strong>6004</strong>, it can be installed withoutchange and the N0 can be set. If the <strong>PCU</strong> is to be used on a 6003, <strong>4003A</strong> or <strong>2406</strong>, the <strong>PCU</strong> software will need to bereprogrammed for correct operation as per the below table. Failure to do this may result in damage to the pedestal.Antenna Model Software Part Number Software Revision<strong>6003A</strong> / <strong>6004</strong> 123385 x04‐2.53k (or later)<strong>4003A</strong> 121449 x03‐2.53 (or later)<strong>2406</strong> 123091 x03‐2.86 (or later)*Contact your local Sea Tel service department to verify the latest software version for your antenna.Install the <strong>PCU</strong> on the pedestal using the following procedure. Do not connect the motor driver harness. Looking at theD‐sub connections on the rear of the <strong>PCU</strong>, the lower right is for the interface harness, the lower left is for the referenceharness and the upper right connector is for the motor driver harness. Do not connect this harness.Energize the pedestal, the system will now try to initialize but won’t be able to drive any of its axes due to the motors notbeing connected (preventing any potential damage). After the system has come out of the initialization process, useProgterm to program the <strong>PCU</strong> with the correct software version for the model of antenna.Once the software upload is complete, configure the <strong>PCU</strong>s N0 parameter as per the following procedure. Then powerdown the system, connect the motor driver harness and re‐energize the pedestal verifying the antenna initializescorrectly.Page 4 of 8Document No135300 Rev BCopyright © Sea Tel, Inc 2011 - The information contained in this document is proprietary to SeaTel, Inc.. This document may not be reproduced or distributed in any form without prior writtenconsent of Sea Tel, Inc.
<strong>Procedure</strong>, <strong>Field</strong> <strong>Replacement</strong>, <strong>PCU</strong> <strong>Kit</strong>, <strong>6003A</strong>/<strong>6004</strong>, <strong>2406</strong> & <strong>4003A</strong>8. Replacing the <strong>PCU</strong> Assembly:8.1. Tools. 2mm Flat Blade (Terminal) Screwdriver #1 Phillips Screwdriver Loctite 2428.2. <strong>Procedure</strong>.Replacing the <strong>6003A</strong>/<strong>6004</strong>, <strong>4003A</strong> and <strong>2406</strong> <strong>PCU</strong>, Sea Tel kit part number: 135337 (<strong>PCU</strong> assembly part number:121185‐X, depending on configuration).*CAUTION: Power down the pedestal before followingthis procedure.1. Using a 2mm flat blade screwdriver, remove harnessconnections from the back of the <strong>PCU</strong> and disconnectthe BNC connector coming from the GPS antenna.2. Using a #1 Phillips screwdriver, remove the 4 screwsattaching the <strong>PCU</strong> to the azimuth post and remove theassembly.3. Now remove the GPS antenna from the faulty <strong>PCU</strong>and attach it to the replacement <strong>PCU</strong> using the adhesivepad provided in the kit & secure the excess with the P‐clips, applying Loctite 242 to the threads.Page 5 of 8Document No135300 Rev BCopyright © Sea Tel, Inc 2011 - The information contained in this document is proprietary to SeaTel, Inc.. This document may not be reproduced or distributed in any form without prior writtenconsent of Sea Tel, Inc.
<strong>Procedure</strong>, <strong>Field</strong> <strong>Replacement</strong>, <strong>PCU</strong> <strong>Kit</strong>, <strong>6003A</strong>/<strong>6004</strong>, <strong>2406</strong> & <strong>4003A</strong>4. Install the replacement <strong>PCU</strong> and secure it to theazimuth post using the 4 screws and washers removedearlier, using Loctite 242 during installation.5. Re‐Connect the D‐sub harness connectors and theGPS antennas BNC connector.6. Configure the <strong>PCU</strong>’s N0 parameter (as per thefollowing procedure) and adjust the remote tilt ifnecessary.9. Calibrating the <strong>6003A</strong>/<strong>6004</strong>, <strong>2406</strong> and <strong>4003A</strong> <strong>PCU</strong> N0 Parameter:As <strong>PCU</strong>s are universal across the model range, it is necessary to configure the N0 parameter of the replacement <strong>PCU</strong> tothe specification of the pedestal it will be installed on. This will set the motor gains for CL (N1), EL (N2) and AZ (N3) andalso configure the dishscan pattern (N7) for the size of the pedestals reflector.Without the N0 parameter configured in the <strong>PCU</strong> the antenna won’t initialize as none of the motor gains will be set ‐ onlythe level cage will drive. The status window of the DAC will also display the model number of the antenna as “xx03”opposed to <strong>6004</strong>, <strong>4003A</strong> or <strong>2406</strong>.Enter into the remote command screen and enter the correct N0 parameter for the model of antenna as per thebelow table. I.e. the N0 parameter for a <strong>4003A</strong> is “008”. You would enter “N0008” (“N0” for the system parameter +“008” for the antenna model).Save the remote parameters.Cycle power to the system to reinitialize the pedestal, verifying the N0 has saved and the system initializescorrectly, displaying the correct model number on the DAC once the initialization has completed.Model N0 N1 N2 N3 N7<strong>4003A</strong> 008 030 030 020 009<strong>6003A</strong> 073 051 051 025 025<strong>6004</strong> 076 051 051 025 025<strong>2406</strong> 017 020 010 012 042Page 6 of 8Document No135300 Rev BCopyright © Sea Tel, Inc 2011 - The information contained in this document is proprietary to SeaTel, Inc.. This document may not be reproduced or distributed in any form without prior writtenconsent of Sea Tel, Inc.
<strong>Procedure</strong>, <strong>Field</strong> <strong>Replacement</strong>, <strong>PCU</strong> <strong>Kit</strong>, <strong>6003A</strong>/<strong>6004</strong>, <strong>2406</strong> & <strong>4003A</strong>10. Calibrating the Remote Tilt Setting:This procedure is required to calibrate the level cage so that all the sensors will be accurately aligned to their axis. Thefluid filled tilt sensor provides a two dimensional horizon reference. The system is not able to automatically calculate theexact center value, therefore it is necessary to perform this procedure to manually enter any offset required to make surethe <strong>PCU</strong> receives a true horizon reference.1. Turn dishscan off:Enter into the Setup Menu by pressing and holding the arrows together until the EL Trim or Auto Trimparameter is displayed.Use the arrow key to scroll through the menu until the dishscan window is displayed.Press the arrow to activate the window and then press the arrow, followed by the button to turndishscan from on to off.*Note: When you press thebutton.arrow to turn dishscan off you won’t see the display change until you press the(Steps 2‐7 requires assistance to observe and operate antenna simultaneously)2. Enter into the Setup Menu by pressing and holding the arrows together until the EL Trim or Auto Trimparameter is displayed.3. Push the arrow key until the Remote Tilt window is displayed.4. Push the arrow key to activate the Remote Tilt setting.5. Use the arrow keys to position the bubble as close to the center as possible. Each press of an arrow key on thedirectional pad will move the Remote Tilt ½ a degree. It is advised that you only press the button once and wait forthe axis to move before pressing it again.When standing behind the antenna looking at the bubble, if the bubble is over to the right, you need to press the(right) arrow to bring the bubble into the center. If the bubble is down towards you, you need to press the(down) arrow to bring it towards the center. If the bubble is to the left, you need to press the (left) arrow and ifthe bubble is up towards the top, you need press the (up) arrow to move it towards the center.Page 7 of 8Document No135300 Rev BCopyright © Sea Tel, Inc 2011 - The information contained in this document is proprietary to SeaTel, Inc.. This document may not be reproduced or distributed in any form without prior writtenconsent of Sea Tel, Inc.
<strong>Procedure</strong>, <strong>Field</strong> <strong>Replacement</strong>, <strong>PCU</strong> <strong>Kit</strong>, <strong>6003A</strong>/<strong>6004</strong>, <strong>2406</strong> & <strong>4003A</strong>When correct the bubble should be as close to the center of the fluid as possible6. When the bubble is as central as possible press the button to deactivate the Remote Tilt setting.7. Turn dishscan on:Enter into the Setup Menu by pressing and holding the arrows until either the EL Trim or Auto Trimparameter is displayed.Use the arrow key to scroll through the menu until the dishscan window is displayed.Press the arrow key to activate the window and then press the arrow key, followed by the button toturn dishscan from off to on.*Note: When you press thebutton.arrow to turn dishscan on you won’t see the display change until you press the8. Save the Remote Tilt setting in the <strong>PCU</strong>:Press the arrow key until the Remote Parameters window is displayed.Press the arrow key to activate the window followed by the button (you’ll see a confirmation on thedisplay saying “Saved”).9. As good practice make a note of your N4 and N5 parameters once you have correctly set the remote tilt. The N4 andN5 parameters are a numeric read of the remote tilt. To do this go to the remote command window and key inN4999 to read the CL setting, followed by N5999 to read the EL setting.Page 8 of 8Document No135300 Rev BCopyright © Sea Tel, Inc 2011 - The information contained in this document is proprietary to SeaTel, Inc.. This document may not be reproduced or distributed in any form without prior writtenconsent of Sea Tel, Inc.