


You also want an ePaper? Increase the reach of your titles
YUMPU automatically turns print PDFs into web optimized ePapers that Google loves.
Part No. 693090 - 05-04-05<br />
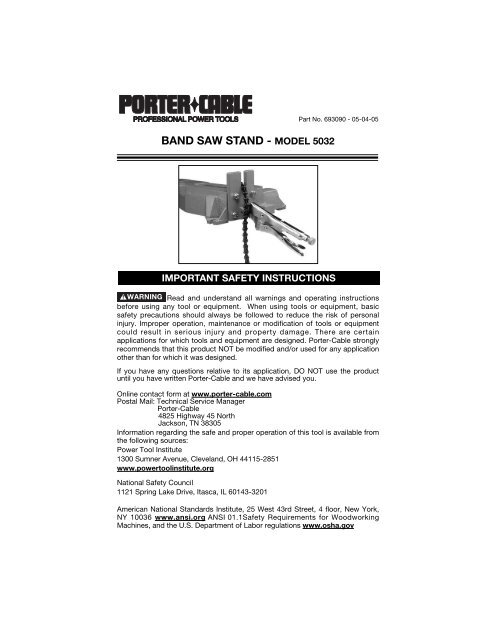
<strong>BAND</strong> <strong>SAW</strong> <strong>STAND</strong> - <strong>MODEL</strong> <strong>5032</strong><br />
IMPORTANT SAFETY INSTRUCTIONS<br />
Read and understand all warnings and operating instructions<br />
before using any tool or equipment. When using tools or equipment, basic<br />
safety precautions should always be followed to reduce the risk of personal<br />
injury. Improper operation, maintenance or modification of tools or equipment<br />
could result in serious injury and property damage. There are certain<br />
applications for which tools and equipment are designed. Porter-Cable strongly<br />
recommends that this product NOT be modified and/or used for any application<br />
other than for which it was designed.<br />
If you have any questions relative to its application, DO NOT use the product<br />
until you have written Porter-Cable and we have advised you.<br />
Online contact form at www.porter-cable.com<br />
Postal Mail: Technical Service Manager<br />
Porter-Cable<br />
4825 Highway 45 North<br />
Jackson, TN 38305<br />
Information regarding the safe and proper operation of this tool is available from<br />
the following sources:<br />
Power Tool Institute<br />
1300 Sumner Avenue, Cleveland, OH 44115-2851<br />
www.powertoolinstitute.org<br />
National Safety Council<br />
1121 Spring Lake Drive, Itasca, IL 60143-3201<br />
American National Standards Institute, 25 West 43rd Street, 4 floor, New York,<br />
NY 10036 www.ansi.org ANSI 01.1Safety Requirements for Woodworking<br />
Machines, and the U.S. Department of Labor regulations www.osha.gov
SPECIFIC SAFETY RULES<br />
1. Read and follow all safety instructions in the instruction manual supplied<br />
with your Porta-Band © saw.<br />
2. Hold tool by insulated gripping surfaces when performing an operation<br />
where the cutting tool may contact hidden wiring or its own cord.<br />
Contact with a “live” wire will make exposed metal parts of the tool “live”<br />
and shock the operator.<br />
3.<br />
Exercise extreme caution when blind cutting to be certain<br />
that there are no foreign objects such as electrical wire, conduit, plumbing<br />
pipes, etc., that may come into contact with the blade.<br />
4. Always use safety glasses.. Wear safety glasses. Everyday eyeglasses only<br />
have impact resistant lenses; they are NOT safety glasses. Also use face or<br />
dust mask if cutting operation is dusty. These safety glasses must conform<br />
to ANSI Z87.1 requirements. NOTE: Approved glasses have Z87 printed or<br />
stamped on them.<br />
5. Maintain a firm grip on band saw handle while making cut.<br />
6. Keep hands away from cutting area. When sawing never reach<br />
underneath or behind the material being cut for any reason.<br />
7. Make sure the material to be cut is firmly held to prevent movement.<br />
8. Always clamp work securely.<br />
9. Support saw weight as cut is completed.<br />
10. When you have finished a cut, be careful not to come into contact with the<br />
blade. Turn off the motor immediately.<br />
11. Always release the trigger latch from the trigger before raising the saw.<br />
12. Always be sure that the saw will remain in the raised position before<br />
clamping or removing work from the vise.<br />
13. Never use a liquid coolant with your bandsaw.<br />
14. Stay clear of end pieces that may fall after being cut off.<br />
15. Properly support long or wide workpieces. Loss of control of the workpiece<br />
can cause serious injury.<br />
16. Be sure the path of the saw is clear of obstruction before sawing.<br />
17. Never hold work in your hand, lap, or against other parts of your body<br />
when sawing.<br />
ASSEMBLY<br />
ASSEMBLY TOOLS REQUIRED<br />
3/8" Wrench<br />
5/16" Wrench<br />
1/4" Wrench<br />
ASSEMBLY TIME ESTIMATE<br />
Less than one hour<br />
2
1. Set the arm assembly (A) on the base (B) Fig. 1, so that the center of the<br />
elongated holes in the mounting bracket are over the center of the<br />
elongated holes in the base.<br />
2. Install the two 3/8" I.D. x 1" O.D. washers on the two 3/8-16 x 1-1/2" bolts.<br />
Insert the bolts through the arm assembly and base and thread them into<br />
the 3/8-16 square nuts.<br />
3. Position the nuts in the grooves (A) Fig. 3 on the underside of the base<br />
beneath the elongated holes. Tighten the bolts.<br />
4. Position the clamp and jaw assembly (A) Fig. 2 on the front of the base and<br />
pass the chain (B) up through the slot in the work surface. Secure the<br />
assembly with four 5/16-18 x 1" bolts and 5/16" I.D. Lockwashers (C).<br />
Tighten the bolts firmly.<br />
C<br />
A<br />
A<br />
B<br />
C<br />
D<br />
B<br />
C<br />
Fig. 1 Fig. 2<br />
SUPPORTING THE <strong>STAND</strong><br />
Either bolt the stand firmly to a bench or portable table, or equip it with legs for<br />
safe operation. Three base lugs (C) Fig. 3 will accept 1/4" diameter bolts (not<br />
furnished) to anchor the stand to a bench.<br />
If you prefer, you can make three legs, approximately 34" long from standard<br />
3/4" pipe. Sockets (B) Fig. 3 to receive these legs are located on the underside<br />
of the base. Three 1/4-20 x 3/4" bolts (A) and "T" nuts (B) Fig. 3 are furnished<br />
for locking the legs in place. To attach the legs:<br />
1. Pass the neck of the "T" nut - (F) Fig. 3 inset - through the hole in the<br />
socket wall.<br />
2. Orient the "T" nut (F) so that the head is seated in the recess in the socket.<br />
3. Thread the bolt (D) inset into the "T" nut (F) from outside the socket.<br />
4. Insert the pipe leg - (E) Fig. 3 inset - into the socket and tighten the bolts<br />
securely.<br />
5. Attach all three legs.<br />
6. Use rubber crutch tips on the ends of the legs to prevent marring the floor.<br />
F<br />
D<br />
E<br />
A<br />
C<br />
C<br />
B<br />
Fig. 3<br />
C<br />
3
ATTACHING THE <strong>SAW</strong> TO THE <strong>STAND</strong><br />
DISCONNECT MACHINE FROM POWER SOURCE!<br />
1. Remove the knob from the front<br />
housing of the saw.<br />
2. Place a 3/8" lockwasher on a 3/8-<br />
24 x 1-1/4" bolt.<br />
3. Insert the bolt through the hole in<br />
the upper end of the arm assembly<br />
(A) Fig. 4. Thread it into the hole<br />
(STEP 1) where the knob was<br />
removed. Hand-tighten for further<br />
adjustment.<br />
A<br />
Fig. 4<br />
B<br />
NOTE: If the side-adjusting screws (B) Fig. 4 on the arm assembly interfere<br />
with the saw housing, loosen the locknuts and back out the screws until you<br />
attach the saw.<br />
ADJUSTING THE <strong>SAW</strong> TO THE <strong>STAND</strong><br />
You will need to adjust the saw and stand so that the blade is 90° to the fence<br />
and 90° to the work surface. This adjustment will provide a square cut and<br />
will help to prevent premature blade breakage.<br />
To adjust:<br />
DISCONNECT MACHINE FROM POWER SOURCE!<br />
1. If the arm has any sideways<br />
movement, tighten the arm pivot<br />
screw (A) Fig. 5.<br />
C<br />
NOTE: Allow the arm to move up and<br />
down freely.<br />
2. Hold the arm of the pivot bracket.<br />
A<br />
Loosen the two front bolts (B) Fig.<br />
5 and rotate the arm so that the top<br />
elongated slot is centered with the<br />
top bolt. Tighten the bolts firmly.<br />
D<br />
B<br />
Fig. 5<br />
3. With the saw in the cutting position, loosen the locknuts (C) Fig. 5 on the<br />
side-adjusting screws until the screws contact the saw housing. Tighten<br />
the locknuts (C) to the arm assembly, as well as the bolt that was handtightened<br />
in STEP 3 of "ATTACHING THE <strong>SAW</strong> TO THE <strong>STAND</strong>".<br />
4. Again, loosen the two front bolts (B) Fig. 5 just enough so that the arm<br />
assembly and saw can be moved and positioned in the center of the trough<br />
in the work surface of the base. Maintain the blade at 90° to the stationary<br />
fence.<br />
NOTE: Make sure that the work stop on the saw clears the end of the base<br />
work surface and the side of the stationary fence, and rests on the lug on the<br />
end of the base.<br />
5. Tighten the bolts firmly.<br />
4
Stationary Jaw<br />
90°<br />
Basic Work<br />
Surface<br />
90°<br />
Blade<br />
Fig. 6 Blade<br />
Fig. 7<br />
6. Check all of the bolts to see that they are firmly tightened. Recheck the<br />
square of the blade in regard to both positions (Figs. 6 and Fig. 7).<br />
7. Insert the trigger latch spring through the tube. Hook it around the saw<br />
handle at the top and off of the switch trigger.<br />
8. Pass the cord set over the top of the saw and insert it into the slot in the<br />
lug on the arm.<br />
CLAMPING THE WORKPIECE<br />
1. Move the saw to the “UP” position.<br />
2. Position the workpiece on the base work surface and against the fence.<br />
from tipping.<br />
Support all long workpieces to prevent the stand and the saw<br />
3. Place the clamping chain (A) Fig. 8<br />
over the workpiece (B) and through<br />
the notch in the stationary fence<br />
(C) Fig. 8.<br />
4. Open the vise grip clamp (D).<br />
5. Hook the vise grip clamp jaw on<br />
the chain pin closest to the<br />
stationary jaw.<br />
6. Close the vise grip.<br />
NOTE: You can regulate the clamping tension by turning the adjusting screw on<br />
the handle of the vise grip clamp.<br />
MAKING THE CUT<br />
Fig. 8<br />
Turn the switch to the "OFF" position!<br />
1. Connect the saw to the power source.<br />
2. Lower the saw, but keep the blade free of the workpiece.<br />
3. Depress the switch trigger and move the trigger latch spring over the<br />
trigger to hold the switch in the “ON” position.<br />
4. Lower the saw blade until it contacts the workpiece, then let it go.<br />
5. When the cut is complete, remove the trigger latch spring from the trigger<br />
to stop the saw.<br />
6. Raise the saw to the ”UP" position, release the clamp, and remove the<br />
workpiece.<br />
A<br />
C<br />
B<br />
D<br />
5
REMOVING THE <strong>SAW</strong> FROM THE <strong>STAND</strong><br />
DISCONNECT MACHINE FROM POWER SOURCE!<br />
1. Disengage the cord set from the slot in the arm.<br />
2. Support the saw with one hand while removing the bolt that holds the saw<br />
to the arm.<br />
3. Slide the saw out from between the two side-adjusting screws on the arm<br />
assembly.<br />
NOTE: If the saw does not easily move out, loosen the adjusting screws on one<br />
side only.<br />
4. Replace the knob on the front of the saw.<br />
TROUBLESHOOTING<br />
For assistance with your tool, visit our website at www.porter-cable.com for a<br />
list of service centers or call the Porter-Cable help line at 1-800-487-8665.<br />
SERVICE<br />
REPLACEMENT PARTS<br />
When servicing use only identical replacement parts. For a service parts list or to<br />
learn more about Porter-Cable visit our website at www.porter-cable.com<br />
SERVICE AND REPAIRS<br />
All quality tools will eventually require servicing, or replacement of parts due to<br />
wear from normal use. For assistance with your tool, visit our website at<br />
www.porter-cable.com for a list of service centers or call the Customer Care<br />
Department at 1-800-487-8665. All repairs made by our service centers are fully<br />
guaranteed against defective material and workmanship. We cannot guarantee<br />
repairs made or attempted by others.<br />
Should you have any questions about your tool, feel free to write us at any time.<br />
In any communications, please give all information shown on the nameplate of<br />
your tool (model number, type, serial number, etc.).<br />
6
WARRANTY<br />
PORTER-CABLE LIMITED<br />
ONE YEAR WARRANTY<br />
Porter-Cable warrants its Professional Power Tools for a period of one year from the date of original<br />
purchase. We will repair or replace at our option, any part or parts of the product and accessories<br />
covered under this warranty which, after examination, proves to be defective in workmanship or<br />
material during the warranty period. For repair or replacement return the complete tool or accessory,<br />
transportation prepaid, to your nearest Porter-Cable Service Center or Authorized Service Station.<br />
Proof of purchase may be required. This warranty does not apply to repair or replacement required<br />
due to misuse, abuse, normal wear and tear or repairs attempted or made by other than our Service<br />
Centers or Authorized Service Stations.<br />
ANY IMPLIED WARRANTY, INCLUDING THE IMPLIED WARRANTIES OF MERCHANTABILITY AND<br />
FITNESS FOR A PARTICULAR PURPOSE, WILL LAST ONLY FOR ONE (1) YEAR FROM THE DATE<br />
OF PURCHASE.<br />
To obtain information on warranty performance please write to: PORTER-CABLE, 4825 Highway 45<br />
North, Jackson, Tennessee 38305; Attention: Product Service. THE FOREGOING OBLIGATION IS<br />
PORTER-CABLE’S SOLE LIABILITY UNDER THIS OR ANY IMPLIED WARRANTY AND UNDER NO<br />
CIRCUMSTANCES SHALL PORTER-CABLE BE LIABLE FOR ANY INCIDENTAL OR CON-<br />
SEQUENTIAL DAMAGES. Some states do not allow limitations on how long an implied warranty<br />
lasts or the exclusion or limitation of incidental or consequential damages, so the above limitation or<br />
exclusion may not apply to you.<br />
This warranty gives you specific legal rights and you may also have other legal rights which vary<br />
from state to state.<br />
7
PORTER-CABLE • DELTA SERVICE CENTERS<br />
(CENTROS DE SERVICIO DE PORTER-CABLE • DELTA)<br />
(CENTRE DE SERVICE PORTER-CABLE • DELTA)<br />
Parts and Repair Service for Porter-Cable • Delta Power Tools are Available at These Locations<br />
(Obtenga Refaccion de Partes o Servicio para su Herramienta en los Siguientes Centros de Porter-Cable • Delta)<br />
(Locations où vous trouverez les pièces de rechange nécessaires ainsi qu’un service d’entretien)<br />
ARIZONA<br />
Phoenix 85013-2906<br />
4501 N. 7th Ave.<br />
Phone: (602) 279-6414<br />
Fax: (602) 279-5470<br />
CALIFORNIA<br />
Ontario 91761 (Los Angeles)<br />
3949A East Guasti Road<br />
Phone: (909) 390-5555<br />
Fax: (909) 390-5554<br />
San Diego 92111<br />
7290 Clairemont Mesa Blvd.<br />
Phone: (858) 279-2011<br />
Fax: (858) 279-0362<br />
San Leandro 94577 (Oakland)<br />
3039 Teagarden Street<br />
Phone: (510) 357-9762<br />
Fax: (510) 357-7939<br />
COLORADO<br />
Denver 80223<br />
700 West Mississippi Ave.<br />
Phone: (303) 922-8325<br />
Fax: (303) 922-0245<br />
FLORIDA<br />
Davie 33314 (Miami)<br />
4343 South State Rd. 7 (441)<br />
Unit #107<br />
Phone: (954) 321-6635<br />
Fax: (954) 321-6638<br />
Tampa 33634<br />
4909 West Waters Ave.<br />
Phone: (813) 884-0434<br />
Fax: (813) 888-5997<br />
GEORGIA<br />
Forest Park 30297 (Atlanta)<br />
5442 Frontage Road,<br />
Suite 112<br />
Phone: (404) 608-0006<br />
Fax: (404) 608-1123<br />
ILLINOIS<br />
Addison 60101 (Chicago)<br />
400 South Rohlwing Rd.<br />
Phone: (630) 424-8805<br />
Fax: (630) 424-8895<br />
KANSAS<br />
Overland Park 66214<br />
9201 Quivira Road<br />
Phone: (913) 495-4330<br />
Fax: (913) 495-4378<br />
MARYLAND<br />
Elkridge 21075 (Baltimore)<br />
7397-102 Washington Blvd.<br />
Phone: (410) 799-9394<br />
Fax: (410) 799-9398<br />
MASSACHUSETTS<br />
Franklin 02038 (Boston)<br />
Franklin Industrial Park<br />
101E Constitution Blvd.<br />
Phone: (508) 520-8802<br />
Fax: (508) 528-8089<br />
MICHIGAN<br />
Madison Heights 48071 (Detroit)<br />
30475 Stephenson Highway<br />
Phone: (248) 597-5000<br />
Fax: (248) 597-5004<br />
MINNESOTA<br />
Eden Prairie 55344<br />
9709 Valley View Road<br />
Phone: (952) 884-9191<br />
Fax: (952) 884-3750<br />
MISSOURI<br />
St. Louis 63146<br />
11477 Page Service Drive<br />
Phone: (314) 997-9100<br />
Fax: (314) 997-9183<br />
NEW YORK<br />
Flushing 11365-1595 (N.Y.C.)<br />
175-25 Horace Harding Expwy.<br />
Phone: (718) 225-2040<br />
Fax: (718) 423-9619<br />
NORTH CAROLINA<br />
Charlotte 28270<br />
9129 Monroe Road, Suite 115<br />
Phone: (704) 841-1176<br />
Fax: (704) 708-4625<br />
OHIO<br />
Columbus 43229<br />
1948 Schrock Road<br />
Phone: (614) 895-3112<br />
Fax: (614) 895-3187<br />
Parma Heights OH 44130<br />
6485 Pearl Road<br />
Phone: (440) 842-9100<br />
Fax: (440) 884-3430<br />
OREGON<br />
Portland 97230<br />
14811 North East Airport Way<br />
Phone: (503) 255-6556<br />
Fax: (503) 255-6543<br />
PENNSYLVANIA<br />
Willow Grove 19090 (Philadelphia)<br />
520 North York Road<br />
Phone: (215) 658-1430<br />
Fax: (215) 658-1433<br />
TEXAS<br />
Carrollton 75006 (Dallas)<br />
1300 Interstate 35 N, Suite 112<br />
Phone: (972) 446-2996<br />
Fax: (972) 446-8157<br />
Houston 77022-2122<br />
536 East Tidwell Rd.<br />
Phone: (713) 692-7111<br />
Fax: (713) 692-1107<br />
WASHINGTON<br />
Auburn 98001(Seattle)<br />
3320 West Valley HWY, North<br />
Building D, Suite 111<br />
Phone: (253) 333-8353<br />
Fax: (253) 333-9613<br />
Authorized Service Stations are located in many large cities. Telephone 800-487-8665 or 731-541-6042 for assistance locating one. Parts and<br />
accessories for Porter-Cable • Delta products should be obtained by contacting any Porter-Cable • Delta Distributor, Authorized Service<br />
Center, or Porter-Cable • Delta Factory Service Center. If you do not have access to any of these, call 888-848-5175 and you will be directed to<br />
the nearest Porter-Cable • Delta Factory Service Center. Las Estaciones de Servicio Autorizadas están ubicadas en muchas grandes ciudades.<br />
Llame al 800-487-8665 ó al 731-541-6042 para obtener asistencia a fin de localizar una. Las piezas y los accesorios para los productos Porter-<br />
Cable • Delta deben obtenerse poniéndose en contacto con cualquier distribuidor Porter-Cable • Delta, Centro de Servicio Autorizado o Centro<br />
de Servicio de Fábrica Porter-Cable • Delta. Si no tiene acceso a ninguna de estas opciones, llame al 888-848-5175 y le dirigirán al Centro de<br />
Servicio de Fábrica Porter-Cable • Delta más cercano. Des centres de service agréés sont situés dans beaucoup de grandes villes. Appelez au<br />
800-487-8665 ou au 731-541-6042 pour obtenir de l’aide pour en repérer un. Pour obtenir des pièces et accessoires pour les produits Porter-<br />
Cable • Delta, s’adresser à tout distributeur Porter-Cable • Delta, centre de service agréé ou centre de service d’usine Porter-Cable • Delta. Si<br />
vous n’avez accès à aucun de ces centres, appeler le 888-848-5175 et on vous dirigera vers le centre de service d’usine Porter-Cable • Delta le<br />
plus proche.<br />
CANADIAN PORTER-CABLE • DELTA SERVICE CENTERS<br />
ALBERTA<br />
Bay 6, 2520-23rd St. N.E.<br />
Calgary, Alberta<br />
T2E 8L2<br />
Phone: (403) 735-6166<br />
Fax: (403) 735-6144<br />
BRITISH COLUMBIA<br />
8520 Baxter Place<br />
Burnaby, B.C.<br />
V5A 4T8<br />
Phone: (604) 420-0102<br />
Fax: (604) 420-3522<br />
MANITOBA<br />
1699 Dublin Avenue<br />
Winnipeg, Manitoba<br />
R3H 0H2<br />
Phone: (204) 633-9259<br />
Fax: (204) 632-1976<br />
ONTARIO<br />
505 Southgate Drive<br />
Guelph, Ontario<br />
N1H 6M7<br />
Phone: (519) 767-4132<br />
Fax: (519) 767-4131<br />
QUÉBEC<br />
1515 Ave.<br />
St-Jean Baptiste, Suite 160<br />
Québec, P.Q.<br />
G2E 5E2<br />
Phone: (418) 877-7112<br />
Fax: (418) 877-7123<br />
1447, Begin<br />
St-Laurent, (Mtl), P.Q.<br />
H4R 1V8<br />
Phone: (514) 336-8772<br />
Fax: (514) 336-3505<br />
The following are trademarks of PORTER-CABLE • DELTA (Las siguientes son marcas registradas de PORTER-CABLE • DELTA S.A.) (Les<br />
marques suivantes sont des marques de fabriquant de la PORTER-CABLE • DELTA): Auto-Set ® , BAMMER ® , B.O.S.S. ® , Builder’s Saw ® ,<br />
Contractor’s Saw ® , Contractor’s Saw II, Delta ® , DELTACRAFT ® , DELTAGRAM, Delta Series 2000, DURATRONIC, Emc², FLEX ® , Flying<br />
Chips, FRAME <strong>SAW</strong> ® , Grip Vac, Homecraft ® , INNOVATION THAT WORKS ® , Jet-Lock ® , JETSTREAM ® , ‘kickstand ® , LASERLOC ® , MICRO-<br />
SET ® , Micro-Set ® , MIDI LATHE ® , MORTEN, NETWORK, OMNIJIG ® , POCKET CUTTER ® , PORTA-<strong>BAND</strong> ® , PORTA-PLANE ® , PORTER-<br />
CABLE ® &(design), PORTER-CABLE ® PROFESSIONAL POWER TOOLS, PORTER-CABLE REDEFINING PERFORMANCE, Posi-Matic ® , Q-<br />
3 ® &(design), QUICKSAND ® &(design), QUICKSET, QUICKSET II ® , QUICKSET PLUS, RIPTIDE&(design), SAFE GUARD II ® , SAFE-LOC ® ,<br />
Sanding Center ® , SANDTRAP ® &(design), <strong>SAW</strong> BOSS ® , Sawbuck, Sidekick ® , SPEED-BLOC ® , SPEEDMATIC ® , SPEEDTRONIC ® , STAIR EASE ® ,<br />
The American Woodshop ® &(design), The Lumber Company ® &(design), THE PROFESSIONAL EDGE ® , THE PROFESSIONAL SELECT ® , THIN-<br />
LINE, TIGER ® , TIGER CUB ® , TIGER <strong>SAW</strong> ® , TORQBUSTER ® , TORQ-BUSTER ® , TRU-MATCH, TWIN-LITE ® , UNIGUARD ® , Unifence ® ,<br />
UNIFEEDER, Unihead ® , Uniplane, Unirip ® , Unisaw ® , Univise ® , Versa-Feeder ® , VERSA-PLANE ® , WHISPER SERIES ® ,<br />
WOODWORKER’S CHOICE.<br />
Trademarks noted with and ® are registered in the United States Patent and Trademark Office and may also be registered in other countries.<br />
Las Marcas Registradas con el signo de y ® son registradas por la Oficina de Registros y Patentes de los Estados Unidos y también pueden<br />
estar registradas en otros países. Marques déposées, indiquées par la lettre et ®, sont déposées au Bureau des brevets d’invention et<br />
marques déposées aux Etats-Unis et pourraient être déposées aux autres pays.<br />
PC7.2-0105-164


