v-2 million power series⢠spotlight instruction manual
v-2 million power series⢠spotlight instruction manual
v-2 million power series⢠spotlight instruction manual
Create successful ePaper yourself
Turn your PDF publications into a flip-book with our unique Google optimized e-Paper software.
SL202B_ManualEN_050107.qxp 5/1/2007 4:15 PM Page i<br />
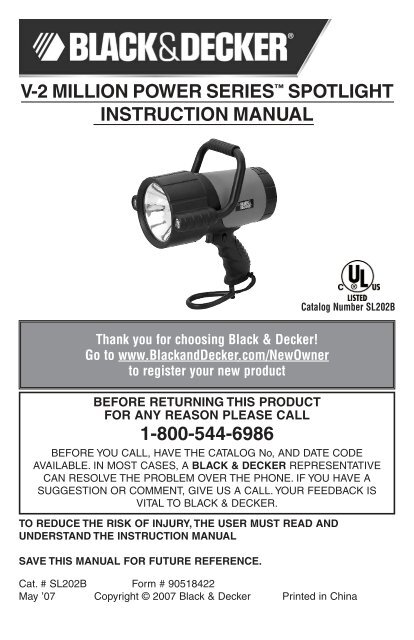
V-2 MILLION POWER SERIES SPOTLIGHT<br />
INSTRUCTION MANUAL<br />
Catalog Number SL202B<br />
Thank you for choosing Black & Decker!<br />
Go to www.BlackandDecker.com/NewOwner<br />
to register your new product<br />
BEFORE RETURNING THIS PRODUCT<br />
FOR ANY REASON PLEASE CALL<br />
1-800-544-6986<br />
BEFORE YOU CALL, HAVE THE CATALOG No, AND DATE CODE<br />
AVAILABLE. IN MOST CASES, A BLACK & DECKER REPRESENTATIVE<br />
CAN RESOLVE THE PROBLEM OVER THE PHONE. IF YOU HAVE A<br />
SUGGESTION OR COMMENT, GIVE US A CALL. YOUR FEEDBACK IS<br />
VITAL TO BLACK & DECKER.<br />
TO REDUCE THE RISK OF INJURY, THE USER MUST READ AND<br />
UNDERSTAND THE INSTRUCTION MANUAL<br />
SAVE THIS MANUAL FOR FUTURE REFERENCE.<br />
Cat. # SL202B Form # 90518422<br />
May ’07 Copyright © 2007 Black & Decker Printed in China
SL202B_ManualEN_050107.qxp 5/1/2007 4:15 PM Page 1<br />
GENERAL SAFETY WARNINGS AND INSTRUCTIONS FOR ALL APPLIANCES<br />
READ ALL INSTRUCTIONS<br />
WARNING: Read all <strong>instruction</strong>s before operating product. Failure to follow all <strong>instruction</strong>s listed below may<br />
result in electric shock, fire and/or serious injury.<br />
• AVOID DANGEROUS ENVIRONMENTS Don’t use appliances in damp or wet locations. Don’t use appliances in the rain.<br />
• KEEP CHILDREN AWAY. All visitors should be kept at a distance from work area.<br />
• STORE IDLE APPLIANCES INDOORS. When not in use, appliances should be stored indoors in dry, and high or<br />
locked-up place – out of reach of children.<br />
• DON’T FORCE APPLIANCE. It will do the job better and with less likelihood of a risk of injury at the rate for which<br />
it was designed.<br />
• USE RIGHT APPLIANCE. Do not use the appliance for any job except that for which it is intended.<br />
• DRESS PROPERLY. Do not wear loose clothing or jewelry. They can be caught in moving parts. Rubber gloves and<br />
substantial, non-skid footwear are recommended when working outdoors. Wear protective hair covering to contain long hair.<br />
• USE SAFETY GLASSES AND OTHER SAFETY EQUIPMENT. Use safety goggles or safety glasses with side shields,<br />
complying with applicable safety standards and, when needed, a face shield. Also use face or dust mask if operation<br />
is dusty. This applies to all persons in the work area. Also use a hard hat, hearing protection, gloves, safety shoes<br />
and dust collection systems when specified or required. Safety glasses or the like are available at extra cost at your<br />
local dealer or Black & Decker Service Center.<br />
• DON’T ABUSE CORD. Never carry appliance by cord or yank it to disconnect from receptacle. Keep cord from<br />
heat, oil, and sharp edges.<br />
• DON’T OVERREACH. Keep proper footing and balance at all times.<br />
• DISCONNECT APPLIANCES. Disconnect the appliance from the <strong>power</strong> supply when not in use, before servicing,<br />
and when changing accessories such as blades and the like.<br />
• AVOID UNINTENTIONAL STARTING. Don’t carry plugged-in appliance with finger on switch. Be sure switch is off<br />
when plugging in.<br />
• GROUND FAULT CIRCUIT INTERRUPTER (GFCI) protection should be provided on the circuits or outlets to be<br />
used. Receptacles are available having built in GFCI protection and may be used for this measure of safety.<br />
• USE OF ACCESSORIES AND ATTACHMENTS. The use of any accessory or<br />
attachment not recommended for use with this appliance could be hazardous. Note: Refer to the accessory section<br />
of this <strong>manual</strong> for further details.<br />
• STAY ALERT. Watch what you are doing. Use common sense. Do not operate tool when you are tired.<br />
• CHECK DAMAGED PARTS. Before further use of the tool, a guard or other part that is damaged should be<br />
carefully checked to determine that it will operate properly and perform its intended function. Check for alignment of<br />
moving parts, binding of moving parts, breakage of parts, mounting, and any other conditions that may affect its<br />
operation. A guard or other part that is damaged should be properly repaired or replaced by an authorized service<br />
center unless otherwise indicated elsewhere in this <strong>instruction</strong> <strong>manual</strong>. Have defective switches replaced by<br />
authorized service center. Do not use tool if switch does not turn it on and off.<br />
• DO NOT OPERATE portable electric tools near flammable liquids or in gaseous or explosive atmospheres. Motors<br />
in these tools normally spark, and the sparks might ignite fumes.<br />
• OUTDOOR USE EXTENSION CORDS. When tool is used outdoors, use only extension cords intended for use<br />
outdoors and so marked.<br />
Minimum Gage for Cord Sets<br />
Volts<br />
Total Length of Cord in Feet<br />
120V 0-25 26-50 51-100 101-150<br />
(0-7,6m) (7,6-15,2m) (15,2-30,4m) (30,4-45,7m)<br />
240V 0-50 51-100 101-200 201-300<br />
(0-15,2m) (15,2-30,4m) (30,4-60,9m) (60,9-91,4m)<br />
Ampere Rating<br />
More Not more American Wire Gage<br />
Than Than<br />
0 - 6 18 16 16 14<br />
6 - 10 18 16 14 12<br />
10 - 12 16 16 14 12<br />
12 - 16 14 12 Not Recommended<br />
1
SL202B_ManualEN_050107.qxp 5/1/2007 4:15 PM Page 2<br />
• EXTENSION CORDS. Make sure your extension cord is in good condition. When using an extension cord, be<br />
sure to use one heavy enough to carry the current your product will draw. An undersized cord will cause a drop in<br />
line voltage resulting in loss of <strong>power</strong> and overheating. The following table shows the correct size to use<br />
depending on cord length and nameplate ampere rating. If in doubt, use the next heavier gage. The smaller the<br />
gage number, the heavier the cord.<br />
SAFETY GUIDELINES / DEFINITIONS<br />
DANGER: Indicates an imminently hazardous situation which, if not avoided, will result in death or serious injury.<br />
WARNING: Indicates a potentially hazardous situation which, if not avoided, could result in death or serious injury.<br />
CAUTION: Indicates a potentially hazardous situation which, if not avoided, may result in minor or moderate injury.<br />
CAUTION: Used without the safety alert symbol indicates potentially hazardous situation which, if not avoided,<br />
may result in property damage.<br />
RISK OF UNSAFE OPERATION. When using tools or equipment, basic safety precautions should always be<br />
followed to reduce the risk of personal injury. Improper operation, maintenance or modification of tools or<br />
equipment could result in serious injury and property damage. There are certain applications for which tools and<br />
equipment are designed. Black & Decker strongly recommends that this product NOT be modified and/or used for<br />
any application other than for which it was designed. Read and understand all warnings and operating<br />
<strong>instruction</strong>s before using any tool or equipment.<br />
IMPORTANT SAFETY INSTRUCTIONS<br />
WARNING: This product or its <strong>power</strong> cord contains lead, a chemical known to the State of California to cause<br />
cancer and birth defect or other reproductive harm. Wash hands after handling.<br />
FOR HOUSEHOLD USE ONLY<br />
INSTRUCTIONS PERTAINING TO RISK OF FIRE, ELECTRIC SHOCK, OR INJURY TO PERSONS<br />
WARNING – WHEN USING ELECTRICAL APPLIANCES, BASIC PRECAUTIONS SHOULD ALWAYS BE<br />
FOLLOWED, INCLUDING THE FOLLOWING:<br />
A) READ THE INSTRUCTIONS BEFORE USING THE APPLIANCE.<br />
B) TO REDUCE THE RISK OF INJURY, CLOSE SUPERVISION IS NECESSARY WHEN AN APPLIANCE IS USED<br />
NEAR CHILDREN.<br />
C) USE ONLY ATTACHMENTS RECOMMENDED OR SOLD BY THE MANUFACTURER.<br />
D) DO NOT USE OUTDOORS.<br />
E) TO REDUCE THE RISK OF ELECTRICAL SHOCK, DO NOT PUT SPOTLIGHT IN WATER OR OTHER LIQUID. DO<br />
NOT PLACE OR STORE APPLIANCE WHERE IT CAN FALL OR BE PULLED INTO A TUB OR SINK.<br />
F) ALWAYS UNPLUG BEFORE REPLACING THE LAMP. ONLY REPLACE BULB WITH TYPE RATED 6 VOLT, H3 55<br />
WATT QUARTZ HALOGEN.<br />
G) USE ONLY THE CHARGER SUPPLIED BY THE MANUFACTURER TO RECHARGE.<br />
H) IF AN EXTENSION CORD IS USED:<br />
1. The marked rating of the detachable <strong>power</strong> supply cord or extension cord should be at least as great as the<br />
electrical rating of this appliance.<br />
2. The cord should be arranged so that it will not drape over the countertop or tabletop where it can be<br />
tripped over, snagged, or pulled on unintentionally (especially by children).<br />
3. The extension cord should be kept dry and off the ground.<br />
4. Do not clean this appliance with a water spray or the like.<br />
WARNING: TO REDUCE THE RISK OF ELECTRIC SHOCK:<br />
Do not plug in a <strong>power</strong> supply without the bulb lens and cover in place.<br />
WARNING: FIRE HAZARD: Never contact combustible material to the lens and never tape or tie the switch in<br />
the on position.<br />
CAUTION: TO REDUCE THE RISK OF INJURY OR PROPERTY DAMAGE:<br />
• All halogen lights give off heat:<br />
– Do not touch lens while operating.<br />
– Keep combustibles away from <strong>spotlight</strong> lens. Extreme heat can cause fires.<br />
– Never place the light face-down on any surface when lit.<br />
• Never look directly into the light or shine the light into another person’s eyes.<br />
• Keep sharp objects away from lens — it is glass and can break.<br />
2
SL202B_ManualEN_050107.qxp 5/1/2007 4:15 PM Page 3<br />
• Do not immerse <strong>spotlight</strong> in water.<br />
• Do not drop or throw <strong>spotlight</strong>. It contains glass and a sealed lead acid battery.<br />
• Only replace bulb with type indicated in specifications (6 volt, H3 55 watt quartz halogen).<br />
• Use only with AC or DC charging adapters that are provided with unit. Plug in the charging adapter at the<br />
<strong>spotlight</strong> first, then plug into the charging source.<br />
• Do not overcharge:<br />
– AC recharge up to 30 hours maximum.<br />
– DC recharge up to 4 hours maximum.<br />
• NEVER ATTEMPT TO USE THE AC CHARGER AND DC CHARGING PORT SIMULTANEOUSLY.<br />
• After charging/recharging, disconnect charging adapter or extension cord and wait 5 minutes before use.<br />
• Do not crush, cut, pull or expose charging adapter cords to extreme heat.<br />
• Position charging adapter cords so they do not become entangled or become a safety hazard. Keep charging<br />
adapter cords away from sharp edges.<br />
• Use in a dry location only.<br />
• Do not open body casing. There are no user-serviceable parts inside.<br />
• To reduce risk of damage to electric plug and cord, pull by plug rather than cord when disconnecting from the<br />
120 Volt AC Charger.<br />
• Do not attempt to charge the unit if the 120 Volt AC Charger plug is damaged – return the unit to manufacturer<br />
for repair.<br />
WARNING: TO REDUCE THE RISK OF INJURY:<br />
• Follow these <strong>instruction</strong>s and those published by the manufacturer of any equipment you intend to use with this<br />
unit. Review cautionary markings on these products.<br />
SAVE THESE INSTRUCTIONS<br />
INTRODUCTION<br />
Thank you for choosing the Black & Decker ® V-2 Million Power Series Spotlight. Please read this guide<br />
carefully before use to ensure optimum performance and to avoid damage to the unit.<br />
FEATURES<br />
• Powerful, focused quartz halogen beam<br />
• LED area lights<br />
• Protective rubber safety guard (bezel) around lens<br />
• Rubber safety cap protects battery compartment<br />
• Comfortable pistol grip and lanyard<br />
• Battery Status LED Indicator<br />
• UL listed, built-in 120 volt AC charger that works with a standard household extension cord (not included)<br />
• 12 volt DC charging adapter included<br />
• Rechargeable, non-spillable, sealed lead acid battery<br />
AREA LIGHT<br />
ON/OFF PUSHBUTTON<br />
RUBBER BEZEL<br />
BATTERY STATUS LED<br />
INDICATOR<br />
LED AREA LIGHTS<br />
120 VOLT AC CHARGER<br />
(BACK OF UNIT)<br />
QUARTZ HALOGEN BULB<br />
ON/OFF TRIGGER<br />
TRIGGER LOCK OFF<br />
PISTOL GRIP HANDLE<br />
DC CHARGING<br />
PORT<br />
3
SL202B_ManualEN_050107.qxp 5/1/2007 4:15 PM Page 4<br />
CHARGING/RECHARGING THE SPOTLIGHT<br />
This unit is shipped in a partially charged state. Charge unit BEFORE first use using the 120 Volt AC Charger for<br />
20-30 hours or until the green Battery Status LED flashes. Charge after each use until green LED flashes.<br />
Charging/Recharging Using the 120 Volt AC Charger and a Standard Household<br />
Extension Cord (not included)<br />
Plug a standard North American 120 volt AC extension cord (not included) into the 120 Volt AC Charger on the<br />
back of the unit.<br />
BATTERY STATUS LED<br />
INDICATOR<br />
BUILT-IN 120V AC<br />
CHARGER<br />
Make sure the Spotlight is OFF (the Trigger Lock is in the OFF position and the Trigger is not depressed).<br />
Charge until the Battery Status LED Indicator green LED flashes (approximately 20-30 hours). DO NOT CHARGE<br />
FOR LONGER THAN 30 HOURS.<br />
Charging/Recharging Using the 12 Volt DC Charging Adapter<br />
Plug the barrel tip of the supplied 12 Volt DC Charging Adapter into the 12 Volt DC Charging Port.<br />
12 VOLT DC CHARGING<br />
PORT<br />
12 VOLT DC CHARGING ADAPTER<br />
Insert the 12 volt DC plug end into the accessory outlet of your vehicle or other 12 volt DC <strong>power</strong> source.<br />
Make sure the Spotlight is OFF (the Trigger Lock is in the OFF position and the Trigger is not depressed).<br />
Charge until the Battery Status LED Indicator green LED lights when the LED AREA LIGHTS pushbutton is pressed<br />
(approximately 3-4 hours). DO NOT CHARGE FOR LONGER THAN 4 HOURS.<br />
Make sure the DC source (jump-starter, battery pack, vehicle accessory outlet, etc.) is 12 volt DC and is able to<br />
supply at least one half amp at 12 volt DC for 8 hours. This means a battery pack should be charged with at least<br />
4 amp hours capacity.<br />
Note: When using a vehicle’s 12 volt DC accessory outlet as a charging source, be aware that some vehicles<br />
require you to turn on the ignition to <strong>power</strong> the accessory outlet.<br />
WARNING: NEVER ATTEMPT TO USE THE AC CHARGER AND DC CHARGING PORT SIMULTANEOUSLY.<br />
OPERATING INSTRUCTIONS<br />
Operating the Spotlight<br />
1. Disconnect from charger.<br />
2. The ON/OFF trigger is located in the front of the<br />
pistol-grip handle of the <strong>spotlight</strong>.<br />
3. To turn the <strong>spotlight</strong> ON, squeeze the trigger.<br />
4. To turn OFF the <strong>spotlight</strong>, release the trigger.<br />
Note: The ON/OFF trigger can be locked in the OFF position using the trigger lock OFF switch on the side of the<br />
unit.<br />
Operating the LED Area Lights<br />
The ON/OFF pushbutton for the LED Area Lights is located on the top of the Spotlight.<br />
ON/OFF<br />
TRIGGER<br />
TRIGGER<br />
LOCK OFF<br />
4
SL202B_ManualEN_050107.qxp 5/1/2007 4:15 PM Page 5<br />
Using the Built-In Carry Lanyard<br />
The Carry Lanyard may be used to store or carry the Spotlight. Adjust the slide on the cords to keep the Lanyard<br />
secure around the supporting object.<br />
CARE AND MAINTENANCE<br />
All batteries lose charge with time, especially when they are warm. Recharge the unit every two months when not<br />
in frequent use, preferably using the 120 volt AC method.<br />
Never submerge the unit in water. If the unit gets dirty, gently clean the outer surfaces of the <strong>spotlight</strong> unit with a soft<br />
cloth moistened with a mild solution of water and detergent.<br />
The quartz halogen bulb is the only user-replaceable part in the Spotlight. Periodically inspect the condition of<br />
adapters, connectors and wires. Contact Technical Support toll-free at 1-800-544-6986 to replace any components<br />
that have become worn or broken.<br />
Spotlight Bulb Replacement<br />
To replace the bulb, you will need a small Phillips screwdriver and a 12 volt H3 75 watt replacement bulb. During<br />
installation, avoid touching the glass part of the bulb. Bulb life may be shortened by installing a bulb with dirt or<br />
fingerprints on it. The bulb can be wiped clean with a cloth moistened with alcohol.<br />
QUARTZ HALOGEN BULB<br />
RUBBER<br />
END CAP<br />
REFLECTOR<br />
TRIGGER<br />
SWITCH<br />
RUBBER BEZEL COVER<br />
RETAINING RING<br />
RUBBER<br />
“O” RING<br />
1. Disconnect the unit from any charging adapters.<br />
2. Push the rubber bezel forward toward the front of the <strong>spotlight</strong> to reveal two small Phillips screws in the<br />
retaining ring.<br />
3. Using the screwdriver, remove (counterclockwise) the two screws. Set them aside.<br />
4. Lift off the retaining ring, glass lens and rubber “O” ring and set them aside.<br />
5. Carefully remove the reflector and bulb assembly.<br />
HAIRPIN RETAINING<br />
WIRES<br />
TRIGGER (OFF)<br />
LOCK<br />
BULB<br />
PHILLIPS<br />
HEAD<br />
SCREWS<br />
REFLECTOR<br />
6. Disconnect the bulb wire from the red <strong>power</strong> wire.<br />
7. Unsnap the hairpin retaining wires from the reflector’s flange.<br />
8. Using the screwdriver, loosen the retaining screw to remove the bulb from the reflector (no need to<br />
completely remove this screw).<br />
9. Lift out the bulb and detach wire.<br />
10. Insert the replacement bulb into the reflector’s flange.<br />
11. Put back and secure the hairpin retaining wires.<br />
5
SL202B_ManualEN_050107.qxp 5/1/2007 4:15 PM Page 6<br />
12. Connect the bulb <strong>power</strong> wire to the red <strong>power</strong> wire.<br />
13. Tighten the retaining screw on the flange.<br />
14. Place the reflector in position in the body of the <strong>spotlight</strong>.<br />
15. Replace the rubber “O” ring in the groove around the perimeter of the reflector.<br />
16. Replace glass and retaining ring so the screw holes are aligned.<br />
17. Secure retaining ring with two screws.<br />
18. Replace rubber bezel.<br />
19. Operate switch to ensure proper operation of <strong>spotlight</strong>.<br />
WARNING: To reduce the risk of electric shock, replace bulb with 12 volt H3 75 watt only.<br />
Battery Replacement/Disposal<br />
Battery Replacement<br />
The battery should last the service life of the unit. Contact Technical Support toll-free at 1-800-544-6986 for any<br />
information you may need.<br />
Safe Battery Disposal<br />
Contains a maintenance-free, sealed, non-spillable, lead acid battery, which must be disposed of<br />
properly. Recycling is required, contact your local authority for information. Failure to comply with<br />
local, state and federal regulations can result in fines, or imprisonment.<br />
WARNINGS:<br />
• Do not dispose of the battery in fire as this may result in an explosion.<br />
• Before disposing of the battery, protect exposed terminals with heavy-duty electrical tape to prevent shorting<br />
(shorting can result in injury or fire).<br />
• Do not expose battery to fire or intense heat as it may explode.<br />
• For more information on recycling this battery, call toll-free (877) 288-7722.<br />
12 Volt DC Charging Adapter Plug Fuse Replacement<br />
The fuse in the plug end of the 12 Volt DC Charging Adapter protects the adapter’s charging circuit. If the 120 Volt AC<br />
Charger operates, but the DC charging adapter does not, then this fuse may be opened (blown).<br />
To replace the fuse:<br />
1. Unscrew the end cap of the DC plug (counterclockwise).<br />
2. Remove spring center contact and fuse.<br />
3. Check fuse with a continuity checker.<br />
4. If blown, locate a replacement 8 amp/250 volt fuse.<br />
5. Replace the fuse, spring, contact and end cap.<br />
6. Screw end cap clockwise until it is finger tight – DO NOT OVER-TIGHTEN.<br />
7. Test for proper operation of the 12 Volt DC Charging Adapter.<br />
TROUBLESHOOTING<br />
The Battery Status Indicator LED Does Not Light When Charging<br />
1. Check connection to the 120 Volt AC Charger or 12 Volt DC Charging Port.<br />
2. Check connection to AC or DC <strong>power</strong> source.<br />
3. Confirm there is a functioning AC or DC current.<br />
Unit Will Not Operate<br />
1. The Spotlight will not operate when charging. Be sure all adapters are disconnected before<br />
Spotlight use.<br />
2. If you suspect the bulb is blown, check the filament. If the filament is coiled and unbroken, the<br />
bulb is not blown. If bulb is blown, replace it.<br />
3. The battery may be completely discharged. Charge the unit following the directions on page 3.<br />
4. If the Spotlight does not operate after recharging as directed, contact Technical Support toll-free<br />
at 1-800-544-6986.<br />
For assistance with your product, visit our website www.blackanddecker.com for the location of the service<br />
center nearest you or call the BLACK & DECKER help line at 1-800-544-6986.<br />
6
SL202B_ManualEN_050107.qxp 5/1/2007 4:15 PM Page 7<br />
Accessories<br />
Recommended accessories for use with your tool are available from your local dealer or authorized service center.<br />
If you need assistance regarding accessories, please call: 1-800-544-6986.<br />
WARNING: The use of any accessory not recommended for use with this tool could be hazardous.<br />
SERVICE INFORMATION<br />
All Black & Decker Service Centers are staffed with trained personnel to provide customers with efficient and<br />
reliable <strong>power</strong> tool service. Whether you need technical advice, repair, or genuine factory replacement parts,<br />
contact the Black & Decker location nearest you. To find your local service location, refer to the yellow page<br />
directory under "Tools–Electric" or call: 1-800-544-6986 or visit www.blackanddecker.com.<br />
FULL TWO-YEAR HOME USE WARRANTY<br />
Black & Decker (U.S.) Inc. warrants this product for two years against any defects in material or workmanship.<br />
The defective product will be replaced or repaired at no charge in either of two ways.<br />
The first, which will result in exchanges only, is to return the product to the retailer from whom it was purchased<br />
(provided that the store is a participating retailer). Returns should be made within the time period of the retailer’s<br />
policy for exchanges (usually 30 to 90 days after the sale). Proof of purchase may be required. Please check with<br />
the retailer for their specific return policy regarding returns that are beyond the time set for exchanges.<br />
The second option is to take or send the product (prepaid) to a Black & Decker owned or authorized Service<br />
Center for repair or replacement at our option. Proof of purchase may be required. Black & Decker owned and<br />
authorized Service Centers are listed under "Tools-Electric" in the yellow pages of the phone directory and on our<br />
website www.blackanddecker.com.<br />
This warranty does not apply to accessories. This warranty gives you specific legal rights and you may have other<br />
rights which vary from state to state or province to province. Should you have any questions, contact the<br />
manager of your nearest Black & Decker Service Center. This product is not intended for commercial use.<br />
FREE WARNING LABEL REPLACEMENT: If your warning labels become illegible or are missing, call 1-800-544-<br />
6986 for a free replacement.<br />
SPECIFICATIONS<br />
Spotlight Bulb: 12 volt, H3 series, 75 watt<br />
Battery:<br />
Maintenance-free, sealed lead acid,<br />
12 volt, 3 amp hour<br />
AC Charger: UL Listed Class 2, 12 volt DC (300 mA)<br />
DC Plug Fuse: 8 A/250 V<br />
Imported by<br />
Black & Decker (U.S.) Inc.,<br />
701 E. Joppa Rd.<br />
Towson, MD 21286 U.S.A.<br />
Vector Products, Inc.<br />
4140 S.W. 30th Ave.<br />
Fort Lauderdale, FL 33312<br />
7


