

Oil-Free Air Compressor
Oil-Free Air Compressor
Oil-Free Air Compressor

You also want an ePaper? Increase the reach of your titles
YUMPU automatically turns print PDFs into web optimized ePapers that Google loves.
To Replace Regulator<br />
1. Release all air pressure from air tank. See "To Drain Tank" in the<br />
Maintenance section.<br />
2. Unplug outfit.<br />
3. Using an adjustable wrench remove the gauges and hose from the<br />
regulator.<br />
4. Remove the regulator.<br />
5. Apply pipe sealant tape to the nipple on the standpipe.<br />
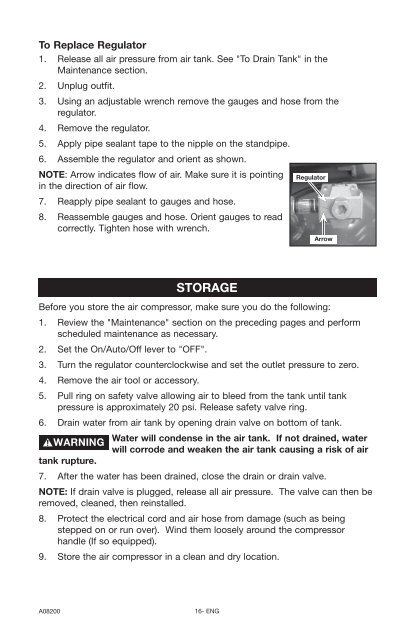
6. Assemble the regulator and orient as shown.<br />
NOTE: Arrow indicates flow of air. Make sure it is pointing<br />
in the direction of air flow.<br />
7. Reapply pipe sealant to gauges and hose.<br />
8. Reassemble gauges and hose. Orient gauges to read<br />
correctly. Tighten hose with wrench.<br />
Regulator<br />
Arrow<br />
Before you store the air compressor, make sure you do the following:<br />
1. Review the "Maintenance" section on the preceding pages and perform<br />
scheduled maintenance as necessary.<br />
2. Set the On/Auto/Off lever to "OFF".<br />
3. Turn the regulator counterclockwise and set the outlet pressure to zero.<br />
4. Remove the air tool or accessory.<br />
5. Pull ring on safety valve allowing air to bleed from the tank until tank<br />
pressure is approximately 20 psi. Release safety valve ring.<br />
6. Drain water from air tank by opening drain valve on bottom of tank.<br />
tank rupture.<br />
STORAGE<br />
Water will condense in the air tank. If not drained, water<br />
will corrode and weaken the air tank causing a risk of air<br />
7. After the water has been drained, close the drain or drain valve.<br />
NOTE: If drain valve is plugged, release all air pressure. The valve can then be<br />
removed, cleaned, then reinstalled.<br />
8. Protect the electrical cord and air hose from damage (such as being<br />
stepped on or run over). Wind them loosely around the compressor<br />
handle (If so equipped).<br />
9. Store the air compressor in a clean and dry location.<br />
A08200<br />
16- ENG


