
Create successful ePaper yourself
Turn your PDF publications into a flip-book with our unique Google optimized e-Paper software.
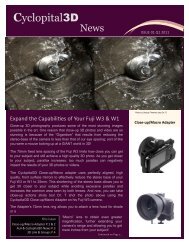
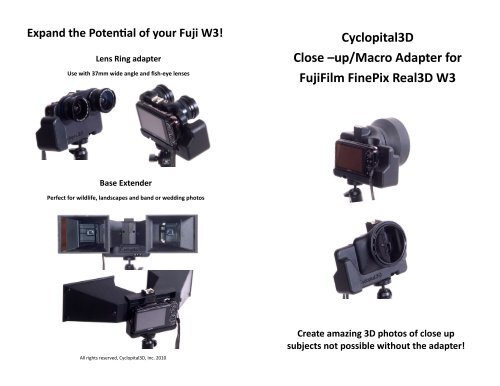
Expand the Potenal of your Fuji W3!<br />
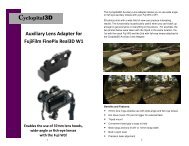
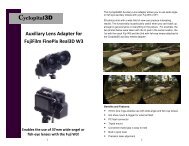
Lens Ring <strong>adapter</strong><br />
Use with 37mm wide angle and fish-eye lenses<br />
<strong>Cyclopital3D</strong><br />
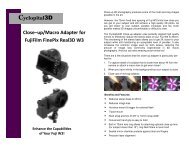
Close –<strong>up</strong>/Macro Adapter for<br />
FujiFilm FinePix Real3D W3<br />
Base Extender<br />
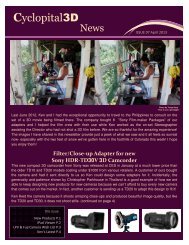
Perfect for wildlife, landscapes and band or wedding photos<br />
Create amazing 3D photos of <strong>close</strong> <strong>up</strong><br />
subjects not possible without the <strong>adapter</strong>!<br />
All rights reserved, <strong>Cyclopital3D</strong>, Inc. 2010
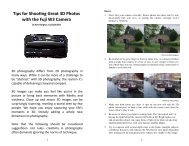
Close <strong>up</strong> 3D photography produces some of the most stunning images<br />
possible in the art.<br />
However, the 75mm fixed lens spacing of Fuji W3 limits how <strong>close</strong> you<br />
can get to your subject and still acieve a high quality 3D photo. As you<br />
get <strong>close</strong>r to your subject, paralax increases and too much paralax<br />
makes 3D images uncomfortable or difficult to view.<br />
The <strong>Cyclopital3D</strong> Close-<strong>up</strong> <strong>adapter</strong> uses perfectly aligned high quality<br />
mirrors to effectively reduce the stereo base of your Fuji W3 to 25mm.<br />
This shortening of the stereo base allows you to get 3X <strong>close</strong>r to your<br />
subject while still maintaining an acceptable level of paralax. It also<br />
increases the common image seen by both lenses, reducing the<br />
amount of image loss commonly experienced in 3D macro photography.<br />
Instructions for use:<br />
1. Slide lens cover open.<br />
2. Insert camera into <strong>adapter</strong>.<br />
3. Attach to camera by inserting thumb screw into the tripod mount.<br />
4. Turning your camera on (and off). If the camera is off, press and<br />
hold the “play” button in the middle of the control panel. The<br />
camera will power <strong>up</strong> in playback mode, switch to camera mode<br />
by half pressing the shutter button. To turn the camera off, press<br />
the play button once which will return it to playback mode, then<br />
press and hold the play button until camera turns off.<br />
There are a few situations that this <strong>close</strong>-<strong>up</strong> <strong>adapter</strong> is particularly perfect<br />
for:<br />
1. To capture detail of a subject that is <strong>close</strong>r than about 4ft from the<br />
camera<br />
2. When you have infinity in the background but your subject is <strong>close</strong><br />
3. Close-<strong>up</strong>s of moving subjects<br />
Benefits and Features:<br />
5. Adjust the zoom. When the camera is first turned on, the lens<br />
will be at minimum zoom. To use the <strong>adapter</strong> you will need to<br />
zoom in until there are no obstructions seen on the display- you<br />
will see the black sides of the <strong>adapter</strong> until it is appropriately<br />
zoomed in.<br />
6. Put your camera into macro mode to improve its ability to set<br />
auto-paralax on the scene by rotating the top round controller to<br />
the “M” position. To change this setting, use the bottom round<br />
control on your camera, press the flower button twice on the left<br />
side of the control to activate macro mode.<br />
• Reduces stereo base to 25mm<br />
• Reduces image loss<br />
• Hot shoe mount & trigger for external flash<br />
• Tripod mount<br />
• Convenient hand grip is easy to hold<br />
• Built in 72mm lens ring allows for attaching optional <strong>close</strong> <strong>up</strong> lens<br />
(for subject <strong>close</strong>r than 12”), ring flash filters or lens hood<br />
• Sealed mirror chamber protects against dust and fingers<br />
• Precision laser alignment<br />
When using a flash:<br />
• The flash hot shoe will accommodate almost any kind of flash unit<br />
that has a hot shoe <strong>adapter</strong>.<br />
• The camera must be set to “forced flash”.<br />
• Set the camera in <strong>manual</strong> mode, use menu to set shutter speed<br />
to 1/60 th second. We recommend setting the aperture to F9 and<br />
the ISO to 100.<br />
• It is recommended to use the auto-flash mode with the same<br />
settings as your camera. Auto mode will allow your flash unit to<br />
automatically produce the correct amount of light for the situation.