Zebra® TLP 2844 Desktop Printer - Agbit Computer Systems
Zebra® TLP 2844 Desktop Printer - Agbit Computer Systems
Zebra® TLP 2844 Desktop Printer - Agbit Computer Systems

You also want an ePaper? Increase the reach of your titles
YUMPU automatically turns print PDFs into web optimized ePapers that Google loves.
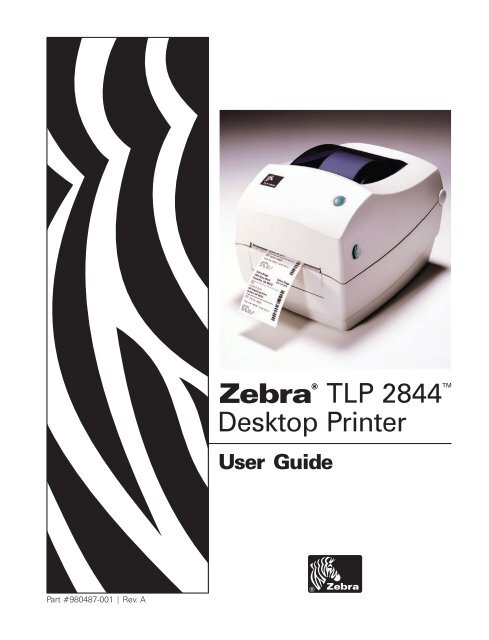
Zebra ®<br />
<strong>TLP</strong> <strong>2844</strong><br />
<strong>Desktop</strong> <strong>Printer</strong><br />
User Guide<br />
TM<br />
Part #980487-001 | Rev. A
ii 980487-001A
Proprietary Statement<br />
This manual contains proprietary information of the manufacturer. It is intended solely for the information and use of parties operating and maintaining the<br />
equipment described herein. Such proprietary information may not be used, reproduced, or disclosed to any other parties for any other purpose without the<br />
expressed written permission of the manufacturer.<br />
Product Improvements<br />
Continuous improvement of products is a policy of the manufacturer. All specifications and signs are subject to change without notice.<br />
FCC Compliance Statement<br />
NOTE: This equipment has been tested and found to comply with the limits for a Class B digital device, pursuant to Part 15 of the FCC Rules. These limits are<br />
designed to provide reasonable protection against harmful interference in a residential installation. This equipment generates, uses, and can radiate radio<br />
frequency energy and, if not installed and used in accordance with the instructions, may cause harmful interference to radio communications. However, there is<br />
no guarantee that the interference will not occur in a particular installation. If this equipment does cause harmful interference to radio or television reception,<br />
which can be determined by turning the equipment off and on, the user is encouraged to try to correct the interference by one or more of the following measures:<br />
■ Reorient or relocate the receiving antenna.<br />
■ Increase the separation between the equipment and the receiver.<br />
■ Connect the equipment into an outlet on a circuit different than that to which the receiver is connected.<br />
■ Consult the dealer or an experienced Radio/TV technician for help.<br />
NOTE: This unit was tested with shielded cables on the peripheral devices. Shielded cables must be used with the unit to insure compliance.<br />
“The user is cautioned that any changes or modifications not expressly approved by the manufacturer could void the user’s authority to operate the equipment.”<br />
Liability Disclaimer<br />
The manufacturer takes steps to assure that its published Engineering specifications and Manuals are correct; however, errors do occur. The manufacturer<br />
reserves the right to correct any such errors and disclaims liability resulting therefrom.<br />
No Liability for Consequential Damage<br />
In no event shall the manufacturer or anyone else involved in the creation, production, or delivery of the accompanying product (including hardware and<br />
software) be liable for any damages whatsoever (including, without limitation, damages for loss of business profits, business interruption, loss of business<br />
information, or other pecuniary loss) arising out of the use of or the results of use of or inability to use such product, even if the manufacturer has been advised<br />
of the possibility of such damages. Because some states do not allow the exclusion or limitation of liability for consequential or incidental damages, the above<br />
limitation may not apply to you.<br />
Trademarks<br />
The Zebra logo and the zebra head design are both registered trademarks and <strong>TLP</strong> <strong>2844</strong> is a service mark of ZIH Corp. Windows and MS-DOS are registered<br />
trademarks of Microsoft Corp. All other marks are trademarks or registered trademarks of their respective holders.<br />
Copyrights<br />
This copyrighted manual and the label printer described herein are owned by the manufacturer. All rights are reserved. Unauthorized reproduction of this<br />
manual or the software in the label printer may result in imprisonment of up to one year and fines of up to $10,000 (17 U.S.C.506). Copyright violators may be<br />
subject to civil liability.<br />
©2004 All rights reserved.<br />
980487-001A iii
Shock Hazard<br />
The printer and power supply should never be operated in a location where<br />
either one can get wet. Personal injury could result.<br />
Media and Ribbon<br />
Always use high-quality, approved labels, tags and ribbons. If adhesive<br />
backed labels are used that DO NOT lay flat on the backing liner, the<br />
exposed edges may stick to the label guides and rollers inside the printer,<br />
causing the label to peel off from the liner and jam the printer. Permanent<br />
damage to the print head may result if a non-approved ribbon is used as it<br />
may be wound incorrectly for the printer or contain chemicals corrosive to<br />
the print head. Approved supplies can be ordered from your dealer.<br />
If labels or ribbon run out while printing, DO NOT turn the power switch<br />
OFF (0) while reloading or data loss may result. After loading new<br />
supplies, press the feed button to resume printing.<br />
Static Discharge<br />
The discharge of electrostatic energy that accumulates on the surface of the<br />
human body or other surfaces can damage or destroy the print head or<br />
electronic components used in this device. DO NOT TOUCH the print<br />
head or the electronic components under the top cover.<br />
Thermal Printing<br />
The print head becomes hot while printing. To protect from damaging the<br />
print head and risk of personal injury, avoid touching the print head. Use<br />
only the cleaning pen to perform maintenance.<br />
iv 980487-001A
Contents<br />
Introduction<br />
Hello!. . . . . . . . . . . . . . . . . . . . . . . . . . . . . . . . . . . . . . . . . . . . . . . . . . . . . 1<br />
What's in the Box?. . . . . . . . . . . . . . . . . . . . . . . . . . . . . . . . . . . . . . . . . . . 2<br />
Inspecting the <strong>Printer</strong>. . . . . . . . . . . . . . . . . . . . . . . . . . . . . . . . . . . . . . . . . 3<br />
Opening the printer . . . . . . . . . . . . . . . . . . . . . . . . . . . . . . . . . . . . . . . 3<br />
Closing the printer. . . . . . . . . . . . . . . . . . . . . . . . . . . . . . . . . . . . . . . . 5<br />
Reporting Damage . . . . . . . . . . . . . . . . . . . . . . . . . . . . . . . . . . . . . . . 6<br />
Related Documentation . . . . . . . . . . . . . . . . . . . . . . . . . . . . . . . . . . . . . . . 6<br />
Getting Started<br />
Modes of Printing . . . . . . . . . . . . . . . . . . . . . . . . . . . . . . . . . . . . . . . . . . . 7<br />
Attaching Power Supply . . . . . . . . . . . . . . . . . . . . . . . . . . . . . . . . . . . . . . 8<br />
Loading Roll Media. . . . . . . . . . . . . . . . . . . . . . . . . . . . . . . . . . . . . . . . . . 9<br />
Placing the Roll in the Media Compartment. . . . . . . . . . . . . . . . . . . . 9<br />
Adjusting the Guides. . . . . . . . . . . . . . . . . . . . . . . . . . . . . . . . . . . . . 10<br />
Loading Ribbon . . . . . . . . . . . . . . . . . . . . . . . . . . . . . . . . . . . . . . . . . . . . 11<br />
Install the Ribbon Supply Roll . . . . . . . . . . . . . . . . . . . . . . . . . . . . . 11<br />
Install the Take-Up Core. . . . . . . . . . . . . . . . . . . . . . . . . . . . . . . . . . 11<br />
Attach and Tighten the Ribbon . . . . . . . . . . . . . . . . . . . . . . . . . . . . . 12<br />
Operator Controls . . . . . . . . . . . . . . . . . . . . . . . . . . . . . . . . . . . . . . . . . . 13<br />
Power Switch . . . . . . . . . . . . . . . . . . . . . . . . . . . . . . . . . . . . . . . . . . 13<br />
Feed Button . . . . . . . . . . . . . . . . . . . . . . . . . . . . . . . . . . . . . . . . . . . 13<br />
Status Light . . . . . . . . . . . . . . . . . . . . . . . . . . . . . . . . . . . . . . . . . . . . 13<br />
Media Length Sensing. . . . . . . . . . . . . . . . . . . . . . . . . . . . . . . . . . . . . . . 14<br />
Hooking Up the <strong>Printer</strong> and <strong>Computer</strong> . . . . . . . . . . . . . . . . . . . . . . . . . . 15<br />
Interface Cable Requirements. . . . . . . . . . . . . . . . . . . . . . . . . . . . . . 15<br />
USB Interface Requirements . . . . . . . . . . . . . . . . . . . . . . . . . . . . . . 16<br />
Parallel Interface Requirements . . . . . . . . . . . . . . . . . . . . . . . . . . . . 16<br />
Ethernet Interface Requirements. . . . . . . . . . . . . . . . . . . . . . . . . . . . 16<br />
Serial Interface Requirements. . . . . . . . . . . . . . . . . . . . . . . . . . . . . . 16<br />
Communicating with the <strong>Printer</strong> . . . . . . . . . . . . . . . . . . . . . . . . . . . . . . . 17<br />
Universal Serial Bus (USB) Communications . . . . . . . . . . . . . . . . . 17<br />
Parallel Communications . . . . . . . . . . . . . . . . . . . . . . . . . . . . . . . . . 17<br />
Internal Ethernet Communications . . . . . . . . . . . . . . . . . . . . . . . . . . 17<br />
Serial Communications . . . . . . . . . . . . . . . . . . . . . . . . . . . . . . . . . . . 18<br />
980487-001A v
Adjusting the Print Width . . . . . . . . . . . . . . . . . . . . . . . . . . . . . . . . . . . 19<br />
Adjusting the Print Quality . . . . . . . . . . . . . . . . . . . . . . . . . . . . . . . . . . . 19<br />
Operation & Options<br />
Thermal Printing . . . . . . . . . . . . . . . . . . . . . . . . . . . . . . . . . . . . . . . . . . . 21<br />
Replacing Supplies . . . . . . . . . . . . . . . . . . . . . . . . . . . . . . . . . . . . . . . . . 22<br />
Adding a New Transfer Ribbon . . . . . . . . . . . . . . . . . . . . . . . . . . . . 22<br />
Replacing a Partially Used Transfer Ribbon. . . . . . . . . . . . . . . . . . . 22<br />
Printing in Peel-Mode . . . . . . . . . . . . . . . . . . . . . . . . . . . . . . . . . . . . . . . 23<br />
Printing on Fan-Fold Media . . . . . . . . . . . . . . . . . . . . . . . . . . . . . . . . . . 24<br />
Using the Cutter Option. . . . . . . . . . . . . . . . . . . . . . . . . . . . . . . . . . . . . . 25<br />
Maintenance<br />
Cleaning. . . . . . . . . . . . . . . . . . . . . . . . . . . . . . . . . . . . . . . . . . . . . . . . . . 27<br />
Print Head Considerations . . . . . . . . . . . . . . . . . . . . . . . . . . . . . . . . 28<br />
Media Path Considerations . . . . . . . . . . . . . . . . . . . . . . . . . . . . . . . . 28<br />
Cleaning Card Considerations . . . . . . . . . . . . . . . . . . . . . . . . . . . . . 28<br />
Platen Considerations . . . . . . . . . . . . . . . . . . . . . . . . . . . . . . . . . . . . 29<br />
Lubrication . . . . . . . . . . . . . . . . . . . . . . . . . . . . . . . . . . . . . . . . . . . . . . . 29<br />
Replacing the Platen . . . . . . . . . . . . . . . . . . . . . . . . . . . . . . . . . . . . . . . . 30<br />
Replacing the Print Head. . . . . . . . . . . . . . . . . . . . . . . . . . . . . . . . . . . . . 31<br />
Thermal-Transfer <strong>TLP</strong> Model. . . . . . . . . . . . . . . . . . . . . . . . . . . . . . 32<br />
Troubleshooting<br />
Print Quality Problems . . . . . . . . . . . . . . . . . . . . . . . . . . . . . . . . . . . . . . 38<br />
Manual Calibration . . . . . . . . . . . . . . . . . . . . . . . . . . . . . . . . . . . . . . . . . 40<br />
Resetting the Factory Default Values . . . . . . . . . . . . . . . . . . . . . . . . . . 41<br />
Communications Diagnostics . . . . . . . . . . . . . . . . . . . . . . . . . . . . . . . . . 41<br />
Feed Button Modes . . . . . . . . . . . . . . . . . . . . . . . . . . . . . . . . . . . . . . . . . 42<br />
Appendix<br />
Interfaces . . . . . . . . . . . . . . . . . . . . . . . . . . . . . . . . . . . . . . . . . . . . . . . . . 43<br />
Universal Serial Bus (USB) Connector. . . . . . . . . . . . . . . . . . . . . . . 43<br />
Parallel Interface . . . . . . . . . . . . . . . . . . . . . . . . . . . . . . . . . . . . . . . . 44<br />
Internal Ethernet PrintServer . . . . . . . . . . . . . . . . . . . . . . . . . . . . . . 45<br />
Serial (RS-232) Connector . . . . . . . . . . . . . . . . . . . . . . . . . . . . . . . . 46<br />
vi 980487-001A
980487-001A vii
980487-001A
Introduction<br />
This section describes what you get in your shipping box and provides an<br />
overview of printer parts. This section also has procedures that describe<br />
how to open and close the printer and report any problems.<br />
Hello!<br />
Thank you for choosing a Zebra ® <strong>TLP</strong> <strong>2844</strong> printer, a high-quality<br />
on-demand printer manufactured by the industry leader in quality, service,<br />
and value—Zebra Technologies Corporation. For over 25 years, Zebra<br />
Technologies Corporation has provided customers with the highest caliber<br />
of products and support.<br />
Your printer is a high-quality on-demand printer. The printer provides<br />
thermal-transfer printing (which uses ribbon) and direct-thermal printing.<br />
This manual provides all of the information you will need to operate your<br />
printer on a daily basis. To create label formats, refer to your programming<br />
guide. This guide is available by contacting your distributor or dealer.<br />
NOTE: Many printer settings may also be controlled by your printer’s<br />
driver or label preparation software. Refer to the driver or<br />
software documentation for more information.<br />
Your printer, when connected to a host computer, functions as a complete<br />
system for printing labels and tags.<br />
980487-001A 1
What's in the Box?<br />
Save the carton and all packing materials in case you need to ship or store<br />
the printer later. After unpacking, make sure you have all parts. Follow the<br />
procedures for inspecting the printer to familiarize yourself with printer<br />
parts so you can follow the instructions in this book.<br />
2 980487-001A
Inspecting the <strong>Printer</strong><br />
Look at the outside of the printer and make sure that all parts are present.<br />
Opening the printer<br />
To access the media compartment, you<br />
must open the printer.<br />
Pull the release levers towards you and lift<br />
the cover.<br />
980487-001A 3
INSPECTING THE PRINTER (continued)<br />
After opening the printer, check the media compartment.<br />
4 980487-001A
Closing the printer<br />
Hold the top cover and press the<br />
“kick-stand” cover lock to release.<br />
Lower the top cover. The ribbon<br />
carriage automatically folds up into place.<br />
MOVIE<br />
Press down until the cover snaps closed.<br />
980487-001A 5
Reporting Damage<br />
If you discover damage or missing parts:<br />
■<br />
■<br />
■<br />
Immediately notify and file a damage report with the shipping company.<br />
The manufacturer is not responsible for any damage incurred during<br />
shipment of the printer and will not cover the repair of this damage<br />
under its warranty policy.<br />
Keep the carton and all packing material for inspection.<br />
Notify the authorized reseller<br />
Related Documentation<br />
Depending on the options you have ordered or choose to use with your new<br />
printer, you will find the following documents helpful:<br />
■<br />
■<br />
■<br />
EPL2® Programmer's Manual—Programming for Page Mode Printing<br />
ZebraNet® PrintServer II TM for Ethernet Networks Installation and<br />
Operation Guide<br />
Universal Serial Bus Specification available from the USB<br />
Implementation Forum<br />
6 980487-001A
Getting Started<br />
This section describes how to set up your printer for the first time and use<br />
the most common operating procedures for loading media in tear-off mode<br />
and loading ribbon.<br />
Modes of Printing<br />
You can operate this printer in different modes:<br />
■<br />
■<br />
■<br />
Standard tear-off mode allows you to tear off each label (or a strip of<br />
labels) after it is printed.<br />
In optional peel-off mode, the backing material is peeled away from the<br />
label as it is printed. After this label is removed, the next one is printed.<br />
In optional cutter mode, an attached unit cuts through the media.<br />
The printer typically uses roll media, but you can use fan-fold or other<br />
continuous media as well.<br />
For procedures to use optional modes and features, refer to the Operation<br />
and Options section.<br />
980487-001A 7
Attaching Power Supply<br />
Check the power supply to make certain it is appropriate for your input<br />
voltage.<br />
Warning: Use the power supply that came with your<br />
printer.<br />
Never operate the printer and power supply in an<br />
area where they can get wet. Serious personal<br />
injury could result!<br />
1. Make sure the power switch is in the off position (down).<br />
2. The DC power supply has a barrel connector on one end that must be<br />
inserted into the power supply receptacle on the back of the printer.<br />
3. Insert the separate AC power cord into the power supply.<br />
4. Plug the other end of the cord into an appropriate AC electrical outlet.<br />
Plug<br />
Varies by<br />
Country<br />
Power<br />
Switch<br />
Barrel<br />
Connector<br />
Power<br />
Supply<br />
AC<br />
Power<br />
Cord<br />
Power<br />
Supply<br />
Receptacle<br />
8 980487-001A
Loading Roll Media<br />
When you load media, you must place the roll on the media hangers and<br />
then adjust the media guides.<br />
MOVIE<br />
You must use the correct media for the type of printing you require. When<br />
printing without a ribbon, you must use direct thermal media. When using<br />
ribbon, you must use thermal transfer media. The printer's ribbon sensor<br />
detects motion of the supply spindle.<br />
Placing the Roll in the Media Compartment<br />
MOVIE<br />
Whether your roll media is inside or<br />
outside wound you load it into the printer<br />
the same way.<br />
1. Open the printer. Remember that you<br />
need to pull the release levers toward<br />
the front of the printer.<br />
2. Remove the outside length of media.<br />
During shipment, the roll may become<br />
dirty when handled or dusty when<br />
stored. Removing the outside length<br />
avoids dragging adhesive or dirty<br />
media between the print head and<br />
platen.<br />
3. Separate and hold open the media<br />
hangers.<br />
4. Orient the media roll so that its<br />
printing surface will be up as it passes<br />
over the platen.<br />
5. Lower the roll between the hangers<br />
and close them onto the core.<br />
980487-001A 9
Adjusting the Guides<br />
The adjustable guides direct the media<br />
toward the platen and print head.<br />
1. Open the media guides by turning the<br />
guide adjuster knob to the rear.<br />
2. Thread the media through the guides.<br />
3. Close the media guides by turning the<br />
guide adjuster knob to the front. They<br />
should just touch, but not restrict, the<br />
edges of the media.<br />
4. Unless you need to load ribbon, close<br />
the top cover. Remember that you<br />
need to release the cover lock, lower<br />
the top cover, and press down until the<br />
latches snap into place.<br />
10 980487-001A
Loading Ribbon<br />
MOVIE<br />
You must use thermal transfer media (accepts wax and/or resin transferred<br />
off a ribbon) when you use a ribbon. When loading ribbon, you install the<br />
supply and take-up rolls, then tighten the ribbon on the carriage.<br />
Install the Ribbon Supply Roll<br />
Before following these steps, prepare the<br />
ribbon by removing its wrapping and<br />
pulling its adhesive strip free.<br />
1. Thread the ribbon through the<br />
carriage.<br />
2. Press the right side onto the supply<br />
hub.<br />
3. Align the notches on the left side and<br />
mount onto the spokes of the left hub.<br />
Install the Take-Up Core<br />
1. Press the right side onto the take-up<br />
hub.<br />
2. Align the notches on the left side and<br />
mount onto the spokes of the left hub.<br />
You can find your first ribbon take-up<br />
core in the packing box. Subsequently,<br />
use the empty supply core to take up the<br />
next roll of ribbon.<br />
980487-001A 11
Attach and Tighten the Ribbon<br />
You must align the ribbon so that it will<br />
be taken straight onto the core.<br />
1. Attach the ribbon to the take up core.<br />
Use the adhesive strip on new rolls;<br />
otherwise, use tape.<br />
2. Turn the ribbon take-up gear<br />
counter-clockwise (top moves toward<br />
rear) to remove slack from the ribbon.<br />
3. Close the top cover. Remember that<br />
you need to release the cover lock,<br />
lower the top cover, and press down<br />
until the latches snap into place.<br />
12 980487-001A
Operator Controls<br />
Power Switch<br />
Feed Button<br />
Status Light<br />
Press up to turn ON or down to turn OFF the printer.<br />
CAUTION: The power should be turned off before connecting or<br />
disconnecting the communications and power cables.<br />
Forces the printer to feed one blank label.<br />
Takes the printer out of a “pause” condition. (The printer is put into<br />
“pause” by either a programming command or an error condition.) See<br />
“What the Status Light is Telling You” on page 35.<br />
Use the Feed button for printer setup and status (see “Feed Button Modes”<br />
on page 42).<br />
Functions as a printer operational indicator (see “What the Status Light is<br />
Telling You” on page 35).<br />
980487-001A 13
Media Length Sensing<br />
MOVIE<br />
Before you connect the printer to your computer, make sure that the printer<br />
is in proper working order. You can do this by making the printer measure<br />
media and print a status printout.<br />
After loading media, perform the<br />
following procedure that measures the<br />
length of each label or tag. Make sure the<br />
top cover of the printer is closed.<br />
1. Make sure that printer power is off.<br />
2. Press and hold the feed button.<br />
3. Turn printer power on.<br />
4. When the status light blinks, release<br />
the feed button.<br />
UKQ2933H U V4.28.19<br />
Serial port : 96,N,8,1<br />
Image buffer size: 1032K<br />
Fmem:000,0K,060.9K avl<br />
Gmem:000K,0331K avl<br />
Emem:000K,0331K avl<br />
I8,0,001 rY JF WY<br />
S2 D07 R0 24,000 ZT UN<br />
q1200 Q 1500,036<br />
Option:<br />
oRO<br />
06 10 16<br />
now in DUMP<br />
5. The printer advances the media to<br />
measure and verify the length of<br />
individual labels or tags. The printer<br />
then prints a status summary and<br />
remains in diagnostic dump mode.<br />
6. To begin normal operation, tap the<br />
feed button. The printer prints "out of<br />
DUMP" and advances a label.<br />
If the status light remains amber or red or<br />
you cannot get this printout, refer to<br />
Troubleshooting on page 35.<br />
out of DUMP<br />
14 980487-001A
Hooking Up the <strong>Printer</strong> and <strong>Computer</strong><br />
MOVIE<br />
Your printer will have one of two combinations of interfaces:<br />
■<br />
■<br />
Universal Serial Bus (USB), parallel and serial<br />
USB, ethernet, and serial<br />
Each specific interface option—USB, parallel, ethernet, serial—is discussed<br />
individually.<br />
You must supply the required interface cable for your application.<br />
CAUTIONS:Keep the power switch in the OFF position when<br />
attaching the interface cable.<br />
Interface Cable Requirements<br />
The power supply barrel connector must be inserted<br />
into the power supply receptacle on the back of the<br />
printer before connecting or disconnecting the communications<br />
cables.<br />
This printer complies with FCC “Rules and Regulations,”<br />
Part 15, for Class B Equipment, using fully<br />
shielded six-foot data cables. Use of longer cables or<br />
unshielded cables may increase radiated emissions<br />
above the Class B limits.<br />
Data cables must be of fully shielded construction and fitted with metal or<br />
metalized connector shells. Shielded cables and connectors are required to<br />
prevent radiation and reception of electrical noise.<br />
To minimize electrical noise pickup in the cable:<br />
Keep data cables as short as possible (6’ [1.83 m] recommended).<br />
Do not tightly bundle the data cables with power cords.<br />
Do not tie the data cables to power wire conduits.<br />
980487-001A 15
USB Interface Requirements<br />
Universal Serial Bus (version 1.1) provides a high-speed interface that is<br />
compatible with your existing PC hardware. USB’s “plug and play” design<br />
makes installation easy. Multiple printers can share a single USB port/hub.<br />
Parallel Interface Requirements<br />
The required cable (IEEE 1284-compliant is recommended) must have a<br />
standard 36-pin parallel connector on one end, which is plugged into the<br />
parallel port located on the back of the printer. The other end of the parallel<br />
interface cable connects to the printer connector at the host computer.<br />
For pinout information, refer to page 44.<br />
Ethernet Interface Requirements<br />
Ethernet provides a powerful networking capability that can be of use in a<br />
variety of internet/intranet printing solutions. After you load media and<br />
close the top cover, you can press the test button next to the connector on<br />
the rear of the printer to get an ethernet configuration label.<br />
Serial Interface Requirements<br />
The required cable must have a nine-pin “D” type (DB-9P) male connector<br />
on one end, which is plugged into the mating (DB-9S) serial port located on<br />
the back of the printer. The other end of this signal interface cable connects<br />
to a serial port at the host computer. Depending on the specific interface<br />
requirements, this will most likely be a straight-through cable.<br />
For pinout information, refer to page 46<br />
16 980487-001A
Communicating with the <strong>Printer</strong><br />
Universal Serial Bus (USB) Communications<br />
The printer is a terminal device when using a universal serial bus interface.<br />
You can refer to the Universal Serial Bus Specification for details regarding<br />
this interface.<br />
Parallel Communications<br />
When using the parallel port, typically there is no setup is required once the<br />
cable is plugged in. If you should encounter any problems, consult the<br />
user’s guide that came with your computer.<br />
Internal Ethernet Communications<br />
For details regarding this interface, refer to the ethernet guide from the<br />
manufacturer.<br />
980487-001A 17
Serial Communications<br />
Serial communications between the printer and the host computer can be set<br />
by the Y command.<br />
Y Command<br />
Use the serial port setup (Y) command to change the communications<br />
settings on the printer.<br />
1. With the host computer set at the same communications settings as the<br />
printer, send the Y command to change the printer to the desired<br />
settings.<br />
2. Change the host computer settings to match the new printer settings.<br />
Refer to the programming guide for more information about this command.<br />
Default the Serial Parameters<br />
The default communications parameters on the printer are 9600 baud, no<br />
parity, 8 data bits, 1 stop bit. Many utilities, downloaders and programs use<br />
these settings.<br />
18 980487-001A
Adjusting the Print Width<br />
Print width must be calibrated when you use a roll with a different width<br />
from previous media.<br />
Print width may be set by using the Set Label Width (Q) command<br />
(described in the programming guide).<br />
Adjusting the Print Quality<br />
Print quality is influenced by the heat of the print head, the speed of the<br />
media and the type of media you are using. Only by experimenting will<br />
you find the optimal mix for your application.<br />
If you find that the print darkness needs to be adjusted, refer to the heat<br />
density (D) command (described in the programming guide).<br />
If you find that the print speed needs to be adjusted, refer to the print speed<br />
(S) command (described in the programming guide).<br />
980487-001A 19
20 980487-001A
Operation & Options<br />
This section helps you get the most from your printer.<br />
You must use programming to control many of the printer’s functions. A<br />
few examples:<br />
■<br />
■<br />
The Q command (set form length) controls label length.<br />
The O command (hardware options) has a parameter "D" that changes<br />
the printing mode to direct thermal.<br />
For detailed information about creating labels using page description<br />
programming language, refer to the programming guide.<br />
To improve print quality, changing both print speed and density may be<br />
required to achieve the desired results. Your application’s printer driver<br />
provides control of the speed and heat (density).<br />
Thermal Printing<br />
The print head becomes hot while printing. To protect from damaging the<br />
print head and risk of personal injury, avoid touching the print head. Use<br />
only the cleaning pen to perform maintenance.<br />
The discharge of electrostatic energy that accumulates on the surface of the<br />
human body or other surfaces can damage or destroy the print head or<br />
electronic components used in this device. You must observe static-safe<br />
procedures when working with the print head or the electronic components<br />
under the top cover.<br />
You must use the correct media for the type of printing you require. When<br />
printing without a ribbon, you must use direct thermal media. When using<br />
ribbon, you must use thermal transfer media. The printer’s ribbon sensor<br />
detects motion of the supply spindle.<br />
980487-001A 21
Replacing Supplies<br />
If labels or ribbon run out while printing, leave the printer power on while<br />
reloading (data loss results if you turn off the printer). After you load a new<br />
label or ribbon roll, press the Feed button to restart .<br />
Always use high quality, approved labels, tags and ribbons. If adhesive<br />
backed labels are used that don’t lay flat on the backing liner, the exposed<br />
edges may stick to the label guides and rollers inside the printer, causing the<br />
label to peel off from the liner and jam the printer. Permanent damage to the<br />
print head may result if a non-approved ribbon is used as it may be wound<br />
incorrectly for the printer or contain chemicals corrosive to the print head.<br />
Approved supplies can be ordered from your dealer.<br />
Adding a New Transfer Ribbon<br />
If ribbon runs out in the middle of a print job, the indicator lights red and<br />
the printer waits for you to add a fresh roll.<br />
1. Keep the power on as you change ribbon.<br />
2. Open the top cover, then cut the used ribbon so you can remove the<br />
cores.<br />
3. Load a new ribbon roll. If necessary, review the Ribbon Loading steps.<br />
4. Close the top cover.<br />
5. Press the Feed button to restart printing.<br />
Replacing a Partially Used Transfer Ribbon<br />
To remove used transfer ribbon, perform the following steps.<br />
1. Cut the ribbon from the take-up roll.<br />
2. Remove the take-up roll and discard used ribbon.<br />
3. Remove the supply roll and tape the end of any fresh ribbon to prevent<br />
it from unwrapping.<br />
When reinstalling a partially used supply roll, tape the cut end onto the<br />
empty take-up roll.<br />
22 980487-001A
Printing in Peel-Mode<br />
ON<br />
OFF<br />
The optional dispenser allows<br />
you to print in “peel-mode”<br />
where the label backing follows<br />
a different path and the labels<br />
are presented one at a time for<br />
subsequent placement.<br />
MOVIE<br />
1. Remove several labels from the<br />
backing material.<br />
2. Open the top cover.<br />
3. Open the dispenser door.<br />
4. Switch on the label-taken sensor.<br />
5. Insert the backing in front of the peel<br />
bar and behind the peel roller.<br />
6. Close the dispenser door.<br />
7. Close the top cover.<br />
8. Press the Feed button to advance the<br />
label.<br />
During the print job, the printer will peel<br />
off the backing and present a single label.<br />
Take the label from the printer so it will<br />
print the next label.<br />
980487-001A 23
Printing on Fan-Fold Media<br />
Printing on fan-fold media requires you to<br />
set both the media hangers and the media<br />
guides in position.<br />
Lock-down<br />
Screw<br />
1. Open the top cover.<br />
2. With a sample of your media, adjust<br />
the media hangers to the width of the<br />
media. The hangers should just touch,<br />
but not restrict, the edges of the<br />
media.<br />
3. Tighten the screw using a small<br />
Phillips driver #1.<br />
4. With a sample of your media, adjust<br />
the guides to the width of the media.<br />
The guides should just touch, but not<br />
restrict, the edges of the media.<br />
5. Insert the media through the slot at the<br />
rear of the printer.<br />
6. Run the media between the hangers<br />
and guides.<br />
7. Close the top cover.<br />
24 980487-001A
Using the Cutter Option<br />
<strong>Printer</strong>s that have a bezel with a motorized blade can dispense one or more<br />
forms that are then automatically cut from the media supply. This option<br />
cuts through continuous paper from rolls and liner between labels. Keep<br />
the cutter dry. Never use any solutions or solvents to clean the blade.<br />
Use the f command to set the cut position and the C command to cut<br />
immediately outside a form.<br />
If the blade cuts through labels, adhesive<br />
can jam the cutter.<br />
1. Turn OFF (O) printer power and<br />
unplug the power and interface cables<br />
before clearing the cutter.<br />
2. After removing debris, plug in the<br />
power and interface cables, turn on<br />
the printer, then test for normal<br />
operation.<br />
980487-001A 25
26 980487-001A
Maintenance<br />
Cleaning<br />
When you clean the printer, use one or more of the following supplies that<br />
best suits your needs:<br />
CLEANING SUPPLIES<br />
Cleaning pens (12)<br />
Cleaning swabs (25)<br />
Cleaning cards, 4-in wide (25)<br />
Save-a-Print Head film, 4-in wide (3)<br />
The cleaning process takes just a couple of minutes using the steps outlined<br />
below.<br />
<strong>Printer</strong> Part Method Interval<br />
Print head<br />
Platen roller<br />
Peel bar<br />
Tear bar<br />
Exterior<br />
Interior<br />
Cutter<br />
Let the print head to cool for one minute, then use a new<br />
cleaning pen to swab the print elements (the thin gray<br />
line on the print head) from end to end. NOTE: You do<br />
not have to turn off the printer to do this.<br />
If print quality remains poor after cleaning, try the<br />
Save-a-Print Head cleaning film to remove buildup<br />
without damaging the print head. Call your authorized<br />
reseller for more information.<br />
Manually rotate the platen roller. Clean it thoroughly<br />
with 70% isopropyl alcohol and a cleaning swab,<br />
cleaning card, or lint-free cloth.<br />
Clean it thoroughly with 70% isopropyl alcohol and a<br />
cotton swab.<br />
Water-dampened cloth<br />
Brush or air blow<br />
Use tweezers to remove scraps<br />
As<br />
necessary<br />
or after<br />
every five<br />
rolls of<br />
media<br />
As needed<br />
980487-001A 27
Adhesives and coatings of media can over time transfer onto the printer<br />
components along the media path including the platen and print head.<br />
This build-up can accumulate dust and debris. Failure to clean the print<br />
head, media path and platen roller could result in inadvertent loss of labels,<br />
label jams and possible damage to the printer.<br />
Print Head Considerations<br />
MOVIE<br />
Always use a new cleaning pen on the print head (an old pen carries<br />
contaminants from its previous uses that may damage the print head).<br />
Media Path Considerations<br />
Use a cleaning swab or pen to remove debris, dust or crust that has built-up<br />
on the holders, guides and media path surfaces.<br />
1. Use the alcohol in the cleaning swab or pen to soak the debris so that it<br />
breaks up.<br />
2. Wipe the area with the cleaning swab or pen to remove the debris.<br />
3. Discard the cleaning swab or pen after use.<br />
Cleaning Card Considerations<br />
Use a cleaning card to remove debris that has built-up on the platen. Avoid<br />
scrubbing or vigorously rubbing the platen; otherwise, the surface could be<br />
damaged.<br />
1. Open the printer and remove labels.<br />
2. Place the cleaning card into the label path so that it is under the guides<br />
and it extends between the print head and platen roller.<br />
3. Close and latch the printer.<br />
4. With the power switch on, press the feed switch to move the cleaning<br />
card through the printer.<br />
5. Discard the card after use.<br />
28 980487-001A
Platen Considerations<br />
The standard platen (drive roller) normally does not require cleaning. Paper<br />
and liner dust can accumulate without effecting print operations.<br />
Contaminates on the platen roller can damage the print head or cause the<br />
media to slip when printing. Adhesive, dirt, general dust, oils and other<br />
contaminates should be cleaned immediately off the platen.<br />
Keep a new platen available as a spare and install it whenever the printer<br />
has significantly poorer performance, print quality or media handling. If<br />
sticking or jamming continues even after cleaning, you must replace the<br />
platen.<br />
The platen can be cleaned with a fiber-free swab (such as a Texpad swab)<br />
or a lint free, clean, damp cloth very lightly moistened with medical grade<br />
alcohol (70% pure or better).<br />
1. Open the media door and remove the media.<br />
2. Clean the platen surface with the alcohol moistened swab. Rotate the<br />
platen while swabbing. Repeat this process two to three times with a<br />
new swab to remove residual contaminates. Adhesives and oils, for<br />
example, may be thinned by the initial cleaning but not completely<br />
removed.<br />
3. Discard the cleaning swab or pen after use.<br />
Allow the printer to dry for one minute before loading labels.<br />
Lubrication<br />
No lubricating agents of any kind should be used on this printer! Some<br />
commercially available lubricants, if used, will damage the finish and the<br />
mechanical parts inside the printer.<br />
980487-001A 29
Replacing the Platen<br />
Removal<br />
MOVIE<br />
Open the printer and remove any media.<br />
1. Using a pointed stylus (such as<br />
tweezers, small slot-head screwdriver,<br />
or razor-knife), unhook the tabs on the<br />
right and left sides. Then rotate them<br />
forward.<br />
2. Lift the platen out of the printer’s<br />
bottom frame.<br />
Assembly<br />
Make sure the right bearing is on the shaft<br />
of the platen.<br />
1. Align the platen with the gear to the<br />
left and lower it into the printer’s<br />
bottom frame.<br />
2. Rotate the tabs back and snap them<br />
into place.<br />
30 980487-001A
Replacing the Print Head<br />
In the event you need to replace the print head, read the procedure and<br />
review the removal and installation steps before actually replacing the print<br />
head.<br />
MOVIE<br />
Prepare your work area by protecting against static discharge. Your work<br />
area must be static-safe and include a properly grounded conductive<br />
cushioned mat to hold the printer and a conductive wrist strap for yourself.<br />
NOTE: Turn the printer power off and unplug the power cord before<br />
replacing the print head.<br />
980487-001A 31
Thermal-Transfer <strong>TLP</strong> Model<br />
Before following the steps in this MOVIE<br />
procedure, open the printer by<br />
pulling the release latches forward then<br />
lifting the top cover. Remove any ribbon<br />
from the carriage.<br />
Removal<br />
1. Grasp the print head spring and pull it<br />
to the left; then, slide it free of the<br />
carriage.<br />
2. Use the spring to pry the print head<br />
clip off the right side of the carriage.<br />
3. Pull the print head and bracket<br />
forward.<br />
4. Use a #2 Phillips driver to remove the<br />
screw that holds the ground wire.<br />
5. Unplug both bundles of print head<br />
wires from their connectors.<br />
32 980487-001A
Replacing the <strong>TLP</strong> Print Head (Continued)<br />
Assembly<br />
The new print head comes with the clip<br />
and ground screw attached.<br />
1. Align the print head and bracket to<br />
plug the left and right connectors into<br />
the black and white wire bundles.<br />
2. Attach the ground wire and secure it<br />
with the screw. Use a #2 Phillips<br />
driver to tighten it.<br />
3. Insert the bracket pegs into the left<br />
side of the carriage.<br />
4. Align the right side of the bracket and<br />
insert the print head clip through the<br />
right side of the ribbon carriage into<br />
the bracket.<br />
5. Slip the left end of the print head<br />
spring into the left side of the ribbon<br />
carriage; then slide the right end into<br />
the other side. The angle of the “V”<br />
fits into the indent on top of the print<br />
head bracket.<br />
6. Clean the print head with the cleaning<br />
pen.<br />
Reload media and ribbon. Plug in the<br />
power cord. Print a status report to ensure<br />
proper function.<br />
980487-001A 33
34 980487-001A
Troubleshooting<br />
What the Status Light is Telling You<br />
Color Status Solution or Reason<br />
None<br />
Green<br />
Amber<br />
Red<br />
off<br />
constant<br />
constant<br />
blinking<br />
constant<br />
1. Check power connection from the A.C. outlet to power<br />
supply to printer.<br />
1. <strong>Printer</strong> printing (normal operation).<br />
2. <strong>Printer</strong> paused; ready to receive data (normal operation).<br />
3. <strong>Printer</strong> paused; waiting for user action (for example, to take<br />
a dispensed label or to tap the feed button).<br />
1. The cover open sensor is active. Press top cover to close<br />
and lock.<br />
2. <strong>Printer</strong> has a syntax or command error. Check program<br />
and resend print job.<br />
1. Firm download in progress. Indicator lights red, then<br />
green.<br />
2. Signal to begin media length sensing after turning ON<br />
printer. Release the feed button.<br />
1. Media or ribbon is out. Reload a new supply. Press feed<br />
button to continue.<br />
2. Power-up failure. Switch power OFF then back ON.<br />
3. <strong>Printer</strong> ready to receive flash programming during firmware<br />
download.<br />
980487-001A 35
<strong>Printer</strong> Operation<br />
Problem<br />
Media does not<br />
advance.<br />
Media moves but<br />
nothing is printed.<br />
Printing is faded or<br />
poor.<br />
Prints only partial<br />
label or skips a label.<br />
Printing stops and<br />
indicator lights Amber<br />
or Red.<br />
Solution or Reason<br />
1. Check interface cable connections from computer to<br />
printer.<br />
2. Make sure top cover is locked closed.<br />
3. Check that labels are correct.<br />
4. Verify media has print surface up for printing.<br />
5. Check that transfer ribbon is correctly routed and has the<br />
ink side out for thermal transfer printing.<br />
6. <strong>Printer</strong> has a syntax or command error. Check program<br />
and resent print job.<br />
1. Verify that the labels are the correct type (thermal transfer<br />
or direct thermal).<br />
2. Check that the roll is loaded with the thermal side facing<br />
up.<br />
3. Clean the print head with cleaning pen.<br />
4. Ensure top cover is locked closed.<br />
1. Clean the print head with cleaning pen.<br />
2. Adjust print speed/darkness in software.<br />
3. Check the media and verify that print surface is facing up.<br />
4. Check that correct thermal media is in use.<br />
1. Perform media length sensing.<br />
2. Label caught on print head.<br />
3. Top cover is not properly latched.<br />
4. Possible software problem. Check the printer memory<br />
configuration. Refer to the programming manual.<br />
1. Perform media length sensing.<br />
2. Possible problem with label stock. Use only approved<br />
labels and tags.<br />
3. Possible label jam.<br />
4. Insufficient memory for label size. Check the printer<br />
memory configuration.<br />
5. Possible software problem. Refer to the programming<br />
manual.<br />
36 980487-001A
Media Handling<br />
Problem<br />
Printing continues<br />
between labels.<br />
Prints one label and<br />
then stops.<br />
Blade cuts through<br />
labels instead of<br />
cutting liner between<br />
labels.<br />
Media jammed in<br />
cutter.<br />
Blade fails to cut<br />
direct thermal paper<br />
or label liner.<br />
Label Dispenser<br />
Solution or Reason<br />
1. Make sure label-taken sensor is on.<br />
2. The label-taken sensor is blocked or dirty. Remove any<br />
scraps or dust.<br />
3. Continuous media may be set. Verify form length setting<br />
through programming Q command. See the programming<br />
guide.<br />
1. Verify the quantity has been correctly set.<br />
Cutter Operation<br />
1. Verify form length setting through programming<br />
1. Unplug power and interface cables. Use tweezers to<br />
remove scaps from cutter opening.<br />
1. Use programming C command to cycle cutter several times<br />
without media to perform a self-cleaning. See the<br />
programming guide.<br />
2. Cutter must be replaced.<br />
980487-001A 37
Print Quality Problems<br />
No print on the label.<br />
■<br />
■<br />
You must use the correct media for the method of printing you require.<br />
When printing without a ribbon, you must use direct thermal media.<br />
When using ribbon, you must use thermal transfer media. The printer's<br />
ribbon sensor detects motion of the supply spindle.<br />
Is the media loaded correctly? Follow the instructions in “Loading the<br />
Media” on page 9.<br />
The printed image does not look right.<br />
■<br />
■<br />
■<br />
■<br />
The print head is dirty. Clean the print head according to the<br />
instructions on page 33.<br />
The print head is under temperature.<br />
Adjust the print darkness and/or print speed. Use the S and D commands<br />
in the programming guide.<br />
The media being used is incompatible with the printer. Be sure to use<br />
the recommended media for your application, and always use<br />
manufacturer-approved labels and tags.<br />
There are long tracks of missing print (blank vertical lines) on<br />
several labels.<br />
■<br />
■<br />
The print head is dirty. Clean the print head according to the<br />
instructions on page 33.<br />
The print head elements are damaged. Replace the print head (see<br />
“Replacing the Print Head” on page 32).<br />
38 980487-001A
The printing does not start at the top of the label, or misprinting of<br />
one to three labels.<br />
■<br />
■<br />
The media may not be threaded under the media guides. Refer to<br />
“Loading the Media” on page 9.<br />
The printer needs to be calibrated. Refer to “Auto Calibration” on page<br />
13.<br />
A label format was sent to, but not recognized by, the printer.<br />
■<br />
■<br />
■<br />
■<br />
Is the printer in pause mode? If so, press the feed button.<br />
If the status LED is on or flashing, refer to “What the Status LED is<br />
Telling You” on page 35.<br />
Make sure the data cable is correctly installed.<br />
A communications problem has occurred. First, make sure that the<br />
correct communications port on the computer is selected. Refer to<br />
“Communicating with the <strong>Printer</strong>” on page 17.<br />
980487-001A 39
Manual Calibration<br />
Manual calibration is recommended whenever you are using pre-printed<br />
media or if the printer will not correctly auto calibrate.<br />
1. Make sure the printer power is off and that media is loaded.<br />
2. Press and hold the feed button then turn on the printer power.<br />
3. Continue to hold the feed button until the status light LED flashes.<br />
Release the feed button.<br />
4. The printer will set the media sensor for the label backing being used.<br />
After the printer is done making this adjustment, the roll will<br />
automatically feed until a label is positioned at the print head.<br />
5. The configuration settings (similar to the example below) will print.<br />
Upon completion, the printer will save the new settings in memory and<br />
remain in diagnostic dump mode.<br />
6. Press the feed button. The printer will dispense another label with the<br />
message "Out of DUMP" and be ready for normal operation.<br />
UKQ2933H U V4.28.19<br />
Serial port : 96,N,8,1<br />
Image buffer size: 1032K<br />
Fmem:000,0K,060.9K avl<br />
Gmem:000K,0331K avl<br />
Emem:000K,0331K avl<br />
I8,0,001 rY JF WY<br />
S2 D07 R0 24,000 ZT UN<br />
q1200 Q 1500,036<br />
Option:<br />
oRO<br />
06 10 16<br />
now in DUMP<br />
out of DUMP<br />
40 980487-001A
Resetting the Factory Default Values<br />
Sometimes, resetting the printer to the factory defaults solves some of the<br />
problems. For troublehooting and to overwrite all stored parameters, send<br />
the ^default command.<br />
Communications Diagnostics<br />
If there is a problem transferring data between the computer and printer, try<br />
putting the printer in the communications diagnostics mode. The printer<br />
will print the ASCII characters and their respective hexadecimal values (a<br />
sample is shown below) for any data received from the host computer. To<br />
find out how, refer to the power off mode procedure in “Manual<br />
Calibration” on page 40.<br />
980487-001A 41
Feed Button Modes<br />
<strong>Printer</strong> Condition<br />
<strong>Printer</strong> is off.<br />
Cover is open<br />
Labels, tags or<br />
fan-fold forms are<br />
loaded.<br />
Continuous media roll<br />
is loaded.<br />
Fresh media has just<br />
been loaded.<br />
<strong>Printer</strong> is OFF<br />
Feed Button Action<br />
Tapping or holding the button has no result.<br />
<strong>Printer</strong> is ON<br />
Tapping or holding the button has no result.<br />
Tap the button once to perform a "form feed."<br />
Hold the button to perform a "continuous feed."<br />
The printer stops at the top of the next form.<br />
Tap the button to perform a "line feed."<br />
The printer stops on the next line.<br />
Hold the button to perform a "continuous feed."<br />
The printer stops at the next line when you release the button.<br />
Tap the button to advance media. If printer fails to detect media,<br />
the platen stops turning and the status LED lights Red; if the<br />
printer cannot detect a gap within 11 inches (27.9 cm), the platen<br />
stops turning and the status LED lights Amber.<br />
42 980487-001A
Appendix<br />
Interfaces<br />
Universal Serial Bus (USB) Connector<br />
The figure below displays the cable wiring required to use the printer’s<br />
USB interface.<br />
Pin<br />
Signal<br />
2<br />
1<br />
1 Vbus-N/C<br />
2 D-<br />
3 4<br />
3 D+<br />
4 Ground<br />
Shell<br />
Shield/<br />
Drain Wire<br />
For information on the USB interface, go to the USB web site at:<br />
Http://www.usb.org<br />
980487-001A 43
Parallel Interface<br />
The figure below displays the cable wiring required to use the printer's<br />
Centronics parallel interface.<br />
HOST<br />
STROBE~<br />
DATA 0<br />
DATA 1<br />
DATA 2<br />
DATA 3<br />
DATA 4<br />
DATA 5<br />
DATA 6<br />
DATA 7<br />
ACK~<br />
BUSY<br />
PAPER ERR.<br />
SELECT<br />
AUTOFD~<br />
ERROR~<br />
N/A<br />
N/A<br />
N/A<br />
SIG. GND<br />
SIG. GND<br />
SIG. GND<br />
SIG. GND<br />
SIG. GND<br />
SIG. GND<br />
SIG. GND<br />
DB-25<br />
Pin No.<br />
1<br />
2<br />
3<br />
4<br />
5<br />
6<br />
7<br />
8<br />
9<br />
10<br />
11<br />
12<br />
13<br />
14<br />
15<br />
16<br />
17<br />
18<br />
19<br />
20<br />
21<br />
22<br />
23<br />
24<br />
25<br />
Centronics<br />
Pin No.<br />
1<br />
2<br />
3<br />
4<br />
5<br />
6<br />
7<br />
8<br />
9<br />
10<br />
11<br />
12<br />
13<br />
14<br />
15<br />
16<br />
17<br />
18<br />
19<br />
20<br />
21<br />
22<br />
23<br />
24<br />
25<br />
26<br />
27<br />
28<br />
29<br />
30<br />
31<br />
32<br />
33<br />
34<br />
35<br />
36<br />
PRINTER<br />
STROBE~<br />
DATA 0<br />
DATA 1<br />
DATA 2<br />
DATA 3<br />
DATA 4<br />
DATA 5<br />
DATA 6<br />
DATA 7<br />
ACK~<br />
BUSY<br />
PAPER ERR.<br />
SELECT<br />
AUTOFD~<br />
n/c<br />
SIG. GND<br />
CHAS GND<br />
+5V<br />
SIG. GND<br />
SIG. GND<br />
SIG. GND<br />
SIG. GND<br />
SIG. GND<br />
SIG. GND<br />
SIG. GND<br />
SIG. GND<br />
SIG. GND<br />
SIG. GND<br />
SIG. GND<br />
SIG. GND<br />
n/c<br />
ERROR~<br />
SIG. GND<br />
n/c<br />
n/c<br />
SELECTIN~<br />
Male DB-25 to Male Centronics (Cable)<br />
44 980487-001A
Internal Ethernet PrintServer<br />
This interface uses an RJ-45 straight-through cable type. The table below<br />
provides the pinout assignments.<br />
Signal Pin Pin Signal<br />
Tx+ 1 1 Tx+<br />
Tx- 2 2 Tx-<br />
Rx+ 3 3 Rx+<br />
--- 4 4 ---<br />
--- 5 5 ---<br />
Rx- 6 6 Rx-<br />
--- 7 7 ---<br />
--- 8 8 ---<br />
Pin 4<br />
Pin 3<br />
Pin 2<br />
Pin 1<br />
Pin 5<br />
Pin 6<br />
Pin 7<br />
Pin 8<br />
Looking into the <strong>Printer</strong>’s<br />
RJ-45 Modular Connector<br />
980487-001A 45
Serial (RS-232) Connector<br />
The printer operates as a Data Communication Equipment (DCE) and<br />
normally connects via a standard RS-232 modem cable to a Data Terminal<br />
Equipment (DTE) such as a computer or terminal with a default<br />
configuration of 9600 baud, 8 bit data, 1 stop bit and No parity.<br />
Host<br />
N/C<br />
RxD<br />
TxD<br />
DTR<br />
GND<br />
DSR<br />
RTS<br />
CTS<br />
RI<br />
DB-9<br />
DB-9<br />
Pin #<br />
Pin #<br />
1<br />
1<br />
2<br />
2<br />
3<br />
3<br />
4<br />
4<br />
5<br />
5<br />
6<br />
6<br />
7<br />
7<br />
8<br />
8<br />
9<br />
9<br />
Female DB-9 to Male DB-9<br />
<strong>Printer</strong><br />
+5 Volts*<br />
TxD<br />
RxD<br />
CTS<br />
GND<br />
RDY<br />
N/C<br />
RDY<br />
N/C<br />
Host<br />
N/C<br />
RxD<br />
TxD<br />
DTR<br />
GND<br />
DSR<br />
RTS<br />
CTS<br />
RI<br />
DB-25<br />
DB-9<br />
Pin #<br />
Pin #<br />
8<br />
1<br />
3<br />
2<br />
2<br />
3<br />
20<br />
4<br />
7<br />
5<br />
6<br />
6<br />
4<br />
7<br />
5<br />
8<br />
22<br />
9<br />
Female DB-25 to Male DB-9<br />
<strong>Printer</strong><br />
+5 Volts*<br />
TxD<br />
RxD<br />
N/C<br />
GND<br />
RDY<br />
N/C<br />
RDY<br />
N/C<br />
*+5 volts at 150 mA for external device (e.g. KDU or scanner)<br />
46 980487-001A