Gold Standard Digital Readout System Manual(PDF)
Gold Standard Digital Readout System Manual(PDF)
Gold Standard Digital Readout System Manual(PDF)

Create successful ePaper yourself
Turn your PDF publications into a flip-book with our unique Google optimized e-Paper software.
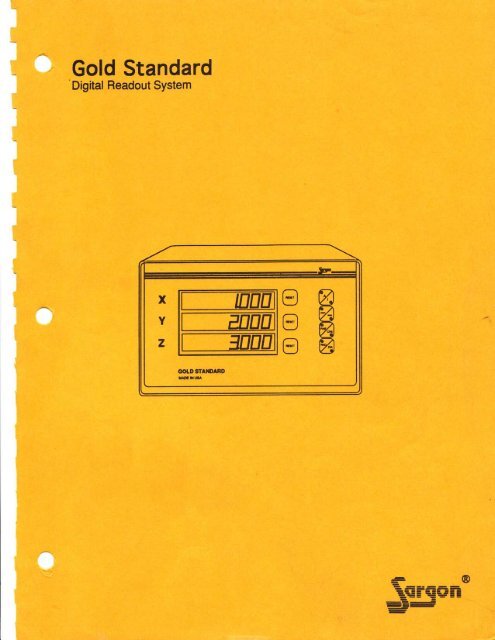
<strong>Gold</strong> <strong>Standard</strong><br />
<strong>Digital</strong> <strong>Readout</strong> <strong>System</strong><br />
HA<br />
:@<br />
-E-<br />
=-g= -l-E=<br />
- --<br />
=-- E
Table of Contents<br />
Features<br />
Keypad Configurations<br />
Installation<br />
Display<br />
AC Ground<br />
AC power Connection<br />
Power Up<br />
Setup Screens<br />
1. Scale Resolutions<br />
2. Scale Directions<br />
3. Diameter/Radius Selections<br />
Resetting the Absolute Coordinates<br />
Machine Error Compensation (MEC)<br />
Viewing the MEC Factor<br />
Clearing the MEC Factor<br />
Calibrating MEC<br />
1<br />
2<br />
5<br />
5<br />
7<br />
7<br />
I<br />
10<br />
11<br />
12<br />
13<br />
14<br />
15<br />
15<br />
16<br />
16<br />
Sargon Industries, Inc.<br />
9400 Lurline Ave., Unit D<br />
Chatsworth. CA 91311<br />
USA<br />
818882-6904<br />
Rel. 010293-LD-4.1
Features<br />
l**'l<br />
Hold afler turning on<br />
pot\rer lo selup<br />
resolultons, scale<br />
darections,<br />
-J-+<br />
and radius<br />
modes through lhe<br />
keyboard<br />
[*"'l<br />
c;)<br />
LJ<br />
GOLD STANDARD<br />
us fl us^
Keypad Configurations<br />
<strong>Gold</strong> <strong>Standard</strong> models are configured with either push-button or membrane<br />
keypads. Please note that these configurations are functionally equivalent and<br />
that the instructions given in this manual apply to both type systems. The<br />
following figures show the ditJerent face plates for all configurations,<br />
See the following page...<br />
2
Warning: Use extreme caution!<br />
Hazardous voltages!<br />
All required electrical work should be performed by a qualified electrician.<br />
Mount the display arm a minimum of 12 inches (=30 cm) away from any<br />
motors.<br />
4
Installation<br />
Display<br />
Remove the large "eye-bolt" located on top of the milling machine column (see<br />
Figure 1). Mounthe arm onto the machine and the display onto the arm with the<br />
5/16-18 bolt provided in the Sargon hardware kit (see Figure 1 ).<br />
Should you wish to mounthe display under the arm, open the display and<br />
reverse the top and bottom halves of the case (see Figure 2). Bolt the display<br />
under the arm using the 5/16-18 bolt provided in the Sargon hardware kit (see<br />
Figure 3).<br />
Figure 1: Display on a milling machine (normal configuration)<br />
5
v<br />
Figure 2: Opening of the display to reverse case halves<br />
Figure 3: Display on a milling machine (reverse configuration)<br />
6
AC Ground<br />
The AC socket used should be a three prong grounded outlet (as per Article 250<br />
of the US National Electrical Code). lf a three prong outlet is not available, use a<br />
grounded adapter and verify that the adapter is grounded.<br />
Note: Verify that the machine is grounded; if it is not, a ground must be<br />
installed.<br />
Install a 14 AWG stranded wire (customer provided) from the ground lug on the<br />
back of the <strong>Gold</strong> <strong>Standard</strong> to the machine power ground connection. lf this is not<br />
possible, locate an alternate place on the machine and drill+tap. Use star or split<br />
washers to secure the ground wire to provide an adequate connection. Use an<br />
approved anti-oxidation compound on the connection where the paint was<br />
scraped.<br />
AC Power Connection<br />
Do not connecthe <strong>Gold</strong> <strong>Standard</strong> to an outlet which is also used to power a<br />
mrchine; use a separate outlet. lf an outlet is not available, one should be<br />
installed near the display mounting location.<br />
The AC power outlet should be of the same voltage indicated on the<br />
identification/serial number on the back of the display.<br />
Use the power cord supplied. Do not modify the power cord.<br />
Connect and secure the scale cable connectors<br />
the display. Using tie-wraps,<br />
secure the scale cables and dress any excess slack. Do not wrap any AC power<br />
fines together with the scale cables. Maintain a minimum of 12 inches (=30 cm)<br />
from AC lines and cross them at right angles.<br />
XYZ<br />
n nn<br />
| | tl<br />
LJLJU<br />
GROUND<br />
AC cord socket<br />
Figure 4: Power cord, AC outlets, ground bolt<br />
7<br />
Ground bolt
Power Up<br />
Turn the unit on using the power switch located on the back of the display (see<br />
Figures 5 and 6). The DRO will display and flash "8.8.8'8'8.8.8.8."<br />
XYZ<br />
n nn<br />
ll I tl<br />
U U U<br />
eaouruo Q<br />
T: B<br />
MEc<br />
0=off<br />
1=O0<br />
Figure 5: ON/OFF switch<br />
W W<br />
@ffi<br />
@w<br />
@6<br />
GOLD STANDARD<br />
MAOE IN U$<br />
Figure 6: Flashing 8's (initial display)
The flashing 8's, will remain until you press a button. lf you press and hold the<br />
A/l button, the display will enter the Setup Screens (see Setup Screens). lf you<br />
press any other key, the display will enter the Normal Mode (see Normal Mode).<br />
9
Setup Screens<br />
After power up when the display is still flashing "8.8.8.8.8.8.8.8.", press and hold<br />
the A/l button to enter the Setup Screens (see Figure 7).<br />
W<br />
W<br />
@<br />
@<br />
@<br />
Press A/l after<br />
Power Up and enter<br />
Setup Screens<br />
Figure 7: Entering Setup Screens<br />
In the Setup Mode, there are 3 screens that enable you to select:<br />
1. Scale Resolutions<br />
2. Scale Directions (polarity)<br />
3. Diameter/Radius Selections<br />
10
1. Scale Resolutions<br />
While in the Setup Mode, press RAD/DIA until the DRO displays the following<br />
(see Figure 8):<br />
m<br />
Wffi<br />
ffiw<br />
ffiffi<br />
ffiffi<br />
Figure 8: Scale Resolutions<br />
Press the RESET button of the desired axis to toggle through available scale<br />
resolutions. When the appropriate scale resolutions are displayed, press A/l or<br />
any button other than RESETS, inch/mm, or RAD/DIA to exit to Normal Mode or<br />
press RAD/DIA to advance to the next Setup Screen. The last displayed value(s)<br />
and setting(s) will be saved automatically.<br />
Note: The scales determine the system resolution, not the DRO. This screen<br />
allows the DRO resolutions to match the scale resolution for each axis,<br />
11
2. Scale Directions<br />
While in the Setup Mode, press RAD/DIA untilthe DRO displays the following<br />
(see Figure 9):<br />
m Wm<br />
ffiw<br />
ffiffi<br />
ffi6<br />
Figure 9: Scale Directions<br />
Press the RESET button of the desired axis to toggle between positive and<br />
negative scale directions. When the appropriate scale directions are displayed,<br />
press Nl or any button other than RESETs, inch/mm, or RAD/DIA to exit to<br />
Normal Mode or press RAD/DIA to advance to the next Setup Screen. The last<br />
displayed value(s) and setting(s) will be saved automatically.<br />
Note: Directions must be correct for angle functions to operate properly. Each<br />
axis is set independently.<br />
12
3. Diameter/Radius Selections<br />
While in the Setup Mode, press RAD/DlA untilthe DRO displays the following<br />
(see Figure 10):<br />
m<br />
W<br />
ffiw<br />
ffiffi<br />
ffi@<br />
Figure 10: DItuRAD<br />
Press the RESET button of the desired axis to toggle between radius and<br />
diameter settings; (DlA NO = diameter disabled (radius), DIA YES = diameter<br />
enabled). When the desired settings are displayed, press Nl or any button other<br />
than RESETs, inch/mm, or RAD/DIA to exit to Normal Mode or press RAD/DIA to<br />
advance to the next Setup Screen. The last displayed value(s) and setting(s) will<br />
be saved automatically.<br />
Note: The RAD/DIA button will affect each axis for which this feature has been<br />
enabled.<br />
13
Resetting the Absolute Coordinates<br />
Using the A/l button, toggle to the Absolute Mode (A). Then press and hold the<br />
A/t button until the unit displays ZERO ABS (see Figure 11). At that point press<br />
the relevant RESET button(s) to resethe corresponding absolute coordinate(s)<br />
to zero.<br />
Hold A/l 2 seconds<br />
while in ABS Mode<br />
Then press<br />
appropriate<br />
RESET<br />
Figure 11: ZERO ABS<br />
14
XYZ<br />
n nn<br />
| || tl<br />
tttttl<br />
||||<br />
U UU f:<br />
onouruo Q<br />
MEC switch<br />
Figure 12: DRO back illustration with MEC switch<br />
Clearing the MEC Factor<br />
While viewing the MEC factors, press RESET for selected axis(es) to resethe<br />
facto(s)to zero.<br />
(61<br />
Calibrating MEC<br />
Clear the MEC as described above. Set FINE/COARSE switch to FINE and the<br />
RAD/DIA switch to RAD. Also, set the inch/mm switch to appropriate units in<br />
which you will perform your work.<br />
Enter the actual certified gauge block length by moving the table until the <strong>Gold</strong><br />
Standar displays the numerical value of the length. This is simply a method to<br />
enter numerical data withouthe use of a numeric keypad. Set the MEC switch<br />
to CAL and press the RESET for the selected axis.<br />
Move table untilthe gauge block measurement is displayed. Set MEC switch to<br />
OFF. The value displayed should now be corrected to the certified gauge block<br />
length entered.<br />
Repeat gauge block measurement to ensure unit is properly calibrated for that<br />
axis.<br />
Repeat procedure forthe remaining €xes.<br />
16
A standard vertical milling machine would not have any error if its table<br />
movements followed perfectly straight lines. This, however, is not the case.<br />
There will always be some finite transfer error.<br />
Machine error can be seen as the difference between the actualength of a<br />
standard gauge block and the value displayed by the digital readout. This error<br />
will also be present in any workpiece machined<br />
that axis.<br />
Machine Error Compensation (MEC) multiplies the internal display count by a<br />
conversion factor so that the displayed value will be correct. This factor is stored<br />
in the display's non-volatile memory and is set at the factory to a 1:1 ratio.<br />
Example: A standard 10.0000 inch gauge block is measured on a knee mill<br />
using proper machine shop practices, but yields a result of 10.0050 inch on the<br />
display. MEC is used to re-proportion the dimension so that the display indicates<br />
the correct measurement of 10.0000 inches of travel. The 0.0050 inch error is<br />
displaced within the 10.0000 inches of travel.<br />
MEC factorange is from -0.999999 to +0.999999.<br />
MEC Factor - Measured Value - Gauge Value<br />
Measured Value<br />
MEC should be a one time job. However, an operator may wish to recalibrate for<br />
a particular area on the machine table where a pafticular work is performed.<br />
Although MEC can compensate for machine table problems, it is not intended as<br />
a substitute for proper machine maintenance.<br />
Viewing the MEC Factor<br />
Set the MEC switch on the back of the display to CAL and hold the A/l button<br />
(see Figure 12). The MEC factor will then be displayed. When finished, move<br />
the MEC switch back to OFF.<br />
15
Note:<br />
1. The MEC procedure is performed one axis at a time.<br />
2. For best results, the display should be calibrated in units in which it will<br />
be used (inch or mm).<br />
3. ABS and INC modes always have the same calibration factor for a<br />
given time.<br />
4. <strong>Standard</strong> machine shop procedures are used for gauge block set up<br />
and measurement.<br />
17