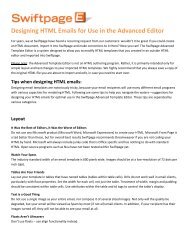
Swiftpage Online Editor
Swiftpage Online Editor
Swiftpage Online Editor

Create successful ePaper yourself
Turn your PDF publications into a flip-book with our unique Google optimized e-Paper software.
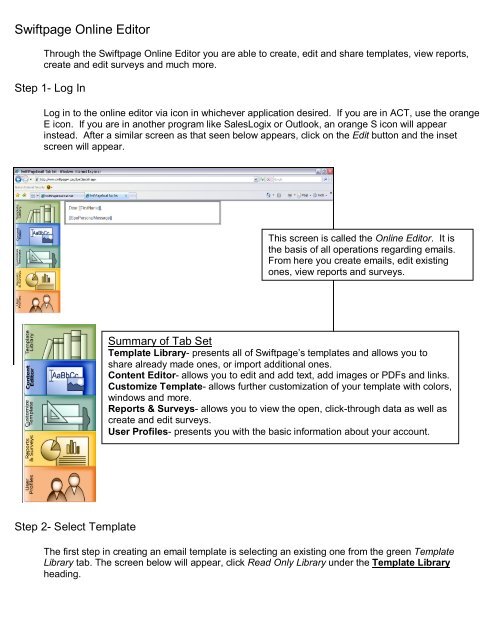
<strong>Swiftpage</strong> <strong>Online</strong> <strong>Editor</strong><br />
Through the <strong>Swiftpage</strong> <strong>Online</strong> <strong>Editor</strong> you are able to create, edit and share templates, view reports,<br />
create and edit surveys and much more.<br />
Step 1- Log In<br />
Log in to the online editor via icon in whichever application desired. If you are in ACT, use the orange<br />
E icon. If you are in another program like SalesLogix or Outlook, an orange S icon will appear<br />
instead. After a similar screen as that seen below appears, click on the Edit button and the inset<br />
screen will appear.<br />
This screen is called the <strong>Online</strong> <strong>Editor</strong>. It is<br />
the basis of all operations regarding emails.<br />
From here you create emails, edit existing<br />
ones, view reports and surveys.<br />
Summary of Tab Set<br />
Template Library- presents all of <strong>Swiftpage</strong>’s templates and allows you to<br />
share already made ones, or import additional ones.<br />
Content <strong>Editor</strong>- allows you to edit and add text, add images or PDFs and links.<br />
Customize Template- allows further customization of your template with colors,<br />
windows and more.<br />
Reports & Surveys- allows you to view the open, click-through data as well as<br />
create and edit surveys.<br />
User Profiles- presents you with the basic information about your account.<br />
Step 2- Select Template<br />
The first step in creating an email template is selecting an existing one from the green Template<br />
Library tab. The screen below will appear, click Read Only Library under the Template Library<br />
heading.
From here you may select a new template to open.<br />
If you would like to view a single template, click the<br />
template and then Preview. To view all templates,<br />
click Preview All Global Templates. After you have<br />
selected click Submit.<br />
Tip- To start from a blank template, choose one<br />
from the “zzz_Template Blank” group.<br />
After you have submitted your template, save click Save As and then<br />
Submit again. This will save your template into the Active Library which<br />
allows you to make changes to it. Click Show Current Template and the<br />
template which you selected will appear and is ready for composition.<br />
Tip: SwiftWindows are the boxes that, when the curser is moved over, turn to a green border. When<br />
you are ready to edit a SwiftWindow, click on it and the green border will change to blue. You have<br />
unlimited SwiftWindows per template and thus unlimited text. However, only one image and one PDF<br />
can be held in each SwiftWindow.<br />
Step 3- Add/Edit Text<br />
To add text to the email, click the blue Content <strong>Editor</strong> tab, and the tab on the far left will<br />
appear.<br />
Click Text Options and the<br />
screen to the right will<br />
appear. To add or edit preexisting<br />
text, first select<br />
your SwiftWindow and then<br />
click Edit Text.
After selecting to Edit Text, the toolbar below will appear within a greater screen. The function of<br />
each button is similar to that of any Word program.<br />
To add a link, highlight words, click on the<br />
Link button which is the globe and the<br />
chain link, and the inset screen will<br />
appear. Type a URL into the box entitled<br />
URL and then click OK.<br />
Another important text feature is the Mail Merge fields menu<br />
on the text toolbar. This feature is used to further personalize<br />
your emails. After you insert a specific tag within your email, upon sending out your email, the tag will<br />
grab that specific field from your database and insert it appropriately. This is a useful tool when<br />
sending out campaigns so that recipients feel more like individuals and less like just another number.<br />
You may also insert the SpePersonalMessage mail merge tag anywhere within your email template.<br />
When you go to send this email template out, <strong>Swiftpage</strong> will recognize this mail merge tag and enable<br />
you to insert text on-the-fly from whichever program you are using with <strong>Swiftpage</strong>.<br />
Step 4- To Add an Image<br />
If you would like to add an image, return to top menu by<br />
clicking on the Top Menu button and select Image Options. The screen below will appear.<br />
To add an image, select the window in which you would like it<br />
to appear and click Add/Replace an Image and then Browse<br />
through your library, find a picture, designate its position and<br />
then click Submit.<br />
To add or replace a header image, click Replace Header<br />
Image, choose an image from either the Header Image Library,<br />
or Upload a Header from your own library and click Submit.<br />
To link your image to a URL, click Link to Survey/Web and<br />
select if you would like to link it to a survey, URL or remove a<br />
link. If opting to add a link, type in the address and click<br />
submit.
Step 5- Customize Template<br />
Under the green Customize Template tab, you have the ability to change the<br />
column width, size, color, and general appearance.<br />
Select the Customize Template tab and the screen to the right will appear.<br />
To select column width select the Set Column Width tab and enter the desired<br />
pixel size for the left column. The right column will adjust itself accordingly. Hit<br />
the Submit button.<br />
Hint- to make your template appear as a single column, type 580 in for the width.<br />
To adjust the background colors select the Background Colors tab. Select the<br />
color by simply clicking on the color, the region that you wish to color under the<br />
Select background area to color drop-down and then click Submit.<br />
To add horizontal lines, select the Horizontal Lines tab. Click on the SwiftWindow that you would<br />
like your line to appear adjacent to. Click on Add Line Above, and the line will appear. To remove<br />
the line, select the window that has the line in it and click Remove Line Above.<br />
To add, delete or duplicate SwiftWindows, return to the blue Content <strong>Editor</strong> tab.<br />
-To Add: Click Add/Delete Window and then choose where you would like to add the window.<br />
Click on the SwiftWindow above and then click the Add Window Below button.<br />
-To Delete: Click Add/Delete Window and then select the window that you wish to discard.<br />
Click the SwiftWindow above and then click Delete Window Below button.<br />
-To Duplicate: Click Add/Delete Window and then select the window that you wish to<br />
duplicate. Click the Duplicate Window button.<br />
Step 6- Save Template<br />
After completing your template, it is necessary to save it before closing the window. To do this, return<br />
to the green Template Library tab and click Save. Congratulations, you are now ready to send your<br />
email template.