You also want an ePaper? Increase the reach of your titles
YUMPU automatically turns print PDFs into web optimized ePapers that Google loves.
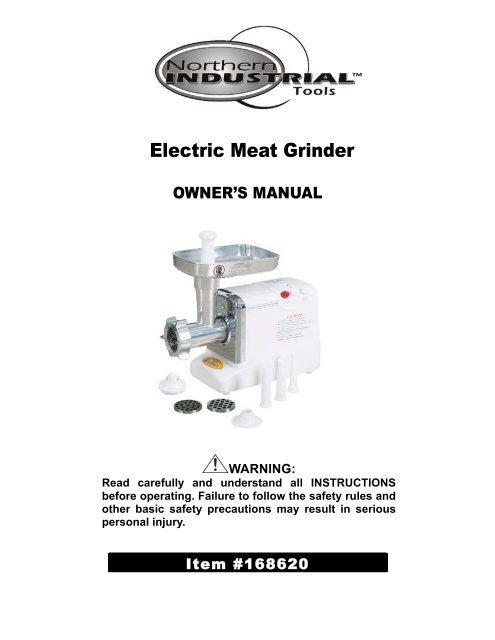
Thank you very much for choosing a NORTHERN TOOL + EQUIPMENT CO., INC. Product!<br />
For future reference, please complete the owner’s record below:<br />
Model: _______________ Purchase Date: _______________<br />
Save the receipt, warranty and these instructions. It is important that you read the entire<br />
manual to become familiar with this product before you begin using it.<br />
This machine is designed for certain applications only. Northern Tool + Equipment cannot be<br />
responsible for issues arising from modification. We strongly recommend this machine is not<br />
modified and/or used for any application other than that for which it was designed. If you have<br />
any questions relative to a particular application, DO NOT use the machine until you have first<br />
contacted Northern Tool + Equipment to determine if it can or should be performed on the<br />
product.<br />
For technical questions please call 1-800-222-5381.<br />
Power Supply: AC110V, 60HZ<br />
Power: 1000W<br />
Capacity: 176 lbs. per hour<br />
Dimension: 16" x 7-7/8" x 13-1/2"<br />
TECHNICAL SPECIFICATIONS<br />
GENERAL SAFETY RULES<br />
WARNING: Read and understand all instructions. Failure to follow all instructions<br />
listed below may result in electric shock, fire and/or serious injury.<br />
WARNING: The warnings, cautions, and instructions discussed in this<br />
instruction manual cannot cover all possible conditions or situations that could occur.<br />
It must be understood by the operator that common sense and caution are factors which<br />
cannot be built into this product, but must be supplied by the operator.<br />
- 2 -
WARNINGS AND PRECAUTIONS<br />
· Always unplug when assembling or disassembling the unit.<br />
· Close supervision is necessary when any appliance is used near children. Do not<br />
allow children to operate the unit.<br />
· When carrying the unit, be sure to hold the Motor Housing with both hands.<br />
· Do not fix Cutting Blade and Cutting Plate when using Kubbe Attachments.<br />
· Never feed food with your hands. Always use the Food Pusher (#5).<br />
· Never grind hard objects such as bones and nuts.<br />
· Never remove or attach the Hopper Plate, Head, or Cap when the motor is operating<br />
· Never disassemble the grinder or place anything (especially fingers, kitchen utensils,<br />
etc.) in the grinder during operation.<br />
· Press the off/reverse switch once to stop the motor. Pressing the off switch multiple<br />
times may damage the motor.<br />
· To reverse the direction of the rotation of the motor, press the Off/Reverse switch.<br />
Allow the motor to come to a complete stop. After the motor has come to a complete<br />
stop, press the Off/Reverse switch again. This restarts the motor and reverses the<br />
direction of the rotation. Failure to allow the motor to come to a complete stop before<br />
changing directions may result in damage to the motor.<br />
BEFORE USE<br />
OPERATING INSTRUCTIONS<br />
WARNING: Make sure the unit is unplugged prior to any cleaning or maintenance. It<br />
is important to wash all parts, except the Motor Housing, in warm, soapy water. The Motor<br />
Housing may be wiped with a damp cloth when needed, but should not be immersed in water.<br />
The metal food contact pieces are shipped with a light coating of food-grade oil to prevent<br />
rusting, and also to prevent the meat from sticking to the attachments. Apply a thin coating of<br />
food-grade oil prior to the first use, and after each subsequent use.<br />
1. Make sure that the voltage and frequency indicated on the bottom plate are the same<br />
as your local supply.<br />
2. Wash all the parts (except those that do not touch foods) in warm soapy water.<br />
3. Ensure that the Switch is off before plugging in the unit.<br />
- 3 -
CAUTION: A bleaching solution containing chlorine will discolor aluminum surfaces.<br />
CAUTION: Do not immerse Motor Housing in water. Wipe the Motor Housing with a<br />
damp cloth to clean.<br />
CAUTION: Thinners and benzines will crack or change the color of the unit. A little<br />
salad oil on the Feed Screw and Cutting Blade after washing and drying will keep them<br />
lubricated.<br />
ASSEMBLY<br />
maintenance.<br />
WARNING: Make sure the power cord is unplugged prior to any assembly or<br />
To Mince <strong>Meat</strong>:<br />
1. Place the Head (#7) tightly on the opening of the Motor Housing (#3). Holding the<br />
Head with one hand, place the Locking Knob (#2) into the hole on the side of the<br />
Motor Housing and tighten clockwise.<br />
2. Place Feed Screw (#8) into the Head (long end first) by turning the Feed Screw<br />
slightly until it is set into Motor Housing.<br />
3. Place Cutting Blade (#9) on the Feed Screw shaft with the blade facing the front as<br />
illustrated.<br />
NOTE: If the Cutting Blade is not fitted properly, meat will not be ground.<br />
4. Place the desired Cutting Plate (#s 10–14) next to the Cutting Blade, fitting<br />
protrusions in the slots.<br />
5. Screw the Cap (#15) into place until tight.<br />
NOTE: Do not over tighten. Place Hopper Plate (#6) on Head and fix into position.<br />
NOTE: The air passage at the bottom and the side of Motor Housing should be kept free and<br />
not blocked.<br />
6. Cut all foods into pieces so that they fit easily in to the Hopper opening.<br />
7. Plug in, and then switch the unit on.<br />
8. Always use the Food Pusher (#5) to feed foods into the Hopper Plate.<br />
9. After use, switch off and unplug.<br />
- 4 -
REASSEMBLING FOR KUBBE<br />
Step 1. Switch the machine off and unplug.<br />
Step 2. Unscrew and remove the Cap.<br />
Step 3. Remove the Cutting Plate and Cutting Blade.<br />
Step 4. Place Kubbe Attachments A and B on to the Feed Screw shaft together, fitting<br />
protrusions in the slots.<br />
Step 5. Screw Cap back into place until tight.<br />
NOTE: Do not over tighten.<br />
CONVERTING TO A SAUSAGE STUFFER<br />
Step 1: Turn off and unplug unit<br />
Step 2: Remove the Cutting Meshplate & the Cutting Blade and place in the sausage funnel.<br />
Step 3: Screw on the Cap until tight.<br />
Step 4: Place artificial or natural intestines around the sausage funnel. When using artificial<br />
intestines, be sure to soak in water 3–4 hours before stuffing.<br />
Step 5: Feed food or meat into the Hopper opening before operating.<br />
Step 6: Switch on the unit.<br />
JAMMING<br />
When the circuit breaker automatically stops the motor, or when the motor continues to<br />
function but no meat comes out of the Cutting Plate, switch off the machine.<br />
Before turning the grinder back on do one or more of the following:<br />
· Place CIRCUIT BREAKER to reset.<br />
· Press OFF/REVERSE to clear jamming of bone or other materials. Reverse operation<br />
will continue for as long as OFF/REVERSE is pressed.<br />
· Clean the unit. Follow the cleaning instructions included in this manual.<br />
DISASSEMBLY<br />
· Make sure that the motor has stopped completely.<br />
· Unplug the unit.<br />
· Disassemble by reversing Steps 1–5 of the assembly instructions.<br />
· The Cap has pins for easy unscrewing.<br />
· Knock Head on a table with Cutting Plate face-up for removal of the Cutting Plate<br />
- 5 -
INSTALLATION DIAGRAM<br />
- 6 -
PARTS LIST<br />
PARTS# DESCRIPTION Quantity<br />
1 Switch 1<br />
2 Locking Knob 1<br />
3 Motor Housing 1<br />
4 Opening 1<br />
5 Food Pusher 1<br />
6 Hopper Plate 1<br />
7 Head 1<br />
8 Feed Screw 1<br />
9 Cutting Blade 1<br />
10-14 Attachments<br />
10 Cutting Plate (fine) 1<br />
11 Cutting Plate (medium) 1<br />
12 Cutting Plate (coarse) 1<br />
13 Kubbe attachment (A) 1<br />
14 Kubbe attachment (B) 1<br />
15 Cap 1<br />
16 Cutters 1<br />
17 Cord compartment 1<br />
For replacement parts and technical questions, please call 1-800-222-5381.<br />
WARRANTY<br />
One-year limited warranty.<br />
Northern Tool + Equipment Co., Inc.<br />
2800 Southcross Drive West<br />
P.O. Box 1499 Burnsville, MN 55337-0499<br />
Made in China.<br />
- 7 -


