OTP Design Principles - Erlang
OTP Design Principles - Erlang
OTP Design Principles - Erlang

You also want an ePaper? Increase the reach of your titles
YUMPU automatically turns print PDFs into web optimized ePapers that Google loves.
<strong>OTP</strong> <strong>Design</strong> <strong>Principles</strong><br />
version 5.6
Typeset in L A TEX from SGML source using the DocBuilder-0.9.7 Document System.
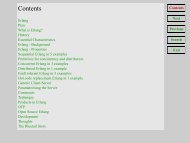
Contents<br />
1 <strong>OTP</strong> <strong>Design</strong> <strong>Principles</strong> 1<br />
1.1 Overview . . . . . . . . . . . . . . . . . . . . . . . . . . . . . . . . . . . . . . . . . . . 1<br />
1.1.1 Supervision Trees . . . . . . . . . . . . . . . . . . . . . . . . . . . . . . . . . . . 1<br />
1.1.2 Behaviours . . . . . . . . . . . . . . . . . . . . . . . . . . . . . . . . . . . . . . 2<br />
1.1.3 Applications . . . . . . . . . . . . . . . . . . . . . . . . . . . . . . . . . . . . . . 5<br />
1.1.4 Releases . . . . . . . . . . . . . . . . . . . . . . . . . . . . . . . . . . . . . . . . 6<br />
1.1.5 Release Handling . . . . . . . . . . . . . . . . . . . . . . . . . . . . . . . . . . . 6<br />
1.2 Gen Server Behaviour . . . . . . . . . . . . . . . . . . . . . . . . . . . . . . . . . . . . 6<br />
1.2.1 Client-Server <strong>Principles</strong> . . . . . . . . . . . . . . . . . . . . . . . . . . . . . . . 6<br />
1.2.2 Example . . . . . . . . . . . . . . . . . . . . . . . . . . . . . . . . . . . . . . . . 7<br />
1.2.3 Starting a Gen Server. . . . . . . . . . . . . . . . . . . . . . . . . . . . . . . . . 8<br />
1.2.4 Synchronous Requests - Call . . . . . . . . . . . . . . . . . . . . . . . . . . . . . 9<br />
1.2.5 Asynchronous Requests - Cast . . . . . . . . . . . . . . . . . . . . . . . . . . . . 9<br />
1.2.6 Stopping . . . . . . . . . . . . . . . . . . . . . . . . . . . . . . . . . . . . . . . . 10<br />
1.2.7 Handling Other Messages . . . . . . . . . . . . . . . . . . . . . . . . . . . . . . 11<br />
1.3 Gen Fsm Behaviour . . . . . . . . . . . . . . . . . . . . . . . . . . . . . . . . . . . . . . 11<br />
1.3.1 Finite State Machines . . . . . . . . . . . . . . . . . . . . . . . . . . . . . . . . . 11<br />
1.3.2 Example . . . . . . . . . . . . . . . . . . . . . . . . . . . . . . . . . . . . . . . . 11<br />
1.3.3 Starting a Gen Fsm . . . . . . . . . . . . . . . . . . . . . . . . . . . . . . . . . . 12<br />
1.3.4 Notifying About Events . . . . . . . . . . . . . . . . . . . . . . . . . . . . . . . 13<br />
1.3.5 Timeouts . . . . . . . . . . . . . . . . . . . . . . . . . . . . . . . . . . . . . . . 14<br />
1.3.6 All State Events . . . . . . . . . . . . . . . . . . . . . . . . . . . . . . . . . . . . 14<br />
1.3.7 Stopping . . . . . . . . . . . . . . . . . . . . . . . . . . . . . . . . . . . . . . . . 15<br />
1.3.8 Handling Other Messages . . . . . . . . . . . . . . . . . . . . . . . . . . . . . . 16<br />
1.4 Gen Event Behaviour . . . . . . . . . . . . . . . . . . . . . . . . . . . . . . . . . . . . . 16<br />
1.4.1 Event Handling <strong>Principles</strong> . . . . . . . . . . . . . . . . . . . . . . . . . . . . . . 16<br />
1.4.2 Example . . . . . . . . . . . . . . . . . . . . . . . . . . . . . . . . . . . . . . . . 16<br />
1.4.3 Starting an Event Manager . . . . . . . . . . . . . . . . . . . . . . . . . . . . . . 17<br />
1.4.4 Adding an Event Handler . . . . . . . . . . . . . . . . . . . . . . . . . . . . . . 17<br />
1.4.5 Notifying About Events . . . . . . . . . . . . . . . . . . . . . . . . . . . . . . . 18<br />
<strong>OTP</strong> <strong>Design</strong> <strong>Principles</strong><br />
iii
1.4.6 Deleting an Event Handler . . . . . . . . . . . . . . . . . . . . . . . . . . . . . . 18<br />
1.4.7 Stopping . . . . . . . . . . . . . . . . . . . . . . . . . . . . . . . . . . . . . . . . 19<br />
1.5 Supervisor Behaviour . . . . . . . . . . . . . . . . . . . . . . . . . . . . . . . . . . . . . 19<br />
1.5.1 Supervision <strong>Principles</strong> . . . . . . . . . . . . . . . . . . . . . . . . . . . . . . . . 19<br />
1.5.2 Example . . . . . . . . . . . . . . . . . . . . . . . . . . . . . . . . . . . . . . . . 20<br />
1.5.3 Restart Strategy . . . . . . . . . . . . . . . . . . . . . . . . . . . . . . . . . . . . 20<br />
1.5.4 Maximum Restart Frequency . . . . . . . . . . . . . . . . . . . . . . . . . . . . 21<br />
1.5.5 Child Specification . . . . . . . . . . . . . . . . . . . . . . . . . . . . . . . . . . 22<br />
1.5.6 Starting a Supervisor . . . . . . . . . . . . . . . . . . . . . . . . . . . . . . . . . 23<br />
1.5.7 Adding a Child Process . . . . . . . . . . . . . . . . . . . . . . . . . . . . . . . . 24<br />
1.5.8 Stopping a Child Process . . . . . . . . . . . . . . . . . . . . . . . . . . . . . . . 24<br />
1.5.9 Simple-One-For-One Supervisors . . . . . . . . . . . . . . . . . . . . . . . . . . 24<br />
1.5.10 Stopping . . . . . . . . . . . . . . . . . . . . . . . . . . . . . . . . . . . . . . . . 25<br />
1.6 Sys and Proc Lib . . . . . . . . . . . . . . . . . . . . . . . . . . . . . . . . . . . . . . . 25<br />
1.6.1 Simple Debugging . . . . . . . . . . . . . . . . . . . . . . . . . . . . . . . . . . 25<br />
1.6.2 Special Processes . . . . . . . . . . . . . . . . . . . . . . . . . . . . . . . . . . . 26<br />
1.6.3 User-Defined Behaviours . . . . . . . . . . . . . . . . . . . . . . . . . . . . . . . 32<br />
1.7 Applications . . . . . . . . . . . . . . . . . . . . . . . . . . . . . . . . . . . . . . . . . . 32<br />
1.7.1 Application Concept . . . . . . . . . . . . . . . . . . . . . . . . . . . . . . . . . 33<br />
1.7.2 Application Callback Module . . . . . . . . . . . . . . . . . . . . . . . . . . . . 33<br />
1.7.3 Application Resource File . . . . . . . . . . . . . . . . . . . . . . . . . . . . . . 34<br />
1.7.4 Directory Structure . . . . . . . . . . . . . . . . . . . . . . . . . . . . . . . . . . 35<br />
1.7.5 Application Controller . . . . . . . . . . . . . . . . . . . . . . . . . . . . . . . . 35<br />
1.7.6 Loading and Unloading Applications . . . . . . . . . . . . . . . . . . . . . . . . 35<br />
1.7.7 Starting and Stopping Applications . . . . . . . . . . . . . . . . . . . . . . . . . 36<br />
1.7.8 Configuring an Application . . . . . . . . . . . . . . . . . . . . . . . . . . . . . 37<br />
1.7.9 Application Start Types . . . . . . . . . . . . . . . . . . . . . . . . . . . . . . . 38<br />
1.8 Included Applications . . . . . . . . . . . . . . . . . . . . . . . . . . . . . . . . . . . . 39<br />
1.8.1 Definition . . . . . . . . . . . . . . . . . . . . . . . . . . . . . . . . . . . . . . . 39<br />
1.8.2 Specifying Included Applications . . . . . . . . . . . . . . . . . . . . . . . . . . 39<br />
1.8.3 Synchronizing Processes During Startup . . . . . . . . . . . . . . . . . . . . . . 40<br />
1.9 Distributed Applications . . . . . . . . . . . . . . . . . . . . . . . . . . . . . . . . . . . 41<br />
1.9.1 Definition . . . . . . . . . . . . . . . . . . . . . . . . . . . . . . . . . . . . . . . 41<br />
1.9.2 Specifying Distributed Applications . . . . . . . . . . . . . . . . . . . . . . . . . 41<br />
1.9.3 Starting and Stopping Distributed Applications . . . . . . . . . . . . . . . . . . 42<br />
1.9.4 Failover . . . . . . . . . . . . . . . . . . . . . . . . . . . . . . . . . . . . . . . . 43<br />
1.9.5 Takeover . . . . . . . . . . . . . . . . . . . . . . . . . . . . . . . . . . . . . . . . 45<br />
1.10 Releases . . . . . . . . . . . . . . . . . . . . . . . . . . . . . . . . . . . . . . . . . . . . 46<br />
1.10.1 Release Concept . . . . . . . . . . . . . . . . . . . . . . . . . . . . . . . . . . . 46<br />
1.10.2 Release Resource File . . . . . . . . . . . . . . . . . . . . . . . . . . . . . . . . . 46<br />
iv<br />
<strong>OTP</strong> <strong>Design</strong> <strong>Principles</strong>
1.10.3 Generating Boot Scripts . . . . . . . . . . . . . . . . . . . . . . . . . . . . . . . 47<br />
1.10.4 Creating a Release Package . . . . . . . . . . . . . . . . . . . . . . . . . . . . . . 48<br />
1.10.5 Directory Structure . . . . . . . . . . . . . . . . . . . . . . . . . . . . . . . . . . 49<br />
1.11 Release Handling . . . . . . . . . . . . . . . . . . . . . . . . . . . . . . . . . . . . . . . 50<br />
1.11.1 Release Handling <strong>Principles</strong> . . . . . . . . . . . . . . . . . . . . . . . . . . . . . 50<br />
1.11.2 Requirements . . . . . . . . . . . . . . . . . . . . . . . . . . . . . . . . . . . . . 52<br />
1.11.3 Distributed Systems . . . . . . . . . . . . . . . . . . . . . . . . . . . . . . . . . 52<br />
1.11.4 Release Handling Instructions . . . . . . . . . . . . . . . . . . . . . . . . . . . . 52<br />
1.11.5 Application Upgrade File . . . . . . . . . . . . . . . . . . . . . . . . . . . . . . . 55<br />
1.11.6 Release Upgrade File . . . . . . . . . . . . . . . . . . . . . . . . . . . . . . . . . 56<br />
1.11.7 Installing a Release . . . . . . . . . . . . . . . . . . . . . . . . . . . . . . . . . . 57<br />
1.11.8 Updating Application Specifications . . . . . . . . . . . . . . . . . . . . . . . . . 60<br />
1.12 Appup Cookbook . . . . . . . . . . . . . . . . . . . . . . . . . . . . . . . . . . . . . . . 61<br />
1.12.1 Changing a Functional Module . . . . . . . . . . . . . . . . . . . . . . . . . . . 61<br />
1.12.2 Changing a Residence Module . . . . . . . . . . . . . . . . . . . . . . . . . . . . 61<br />
1.12.3 Changing a Callback Module . . . . . . . . . . . . . . . . . . . . . . . . . . . . 61<br />
1.12.4 Changing Internal State . . . . . . . . . . . . . . . . . . . . . . . . . . . . . . . 62<br />
1.12.5 Module Dependencies . . . . . . . . . . . . . . . . . . . . . . . . . . . . . . . . 62<br />
1.12.6 Changing Code For a Special Process . . . . . . . . . . . . . . . . . . . . . . . . 63<br />
1.12.7 Changing a Supervisor . . . . . . . . . . . . . . . . . . . . . . . . . . . . . . . . 64<br />
1.12.8 Adding or Deleting a Module . . . . . . . . . . . . . . . . . . . . . . . . . . . . 67<br />
1.12.9 Starting or Terminating a Process . . . . . . . . . . . . . . . . . . . . . . . . . . 67<br />
1.12.10Adding or Removing an Application . . . . . . . . . . . . . . . . . . . . . . . . 67<br />
1.12.11Restarting an Application . . . . . . . . . . . . . . . . . . . . . . . . . . . . . . 67<br />
1.12.12Changing an Application Specification . . . . . . . . . . . . . . . . . . . . . . . 67<br />
1.12.13Changing Application Configuration . . . . . . . . . . . . . . . . . . . . . . . . 67<br />
1.12.14Changing Included Applications . . . . . . . . . . . . . . . . . . . . . . . . . . . 68<br />
1.12.15Changing Non-<strong>Erlang</strong> Code . . . . . . . . . . . . . . . . . . . . . . . . . . . . . 70<br />
1.12.16Emulator Restart . . . . . . . . . . . . . . . . . . . . . . . . . . . . . . . . . . . 71<br />
List of Figures 73<br />
<strong>OTP</strong> <strong>Design</strong> <strong>Principles</strong><br />
v
vi<br />
<strong>OTP</strong> <strong>Design</strong> <strong>Principles</strong>
Chapter 1<br />
<strong>OTP</strong> <strong>Design</strong> <strong>Principles</strong><br />
1.1 Overview<br />
The <strong>OTP</strong> <strong>Design</strong> <strong>Principles</strong> is a set of principles for how to structure <strong>Erlang</strong> code in terms of processes,<br />
modules and directories.<br />
1.1.1 Supervision Trees<br />
A basic concept in <strong>Erlang</strong>/<strong>OTP</strong> is the supervision tree. This is a process structuring model based on the<br />
idea of workers and supervisors.<br />
¯ Workers are processes which perform computations, that is, they do the actual work.<br />
¯ Supervisors are processes which monitor the behaviour of workers. A supervisor can restart a<br />
worker if something goes wrong.<br />
¯ The supervision tree is a hierarchical arrangement of code into supervisors and workers, making it<br />
possible to design and program fault-tolerant software.<br />
<strong>OTP</strong> <strong>Design</strong> <strong>Principles</strong><br />
1
Chapter 1: <strong>OTP</strong> <strong>Design</strong> <strong>Principles</strong><br />
1<br />
1<br />
a<br />
a<br />
1<br />
Figure 1.1: Supervision Tree<br />
In the figure above, square boxes represents supervisors and circles represent workers.<br />
1.1.2 Behaviours<br />
In a supervision tree, many of the processes have similar structures, they follow similar patterns. For<br />
example, the supervisors are very similar in structure. The only difference between them is which child<br />
processes they supervise. Also, many of the workers are servers in a server-client relation, finite state<br />
machines, or event handlers such as error loggers.<br />
Behaviours are formalizations of these common patterns. The idea is to divide the code for a process in<br />
a generic part (a behaviour module) and a specific part (a callback module).<br />
The behaviour module is part of <strong>Erlang</strong>/<strong>OTP</strong>. To implement a process such as a supervisor, the user only<br />
has to implement the callback module which should export a pre-defined set of functions, the callback<br />
functions.<br />
An example to illustrate how code can be divided into a generic and a specific part: Consider the<br />
following code (written in plain <strong>Erlang</strong>) for a simple server, which keeps track of a number of<br />
“channels”. Other processes can allocate and free the channels by calling the functions alloc/0 and<br />
free/1, respectively.<br />
-module(ch1).<br />
-export([start/0]).<br />
-export([alloc/0, free/1]).<br />
-export([init/0]).<br />
start() -><br />
spawn(ch1, init, []).<br />
alloc() -><br />
2 <strong>OTP</strong> <strong>Design</strong> <strong>Principles</strong>
1.1: Overview<br />
ch1 ! {self(), alloc},<br />
receive<br />
{ch1, Res} -><br />
Res<br />
end.<br />
free(Ch) -><br />
ch1 ! {free, Ch},<br />
ok.<br />
init() -><br />
register(ch1, self()),<br />
Chs = channels(),<br />
loop(Chs).<br />
loop(Chs) -><br />
receive<br />
{From, alloc} -><br />
{Ch, Chs2} = alloc(Chs),<br />
From ! {ch1, Ch},<br />
loop(Chs2);<br />
{free, Ch} -><br />
Chs2 = free(Ch, Chs),<br />
loop(Chs2)<br />
end.<br />
The code for the server can be rewritten into a generic part server.erl:<br />
-module(server).<br />
-export([start/1]).<br />
-export([call/2, cast/2]).<br />
-export([init/1]).<br />
start(Mod) -><br />
spawn(server, init, [Mod]).<br />
call(Name, Req) -><br />
Name ! {call, self(), Req},<br />
receive<br />
{Name, Res} -><br />
Res<br />
end.<br />
cast(Name, Req) -><br />
Name ! {cast, Req},<br />
ok.<br />
init(Mod) -><br />
register(Mod, self()),<br />
State = Mod:init(),<br />
loop(Mod, State).<br />
loop(Mod, State) -><br />
<strong>OTP</strong> <strong>Design</strong> <strong>Principles</strong><br />
3
Chapter 1: <strong>OTP</strong> <strong>Design</strong> <strong>Principles</strong><br />
receive<br />
{call, From, Req} -><br />
{Res, State2} = Mod:handle_call(Req, State),<br />
From ! {Mod, Res},<br />
loop(Mod, State2);<br />
{cast, Req} -><br />
State2 = Mod:handle_cast(Req, State),<br />
loop(Mod, State2)<br />
end.<br />
and a callback module ch2.erl:<br />
-module(ch2).<br />
-export([start/0]).<br />
-export([alloc/0, free/1]).<br />
-export([init/0, handle_call/2, handle_cast/2]).<br />
start() -><br />
server:start(ch2).<br />
alloc() -><br />
server:call(ch2, alloc).<br />
free(Ch) -><br />
server:cast(ch2, {free, Ch}).<br />
init() -><br />
channels().<br />
handle_call(alloc, Chs) -><br />
alloc(Chs). % => {Ch,Chs2}<br />
handle_cast({free, Ch}, Chs) -><br />
free(Ch, Chs). % => Chs2<br />
Note the following:<br />
¯ Thecodeinserver can be re-used to build many different servers.<br />
¯ The name of the server, in this example the atom ch2, is hidden from the users of the client<br />
functions. This means the name can be changed without affecting them.<br />
¯ The protcol (messages sent to and received from the server) is hidden as well. This is good<br />
programming practice and allows us to change the protocol without making changes to code using<br />
the interface functions.<br />
¯ We can extend the functionality of server, without having to change ch2 or any other callback<br />
module.<br />
(In ch1.erl and ch2.erl above, the implementation of channels/0, alloc/1 and free/2 has been<br />
intentionally left out, as it is not relevant to the example. For completeness, one way to write these<br />
functions are given below. Note that this is an example only, a realistic implementation must be able to<br />
handle situations like running out of channels to allocate etc.)<br />
4 <strong>OTP</strong> <strong>Design</strong> <strong>Principles</strong>
1.1: Overview<br />
channels() -><br />
{_Allocated = [], _Free = lists:seq(1,100)}.<br />
alloc({Allocated, [H|T] = _Free}) -><br />
{H, {[H|Allocated], T}}.<br />
free(Ch, {Alloc, Free} = Channels) -><br />
case lists:member(Ch, Alloc) of<br />
true -><br />
{lists:delete(Ch, Alloc), [Ch|Free]};<br />
false -><br />
Channels<br />
end.<br />
Code written without making use of behaviours may be more efficient, but the increased efficiency will<br />
be at the expense of generality. The ability to manage all applications in the system in a consistent<br />
manner is very important.<br />
Using behaviours also makes it easier to read and understand code written by other programmers. Ad<br />
hoc programming structures, while possibly more efficient, are always more difficult to understand.<br />
The module server corresponds, greatly simplified, to the <strong>Erlang</strong>/<strong>OTP</strong> behaviour gen server.<br />
The standard <strong>Erlang</strong>/<strong>OTP</strong> behaviours are:<br />
gen server [page 6 ] For implementing the server of a client-server relation.<br />
gen fsm [page 11 ] For implementing finite state machines.<br />
gen event [page 16 ] For implementing event handling functionality.<br />
supervisor [page 19 ] For implementing a supervisor in a supervision tree.<br />
The compiler understands the module attribute -behaviour(Behaviour) and issues warnings about<br />
missing callback functions. Example:<br />
-module(chs3).<br />
-behaviour(gen_server).<br />
...<br />
3> c(chs3).<br />
./chs3.erl:10: Warning: undefined call-back function handle_call/3<br />
{ok,chs3}<br />
1.1.3 Applications<br />
<strong>Erlang</strong>/<strong>OTP</strong> comes with a number of components, each implementing some specific functionality.<br />
Components are with <strong>Erlang</strong>/<strong>OTP</strong> terminology called applications. Examplesof<strong>Erlang</strong>/<strong>OTP</strong><br />
applications are Mnesia, which has everything needed for programming database services, and<br />
Debugger which is used to debug <strong>Erlang</strong> programs. The minimal system based on <strong>Erlang</strong>/<strong>OTP</strong> consists<br />
of the applications Kernel and STDLIB.<br />
The application concept applies both to program structure (processes) and directory structure<br />
(modules).<br />
The simplest kind of application does not have any processes, but consists of a collection of functional<br />
modules. Such an application is called a library application. An example of a library application is<br />
STDLIB.<br />
<strong>OTP</strong> <strong>Design</strong> <strong>Principles</strong><br />
5
Chapter 1: <strong>OTP</strong> <strong>Design</strong> <strong>Principles</strong><br />
An application with processes is easiest implemented as a supervision tree using the standard<br />
behaviours.<br />
How to program applications is described in Applications [page 32].<br />
1.1.4 Releases<br />
A release is a complete system made out from a subset of the <strong>Erlang</strong>/<strong>OTP</strong> applications and a set of<br />
user-specific applications.<br />
How to program releases is described in Releases [page 46].<br />
How to install a release in a target environment is described in the chapter about Target Systems in<br />
System <strong>Principles</strong>.<br />
1.1.5 Release Handling<br />
Release handling is upgrading and downgrading between different versions of a release, in a (possibly)<br />
running system. How to do this is described in Release Handling [page 50].<br />
1.2 Gen Server Behaviour<br />
This chapter should be read in conjunction with [gen server(3)], where all interface functions and<br />
callback functions are described in detail.<br />
1.2.1 Client-Server <strong>Principles</strong><br />
The client-server model is characterized by a central server and an arbitrary number of clients. The<br />
client-server model is generally used for resource management operations, where several different<br />
clients want to share a common resource. The server is responsible for managing this resource.<br />
6 <strong>OTP</strong> <strong>Design</strong> <strong>Principles</strong>
1.2: Gen Server Behaviour<br />
Query<br />
Clients<br />
Reply<br />
Server<br />
The Client-server model<br />
Figure 1.2: Client-Server Model<br />
1.2.2 Example<br />
An example of a simple server written in plain <strong>Erlang</strong> was given in Overview [page 2]. The server can<br />
be re-implemented using gen server, resulting in this callback module:<br />
-module(ch3).<br />
-behaviour(gen_server).<br />
-export([start_link/0]).<br />
-export([alloc/0, free/1]).<br />
-export([init/1, handle_call/3, handle_cast/2]).<br />
start_link() -><br />
gen_server:start_link({local, ch3}, ch3, [], []).<br />
alloc() -><br />
gen_server:call(ch3, alloc).<br />
free(Ch) -><br />
gen_server:cast(ch3, {free, Ch}).<br />
init(_Args) -><br />
{ok, channels()}.<br />
handle_call(alloc, _From, Chs) -><br />
<strong>OTP</strong> <strong>Design</strong> <strong>Principles</strong><br />
7
Chapter 1: <strong>OTP</strong> <strong>Design</strong> <strong>Principles</strong><br />
{Ch, Chs2} = alloc(Chs),<br />
{reply, Ch, Chs2}.<br />
handle_cast({free, Ch}, Chs) -><br />
Chs2 = free(Ch, Chs),<br />
{noreply, Chs2}.<br />
The code is explained in the next sections.<br />
1.2.3 Starting a Gen Server<br />
In the example in the previous section, the gen server is started by calling ch3:start link():<br />
start_link() -><br />
gen_server:start_link({local, ch3}, ch3, [], []) => {ok, Pid}<br />
start link calls the function gen server:start link/4. This function spawns and links to a new<br />
process, a gen server.<br />
¯ The first argument local, ch3 specifies the name. In this case, the gen server will be locally<br />
registered as ch3.<br />
If the name is omitted, the gen server is not registered. Instead its pid must be used. The name<br />
could also be given as global, Name, in which case the gen server is registered using<br />
global:register name/2.<br />
¯ The second argument, ch3, is the name of the callback module, that is the module where the<br />
callback functions are located.<br />
In this case, the interface functions (start link, alloc and free) are located in the same module<br />
as the callback functions (init, handle call and handle cast). This is normally good<br />
programming practice, to have the code corresponding to one process contained in one module.<br />
¯ The third argument, [], is a term which is passed as-is to the callback function init. Here,init<br />
does not need any indata and ignores the argument.<br />
¯ The fourth argument, [], is a list of options. See gen server(3) for available options.<br />
If name registration succeeds, the new gen server process calls the callback function ch3:init([]).<br />
init is expected to return ok, State,whereState is the internal state of the gen server. In this<br />
case, the state is the available channels.<br />
init(_Args) -><br />
{ok, channels()}.<br />
Note that gen server:start link is synchronous. It does not return until the gen server has been<br />
initialized and is ready to receive requests.<br />
gen server:start link must be used if the gen server is part of a supervision tree, i.e. is started by a<br />
supervisor. There is another function gen server:start to start a stand-alone gen server, i.e. a<br />
gen server which is not part of a supervision tree.<br />
8 <strong>OTP</strong> <strong>Design</strong> <strong>Principles</strong>
1.2: Gen Server Behaviour<br />
1.2.4 Synchronous Requests - Call<br />
The synchronous request alloc() is implemented using gen server:call/2:<br />
alloc() -><br />
gen_server:call(ch3, alloc).<br />
ch3 is the name of the gen server and must agree with the name used to start it. alloc is the actual<br />
request.<br />
The request is made into a message and sent to the gen server. When the request is received, the<br />
gen server calls handle call(Request, From, State) which is expected to return a tuple reply,<br />
Reply, State1. Reply is the reply which should be sent back to the client, and State1 is a new value<br />
for the state of the gen server.<br />
handle_call(alloc, _From, Chs) -><br />
{Ch, Chs2} = alloc(Chs),<br />
{reply, Ch, Chs2}.<br />
In this case, the reply is the allocated channel Ch and the new state is the set of remaining available<br />
channels Chs2.<br />
Thus, the call ch3:alloc() returns the allocated channel Ch and the gen server then waits for new<br />
requests, now with an updated list of available channels.<br />
1.2.5 Asynchronous Requests - Cast<br />
The asynchronous request free(Ch) is implemented using gen server:cast/2:<br />
free(Ch) -><br />
gen_server:cast(ch3, {free, Ch}).<br />
ch3 is the name of the gen server. free, Ch is the actual request.<br />
The request is made into a message and sent to the gen server. cast, and thus free, then returns ok.<br />
When the request is received, the gen server calls handle cast(Request, State) which is expected to<br />
return a tuple noreply, State1. State1 is a new value for the state of the gen server.<br />
handle_cast({free, Ch}, Chs) -><br />
Chs2 = free(Ch, Chs),<br />
{noreply, Chs2}.<br />
In this case, the new state is the updated list of available channels Chs2. The gen server is now ready for<br />
new requests.<br />
<strong>OTP</strong> <strong>Design</strong> <strong>Principles</strong><br />
9
Chapter 1: <strong>OTP</strong> <strong>Design</strong> <strong>Principles</strong><br />
1.2.6 Stopping<br />
In a Supervision Tree<br />
If the gen server is part of a supervision tree, no stop function is needed. The gen server will<br />
automatically be terminated by its supervisor. Exactly how this is done is defined by a shutdown<br />
strategy [page 22] set in the supervisor.<br />
If it is necessary to clean up before termination, the shutdown strategy must be a timeout value and the<br />
gen server must be set to trap exit signals in the init function. When ordered to shutdown, the<br />
gen server will then call the callback function terminate(shutdown, State):<br />
init(Args) -><br />
...,<br />
process_flag(trap_exit, true),<br />
...,<br />
{ok, State}.<br />
...<br />
terminate(shutdown, State) -><br />
..code for cleaning up here..<br />
ok.<br />
Stand-Alone Gen Servers<br />
If the gen server is not part of a supervision tree, a stop function may be useful, for example:<br />
...<br />
export([stop/0]).<br />
...<br />
stop() -><br />
gen_server:cast(ch3, stop).<br />
...<br />
handle_cast(stop, State) -><br />
{stop, normal, State};<br />
handle_cast({free, Ch}, State) -><br />
....<br />
...<br />
terminate(normal, State) -><br />
ok.<br />
The callback function handling the stop request returns a tuple stop, normal, State1,where<br />
normal specifies that it is a normal termination and State1 is a new value for the state of the gen server.<br />
This will cause the gen server to call terminate(normal,State1) and then terminate gracefully.<br />
10 <strong>OTP</strong> <strong>Design</strong> <strong>Principles</strong>
1.3: Gen Fsm Behaviour<br />
1.2.7 Handling Other Messages<br />
If the gen server should be able to receive other messages than requests, the callback function<br />
handle info(Info, State) must be implemented to handle them. Examples of other messages are<br />
exit messages, if the gen server is linked to other processes (than the supervisor) and trapping exit<br />
signals.<br />
handle_info({’EXIT’, Pid, Reason}, State) -><br />
..code to handle exits here..<br />
{noreply, State1}.<br />
1.3 Gen Fsm Behaviour<br />
This chapter should be read in conjunction with gen fsm(3), where all interface functions and callback<br />
functions are described in detail.<br />
1.3.1 Finite State Machines<br />
A finite state machine, FSM, can be described as a set of relations of the form:<br />
State(S) x Event(E) - Actions(A), State(S’)<br />
These relations are interpreted as meaning:<br />
If we are in state S and the event E occurs, we should perform the actions A and make a<br />
transition to the state S’.<br />
For an FSM implemented using the gen fsm behaviour, the state transition rules are written as a<br />
number of <strong>Erlang</strong> functions which conform to the following convention:<br />
StateName(Event, StateData) -<br />
.. code for actions here ...<br />
next state, StateName’, StateData’<br />
1.3.2 Example<br />
A door with a code lock could be viewed as an FSM. Initially, the door is locked. Anytime someone<br />
presses a button, this generates an event. Depending on what buttons have been pressed before, the<br />
sequence so far may be correct, incomplete or wrong.<br />
If it is correct, the door is unlocked for 30 seconds (30000 ms). If it is incomplete, we wait for another<br />
button to be pressed. If it is is wrong, we start all over, waiting for a new button sequence.<br />
Implementing the code lock FSM using gen fsm results in this callback module:<br />
<strong>OTP</strong> <strong>Design</strong> <strong>Principles</strong><br />
11
Chapter 1: <strong>OTP</strong> <strong>Design</strong> <strong>Principles</strong><br />
-module(code_lock).<br />
-behaviour(gen_fsm).<br />
-export([start_link/1]).<br />
-export([button/1]).<br />
-export([init/1, locked/2, open/2]).<br />
start_link(Code) -><br />
gen_fsm:start_link({local, code_lock}, code_lock, Code, []).<br />
button(Digit) -><br />
gen_fsm:send_event(code_lock, {button, Digit}).<br />
init(Code) -><br />
{ok, locked, {[], Code}}.<br />
locked({button, Digit}, {SoFar, Code}) -><br />
case [Digit|SoFar] of<br />
Code -><br />
do_unlock(),<br />
{next_state, open, {[], Code}, 3000};<br />
Incomplete when length(Incomplete)<br />
{next_state, locked, {Incomplete, Code}};<br />
_Wrong -><br />
{next_state, locked, {[], Code}};<br />
end.<br />
open(timeout, State) -><br />
do_lock(),<br />
{next_state, locked, State}.<br />
The code is explained in the next sections.<br />
1.3.3 Starting a Gen Fsm<br />
In the example in the previous section, the gen fsm is started by calling code lock:start link(Code):<br />
start_link(Code) -><br />
gen_fsm:start_link({local, code_lock}, code_lock, Code, []).<br />
start link calls the function gen fsm:start link/4. This function spawns and links to a new process,<br />
a gen fsm.<br />
¯ The first argument local, code lock specifies the name. In this case, the gen fsm will be<br />
locally registered as code lock.<br />
If the name is omitted, the gen fsm is not registered. Instead its pid must be used. The name<br />
could also be given as global, Name, in which case the gen fsm is registered using<br />
global:register name/2.<br />
12 <strong>OTP</strong> <strong>Design</strong> <strong>Principles</strong>
1.3: Gen Fsm Behaviour<br />
¯ The second argument, code lock, is the name of the callback module, that is the module where<br />
the callback functions are located.<br />
In this case, the interface functions (start link and button)arelocatedinthesamemoduleas<br />
the callback functions (init, locked and open). This is normally good programming practice, to<br />
have the code corresponding to one process contained in one module.<br />
¯ The third argument, Code, is a term which is passed as-is to the callback function init. Here,<br />
init gets the correct code for the lock as indata.<br />
¯ The fourth argument, [], is a list of options. See gen fsm(3) for available options.<br />
If name registration succeeds, the new gen fsm process calls the callback function<br />
code lock:init(Code). This function is expected to return ok, StateName, StateData,where<br />
StateName is the name of the initial state of the gen fsm. In this case locked, assuming the door is<br />
locked to begin with. StateData is the internal state of the gen fsm. (For gen fsms, the internal state is<br />
often referred to ’state data’ to distinguish it from the state as in states of a state machine.) In this case,<br />
the state data is the button sequence so far (empty to begin with) and the correct code of the lock.<br />
init(Code) -><br />
{ok, locked, {[], Code}}.<br />
Note that gen fsm:start link is synchronous. It does not return until the gen fsm has been initialized<br />
and is ready to receive notifications.<br />
gen fsm:start link must be used if the gen fsm is part of a supervision tree, i.e. is started by a<br />
supervisor. There is another function gen fsm:start to start a stand-alone gen fsm, i.e. a gen fsm<br />
which is not part of a supervision tree.<br />
1.3.4 Notifying About Events<br />
The function notifying the code lock about a button event is implemented using<br />
gen fsm:send event/2:<br />
button(Digit) -><br />
gen_fsm:send_event(code_lock, {button, Digit}).<br />
code lock is the name of the gen fsm and must agree with the name used to start it. button, Digit<br />
is the actual event.<br />
The event is made into a message and sent to the gen fsm. When the event is received, the gen fsm<br />
calls StateName(Event, StateData) which is expected to return a tuple next state, StateName1,<br />
StateData1. StateName is the name of the current state and StateName1 is the name of the next state<br />
to go to. StateData1 is a new value for the state data of the gen fsm.<br />
locked({button, Digit}, {SoFar, Code}) -><br />
case [Digit|SoFar] of<br />
Code -><br />
do_unlock(),<br />
{next_state, open, {[], Code}, 30000};<br />
Incomplete when length(Incomplete)<br />
{next_state, locked, {Incomplete, Code}};<br />
_Wrong -><br />
{next_state, locked, {[], Code}};<br />
end.<br />
<strong>OTP</strong> <strong>Design</strong> <strong>Principles</strong><br />
13
Chapter 1: <strong>OTP</strong> <strong>Design</strong> <strong>Principles</strong><br />
open(timeout, State) -><br />
do_lock(),<br />
{next_state, locked, State}.<br />
If the door is locked and a button is pressed, the complete button sequence so far is compared with the<br />
correct code for the lock and, depending on the result, the door is either unlocked and the gen fsm goes<br />
to state open, or the door remains in state locked.<br />
1.3.5 Timeouts<br />
When a correct code has been givened, the door is unlocked and the following tuple is returned from<br />
locked/2:<br />
{next_state, open, {[], Code}, 30000};<br />
30000 is a timeout value in milliseconds. After 30000 ms, i.e. 30 seconds, a timeout occurs. Then<br />
StateName(timeout, StateData) is called. In this case, the timeout occurs when the door has been in<br />
state open for 30 seconds. After that the door is locked again:<br />
open(timeout, State) -><br />
do_lock(),<br />
{next_state, locked, State}.<br />
1.3.6 All State Events<br />
Sometimes an event can arrive at any state of the gen fsm. Instead of sending the message with<br />
gen fsm:send event/2 and writing one clause handling the event for each state function, the message<br />
can be sent with gen fsm:send all state event/2 and handled with Module:handle event/3:<br />
-module(code_lock).<br />
...<br />
-export([stop/0]).<br />
...<br />
stop() -><br />
gen_fsm:send_all_state_event(code_lock, stop).<br />
...<br />
handle_event(stop, _StateName, StateData) -><br />
{stop, normal, StateData}.<br />
14 <strong>OTP</strong> <strong>Design</strong> <strong>Principles</strong>
1.3: Gen Fsm Behaviour<br />
1.3.7 Stopping<br />
In a Supervision Tree<br />
If the gen fsm is part of a supervision tree, no stop function is needed. The gen fsm will automatically<br />
be terminated by its supervisor. Exactly how this is done is defined by a shutdown strategy [page 22] set<br />
in the supervisor.<br />
If it is necessary to clean up before termination, the shutdown strategy must be a timeout value and the<br />
gen fsm must be set to trap exit signals in the init function. When ordered to shutdown, the gen fsm<br />
will then call the callback function terminate(shutdown, StateName, StateData):<br />
init(Args) -><br />
...,<br />
process_flag(trap_exit, true),<br />
...,<br />
{ok, StateName, StateData}.<br />
...<br />
terminate(shutdown, StateName, StateData) -><br />
..code for cleaning up here..<br />
ok.<br />
Stand-Alone Gen Fsms<br />
If the gen fsm is not part of a supervision tree, a stop function may be useful, for example:<br />
...<br />
-export([stop/0]).<br />
...<br />
stop() -><br />
gen_fsm:send_all_state_event(code_lock, stop).<br />
...<br />
handle_event(stop, _StateName, StateData) -><br />
{stop, normal, StateData}.<br />
...<br />
terminate(normal, _StateName, _StateData) -><br />
ok.<br />
The callback function handling the stop event returns a tuple stop,normal,StateData1,where<br />
normal specifies that it is a normal termination and StateData1 is a new value for the state data of the<br />
gen fsm. This will cause the gen fsm to call terminate(normal,StateName,StateData1) and then<br />
terminate gracefully:<br />
<strong>OTP</strong> <strong>Design</strong> <strong>Principles</strong><br />
15
Chapter 1: <strong>OTP</strong> <strong>Design</strong> <strong>Principles</strong><br />
1.3.8 Handling Other Messages<br />
If the gen fsm should be able to receive other messages than events, the callback function<br />
handle info(Info, StateName, StateData) must be implemented to handle them. Examples of<br />
other messages are exit messages, if the gen fsm is linked to other processes (than the supervisor) and<br />
trapping exit signals.<br />
handle_info({’EXIT’, Pid, Reason}, StateName, StateData) -><br />
..code to handle exits here..<br />
{next_state, StateName1, StateData1}.<br />
1.4 Gen Event Behaviour<br />
This chapter should be read in conjunction with gen event(3), where all interface functions and<br />
callback functions are described in detail.<br />
1.4.1 Event Handling <strong>Principles</strong><br />
In <strong>OTP</strong>, an event manager is a named object to which events can be sent. An event could be, for<br />
example, an error, an alarm or some information that should be logged.<br />
In the event manager, zero, one or several event handlers are installed. When the event manager is<br />
notified about an event, the event will be processed by all the installed event handlers. For example, an<br />
event manager for handling errors can by default have a handler installed which writes error messages to<br />
the terminal. If the error messages during a certain period should be saved to a file as well, the user adds<br />
another event handler which does this. When logging to file is no longer necessary, this event handler is<br />
deleted.<br />
An event manager is implemented as a process and each event handler is implemented as a callback<br />
module.<br />
The event manager essentially maintains a list of Module, State pairs, where each Module is an event<br />
handler, and State the internal state of that event handler.<br />
1.4.2 Example<br />
The callback module for the event handler writing error messages to the terminal could look like:<br />
-module(terminal_logger).<br />
-behaviour(gen_event).<br />
-export([init/1, handle_event/2, terminate/2]).<br />
init(_Args) -><br />
{ok, []}.<br />
handle_event(ErrorMsg, State) -><br />
io:format("***Error*** ~p~n", [ErrorMsg]),<br />
{ok, State}.<br />
terminate(_Args, _State) -><br />
ok.<br />
16 <strong>OTP</strong> <strong>Design</strong> <strong>Principles</strong>
1.4: Gen Event Behaviour<br />
The callback module for the event handler writing error messages to a file could look like:<br />
-module(file_logger).<br />
-behaviour(gen_event).<br />
-export([init/1, handle_event/2, terminate/2]).<br />
init(File) -><br />
{ok, Fd} = file:open(File, read),<br />
{ok, Fd}.<br />
handle_event(ErrorMsg, Fd) -><br />
io:format(Fd, "***Error*** ~p~n", [ErrorMsg]),<br />
{ok, Fd}.<br />
terminate(_Args, Fd) -><br />
file:close(Fd).<br />
The code is explained in the next sections.<br />
1.4.3 Starting an Event Manager<br />
To start an event manager for handling errors, as described in the example above, call the following<br />
function:<br />
gen_event:start_link({local, error_man})<br />
This function spawns and links to a new process, an event manager.<br />
The argument, local, error man specifies the name. In this case, the event manager will be locally<br />
registered as error man.<br />
If the name is omitted, the event manager is not registered. Instead its pid must be used. The name<br />
could also be given as global, Name, in which case the event manager is registered using<br />
global:register name/2.<br />
gen event:start link must be used if the event manager is part of a supervision tree, i.e. is started by<br />
a supervisor. There is another function gen event:start to start a stand-alone event manager, i.e. an<br />
event manager which is not part of a supervision tree.<br />
1.4.4 Adding an Event Handler<br />
Here is an example using the shell on how to start an event manager and add an event handler to it:<br />
1 gen event:start(local, error man).<br />
ok,0.31.0<br />
2 gen event:add handler(error man, terminal logger, []).<br />
ok<br />
This function sends a message to the event manager registered as error man, telling it to add the event<br />
handler terminal logger. The event manager will call the callback function<br />
terminal logger:init([]), where the argument [] is the third argument to add handler. init is<br />
expected to return ok, State, whereState is the internal state fo the event handler.<br />
<strong>OTP</strong> <strong>Design</strong> <strong>Principles</strong><br />
17
Chapter 1: <strong>OTP</strong> <strong>Design</strong> <strong>Principles</strong><br />
init(_Args) -><br />
{ok, []}.<br />
Here, init does not need any indata and ignores its argument. Also, for terminal logger the internal<br />
state is not used. For file logger, the internal state is used to save the open file descriptor.<br />
init(_Args) -><br />
{ok, Fd} = file:open(File, read),<br />
{ok, Fd}.<br />
1.4.5 Notifying About Events<br />
3 gen event:notify(error man, no reply).<br />
***Error*** no reply<br />
ok<br />
error man is the name of the event manager and no reply is the event.<br />
The event is made into a message and sent to the event manager. When the event is received, the event<br />
manager calls handle event(Event, State) for each installed event handler, in the same order as they<br />
were added. The function is expected to return a tuple ok, State1, whereState1 is a new value for<br />
the state of the event handler.<br />
In terminal logger:<br />
handle_event(ErrorMsg, State) -><br />
io:format("***Error*** ~p~n", [ErrorMsg]),<br />
{ok, State}.<br />
In file logger:<br />
handle_event(ErrorMsg, Fd) -><br />
io:format(Fd, "***Error*** ~p~n", [ErrorMsg]),<br />
{ok, Fd}.<br />
1.4.6 Deleting an Event Handler<br />
4 gen event:delete handler(error man, terminal logger, []).<br />
ok<br />
This function sends a message to the event manager registered as error man, telling it to delete the<br />
event handler terminal logger. The event manager will call the callback function<br />
terminal logger:terminate([], State), where the argument [] is the third argument to<br />
delete handler. terminate should be the opposite of init and do any necessary cleaning up. Its<br />
return value is ignored.<br />
For terminal logger, no cleaning up is necessary:<br />
terminate(_Args, _State) -><br />
ok.<br />
18 <strong>OTP</strong> <strong>Design</strong> <strong>Principles</strong>
1.5: Supervisor Behaviour<br />
For file logger, the file descriptor opened in init needs to be closed:<br />
terminate(_Args, Fd) -><br />
file:close(Fd).<br />
1.4.7 Stopping<br />
When an event manager is stopped, it will give each of the installed event handlers the chance to clean<br />
up by calling terminate/2, the same way as when deleting a handler.<br />
In a Supervision Tree<br />
If the event manager is part of a supervision tree, no stop function is needed. The event manager will<br />
automatically be terminated by its supervisor. Exactly how this is done is defined by a shutdown<br />
strategy [page 22] set in the supervisor.<br />
Stand-Alone Event Managers<br />
An event manager can also be stopped by calling:<br />
gen event:stop(error man).<br />
ok<br />
1.5 Supervisor Behaviour<br />
This section should be read in conjunction with supervisor(3), where all details about the supervisor<br />
behaviour is given.<br />
1.5.1 Supervision <strong>Principles</strong><br />
A supervisor is responsible for starting, stopping and monitoring its child processes. The basic idea of a<br />
supervisor is that it should keep its child processes alive by restarting them when necessary.<br />
Which child processes to start and monitor is specified by a list of child specifications [page 22]. The<br />
child processes are started in the order specified by this list, and terminated in the reversed order.<br />
<strong>OTP</strong> <strong>Design</strong> <strong>Principles</strong><br />
19
Chapter 1: <strong>OTP</strong> <strong>Design</strong> <strong>Principles</strong><br />
1.5.2 Example<br />
The callback module for a supervisor starting the server from the gen server chapter [page 7] could<br />
look like this:<br />
-module(ch_sup).<br />
-behaviour(supervisor).<br />
-export([start_link/0]).<br />
-export([init/1]).<br />
start_link() -><br />
supervisor:start_link(ch_sup, []).<br />
init(_Args) -><br />
{ok, {{one_for_one, 1, 60},<br />
[{ch3, {ch3, start_link, []},<br />
permanent, brutal_kill, worker, [ch3]}]}}.<br />
one for one is the restart strategy [page 20].<br />
1 and 60 defines the maximum restart frequency [page 21].<br />
The tuple ch3, ... is a child specification [page 22].<br />
1.5.3 Restart Strategy<br />
one for one<br />
If a child process terminates, only that process is restarted.<br />
1<br />
One for one supervision<br />
If any child dies it is restarted<br />
P1 P2 Pn<br />
Figure 1.3: One For One Supervision<br />
20 <strong>OTP</strong> <strong>Design</strong> <strong>Principles</strong>
1.5: Supervisor Behaviour<br />
one for all<br />
If a child process terminates, all other child processes are terminated and then all child processes,<br />
including the terminated one, are restarted.<br />
a<br />
all-for-one supervision<br />
If any child dies all children<br />
are terminated and all are restarted<br />
P1 P2 Pn<br />
Figure 1.4: One For All Supervision<br />
rest for one<br />
If a child process terminates, the ’rest’ of the child processes – i.e. the child processes after the<br />
terminated process in start order – are terminated. Then the terminated child process and the rest of<br />
the child processes are restarted.<br />
1.5.4 Maximum Restart Frequency<br />
The supervisors have a built-in mechanism to limit the number of restarts which can occur in a given<br />
time interval. This is determined by the values of the two parameters MaxR and MaxT in the start<br />
specification returned by the callback function init:<br />
init(...) -><br />
{ok, {{RestartStrategy, MaxR, MaxT},<br />
[ChildSpec, ...]}}.<br />
If more than MaxR number of restarts occur in the last MaxT seconds, then the supervisor terminates all<br />
the child processes and then itself.<br />
When the supervisor terminates, then the next higher level supervisor takes some action. It either<br />
restarts the terminated supervisor, or terminates itself.<br />
The intention of the restart mechanism is to prevent a situation where a process repeatedly dies for the<br />
same reason, only to be restarted again.<br />
<strong>OTP</strong> <strong>Design</strong> <strong>Principles</strong><br />
21
Chapter 1: <strong>OTP</strong> <strong>Design</strong> <strong>Principles</strong><br />
1.5.5 Child Specification<br />
This is the type definition for a child specification:<br />
{Id, StartFunc, Restart, Shutdown, Type, Modules}<br />
Id = term()<br />
StartFunc = {M, F, A}<br />
M = F = atom()<br />
A = [term()]<br />
Restart = permanent | transient | temporary<br />
Shutdown = brutal_kill | integer() >=0 | infinity<br />
Type = worker | supervisor<br />
Modules = [Module] | dynamic<br />
Module = atom()<br />
¯ Id is a name that is used to identify the child specification internally by the supervisor.<br />
¯ StartFunc defines the function call used to start the child process. It is a<br />
module-function-arguments tuple used as apply(M, F, A).<br />
It should be (or result in) a call to supervisor:start link, gen server:start link,<br />
gen fsm:start link or gen event:start link. (Or a function compliant with these functions,<br />
see supervisor(3) for details.<br />
¯ Restart defines when a terminated child process should be restarted.<br />
– A permanent child process is always restarted.<br />
– A temporary child process is never restarted.<br />
– A transient child process is restarted only if it terminates abnormally, i.e. with another exit<br />
reason than normal.<br />
¯ Shutdown defines how a child process should be terminated.<br />
– brutal kill means the child process is unconditionally terminated using exit(Child,<br />
kill).<br />
– An integer timeout value means that the supervisor tells the child process to terminate by<br />
calling exit(Child, shutdown) and then waits for an exit signal back. If no exit signal is<br />
received within the specified time, the child process is unconditionally terminated using<br />
exit(Child, kill).<br />
– If the child process is another supervisor, it should be set to infinity to give the subtree<br />
enough time to shutdown.<br />
¯ Type specifies if the child process is a supervisor or a worker.<br />
¯ Modules should be a list with one element [Module],whereModule is the name of the callback<br />
module, if the child process is a supervisor, gen server or gen fsm. If the child process is a<br />
gen event, Modules should be dynamic.<br />
This information is used by the release handler during upgrades and downgrades, see Release<br />
Handling [page 50].<br />
Example: The child specification to start the server ch3 in the example above looks like:<br />
{ch3,<br />
{ch3, start_link, []},<br />
permanent, brutal_kill, worker, [ch3]}<br />
Example: A child specification to start the event manager from the chapter about gen event [page 17]:<br />
22 <strong>OTP</strong> <strong>Design</strong> <strong>Principles</strong>
1.5: Supervisor Behaviour<br />
{error_man,<br />
{gen_event, start_link, [{local, error_man}]},<br />
permanent, 5000, worker, dynamic}<br />
Both the server and event manager are registered processes which can be expected to be accessible at all<br />
times, thus they are specified to be permanent.<br />
ch3 does not need to do any cleaning up before termination, thus no shutdown time is needed but<br />
brutal kill should be sufficient. error man may need some time for the event handlers to clean up,<br />
thus Shutdown is set to 5000 ms.<br />
Example: A child specification to start another supervisor:<br />
{sup,<br />
{sup, start_link, []},<br />
transient, infinity, supervisor, [sup]}<br />
1.5.6 Starting a Supervisor<br />
In the example above, the supervisor is started by calling ch sup:start link():<br />
start_link() -><br />
supervisor:start_link(ch_sup, []).<br />
ch sup:start link calls the function supervisor:start link/2. This function spawns and links to a<br />
new process, a supervisor.<br />
¯ The first argument, ch sup, is the name of the callback module, that is the module where the<br />
init callback function is located.<br />
¯ The second argument, [], is a term which is passed as-is to the callback function init. Here,init<br />
does not need any indata and ignores the argument.<br />
In this case, the supervisor is not registered. Instead its pid must be used. A name can be specified by<br />
calling supervisor:start link(local, Name, Module, Args) or<br />
supervisor:start link(global, Name, Module, Args).<br />
The new supervisor process calls the callback function ch sup:init([]). init is expected to return<br />
ok, StartSpec:<br />
init(_Args) -><br />
{ok, {{one_for_one, 1, 60},<br />
[{ch3, {ch3, start_link, []},<br />
permanent, brutal_kill, worker, [ch3]}]}}.<br />
The supervisor then starts all its child processes according to the child specifications in the start<br />
specification. In this case there is one child process, ch3.<br />
Note that supervisor:start link is synchronous. It does not return until all child processes have<br />
been started.<br />
<strong>OTP</strong> <strong>Design</strong> <strong>Principles</strong><br />
23
Chapter 1: <strong>OTP</strong> <strong>Design</strong> <strong>Principles</strong><br />
1.5.7 Adding a Child Process<br />
In addition to the static supervision tree, we can also add dynamic child processes to an existing<br />
supervisor with the following call:<br />
supervisor:start_child(Sup, ChildSpec)<br />
Sup is the pid, or name, of the supervisor. ChildSpec is a child specification [page 22].<br />
Child processes added using start child/2 behave in the same manner as the other child processes,<br />
with the following important exception: If a supervisor dies and is re-created, then all child processes<br />
which were dynamically added to the supervisor will be lost.<br />
1.5.8 Stopping a Child Process<br />
Any child process, static or dynamic, can be stopped in accordance with the shutdown specification:<br />
supervisor:terminate_child(Sup, Id)<br />
The child specification for a stopped child process is deleted with the following call:<br />
supervisor:delete_child(Sup, Id)<br />
Sup is the pid, or name, of the supervisor. Id is the id specified in the child specification [page 22].<br />
As with dynamically added child processes, the effects of deleting a static child process is lost if the<br />
supervisor itself restarts.<br />
1.5.9 Simple-One-For-One Supervisors<br />
A supervisor with restart strategy simple one for one is a simplified one for one supervisor, where all<br />
child processes are dynamically added instances of the same process.<br />
Example of a callback module for a simple one for one supervisor:<br />
-module(simple_sup).<br />
-behaviour(supervisor).<br />
-export([start_link/0]).<br />
-export([init/1]).<br />
start_link() -><br />
supervisor:start_link(simple_sup, []).<br />
init(_Args) -><br />
{ok, {{simple_one_for_one, 0, 1},<br />
[{call, {call, start_link, []},<br />
temporary, brutal_kill, worker, [call]}]}}.<br />
When started, the supervisor will not start any child processes. Instead, all child processes are added<br />
dynamically by calling:<br />
supervisor:start_child(Sup, List)<br />
24 <strong>OTP</strong> <strong>Design</strong> <strong>Principles</strong>
1.6: Sys and Proc Lib<br />
Sup is the pid, or name, of the supervisor. List is an arbitrary list of terms which will be added to the<br />
list of arguments specified in the child specification. If the start function is specified as M, F, A, then<br />
the child process is started by calling apply(M, F, A++List).<br />
For example, adding a child to simple sup above:<br />
supervisor:start_child(Pid, [id1])<br />
results in the child process being started by calling apply(call, start link, []++[id1]), or actually:<br />
call:start_link(id1)<br />
1.5.10 Stopping<br />
Since the supervisor is part of a supervision tree, it will automatically be terminated by its supervisor.<br />
When asked to shutdown, it will terminate all child processes in reversed start order according to the<br />
respective shutdown specifications, and then terminate itself.<br />
1.6 Sys and Proc Lib<br />
The module sys contains functions for simple debugging of processes implemented using behaviours.<br />
There are also functions that, together with functions in the module proc lib, can be used to<br />
implement a special process, a process which comply to the <strong>OTP</strong> design principles without making use<br />
of a standard behaviour. They can also be used to implement user defined (non-standard) behaviours.<br />
Both sys and proc lib belong to the STDLIB application.<br />
1.6.1 Simple Debugging<br />
The module sys contains some functions for simple debugging of processes implemented using<br />
behaviours. We use the code lock example from the gen event [page 11] chapter to illustrate this:<br />
% erl<br />
<strong>Erlang</strong> (BEAM) emulator version 5.2.3.6 [hipe] [threads:0]<br />
Eshell V5.2.3.6<br />
(abort with ^G)<br />
1 code lock:start link([1,2,3,4]).<br />
ok,0.32.0<br />
2 sys:statistics(code lock, true).<br />
ok<br />
3 sys:trace(code lock, true).<br />
ok<br />
4 code lock:button(4).<br />
*DBG* code lock got event button,4 in state closed<br />
ok<br />
*DBG* code lock switched to state closed<br />
5 code lock:button(3).<br />
*DBG* code lock got event button,3 in state closed<br />
ok<br />
*DBG* code lock switched to state closed<br />
6 code lock:button(2).<br />
<strong>OTP</strong> <strong>Design</strong> <strong>Principles</strong><br />
25
Chapter 1: <strong>OTP</strong> <strong>Design</strong> <strong>Principles</strong><br />
*DBG* code lock got event button,2 in state closed<br />
ok<br />
*DBG* code lock switched to state closed<br />
7 code lock:button(1).<br />
*DBG* code lock got event button,1 in state closed<br />
ok<br />
OPEN DOOR<br />
*DBG* code lock switched to state open<br />
*DBG* code lock got event timeout in state open<br />
CLOSE DOOR<br />
*DBG* code lock switched to state closed<br />
8 sys:statistics(code lock, get).<br />
ok,[start time,2003,6,12,14,11,40,<br />
current time,2003,6,12,14,12,14,<br />
reductions,333,<br />
messages in,5,<br />
messages out,0]<br />
9 sys:statistics(code lock, false).<br />
ok<br />
10 sys:trace(code lock, false).<br />
ok<br />
11 sys:get status(code lock).<br />
status,0.32.0,<br />
module,gen fsm,<br />
[[’$ancestors’,[0.30.0],<br />
’$initial call’,gen,init it,<br />
[gen fsm,<br />
0.30.0,<br />
0.30.0,<br />
local,code lock,<br />
code lock,<br />
[1,2,3,4],<br />
[]]],<br />
running,<br />
0.30.0,<br />
[],<br />
[code lock,closed,[],[1,2,3,4],code lock,infinity]]<br />
1.6.2 Special Processes<br />
This section describes how to write a process which comply to the <strong>OTP</strong> design principles, without<br />
making use of a standard behaviour. Such a process should:<br />
¯ be started in a way that makes the process fit into a supervision tree,<br />
¯ support the sysdebug facilities [page 29], and<br />
¯ take care of system messages [page 30].<br />
System messages are messages with special meaning, used in the supervision tree. Typical system<br />
messages are requests for trace output, and requests to suspend or resume process execution (used<br />
during release handling). Processes implemented using standard behaviours automatically understand<br />
these messages.<br />
26 <strong>OTP</strong> <strong>Design</strong> <strong>Principles</strong>
1.6: Sys and Proc Lib<br />
Example<br />
The simple server from the Overview [page 2] chapter, implemented using sys and proc lib so it fits<br />
into a supervision tree:<br />
-module(ch4).<br />
-export([start link/0]).<br />
-export([alloc/0, free/1]).<br />
-export([init/1]).<br />
-export([system continue/3, system terminate/4,<br />
write debug/3]).<br />
start link() -<br />
proc lib:start link(ch4, init, [self()]).<br />
alloc() -<br />
ch4 ! self(), alloc,<br />
receive<br />
ch4, Res -<br />
Res<br />
end.<br />
free(Ch) -<br />
ch4 ! free, Ch,<br />
ok.<br />
init(Parent) -<br />
register(ch4, self()),<br />
Chs = channels(),<br />
Deb = sys:debug options([]),<br />
proc lib:init ack(Parent, ok, self()),<br />
loop(Chs, Parent, Deb).<br />
loop(Chs, Parent, Deb) -<br />
receive<br />
From, alloc -<br />
Deb2 = sys:handle debug(Deb, ch4, write debug,<br />
ch4, in, alloc, From),<br />
Ch, Chs2 = alloc(Chs),<br />
From ! ch4, Ch,<br />
Deb3 = sys:handle debug(Deb2, ch4, write debug,<br />
ch4, out, ch4, Ch, From),<br />
loop(Chs2, Parent, Deb3);<br />
free, Ch -<br />
Deb2 = sys:handle debug(Deb, ch4, write debug,<br />
ch4, in, free, Ch),<br />
Chs2 = free(Ch, Chs),<br />
loop(Chs2, Parent, Deb2);<br />
system, From, Request -<br />
sys:handle system msg(Request, From, Parent,<br />
ch4, Deb, Chs)<br />
end.<br />
<strong>OTP</strong> <strong>Design</strong> <strong>Principles</strong><br />
27
Chapter 1: <strong>OTP</strong> <strong>Design</strong> <strong>Principles</strong><br />
system continue(Parent, Deb, Chs) -<br />
loop(Chs, Parent, Deb).<br />
system terminate(Reason, Parent, Deb, Chs) -<br />
exit(Reason).<br />
write debug(Dev, Event, Name) -<br />
io:format(Dev, "~p event = ~p~n", [Name, Event]).<br />
Example on how the simple debugging functions in sys can be used for ch4 as well:<br />
% erl<br />
<strong>Erlang</strong> (BEAM) emulator version 5.2.3.6 [hipe] [threads:0]<br />
Eshell V5.2.3.6<br />
(abort with ^G)<br />
1 ch4:start link().<br />
ok,0.30.0<br />
2 sys:statistics(ch4, true).<br />
ok<br />
3 sys:trace(ch4, true).<br />
ok<br />
4 ch4:alloc().<br />
ch4 event = in,alloc,0.25.0<br />
ch4 event = out,ch4,ch1,0.25.0<br />
ch1<br />
5 ch4:free(ch1).<br />
ch4 event = in,free,ch1<br />
ok<br />
6 sys:statistics(ch4, get).<br />
ok,[start time,2003,6,13,9,47,5,<br />
current time,2003,6,13,9,47,56,<br />
reductions,109,<br />
messages in,2,<br />
messages out,1]<br />
7 sys:statistics(ch4, false).<br />
ok<br />
8 sys:trace(ch4, false).<br />
ok<br />
9 sys:get status(ch4).<br />
status,0.30.0,<br />
module,ch4,<br />
[[’$ancestors’,[0.25.0],’$initial call’,ch4,init,[0.25.0]],<br />
running,<br />
0.25.0,<br />
[],<br />
[ch1,ch2,ch3]]<br />
28 <strong>OTP</strong> <strong>Design</strong> <strong>Principles</strong>
1.6: Sys and Proc Lib<br />
Starting the Process<br />
Afunctionintheproc lib module should be used to start the process. There are several possible<br />
functions, for example spawn link/3,4 for asynchronous start and start link/3,4,5 for synchronous<br />
start.<br />
A process started using one of these functions will store information that is needed for a process in a<br />
supervision tree, for example about the ancestors and initial call.<br />
Also, if the process terminates with another reason than normal or shutdown, a crash report (see SASL<br />
User’s Guide) is generated.<br />
In the example, synchronous start is used. The process is started by calling ch4:start link():<br />
start_link() -><br />
proc_lib:start_link(ch4, init, [self()]).<br />
ch4:start link calls the function proc lib:start link. This function takes a module name, a<br />
function name and an argument list as arguments and spawns and links to a new process. The new<br />
process starts by executing the given function, in this case ch4:init(Pid),wherePid is the pid<br />
(self()) of the first process, that is the parent process.<br />
In init, all initialization including name registration is done. The new process must also acknowledge<br />
that it has been started to the parent:<br />
init(Parent) -><br />
...<br />
proc_lib:init_ack(Parent, {ok, self()}),<br />
loop(...).<br />
proc lib:start link is synchronous and does not return until proc lib:init ack has been called.<br />
Debugging<br />
To support the debug facilites in sys, we need a debug structure, atermDeb which is initialized using<br />
sys:debug options/1:<br />
init(Parent) -><br />
...<br />
Deb = sys:debug_options([]),<br />
...<br />
loop(Chs, Parent, Deb).<br />
sys:debug options/1 takes a list of options as argument. Here the list is empty, which means no<br />
debugging is enabled initially. See sys(3) for information about possible options.<br />
Then for each system event that we want to be logged or traced, the following function should be called.<br />
sys:handle_debug(Deb, Func, Info, Event) => Deb1<br />
¯ Deb is the debug structure.<br />
¯ Func is a tuple Module, Name (or a fun) and should specify a (user defined) function used to<br />
format trace output. For each system event, the format function is called as Module:Name(Dev,<br />
Event, Info), where:<br />
<strong>OTP</strong> <strong>Design</strong> <strong>Principles</strong><br />
29
Chapter 1: <strong>OTP</strong> <strong>Design</strong> <strong>Principles</strong><br />
– Dev is the IO device to which the output should be printed. See io(3).<br />
– Event and Info are passed as-is from handle debug.<br />
¯ Info is used to pass additional information to Func, it can be any term and is passed as-is.<br />
¯ Event is the system event. It is up to the user to define what a system event is and how it should<br />
be represented, but typically at least incoming and outgoing messages are considered system<br />
events and represented by the tuples in,Msg[,From] and out,Msg,To, respectively.<br />
handle debug returns an updated debug structure Deb1.<br />
In the example, handle debug is called for each incoming and outgoing message. The format function<br />
Func is the function ch4:write debug/3 which prints the message using io:format/3.<br />
loop(Chs, Parent, Deb) -><br />
receive<br />
{From, alloc} -><br />
Deb2 = sys:handle_debug(Deb, {ch4, write_debug},<br />
ch4, {in, alloc, From}),<br />
{Ch, Chs2} = alloc(Chs),<br />
From ! {ch4, Ch},<br />
Deb3 = sys:handle_debug(Deb2, {ch4, write_debug},<br />
ch4, {out, {ch4, Ch}, From}),<br />
loop(Chs2, Parent, Deb3);<br />
{free, Ch} -><br />
Deb2 = sys:handle_debug(Deb, {ch4, write_debug},<br />
ch4, {in, {free, Ch}}),<br />
Chs2 = free(Ch, Chs),<br />
loop(Chs2, Parent, Deb2);<br />
...<br />
end.<br />
write_debug(Dev, Event, Name) -><br />
io:format(Dev, "~p event = ~p~n", [Name, Event]).<br />
Handling System Messages<br />
System messages are received as:<br />
{system, From, Request}<br />
The content and meaning of these messages do not need to be interpreted by the process. Instead the<br />
following function should be called:<br />
sys:handle_system_msg(Request, From, Parent, Module, Deb, State)<br />
This function does not return. It will handle the system message and then call:<br />
Module:system_continue(Parent, Deb, State)<br />
if process execution should continue, or:<br />
Module:system_terminate(Reason, Parent, Deb, State)<br />
30 <strong>OTP</strong> <strong>Design</strong> <strong>Principles</strong>
1.6: Sys and Proc Lib<br />
if the process should terminate. Note that a process in a supervision tree is expected to terminate with<br />
thesamereasonasitsparent.<br />
¯ Request and From should be passed as-is from the system message to the call to<br />
handle system msg.<br />
¯ Parent is the pid of the parent.<br />
¯ Module is the name of the module.<br />
¯ Deb is the debug structure.<br />
¯ State is a term describing the internal state and is passed to<br />
system continue/system terminate.<br />
In the example:<br />
loop(Chs, Parent, Deb) -><br />
receive<br />
...<br />
{system, From, Request} -><br />
sys:handle_system_msg(Request, From, Parent,<br />
ch4, Deb, Chs)<br />
end.<br />
system_continue(Parent, Deb, Chs) -><br />
loop(Chs, Parent, Deb).<br />
system_terminate(Reason, Parent, Deb, Chs) -><br />
exit(Reason).<br />
If the special process is set to trap exits, note that if the parent process terminates, the expected<br />
behavior is to terminate with the same reason:<br />
init(...) -><br />
...,<br />
process_flag(trap_exit, true),<br />
...,<br />
loop(...).<br />
loop(...) -><br />
receive<br />
...<br />
{’EXIT’, Parent, Reason} -><br />
..maybe some cleaning up here..<br />
exit(Reason);<br />
...<br />
end.<br />
<strong>OTP</strong> <strong>Design</strong> <strong>Principles</strong><br />
31
Chapter 1: <strong>OTP</strong> <strong>Design</strong> <strong>Principles</strong><br />
1.6.3 User-Defined Behaviours<br />
To implement a user-defined behaviour, write code similar to code for a special process but calling<br />
functions in a callback module for handling specific tasks.<br />
If it is desired that the compiler should warn for missing callback functions, as it does for the <strong>OTP</strong><br />
behaviours, implement and export the function:<br />
behaviour_info(callbacks) -><br />
[{Name1,Arity1},...,{NameN,ArityN}].<br />
where each Name,Arity specifies the name and arity of a callback function.<br />
When the compiler encounters the module attribute -behaviour(Behaviour). in a module Mod, it will<br />
call Behaviour:behaviour info(callbacks) and compare the result with the set of functions actually<br />
exported from Mod, and issue a warning if any callback function is missing.<br />
Example:<br />
%% User-defined behaviour module<br />
-module(simple_server).<br />
-export([start_link/2,...]).<br />
-export([behaviour_info/1]).<br />
behaviour_info(callbacks) -><br />
[{init,1},<br />
{handle_req,1},<br />
{terminate,0}].<br />
start_link(Name, Module) -><br />
proc_lib:start_link(?MODULE, init, [self(), Name, Module]).<br />
init(Parent, Name, Module) -><br />
register(Name, self()),<br />
...,<br />
Dbg = sys:debug_options([]),<br />
proc_lib:init_ack(Parent, {ok, self()}),<br />
loop(Parent, Module, Deb, ...).<br />
...<br />
In a callback module:<br />
-module(db).<br />
-behaviour(simple_server).<br />
-export([init/0, handle_req/1, terminate/0]).<br />
...<br />
1.7 Applications<br />
This chapter should be read in conjunction with app(4) and application(3).<br />
32 <strong>OTP</strong> <strong>Design</strong> <strong>Principles</strong>
1.7: Applications<br />
1.7.1 Application Concept<br />
When we have written code implementing some specific functionality, we might want to make the code<br />
into an application, that is a component that can be started and stopped as a unit, and which can be<br />
re-used in other systems as well.<br />
To do this, we create an application callback module [page 33], where we describe how the application<br />
should be started and stopped.<br />
Then, an application specification is needed, which is put in an application resource file [page 34].<br />
Among other things, we specify which modules the application consists of and the name of the callback<br />
module.<br />
If we use systools, the <strong>Erlang</strong>/<strong>OTP</strong> tools for packaging code (see Releases [page 46]), the code for<br />
each application is placed in a separate directory following a pre-defined directory structure [page 35].<br />
1.7.2 Application Callback Module<br />
How to start and stop the code for the application, i.e. the supervision tree, is described by two callback<br />
functions:<br />
start(StartType, StartArgs) -> {ok, Pid} | {ok, Pid, State}<br />
stop(State)<br />
start is called when starting the application and should create the supervision tree by starting the top<br />
supervisor. It is expected to return the pid of the top supervisor and an optional term State, which<br />
defaults to []. This term is passed as-is to stop.<br />
StartType is usually the atom normal. It has other values only in the case of a takeover or failover, see<br />
Distributed Applications [page 41]. StartArgs is defined by the key mod in the application resource file<br />
[page 34] file.<br />
stop/1 is called after the application has been stopped and should do any necessary cleaning up. Note<br />
that the actual stopping of the application, that is the shutdown of the supervision tree, is handled<br />
automatically as described in Starting and Stopping Applications [page 36].<br />
Example of an application callback module for packaging the supervision tree from the Supervisor<br />
[page 20] chapter:<br />
-module(ch_app).<br />
-behaviour(application).<br />
-export([start/2, stop/1]).<br />
start(_Type, _Args) -><br />
ch_sup:start_link().<br />
stop(_State) -><br />
ok.<br />
A library application, which can not be started or stopped, does not need any application callback<br />
module.<br />
<strong>OTP</strong> <strong>Design</strong> <strong>Principles</strong><br />
33
Chapter 1: <strong>OTP</strong> <strong>Design</strong> <strong>Principles</strong><br />
1.7.3 Application Resource File<br />
To define an application, we create an application specification which is put in an application resource file,<br />
or in short .app file:<br />
{application, Application, [Opt1,...,OptN]}.<br />
Application, an atom, is the name of the application. The file must be named Application.app.<br />
Each Opt is a tuple Key, Value which define a certain property of the application. All keys are<br />
optional. Default values are used for any omitted keys.<br />
The contents of a minimal .app file for a library application libapp looks like this:<br />
{application, libapp, []}.<br />
The contents of a minimal .app file ch app.app for a supervision tree application like ch app looks like<br />
this:<br />
{application, ch_app,<br />
[{mod, {ch_app,[]}}]}.<br />
The key mod defines the callback module and start argument of the application, in this case ch app and<br />
[], respectively. This means that<br />
ch_app:start(normal, [])<br />
will be called when the application should be started and<br />
ch_app:stop([])<br />
will be called when the application has been stopped.<br />
When using systools, the <strong>Erlang</strong>/<strong>OTP</strong> tools for packaging code (see Releases [page 46]), the keys<br />
description, vsn, modules, registered and applications should also be specified:<br />
{application, ch_app,<br />
[{description, "Channel allocator"},<br />
{vsn, "1"},<br />
{modules, [ch_app, ch_sup, ch3]},<br />
{registered, [ch3]},<br />
{applications, [kernel, stdlib, sasl]},<br />
{mod, {ch_app,[]}}<br />
]}.<br />
description A short description, a string. Defaults to “”.<br />
vsn Version number, a string. Defaults to “”.<br />
modules All modules introduced by this application. systools uses this list when generating boot<br />
scripts and tar files. A module must be defined in one and only one application. Defaults to [].<br />
registered All names of registered processes in the application. systools uses this list to detect name<br />
clashes between applications. Defaults to [].<br />
applications All applications which must be started before this application is started. systools uses<br />
this list to generate correct boot scripts. Defaults to [], but note that all applications have<br />
dependencies to at least kernel and stdlib.<br />
The syntax and contents of of the application resource file are described in detail in app(4).<br />
34 <strong>OTP</strong> <strong>Design</strong> <strong>Principles</strong>
1.7: Applications<br />
1.7.4 Directory Structure<br />
When packaging code using systools, the code for each application is placed in a separate directory<br />
lib/Application-Vsn,whereVsn is the version number.<br />
This may be useful to know, even if systools is not used, since <strong>Erlang</strong>/<strong>OTP</strong> itself is packaged according<br />
to the <strong>OTP</strong> principles and thus comes with this directory structure. The code server (see code(3)) will<br />
automatically use code from the directory with the highest version number, if there are more than one<br />
version of an application present.<br />
The application directory structure can of course be used in the development environment as well. The<br />
version number may then be omitted from the name.<br />
The application directory have the following sub-directories:<br />
¯ src<br />
¯ ebin<br />
¯ priv<br />
¯ include<br />
src Contains the <strong>Erlang</strong> source code.<br />
ebin Contains the <strong>Erlang</strong> object code, the beam files. The .app file is also placed here.<br />
priv Used for application specific files. For example, C executables are placed here. The function<br />
code:priv dir/1 should be used to access this directory.<br />
include Used for include files.<br />
1.7.5 Application Controller<br />
When an <strong>Erlang</strong> runtime system is started, a number of processes are started as part of the Kernel<br />
application. One of these processes is the application controller process, registered as<br />
application controller.<br />
All operations on applications are coordinated by the application controller. It is interfaced through the<br />
functions in the module application,seeapplication(3). In particular, applications can be loaded,<br />
unloaded, started and stopped.<br />
1.7.6 Loading and Unloading Applications<br />
Before an application can be started, it must be loaded. The application controller reads and stores the<br />
information from the .app file.<br />
1 application:load(ch app).<br />
ok<br />
2 application:loaded applications().<br />
[kernel,"ERTS CXC 138 10","2.8.1.3",<br />
stdlib,"ERTS CXC 138 10","1.11.4.3",<br />
ch app,"Channel allocator","1"]<br />
An application that has been stopped, or has never been started, can be unloaded. The information<br />
about the application is erased from the internal database of the application controller.<br />
<strong>OTP</strong> <strong>Design</strong> <strong>Principles</strong><br />
35
Chapter 1: <strong>OTP</strong> <strong>Design</strong> <strong>Principles</strong><br />
3 application:unload(ch app).<br />
ok<br />
4 application:loaded applications().<br />
[kernel,"ERTS CXC 138 10","2.8.1.3",<br />
stdlib,"ERTS CXC 138 10","1.11.4.3"]<br />
Note:<br />
Loading/unloading an application does not load/unload the code used by the application. Code<br />
loading is done the usual way.<br />
1.7.7 Starting and Stopping Applications<br />
An application is started by calling:<br />
5 application:start(ch app).<br />
ok<br />
6 application:which applications().<br />
[kernel,"ERTS CXC 138 10","2.8.1.3",<br />
stdlib,"ERTS CXC 138 10","1.11.4.3",<br />
ch app,"Channel allocator","1"]<br />
If the application is not already loaded, the application controller will first load it using<br />
application:load/1. It will check the value of the applications key, to ensure that all applications<br />
that should be started before this application are running.<br />
The application controller then creates an application master for the application. The application master<br />
is the group leader of all the processes in the application. The application master starts the application<br />
by calling the application callback function start/2 in the module, and with the start argument,<br />
defined by the mod key in the .app file.<br />
An application is stopped, but not unloaded, by calling:<br />
7 application:stop(ch app).<br />
ok<br />
The application master stops the application by telling the top supervisor to shutdown. The top<br />
supervisor tells all its child processes to shutdown etc. and the entire tree is terminated in reversed start<br />
order. The application master then calls the application callback function stop/1 inthemoduledefined<br />
by the mod key.<br />
36 <strong>OTP</strong> <strong>Design</strong> <strong>Principles</strong>
1.7: Applications<br />
1.7.8 Configuring an Application<br />
An application can be configured using configuration parameters. These are a list of Par, Val tuples<br />
specified by a key env in the .app file.<br />
{application, ch_app,<br />
[{description, "Channel allocator"},<br />
{vsn, "1"},<br />
{modules, [ch_app, ch_sup, ch3]},<br />
{registered, [ch3]},<br />
{applications, [kernel, stdlib, sasl]},<br />
{mod, {ch_app,[]}},<br />
{env, [{file, "/usr/local/log"}]}<br />
]}.<br />
Par should be an atom, Val is any term. The application can retrieve the value of a configuration<br />
parameter by calling application:get env(App, Par) or a number of similar functions, see<br />
application(3).<br />
Example:<br />
% erl<br />
<strong>Erlang</strong> (BEAM) emulator version 5.2.3.6 [hipe] [threads:0]<br />
Eshell V5.2.3.6<br />
(abort with ^G)<br />
1 application:start(ch app).<br />
ok<br />
2 application:get env(ch app, file).<br />
ok,"/usr/local/log"<br />
The values in the .app file can be overridden by values in a system configuration file. Thisisafilewhich<br />
contains configuration parameters for relevant applications:<br />
[{Application1, [{Par11,Val11},...]},<br />
...,<br />
{ApplicationN, [{ParN1,ValN1},...]}].<br />
The system configuration should be called Name.config and <strong>Erlang</strong> should be started with the<br />
command line argument -config Name. Seeconfig(4) for more information.<br />
Example: A file test.config is created with the following contents:<br />
[{ch_app, [{file, "testlog"}]}].<br />
The value of file will override the value of file as defined in the .app file:<br />
<strong>OTP</strong> <strong>Design</strong> <strong>Principles</strong><br />
37
Chapter 1: <strong>OTP</strong> <strong>Design</strong> <strong>Principles</strong><br />
% erl -config test<br />
<strong>Erlang</strong> (BEAM) emulator version 5.2.3.6 [hipe] [threads:0]<br />
Eshell V5.2.3.6<br />
(abort with ^G)<br />
1 application:start(ch app).<br />
ok<br />
2 application:get env(ch app, file).<br />
ok,"testlog"<br />
If release handling [page 60] is used, exactly one system configuration file should be used and that file<br />
should be called sys.config<br />
The values in the .app file, as well as the values in a system configuration file, can be overridden directly<br />
from the command line:<br />
% erl -ApplName Par1 Val1 ... ParN ValN<br />
Example:<br />
% erl -ch app file ’"testlog"’<br />
<strong>Erlang</strong> (BEAM) emulator version 5.2.3.6 [hipe] [threads:0]<br />
Eshell V5.2.3.6<br />
(abort with ^G)<br />
1 application:start(ch app).<br />
ok<br />
2 application:get env(ch app, file).<br />
ok,"testlog"<br />
1.7.9 Application Start Types<br />
A start type is defined when starting the application:<br />
application:start(Application, Type)<br />
application:start(Application) is the same as calling application:start(Application,<br />
temporary). The type can also be permanent or transient:<br />
¯ If a permanent application terminates, all other applications and the runtime system are also<br />
terminated.<br />
¯ If a transient application terminates with reason normal, this is reported but no other applications<br />
are terminated. If a transient application terminates abnormally, that is with any other reason than<br />
normal, all other applications and the runtime system are also terminated.<br />
¯ If a temporary application terminates, this is reported but no other applications are terminated.<br />
It is always possible to stop an application explicitly by calling application:stop/1. Regardless of the<br />
mode, no other applications will be affected.<br />
Note that transient mode is of little practical use, since when a supervision tree terminates, the reason is<br />
set to shutdown,notnormal.<br />
38 <strong>OTP</strong> <strong>Design</strong> <strong>Principles</strong>
1.8: Included Applications<br />
1.8 Included Applications<br />
1.8.1 Definition<br />
An application can include other applications. An included application has its own application directory<br />
and .app file, but it is started as part of the supervisor tree of another application.<br />
An application can only be included by one other application.<br />
An included application can include other applications.<br />
An application which is not included by any other application is called a primary application.<br />
Figure 1.5: Primary Application and Included Applications.<br />
The application controller will automatically load any included applications when loading a primary<br />
application, but not start them. Instead, the top supervisor of the included application must be started<br />
by a supervisor in the including application.<br />
This means that when running, an included application is in fact part of the primary application and a<br />
process in an included application will consider itself belonging to the primary application.<br />
1.8.2 Specifying Included Applications<br />
Which applications to include is defined by the included applications key in the .app file.<br />
application, prim app,<br />
[description, "Tree application",<br />
vsn, "1",<br />
modules, [prim app cb, prim app sup, prim app server],<br />
registered, [prim app server],<br />
included applications, [incl app],<br />
applications, [kernel, stdlib, sasl],<br />
mod, prim app cb,[],<br />
env, [file, "/usr/local/log"]<br />
].<br />
<strong>OTP</strong> <strong>Design</strong> <strong>Principles</strong><br />
39
Chapter 1: <strong>OTP</strong> <strong>Design</strong> <strong>Principles</strong><br />
1.8.3 Synchronizing Processes During Startup<br />
The supervisor tree of an included application is started as part of the supervisor tree of the including<br />
application. If there is a need for synchronization between processes in the including and included<br />
applications, this can be achieved by using start phases.<br />
Start phases are defined by the start phases key in the .app file as a list of tuples<br />
Phase,PhaseArgs,wherePhase is an atom and PhaseArgs is a term. Also, the value of the mod key<br />
of the including application must be set to application starter,[Module,StartArgs],where<br />
Module as usual is the application callback module and StartArgs a term provided as argument to the<br />
callback function Module:start/2.<br />
{application, prim_app,<br />
[{description, "Tree application"},<br />
{vsn, "1"},<br />
{modules, [prim_app_cb, prim_app_sup, prim_app_server]},<br />
{registered, [prim_app_server]},<br />
{included_applications, [incl_app]},<br />
{start_phases, [{init,[]}, {go,[]}]},<br />
{applications, [kernel, stdlib, sasl]},<br />
{mod, {application_starter,[prim_app_cb,[]]}},<br />
{env, [{file, "/usr/local/log"}]}<br />
]}.<br />
{application, incl_app,<br />
[{description, "Included application"},<br />
{vsn, "1"},<br />
{modules, [incl_app_cb, incl_app_sup, incl_app_server]},<br />
{registered, []},<br />
{start_phases, [{go,[]}]},<br />
{applications, [kernel, stdlib, sasl]},<br />
{mod, {incl_app_cb,[]}}<br />
]}.<br />
When starting a primary application with included applications, the primary application is started the<br />
normal way: The application controller creates an application master for the application, and the<br />
application master calls Module:start(normal, StartArgs) to start the top supervisor.<br />
Then, for the primary application and each included application in top-down, left-to-right order, the<br />
application master calls Module:start phase(Phase, Type, PhaseArgs) for each phase defined for<br />
for the primary application, in that order. Note that if a phase is not defined for an included application,<br />
the function is not called for this phase and application.<br />
The following requirements apply to the .app file for an included application:<br />
¯ The mod, Module,StartArgs option must be included. This option is used to find the<br />
callback module Module of the application. StartArgs is ignored, as Module:start/2 is called<br />
only for the primary application.<br />
¯ If the included application itself contains included applications, instead the option mod,<br />
application starter, [Module,StartArgs] must be included.<br />
¯ The start phases, [Phase,PhaseArgs] option must be included, and the set of specified<br />
phases must be a subset of the set of phases specified for the primary application.<br />
When starting prim app as defined above, the application controller will call the following callback<br />
functions, before application:start(prim app) returns a value:<br />
40 <strong>OTP</strong> <strong>Design</strong> <strong>Principles</strong>
1.9: Distributed Applications<br />
application:start(prim_app)<br />
=> prim_app_cb:start(normal, [])<br />
=> prim_app_cb:start_phase(init, normal, [])<br />
=> prim_app_cb:start_phase(go, normal, [])<br />
=> incl_app_cb:start_phase(go, normal, [])<br />
ok<br />
1.9 Distributed Applications<br />
1.9.1 Definition<br />
In a distributed system with several <strong>Erlang</strong> nodes, there may be a need to control applications in a<br />
distributed manner. If the node, where a certain application is running, goes down, the application<br />
should be restarted at another node.<br />
Such an application is called a distributed application. Note that it is the control of the application<br />
which is distributed, all applications can of course be distributed in the sense that they, for example, use<br />
services on other nodes.<br />
Because a distributed application may move between nodes, some addressing mechanism is required to<br />
ensure that it can be addressed by other applications, regardless on which node it currently executes.<br />
This issue is not addressed here, but the Kernel module global or STDLIB module pg can be used for<br />
this purpose.<br />
1.9.2 Specifying Distributed Applications<br />
Distributed applications are controlled by both the application controller and a distributed application<br />
controller process, dist ac. Both these processes are part of the kernel application. Therefore,<br />
distributed applications are specified by configuring the kernel application, using the following<br />
configuration parameter (see also kernel(6)):<br />
distributed = [Application, [Timeout,] NodeDesc] Specifies where the application<br />
Application = atom() may execute. NodeDesc = [Node | Node,...,Node] is a list of node<br />
names in priority order. The order between nodes in a tuple is undefined.<br />
Timeout = integer() specifies how many milliseconds to wait before restarting the application<br />
at another node. Defaults to 0.<br />
For distribution of application control to work properly, the nodes where a distributed application may<br />
run must contact each other and negotiate where to start the application. This is done using the<br />
following kernel configuration parameters:<br />
sync nodes mandatory = [Node] Specifies which other nodes must be started (within the timeout<br />
specified by sync nodes timeout.<br />
sync nodes optional = [Node] Specifies which other nodes can be started (within the timeout<br />
specified by sync nodes timeout.<br />
sync nodes timeout = integer() | infinity Specifies how many milliseconds to wait for the other<br />
nodes to start.<br />
<strong>OTP</strong> <strong>Design</strong> <strong>Principles</strong><br />
41
Chapter 1: <strong>OTP</strong> <strong>Design</strong> <strong>Principles</strong><br />
When started, the node will wait for all nodes specified by sync nodes mandatory and<br />
sync nodes optional to come up. When all nodes have come up, or when all mandatory nodes have<br />
come up and the time specified by sync nodes timeout has elapsed, all applications will be started. If<br />
not all mandatory nodes have come up, the node will terminate.<br />
Example: An application myapp should run at the node cp1@cave. If this node goes down, myapp<br />
should be restarted at cp2@cave or cp3@cave. A system configuration file cp1.config for cp1@cave<br />
could look like:<br />
[{kernel,<br />
[{distributed, [{myapp, 5000, [cp1@cave, {cp2@cave, cp3@cave}]}]},<br />
{sync_nodes_mandatory, [cp2@cave, cp3@cave]},<br />
{sync_nodes_timeout, 5000}<br />
]<br />
}<br />
].<br />
The system configuration files for cp2@cave and cp3@cave are identical, except for the list of mandatory<br />
nodes which should be [cp1@cave, cp3@cave] for cp2@cave and [cp1@cave, cp2@cave] for<br />
cp3@cave.<br />
Note:<br />
All involved nodes must have the same value for distributed and sync nodes timeout, orthe<br />
behaviour of the system is undefined.<br />
1.9.3 Starting and Stopping Distributed Applications<br />
When all involved (mandatory) nodes have been started, the distributed application can be started by<br />
calling application:start(Application) at all of these nodes.<br />
It is of course also possible to use a boot script (see Releases [page 46]) which automatically starts the<br />
application.<br />
The application will be started at the first node, specified by the distributed configuration parameter,<br />
which is up and running. The application is started as usual. That is, an application master is created<br />
and calls the application callback function:<br />
Module:start(normal, StartArgs)<br />
Example: Continuing the example from the previous section, the three nodes are started, specifying the<br />
system configuration file:<br />
erl -sname cp1 -config cp1<br />
erl -sname cp2 -config cp2<br />
erl -sname cp3 -config cp3<br />
42 <strong>OTP</strong> <strong>Design</strong> <strong>Principles</strong>
1.9: Distributed Applications<br />
When all nodes are up and running, myapp can be started. This is achieved by calling<br />
application:start(myapp) at all three nodes. It is then started at cp1, as shown in the figure below.<br />
cp1<br />
cp2<br />
cp3<br />
myapp<br />
Figure 1.6: Application myapp - Situation 1<br />
Similarly, the application must be stopped by calling application:stop(Application) at all involved<br />
nodes.<br />
1.9.4 Failover<br />
If the node where the application is running goes down, the application is restarted (after the specified<br />
timeout) at the first node, specified by the distributed configuration parameter, which is up and<br />
running. This is called a failover.<br />
The application is started the normal way at the new node, that is, by the application master calling:<br />
Module:start(normal, StartArgs)<br />
Exception: If the application has the start phases key defined (see Included Applications [page 39]),<br />
then the application is instead started by calling:<br />
Module:start({failover, Node}, StartArgs)<br />
where Node is the terminated node.<br />
Example: If cp1 goes down, the system checks which one of the other nodes, cp2 or cp3, hastheleast<br />
number of running applications, but waits for 5 seconds for cp1 to restart. If cp1 does not restart and<br />
cp2 runs fewer applications than cp3, then myapp is restarted on cp2.<br />
<strong>OTP</strong> <strong>Design</strong> <strong>Principles</strong><br />
43
Chapter 1: <strong>OTP</strong> <strong>Design</strong> <strong>Principles</strong><br />
cp1<br />
cp2<br />
cp3<br />
myapp<br />
5 secs.<br />
cp2<br />
cp3<br />
myapp<br />
Figure 1.7: Application myapp - Situation 2<br />
Suppose now that cp2 goes down as well and does not restart within 5 seconds. myapp is now restarted<br />
on cp3.<br />
cp2<br />
cp3<br />
myapp<br />
5 secs.<br />
cp3<br />
myapp<br />
Figure 1.8: Application myapp - Situation 3<br />
44 <strong>OTP</strong> <strong>Design</strong> <strong>Principles</strong>
1.9: Distributed Applications<br />
1.9.5 Takeover<br />
If a node is started, which has higher priority according to distributed, than the node where a<br />
distributed application is currently running, the application will be restarted at the new node and<br />
stopped at the old node. This is called a takeover.<br />
The application is started by the application master calling:<br />
Module:start({takeover, Node}, StartArgs)<br />
where Node is the old node.<br />
Example: If myapp is running at cp3, andifcp2 now restarts, it will not restart myapp, because the order<br />
between nodes cp2 and cp3 is undefined.<br />
cp2<br />
cp3<br />
myapp<br />
Figure 1.9: Application myapp - Situation 4<br />
However, if cp1 restarts as well, the function application:takeover/2 moves myapp to cp1, because<br />
cp1 has a higher priority than cp3 for this application. In this case, Module:start(takeover,<br />
cp3@cave, StartArgs) is executed at cp1 to start the application.<br />
cp2<br />
cp3<br />
myapp<br />
cp1: application:takeover(myapp, permanent)<br />
cp1<br />
cp2<br />
cp3<br />
myapp<br />
Figure 1.10: Application myapp - Situation 5<br />
<strong>OTP</strong> <strong>Design</strong> <strong>Principles</strong><br />
45
Chapter 1: <strong>OTP</strong> <strong>Design</strong> <strong>Principles</strong><br />
1.10 Releases<br />
This chapter should be read in conjuction with rel(4), systools(3) and script(4).<br />
1.10.1 Release Concept<br />
When we have written one or more applications, we might want to create a complete system consisting<br />
of these applications and a subset of the <strong>Erlang</strong>/<strong>OTP</strong> applications. This is called a release.<br />
To do this, we create a release resource file [page 46] which defines which applications are included in<br />
the release.<br />
The release resource file is used to generate boot scripts [page 47] and release packages [page 48]. A<br />
system which is transfered to and installed at another site is called a target system. Howtousearelease<br />
package to create a target system is described in System <strong>Principles</strong>.<br />
1.10.2 Release Resource File<br />
To define a release, we create a release resource file, orinshort.rel file,wherewespecifythenameand<br />
version of the release, which ERTS version it is based on, and which applications it consists of:<br />
{release, {Name,Vsn}, {erts, EVsn},<br />
[{Application1, AppVsn1},<br />
...<br />
{ApplicationN, AppVsnN}]}.<br />
The file must be named Rel.rel,whereRel is a unique name.<br />
Name, Vsn and Evsn are strings.<br />
Each Application (atom) and AppVsn (string) is the name and version of an application included in the<br />
release. Note the the minimal release based on <strong>Erlang</strong>/<strong>OTP</strong> consists of the kernel and stdlib<br />
applications, so these applications must be included in the list.<br />
Example: We want to make a release of ch app from the Applications [page 33] chapter. It has the<br />
following .app file:<br />
{application, ch_app,<br />
[{description, "Channel allocator"},<br />
{vsn, "1"},<br />
{modules, [ch_app, ch_sup, ch3]},<br />
{registered, [ch3]},<br />
{applications, [kernel, stdlib, sasl]},<br />
{mod, {ch_app,[]}}<br />
]}.<br />
The .rel file must also contain kernel, stdlib and sasl, since these applications are required by<br />
ch app. We call the file ch rel-1.rel:<br />
46 <strong>OTP</strong> <strong>Design</strong> <strong>Principles</strong>
1.10: Releases<br />
{release,<br />
{"ch_rel", "A"},<br />
{erts, "5.3"},<br />
[{kernel, "2.9"},<br />
{stdlib, "1.12"},<br />
{sasl, "1.10"},<br />
{ch_app, "1"}]<br />
}.<br />
1.10.3 Generating Boot Scripts<br />
There are tools in the SASL module systools available to build and check releases. The functions read<br />
the .rel and .app files and performs syntax and dependency checks. The function<br />
systools:make script/1,2 is used to generate a boot script (see System <strong>Principles</strong>).<br />
1 systools:make script("ch rel-1", [local]).<br />
ok<br />
This creates a boot script, both the readable version ch rel-1.script and the binary version used by<br />
the runtime system, ch rel-1.boot. "ch rel-1" is the name of the .rel file, minus the extension.<br />
local is an option that means that the directories where the applications are found are used in the boot<br />
script, instead of $ROOT/lib. ($ROOT is the root directory of the installed release.) This is a useful way<br />
to test a generated boot script locally.<br />
When starting <strong>Erlang</strong>/<strong>OTP</strong> using the boot script, all applications from the .rel file are automatically<br />
loaded and started:<br />
% erl -boot ch rel-1<br />
<strong>Erlang</strong> (BEAM) emulator version 5.3<br />
Eshell V5.3 (abort with ^G)<br />
1<br />
=PROGRESS REPORT==== 13-Jun-2003::12:01:15 ===<br />
supervisor: local,sasl safe sup<br />
started: [pid,0.33.0,<br />
name,alarm handler,<br />
mfa,alarm handler,start link,[],<br />
restart type,permanent,<br />
shutdown,2000,<br />
child type,worker]<br />
...<br />
=PROGRESS REPORT==== 13-Jun-2003::12:01:15 ===<br />
application: sasl<br />
started at: nonode@nohost<br />
...<br />
=PROGRESS REPORT==== 13-Jun-2003::12:01:15 ===<br />
application: ch app<br />
started at: nonode@nohost<br />
<strong>OTP</strong> <strong>Design</strong> <strong>Principles</strong><br />
47
Chapter 1: <strong>OTP</strong> <strong>Design</strong> <strong>Principles</strong><br />
1.10.4 Creating a Release Package<br />
There is a function systools:make tar/1,2 which takes a .rel file as input and creates a zipped<br />
tar-file with the code for the specified applications, a release package.<br />
1 systools:make script("ch rel-1").<br />
ok<br />
2 systools:make tar("ch rel-1").<br />
ok<br />
The release package by default contains the .app files and object code for all applications, structured<br />
according to the application directory structure [page 35], the binary boot script renamed to<br />
start.boot,andthe.rel file.<br />
% tar tf ch rel-1.tar<br />
lib/kernel-2.9/ebin/kernel.app<br />
lib/kernel-2.9/ebin/application.beam<br />
...<br />
lib/stdlib-1.12/ebin/stdlib.app<br />
lib/stdlib-1.12/ebin/beam lib.beam<br />
...<br />
lib/sasl-1.10/ebin/sasl.app<br />
lib/sasl-1.10/ebin/sasl.beam<br />
...<br />
lib/ch app-1/ebin/ch app.app<br />
lib/ch app-1/ebin/ch app.beam<br />
lib/ch app-1/ebin/ch sup.beam<br />
lib/ch app-1/ebin/ch3.beam<br />
releases/A/start.boot<br />
releases/ch rel-1.rel<br />
Note that a new boot script was generated, without the local option set, before the release package<br />
was made. In the release package, all application directories are placed under lib. Also, we do not<br />
know where the release package will be installed, so we do not want any hardcoded absolute paths in<br />
the boot script here.<br />
If a relup file and/or a system configuration file called sys.config is found, these files are included in<br />
the release package as well. See Release Handling [page 52].<br />
Options can be set to make the release package include source code and the ERTS binary as well.<br />
Refer to System <strong>Principles</strong> for how to install the first target system, using a release package, and to<br />
Release Handling [page 50] for how to install a new release package in an existing system.<br />
48 <strong>OTP</strong> <strong>Design</strong> <strong>Principles</strong>
1.10: Releases<br />
1.10.5 Directory Structure<br />
Directory structure for the code installed by the release handler from a release package:<br />
$ROOT/lib/App1-AVsn1/ebin<br />
/priv<br />
/App2-AVsn2/ebin<br />
/priv<br />
...<br />
/AppN-AVsnN/ebin<br />
/priv<br />
/erts-EVsn/bin<br />
/releases/Vsn<br />
/bin<br />
lib Application directories.<br />
erts-EVsn/bin <strong>Erlang</strong> runtime system executables.<br />
releases/Vsn .rel file and boot script start.boot.<br />
If present in the release package,<br />
relup and/or sys.config.<br />
bin Top level <strong>Erlang</strong> runtime system executables.<br />
Applications are not required to be located under the $ROOT/lib directory. Accordingly, several<br />
installation directories may exist which contain different parts of a system. For example, the previous<br />
example could be extended as follows:<br />
$SECOND ROOT/.../SApp1-SAVsn1/ebin<br />
/priv<br />
/SApp2-SAVsn2/ebin<br />
/priv<br />
...<br />
/SAppN-SAVsnN/ebin<br />
/priv<br />
$THIRD ROOT/TApp1-TAVsn1/ebin<br />
/priv<br />
/TApp2-TAVsn2/ebin<br />
/priv<br />
...<br />
/TAppN-TAVsnN/ebin<br />
/priv<br />
The $SECOND ROOT and $THIRD ROOT are introduced as variables in the call to the<br />
systools:make script/2 function.<br />
<strong>OTP</strong> <strong>Design</strong> <strong>Principles</strong><br />
49
Chapter 1: <strong>OTP</strong> <strong>Design</strong> <strong>Principles</strong><br />
Disk-Less and/or Read-Only Clients<br />
If a complete system consists of some disk-less and/or read-only client nodes, a clients directory should<br />
be added to the $ROOT directory. By a read-only node we mean a node with a read-only file system.<br />
The clients directory should have one sub-directory per supported client node. The name of each<br />
client directory should be the name of the corresponding client node. As a minimum, each client<br />
directory should contain the bin and releases sub-directories. These directories are used to store<br />
information about installed releases and to appoint the current release to the client. Accordingly, the<br />
$ROOT directory contains the following:<br />
$ROOT/...<br />
/clients/ClientName1/bin<br />
/releases/Vsn<br />
/ClientName2/bin<br />
/releases/Vsn<br />
...<br />
/ClientNameN/bin<br />
/releases/Vsn<br />
This structure should be used if all clients are running the same type of <strong>Erlang</strong> machine. If there are<br />
clients running different types of <strong>Erlang</strong> machines, or on different operating systems, the clients<br />
directory could be divided into one sub-directory per type of <strong>Erlang</strong> machine. Alternatively, you can set<br />
up one $ROOT per type of machine. For each type, some of the directories specified for the $ROOT<br />
directory should be included:<br />
$ROOT/...<br />
/clients/Type1/lib<br />
/erts-EVsn<br />
/bin<br />
/ClientName1/bin<br />
/releases/Vsn<br />
/ClientName2/bin<br />
/releases/Vsn<br />
...<br />
/ClientNameN/bin<br />
/releases/Vsn<br />
...<br />
/TypeN/lib<br />
/erts-EVsn<br />
/bin<br />
...<br />
With this structure, the root directory for clients of Type1 is $ROOT/clients/Type1.<br />
1.11 Release Handling<br />
1.11.1 Release Handling <strong>Principles</strong><br />
An important feature of the <strong>Erlang</strong> programming language is the ability to change module code in<br />
run-time, code replacement, as described in <strong>Erlang</strong> Reference Manual.<br />
50 <strong>OTP</strong> <strong>Design</strong> <strong>Principles</strong>
1.11: Release Handling<br />
Based on this feature, the <strong>OTP</strong> application SASL provides a framework for upgrading and downgrading<br />
between different versions of an entire release in run-time. This is what we call release handling.<br />
The framework consists of off-line support (systools) for generating scripts and building release<br />
packages, and on-line support (release handler) for unpacking and installing release packages.<br />
Note that the minimal system based on <strong>Erlang</strong>/<strong>OTP</strong>, enabling release handling, thus consists of Kernel,<br />
STDLIB and SASL.<br />
1. A release is created as described in the previous chapter Releases [page 46]. The release is<br />
transferred to and installed at target environment. Refer to System <strong>Principles</strong> for information of<br />
how to install the first target system.<br />
2. Modifications, for example error corrections, are made to the code in the development<br />
environment.<br />
3. At some point it is time to make a new version of release. The relevant .app files are updated and<br />
anew.rel file is written.<br />
4. For each modified application, an application upgrade file [page 55], .appup, iscreated.Inthis<br />
file, it is described how to upgrade and/or downgrade between the old and new version of the<br />
application.<br />
5. Based on the .appup files, a release upgrade file [page 56] called relup, iscreated.Thisfile<br />
describes how to upgrade and/or downgrade between the old and new version of the entire<br />
release.<br />
6. A new release package is made and transferred to the target system.<br />
7. The new release package is unpacked using the release handler.<br />
8. The new version of the release is installed, also using the release handler. This is done by<br />
evaluating the instructions in relup. Modules may be added, deleted or re-loaded, applications<br />
may be started, stopped or re-started etc. In some cases, it is even necessary to restart the entire<br />
emulator.<br />
If the installation fails, the system may be rebooted. The old release version is then automatically<br />
used.<br />
9. If the installation succeeds, the new version is made the default version, which should now be<br />
used in case of a system reboot.<br />
The next chapter, Appup Cookbook [page 61], contains examples of .appup files for typical cases of<br />
upgrades/downgrades that are normally easy to handle in run-time. However, there are a many aspects<br />
that can make release handling complicated. To name a few examples:<br />
¯ Complicated or circular dependencies can make it difficult or even impossible to decide in which<br />
order things must be done without risking run-time errors during an upgrade or downgrade.<br />
Dependencies may be:<br />
– between nodes,<br />
– between processes, and<br />
– between modules.<br />
¯ During release handling, non-affected processes continue normal execution. This may lead to<br />
timeouts or other problems. For example, new processes created in the time window between<br />
suspending processes using a certain module and loading a new version of this module, may<br />
execute old code.<br />
It is therefore recommended that code is changed in as small steps as possible, and always kept<br />
backwards compatible.<br />
<strong>OTP</strong> <strong>Design</strong> <strong>Principles</strong><br />
51
Chapter 1: <strong>OTP</strong> <strong>Design</strong> <strong>Principles</strong><br />
1.11.2 Requirements<br />
For release handling to work properly, the runtime system needs to have knowledge about which release<br />
it is currently running. It must also be able to change (in run-time) which boot script and system<br />
configuration file should be used if the system is rebooted, for example by heart after a failure.<br />
Therefore, <strong>Erlang</strong> must be started as an embedded system, see Embedded System for information on how<br />
to do this.<br />
For system reboots to work properly, it is also required that the system is started with heart beat<br />
monitoring, see erl(1) and heart(3).<br />
Other requirements:<br />
¯ The boot script included in a release package must be generated from the same .rel file as the<br />
release package itself.<br />
Information about applications are fetched from the script when an upgrade or downgrade is<br />
performed.<br />
¯ The system must be configured using one and only one system configuration file, called<br />
sys.config.<br />
If found, this file is automatically included when a release package is created.<br />
¯ All versions of a release, except the first one, must contain a relup file.<br />
If found, this file is automatically included when a release package is created.<br />
1.11.3 Distributed Systems<br />
If the system consists of several <strong>Erlang</strong> nodes, each node may use its own version of the release. The<br />
release handler is a locally registered process and must be called at each node where an upgrade or<br />
downgrade is required. There is a release handling instruction that can be used to synchronize the<br />
release handler processes at a number of nodes: sync nodes. Seeappup(4).<br />
1.11.4 Release Handling Instructions<br />
<strong>OTP</strong> supports a set of release handling instructions that is used when creating .appup files. The release<br />
handler understands a subset of these, the low-level instructions. To make it easier for the user, there are<br />
also a number of high-level instructions, which are translated to low-level instructions by<br />
systools:make relup.<br />
Here, some of the most frequently used instructions are described. The complete list of instructions is<br />
found in appup(4).<br />
First, some definitions:<br />
Residence module The module where a process has its tail-recursive loop function(s). If the<br />
tail-recursive loop functions are implemented in several modules, all those modules are residence<br />
modules for the process.<br />
Functional module A module which is not a residence module for any process.<br />
Note that for a process implemented using an <strong>OTP</strong> behaviour, the behaviour module is the residence<br />
module for that process. The callback module is a functional module.<br />
52 <strong>OTP</strong> <strong>Design</strong> <strong>Principles</strong>
1.11: Release Handling<br />
load module<br />
If a simple extension has been made to a functional module, it is sufficient to simply load the new<br />
version of the module into the system, and remove the old version. This is called simple code replacement<br />
and for this the following instruction is used:<br />
{load_module, Module}<br />
update<br />
If a more complex change has been made, for example a change to the format of the internal state of a<br />
gen server, simple code replacement is not sufficient. Instead it is necessary to suspend the processes<br />
using the module (to avoid that they try to handle any requests before the code replacement is<br />
completed), ask them to transform the internal state format and switch to the new version of the<br />
module, remove the old version and last, resume the processes. This is called synchronized code<br />
replacement and for this the following instructions are used:<br />
{update, Module, {advanced, Extra}}<br />
{update, Module, supervisor}<br />
update with argument advanced,Extra is used when changing the internal state of a behaviour as<br />
described above. It will cause behaviour processes to call the callback function code change, passing<br />
the term Extra and some other information as arguments. See the man pages for the respective<br />
behaviours and Appup Cookbook [page 62].<br />
update with argument supervisor is used when changing the start specification of a supervisor. See<br />
Appup Cookbook [page 64].<br />
The release handler finds the processes using a module to update by traversing the supervision tree of<br />
each running application and checking all the child specifications:<br />
{Id, StartFunc, Restart, Shutdown, Type, Modules}<br />
A process is using a module if the name is listed in Modules in the child specification for the process.<br />
If Modules=dynamic, which is the case for event managers, the event manager process informs the<br />
release handler about the list of currently installed event handlers (gen fsm) and it is checked if the<br />
module name is in this list instead.<br />
The release handler suspends, asks for code change, and resumes processes by calling the functions<br />
sys:suspend/1,2, sys:change code/4,5 and sys:resume/1,2 respectively.<br />
<strong>OTP</strong> <strong>Design</strong> <strong>Principles</strong><br />
53
Chapter 1: <strong>OTP</strong> <strong>Design</strong> <strong>Principles</strong><br />
add module and delete module<br />
If a new module is introduced, the following instruction is used:<br />
{add_module, Module}<br />
The instruction loads the module and is absolutely necessary when running <strong>Erlang</strong> in embedded mode.<br />
It is not strictly required when running <strong>Erlang</strong> in interactive (default) mode, since the code server<br />
automatically searches for and loads unloaded modules.<br />
The opposite of add module is delete module which unloads a module:<br />
{delete_module, Module}<br />
Note that any process, in any application, with Module as residence module, is killed when the<br />
instruction is evaluated. The user should therefore ensure that all such processes are terminated before<br />
deleting the module, to avoid a possible situation with failing supervisor restarts.<br />
Application Instructions<br />
Instruction for adding an application:<br />
{add_application, Application}<br />
Adding an application means that the modules defined by the modules key in the .app file are loaded<br />
using a number of add module instructions, then the application is started.<br />
Instruction for removing an application:<br />
{remove_application, Application}<br />
Removing an application means that the application is stopped, the modules are unloaded using a<br />
number of delete module instructions and then the application specification is unloaded from the<br />
application controller.<br />
Instruction for removing an application:<br />
{restart_application, Application}<br />
Restarting an application means that the application is stopped and then started again similar to using<br />
the instructions remove application and add application in sequence.<br />
apply (low-level)<br />
To call an arbitrary function from the release handler, the following instruction is used:<br />
{apply, {M, F, A}}<br />
The release handler will evalute apply(M, F, A).<br />
54 <strong>OTP</strong> <strong>Design</strong> <strong>Principles</strong>
1.11: Release Handling<br />
restart new emulator (low-level)<br />
This instruction is used when changing to a new emulator version, or if a system reboot is needed for<br />
some other reason. Requires that the system is started with heart beat monitoring, see erl(1) and<br />
heart(3).<br />
When the release handler encounters the instruction, it shuts down the current emulator by calling<br />
init:reboot(),seeinit(3). All processes are terminated gracefully and the system can then be<br />
rebooted by the heart program, using the new release version. This new version must still be made<br />
permanent when the new emulator is up and running. Otherwise, the old version is used in case of a<br />
new system reboot.<br />
On UNIX, the release handler tells the heart program which command to use to reboot the system.<br />
Note that the environment variable HEART COMMAND, normally used by the heart program, in this case is<br />
ignored. The command instead defaults to $ROOT/bin/start. Another command can be set by using<br />
the SASL configuration parameter start prg, seesasl(6).<br />
1.11.5 Application Upgrade File<br />
To define how to upgrade/downgrade between the current version and previous versions of an<br />
application, we create an application upgrade file, orinshort.appup file. The file should be called<br />
Application.appup,whereApplication is the name of the application:<br />
{Vsn,<br />
[{UpFromVsn1, InstructionsU1},<br />
...,<br />
{UpFromVsnK, InstructionsUK}],<br />
[{DownToVsn1, InstructionsD1},<br />
...,<br />
{DownToVsnK, InstructionsDK}]}.<br />
Vsn, a string, is the current version of the application, as defined in the .app file. Each UpFromVsn is a<br />
previous version of the application to upgrade from, and each DownToVsn is a previous version of the<br />
application to downgrade to. Each Instructions is a list of release handling instructions.<br />
The syntax and contents of the appup file are described in detail in appup(4).<br />
In the chapter Appup Cookbook [page 61], examples of .appup files for typical upgrade/downgrade<br />
cases are given.<br />
Example: Consider the release ch rel-1 from the Releases [page 46] chapter. Assume we want to add<br />
afunctionavailable/0 to the server ch3 which returns the number of available channels:<br />
(Hint: When trying out the example, make the changes in a copy of the original directory, so that the<br />
first versions are still available.)<br />
-module(ch3).<br />
-behaviour(gen_server).<br />
-export([start_link/0]).<br />
-export([alloc/0, free/1]).<br />
-export([available/0]).<br />
-export([init/1, handle_call/3, handle_cast/2]).<br />
start_link() -><br />
gen_server:start_link({local, ch3}, ch3, [], []).<br />
<strong>OTP</strong> <strong>Design</strong> <strong>Principles</strong><br />
55
Chapter 1: <strong>OTP</strong> <strong>Design</strong> <strong>Principles</strong><br />
alloc() -><br />
gen_server:call(ch3, alloc).<br />
free(Ch) -><br />
gen_server:cast(ch3, {free, Ch}).<br />
available() -><br />
gen_server:call(ch3, available).<br />
init(_Args) -><br />
{ok, channels()}.<br />
handle_call(alloc, _From, Chs) -><br />
{Ch, Chs2} = alloc(Chs),<br />
{reply, Ch, Chs2};<br />
handle_call(available, _From, Chs) -><br />
N = available(Chs),<br />
{reply, N, Chs}.<br />
handle_cast({free, Ch}, Chs) -><br />
Chs2 = free(Ch, Chs),<br />
{noreply, Chs2}.<br />
A new version of the ch app.app file must now be created, where the version is updated:<br />
{application, ch_app,<br />
[{description, "Channel allocator"},<br />
{vsn, "2"},<br />
{modules, [ch_app, ch_sup, ch3]},<br />
{registered, [ch3]},<br />
{applications, [kernel, stdlib, sasl]},<br />
{mod, {ch_app,[]}}<br />
]}.<br />
To upgrade ch app from "1" to "2" (and to downgrade from "2" to "1"), we simply need to load the<br />
new (old) version of the ch3 callback module. We create the application upgrade file ch app.appup in<br />
the ebin directory:<br />
{"2",<br />
[{"1", [{load_module, ch3}]}],<br />
[{"1", [{load_module, ch3}]}]<br />
}.<br />
1.11.6 Release Upgrade File<br />
To define how to upgrade/downgrade between the new version and previous versions of a release, we<br />
create a release upgrade file, orinshortrelup file.<br />
This file does not need to be created manually, it can be generated by systools:make relup/3,4. The<br />
relevant versions of the .rel file, .app files and .appup files are used as input. It is deducted which<br />
applications should be added and deleted, and which applications that need to be upgraded and/or<br />
56 <strong>OTP</strong> <strong>Design</strong> <strong>Principles</strong>
1.11: Release Handling<br />
downgraded. The instructions for this is fetched from the .appup files and transformed into a single list<br />
of low-level instructions in the right order.<br />
If the relup file is relatively simple, it can be created manually. Remember that it should only contain<br />
low-level instructions.<br />
The syntax and contents of the release upgrade file are described in detail in relup(4).<br />
Example, continued from the previous section. We have a new version “2” of ch app and an .appup file.<br />
We also need a new version of the .rel file. This time the file is called ch rel-2.rel and the release<br />
version string is changed changed from “A” to “B”:<br />
{release,<br />
{"ch_rel", "B"},<br />
{erts, "5.3"},<br />
[{kernel, "2.9"},<br />
{stdlib, "1.12"},<br />
{sasl, "1.10"},<br />
{ch_app, "2"}]<br />
}.<br />
Now the relup file can be generated:<br />
1 systools:make relup("ch rel-2", ["ch rel-1"], ["ch rel-1"]).<br />
ok<br />
This will generate a relup file with instructions for how to upgrade from version “A” (“ch rel-1”) to<br />
version “B” (“ch rel-2”) and how to downgrade from version “B” to version “A”.<br />
Note that both the old and new versions of the .app and .rel files must be in the code path, as well as<br />
the .appup and (new) .beam files. It is possible to extend the code path by using the option path:<br />
1 systools:make relup("ch rel-2", ["ch rel-1"], ["ch rel-1"],<br />
[path,["../ch rel-1",<br />
"../ch rel-1/lib/ch app-1/ebin"]]).<br />
ok<br />
1.11.7 Installing a Release<br />
When we have made a new version of a release, a release package can be created with this new version<br />
and transferred to the target environment.<br />
To install the new version of the release in run-time, the release handler is used. This is a process<br />
belonging to the SASL application, that handles unpacking, installation, and removal of release<br />
packages. It is interfaced through the module release handler, which is described in detail in<br />
release handler(3).<br />
Assuming there is a target system up and running with installation root directory $ROOT, therelease<br />
package with the new version of the release should be copied to $ROOT/releases.<br />
The first action is to unpack the release package, the files are then extracted from the package:<br />
release_handler:unpack_release(ReleaseName) => {ok, Vsn}<br />
<strong>OTP</strong> <strong>Design</strong> <strong>Principles</strong><br />
57
Chapter 1: <strong>OTP</strong> <strong>Design</strong> <strong>Principles</strong><br />
ReleaseName is the name of the release package except the .tar.gz extension. Vsn is the version of the<br />
unpacked release, as defined in its .rel file.<br />
Adirectory$ROOT/lib/releases/Vsn will be created, where the .rel file, the boot script start.boot,<br />
the system configuration file sys.config and relup are placed. For applications with new version<br />
numbers, the application directories will be placed under $ROOT/lib. Unchanged applications are not<br />
affected.<br />
An unpacked release can be installed. The release handler then evaluates the instructions in relup, step<br />
by step:<br />
release_handler:install_release(Vsn) => {ok, FromVsn, []}<br />
If an error occurs during the installation, the system is rebooted using the old version of the release. If<br />
installation succeeds, the system is afterwards using the new version of the release, but should anything<br />
happen and the system is rebooted, it would start using the previous version again. To be made the<br />
default version, the newly installed release must be made permanent, which means the previous version<br />
becomes old:<br />
release_handler:make_permanent(Vsn) => ok<br />
The system keeps information about which versions are old and permanent in the files<br />
$ROOT/releases/RELEASES and $ROOT/releases/start erl.data.<br />
To downgrade from Vsn to FromVsn, install release must be called again:<br />
release_handler:install_release(FromVsn) => {ok, Vsn, []}<br />
An installed, but not permanent, release can be removed. Information about the release is then deleted<br />
from $ROOT/releases/RELEASES and the release specific code, that is the new application directories<br />
and the $ROOT/releases/Vsn directory, are removed.<br />
release_handler:remove_release(Vsn) => ok<br />
Example, continued from the previous sections:<br />
1) Create a target system as described in System <strong>Principles</strong> of the first version "A" of ch rel from the<br />
Releases [page 46] chapter. This time sys.config must be included in the release package. If no<br />
configuration is needed, the file should contain the empty list:<br />
[].<br />
2) Start the system as a simple target system. Note that in reality, it should be started as an embedded<br />
system. However, using erl with the correct boot script and .config file is enough for illustration<br />
purposes:<br />
% cd $ROOT<br />
% bin/erl -boot $ROOT/releases/A/start -config $ROOT/releases/A/sys<br />
...<br />
$ROOT is the installation directory of the target system.<br />
3) In another <strong>Erlang</strong> shell, generate start scripts and create a release package for the new version "B".<br />
Remember to include (a possible updated) sys.config and the relup file, see Release Upgrade File<br />
[page 56] above.<br />
58 <strong>OTP</strong> <strong>Design</strong> <strong>Principles</strong>
1.11: Release Handling<br />
1 systools:make script("ch rel-2").<br />
ok<br />
2 systools:make tar("ch rel-2").<br />
ok<br />
The new release package now contains version “2” of ch app and the relup file as well:<br />
% tar tf ch_rel-2.tar<br />
lib/kernel-2.9/ebin/kernel.app<br />
lib/kernel-2.9/ebin/application.beam<br />
...<br />
lib/stdlib-1.12/ebin/stdlib.app<br />
lib/stdlib-1.12/ebin/beam_lib.beam<br />
...<br />
lib/sasl-1.10/ebin/sasl.app<br />
lib/sasl-1.10/ebin/sasl.beam<br />
...<br />
lib/ch_app-2/ebin/ch_app.app<br />
lib/ch_app-2/ebin/ch_app.beam<br />
lib/ch_app-2/ebin/ch_sup.beam<br />
lib/ch_app-2/ebin/ch3.beam<br />
releases/B/start.boot<br />
releases/B/relup<br />
releases/B/sys.config<br />
releases/ch_rel-2.rel<br />
4) Copy the release package ch rel-2.tar.gz to the $ROOT/releases directory.<br />
5) In the running target system, unpack the release package:<br />
1 release handler:unpack release("ch rel-2").<br />
ok,"B"<br />
The new application version ch app-2 is installed under $ROOT/lib next to ch app-1. Thekernel,<br />
stdlib and sasl directories are not affected, as they have not changed.<br />
Under $ROOT/releases,anewdirectoryB is created, containing ch rel-2.rel, start.boot,<br />
sys.config and relup.<br />
6) Check if the function ch3:available/0 is available:<br />
2 ch3:available().<br />
** exited: undef,[ch3,available,[],<br />
erl eval,do apply,5,<br />
shell,eval loop,2] **<br />
7) Install the new release. The instructions in $ROOT/releases/B/relup are executed one by one,<br />
resulting in the new version of ch3 being loaded. The function ch3:available/0 is now available:<br />
<strong>OTP</strong> <strong>Design</strong> <strong>Principles</strong><br />
59
Chapter 1: <strong>OTP</strong> <strong>Design</strong> <strong>Principles</strong><br />
3 release handler:install release("B").<br />
ok,"A",[]<br />
4 ch3:available().<br />
3<br />
5 code:which(ch3).<br />
".../lib/ch app-2/ebin/ch3.beam"<br />
6 code:which(ch sup).<br />
".../lib/ch app-1/ebin/ch sup.beam"<br />
Note that processes in ch app for which code have not been updated, for example the supervisor, are<br />
still evaluating code from ch app-1.<br />
8) If the target system is now rebooted, it will use version “A” again. The “B” version must be made<br />
permanent, in order to be used when the system is rebooted.<br />
7 release handler:make permanent("B").<br />
ok<br />
1.11.8 Updating Application Specifications<br />
When a new version of a release is installed, the application specifications are automatically updated for<br />
all loaded applications.<br />
Note:<br />
The information about the new application specifications are fetched from the boot script included<br />
in the release package. It is therefore important that the boot script is generated from the same .rel<br />
file as is used to build the release package itself.<br />
Specifically, the application configuration parameters are automatically updated according to (in<br />
increasing priority order):<br />
1. The data in the boot script, fetched from the new application resource file App.app<br />
2. The new sys.config<br />
3. Command line arguments -App Par Val<br />
This means that parameter values set in the other system configuration files, as well as values set using<br />
application:set env/3, are disregarded.<br />
When an installed release is made permanent, the system process init is set to point out the new<br />
sys.config.<br />
After the installation, the application controller will compare the old and new configuration parameters<br />
for all running applications and call the callback function:<br />
Module:config_change(Changed, New, Removed)<br />
Module is the application callback module as defined by the mod key in the .app file. Changed and New<br />
are lists of Par,Val for all changed and added configuration parameters, respectively. Removed is a list<br />
of all parameters Par that have been removed.<br />
The function is optional and may be omitted when implementing an application callback module.<br />
60 <strong>OTP</strong> <strong>Design</strong> <strong>Principles</strong>
1.12: Appup Cookbook<br />
1.12 Appup Cookbook<br />
This chapter contains examples of .appup files for typical cases of upgrades/downgrades done in<br />
run-time.<br />
1.12.1 Changing a Functional Module<br />
When a change has been made to a functional module, for example if a new function has been added or<br />
a bug has been corrected, simple code replacement is sufficient.<br />
Example:<br />
{"2",<br />
[{"1", [{load_module, m}]}],<br />
[{"1", [{load_module, m}]}]<br />
}.<br />
1.12.2 Changing a Residence Module<br />
In a system implemented according to the <strong>OTP</strong> <strong>Design</strong> <strong>Principles</strong>, all processes, except system processes<br />
and special processes, reside in one of the behaviours supervisor, gen server, gen fsm or gen event.<br />
These belong to the STDLIB application and upgrading/downgrading normally requires an emulator<br />
restart.<br />
<strong>OTP</strong> thus provides no support for changing residence modules except in the case of special processes<br />
[page 63].<br />
1.12.3 Changing a Callback Module<br />
A callback module is a functional module, and for code extensions simple code replacement is sufficient.<br />
Example: When adding a function to ch3 as described in the example in Release Handling [page 55],<br />
ch app.appup looks as follows:<br />
{"2",<br />
[{"1", [{load_module, ch3}]}],<br />
[{"1", [{load_module, ch3}]}]<br />
}.<br />
<strong>OTP</strong> also supports changing the internal state of behaviour processes, see Changing Internal State [page<br />
62] below.<br />
<strong>OTP</strong> <strong>Design</strong> <strong>Principles</strong><br />
61
Chapter 1: <strong>OTP</strong> <strong>Design</strong> <strong>Principles</strong><br />
1.12.4 Changing Internal State<br />
In this case, simple code replacement is not sufficient. The process must explicitly transform its state<br />
using the callback function code change before switching to the new version of the callback module.<br />
Thus synchronized code replacement is used.<br />
Example: Consider the gen server ch3 from the chapter about the gen server behaviour [page 7]. The<br />
internal state is a term Chs representing the available channels. Assume we want add a counter N which<br />
keepstrackofthenumberofalloc requests so far. This means we need to change the format to<br />
Chs,N.<br />
The .appup file could look as follows:<br />
{"2",<br />
[{"1", [{update, ch3, {advanced, []}}]}],<br />
[{"1", [{update, ch3, {advanced, []}}]}]<br />
}.<br />
The third element of the update instruction is a tuple advanced,Extra which says that the affected<br />
processes should do a state transformation before loading the new version of the module. This is done<br />
by the processes calling the callback function code change (see gen server(3)). The term Extra, in<br />
this case [], is passed as-is to the function:<br />
-module(ch3).<br />
...<br />
-export([code_change/3]).<br />
...<br />
code_change({down, _Vsn}, {Chs, N}, _Extra) -><br />
{ok, Chs};<br />
code_change(_Vsn, Chs, _Extra) -><br />
{ok, {Chs, 0}}.<br />
The first argument is down,Vsn in case of a downgrade, or Vsn in case of an upgrade. The term Vsn is<br />
fetched from the ’original’ version of the module, i.e. the version we are upgrading from, or<br />
downgrading to.<br />
The version is defined by the module attribute vsn, if any. There is no such attribute in ch3, sointhis<br />
case the version is the checksum (a huge integer) of the BEAM file, an uninteresting value which is<br />
ignored.<br />
(The other callback functions of ch3 need to be modified as well and perhaps a new interface function<br />
added, this is not shown here).<br />
1.12.5 Module Dependencies<br />
Assume we extend a module by adding a new interface function, as in the example in Release Handling<br />
[page 55], where a function available/0 is added to ch3.<br />
If we also add a call to this function, say in the module m1, a run-time error could occur during release<br />
upgrade if the new version of m1 is loaded first and calls ch3:available/0 before the new version of<br />
ch3 is loaded.<br />
Thus, ch3 must be loaded before m1 is, in the upgrade case, and vice versa in the downgrade case. We say<br />
that m1is dependent onch3. In a release handling instruction, this is expressed by the element DepMods:<br />
62 <strong>OTP</strong> <strong>Design</strong> <strong>Principles</strong>
1.12: Appup Cookbook<br />
{load_module, Module, DepMods}<br />
{update, Module, {advanced, Extra}, DepMods}<br />
DepMods is a list of modules, on which Module is dependent.<br />
Example: The module m1 in the application myapp is dependent on ch3 when upgrading from “1” to “2”,<br />
or downgrading from “2” to “1”:<br />
myapp.appup:<br />
{"2",<br />
[{"1", [{load_module, m1, [ch3]}]}],<br />
[{"1", [{load_module, m1, [ch3]}]}]<br />
}.<br />
ch_app.appup:<br />
{"2",<br />
[{"1", [{load_module, ch3}]}],<br />
[{"1", [{load_module, ch3}]}]<br />
}.<br />
If m1 and ch3 had belonged to the same application, the .appup file could have looked like this:<br />
{"2",<br />
[{"1",<br />
[{load_module, ch3},<br />
{load_module, m1, [ch3]}]}],<br />
[{"1",<br />
[{load_module, ch3},<br />
{load_module, m1, [ch3]}]}]<br />
}.<br />
Note that it is m1 that is dependent on ch3 also when downgrading. systools knows the difference<br />
between up- and downgrading and will generate a correct relup, wherech3 is loaded before m1 when<br />
upgrading but m1 is loaded before ch3 when downgrading.<br />
1.12.6 Changing Code For a Special Process<br />
In this case, simple code replacement is not sufficient. When a new version of a residence module for a<br />
special process is loaded, the process must make a fully qualified call to its loop function to switch to<br />
the new code. Thus synchronized code replacement must be used.<br />
Note:<br />
The name(s) of the user-defined residence module(s) must be listed in the Modules part of the child<br />
specification for the special process, in order for the release handler to find the process.<br />
Example. Consider the example ch4 from the chapter about sys and proc lib [page 27]. When started<br />
by a supervisor, the child specification could look like this:<br />
<strong>OTP</strong> <strong>Design</strong> <strong>Principles</strong><br />
63
Chapter 1: <strong>OTP</strong> <strong>Design</strong> <strong>Principles</strong><br />
{ch4, {ch4, start_link, []},<br />
permanent, brutal_kill, worker, [ch4]}<br />
If ch4 is part of the application sp app and a new version of the module should be loaded when<br />
upgrading from version “1” to “2” of this application, sp app.appup could look like this:<br />
{"2",<br />
[{"1", [{update, ch4, {advanced, []}}]}],<br />
[{"1", [{update, ch4, {advanced, []}}]}]<br />
}.<br />
The update instruction must contain the tuple advanced,Extra. The instruction will make the<br />
special process call the callback function system code change/4, a function the user must implement.<br />
The term Extra, in this case [], is passed as-is to system code change/4:<br />
-module(ch4).<br />
...<br />
-export([system_code_change/4]).<br />
...<br />
system_code_change(Chs, _Module, _OldVsn, _Extra) -><br />
{ok, Chs}.<br />
The first argument is the internal state State passed from the function<br />
sys:handle system msg(Request, From, Parent, Module, Deb, State), called by the special<br />
process when a system message is received. In ch4, the internal state is the set of available channels Chs.<br />
The second argument is the name of the module (ch4).<br />
The third argument is Vsn or down,Vsn as described for gen server:code change/3 [page 62].<br />
In this case, all arguments but the first are ignored and the function simply returns the internal state<br />
again. This is enough if the code only has been extended. If we had wanted to change the internal state<br />
(similar to the example in Changing Internal State [page 62]), it would have been done in this function<br />
and ok,Chs2 returned.<br />
1.12.7 Changing a Supervisor<br />
The supervisor behaviour supports changing the internal state, i.e. changing restart strategy and<br />
maximum restart frequency properties, as well as changing existing child specifications.<br />
Adding and deleting child processes are also possible, but not handled automatically. Instructions must<br />
begivenbyinthe.appup file.<br />
64 <strong>OTP</strong> <strong>Design</strong> <strong>Principles</strong>
1.12: Appup Cookbook<br />
Changing Properties<br />
Since the supervisor should change its internal state, synchronized code replacement is required.<br />
However, a special update instruction must be used.<br />
The new version of the callback module must be loaded first both in the case of upgrade and downgrade.<br />
Then the new return value of init/1 can be checked and the internal state be changed accordingly.<br />
The following upgrade instruction is used for supervisors:<br />
{update, Module, supervisor}<br />
Example: Assume we want to change the restart strategy of ch sup from the Supervisor Behaviour<br />
[page 20] chapter from one for one to one for all. We change the callback function init/1 in<br />
ch sup.erl:<br />
-module(ch_sup).<br />
...<br />
init(_Args) -><br />
{ok, {{one_for_all, 1, 60}, ...}}.<br />
The file ch app.appup:<br />
{"2",<br />
[{"1", [{update, ch_sup, supervisor}]}],<br />
[{"1", [{update, ch_sup, supervisor}]}]<br />
}.<br />
Changing Child Specifications<br />
The instruction, and thus the .appup file, when changing an existing child specification, is the same as<br />
when changing properties as described above:<br />
{"2",<br />
[{"1", [{update, ch_sup, supervisor}]}],<br />
[{"1", [{update, ch_sup, supervisor}]}]<br />
}.<br />
The changes do not affect existing child processes. For example, changing the start function only<br />
specifies how the child process should be restarted, if needed later on.<br />
Note that the id of the child specification cannot be changed.<br />
Note also that changing the Modules field of the child specification may affect the release handling<br />
process itself, as this field is used to identify which processes are affected when doing a synchronized<br />
code replacement.<br />
<strong>OTP</strong> <strong>Design</strong> <strong>Principles</strong><br />
65
Chapter 1: <strong>OTP</strong> <strong>Design</strong> <strong>Principles</strong><br />
Adding And Deleting Child Processes<br />
As stated above, changing child specifications does not affect existing child processes. New child<br />
specifications are automatically added, but not deleted. Also, child processes are not automatically<br />
started or terminated. Instead, this must be done explicitly using apply instructions.<br />
Example: Assume we want to add a new child process m1 to ch sup when upgrading ch app from “1” to<br />
“2”. This means m1 should be deleted when downgrading from “2” to “1”:<br />
{"2",<br />
[{"1",<br />
[{update, ch_sup, supervisor},<br />
{apply, {supervisor, restart_child, [ch_sup, m1]}}<br />
]}],<br />
[{"1",<br />
[{apply, {supervisor, terminate_child, [ch_sup, m1]}},<br />
{apply, {supervisor, delete_child, [ch_sup, m1]}},<br />
{update, ch_sup, supervisor}<br />
]}]<br />
}.<br />
Note that the order of the instructions is important.<br />
Note also that the supervisor must be registered as ch sup for the script to work. If the supervisor is not<br />
registered, it cannot be accessed directly from the script. Instead a help function that finds the pid of<br />
the supervisor and calls supervisor:restart child etc. must be written, and it is this function that<br />
should be called from the script using the apply instruction.<br />
If the module m1 is introduced in version “2” of ch app, it must also be loaded when upgrading and<br />
deleted when downgrading:<br />
{"2",<br />
[{"1",<br />
[{add_module, m1},<br />
{update, ch_sup, supervisor},<br />
{apply, {supervisor, restart_child, [ch_sup, m1]}}<br />
]}],<br />
[{"1",<br />
[{apply, {supervisor, terminate_child, [ch_sup, m1]}},<br />
{apply, {supervisor, delete_child, [ch_sup, m1]}},<br />
{update, ch_sup, supervisor},<br />
{delete_module, m1}<br />
]}]<br />
}.<br />
Note again that the order of the instructions is important. When upgrading, m1 must be loaded and the<br />
supervisor’s child specification changed, before the new child process can be started. When<br />
downgrading, the child process must be terminated before child specification is changed and the<br />
module is deleted.<br />
66 <strong>OTP</strong> <strong>Design</strong> <strong>Principles</strong>
1.12: Appup Cookbook<br />
1.12.8 Adding or Deleting a Module<br />
Example: A new functional module m is added to ch app:<br />
{"2",<br />
[{"1", [{add_module, m}]}],<br />
[{"1", [{delete_module, m}]}]<br />
1.12.9 Starting or Terminating a Process<br />
In a system structured according to the <strong>OTP</strong> design principles, any process would be a child process<br />
belonging to a supervisor, see Adding and Deleting Child Processes [page 65] above.<br />
1.12.10 Adding or Removing an Application<br />
When adding or removing an application, no .appup file is needed. When generating relup, the.rel<br />
files are compared and add application and remove application instructions are added<br />
automatically.<br />
1.12.11 Restarting an Application<br />
Restarting an application is useful when a change is too complicated to be made without restarting the<br />
processes, for example if the supervisor hierarchy has been restructured.<br />
Example: When adding a new child m1 to ch sup, as in the example above [page 65], an alternative to<br />
updating the supervisor is to restart the entire application:<br />
{"2",<br />
[{"1", [{restart_application, ch_app}]}],<br />
[{"1", [{restart_application, ch_app}]}]<br />
}.<br />
1.12.12 Changing an Application Specification<br />
When installing a release, the application specifications are automatically updated before evaluating the<br />
relup script. Hence, no instructions are needed in the .appup file:<br />
"2",<br />
["1", []],<br />
["1", []]<br />
.<br />
1.12.13 Changing Application Configuration<br />
Changing an application configuration by updating the env key in the .app file is an instance of<br />
changing an application specification, see above [page 67].<br />
Alternatively, application configuration parameters can be added or updated in sys.config.<br />
<strong>OTP</strong> <strong>Design</strong> <strong>Principles</strong><br />
67
Chapter 1: <strong>OTP</strong> <strong>Design</strong> <strong>Principles</strong><br />
1.12.14 Changing Included Applications<br />
The release handling instructions for adding, removing and restarting applications apply to primary<br />
applications only. There are no corresponding instructions for included applications. However, since an<br />
included application is really a supervision tree with a topmost supervisor, started as a child process to a<br />
supervisor in the including application, a relup file can be manually created.<br />
Example: Assume we have a release containing an application prim app which have a supervisor<br />
prim sup in its supervision tree.<br />
In a new version of the release, our example application ch app should be included in prim app. That<br />
is, its topmost supervisor ch sup should be started as a child process to prim sup.<br />
1)Editthecodeforprim sup:<br />
init(...) -><br />
{ok, {...supervisor flags...,<br />
[...,<br />
{ch_sup, {ch_sup,start_link,[]},<br />
permanent,infinity,supervisor,[ch_sup]},<br />
...]}}.<br />
2) Edit the .app file for prim app:<br />
{application, prim_app,<br />
[...,<br />
{vsn, "2"},<br />
...,<br />
{included_applications, [ch_app]},<br />
...<br />
]}.<br />
3) Create a new .rel file, including ch app:<br />
{release,<br />
...,<br />
[...,<br />
{prim_app, "2"},<br />
{ch_app, "1"}]}.<br />
Application Restart<br />
4a) One way to start the included application is to restart the entire prim app application. Normally,<br />
we would then use the restart application instruction in the .appup file for prim app.<br />
However, if we did this and then generated a relup file, not only would it contain instructions for<br />
restarting (i.e. removing and adding) prim app, it would also contain instructions for starting ch app<br />
(and stopping it, in the case of downgrade). This is due to the fact that ch app is included in the new<br />
.rel file, but not in the old one.<br />
Instead, a correct relup file can be created manually, either from scratch or by editing the generated<br />
version. The instructions for starting/stopping ch app are replaced by instructions for loading/unloading<br />
the application:<br />
68 <strong>OTP</strong> <strong>Design</strong> <strong>Principles</strong>
1.12: Appup Cookbook<br />
{"B",<br />
[{"A",<br />
[],<br />
[{load_object_code,{ch_app,"1",[ch_sup,ch3]}},<br />
{load_object_code,{prim_app,"2",[prim_app,prim_sup]}},<br />
point_of_no_return,<br />
{apply,{application,stop,[prim_app]}},<br />
{remove,{prim_app,brutal_purge,brutal_purge}},<br />
{remove,{prim_sup,brutal_purge,brutal_purge}},<br />
{purge,[prim_app,prim_sup]},<br />
{load,{prim_app,brutal_purge,brutal_purge}},<br />
{load,{prim_sup,brutal_purge,brutal_purge}},<br />
{load,{ch_sup,brutal_purge,brutal_purge}},<br />
{load,{ch3,brutal_purge,brutal_purge}},<br />
{apply,{application,load,[ch_app]}},<br />
{apply,{application,start,[prim_app,permanent]}}]}],<br />
[{"A",<br />
[],<br />
[{load_object_code,{prim_app,"1",[prim_app,prim_sup]}},<br />
point_of_no_return,<br />
{apply,{application,stop,[prim_app]}},<br />
{apply,{application,unload,[ch_app]}},<br />
{remove,{ch_sup,brutal_purge,brutal_purge}},<br />
{remove,{ch3,brutal_purge,brutal_purge}},<br />
{purge,[ch_sup,ch3]},<br />
{remove,{prim_app,brutal_purge,brutal_purge}},<br />
{remove,{prim_sup,brutal_purge,brutal_purge}},<br />
{purge,[prim_app,prim_sup]},<br />
{load,{prim_app,brutal_purge,brutal_purge}},<br />
{load,{prim_sup,brutal_purge,brutal_purge}},<br />
{apply,{application,start,[prim_app,permanent]}}]}]<br />
}.<br />
Supervisor Change<br />
4b) Another way to start the included application (or stop it in the case of downgrade) is by combining<br />
instructions for adding and removing child processes to/from prim sup with instructions for<br />
loading/unloading all ch app code and its application specification.<br />
Again, the relup file is created manually. Either from scratch or by editing a generated version. Load all<br />
code for ch app first, and also load the application specification, before prim sup is updated. When<br />
downgrading, prim sup should be updated first, before the code for ch app and its application<br />
specification are unloaded.<br />
{"B",<br />
[{"A",<br />
[],<br />
[{load_object_code,{ch_app,"1",[ch_sup,ch3]}},<br />
{load_object_code,{prim_app,"2",[prim_sup]}},<br />
point_of_no_return,<br />
{load,{ch_sup,brutal_purge,brutal_purge}},<br />
{load,{ch3,brutal_purge,brutal_purge}},<br />
{apply,{application,load,[ch_app]}},<br />
<strong>OTP</strong> <strong>Design</strong> <strong>Principles</strong><br />
69
Chapter 1: <strong>OTP</strong> <strong>Design</strong> <strong>Principles</strong><br />
{suspend,[prim_sup]},<br />
{load,{prim_sup,brutal_purge,brutal_purge}},<br />
{code_change,up,[{prim_sup,[]}]},<br />
{resume,[prim_sup]},<br />
{apply,{supervisor,restart_child,[prim_sup,ch_sup]}}]}],<br />
[{"A",<br />
[],<br />
[{load_object_code,{prim_app,"1",[prim_sup]}},<br />
point_of_no_return,<br />
{apply,{supervisor,terminate_child,[prim_sup,ch_sup]}},<br />
{apply,{supervisor,delete_child,[prim_sup,ch_sup]}},<br />
{suspend,[prim_sup]},<br />
{load,{prim_sup,brutal_purge,brutal_purge}},<br />
{code_change,down,[{prim_sup,[]}]},<br />
{resume,[prim_sup]},<br />
{remove,{ch_sup,brutal_purge,brutal_purge}},<br />
{remove,{ch3,brutal_purge,brutal_purge}},<br />
{purge,[ch_sup,ch3]},<br />
{apply,{application,unload,[ch_app]}}]}]<br />
}.<br />
1.12.15 Changing Non-<strong>Erlang</strong> Code<br />
Changing code for a program written in another programming language than <strong>Erlang</strong>, for example a port<br />
program, is very application dependent and <strong>OTP</strong> provides no special support for it.<br />
Example, changing code for a port program: Assume that the <strong>Erlang</strong> process controlling the port is a<br />
gen server portc and that the port is opened in the callback function init/1:<br />
init(...) -><br />
...,<br />
PortPrg = filename:join(code:priv_dir(App), "portc"),<br />
Port = open_port({spawn,PortPrg}, [...]),<br />
...,<br />
{ok, #state{port=Port, ...}}.<br />
If the port program should be updated, we can extend the code for the gen server with a code change<br />
function which closes the old port and opens a new port. (If necessary, the gen server may first request<br />
data that needs to be saved from the port program and pass this data to the new port):<br />
code_change(_OldVsn, State, port) -><br />
State#state.port ! close,<br />
receive<br />
{Port,close} -><br />
true<br />
end,<br />
PortPrg = filename:join(code:priv_dir(App), "portc"),<br />
Port = open_port({spawn,PortPrg}, [...]),<br />
{ok, #state{port=Port, ...}}.<br />
Update the application version number in the .app file and write an .appup file:<br />
70 <strong>OTP</strong> <strong>Design</strong> <strong>Principles</strong>
1.12: Appup Cookbook<br />
["2",<br />
[{"1", [{update, portc, {advanced,port}}]}],<br />
[{"1", [{update, portc, {advanced,port}}]}]<br />
].<br />
Make sure the priv directory where the C program is located is included in the new release package:<br />
1 systools:make tar("my release", [dirs,[priv]]).<br />
...<br />
1.12.16 Emulator Restart<br />
If the emulator can or should be restarted, the very simple .relup file can be created manually:<br />
{"B",<br />
[{"A",<br />
[],<br />
[restart_new_emulator]}],<br />
[{"A",<br />
[],<br />
[restart_new_emulator]}]<br />
}.<br />
This way, the release handler framework with automatic packing and unpacking of release packages,<br />
automatic path updates etc. can be used without having to specify .appup files.<br />
If some transformation of persistent data, for example database contents, needs to be done before<br />
installing the new release version, instructions for this can be added to the .relup file as well.<br />
<strong>OTP</strong> <strong>Design</strong> <strong>Principles</strong><br />
71
Chapter 1: <strong>OTP</strong> <strong>Design</strong> <strong>Principles</strong><br />
72 <strong>OTP</strong> <strong>Design</strong> <strong>Principles</strong>
List of Figures<br />
1.1 Supervision Tree . . . . . . . . . . . . . . . . . . . . . . . . . . . . . . . . . . . . . . . . . 2<br />
1.2 Client-Server Model . . . . . . . . . . . . . . . . . . . . . . . . . . . . . . . . . . . . . . . 7<br />
1.3 One For One Supervision . . . . . . . . . . . . . . . . . . . . . . . . . . . . . . . . . . . . 20<br />
1.4 One For All Supervision . . . . . . . . . . . . . . . . . . . . . . . . . . . . . . . . . . . . . 21<br />
1.5 Primary Application and Included Applications. . . . . . . . . . . . . . . . . . . . . . . . . 39<br />
1.6 Application myapp - Situation 1 . . . . . . . . . . . . . . . . . . . . . . . . . . . . . . . . . 43<br />
1.7 Application myapp - Situation 2 . . . . . . . . . . . . . . . . . . . . . . . . . . . . . . . . . 44<br />
1.8 Application myapp - Situation 3 . . . . . . . . . . . . . . . . . . . . . . . . . . . . . . . . . 44<br />
1.9 Application myapp - Situation 4 . . . . . . . . . . . . . . . . . . . . . . . . . . . . . . . . . 45<br />
1.10 Application myapp - Situation 5 . . . . . . . . . . . . . . . . . . . . . . . . . . . . . . . . . 45<br />
<strong>OTP</strong> <strong>Design</strong> <strong>Principles</strong><br />
73