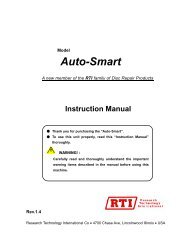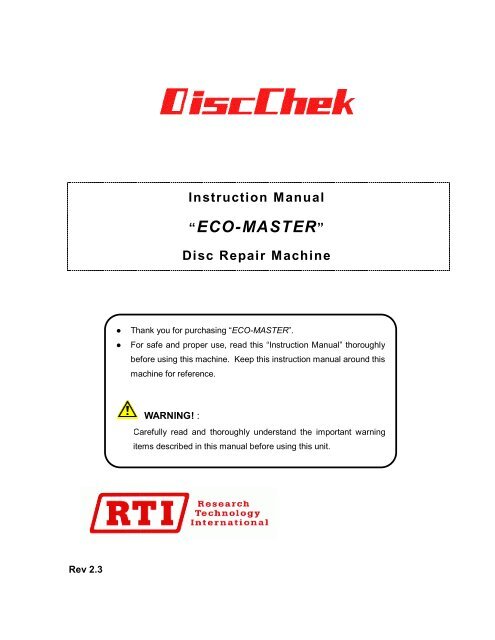
Instruction Manual “ECO-MASTER” Disc Repair Machine - RTI
Instruction Manual “ECO-MASTER” Disc Repair Machine - RTI
Instruction Manual “ECO-MASTER” Disc Repair Machine - RTI

You also want an ePaper? Increase the reach of your titles
YUMPU automatically turns print PDFs into web optimized ePapers that Google loves.
<strong>Instruction</strong> <strong>Manual</strong><br />
<strong>“ECO</strong>-<strong>MASTER”</strong><br />
<strong>Disc</strong> <strong>Repair</strong> <strong>Machine</strong><br />
●<br />
●<br />
Thank you for purchasing <strong>“ECO</strong>-<strong>MASTER”</strong>.<br />
For safe and proper use, read this “<strong>Instruction</strong> <strong>Manual</strong>” thoroughly<br />
before using this machine. Keep this instruction manual around this<br />
machine for reference.<br />
WARNING! :<br />
Carefully read and thoroughly understand the important warning<br />
items described in this manual before using this unit.<br />
Rev 2.3
Contents<br />
1. Safety Precautions .................................................................1<br />
1.1 Explanation .........................................................................................................................1<br />
1.2 Table of Illustrated Symbols.................................................................................................2<br />
1.3 Fundamental Matters of “WARNING!” and “CAUTION!” ......................................................3<br />
1.4 Requirements for Installation ...............................................................................................4<br />
2. Contents of packing ...............................................................5<br />
3. Description and Function of Each Part .................................6<br />
3.1 Main Body ...........................................................................................................................6<br />
3.2 Operation Part.....................................................................................................................7<br />
3.3 Abrasive Unit .......................................................................................................................8<br />
3.4 Loading Unit........................................................................................................................9<br />
3.5 Platen Unit.........................................................................................................................10<br />
3.7 Pump and Water Recycle Unit...........................................................................................12<br />
3.8 Pad Holders ......................................................................................................................13<br />
Make sure the pads are CENTERED on the pad holders. They should not wobble when they rotate!<br />
...................................................................................................13<br />
4. Set Up....................................................................................14<br />
4.1 Set up Changer Unit and Power Supply ............................................................................14<br />
4.2 Set up Water Recycle System ...........................................................................................15<br />
4.3 Preparation for Operation ..................................................................................................19<br />
4.3.1 Setting spindle ........................................................................................................19<br />
4.3.2 Turning on the power ................................................................................................19<br />
4.3.3 Preparation of Water and Compound...........................................................................20<br />
MAIN DISPLAY..................................................................................................................................... 21<br />
5. Operation ..............................................................................22<br />
5.1. Power on..........................................................................................................................22<br />
5.2. Power off ..........................................................................................................................22
5.3. Initialization ......................................................................................................................22<br />
5.4. Select Menu - <strong>Repair</strong>ing <strong>Disc</strong>s .........................................................................................23<br />
5.4.2 Sanding (For very deep scratch removal on CD’s only)...............................................26<br />
5.5 During operations..............................................................................................................27<br />
5.6 During a pause..................................................................................................................27<br />
5.7 Check (Brings up many displays of statistics and parameters.) .....................................28<br />
5.7.1 Running total................................................................................................................28<br />
5.7.2 Warning .......................................................................................................................31<br />
5.7.3 <strong>Repair</strong> history...............................................................................................................31<br />
5.8 Error Messages.................................................................................................................32<br />
5.9 Error List............................................................................................................................33<br />
6. Maintenance..........................................................................35<br />
6.1 Supplement Compound.....................................................................................................35<br />
6.2 Supplement Water.............................................................................................................35<br />
6.3 Daily maintenance.............................................................................................................35<br />
6.4 Weekly maintenance .........................................................................................................38<br />
7. Caution..................................................................................39<br />
8. Service..................................................................................39<br />
9. Specifications .......................................................................39<br />
10.Wiring Diagram ....................................................................40<br />
11. Replacement Parts..............................................................42
1. Safety Precautions<br />
1.1 Explanation<br />
<br />
Illustrated Symbols<br />
Various symbols are used in this safety manual. A list of problems caused by ignoring<br />
the warnings and improper handling is divided as shown below. Be sure that you<br />
understand the warnings and cautions in this manual before operating the unit.<br />
WARNING!<br />
CAUTION!<br />
If the warning is ignored, there is the danger of a<br />
problem that may cause a serious accident or<br />
even fatality.<br />
If the caution is ignored, there is the danger of a<br />
problem that may cause injury/damage to the<br />
operator or the unit itself.<br />
Meaning of Symbols<br />
A detailed warning message is shown adjacent to the symbol.<br />
This symbol indicates items that are strictly prohibited.<br />
A detailed message is shown adjacent to the symbol with specific actions not to<br />
perform.<br />
This symbol indicates items that should be always performed.<br />
A detailed message with instruction is shown adjacent to the symbol.<br />
1
1.2 Table of Illustrated Symbols<br />
<br />
Warning<br />
General<br />
Warning<br />
Warning,<br />
High voltage<br />
Warning,<br />
High temperature<br />
<br />
Caution<br />
General<br />
Caution<br />
Caution,<br />
Rotation<br />
Caution,<br />
Finger<br />
<br />
Prohibit<br />
General<br />
Prohibition<br />
Prohibit,<br />
To disassemble<br />
Prohibit,<br />
To touch<br />
<br />
Compulsion<br />
Compulsion,<br />
Important.<br />
Compulsion,<br />
<strong>Disc</strong>onnect the<br />
power plug<br />
Compulsion,<br />
Connect to the<br />
grounding terminal<br />
2
1.3 Fundamental Matters of “WARNING!” and “CAUTION!”<br />
WARNING!<br />
Do not use this unit in an area where there is flammable or<br />
explosive gas<br />
Never use this unit in an area where there is flammable or explosive gas.<br />
This unit is not explosion-proof. An arc may be generated when the power switch is<br />
turned on or off, and fire/explosion may result.<br />
Always ground this unit<br />
Always ground this unit on the power equipment side in order to avoid electrical shock<br />
due to a power surge.<br />
If a problem occurs<br />
If smoke or strange odor should come out of this unit for some reason, turn off the<br />
power switch right away. Immediately contact a service technician for inspection. If this<br />
procedure is not followed, fire or electrical shock may result.<br />
Never perform repair work yourself, since it is dangerous not recommended.<br />
Do not use the power cable if it is bundled or tangled<br />
Do not use the power cable if it is bundled or tangled. If it is used in this manner, it can<br />
overheat and fire may be caused.<br />
Do not process, bend, wring, or stretch the power cable<br />
forcibly. Do not let anything stand or rest on top of the cord.<br />
Do not process, bend, wring, or stretch the power cable forcibly. Fire or electrical<br />
shock may result.<br />
Do not disassemble or modify this unit<br />
Do not disassemble or modify this unit. Fire or electrical shock or failure may be<br />
caused.<br />
CAUTION!<br />
During a thunder storm<br />
During a thunderstorm, turn off the power switch immediately. If this procedure is not<br />
followed, fire or electrical shock or failure may be caused.<br />
3
1.4 Requirements for Installation<br />
WARNING!<br />
1. Always ground this unit<br />
Connect the power plug to a grounded receptacle.<br />
Do not forget to ground this unit, to protect you and the unit from electrical shock in case of<br />
power surge. Choose a receptacle with grounding contact (3 prong type.)<br />
Do not connect the grounding wire to a gas pipe, or to a lightning rod or telephone line. A fire or<br />
electrical shock can occur.<br />
2. Choose a proper place for installation<br />
Do not install this unit in a place where:<br />
Flammable gas or corrosive gas is generated.<br />
There is direct sunlight.<br />
There is excessive humidity and dust.<br />
There is constant vibration.<br />
3. Place on a level floor. Unit is top heavy. Tilting the machine may cause it to fall.<br />
Exercise care when plugging in power cord or when performing service on the machine. Do not tilt the<br />
machine. For access underneath the left-hand changer (loading) assembly, remove it from its hinges.<br />
4. Do not modify<br />
<br />
Modification of this unit is strictly prohibited. This could cause a failure.<br />
CAUTION!<br />
5. Use a correct power receptacle<br />
Use a correct power receptacle that meets the unit’s rated electric capacity.<br />
Electric capacity:<br />
Eco-Master : 100 – 240 VAC, 50/60Hz, 250W(Max)<br />
4
2. Contents of packing<br />
After checking the contents of your shipment, turn to page 14 for machine Setup.<br />
After Setup, disc repair operation is described on page 23.<br />
Changer Unit<br />
(shown sideways)<br />
Power Supply<br />
2 Connectors to<br />
Main body<br />
1st Tank Cover<br />
Funnel<br />
Spindle<br />
Compound Bottle<br />
Cap for Outer-Pipe<br />
Power Cable<br />
Outer-Pipe/<br />
Inner pipe<br />
1st Tank<br />
2nd Tank Cover<br />
1st Filter<br />
2nd Tank<br />
5
3. Description and Function of Each Part<br />
3.1 Main Body<br />
1<br />
4<br />
5<br />
2<br />
6<br />
3<br />
6-D<br />
6-C<br />
6-B<br />
6-A<br />
Grounding Screw<br />
1 Hatch Handle Open to change Pads. It is locked during disc repair.<br />
2 Front Door Open to change Water and the water-recycle system parts.<br />
3 Casters Be sure to lock them before operation since the unit is top heavy.<br />
4 Hinges Used to install a Changer Unit.<br />
5 Changer Connector Connecting to Changer Connector.<br />
6 External Connectors 6-A Power supply Input<br />
6-B RS-232C communication unit<br />
6-C Ethernet unit<br />
6-D Option Output.<br />
6
3.2 Operation Part<br />
7<br />
8<br />
7 LCD with Touch Panel The menu of operations and the condition of the machine<br />
are displayed here. Don’t touch the display with sharp<br />
objects (pens, pencils). It is designed for finger touch.<br />
8 POWER/PAUSE<br />
Switch<br />
This turns on and off the power. Also, push it when you<br />
want to stop or pause automatic operations of the machine.<br />
(Power switch on the bottom of the changer must be ON to<br />
operate the machine.)<br />
7
3.3 Abrasive Unit<br />
10 11<br />
12<br />
9<br />
15<br />
13<br />
16<br />
14<br />
9 Cooling Fan For cooling Motors and other parts.<br />
10 Platen Motor Motor drives the Turntable.<br />
11 Sanding Motor Motor drives the Pads.<br />
12 Abrasive Connectors Connected to Main Board.<br />
13 Pads 5 different type of Pads<br />
14 Splash Cover Cover limits the splashing water during disc repair.<br />
15 Turntable Drive Shaft Shaft drives the Turntable (Platen).<br />
16 Center Rubber Protects the center of disc from water and compound.<br />
(Not visible in this view.)<br />
8
3.4 Loading Unit<br />
19<br />
19<br />
17<br />
18<br />
17 Loading Motor Motor drives the Grabs in and out of the changer unit.<br />
18 Loading Connector Connected to Main Board.<br />
19 Grabs Grabs transfer the disc from the changer to the platen.<br />
9
3.5 Platen Unit<br />
20<br />
21<br />
22<br />
23<br />
20 Center Pin It secures the Turntable and centers the disc.<br />
21 Turntable (Platen) It holds the disc during processing.<br />
22 Under Splash Cover Collects drainage water.<br />
23 Lift Motor Motor drives Turntable (Platen) up and down.<br />
10
3.6 Changer Unit<br />
30<br />
24<br />
Finished discs<br />
are placed here<br />
by the machine<br />
25<br />
Stack damaged<br />
discs here –<br />
label side down<br />
26<br />
27<br />
29<br />
31<br />
28<br />
24 Spindle <strong>Repair</strong>ed <strong>Disc</strong>s are stored on this spindle.<br />
25 Stocker <strong>Disc</strong>s to be repaired are placed here, label side down.<br />
26 Changer Motor Motor drives the changer up and down for disc loading.<br />
27 Changer Connector Connected to Main Board.<br />
28 Vacuum Filter Protects the vacuum pump from dust in air tube.<br />
29 Vacuum Pump For picking up the disc.<br />
30 Changer Door Close and lock this door when Changer motor is moving.<br />
<strong>Machine</strong> will not run without this door closed.<br />
31 Power Supply Main Power Supply for this machine.<br />
11
3.7 Pump and Water Recycle Unit<br />
35<br />
34<br />
32<br />
36<br />
33<br />
32 Compound Pump It pumps Compound from the bottle to the nozzle.<br />
33 Water Pump Pumps Water from the tank to the nozzle.<br />
34 Exhaust Fan Exhaust fan for vapor from water Recycle System.<br />
35 Terminals Contacts to put voltage between Inner-Pipe & Outer-Pipe.<br />
Necessary for the water recycling system.<br />
36 Tank Holder The bracket for the Compound Tank.<br />
12
3.8 Pad Holders<br />
38<br />
39<br />
40<br />
37<br />
41<br />
42<br />
Make sure the pads are CENTERED on the pad holders. They should not wobble when they rotate!<br />
37 #5 Blue Pad Holder Mount the Blue Pad here.<br />
38 #4 Red Pad Holder Mount the Red Pad here.<br />
39 #3 Green Pad Holder Mount the Green Pad here.<br />
40 #2 Yellow Pad Holder Mount the Yellow Pad here.<br />
41 #1 Black Pad Holder Mount the Black Pad here.<br />
42 For Spare Pad<br />
13
4. Set Up<br />
4.1 Set up Changer Unit and Power Supply<br />
1) Insert each Hinge on Changer into hinges on<br />
the Main Body referring to the picture. Note<br />
that the main power cord is plugged into the<br />
power supply at the bottom of the changer. DO<br />
NOT PLUG IT INTO THE WALL OUTLET YET.<br />
2) Be sure to connect the 2 connectors firmly.<br />
Also, the Ground wire has to be connected to<br />
the Main Body with the Screw provided.<br />
Changer control<br />
Cable. The wires<br />
must come this<br />
opening<br />
Power supply<br />
cable<br />
Grounding wire<br />
3) Close Changer by rotating it to the main body.<br />
Then, secure it with two black thumbscrews.<br />
14
4.2 Set up Water Recycle System<br />
1 st . Filter<br />
1) Place the “1 st . filter<br />
into the 1 st . tank. Fold it<br />
over the edge.<br />
Outer - Reactor<br />
Pipe<br />
Inner pipe<br />
1 st . Tank<br />
Bottom cap<br />
Tank cover<br />
Funnel<br />
2) Assembled 1 st . Tank<br />
Funnel<br />
Inner pipe<br />
First filter<br />
New Outer<br />
Reactor pipe<br />
Tank cover<br />
Drain tube<br />
15
4) Prepare a 1-gallon bottle with distilled<br />
water and 20 ml. of “Solution D”.<br />
The “Solution D”(100ml) is included in the<br />
“Starter Kit”.<br />
See mixing ratio below.<br />
We recommend using DISTILLED water to get the best finishing quality<br />
CAUTION!<br />
<br />
“Water” 1 gallon: “Solution D” 20 milliliter<br />
If you make it using another ratio, we can't assure the quality of disc repair.<br />
2 nd . Tank<br />
5) Put in “Solution D” into the water and stir well. (This is the Polish Water)<br />
6) Put Polish Water into the 2nd Tank. Pour it into each of the four sections<br />
of the tank. The water will automatically level out in the 4 sections.<br />
1-1½ gallons of water is needed for machine operation.<br />
16
7) Place the cover on the 2 nd . Tank 8) Slide the Water Supply pipe<br />
Then, slide it into the cabinet.<br />
into the 2nd Tank. See below.<br />
Water Supply<br />
Pipe<br />
Make sure it is<br />
at least ½”<br />
below the<br />
surface of the<br />
water in the<br />
tank.<br />
Note: If the tank fails to go all the way into<br />
the machine, move any wires or tubes that may<br />
be hanging down in the rear of the tank area.<br />
9) Place the 1st Tank on the<br />
2nd Tank.<br />
Make sure that Terminal contact<br />
bracket is making firm contact with<br />
the inner and outer pipes. (Upper<br />
and lower contacts must never<br />
touch each other, only the tubes.)<br />
Fill 1 st . tank with conditioned water<br />
up to drainage pipe<br />
Collar not used on later models<br />
17
10) Rotate the Drainage Pipe down through<br />
the cover hole and into the 2nd Tank.<br />
Drainage tube<br />
Tank holder<br />
bracket<br />
11) Fill the Compound Tank (bottle) to about ¾ full<br />
and place it in the Tank Holder.<br />
18
4.3 Preparation for Operation<br />
4.3.1 Setting spindle<br />
With the changer mechanism in the<br />
UP position, place the spindle on top<br />
of the Changer.<br />
4.3.2 Turning on the power<br />
Turn on the Power Switch.<br />
The Power ON position is<br />
toward the Operator.<br />
ON (front)<br />
Turn on the POWER/PAUSE switch.<br />
It is OK if the Red LED light waits a few<br />
seconds after the switch is pressed.<br />
CAUTION!<br />
Please keep Power Switch OFF for a minimum of 10 seconds, before<br />
turning on the power again.<br />
If Red LED doesn’t light, wait over 1 minute with Power Switch OFF. Retry.<br />
Check the connectors between the changer and the main body.<br />
19
4.3.3 Preparation of Water and Compound<br />
Turn on the compound pump or the water pump until<br />
the compound and water drips from the nozzles. The<br />
water should be a pretty good stream, not spurting<br />
with air bubbles. SEE THE NEXT PAGE FOR THE<br />
LOCATION OF THE PUMP SWITCHES ON THE<br />
DISPLAY PANEL.<br />
Close the hatch firmly.<br />
Note: Never try to force the latch<br />
open. It is locked during operation.<br />
20
Push here<br />
MAIN DISPLAY<br />
ECOMaster<br />
Message Display<br />
Check<br />
<strong>Disc</strong><br />
1/50<br />
CD DVD ** ***<br />
Mode<br />
Sanding Deep Medium Light Very Light<br />
Start<br />
Screen 1/4<br />
Water Timers<br />
BACK<br />
Running total<br />
:<br />
10h15m20s<br />
Clear<br />
Water<br />
1st Filter *<br />
:<br />
10h15m20s<br />
1h23m15s<br />
Clear<br />
Push here<br />
(Water pump)<br />
Reactor tube<br />
Water<br />
ON<br />
OFF<br />
:<br />
1h20m25s<br />
Clear<br />
Make sure to<br />
turn OFF both<br />
the water and<br />
the compound<br />
pumps after<br />
Screen 2/4<br />
Fluid Timers<br />
priming the<br />
tubing system.<br />
Compound<br />
: 2h30m25s Clear<br />
During repair,<br />
the machine<br />
takes control of<br />
these pumps.<br />
Push here<br />
(Compound)<br />
Compound<br />
ON<br />
OFF<br />
21
5. Operation<br />
This chapter explains how to operate the machine.<br />
5.1. Power on<br />
After turning on POWER/PAUSE Switch, the machine starts initialization.<br />
ECOMaster<br />
Now Loading…<br />
Please wait.<br />
POWER/PAUSE<br />
switch<br />
5.2. Power off<br />
The machine power will shut down by pushing (and holding) the POWER/PAUSE switch for 4<br />
seconds when the Main menu screen is showing.<br />
In an emergency, you may turn off the Power supply switch on the bottom of changer.<br />
5.3. Initialization<br />
The initialization of the machine is done for selfchecking when the power supply is turned ON or<br />
when an error occurs. Messages below are displayed during initialization. Then, the menu for<br />
operations will be displayed.<br />
Initializing.<br />
Please wait.<br />
22
5.4. Select Menu - <strong>Repair</strong>ing <strong>Disc</strong>s<br />
<strong>Repair</strong>ing your first discs<br />
Remove the discs that need to be repaired from their cases. Put the cases aside and place the discs<br />
on the “stocker” in the changer unit (see item 25 on page 11.) Make sure you put the discs in the<br />
changer unit with THE LABEL SIDE DOWN and push them back to the white posts. (See photo<br />
below.) The changer will not handle more than 50 discs at a time. Remember, the side to be repaired<br />
must be “up.” For double sided discs, repair one side and then reload the disc with the “other” side<br />
facing upwards. Always close the changer door and the latch before running the machine.<br />
White posts<br />
Stack discs (label side down) here<br />
Press in this latch (latched<br />
position)<br />
after closing the door. <strong>Machine</strong> will<br />
not run with the latch open.<br />
When repairing discs in the Eco Master it is helpful to visually inspect the discs and sort them. Look<br />
for discs that are “heavily damaged” and put them in one pile. Then put discs that are “scratched” in<br />
another pile and those that are only “lighted scuffed” in a third pile. Now you can select the type of<br />
repair that is appropriate and most efficient for each stack. It requires a little experience to classify the<br />
discs but most operators learn this very quickly.<br />
This procedure may take a minute extra but it saves time in the long run. It is also better for the discs.<br />
For example, if all discs were run in the “deep” mode, whether they needed it or not, it would take extra<br />
time for the extra stages of repair. In addition, the discs would be sanded down more than necessary.<br />
You can repair a disc many times in the Eco Master with excellent results. However, it is always best<br />
to repair discs at the least aggressive level to get the job done.<br />
Now, follow the directions on the next pages.<br />
23
5.4.1 Main menu screen - <strong>Disc</strong> <strong>Repair</strong><br />
The menu for operations is displayed after initialization. Select <strong>Disc</strong> and mode, and touch the “Start”<br />
after placing discs in the Changer. The machine will start to repair discs. Several messages<br />
(demands for replacing water, Filters, and Pads, etc.) are displayed in “Message Display” area of the<br />
screen. You won’t be able to start operations if messages are displayed there.<br />
*The machine will stop after all the discs have been picked up from the “stocker” or after the machine<br />
tries (and fails) three times to pick up a disc in the Changer.<br />
ECOMaster<br />
Message Display<br />
Check<br />
Process number of discs:<br />
Number of discs to deal with can be<br />
changed or left at 50.<br />
<strong>Disc</strong><br />
CD<br />
50 discs<br />
DVD ** ***<br />
Mode<br />
Sanding Deep Medium Light Abrasion<br />
For AUTO Power OFF, change this<br />
value. Press this box and then<br />
enter the number (1-50) of discs to<br />
be fixed. Load that number of discs.<br />
<strong>Machine</strong> will then automatically shut<br />
itself down when that number of<br />
discs has finished.<br />
This is helpful when running the<br />
machine unattended or over night.<br />
Start<br />
<br />
ONLY PRESS THE SCREEN<br />
WITH YOUR FINGER TIP.<br />
NOT PENS, PENCILS, ETC.<br />
“CD”: Select this to repair CD’s. (Audio, some games, data)<br />
“DVD”: Select this to repair DVD’s. (Movies, High Density <strong>Disc</strong>s)<br />
Note: Selecting “DVD” plus “Sanding” or “Deep” mode is prohibited.<br />
You may use the “CD, Deep” setting to remove heavy scratches in a DVD one time, no more! Most repairs,<br />
however, are accomplished very well in the “DVD, Medium” mode (or lighter) for both CD’s and DVD discs.<br />
<br />
Mode<br />
Sanding<br />
Deep<br />
Medium<br />
Light<br />
Abrasion<br />
Description<br />
For discs that have heavy gouges, not being repaired in “Deep”<br />
mode. In this mode the <strong>Disc</strong> is sanded roughly, finishing process<br />
isn’t done. So polish it in “Deep” mode again.<br />
For discs that have gouges.<br />
For discs that have scratches<br />
For discs that have light scratches.<br />
This is selected for a light polish of the disc..<br />
Press “Check”: When you need to check several states of the machine, for example, usage<br />
of water, Filters, and Pads, etc., push here. (See 5.6.Check)<br />
To repair discs:<br />
1. Load the discs, prime the fluids, install the output spindle, etc.<br />
2. Select media type (CD, DVD)<br />
3. Select repair mode (Deep, medium, light, etc.)<br />
4. Press “START”<br />
It’s really that easy! You may leave the machine and come back later to retrieve your repaired discs. If you<br />
remove discs from the output spindle while the machine is running, make sure you put it back for the next<br />
repaired discs coming out of the unit. Close the changer door and latch it! For sanding repairs, read on . . .<br />
25
Replacing Consumable items<br />
Now that you are repairing discs, you need to know about replacing the supply items. The following<br />
items assume that the machine is cleaned regularly as described later in this manual.<br />
• Replace all of the colored pads (but not the #1 foam pad) every 40-50 discs.<br />
• Replace the #1 foam pad every 250 discs (more frequently if pad is heavily worn.)<br />
• Change the polish water (water/“D” solution) every 250 discs or when the water looks milky,<br />
whichever comes first. If water level is low just add some more. Replace the 1 st . tank filter at<br />
this time (every 250 discs.) Clean both inner and outer pipes carefully at this time.<br />
• Replenish the compound when the bottle gets down to only 1/3 full.<br />
• Replace the Reactor pipe when the water gets milky quickly or every 1500 discs.<br />
• Replace the Inner pipe if it has brown or red corrosion on it.<br />
Game Cube discs<br />
Game cube discs may be repaired on the ECO MASTER. They require a special adapter to<br />
hold them and they may only be processed one at a time. Do not put more than one of them on the<br />
loading stack. Process the one disc and then put another game cube in the holder and do that one.<br />
5.4.2 Sanding (For very deep scratch removal on CD’s only)<br />
The screen below is displayed when you touch “Start” in the “Sanding” mode. This is only for BADLY<br />
damaged CD’s, not DVD’s. The machine starts operating when you select a sanding level and touch<br />
“OK”.<br />
Rough Sanding<br />
Select the Level.<br />
Level 3 Level 2 Level 1<br />
Are you sure?<br />
OK<br />
Cancel<br />
“Level 3”: <strong>Disc</strong>s are sanded three times as hard as “Level 1”.<br />
“Level 2”: <strong>Disc</strong>s are sanded twice as hard as “Level 1”.<br />
“Level 1”: <strong>Disc</strong>s are sanded as hard as “Deep” mode.<br />
26
5.5 During operations<br />
The number of discs, the phase of repairing process, and the state of each process are displayed during<br />
automatic disc repair.<br />
Push POWER/PAUSE Switch if you want to pause the machine.<br />
[DVD - MEDIUM]<br />
Processing the 23 rd . disc<br />
out of 50 total.<br />
DISC<br />
Processing… 23/50<br />
COUNT<br />
Please push the<br />
[POWER/PAUSE] switch to pause.<br />
5.6 During a pause<br />
<strong>Repair</strong>ing will be resumed if “Continue” is touched. Operation will be terminated regardless of the phase<br />
of repairing process if “End” is touched.<br />
[CD - Deep]<br />
<strong>Disc</strong><br />
Process<br />
Pause<br />
1/50 Count<br />
1/5<br />
Continue<br />
End<br />
27
5.7 Check (Brings up many displays of statistics and parameters.)<br />
You will see the screens below if you touch “Check” in the main Menu.<br />
5.7.1 Running total<br />
Total run-time of each item is displayed. If something needs to be exchanged, “Clear” will turn black and<br />
white. Be sure to display these screens and touch “Clear” for each item after replacing it.<br />
Run the machine pumps to confirm proper operation after renewing Water or Filters. Do the same after<br />
supplying Compound.<br />
Touch “ ↓ ” button to go to next page, and “ ↑ ” or “return” button to go to previous page.<br />
Check 1/4<br />
Running total<br />
Return<br />
Water<br />
:<br />
10h15m20s<br />
Clear<br />
1st Filter *<br />
:<br />
10h15m20s<br />
Clear<br />
1h23m15s<br />
Al-Pipe<br />
:<br />
1h20m25s<br />
Clear<br />
Water<br />
ON<br />
OFF<br />
Mode<br />
*1st Filter has two timers internal to the machine. If either of them reaches<br />
the limit, you have to renew the 1st Filter and clear it.<br />
28
“Mode”<br />
Pushing this button allows the setup parameters of a Mode to be changed.<br />
Automatic Power OFF Mode<br />
ON: The power supply is cut off automatically when process is completed and an error doesn't<br />
occur.<br />
OFF: The power supply is not cut off automatically.<br />
Cartridge Retry Mode in the Changer<br />
ON: Picking-up action will be attempted 3 times if a disc was not picked up by the<br />
vacuum.<br />
OFF: The vacuum Picking-up action will only occur once.<br />
Mode<br />
Return<br />
Automatic Power OFF<br />
ON<br />
OFF<br />
Cartridge Retry<br />
ON<br />
OFF<br />
29
Check 2/4<br />
Running total<br />
Compound<br />
: 2h30m25s Clear<br />
Compound<br />
ON<br />
OFF<br />
When you want to run the Water Pump, or the Compound Pump, touch “ON” to start and “OFF”<br />
to stop them. After priming of the tubing is done they should be OFF for normal machine<br />
operation.<br />
Check 3/4<br />
Running total<br />
Pad #5:<br />
Pad #4:<br />
Pad #3:<br />
Pad #2:<br />
Pad #1:<br />
Pad #0:<br />
20 Count<br />
30 Count<br />
48 Count<br />
48 Count<br />
80 Count<br />
0 Count<br />
Clear<br />
Clear<br />
Clear<br />
Clear<br />
Clear<br />
Clear<br />
30
5.7.2 Warning<br />
This “Warning” screen will be displayed if “Clear” is touched for an item. Touch “OK” when you<br />
want to clear the item selected, and “Cancel” when you don’t.<br />
Warning<br />
Water : 10h15m20s<br />
Are you sure to clear?<br />
OK<br />
Cancel<br />
5.7.3 <strong>Repair</strong> history<br />
Total number of <strong>Disc</strong>s repaired is displayed by the kind of <strong>Disc</strong> and mode, respectively.<br />
*You can’t clear these counts.<br />
Check 4/4<br />
<strong>Repair</strong> history<br />
CD DVD **<br />
Sanding<br />
Deep<br />
Medium<br />
Light<br />
Abrasion<br />
:<br />
:<br />
:<br />
:<br />
:<br />
200 Count<br />
100 Count<br />
150 Count<br />
300 Count<br />
500 Count<br />
31
5.8 Error Messages<br />
They are displayed when an error with the machine happens. ERROR MESSAGES WILL OCCUR<br />
OCCASIONALLY. MANY TIMES THE PROBLEM IS RESOLVED BY REPLACING THE PAD THAT WAS<br />
IN USE AT THE TIME. Sometimes you will want to replace all the pads and reset the pad counters to<br />
zero. Most errors occur due to minor changes in water supply, certain conditions of the disc, condition of<br />
pads, centering of pad on the pad holder, etc. It is not a big problem. The computer electronics monitor<br />
all of the frictions, speeds and pressures. If all of these factors are not exactly what the machine expects,<br />
an error message may result. It does not mean that the machine is broken.<br />
Push the [POWER/PAUSE] Switch after the trouble is settled.<br />
*** ERROR OCCURRENCE! ***<br />
Indications of errors<br />
This number (minus”1”)<br />
is the stage when the<br />
error occurred.<br />
i.e. In this case, the<br />
error occurred during<br />
stage 5 (6-1), the blue<br />
pad.<br />
ERROR CODE: 01-6-05-C072<br />
<strong>Disc</strong> 1/50 Count<br />
CAUTION!<br />
Error messages may appear occasionally, however, if the Error occurs<br />
often, please note ERROR CODE number and contact the sales agency<br />
that unit was purchased or a service center.<br />
32
5.9 Error List<br />
Error Cause How to clear errors<br />
Turret Position<br />
Grabs Position<br />
<strong>Disc</strong> Out Cartridge<br />
<strong>Disc</strong> Loading<br />
<strong>Disc</strong> Release<br />
Splash Cover<br />
Platen Lift Position<br />
Turret Motor doesn’t move<br />
or there is something<br />
interfering with turret<br />
rotation.<br />
Grabs position is unusual<br />
(not what the machine<br />
expects.)<br />
A disc is out of position in the<br />
Cartridge.<br />
Grabs didn’t catch a disc<br />
correctly.<br />
Grabs didn’t place a disc on<br />
Platen table.<br />
There is no Splash Cover or<br />
Splash Cover doesn’t go<br />
down smoothly.<br />
Platen original position is not<br />
detected properly.<br />
Check there is nothing to hinder Turret rotation.<br />
(Ex. gears, Splash Cover)<br />
If Grabs have gripped the disc incorrectly, remove<br />
the disc.<br />
Open the Changer Door and place the discs on<br />
the Stocker correctly.<br />
If the Grabs have the disc incorrectly, remove the<br />
disc.<br />
Remove the disc and clear the error.<br />
If there is no Splash Cover, install it.<br />
If the Splash Cover doesn’t go down smoothly,<br />
check what may hinder its movement and fix it.<br />
Clear the error.<br />
If the error happens again, call a service person.<br />
Cartridge Position<br />
<strong>Disc</strong> Unstoring<br />
Cartridge original position is<br />
not detected properly.<br />
Grabs did not return a disc<br />
into Cartridge.<br />
Check that the Changer Connector is connected<br />
firmly.<br />
Open the Changer Door and check inside the unit<br />
for something that interferes with the Cartridge<br />
system.<br />
If Grabs have the <strong>Disc</strong> incorrectly, remove the<br />
disc.<br />
Any <strong>Disc</strong> Release There is no disc on<br />
Turntable during process.<br />
Check there is no disc on Turntable and clear the<br />
error.<br />
No Sanding Pad<br />
<strong>Disc</strong> Unloading<br />
Sanding Motor<br />
Over Load<br />
Wire Down<br />
Non Stop<br />
Not Ready<br />
Ready<br />
Platen Motor<br />
Turn Lock<br />
There are no Pads on Pad<br />
Holder.<br />
Grabs don’t catch a <strong>Disc</strong><br />
from the Turntable.<br />
Sanding Motor doesn’t work<br />
normally.<br />
Platen Motor doesn’t work<br />
normally. It has slowed<br />
down or stalled for some<br />
reason.<br />
Make sure ALL holders have pads. Center the<br />
pads on the holders.<br />
If Grabs have the disc incorrectly, remove it.<br />
Clear the error.<br />
If the error happens again, call service person.<br />
Clear the error. Change pads.<br />
If the error happens repeatedly, call service<br />
person.<br />
33
Turret Sensor<br />
Sanding Pressure<br />
Lack<br />
Water Leaking<br />
EEPROM<br />
Initialize Error<br />
Load Error<br />
Verify Error<br />
Write Error<br />
Reload Error<br />
Over writing Error<br />
SYSTEM Error<br />
Turret Sensors don’t turn<br />
on/off.<br />
Sanding pressure is<br />
unusual.<br />
Water leaks from Splash<br />
Covers.<br />
Program doesn’t work<br />
usually.<br />
Clear the error.<br />
If the error happens repeatedly, call service<br />
person. Sensors may be dirty.<br />
Change Pads.<br />
Clean Under Splash Cover and all Splash Covers.<br />
Make sure the small, white liquid sensor is free of<br />
water and/or white residue.<br />
Turn OFF and ON Power SW.<br />
Don’t turn OFF and ON Power SW quickly.<br />
34
6. Maintenance<br />
6.1 Supplement Compound<br />
Supplement Compound when “Compound Adding” message appears on Main menu Screen.<br />
Confirm that the bottle is over ¾ filled with Compound before operation.<br />
CAUTION!<br />
If the level of Compound is too low and/or air gets into the Compound tubing, pump out the air from<br />
it completely. If there is air in it, you might get a poor finish on the disc or, at worst, a damaged one.<br />
6.2 Supplement Water<br />
The height of the Polish Water must be higher than the Water Supply Pipe. (Note “Lower Level”<br />
label)<br />
Confirm the height of Polish Water before operation. More water is better than too little water.<br />
Abrasion without supplying Polish Water can cause disc and Pad damage.<br />
Water Level<br />
Water tube<br />
Tip must be below<br />
the water level, and<br />
about 2” above the<br />
bottom of the tank<br />
6.3 Daily maintenance<br />
1) The Drainage Pipe has to be turned facing upward before removing the 1 st tank.<br />
Remove the 1st Tank by pulling the handle and pulling it forwards. Be careful of the funnel.<br />
Drainage<br />
Pipe<br />
35
2) Remove the Pipe assembly and the<br />
first filter.<br />
3) Clean up the Reactor Outer-Pipe with water.<br />
Clean the inside with the brush provided.<br />
But, Do not use a brush on the Outside of the<br />
Outer-Pipe. Use a soft cloth only.<br />
Remove bottom cap<br />
For ease of cleaning<br />
36
4) Clean up the Funnel using brush and water.<br />
5) Put a new 1st Filter in the 1st Tank and turn the end over the top of the Tank.<br />
Expand the inside of the 1st Filter.<br />
6) Pour Polish Water to 1st Tank.<br />
Polish Water is needed! Fill up to the level of the drainage<br />
tube. Make it according to the standard mixture ratio with<br />
Distilled Water and “Solution D”.<br />
37
7) Re-assemble all the parts 8) Install the 1st Tank on top of the 2nd Tank<br />
as they were before.<br />
Make sure that Terminal contact brackets<br />
make firm contact with the inner and outer pipes.<br />
Upper contact<br />
bracket<br />
This collar is<br />
not used on<br />
later models.<br />
See page 16.<br />
Lower contact<br />
bracket<br />
9) Rotate the Drainage Pipe downwards<br />
and put it into the hole of the 2nd Tank.<br />
6.4 Weekly maintenance<br />
Cleaning the machine is necessary to insure continued operation and good performance. Wipe<br />
down all surfaces that accumulate debris and residue from the disc repairing process. This may be done on<br />
weekly basis or on a daily basis. Use your judgment based on the number of discs repaired and the amount<br />
of residue build-up in the machine. A clean machine will always perform better than a dirty one!<br />
Especially, clean up the “Splash Cover” and the “Turntable” with a soft cloth. Also,<br />
clean the hex shaped hole in the middle of the turntable. Using a standard liquid glass<br />
cleaner on the cloth helps.<br />
38
7. Caution<br />
<strong>RTI</strong> Group<br />
4700 Chase Ave. - Lincolnwood - IL - USA - 60712<br />
Phone: 1-800-323-7520<br />
Fax: 1-847-677-1311<br />
CAUTION! Installation on horizontal surface<br />
E-mail: service@rtico.com<br />
CAUTION! Handling of machine<br />
When moving this machine, 1st Tank and 2nd Tank have to be empty.<br />
8. Service<br />
If the Errors occur often, turn the machine OFF and back ON again, replace pads, etc. If the unit still<br />
malfunctions, stop the operation, turn OFF the power switch, and unplug the power plug. Please contact the<br />
sales or service agency for advice.<br />
<br />
(See the production plate attached to this unit)<br />
Model name of product<br />
Serial Number<br />
About Trouble (in as much detail as possible)<br />
Error Code<br />
9. Specifications<br />
EDR Series<br />
Model<br />
ECOMaster<br />
CPU<br />
32bit RISC Microprocessor<br />
320 * 240 dots STN Color-LCD<br />
Operation Panel<br />
and Touch panel<br />
Operation ambient<br />
Temperature range<br />
5 to 35<br />
Operation ambient<br />
Humidity range Below 90%<br />
Power supply (50/60Hz) 100VAC to 240VAC, 250W(MAX)<br />
Dimensions<br />
(W * D * H mm) 472 * 310 * 1023<br />
Weight<br />
Approx. 64.5Kg<br />
39
10.Wiring Diagram<br />
90VAC-260VAC (50/60Hz)<br />
POWER SUPPLY<br />
(26VDC, 5Vsb)<br />
AC INLET (FUSE:250V 6A)<br />
CNPS:5557-08R<br />
MAIN BODY<br />
CNCG:5559-16P<br />
CNOP:5559-04P<br />
CNPS:5559-08P<br />
CNMD:DSub-9<br />
CNET:RJ-45<br />
CNCG:5557-16R<br />
OPTION OUTPUT<br />
RS-232C<br />
Ethernet<br />
CHANGER UNIT<br />
40
CN9:5557-04R<br />
CN5:HIF3BA-50DA-2.54R<br />
CN14:5557-24R<br />
CN12:5557-14R<br />
CN11:5557-12R<br />
STOP SW<br />
CN9:5566-04A<br />
CN7:B4B-XH-A<br />
CN7:XHP-04<br />
CNPS:5559-08P<br />
CN13:5566-08A<br />
CN13:5557-08R<br />
POWER SUPPLY<br />
CNET:RJ-45<br />
CNCG:5557-16R<br />
CN5:HIF3BA-50PA-2.54DSA<br />
CN2:B8B-XH-A<br />
Ethernet<br />
CN2:XHP-08<br />
CNCG:5559-16P<br />
CNMD:DSub-9<br />
CHANGER BLOCK<br />
CN6:B9B-XH-A<br />
RS-232C<br />
CN14:5566-24A<br />
CN6:XHP-09<br />
CNMB:5557-12R<br />
CNLCD:HIF3BA-40PA-2.54DS<br />
CNLCD:HIF3BA-40DA-2.54R<br />
CN12:5566-14A CN5:HIF3BA-40PA-2.54DS<br />
CN5:HIF3BA-40DA-2.54R<br />
CNBLT:B4B-XH-A<br />
CNMB:5559-12P<br />
CN11:5566-12A<br />
BODY BLOCK<br />
CNLT:5557-14R<br />
CNLT:5559-14P<br />
LIFT BLOCK<br />
CNLD:5557-10R<br />
CN3:5557-04R<br />
CN3:5566-04A<br />
CN10:5557-12R CNPW:5557-12R<br />
CN10:5569-12A1 CNPW:5569-12A1<br />
MAIN BOARD<br />
LCD CONTROL BOARD<br />
CNOT:5559-04P<br />
OPTION OUTPUT<br />
CNFPC:FPC-16P<br />
CNBLT:XHP-04<br />
STN COLOR LCD<br />
41<br />
CNLD:5559-10P<br />
LOADING BLOCK<br />
CNSB2:5557-12R<br />
CNSB2:5559-12P<br />
CNSB1:5557-14R<br />
CNSB1:5559-14P<br />
ABRASIVE BLOCK<br />
CNPM:5557-16R<br />
CNPM:5559-16P<br />
PUMP BLOCK
11. Replacement Parts<br />
<br />
Part Name Part No. Specification<br />
Center seal<br />
EDR - EM – A32D<br />
Compound Pump<br />
EDR - EM – F10A<br />
Water Pump<br />
EDR - EJ – N15<br />
Sanding Motor Unit<br />
EDR - EM – C04B<br />
Vacuum Pump<br />
EDR - EM – D58<br />
Vacuum Filter<br />
EDR - EM – D59<br />
Vacuum Pad<br />
EDR - EM – D55E<br />
Stone Filter<br />
EDR – EJ – N58<br />
<br />
Part Name Catalog No. Specification<br />
Pad (BLUE) 10440<br />
Pad (RED) 10442<br />
Pad (GREEN) 10444<br />
Pad (YELLOW) 10446<br />
Pad (BLACK) 10448 Dia. 57mm foam pad<br />
Compound 10450 (750ml)<br />
Solution D 10452 500ml<br />
Al-Pipe 10459 New Outer AL pipe<br />
1st Filter 10456 1pack (20 sheets)<br />
Rev 2.2 2/2005<br />
42