CLX 485/CLX475 SERIES OWNER'S MANUAL - at Uniden
CLX 485/CLX475 SERIES OWNER'S MANUAL - at Uniden
CLX 485/CLX475 SERIES OWNER'S MANUAL - at Uniden

Create successful ePaper yourself
Turn your PDF publications into a flip-book with our unique Google optimized e-Paper software.
<strong>CLX</strong> <strong>485</strong>/<strong>CLX</strong>475<br />
<strong>SERIES</strong><br />
<strong>OWNER'S</strong><br />
<strong>MANUAL</strong>
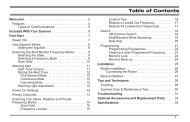
Welcome/Fe<strong>at</strong>ures/Terminology 2<br />
Controls & Functions 4<br />
Setting up the Phone 6<br />
Choose the best loc<strong>at</strong>ion 6<br />
Install the rechargeable<br />
b<strong>at</strong>tery pack 7<br />
Low b<strong>at</strong>tery alert 8<br />
Cleaning the b<strong>at</strong>tery charging<br />
contacts 8<br />
Connect the base and charge the<br />
handset 9<br />
Mounting the Base Unit on a Wall 10<br />
Standard wall pl<strong>at</strong>e mounting 10<br />
Expanding Your Phone 11<br />
Backwards/Forwards<br />
Comp<strong>at</strong>ibility 11<br />
Connect the expansion handset's<br />
charger 12<br />
Register the Handset 12<br />
Register the TCX440 and TCX400<br />
expansion handset to main base 13<br />
Changing the Digital Security Code 14<br />
Installing the Beltclip 14<br />
Optional Headset Install<strong>at</strong>ion 15<br />
Installing <strong>Uniden</strong>'s Cordless Telephone<br />
Customiz<strong>at</strong>ion Tool 15<br />
Using the Interface 17<br />
Example of the standby mode<br />
display 17<br />
Display Icons 18<br />
Soft Key Function 19<br />
Using the joystick 20<br />
Entering text 21<br />
Main Menu Options 22<br />
System Setup Menu 23<br />
Using Your Phone 36<br />
Contents<br />
Making Calls 36<br />
Receiving a call 38<br />
Hanging Up 38<br />
Switching to the Handset<br />
Speakerphone During a Call 38<br />
Moving out of range 39<br />
Call Waiting 39<br />
Call Waiting Deluxe 39<br />
Placing a Call on Hold 40<br />
Conferencing 41<br />
Redialing Calls 42<br />
Adjusting Base Ringer and Speaker<br />
Volumes 43<br />
Using the Handset Volume<br />
Options 44<br />
Mute 45<br />
Mute the Microphone 45<br />
Tone Dialing Switch Over 46<br />
Privacy Mode 46<br />
Find Handset 46<br />
Reminder (Handset only) 47<br />
Using the Phonebook 49<br />
Cre<strong>at</strong>ing and Editing Phonebook<br />
Entries 49<br />
Storing Caller ID or Redial<br />
Numbers in the Phonebook 52<br />
Managing the Phonebook 53<br />
Checking the number of<br />
stored entries 54<br />
Changing the sorting order 54<br />
Naming phonebook groups 55<br />
Making Calls with the<br />
Phonebook 55<br />
Caller ID Fe<strong>at</strong>ures 56<br />
Using the Caller ID List 56<br />
Deleting Caller ID numbers 57<br />
Answering Machine 58<br />
Fe<strong>at</strong>ures 58<br />
Setting Up the Answering<br />
Machine 59<br />
Setting Your Outgoing Greeting 62<br />
Using the Answering Machine 63<br />
Recording a phone convers<strong>at</strong>ion 66<br />
Screening Calls 66<br />
Do Not Disturb (DND) 67<br />
Remote Oper<strong>at</strong>ion 68<br />
Multi-Handset Fe<strong>at</strong>ures 70<br />
Using DirectLink Mode 70<br />
Room/Baby Monitor 71<br />
Intercom 72<br />
Transferring a Call 73<br />
Note on Power Sources 74<br />
Power Failure 74<br />
Optional Power Backup Fe<strong>at</strong>ure 74<br />
B<strong>at</strong>tery replacement and<br />
handling 74<br />
Warning 74<br />
Install the optional power backup<br />
b<strong>at</strong>tery in the base 75<br />
General Inform<strong>at</strong>ion 76<br />
AC Adapter Inform<strong>at</strong>ion 76<br />
B<strong>at</strong>tery Inform<strong>at</strong>ion 76<br />
Troubleshooting 77<br />
System Reset 80<br />
Liquid Damage 81<br />
Precautions & Warranty 82<br />
I.C. Notice 84<br />
Index 85<br />
[1] www.uniden.com
Welcome<br />
Fe<strong>at</strong>ures<br />
Thank you for purchasing a <strong>Uniden</strong> Multi-Handset phone. The USB connection lets<br />
you use your personal computer to edit your phonebook, download schedule<br />
reminders, and even import contacts from Microsoft ® Outlook ® .<br />
Note: Illustr<strong>at</strong>ions in this manual are used for explan<strong>at</strong>ion purposes. Some<br />
illustr<strong>at</strong>ions in this manual may differ from the actual unit.<br />
As an Energy Star ® Partner, <strong>Uniden</strong> has determined th<strong>at</strong> this product or product<br />
models meets the Energy Star ® guidelines for energy efficiency.<br />
Energy Star ® is a U.S. registered mark.<br />
• 5.8GHz Digital Expandable System<br />
• Integr<strong>at</strong>ed Answering system<br />
• Caller ID/Call Waiting Deluxe Options<br />
• Customize Handset Profiles Using Personal Computer<br />
• 100 Phonebook Names (4 Numbers Per Name)<br />
• Downloadable Images<br />
• Recordable Ringer Tones<br />
• Calendar with Schedule Reminder Capability<br />
• B<strong>at</strong>tery Backup During Power Failure (optional)<br />
Welcome/Fe<strong>at</strong>ures/<br />
Terminology<br />
<strong>Uniden</strong> ® is a registered trademark of <strong>Uniden</strong> America Corpor<strong>at</strong>ion. AutoStandby,<br />
DirectLink, IntegriSound and Random Code are trademarks of <strong>Uniden</strong> America.<br />
Microsoft and Windows are either registered trademarks or trademarks of Microsoft<br />
Corpor<strong>at</strong>ion in the United St<strong>at</strong>es and/or other countries.<br />
Welcome/<br />
www.uniden.com<br />
Welcome/Fe<strong>at</strong>ures/Terminology [2]
Terminology<br />
•Standby mode:<br />
•Talk mode:<br />
The handset is not in use. If it is off the cradle, no line has been activ<strong>at</strong>ed. No dial<br />
tone is present.<br />
A telephone line has been activ<strong>at</strong>ed on the handset, enabling a dial tone.<br />
Accessibility<br />
<strong>Uniden</strong> provides a customer service hotline for accessibility questions. If you have a disability and need<br />
customer service assistance or if you have any questions about how <strong>Uniden</strong>'s products can accommod<strong>at</strong>e<br />
persons with disabilities, please call the accessibility voice/TTY line:<br />
1-800-874-9314<br />
Welcome/Fe<strong>at</strong>ures/<br />
A represent<strong>at</strong>ive is available to talk to you M-F, 8:00 am to 5:00 pm, CST. After hours, you can leave us a<br />
message, and we will call you back. Inform<strong>at</strong>ion is also available on our website, www.uniden.com, under<br />
the "Accessibility" link.<br />
[3] Welcome/Fe<strong>at</strong>ures/Terminology www.uniden.com
Controls & Functions<br />
1<br />
2<br />
3<br />
4<br />
5<br />
7<br />
8<br />
9<br />
10<br />
11<br />
15<br />
16<br />
17<br />
18<br />
19<br />
1.New Message LED<br />
2.Volume (up) (P. 44)<br />
3.Volume (down) (P. 44)<br />
4.Talk/flash (P. 36 & 39)<br />
5.Back/hold/intercom (P. 20, 40 & 72)<br />
6. */tone (P. 57 & 46)<br />
7.Ear Speaker<br />
8.Soft menu keys (P. 19)<br />
9.end (P. 38)<br />
10.Joystick (P. 20)<br />
11.Speaker Phone (P. 37)<br />
12.# (P. 57)<br />
13.Handset Microphone<br />
14.Handset Charging Contacts<br />
15.Handset Antenna<br />
16.Beltclip Hole<br />
17.Speakerphone Speaker and Ringer<br />
18.Headset Jack<br />
19.Handset B<strong>at</strong>tery Compartment<br />
20.USB jack<br />
Controls & Functions<br />
6 12<br />
13<br />
14<br />
20<br />
www.uniden.com<br />
Controls & Functions [4]
21 24 25 26 27 28<br />
22<br />
23<br />
29<br />
30<br />
31 42<br />
32<br />
33<br />
34<br />
35<br />
36<br />
37<br />
43<br />
44<br />
21. Base Antenna<br />
22. Base Charge Contacts<br />
23. Base Speaker<br />
24. Back/hold/intercom<br />
(P. 20, 40 & 72)<br />
25. LCD Display<br />
26. Soft Menu keys (P. 19)<br />
27. Phonebook/ (P. 49 & 20)<br />
28. /Speaker Volume Up<br />
(P. 20 & 43)<br />
38 39 40<br />
41<br />
29. Menu/select (P. 20)<br />
30. (Caller ID)/ (P. 20 & 56)<br />
31. /Speaker Volume Down<br />
(P. 20 & 43)<br />
32. (play/stop) (P. 65)<br />
33. (delete) (P. 65)<br />
34. answer on/off (P. 63)<br />
35. Dnd (do not disturb) (P. 67)/<br />
Dnd LED<br />
36. End/find handset (P. 38 & 46)<br />
37. speaker/flash (P. 37 & 39) /<br />
Speaker LED<br />
38. Handset charge LED<br />
39. */tone (P. 46 & 57)<br />
40. # (P. 57)<br />
41. Base Microphone<br />
42. Backup B<strong>at</strong>tery Compartment<br />
43. DC IN 9V Jack<br />
44. TEL LINE Jack<br />
[5] Controls & Functions www.uniden.com
note<br />
For maximum range:<br />
•Do not hold the<br />
handset where you<br />
might block the signal.<br />
Setting up the Phone<br />
Choose the best loc<strong>at</strong>ion<br />
When choosing a loc<strong>at</strong>ion for your new phone, here are some important guidelines<br />
you should consider:<br />
Antenna<br />
Correct<br />
Incorrect<br />
•Metal and reinforced<br />
concrete may affect<br />
cordless telephone<br />
performance.<br />
www.uniden.com<br />
• The loc<strong>at</strong>ion should be close to both a phone jack and a continuous power outlet (one<br />
which is not connected to a switch).<br />
• The base and handset should be kept away from sources of electrical noise such as motors,<br />
Microwave ovens, and fluorescent lighting.<br />
• For better reception, place the base as high as possible.<br />
• The base should be placed in an open area for optimum range and reception.<br />
• If your home has specially wired alarm equipment connected to your phone line, be sure<br />
th<strong>at</strong> installing the system does not disable your alarm equipment.<br />
• If you have questions about wh<strong>at</strong> will disable alarm equipment, contact your telephone<br />
company or a qualified installer.<br />
Setting up the Phone [6]<br />
Setting up the Phone
Install the rechargeable b<strong>at</strong>tery pack<br />
1) Press down on the handset b<strong>at</strong>tery case cover (use the finger indention for a better grip)<br />
and slide the cover downward to remove.<br />
2) Place the b<strong>at</strong>tery pack in the b<strong>at</strong>tery compartment with the connectors on the b<strong>at</strong>tery and<br />
on compartment aligned.<br />
3) Place the b<strong>at</strong>tery case cover back on the handset and slide it upwards until it clicks into<br />
place.<br />
note<br />
Use only the <strong>Uniden</strong><br />
(BT-0003)<br />
rechargeable b<strong>at</strong>tery<br />
pack supplied with<br />
your cordless<br />
telephone.<br />
Setting up the Phone<br />
[7] Setting up the Phone www.uniden.com
note<br />
Low b<strong>at</strong>tery alert<br />
When the b<strong>at</strong>tery pack is very low, the phone is programmed to elimin<strong>at</strong>e functions<br />
in order to save power.<br />
•Even when the b<strong>at</strong>tery<br />
pack is not being used,<br />
it will gradually<br />
discharge over a long<br />
period of time.<br />
•For optimum<br />
performance, be sure<br />
to return the handset<br />
to the cradle after<br />
each telephone call.<br />
•If the handset is left<br />
off the base, the actual<br />
talk mode dur<strong>at</strong>ion will<br />
be reduced respective<br />
to the amount of time<br />
the handset is off the<br />
cradle.<br />
www.uniden.com<br />
The b<strong>at</strong>tery pack needs to be charged when:<br />
- The empty b<strong>at</strong>tery icon appears.<br />
- Low B<strong>at</strong>tery appears in the display.<br />
If the phone is in standby mode, none of the keys will oper<strong>at</strong>e. If<br />
you are on a call, complete your convers<strong>at</strong>ion as quickly as<br />
possible, and return the handset to the cradle.<br />
Cleaning the b<strong>at</strong>tery charging contacts<br />
To maintain a good charge, clean the charging contacts on the handset once a<br />
month. Dampen a cloth with plain w<strong>at</strong>er. Gently rub the damp cloth over the<br />
charging contacts until all visible dirt is removed. Dry the contacts thoroughly<br />
before returning the handset to the cradle.<br />
Caution: Do not use paint thinner, benzene,<br />
alcohol, or other chemical products. Doing so<br />
may discolor the surface of the telephone<br />
and damage the finish.<br />
<br />
<br />
<br />
Setting up the Phone [8]<br />
Setting up the Phone
Connect the base and charge the handset<br />
1) Connect the AC adapter to the DC IN 9V<br />
jack.<br />
Place the base close to the AC outlet to<br />
avoid long extension cords.<br />
2) Connect the AC adapter to a continuous<br />
power supply (i.e., an outlet th<strong>at</strong> is not<br />
controlled by a switch).<br />
3) Place the handset in the base with the<br />
display facing forward.<br />
4) Make sure th<strong>at</strong> the charge LED illumin<strong>at</strong>es.<br />
If the LED does not illumin<strong>at</strong>e, check to see th<strong>at</strong> the AC adapter is plugged in and the<br />
handset makes good contact with the base charging contacts.<br />
5) Charge your handset <strong>at</strong> least 15 hours before plugging into the phone line.<br />
6) Once the handset b<strong>at</strong>tery pack is fully<br />
charged, connect the telephone line cord to<br />
the TEL LINE jack and to a telephone<br />
outlet.<br />
note<br />
•Use only the supplied<br />
AD-0006 AC adapter.<br />
Do not use any other<br />
AC adapter.<br />
•Do not place the power<br />
cord where it cre<strong>at</strong>es a<br />
trip hazard or where it<br />
could become chafed<br />
and cre<strong>at</strong>e a fire or<br />
electrical hazard.<br />
•Don't place the base in<br />
direct sunlight or<br />
subject it to high<br />
temper<strong>at</strong>ures. The<br />
b<strong>at</strong>tery may not charge<br />
properly.<br />
Setting up the Phone<br />
If your telephone<br />
outlet isn't modular,<br />
contact your<br />
telephone company.<br />
[9] Setting up the Phone www.uniden.com
!<br />
DO NOT use an AC<br />
outlet controlled by a<br />
wall switch.<br />
Mounting the Base Unit on a Wall<br />
Standard wall pl<strong>at</strong>e mounting<br />
This phone can be mounted on any standard wall pl<strong>at</strong>e.<br />
1) Plug the AC adapter into the DC IN 9V jack.<br />
2) Plug the telephone line cord into the TEL<br />
LINE jack. Wrap the cord inside the molded<br />
wiring channel as shown.<br />
Mounting the Base Unit on<br />
a Wall<br />
3) Snap the wall mount adapter into the<br />
notches on the base top.<br />
4) Wrap the AC adapter cord and telephone<br />
line cord inside the molded wiring channel<br />
as shown.<br />
5) Plug the AC adapter into a standard 120V<br />
AC wall outlet.<br />
6) Plug the telephone line cord into the<br />
telephone outlet.<br />
7) Align the mounting slots on the base with<br />
the mounting posts on the wall. Then push<br />
in and down until the phone is firmly<br />
se<strong>at</strong>ed.<br />
www.uniden.com<br />
Mounting the Base Unit on a Wall [10]
Expanding Your Phone<br />
Your phone can support a total of<br />
ten handsets. Expansion handsets<br />
do not need to be connected to a<br />
phone jack, and allow you to use<br />
additional fe<strong>at</strong>ures such as<br />
DirectLink Mode and up to 4-way<br />
conference calling. Expansion<br />
handsets need to be registered to<br />
the base before they will oper<strong>at</strong>e.<br />
10 Handsets<br />
Backwards/Forwards Comp<strong>at</strong>ibility<br />
Your phone is comp<strong>at</strong>ible with other <strong>Uniden</strong> 5.8GHz Digital<br />
Expandable Handsets. Comp<strong>at</strong>ible models include the TCX400,<br />
TCX440, ELX500, TCX805, and TCX860. (Please check<br />
www.uniden.com for an upd<strong>at</strong>ed list of expansion handsets<br />
comp<strong>at</strong>ible with this series.)<br />
note<br />
•Advanced fe<strong>at</strong>ures may<br />
not be supported by<br />
older handsets.<br />
•If you have any trouble<br />
with your phone, visit<br />
our web site <strong>at</strong><br />
www.uniden.com or call<br />
our Customer Hotline<br />
(see back cover page).<br />
Expanding Your Phone<br />
[11] Expanding Your Phone www.uniden.com
note<br />
•Use only the supplied<br />
AD-0005 AC adapter.<br />
Do not use any other<br />
AC adapter.<br />
Connect the expansion handset's charger<br />
The handset is powered by a rechargeable<br />
b<strong>at</strong>tery pack. The b<strong>at</strong>tery recharges<br />
autom<strong>at</strong>ically when the handset is placed<br />
in the charger.<br />
1) Connect the AC adapter to the DC IN 9V jack<br />
and to a standard 120V AC wall outlet.<br />
2) Set the charger on a desk or tabletop, and<br />
place the handset in the charger with the<br />
handset facing forward.<br />
3) Make sure th<strong>at</strong> the charge LED illumin<strong>at</strong>es.<br />
If the LED does not illumin<strong>at</strong>e, check to see<br />
th<strong>at</strong> the AC adapter is plugged in and the<br />
handset makes good contact with the<br />
charger charging contacts.<br />
4) Charge the handset b<strong>at</strong>tery pack for <strong>at</strong> least<br />
15 hours before using your new cordless<br />
telephone for the first time.<br />
Expanding Your Phone<br />
•Your phone may be<br />
comp<strong>at</strong>ible with other<br />
<strong>Uniden</strong> 5.8Ghz Digital<br />
Expandable Systems.<br />
Look for the technology<br />
icon on our boxes or<br />
visit our website for a<br />
list of comp<strong>at</strong>ible<br />
models.<br />
www.uniden.com<br />
Register the Handset<br />
Handsets supplied with the phone are registered to the base by the factory. Preregistered<br />
handsets display a handset ID number. Handsets th<strong>at</strong> have not been<br />
registered display MUST place the handset in base to register! Models may vary,<br />
refer to Owners Manual for help. in the LCD. When you register an extra handset<br />
to the base, the handset ID will be assigned. Only one handset can be registered <strong>at</strong><br />
a time.<br />
Expanding Your Phone [12]
Register the TCX440 and TCX400 expansion handset to main<br />
base<br />
Before an expansion handset is registered, the b<strong>at</strong>tery pack MUST be charged for 15<br />
hours.<br />
To register a TCX440 or TCX400 handset, simply place it in the main base.<br />
While the handset is registering, Handset Registering will appear in the LCD. When<br />
Registr<strong>at</strong>ion complete. is displayed, the handset has been registered to the base. If<br />
Registr<strong>at</strong>ion failed. appears, please try these steps again.<br />
Expanding Your Phone<br />
To register a TCX805, TCX860, ELX500 handset, follow the steps below:<br />
1) From the base, press menu/select and select System<br />
Setup menu.<br />
<br />
<br />
0 <br />
2) Select Register Handset, and press menu/select.<br />
<br />
3) On the handset, press and hold # until you hear a beep.<br />
While the handset is registering, Handset Registering will appear in the LCD. When<br />
Registr<strong>at</strong>ion complete. is displayed, the handset has been registered to the base. If<br />
Registr<strong>at</strong>ion failed. appears, please try these steps again.<br />
[13] Expanding Your Phone www.uniden.com
Changing the Digital Security Code<br />
The digital security code is an identific<strong>at</strong>ion code used to connect the handset and<br />
the base unit. Normally, setting the code is not necessary. In the rare situ<strong>at</strong>ion th<strong>at</strong><br />
you suspect another cordless telephone is using the same security code, you can<br />
change the code. To change the digital security code:<br />
1. De-register all the handsets you have (see page 80).<br />
2. Re-register each handset by following the steps on page 13.<br />
Installing the Beltclip<br />
To <strong>at</strong>tach the beltclip<br />
Insert the beltclip into the holes on each side of the handset.<br />
Press down until it clicks.<br />
To remove the beltclip<br />
Pull either side of the beltclip to release the tabs from the<br />
holes.<br />
www.uniden.com<br />
Changing the Digital Security Code [14]<br />
Changing the Digital<br />
Security Code
Optional Headset Install<strong>at</strong>ion<br />
Your phone may be used with an optional headset.<br />
To use an optional headset, insert the headset plug<br />
into the headset jack. Your phone is ready for handsfree<br />
convers<strong>at</strong>ions. (Headsets may be purchased by<br />
calling <strong>Uniden</strong>'s Parts Department (see back cover<br />
page).<br />
Optional Headset<br />
Installing <strong>Uniden</strong>'s Cordless Telephone<br />
Customiz<strong>at</strong>ion Tool<br />
This phone includes <strong>Uniden</strong>'s Cordless Telephone Customiz<strong>at</strong>ion Tool for your<br />
Windows PC. You can use this software applic<strong>at</strong>ion to completely configure your<br />
phone, download pictures for wallpaper, and import contacts from Microsoft ®<br />
Outlook ® .<br />
[15] Optional Headset Install<strong>at</strong>ion www.uniden.com
NOTE: <strong>Uniden</strong>'s Cordless Telephone Customiz<strong>at</strong>ion Tool requires either Microsoft®,<br />
Windows® 98SE, Windows ME, Windows 2000, Windows XP and more than 150MB<br />
free hard drive space.<br />
1) Insert the Cordless Telephone<br />
Customiz<strong>at</strong>ion Tool CD into your<br />
computer's CD-ROM drive. The<br />
install<strong>at</strong>ion applic<strong>at</strong>ion should start<br />
autom<strong>at</strong>ically.<br />
2) If the applic<strong>at</strong>ion doesn't start, go<br />
to the Start menu and select Run.<br />
3) In the window, type d:\autorun.exe<br />
(where d is the letter assigned to<br />
your CD-ROM drive), and click OK.<br />
4) Once the software is installed,<br />
connect the USB cable to the<br />
handset and your PC as shown.<br />
5) Customize your <strong>Uniden</strong> cordless<br />
handset with your personal<br />
preferences.<br />
To the<br />
USB jack<br />
To PC<br />
Installing <strong>Uniden</strong>'s Cordless<br />
Telephone Customiz<strong>at</strong>ion Tool<br />
For complete instructions on using <strong>Uniden</strong>'s Cordless Telephone Customiz<strong>at</strong>ion Tool,<br />
see the help file on the CD-ROM.<br />
www.uniden.com<br />
Installing <strong>Uniden</strong>'s Cordless Telephone Customiz<strong>at</strong>ion Tool [16]
Using the Interface<br />
Example of the standby mode display<br />
•Handset<br />
<br />
B<strong>at</strong>tery icon<br />
D<strong>at</strong>e, Day of the week, and time<br />
<br />
Number of new caller ID calls received<br />
•Base<br />
<br />
<br />
Day of the week and time<br />
0 Number of new caller ID calls received<br />
Number of message<br />
St<strong>at</strong>us if your answering machine<br />
If you do not press a key within 30 seconds, the phone will time out and exit the menu<br />
mode. When setting D<strong>at</strong>e and Time, the time-out period is extended to two minutes.<br />
appears if you have a new message.<br />
appears when the message storage is full.<br />
appears if you set your answering system to announce only.<br />
[17] Using the Interface www.uniden.com
Display Icons<br />
Handset<br />
ICON<br />
Base<br />
-<br />
DESCRIPTION<br />
B<strong>at</strong>tery icons indic<strong>at</strong>e the handset b<strong>at</strong>tery st<strong>at</strong>us. This icon cycles depending on<br />
the b<strong>at</strong>tery st<strong>at</strong>us (empty, low, medium, and full).<br />
Ringer off icon indic<strong>at</strong>es th<strong>at</strong> the ringer is turned off.<br />
Telephone icon indic<strong>at</strong>es th<strong>at</strong> the line is in use.<br />
Mute icon appears when you mute the handset.<br />
- Speaker icon appears when the handset speaker phone is in use.<br />
- Envelope icon appears when a new message is received.<br />
Privacy icon appears when the Privacy Mode is turned on.<br />
Call record icon appears while recording a convers<strong>at</strong>ion.<br />
Using the Interface<br />
www.uniden.com<br />
Using the Interface [18]
Soft Key Function<br />
"Soft" keys are keys th<strong>at</strong> change function during the oper<strong>at</strong>ion of the phone. There are two soft keys on<br />
the handset and base.<br />
The text right above the soft key indic<strong>at</strong>es th<strong>at</strong> key's current function. For example, when the phone is in<br />
standby mode, pressing soft key 2 on the handset makes a selection. When the phone is in talk mode,<br />
pressing soft key 2 brings up the options menu. Complete inform<strong>at</strong>ion on the fe<strong>at</strong>ures controlled by the<br />
soft keys can be found under each fe<strong>at</strong>ure.<br />
In standby mode<br />
Handset<br />
<br />
In talk mode<br />
<br />
<br />
<br />
<br />
Soft key 2 Soft key 2<br />
Base<br />
<br />
<br />
0 <br />
<br />
<br />
0<br />
<br />
<br />
Soft key 2<br />
[19] Using the Interface www.uniden.com
Using the joystick<br />
The joystick makes it easy to use your phone. The four most commonly used<br />
functions are accessible just by moving the joystick.<br />
Handset Remote<br />
View the<br />
phonebook<br />
View the<br />
Caller ID<br />
Joystick<br />
Redial a number<br />
<br />
Highlight the option you want by moving the joystick<br />
up, down, right, or left on the handset, or up or down<br />
on the base. This will move the cursor; the option<br />
currently highlighted appears in reversed out text.<br />
Select the highlighted option by pressing in on the<br />
center of the joystick or the menu/select key on the<br />
base.<br />
To exit the MENU and return to standby, press the end key<br />
on the handset or the end/find handset key on the base.<br />
To go back a level in the menu, press the back/hold/intercom.<br />
Using the Interface<br />
www.uniden.com<br />
<br />
Using the Interface [20]
Entering text<br />
You can use the number keypad on your<br />
phone to enter text by referring to the<br />
letters printed on each number key.<br />
When you press the number key in a text<br />
entry field, the phone displays the first<br />
letter printed on the number key. Press<br />
the number key twice to display the<br />
second letter and three times to display<br />
the third. Capital letters are displayed<br />
first, then lower case letters, then the<br />
number on the key.<br />
If two letters in a row use the same<br />
number key, enter the first letter, then<br />
press the joystick to the right to move<br />
the cursor to the next position to enter<br />
the second letter.<br />
For example, to enter Movies:<br />
1) Press 6 once to enter M.<br />
2) Use joystick, or the right key to move the cursor to the right.<br />
3) Press 6 six times to enter o.<br />
4) Press 8 six times to enter v.<br />
5) Press 4 six times to enter i.<br />
6) Press 3 five times to enter e.<br />
7) Press 7 eight times to enter s.<br />
8) Press the center of the joystick or menu/select on the base to end your text entry.<br />
If you make a mistake while entering a name, use the joystick to move the cursor to the incorrect character. Press<br />
the DELETE soft key to erase the incorrect character, and then enter the correct character.<br />
To delete all characters in the text entry field, press and hold the DELETE soft key.<br />
[21] Using the Interface www.uniden.com
Main Menu Options<br />
On the handset, the options are DirectLink, Room Monitor, Messages, Ringer<br />
Options, Speaker Setup, Display Options, Reminder, and System Setup.<br />
Note:<br />
All of these options can be configured in the Cordless Customiz<strong>at</strong>ion Applic<strong>at</strong>ion.<br />
Handset Main Menu Options<br />
<br />
<br />
DirectLink Room Monitor Messages<br />
Ringer Options Speaker Setup Display Options<br />
Reminder<br />
System Setup<br />
On the base, the options are Rings/Volumes, Caller ID, Redial, Phonebook, Room<br />
Monitor, Record Memo, and System Setup.<br />
www.uniden.com<br />
<br />
<br />
<br />
0<br />
<br />
Main Menu Options [22]<br />
Main Menu Options
System Setup Menu<br />
System Setup<br />
Handset or Base<br />
The following submenu options must be set separ<strong>at</strong>ely for<br />
each handset and the base.<br />
LCD Contrast (For Base)<br />
You can change the contrast of your base display to make<br />
it easier to read. Your phone gives you 10 levels of<br />
contrast to choose from. To adjust the contrast, go to LCD<br />
Contrast. Use the up or right key to increase the contrast<br />
and the down or left key to decrease the contrast. When<br />
you like the level of contrast, press menu/select to<br />
select it.<br />
Key Touch Tone<br />
Key Touch Tone is the tone your keypad makes when keys are<br />
pressed. To turn off the tone, go to Key Touch Tone and select Off.<br />
A confirm<strong>at</strong>ion tone tells you th<strong>at</strong> the tone has been deactiv<strong>at</strong>ed.<br />
0<br />
<br />
<br />
<br />
<br />
<br />
<br />
<br />
<br />
note<br />
Through this section we<br />
use the handset display<br />
screens for examples.<br />
Handset (Base)<br />
(System Setup)<br />
LCD<br />
Contrast<br />
Key Touch<br />
Tone<br />
System Setup Menu<br />
<br />
<br />
[23] System Setup Menu www.uniden.com
(System Setup)<br />
Handset<br />
(Base)<br />
Call<br />
Privacy<br />
Call Privacy<br />
If you don't want other registered handsets or the base to<br />
interrupt you on a call, you can turn on privacy mode. As long<br />
as your handset or the base is in privacy mode, other handsets<br />
won't be able to join your call or make any calls of their own. To<br />
turn on privacy mode, go to Call Privacy and select On. You can<br />
turn on privacy mode when the phone is in standby or when<br />
you're already on a call.<br />
<br />
<br />
<br />
<br />
<br />
System Setup Menu<br />
Language<br />
Language (For Base)<br />
You can change the language the menu display will use.<br />
Choose from English, French, or Spanish. To change the<br />
language, go to Language and select English, Franユais<br />
(French), or Espa ツ ol (Spanish). You hear a confirm<strong>at</strong>ion<br />
tone, and the display will use the selected language.<br />
<br />
<br />
<br />
0<br />
<br />
Auto Talk<br />
Auto Talk (Handset only)<br />
Auto Talk lets you answer the phone by removing the handset<br />
from the cradle. To turn on Auto Talk go to Auto Talk and select<br />
On. A confirm<strong>at</strong>ion tone tells you th<strong>at</strong> Auto Talk is active.<br />
<br />
<br />
<br />
<br />
<br />
www.uniden.com<br />
System Setup Menu [24]
Any Key Answer (Handset only)<br />
Any Key Answer lets you answer the phone by pressing any key<br />
on the number pad. To turn on Any Key Answer, go to Any Key<br />
Answer and select On. A confirm<strong>at</strong>ion tone tells you th<strong>at</strong> Any Key<br />
Answer is active.<br />
<br />
<br />
<br />
<br />
(System Setup)<br />
Any Key<br />
Answer<br />
System Setup Menu<br />
Banner (Handset only)<br />
You can change the name your phone displays on the screen. If<br />
you have more than one handset, you can use the banner name<br />
to identify your handset during handset-to-handset functions<br />
like intercom and DirectLink. Go to Banner Display and enter the<br />
name you want to use. You can use up to 10 characters. Use the<br />
DELETE soft key to delete an existing handset name. Press the<br />
center of the joystick when you're finished.<br />
<br />
<br />
<br />
<br />
<br />
Banner<br />
Display<br />
Unique ID (Handset only)<br />
You can assign special ringer tones to anyone in your<br />
phonebook. When your phone gets a call, it looks up the Caller<br />
ID inform<strong>at</strong>ion in your phonebook; if you assigned a distinctive<br />
ringer and pictures to th<strong>at</strong> number, the phone uses it so you<br />
know who's calling. To turn on distinctive ringing, go to Unique<br />
ID and select On. A confirm<strong>at</strong>ion tone tells you th<strong>at</strong> distinctive<br />
ringing is active.<br />
<br />
<br />
<br />
<br />
<br />
Unique ID<br />
If you don't activ<strong>at</strong>e Unique ID, the phone uses the default picture.<br />
[25] System Setup Menu www.uniden.com
(System Setup)<br />
Global<br />
Global Setup<br />
Global settings apply to all registered handsets and the base. If<br />
you change something under the global menu, you change it for<br />
handsets and the base. Only one handset or the base can change<br />
global settings <strong>at</strong> a time, and you have to make sure the phone<br />
is not currently being used.<br />
<br />
System Setup Menu<br />
<br />
Some fe<strong>at</strong>ures may not be supported by older handsets.<br />
D<strong>at</strong>e &<br />
Time<br />
D<strong>at</strong>e and Time<br />
To change the d<strong>at</strong>e and time shown in the display, go to D<strong>at</strong>e &<br />
Time. Move the cursor up, down, right, or left to highlight the<br />
part you want to change (d<strong>at</strong>e, time, AM/PM). Use the number<br />
keypad, the up or down key, or */tone to change each part.<br />
Press the center of joystick or menu/select on the base when<br />
you finish.<br />
<br />
<br />
<br />
<br />
www.uniden.com<br />
System Setup Menu [26]
Call Waiting<br />
Your phone supports Caller ID with Call Waiting, so you can see the name and<br />
number of someone who calls when you are already on the line. Your phone also<br />
supports Call Waiting Deluxe, which gives you a choice of how you want to handle a<br />
waiting call. You need to subscribe to these fe<strong>at</strong>ures with your phone company<br />
before you can use them.<br />
To let your phone support these fe<strong>at</strong>ures, go to Call Waiting.<br />
Select On, and the phone will display the CallWaitDeluxe screen.<br />
Select On. (You have to turn on Call Waiting before you can turn<br />
on Call Waiting Deluxe.) A confirm<strong>at</strong>ion tone tells you th<strong>at</strong> your<br />
phone is ready to use these fe<strong>at</strong>ures.<br />
<br />
<br />
<br />
(System Setup)<br />
Global<br />
Call<br />
Waiting<br />
System Setup Menu<br />
Area Code<br />
If you can make a call by dialing only 7 digits (instead of 10), you can program your<br />
local area code in your phone. If you get a call from within your area code, you will<br />
only see the 7-digit phone number. If you get a call from outside your area code, you<br />
will see all 10 digits.<br />
<br />
<br />
Area Code<br />
To enter an area code, go to Area Code. Use the number keypad<br />
to enter your 3-digit area code. Press the center of the joystick<br />
or menu/select on the base when you finish.<br />
<br />
<br />
<br />
<br />
[27] System Setup Menu www.uniden.com
(System Setup)<br />
Global<br />
Dial Mode<br />
Dial Mode<br />
Your phone can communic<strong>at</strong>e with the telephone network in two different ways: tone<br />
dialing and pulse dialing. These days, most phone networks use a method called tone<br />
dialing, so your phone comes programmed for tone dialing.<br />
If your phone company uses pulse dialing, you will need to<br />
change your phone's dial mode. There's an easy way to tell: try<br />
making a call. If your call connects, your phone's setting is fine.<br />
If not, go to Dial Mode and select Pulse. A confirm<strong>at</strong>ion tone<br />
tells you th<strong>at</strong> the dial mode has been changed and you can try<br />
making a call again.<br />
<br />
<br />
<br />
<br />
<br />
System Setup Menu<br />
www.uniden.com<br />
System Setup Menu [28]
Setting the Ringer Options<br />
This menu lets you customize ringer or speaker volume settings<br />
on your phone. You can set these options separ<strong>at</strong>ely for the base<br />
and each handset.<br />
<br />
<br />
Ringer Tone<br />
You can set a different ringer for each handset and the base. This phone comes with<br />
10 prerecorded songs and 15 different ringer tones; for the handset you can also<br />
record your own ringer tones (see page 30).<br />
- Songs: Beethoven's Symphony #9 [Beethoven9], For Elise [Elise], Home Sweet Home [Hm<br />
Swt Hm], Lorri Song #6 [Lorri Song], WT Overture (Handset only), Twinkle Star (Handset<br />
only), Je Te Veux (Handset only) When the Irish Eyes Are Smiling [Irish Eyes] (Base<br />
only), Aura Lee (Base only), Let Me Call You Sweet Heart [Sweetheart] (Base only), Star<br />
Spangled Banner [Star Spangl], Old MacDonald [Old MacDld], We Wish You A Merry<br />
Christmas [Merry-Xmas]<br />
- Ringer tones: Flicker, Cl<strong>at</strong>ter, Coin Toss, Synthesize, Finish Line, Soft Alert, Wake Up,<br />
Lighting Bug, Bebop, Tone Board, Chirp, Party Clap, Reminder, Burble, TeleTone,<br />
1) Go to Ringer Tones and highlight the ringer you want. (Each ringer will sound as<br />
you highlight it.)<br />
2) Select a ringer from the list.<br />
3) Press the center of the joystick or menu/select on the base to confirm the setting.<br />
You will hear a confirm<strong>at</strong>ion tone, and the phone will go back to the menu.<br />
(Ringer Options)<br />
(Base:Rings/Volumes)<br />
Ringer Tones<br />
System Setup Menu<br />
[29] System Setup Menu www.uniden.com
(Ringer Options)<br />
(Base:Rings/Volumes)<br />
Unique Ring<br />
Unique Ring Setup (Base Only)<br />
You can assign special ringer tones to anyone in your<br />
phonebook. When your phone gets a call, it looks up the<br />
Caller ID inform<strong>at</strong>ion in your phonebook; if you have<br />
assigned a distinctive ringer to th<strong>at</strong> number, the phone<br />
uses th<strong>at</strong> ring so you know who's calling.<br />
<br />
<br />
<br />
0<br />
<br />
System Setup Menu<br />
To turn on distinctive ringing, go to Unique Ring and select On. A confirm<strong>at</strong>ion tone<br />
tells you th<strong>at</strong> Unique Ring is active.<br />
Rec/Edit<br />
Rings<br />
Customize Your Own Distinctive Ringer Tones (Handset Only)<br />
Your phone can store up to 5<br />
different recordings (a total of<br />
100 seconds) to use as ringer<br />
tones. Each recording must be<br />
less than 20 seconds long.<br />
To the<br />
headset jack<br />
To the<br />
sound source<br />
www.uniden.com<br />
System Setup Menu [30]
Storing Ringer Tones<br />
1) Connect the audio recording cable to the handset and sound source (e.g.stereo<br />
or CD player). Insert one end of the audio recording cable into the handset's<br />
headset jack and the other end into the sound source. You can also simply use<br />
the handset's microphone by holding the handset close to the sound source.<br />
2) Go to Rec/Edit Rings.<br />
3) Select a loc<strong>at</strong>ion from 1-5, and press the OPTIONS soft key.<br />
4) Select Record. To start recording, press the RECORD soft key.<br />
The message counter displays 20 and then begins to count<br />
down.<br />
5) When you are finished recording, press the STOP soft key. The<br />
phone will play the recorded ringer. To re-record the ringer, press<br />
the ReRec soft key while playing the ringer.<br />
6) Enter the title of this ringer (up to 12 digits) using the number<br />
keypad, or the DELETE soft key, right, or left key.<br />
7) Press the center of the joystick. You will hear a confirm<strong>at</strong>ion tone, and Done!<br />
appears.<br />
Playing the Ringer<br />
1) Go to Rec/Edit Rings.<br />
2) Select a ringer to play, and press the OPTIONS soft key.<br />
3) Use the joystick to select Play. To stop, press the center of the<br />
joystick or the STOP soft key.<br />
<br />
<br />
<br />
<br />
<br />
<br />
<br />
<br />
<br />
<br />
System Setup Menu<br />
<br />
[31] System Setup Menu www.uniden.com
Changing Ringer Name<br />
1) Go to Rec/Edit Rings.<br />
2) Select the ringer title you want to change, and press the<br />
OPTIONS soft key.<br />
3) Use joystick or the up/down key to select Change Title.<br />
4) Edit the title of this ringer (up to 12 characters) using the<br />
number keypad, the DELETE soft key, and the right/left keys.<br />
When you are finished, press the center of the joystick. You<br />
will hear a confirm<strong>at</strong>ion tone, and Done! appears.<br />
<br />
<br />
<br />
<br />
System Setup Menu<br />
Delete Ringer<br />
To delete a ringer tone, go to Rec/Edit Rings, and select the<br />
ringer you want to delete. Press OPTIONS soft key. Use the joystick<br />
or the up/down key to select Delete. Select Yes. You will hear a<br />
confirm<strong>at</strong>ion tone, and Deleted! appears. The ringer is deleted<br />
from the list, and the phone stays on the ringer list.<br />
<br />
<br />
<br />
<br />
<br />
You can not delete the ringer if it is currently being used<br />
for the default ringer tone, for a Unique Ring setting, or for a Reminder.<br />
<br />
www.uniden.com<br />
System Setup Menu [32]
Display Settings (Handset Only)<br />
The following submenu options must be set separ<strong>at</strong>ely for each<br />
handset.<br />
<br />
(DisplayOptions)<br />
System Setup Menu<br />
Wall Paper (Handset Only)<br />
Your phone has 34 preset wallpaper/images<br />
to choose from. You can customize or<br />
replace 30 of these images using the<br />
software applic<strong>at</strong>ion CD-ROM supplied with<br />
this phone.<br />
<br />
<br />
<br />
<br />
<br />
<br />
<br />
<br />
<br />
<br />
<br />
Wall Paper<br />
During standby mode, the wallpaper will display on the Handset's LCD Screen. To set<br />
your wallpaper, scroll through Wall Paper options, and press the VIEW soft key.<br />
Press the center of the joystick to activ<strong>at</strong>e the wallpaper of your choice.<br />
• You can download images of your own by using the PC software applic<strong>at</strong>ion CD-ROM.<br />
[33] System Setup Menu www.uniden.com
(DisplayOptions)<br />
Color Scheme<br />
Color Scheme (Color handsets only)<br />
You can change the color of your phone's display. There are 5<br />
different colors to choose from: Sky Blue, Haze Gray, Chic<br />
Purple, Coral Red, and Lime Green.<br />
To change the color of the display, go to Color Scheme and select<br />
the color you want. As you scroll through the options, the phone<br />
displays the highlighted color for you.<br />
<br />
<br />
<br />
<br />
<br />
<br />
<br />
<br />
System Setup Menu<br />
LCD Contrast<br />
LCD Contrast (for the handset)<br />
LCD Contrast adjusts the handset's display. To adjust the<br />
contrast, go to LCD Contrast and use the joystick or the up/<br />
down key to adjust the contrast level you want. A confirm<strong>at</strong>ion<br />
tone tells you the contrast level has been activ<strong>at</strong>ed.<br />
<br />
<br />
<br />
www.uniden.com<br />
System Setup Menu [34]
Anim<strong>at</strong>ion Type (Handset only)<br />
Your phone has 4 different anim<strong>at</strong>ions (Dog, Car, Frog and Abstract) with 7 different<br />
anim<strong>at</strong>ion schemes:<br />
delete done page talk b<strong>at</strong>t-low end unavailable<br />
(DisplayOptions)<br />
Anim<strong>at</strong>ion Type<br />
System Setup Menu<br />
To set your anim<strong>at</strong>ion type, scroll through Anim<strong>at</strong>ion Type<br />
options, and press the VIEW soft key. Press the center of the<br />
joystick to activ<strong>at</strong>e the anim<strong>at</strong>ion type of your choice.<br />
Language (for the handset)<br />
You can change the language the menu display will use. Choose<br />
from English, French, or Spanish. To change the language, go to<br />
Language and select English, Franユais (French), or Espaツol<br />
(Spanish). You will hear a confirm<strong>at</strong>ion tone, and the display<br />
will use the selected language.<br />
<br />
<br />
<br />
<br />
<br />
<br />
<br />
<br />
<br />
<br />
<br />
<br />
Language<br />
<br />
<br />
[35] System Setup Menu www.uniden.com
note<br />
•When you dial the<br />
number from the<br />
handset in standby<br />
mode, hyphens are<br />
inserted between<br />
numbers.<br />
•If the line is already in<br />
use, all registered<br />
handsets and the base<br />
th<strong>at</strong> are not currently<br />
in use will display<br />
InUse.<br />
Using Your Phone<br />
Making Calls<br />
From the Handset<br />
1) Remove the handset from the charging cradle.<br />
2) Press talk/flash.<br />
3) Listen for the dial tone.<br />
4) Dial the number.<br />
OR<br />
1) Remove the handset from the charging cradle.<br />
2) Dial the number.<br />
If you need the phone to pause before dialing more digits (for example, to enter<br />
an access code or extension), press the center of the joystick, and select Pause<br />
Entry from the list. P appears in the display, which represents a 2-second pause.<br />
Using Your Phone<br />
4) Press talk/flash.<br />
www.uniden.com<br />
Using Your Phone [36]
From the Handset Speakerphone<br />
1) Remove the handset from the charging cradle.<br />
2) Press speaker.<br />
3) Listen for the dial tone.<br />
4) Dial the number.<br />
5) When the other party answers, talk into the microphone<br />
loc<strong>at</strong>ed <strong>at</strong> the bottom of the handset.<br />
OR<br />
1) Remove the handset from the charging cradle.<br />
2) Dial the number.<br />
3) Press speaker.<br />
4) When the other party answers, talk into the microphone<br />
in the bottom of the handset.<br />
note<br />
For best performance,<br />
use the speaker<br />
phone in a quiet room<br />
and let the caller<br />
finish speaking<br />
before you speak. If<br />
you or the other party<br />
has difficulty<br />
hearing, adjust the<br />
speaker volume.<br />
Using Your Phone<br />
From the base<br />
1) Press /flash.<br />
2) Listen for the dial tone.<br />
3) Dial the number.<br />
OR<br />
1) Dial the number.<br />
If you need the phone to pause before dialing more digits (for example, to enter<br />
an access code or extension), press the center of the joystick, and select Pause<br />
Entry from the list. P appears in the display, which represents a 2-second pause.<br />
2) Press /flash.<br />
[37] Using Your Phone www.uniden.com
Receiving a call<br />
Handset is in the cradle<br />
Remove the handset from the charging<br />
cradle and press talk/flash.<br />
If Auto Talk is ON, the phone will<br />
autom<strong>at</strong>ically answer the call when you<br />
pick up the handset. (see page 24)<br />
Handset is off the cradle<br />
Press talk/flash.<br />
If Any Key Answer is set to on, you can<br />
also press any key on the number pad to<br />
answer a call.<br />
(see page 25)<br />
From the base<br />
Press /flash.<br />
Hanging Up<br />
From the handset, press end or return the handset to the charging cradle.<br />
From the base, press end/find handset.<br />
Switching to the Handset Speakerphone During a Call<br />
To switch a normal call to the speakerphone, press speaker. To switch from a<br />
speakerphone call to a normal call, press speaker.<br />
Using Your Phone<br />
www.uniden.com<br />
Using Your Phone [38]
Moving out of range<br />
If you move your handset farther from the base unit during a call, you might start<br />
to hear more noise than usual. If you go too far from the base, you will hear a beep<br />
and see No Signal Press HELP. Press the HELP soft key on the display.<br />
Call Waiting<br />
If you hear a call waiting tone while you are on a call, press talk/flash or /flash<br />
on the base to switch to the new call. After a short pause, you will hear the new<br />
caller. Press talk/flash or /flash on the base again to go back to the original<br />
caller.<br />
Call Waiting Deluxe<br />
If you subscribe to Call Waiting Deluxe (CWDX) from your phone<br />
company, you have several different options when you get a call<br />
waiting call. When you hear the call waiting tone, instead of<br />
answering the call, you can press the center of the joystick or<br />
menu/select on the base, or the OPTION soft key, and then<br />
select CallWaitDeluxe. Use joystick or the up/down key or press<br />
1-7 to choose from the following options:<br />
<br />
<br />
<br />
<br />
<br />
<br />
<br />
note<br />
•To scroll through the<br />
help, press the >>|<br />
soft key.<br />
•You must subscribe<br />
through your local<br />
telephone company to<br />
receive Call Waiting or<br />
Caller ID with call<br />
waiting service.<br />
•Your phone can't show<br />
call waiting caller ID<br />
inform<strong>at</strong>ion when a<br />
call is on hold.<br />
•To use CWDX fe<strong>at</strong>ure,<br />
you must set Call<br />
Waiting and<br />
CallWaitDeluxe to On<br />
in the system setup<br />
menu (see page 27).<br />
Using Your Phone<br />
[39] Using Your Phone www.uniden.com
Option Definition Press<br />
Ask to Hold A prerecorded message tells the caller th<strong>at</strong> you will be available<br />
shortly, and the call is place on hold.<br />
1<br />
Tell Busy<br />
A prerecorded message tells the caller you are busy, and the waiting call is<br />
disconnected.<br />
2<br />
Forward The caller is sent to your voice mail box, if available. 3<br />
Answer/Drop 1 Disconnects the first call, and connects to the new caller. 4<br />
Conference Starts a conference call with your first and second callers. 5<br />
Drop First/Drop Last During a conference call, allows you to choose to drop the first or last caller. 6 / 7<br />
Placing a Call on Hold<br />
During a call, press back/hold/int'com, to put the call<br />
on hold. Press talk/flash or /flash on the base to go<br />
back to the call.<br />
<br />
<br />
Using Your Phone<br />
<br />
<br />
0 <br />
www.uniden.com<br />
Using Your Phone [40]
Conferencing<br />
If you have more than one handset, up to four people can particip<strong>at</strong>e in a<br />
conference call.<br />
3-Way Conferencing<br />
• Outside line + Handset + Base (or Handset)<br />
4-Way Conferencing<br />
• Outside line + Handset + Handset + Base<br />
Joining a Conference Call<br />
You can easily join a call already in progress.<br />
From the base<br />
1) Press on the base to join the conference call.<br />
2) To hang up, press end/find handset. The handset(s)<br />
will still be connected to the call.<br />
note<br />
•If you leave a call on<br />
hold for a more than 5<br />
minutes, a warning<br />
tone sounds and Hold<br />
Reminder! Answer<br />
held line appears,<br />
and the line will<br />
disconnect in 15<br />
seconds.<br />
•If someone is using<br />
another handset or<br />
base in Privacy Mode,<br />
Unavailable<br />
appears in the display,<br />
and you cannot join<br />
the call.<br />
Using Your Phone<br />
[41] Using Your Phone www.uniden.com
From the handset<br />
1) Press talk/flash or speaker on the handset to join<br />
the call.<br />
2) To hangup, return the handset to the cradle or press<br />
end on the handset. The base or other handset will<br />
still be connected to the call.<br />
note<br />
•Each redial record can<br />
store up to 32 digits.<br />
•To store redial numbers<br />
in the Phonebook, see<br />
page 52.<br />
Invite someone to a conference<br />
Press back/hold/intercom or hold/intercom/back on<br />
the base. Select the handset or the base to ask joining<br />
the conference.<br />
On the receiving party, press talk/flash or speaker, or on the base to answer the<br />
page. Press talk/flash or speaker, or on the base to join the conference.<br />
The initi<strong>at</strong>e handset or base returns to standby mode. press talk/flash or speaker,<br />
or on the base to join the conference.<br />
Redialing Calls<br />
You can quickly redial the last 20 phone numbers dialed<br />
from each handset and 10 numbers from the base.<br />
With the phone in standby mode, slide the joystick down<br />
(or press menu/select, and then select Redial on the<br />
base). This brings up the redial list. Use the joystick or<br />
up/down key to scroll through the numbers, and select<br />
the number you want to dial.<br />
Press talk/flash (or speaker,) or /flash on the base to dial the selected number.<br />
Using Your Phone<br />
www.uniden.com<br />
Using Your Phone [42]
You can also display the redial list with the phone in talk mode. After selecting the<br />
number, press the DIAL soft key to dial the number.<br />
Deleting Redial Records<br />
If you want to delete a phone number from the redial list, go to the redial list in<br />
standby mode, and select the number you want to delete. Press the OPTIONS soft<br />
key, and select Delete Selection, and then Yes. Press the center of the joystick or<br />
menu/select on the base. If you want to delete all the redial records, select Delete<br />
All, and then Yes. Press the center of the joystick or menu/select on the base.<br />
Rings/Volumes<br />
Using Your Phone<br />
Adjusting Base Ringer and Speaker Volumes<br />
Adjusting the base ringer volume<br />
You can choose from three ringer settings on the base: off,<br />
low, and high. When the phone is in standby mode, go to<br />
Rings/Volumes menu, and then select Ringer Volume. Use the<br />
up/down key to select the ringer volume, and then press<br />
menu/select. You will here a confirm<strong>at</strong>ion tone.<br />
Adjusting the base speaker volume<br />
You can adjust the volume of the speaker during a call. Press the up/down during a call<br />
to choose one of the 10 volume levels.<br />
You can also set the speaker volume from the menu. Go to Rings/Volumes menu, and<br />
then select Speaker Volume. Use the up/down key to select the speaker volume, and<br />
then press menu/select. You will hear a confirm<strong>at</strong>ion tone.<br />
Ringer Volume<br />
Speaker Volume<br />
[43] Using Your Phone www.uniden.com
Using the Handset Volume Options<br />
Ringer: Adjust the handset ringer volume<br />
You can choose from three different ringer<br />
volume settings on your handset: off, low,<br />
and high. When the phone is in standby<br />
mode, go to the Ringer Options menu, and<br />
then select Ringer Volume. Use the joystick<br />
to select the ringer volume, and press the<br />
center of the joystick. You will hear a<br />
confirm<strong>at</strong>ion tone.<br />
Earpiece speaker:<br />
You can choose from six volume levels for the<br />
earpiece speaker. To adjust the volume, go to<br />
Speaker Setup menu, and select Earpiece<br />
Volume and select the volume level you want<br />
to use.<br />
<br />
<br />
<br />
<br />
<br />
<br />
<br />
<br />
Using Your Phone<br />
You can also adjust the earpiece volume<br />
during a call by pressing the or keys on<br />
the side of the handset to make it louder or<br />
softer.<br />
<br />
<br />
www.uniden.com<br />
Using Your Phone [44]
Speaker: Adjust the handset speaker volume<br />
You can choose from six volume levels for the handset<br />
speakerphone. To adjust the speaker volume, go to Speaker Setup<br />
menu, and select Speaker Volume, and then select the volume level<br />
you want to use.<br />
You can also adjust the handset speaker volume during a call by<br />
pressing the or key on the side of the handset to make it<br />
louder or softer.<br />
<br />
<br />
<br />
(Speaker Setup)<br />
Speaker Volume<br />
Using Your Phone<br />
Audio Tone<br />
If you aren't s<strong>at</strong>isfied with the audio quality of your phone, you<br />
can adjust the Audio Tone of the earpiece. Your phone gives you<br />
three audio tone options: low, n<strong>at</strong>ural or high. Go to Speaker<br />
Setup menu, and select Audio Tone and select the option th<strong>at</strong><br />
sounds best to you.<br />
(Audio tone adjustments only apply to the earpiece, not the<br />
speakerphone.)<br />
<br />
<br />
<br />
Audio Tone<br />
Mute<br />
While the handset is ringing, you can mute the handset ringer for this call by<br />
pressing end on the handset. To mute the base ringer, press or end/find<br />
handset on the base. The phone will ring as normal on the next call.<br />
Mute the Microphone<br />
When you're on the phone, press the center of the joystick or menu/select on the base and<br />
select Mute to turn off the microphone so the caller will not hear you. The display shows<br />
Mute On while the microphone is muted. To turn off muting, repe<strong>at</strong> the above step again.<br />
[45] Using Your Phone www.uniden.com
Tone Dialing Switch Over<br />
If your telephone company uses pulse dialing, you can<br />
switch over to tone dialing after the call connects. This<br />
fe<strong>at</strong>ure is useful when you need tone dialing to use any<br />
autom<strong>at</strong>ed menu systems, such as autom<strong>at</strong>ed banking,<br />
prescription refill lines, customer support menus, etc.<br />
If your phone is set to pulse dialing mode, make your call<br />
normally. Once your call connects, press<br />
*/tone on the<br />
handset or base. Any digits you enter from then on will be sent as tone digits.<br />
When this particular call ends, the phone autom<strong>at</strong>ically returns to pulse dialing<br />
mode.<br />
Privacy Mode<br />
Privacy mode prevents interruption from other registered<br />
handsets or the base. This works only when the phone is in use.<br />
While on a call, press the OPTIONS soft key on the handset or<br />
base. Use the joystick or the up/down key to select Call<br />
Privacy. Privacy Mode On appears in the display. To exit Privacy<br />
Mode, use the same procedure. Privacy Mode Off appears.<br />
Find Handset<br />
To loc<strong>at</strong>e the handset, press end/find handset. on the base<br />
when the phone is in standby mode. Select the handset to<br />
page. The handset beeps for 60 seconds, and Paging appears<br />
on the handset display. To cancel paging, press any key on<br />
the handset or end/find handset on the base.<br />
<br />
<br />
<br />
<br />
<br />
<br />
Using Your Phone<br />
www.uniden.com<br />
Using Your Phone [46]
Reminder (Handset only)<br />
The D<strong>at</strong>e & Time must be set to use the Calendar fe<strong>at</strong>ures. To set the D<strong>at</strong>e &<br />
Time, scroll to Global System Setup options. (see page 26.)<br />
!<br />
Your phone has a built-in calendar th<strong>at</strong> you can use to schedule<br />
reminders and appointments (all the way through December 31,<br />
2099). You can set alarms for up to 30 different events.<br />
A pop-up screen appears and a reminder tone sounds when the<br />
scheduled time & d<strong>at</strong>e arrives. To show detailed info on the<br />
reminder, press the VIEW soft key. To mute the reminder tone,<br />
press the MUTE key.<br />
<br />
<br />
Using Your Phone<br />
To reset the reminder and clear the screen, press end when the reminder tone stops.<br />
To dismiss Reminder display press DISMISS appears. Press the DIMISS soft key. The<br />
phone returns to standby mode.<br />
Scheduling a reminder<br />
Select the reminder option to show Reminder (Calendar). Today<br />
is highlighted. If the reminder is set for the morning, a bar<br />
appears in the lower left of the d<strong>at</strong>e number; if the reminder is<br />
set for the afternoon or evening, a bar appears in the lower<br />
right of the d<strong>at</strong>e number. Use up, down, right or left key to<br />
move the cursor to the desired d<strong>at</strong>e.<br />
<br />
<br />
<br />
<br />
[47] Using Your Phone www.uniden.com
1) Press the center of the joystick to select a d<strong>at</strong>e.<br />
<br />
2) Press the STORE soft key to add a reminder.<br />
3) Press the center of the Joystick to set the d<strong>at</strong>e and time. <br />
4) Use the number keypad or<br />
*/tone to select the hours and<br />
minutes. Press the center of the joystick when you finish.<br />
5) To change the title, select and press the center of the joystick.<br />
Use the number keypad, left, right key, and the DELETE soft key.<br />
<br />
Press the center of the joystick when you finish.<br />
6) If you want to set recurrence, select , and press the center of the joystick.<br />
Select the frequency (None, Daily, Weekly, Monthly, Yearly) from the list. Press<br />
the center of the joystick when you finish.<br />
7) If you want your phone to ring when this reminder occurs, move to the line<br />
indic<strong>at</strong>ed by , and press the center of the joystick. Select the ringer tone you<br />
want the phone to use. Press the center of the joystick when you finish.<br />
8) To enter a reminder text for this reminder, select and press the center of the<br />
joystick. Edit Message appears. You can enter up to 80 characters. Press the<br />
center of the joystick when you finish.<br />
9) When everything is correct, press the DONE soft key.<br />
Editing and deleting reminders<br />
You can edit reminders by pressing the SCHEDULE soft key and<br />
selecting the reminder by pressing the OPTIONS key. Once the<br />
reminder is selected, you can edit the d<strong>at</strong>e, time, reminder tone,<br />
and text the same way you entered them for a new entry.<br />
To delete reminders, select the reminder and press the OPTIONS<br />
soft key. Select Delete Selection. To delete all reminders, select<br />
Delete All.<br />
<br />
<br />
<br />
<br />
Using Your Phone<br />
www.uniden.com<br />
Using Your Phone [48]
Using the Phonebook<br />
Your phone lets you store up to 100 entries in each handset and base. You can store<br />
up to 4 phone numbers for each name in your phonebook (for a total of 400<br />
numbers), and you can assign names to groups for easy searching. You can store a<br />
distinctive ringer tone and picture display, to each name or group.<br />
You can enter your phonebook by sliding the<br />
joystick to the left (or by pressing the phonebook<br />
key on the base).<br />
Using the Phonebook<br />
Cre<strong>at</strong>ing and Editing Phonebook Entries<br />
Enter the phonebook menu and press the STORE soft key for the first entry. From<br />
the 2nd entry, enter the phonebook menu and then the OPTIONS soft key. Select<br />
New Entry to store, or Edit Selection to edit the loc<strong>at</strong>ion. Enter as much of the<br />
inform<strong>at</strong>ion as you want. Press the center of the joystick or menu/select to enter<br />
each entry and confirm the selection. When you finish, press the DONE soft key to<br />
save this phonebook entry.<br />
[49] Using the Phonebook www.uniden.com
note<br />
You can save up to 4<br />
numbers for each<br />
phonebook entry. You'll<br />
have to delete one of<br />
the existing numbers<br />
before you add a new<br />
one.<br />
www.uniden.com<br />
Step 1: Name /<br />
Select , (or on the base) and use the keypad to<br />
enter the name for this entry. You can enter up to 16<br />
characters. If you don't want to enter a name, your<br />
phone will store this entry as No Name. Press the center<br />
of the joystick or menu/select when you finish, and your<br />
phone will go back to the current phonebook entry.<br />
Step 2: Number /<br />
Select , (or on the base) and enter a phone<br />
number for this entry. If you need your phone to pause<br />
between digits when it's dialing (for example, to enter an<br />
extension or an access code), press the PAUSE soft key<br />
to insert a two-second pause. You'll see a P in the<br />
<br />
<br />
<br />
<br />
<br />
<br />
<br />
<br />
<br />
<br />
<br />
<br />
display. You can stack more than one pause together if two seconds is not long<br />
enough. Each pause counts as one digit; you can enter up to 20 digits for the<br />
phone number. Press the center of the joystick or menu/select when you finish, and<br />
your phone will go back to the current phonebook entry.<br />
You can select an icon to remind you which number this is: home , , work ,<br />
, mobile , , or general phone number. , Press the center of the joystick<br />
or menu/select when you finish.<br />
Step 3: Unique Ring /<br />
Select , (or on the base) to <strong>at</strong>tach a special ring to this entry. Select the<br />
ringer tone you want the phone to use when this person calls, or select No<br />
Selection to have the phone use its regular ringer tone. Press the center of the<br />
joystick or menu/select on the base when you finish, and your phone will go back<br />
to the current phonebook entry.<br />
0<br />
Using the Phonebook [50]<br />
Using the Phonebook
Step 4: Unique Display (Handset only)<br />
Select to <strong>at</strong>tach a special screen display to this entry. Select the display you<br />
want the phone to use when this person calls, or select No Selection to have the<br />
phone use its regular display. You can press the VIEW soft key to see the display<br />
choices.<br />
Press the center of the joystick when you finish, and your phone will go back to the<br />
current phonebook entry.<br />
Using the Phonebook<br />
Step 5: Phonebook Group /<br />
Select , (or on the base) to place this entry into a phonebook group. Select<br />
the group (0-9) you want this entry to belong to, or select No Selection to leave<br />
the entry outside of any group. Press the center of the joystick or menu/select<br />
when you finish, and your phone will go back to the current phonebook entry. See<br />
page 55 for inform<strong>at</strong>ion on cre<strong>at</strong>ing and editing groups.<br />
Step 6: Speed Dial /<br />
Select 0-9 to save this number to one of the 10 speed dial numbers or No Selection<br />
if you don't want to save it to a speed dial number. If a phone number already<br />
exists for the speed dial number you select, your phone will ask if you want to<br />
overwrite the number. Press the center of the joystick or menu/select when you<br />
finish, and your phone will go back to the current phonebook entry.<br />
[51] Using the Phonebook www.uniden.com
Storing Caller ID or Redial Numbers in the Phonebook<br />
You can store Caller ID or redial numbers in your phonebook so you can use them<br />
l<strong>at</strong>er. Go to the Caller ID list or redial list and select the number you want to store.<br />
(If the Caller ID inform<strong>at</strong>ion did not include the number, then you will not be able<br />
to store it.)<br />
1) With the phone in standby mode, go to the Caller ID list or redial list and select<br />
the number you want to store.<br />
2) Press OPTIONS soft key, and then select Add to Phonebook.<br />
3) Use the joystick or the up/down key to select New Entry to enter a new<br />
phonebook loc<strong>at</strong>ion. If you want to add a number to the existing phonebook<br />
loc<strong>at</strong>ion, select Store & Edit, and then select a loc<strong>at</strong>ion to edit.<br />
4) Enter each entry and confirm the selection by following the steps in pages 50-51.<br />
www.uniden.com<br />
Storing and Editing Numbers from the Dial Oper<strong>at</strong>ion<br />
1) With the phone in standby mode, enter the number to store using the number<br />
keypad.<br />
2) Press the center of the joystick or menu/select and select Add to Phonebook.<br />
3) Use the joystick or the up/down key to select New Entry to enter a new<br />
phonebook loc<strong>at</strong>ion. If you want to add a number to the existing phonebook<br />
loc<strong>at</strong>ion, select Store & Edit, and then select a loc<strong>at</strong>ion to edit.<br />
4) Enter each entry and confirm the selection by following the steps in pages 50-<br />
51.<br />
Using the Phonebook [52]<br />
Using the Phonebook
Managing the Phonebook<br />
With the OPTIONS soft key, you can delete phonebook entries, copy entries to<br />
another handset or base, check how many empty phonebook and speed dial entries<br />
you have available, sort your phonebook by groups, and name phonebook groups.<br />
Deleting phonebook entries<br />
Go to the phonebook and select the entry you want to delete. Press the OPTIONS<br />
soft key and select Delete Selection. Your phone will ask you to confirm, select Yes.<br />
To delete all the entries from your phonebook, go to the phonebook and press the<br />
OPTIONS soft key without selecting an entry. Select Delete All. Your phone will ask<br />
you to confirm, select Yes.<br />
Copying phonebook entries to another handset<br />
Note: When you copy entries to another handset or base, the group and speed dial<br />
inform<strong>at</strong>ion won't be transferred. Your phone will cancel the copying process<br />
if any one of the following occurs:<br />
Using the Phonebook<br />
-- If the handset you are copying to does not have enough memory (the phone will show<br />
"Not enough memory in receiving unit").<br />
-- A call comes in during the copying process.<br />
[53] Using the Phonebook www.uniden.com
To copy a single entry, go to the Phonebook and select the entry<br />
you want to copy. Press the OPTIONS soft key and then select<br />
Copy Selection. Select the handset or base you want to copy the<br />
entry to. Your phone will ask you to confirm, select Yes.<br />
To copy all the phonebook entries, go to the phonebook and<br />
press the OPTIONS soft key without selecting an entry. Select<br />
Copy All. Select the handset or base you want to copy the entry<br />
to.<br />
<br />
<br />
<br />
<br />
<br />
<br />
<br />
www.uniden.com<br />
Checking the number of stored entries<br />
To see how many phonebook entries you have, go to the<br />
phonebook and press the OPTIONS soft key and select PhoneBk<br />
Capacity. The phone will show you how many stored names<br />
(entries) and how many stored phone numbers (total) you have.<br />
To see your speed dial entries, go to the phonebook and press the<br />
OPTIONS key and select Check Dial. The phone will show you<br />
which speed dial slots have phone numbers stored in them.<br />
<br />
<br />
<br />
<br />
<br />
<br />
<br />
<br />
Changing the sorting order<br />
To change the sorting order of your phonebook entries, go to the phonebook and<br />
press the OPTIONS soft key and select Sort.Then select Alphabetically by pressing<br />
the center of the joystick or menu/select on the base to see the list of names in<br />
alphabetical order; select Group by pressing the center of the joystick or menu/<br />
select on the base to see the list of groups in alphabetical order. For alphabetical<br />
order, enter a letter from the keypad to jump to the first entry beginning with th<strong>at</strong><br />
letter.<br />
Using the Phonebook [54]<br />
Using the Phonebook
Naming phonebook groups<br />
Your phone comes with 10 groups to help you organize<br />
phonebook. You can name groups things like "Family" or<br />
"Friends" or "Softball team" to let you find entries in your<br />
phonebook more quickly.<br />
<br />
<br />
<br />
<br />
<br />
<br />
Follow the steps below to name a group:<br />
<br />
1) Go to the Phonebook and select the OPTIONS soft key.<br />
2) Scroll down to Edit Group Name and press the center of the<br />
joystick or menu/select on the base.<br />
3) Scroll down to the group number you want to edit, and press the center of the<br />
joystick or menu/select on the base.<br />
4) Use the number keypad to enter a name for this group. Press the center of the<br />
joystick or menu/select on the base when finished.<br />
<br />
Making Calls with the Phonebook<br />
To call someone in your phonebook, go to the phonebook and select th<strong>at</strong> person's<br />
phonebook entry and press the center of the joystick or menu/select on the base.<br />
Select the number (one of the four available) th<strong>at</strong> you want to call, and then press<br />
talk/flash, speaker or /flash on the base. You can also dial the number with the<br />
phone in talk mode. After select number, press the DIAL soft key. The phone will<br />
dial the number <strong>at</strong> the top of the list.<br />
Using the Speed Dial<br />
With the phone in standby mode, press and hold the number of the speed dial entry you<br />
want to call until the phonebook entry appears. Select the number (one of the four<br />
available) th<strong>at</strong> you want to call, and then press talk/flash, speaker on the handset or<br />
/flash on the base.<br />
[55] Using the Phonebook www.uniden.com<br />
Using the Phonebook
Caller ID Fe<strong>at</strong>ures<br />
If you subscribe to Caller ID from your phone company,<br />
your phone will show you the caller's phone number and<br />
name (if available) whenever a call comes in.<br />
If you subscribe to both Call Waiting and Caller ID the<br />
phone also shows you the name and the number of any<br />
incoming calls when you are already on the phone with a<br />
caller.<br />
<br />
<br />
<br />
<br />
<br />
<br />
Caller ID Fe<strong>at</strong>ures<br />
Using the Caller ID List<br />
You can store up to 100 Caller ID numbers in each<br />
handset or the base. To see the Caller ID list, slide<br />
the joystick to the right (or by pressing the Caller ID<br />
key on the base). The phone will show the Caller ID<br />
list. You can use the joystick or the up/down key to<br />
scroll through the list, or you can enter a letter with<br />
the keypad to jump to the first caller ID name th<strong>at</strong><br />
starts with th<strong>at</strong> letter.<br />
<br />
<br />
<br />
0<br />
<br />
www.uniden.com<br />
Caller ID Fe<strong>at</strong>ures [56]
If you want to see how many Caller ID numbers are stored in<br />
your phone, slide the Joystick to the right or press the Caller ID<br />
key on the base, and then the OPTIONS soft key. Select CID<br />
Capacity.<br />
<br />
<br />
<br />
<br />
<br />
Calling someone from the Caller ID list<br />
Go to the Caller ID list and select the number you want to call.<br />
<br />
If you need to add a "1" to the number for a long distance call,<br />
press<br />
*/tone. If you need to add your saved area code to the number, press #. Then<br />
press talk/flash or speaker on the handset, or /flash on the base.<br />
note<br />
When you delete a Caller<br />
ID number, you delete it<br />
permanently from the<br />
caller id list.<br />
Caller ID Fe<strong>at</strong>ures<br />
Deleting Caller ID numbers<br />
To delete only one Caller ID number, go to the Caller ID list and select the number<br />
you want to delete. Press the OPTIONS soft key, and select Delete Selection. When<br />
the phone asks you to confirm, select Yes.<br />
To delete all the Caller ID numbers, go to the Caller ID list and press the OPTIONS<br />
soft key. Select Delete All. When the phone asks you to confirm, select Yes.<br />
[57] Caller ID Fe<strong>at</strong>ures www.uniden.com
Answering Machine<br />
The phone has a built-in answering machine th<strong>at</strong> answers and records incoming<br />
calls. You can also use your answering machine to record a convers<strong>at</strong>ion, leave a<br />
voice memo message, or announce a special outgoing message to callers when you<br />
are away from your phone.<br />
Fe<strong>at</strong>ures<br />
• Digital Tapeless Recording<br />
• Up to 12 minutes of Recording Time<br />
• Call Screening<br />
• Personal or Prerecorded Outgoing Messages<br />
• Voice Prompts (English, Spanish, or French)<br />
• Time and Day Announcement<br />
• Remote Message Retrieval<br />
• Toll Saver<br />
• Convers<strong>at</strong>ion Recording<br />
•Voice Memo<br />
• Message Alert On/Off<br />
• Retrieve Messages Using Handset<br />
• Do Not Disturb<br />
• Hands-free Speakerphone<br />
Answering Machine<br />
www.uniden.com<br />
Answering Machine [58]
Setting Up the Answering Machine<br />
To access the answering machine settings, go to the<br />
System Setup Menu and select Answer Machine.<br />
<br />
Answering Machine<br />
<br />
Security Code<br />
If you want to call in and get your messages when you are away<br />
from home, you will have to set a security code. Go to Answer<br />
Machine and select Security Code. Use the keypad to enter a<br />
two-digit number (01-99), and press the center of the joystick<br />
or menu/select on the base when you finish. A confirm<strong>at</strong>ion<br />
tone tells you the security code has been saved.<br />
<br />
<br />
<br />
0<br />
<br />
<br />
<br />
<br />
(System Setup)<br />
Answer<br />
Machine<br />
Security<br />
Code<br />
[59] Answering Machine www.uniden.com
(System Setup)<br />
Answer<br />
Machine<br />
Ring Time<br />
Record Time<br />
Ring Time<br />
You can set the number of times the phone will ring before the<br />
machine answers the call. Go to Answer Machine and select Ring<br />
Time. Then select the number of times you want the phone to<br />
ring; choose from 2, 4, or 6 times. The Toll Saver fe<strong>at</strong>ure makes<br />
the answering machine answer after two rings if you have new<br />
messages and after four rings if you don't. With the Toll Saver<br />
fe<strong>at</strong>ure, the answering machine answers after two rings when<br />
you have new messages and four rings when you have none. If<br />
you call long distance to check your messages, Toll Saver lets you hang up after<br />
three rings and not get charged for the call.<br />
Record Time<br />
You can set how long a caller has to leave a message before the<br />
answering machine hangs up. Go to Answer Machine and select<br />
Record Time. Then select the maximum length of messages;<br />
choose from 1 minute or 4 minutes. With the Announce Only<br />
fe<strong>at</strong>ure, the answering machine will answer the call, but it will<br />
not allow callers to leave a message. When the Announce Only<br />
fe<strong>at</strong>ure is on, will appear on the base.<br />
<br />
<br />
<br />
<br />
<br />
<br />
<br />
<br />
<br />
<br />
<br />
<br />
<br />
Answering Machine<br />
www.uniden.com<br />
Answering Machine [60]
Message Alert<br />
If you want the answering machine to beep every 15 seconds on<br />
the base whenever you have unheard messages, turn on the<br />
message alert tone. Go to Answer Machine and select Message<br />
Alert. Select On. A confirm<strong>at</strong>ion tone tells you the setting has<br />
been saved.<br />
The message alert turns off autom<strong>at</strong>ically after you listen to all<br />
your new messages. You can also turn off the message alert by<br />
pressing any key on the base.<br />
Language<br />
To change the language of your answering machine's voice<br />
prompts and pre-recorded greetings, go to Answer Machine and<br />
select Language. Select English, Fran ユ ais (French), or Espa ツ ol<br />
(Spanish).<br />
<br />
<br />
<br />
<br />
<br />
<br />
<br />
<br />
<br />
(System Setup)<br />
Answering<br />
Machine<br />
Message Alert<br />
Language<br />
Answering Machine<br />
<br />
Call Screen<br />
If you want to be able to listen to the caller's message on the<br />
base before you answer, turn on the call screen fe<strong>at</strong>ure. Go to<br />
Answer Machine and select Call Screen. Select On to turn on call<br />
screening.<br />
<br />
<br />
<br />
<br />
Call Screen<br />
<br />
<br />
[61] Answering Machine www.uniden.com
(System Setup)<br />
Answering<br />
Machine<br />
Setting Your Outgoing Greeting<br />
Your answering machine comes with a prerecorded greeting: "Hello. No one is<br />
available to take your call. Please leave a message after the tone." You can use this<br />
greeting, or you can record your own.<br />
Record<br />
Greeting<br />
• To finish the recording, press end.<br />
• You will hear a beeping tone while you set record greetings and play messages from<br />
the handset.<br />
• Your own greeting must be more than 2 seconds and less than 30 seconds.<br />
Recording a greeting<br />
From the base<br />
To record your own greeting, make sure the phone is in standby mode. Go to Record<br />
Greeting, and then press menu/select. Press the START soft key. After the<br />
answering machine says, "Record greeting," you can start recording. The message<br />
counter displays 30 and then begins to count down. When you finish, press the<br />
STOP soft key. The answering machine will play back your greeting.<br />
From the handset<br />
Slide the Joystick up. Press /8. After the answering machine says, "Record<br />
greeting", you can start recording. When you finish, press the /8 key.<br />
Answering Machine<br />
Greeting<br />
Options<br />
Choosing a greeting<br />
From the base<br />
To choose between the two greetings, first make sure the phone is in standby mode.<br />
Go to GreetingOptions, and then press menu/select. The greeting currently being<br />
used will be played. If you want to use the other greeting, press the CHANGE soft<br />
key.<br />
www.uniden.com<br />
Answering Machine [62]
If you want to delete personal recorded, press the DELETE soft key while the<br />
greeting is playing (You can not delete the prerecorded greeting.)<br />
From the handset<br />
Slide the Joystick up.<br />
Press /6. The greeting currently being used will be played. If you want to use<br />
the other greeting, press the key again.<br />
Answering Machine<br />
If you want to delete personal recorded, press the<br />
(You can not delete the prerecorded greeting.)<br />
/4 while the greeting is playing<br />
Using the Answering Machine<br />
Turning On the Answering Machine<br />
You can turn on/off the machine using the handset remote function. Slide the<br />
Joystick up. Press /9. Each time the key is pressed the answering machine<br />
switches between On and Off.<br />
From the base, with the phone in standby mode, press answer on/off. MESSAGE<br />
appears on the display. If the number is flashing, then there are new messages<br />
waiting for you. To turn your answering machine off, press answer on/off again.<br />
[63] Answering Machine www.uniden.com
Reviewing Messages<br />
When you have a new message, the new message LED on the handset blinks. The<br />
LED stops blinking when you listen to all of your new messages. The answering<br />
machine plays your new messages first. After you play all of your new messages,<br />
you can then play your old messages.<br />
Answering Machine<br />
www.uniden.com<br />
Answering Machine [64]
You can review your messages from the base or from the handset:<br />
Playing your messages<br />
Repe<strong>at</strong>ing a message<br />
Skipping a message<br />
Delete a message<br />
Delete all messages<br />
Stop reviewing messages<br />
From the base<br />
From the handset<br />
Press . The answering machine tells Slide the joystick up. The phone tells<br />
you how many new and old messages you how many new and old messages<br />
you have. It announces the message you have. Press /2 to play your<br />
number, plays the message, then<br />
announces the time and d<strong>at</strong>e th<strong>at</strong><br />
message was received.<br />
messages. After playing the message,<br />
the answering machine announces the<br />
time and d<strong>at</strong>e th<strong>at</strong> message was<br />
received.<br />
Press once to go to the beginning of<br />
the current message. Press<br />
repe<strong>at</strong>edly to go back to a previous<br />
message. Press and hold to rewind<br />
through the current message.<br />
Press to go to the beginning of the<br />
next message. Press and hold to fast<br />
forward through the current message.<br />
While a message is playing, press to<br />
delete it. The message is permanently<br />
deleted.<br />
While the phone is in standby, press<br />
to delete all messages. When the<br />
answering machine asks you to confirm,<br />
press delete again. All messages are<br />
permanently deleted.<br />
Press to stop the message<br />
playback and return to standby.<br />
Press /1 once to go to the<br />
beginning of the current message. Press<br />
/1 repe<strong>at</strong>edly to go back to a<br />
previous message.<br />
Press /3 to go to the beginning of<br />
the next message. Press and hold<br />
/3 to fast forward through the<br />
current message.<br />
While a message is playing, press /4<br />
to delete it. The message is permanently<br />
deleted.<br />
Press /5 to stop the message<br />
playback. Press end to exit the message<br />
system and return to standby.<br />
-<br />
note<br />
•You can not delete<br />
unheard messages. If<br />
you try to delete<br />
messages before<br />
listening to them, the<br />
answering machine will<br />
beep and say "Please<br />
playback all<br />
messages."<br />
•If you press during<br />
the first two seconds<br />
(or press /1<br />
during the first 4<br />
seconds) of a message,<br />
the answering machine<br />
goes back to the<br />
previous message.<br />
Answering Machine<br />
[65] Answering Machine www.uniden.com
note<br />
•If the recording<br />
memory is full,<br />
Unavailable appears<br />
in the display. You can<br />
not record a<br />
convers<strong>at</strong>ion until you<br />
clear some messages<br />
from the memory.<br />
•Every st<strong>at</strong>e has<br />
different regul<strong>at</strong>ions<br />
governing the<br />
recording of<br />
convers<strong>at</strong>ions over the<br />
telephone. Make sure to<br />
check your local, st<strong>at</strong>e<br />
and federal laws before<br />
using this product to<br />
record any telephone<br />
convers<strong>at</strong>ion in order<br />
to determine th<strong>at</strong> your<br />
use is in compliance<br />
with such laws or<br />
guidelines.<br />
•You can not record<br />
intercom convers<strong>at</strong>ions.<br />
•Only one handset can<br />
screen calls <strong>at</strong> a time.<br />
If another handset is<br />
screening the call, you<br />
will just hear a beep<br />
when you try to screen<br />
the call.<br />
Recording a phone convers<strong>at</strong>ion<br />
You can record a phone convers<strong>at</strong>ion with your handset or base. The convers<strong>at</strong>ion<br />
has to last more than two seconds and less than ten minutes. During a<br />
convers<strong>at</strong>ion, press the center of the joystick or menu/select. Use the joystick or<br />
the up/down key to select Call Record. The handset or the base sounds a<br />
confirm<strong>at</strong>ion tone th<strong>at</strong> can be heard by both parties and displays Recording a call.<br />
When you want to stop recording, press the center of the joystick or menu/select<br />
and select Call Record again.<br />
Screening Calls<br />
You can screen calls from the base: by allowing the answering machine to answer<br />
the call and listening as the caller leaves a message. Answer the phone if you want<br />
to talk to the caller. To mute the call screen, press .<br />
If you turn on the call screen fe<strong>at</strong>ure (see page 61), you can also screen calls from<br />
the handset. Let the answering machine answer the call, then press the volume up<br />
key. If you want to talk to the caller, just press talk/flash or /flash on the base,<br />
and the answering machine will stop recording. To mute the call screen, press end.<br />
Answering Machine<br />
www.uniden.com<br />
Answering Machine [66]
Do Not Disturb (DND)<br />
The do not disturb fe<strong>at</strong>ure (DND) allows you to mute the ringer of the base and any<br />
registered handsets <strong>at</strong> the same time. The phone must be in standby mode. Press<br />
and hold dnd on the base. You will hear a confirm<strong>at</strong>ion tone, and the dnd LED<br />
illumin<strong>at</strong>es. To cancel the DND fe<strong>at</strong>ure, press dnd again. You can also mute the<br />
ringer tone while the phone is ringing by pressing dnd on the base.<br />
Activ<strong>at</strong>ing the DND while the answering system is off will turn the answering<br />
system on autom<strong>at</strong>ically. The answering system setting will reset to the original<br />
setting when you cancel the DND.<br />
Answering Machine<br />
Recording a voice memo<br />
The voice memo function allows you to record messages (more than 2 seconds and<br />
less than 4 minutes). To record your memo, make sure the phone is in standby<br />
mode. Press menu/select on the base. Select Record Memo and press menu/select.<br />
Press the START soft key. After the answering machine says, "Record memo<br />
message," you can start recording. When you finish, press the STOP soft key.<br />
You will hear a confirm<strong>at</strong>ion tone.<br />
You can also record a voice memo remotely, Press and then /7. After the<br />
answering machine says, "Record Memo Message" you can start recording. When you<br />
finish, press /7 key.<br />
[67] Answering Machine www.uniden.com
note<br />
•The system will only<br />
play back messages for<br />
four minutes and then<br />
it returns to the<br />
command waiting<br />
mode.<br />
•To continue playing<br />
your messages, press 0<br />
then 2 again within 15<br />
seconds.<br />
•If you enter an<br />
incorrect security code<br />
three times, you will<br />
hear a beep and the<br />
system will return to<br />
standby.<br />
•For your convenience,<br />
a remote oper<strong>at</strong>ion<br />
card is provided for<br />
you to use while away<br />
from home (refer to<br />
page 88).<br />
Remote Oper<strong>at</strong>ion<br />
You can check, play, or delete messages when you are away from home. You can also<br />
record your own personal greeting. To access your answering machine remotely, you<br />
need a touch tone telephone and a two-digit security code (see Setting a Security<br />
Code on page 59).<br />
1) Call your telephone number and wait for the system to answer. If Toll Saver is<br />
enabled, the answering machine will answer in 2 rings if you have new messages<br />
or 4 rings if you have none. If the answering machine is off, it will answer after<br />
about 10 rings and sound a series of beeps.<br />
2) During the greeting message (or a series of beeps when the answering machine is<br />
off), press 0 and enter your security code within two seconds.<br />
3) The answering machine announces the current time and the number of messages<br />
stored in memory. You hear "To play incoming messages, press zero-two. For<br />
help, press one-zero." Then, you hear a beep.<br />
4) Enter a command from the following chart within 15 seconds. After the first<br />
command, you have two seconds to enter each command.<br />
Answering Machine<br />
www.uniden.com<br />
Answering Machine [68]
Command Function Command Function<br />
0 then 1 Repe<strong>at</strong> a Message* 0 then 6 Answering machine On<br />
0 then 2 Play incoming Messages 0 then 7 Memo Record/Stop**<br />
Greeting Message Record/<br />
0 then 3 Skip a Message 0 then 8<br />
Stop**<br />
0 then 4 Delete a Message 0 then 9 Answering machine Off<br />
0 then 5 Stop Oper<strong>at</strong>ion 1 then 0 Help<br />
* For the Repe<strong>at</strong> a Message function, press 0 then 1 within about 4 seconds to<br />
repe<strong>at</strong> the previous message, or press 0 then 1 after about 4 seconds to repe<strong>at</strong><br />
the current message.<br />
**The first time you enter the Memo Record or the Greeting Message Record<br />
command, the answering machine will start recording. Enter the same command<br />
again to stop recording.<br />
5) When you finish, you will hear intermittent beeps indic<strong>at</strong>ing th<strong>at</strong> the system is<br />
in the command waiting mode. You can enter another command from the chart,<br />
or you can hang up to exit the system.<br />
6) When you hang up, the answering machine autom<strong>at</strong>ically returns to its normal<br />
setting.<br />
Answering Machine<br />
[69] Answering Machine www.uniden.com
note<br />
•If the party is out of<br />
range, No Signal<br />
appears in the display,<br />
and the oper<strong>at</strong>ion will<br />
be canceled.<br />
•While a pair of<br />
handsets are in<br />
Intercom or DirectLink<br />
mode, they cannot be<br />
used to make or<br />
receive calls. Other<br />
handsets can still make<br />
and receive calls.<br />
Multi-Handset Fe<strong>at</strong>ures<br />
The fe<strong>at</strong>ures in this section require a minimum of two handsets to oper<strong>at</strong>e. To add<br />
additional handsets to your system, see "Expanding Your Phone" on page 11.<br />
Using DirectLink Mode<br />
In DirectLink Mode, a pair of handsets<br />
can function as two-way radios.<br />
DirectLink Mode does not interfere with<br />
the base's ability to make or receive<br />
telephone calls. You must set both<br />
handsets to DirectLink Mode to make a<br />
DirectLink call.<br />
To enter DirectLink mode, select Direct<br />
Link option from the main menu. And<br />
then press the ENTER soft key. Direct<br />
Link Mode complete. appears once the<br />
selection is confirmed.<br />
www.uniden.com<br />
To make a DirectLink call, press the DirectLink soft key. Select<br />
the handset you want to call. To answer a DirectLink call, press<br />
talk/flash or if Any Key Answer is on, press any number key, * /<br />
tone or # key. Press end when you want to hang up.<br />
To exit DirectLink mode and be able to receive normal phone<br />
calls again, press the CANCEL soft key, and then press the OK<br />
soft key.<br />
<br />
<br />
Multi-Handset Fe<strong>at</strong>ures [70]<br />
Multi-Handset Fe<strong>at</strong>ures
Room/Baby Monitor<br />
This fe<strong>at</strong>ure allows you to monitor<br />
sounds in another room. Place a<br />
handset or the base in the room you<br />
wish to monitor; it will function as a<br />
microphone. A second handset or the<br />
base can be used as a remote speaker,<br />
allowing you to monitor sounds in the<br />
room.<br />
Using Room/Baby Monitor<br />
To enter Room Monitor mode, press<br />
the center of the joystick or menu/<br />
select. Select the Room Monitor<br />
option and then select the handset or<br />
base you want to monitor. Press end<br />
from the handset or end/find<br />
handset from the base when you want to stop monitoring.<br />
note<br />
•This fe<strong>at</strong>ure only works<br />
when the handset is<br />
within the range of the<br />
base.<br />
•If the party is out of<br />
range, Unavailable<br />
appears in the display,<br />
and the oper<strong>at</strong>ion will<br />
be canceled.<br />
Multi-Handset Fe<strong>at</strong>ures<br />
To prevent the monitoring of a particular handset or the base,<br />
simply turn off the Room Monitor fe<strong>at</strong>ure on th<strong>at</strong> handset or on<br />
the base.<br />
To turn off the Room Monitor, go to System Setup, select Base<br />
from the base menu or select Handset from the handset menu;<br />
then Room Monitor and select off. You will hear a confirm<strong>at</strong>ion<br />
tone.<br />
<br />
<br />
[71] Multi-Handset Fe<strong>at</strong>ures www.uniden.com
Intercom<br />
You can use the intercom to talk to another handset or base<br />
without using the phone line. While the phone is in standby<br />
mode, press back/hold/int'com. Select the handset or base you<br />
want to page. If you select All, all other handsets and the base<br />
will be paged.<br />
If the handset or base you are trying to page is busy, the phone<br />
displays System busy Please try l<strong>at</strong>er. If the handset you are<br />
trying to page is out of range, the phone displays No Signal<br />
Press HELP and the page is canceled.<br />
<br />
<br />
<br />
<br />
<br />
<br />
<br />
<br />
www.uniden.com<br />
Answering an intercom page<br />
When the handset receives an intercom page, it sounds a tone and shows the ID of<br />
the handset th<strong>at</strong> is paging. To answer the page, pick up the handset and press talk/<br />
flash, speaker, or back/hold/int'com on the handset, /flash or back/hold/<br />
int'com on the base.<br />
• If you receive an outside/intercom call or page while selecting the other handset, the<br />
oper<strong>at</strong>ion is canceled.<br />
• If the party does not answer within one minute, the oper<strong>at</strong>ion is canceled.<br />
• During an intercom call, if you receive a call, you will hear a ringer tone from the ear<br />
speaker.<br />
• If all handsets are paged, only the first party to answer the page will connect.<br />
• If you do not select a handset within 30 seconds, the oper<strong>at</strong>ion will be canceled.<br />
To hang up an intercom page, press end on any handset or end/find handset on the<br />
base.<br />
Multi-Handset Fe<strong>at</strong>ures [72]<br />
Multi-Handset Fe<strong>at</strong>ures
Transferring a Call<br />
You can transfer calls between the handsets and the base or between any two<br />
handsets. During a call, press back/hold/int'com; this will put the call on hold.<br />
Select the handset or base you want to transfer the call to cancel the transfer and<br />
go back to the caller, press talk /flash or /flash on the base.<br />
Answering a transfer page<br />
When the handset receives a transfer page, it sounds a tone and shows the ID of the<br />
handset. Press talk/flash, speaker or back/hold/int'com on the handeset or /<br />
flash or back/hold/int'com on the base to answer the page. If you want to accept<br />
the transfer and talk to the outside caller, press talk/flash or back/hold/int'com<br />
on the handset, or /flash or back/hold/int'com on the base.<br />
Multi-Handset Fe<strong>at</strong>ures<br />
[73] Multi-Handset Fe<strong>at</strong>ures www.uniden.com
note<br />
•A replacement <strong>Uniden</strong><br />
adapter or b<strong>at</strong>tery may<br />
be purchased by<br />
calling <strong>Uniden</strong>'s Parts<br />
department (see back<br />
cover page).<br />
•Use only the <strong>Uniden</strong><br />
(BT-0003) rechargeable<br />
b<strong>at</strong>tery pack supplied<br />
with your cordless<br />
phone.<br />
Note on Power Sources<br />
Power Failure<br />
During the period th<strong>at</strong> the power is off, you will not be able to make or receive calls<br />
with the telephone.<br />
Optional Power Backup Fe<strong>at</strong>ure<br />
The phone has an optional backup b<strong>at</strong>tery in the base. It provides power backup in<br />
the event of a power failure or outage. You will be able to make or receive calls with<br />
the telephone.<br />
B<strong>at</strong>tery replacement and handling<br />
When the oper<strong>at</strong>ing time becomes short, even after the b<strong>at</strong>tery is recharged, please<br />
replace the b<strong>at</strong>tery. With normal usage, your b<strong>at</strong>tery should last about one year.<br />
Warning<br />
To avoid the risk of personal injury or property damage from fire or electrical shock,<br />
use only <strong>Uniden</strong> AD-0006 AC adapters and <strong>Uniden</strong> BT-0003 b<strong>at</strong>tery packs with your<br />
phone.<br />
Note on Power Sources<br />
www.uniden.com<br />
Note on Power Sources [74]
Install the optional power backup b<strong>at</strong>tery in the base<br />
The b<strong>at</strong>tery backup allows you to make and receive calls<br />
during a power failure. You can use any handset or the<br />
base, just as you would normally.<br />
1) Open the b<strong>at</strong>tery case cover by pressing in slightly on the<br />
right side of the base as shown.<br />
2) Place the b<strong>at</strong>tery pack in the b<strong>at</strong>tery compartment with the<br />
connectors on the b<strong>at</strong>tery and on the compartment aligned.<br />
3) Push the b<strong>at</strong>tery compartment back in.<br />
note<br />
• appears in LCD as<br />
a warning th<strong>at</strong> the<br />
backup b<strong>at</strong>tery pack is<br />
NOT installed in the<br />
base unit.<br />
•To use the backup<br />
b<strong>at</strong>tery Fe<strong>at</strong>ure you<br />
need to connect the AC<br />
adapter to the base,<br />
and charge the base<br />
b<strong>at</strong>tery for <strong>at</strong> least 24<br />
hours.<br />
•Use only the <strong>Uniden</strong><br />
(BT-0003) rechargeable<br />
b<strong>at</strong>tery pack. The<br />
b<strong>at</strong>tery may be<br />
purchased by calling<br />
<strong>Uniden</strong>'s Parts<br />
Department (see back<br />
cover page).<br />
Note on Power Sources<br />
Caution<br />
• Use only the specified <strong>Uniden</strong> b<strong>at</strong>tery pack (BT-0003).<br />
• Do not remove the b<strong>at</strong>teries from the handset to charge them.<br />
• Never throw the b<strong>at</strong>tery into a fire, disassemble them, or he<strong>at</strong> them.<br />
• Do not remove or damage the b<strong>at</strong>tery casing.<br />
[75] Note on Power Sources www.uniden.com
General Inform<strong>at</strong>ion<br />
The phone complies with FCC Parts 15 and 68. Oper<strong>at</strong>ing temper<strong>at</strong>ure:<br />
0 °C to +50 °C (+32 °F to +122 °F)<br />
AC Adapter Inform<strong>at</strong>ion<br />
AC Adapter part number: AD-0006<br />
Input Voltage: 120V AC 60Hz<br />
Output Voltage: 9V DC 500mA<br />
B<strong>at</strong>tery Inform<strong>at</strong>ion<br />
B<strong>at</strong>tery part number: BT-0003<br />
Capacity: 900mAh, 3.6V<br />
Specific<strong>at</strong>ions, fe<strong>at</strong>ures, and availability of optional accessories are all subject to<br />
change without prior notice.<br />
General Inform<strong>at</strong>ion<br />
www.uniden.com<br />
General Inform<strong>at</strong>ion [76]
Troubleshooting<br />
If your phone is not performing to your expect<strong>at</strong>ions, please try these simple steps first. If these steps<br />
do not solve your problem, please call our Customer Service Hotline <strong>at</strong> 1-800-297-1023. (Mon - Fri 7 am<br />
to 7 pm, S<strong>at</strong>/Sun 9 am to 5 pm, CST. The Customer Service Hotline is closed on holidays.)<br />
Symptom<br />
Suggestion<br />
The charge LED won't<br />
illumin<strong>at</strong>e when the handset is<br />
placed in the cradle.<br />
The charge LED flashes.<br />
The audio sounds weak.<br />
Unable to make or receive calls.<br />
The handset does not ring or<br />
receive a page.<br />
Severe noise interference.<br />
• Make sure the AC adapter is plugged into the base or the chargers (if you have more than one<br />
handset) and the wall outlet.<br />
• Make sure the handset is properly se<strong>at</strong>ed in the cradle.<br />
• Make sure the charging contacts on the handset are clean.<br />
• Clean the charging contacts on the handset.<br />
• Move the handset and/or base away from metal objects or appliances and try again.<br />
• Make sure th<strong>at</strong> you are not too far away from the base.<br />
• Make sure th<strong>at</strong> you are not too far away from the base.<br />
• Make sure the line is not in use. If an outside call is already in use on a line, you cannot use th<strong>at</strong> line<br />
to make another outside call.<br />
• Check both ends of the base telephone line cord.<br />
• Make sure the AC adapter is plugged into the base and wall outlet.<br />
• Disconnect the AC adapter and the backup b<strong>at</strong>tery.<br />
• Change the Digital Security Code (see page 14).<br />
• Make sure th<strong>at</strong> you are not too far away from the base.<br />
• Charge the b<strong>at</strong>tery pack in the handset for 15 hours by placing the handset on the base or charging cradle.<br />
• Change the Digital Security Code (see page 14).<br />
• Keep the handset away from microwave ovens, computers, remote control toys, wireless microphones,<br />
alarm systems, intercoms, room monitors, fluorescent lights, and electrical appliances.<br />
• Move to another loc<strong>at</strong>ion or turn off the source of interference.<br />
[77] Troubleshooting www.uniden.com
Symptom<br />
The Caller ID does not display.<br />
You cannot register the<br />
handset <strong>at</strong> the base.<br />
The handset does not<br />
communic<strong>at</strong>e with other<br />
handsets.<br />
An extra handset is not able to<br />
join the convers<strong>at</strong>ion.<br />
The Room Monitor fe<strong>at</strong>ure does<br />
not work.<br />
The answering machine does<br />
not work.<br />
Messages are incomplete.<br />
No sound on the base unit or<br />
handset speaker during call<br />
monitoring or message<br />
playback.<br />
www.uniden.com<br />
• The call was placed through a switchboard.<br />
• Call your local telephone company to verify your Caller ID service is working properly or if there has<br />
been a temporary service interruption.<br />
• Charge the b<strong>at</strong>tery pack in the handset for 10 hours.<br />
• Change the Digital Security Code (see page 14).<br />
• Change the Digital Security Code (see page 14).<br />
• Make sure th<strong>at</strong> you have registered all handsets.<br />
Suggestion<br />
• Make sure there are not 2 handsets already using the conference fe<strong>at</strong>ure.<br />
• Make sure th<strong>at</strong> another handset is not in privacy mode.<br />
• Make sure to place the handset(s) within the range of the base.<br />
• Make sure the base unit is plugged in.<br />
• Make sure th<strong>at</strong> the answering machine is turned on.<br />
• Make sure th<strong>at</strong> the message record time is not set to Announce only<br />
(see page 60).<br />
• The incoming messages may be too long. Remind callers to leave a brief message.<br />
• The memory may be full. Delete some or all of the saved messages.<br />
• Adjust the speaker volume on the base unit or handset.<br />
• Make sure the call screen fe<strong>at</strong>ure is set to on.<br />
Troubleshooting [78]<br />
Troubleshooting
Symptom<br />
Cannot access remote call-in<br />
fe<strong>at</strong>ures from another touchtone<br />
phone.<br />
Suggestion<br />
• Make sure you are using the correct PIN number.<br />
• Make sure th<strong>at</strong> the touch-tone phone you're using can transmit the tone for <strong>at</strong> least two seconds. If it<br />
cannot, you may have to use another phone.<br />
Time stamp cannot be heard. • Make sure you have set the time (see "Setting D<strong>at</strong>e and Time" on page 26).<br />
[79] Troubleshooting www.uniden.com
System Reset<br />
De-register the Handset<br />
1) Press and hold end and # for more than 5 seconds. Select Deregister HS.<br />
2) The phone will ask you to confirm the deregistr<strong>at</strong>ion. Select Yes.<br />
When the base inform<strong>at</strong>ion is deleted, the handset displays<br />
MUST place the handset in base to register! Models may vary, refer to Owners Manual<br />
for help Re-register the handset to the base (see page 13).<br />
<br />
<br />
<br />
Replacing the Base Setting<br />
1) Press and hold end and # for more than 5 seconds. Select Replacing Base.<br />
2) Select Yes.<br />
3) You will hear a confirm<strong>at</strong>ion tone. The base inform<strong>at</strong>ion will be deleted.<br />
<br />
<br />
<br />
<br />
When the base inform<strong>at</strong>ion is deleted, the handset displays<br />
MUST place the handset in base to register! Models may vary, refer to Owners Manual<br />
for help Re-register the handset to the base (see page 13).<br />
<br />
<br />
<br />
<br />
www.uniden.com<br />
<br />
Troubleshooting [80]<br />
Troubleshooting
Liquid Damage<br />
Moisture and liquid may damage your cordless phone. Follow the steps below if your phone gets wet:<br />
Case<br />
If the exterior plastic housing on the handset or<br />
base is exposed to moisture or liquid.<br />
If moisture or liquid has entered the plastic housing<br />
(i.e. liquid can be heard in the phone or liquid has<br />
entered the handset b<strong>at</strong>tery compartment or vent<br />
openings on the base).<br />
Wipe off the liquid, and use as normal.<br />
Action<br />
Handset:<br />
1) Remove the b<strong>at</strong>tery cover and leave it off for ventil<strong>at</strong>ion.<br />
2) Disconnect the b<strong>at</strong>tery pack. Leave the b<strong>at</strong>tery cover off and the b<strong>at</strong>tery pack<br />
disconnected for <strong>at</strong> least 3 days.<br />
3) Once the handset is completely dry, reconnect the b<strong>at</strong>tery pack and the b<strong>at</strong>tery<br />
cover.<br />
4) Recharge the handset's b<strong>at</strong>tery pack for 20 hours before using.<br />
Base:<br />
1) Disconnect the AC adapter from the base, cutting off electrical power.<br />
2) Disconnect the telephone cord from the base.<br />
3) Let dry for <strong>at</strong> least 3 days.<br />
IMPORTANT: You must unplug the telephone line while recharging the b<strong>at</strong>tery<br />
packs to avoid charge interruption.<br />
CAUTION: DO NOT use a microwave oven to speed up the drying process. This will<br />
cause permanent damage to the handset, base and the microwave oven.<br />
After following these steps, if your cordless telephone does not work, please call<br />
our Customer Service Hotline <strong>at</strong> 1-800-297-1023.<br />
[81] Liquid Damage www.uniden.com
Precautions!<br />
Before you read anything else, please observe the following:<br />
Warning!<br />
<strong>Uniden</strong> America Corpor<strong>at</strong>ion DOES NOT represent this unit to be<br />
w<strong>at</strong>erproof. To reduce the risk of fire, electrical shock, or damage to the<br />
unit, DO NOT expose this unit to rain or moisture.<br />
Rechargeable Nickel-Metal-Hydride B<strong>at</strong>tery<br />
Warning<br />
• This equipment contains rechargeable Nickel-Metal-Hydride b<strong>at</strong>teries.<br />
• The rechargeable b<strong>at</strong>teries contained in this equipment may explode<br />
if disposed of in a fire.<br />
• Nickel is a chemical known to st<strong>at</strong>e of California to cause cancer.<br />
• Do not short-circuit the b<strong>at</strong>tery.<br />
• Do not charge the rechargeable b<strong>at</strong>teries used in this equipment in<br />
any charger other than the one designed to charge these b<strong>at</strong>teries as<br />
specified in the owner's manual. Using another charger may damage<br />
the b<strong>at</strong>tery or cause the b<strong>at</strong>tery to explode.<br />
Rechargeable B<strong>at</strong>teries Must Be Recycled or<br />
Disposed of Properly<br />
The exclam<strong>at</strong>ion point within an equil<strong>at</strong>eral is<br />
intended to alert the user to the presence of important<br />
oper<strong>at</strong>ing and maintenance (servicing) instructions in<br />
the liter<strong>at</strong>ure accompanying the appliance.<br />
<strong>Uniden</strong> works to reduce lead content in our PVC co<strong>at</strong>ed cords in our<br />
products and accessories.<br />
Warning!<br />
The cords on this product and/or accessories contain lead, a chemical<br />
known to the St<strong>at</strong>e of California to cause birth defects or other<br />
reproductive harm. Wash hands after handling.<br />
Important Safety Instructions<br />
When using your telephone equipment, basic safety precautions should<br />
always be followed to reduce the risk of fire, electric shock and injury<br />
to persons, including the following:<br />
1. Do not use this product near w<strong>at</strong>er, for example, near a b<strong>at</strong>h tub,<br />
wash bowl, kitchen sink or laundry tub, in a wet basement or near a<br />
swimming pool.<br />
2. Avoid using a telephone (other than a cordless type) during an<br />
electrical storm. There may be a remote risk of electric shock from<br />
lightning.<br />
Precautions &<br />
3. Do not use the telephone to report a gas leak in the vicinity of the<br />
leak.<br />
4. Use only the power cord and b<strong>at</strong>teries indic<strong>at</strong>ed in this manual. Do<br />
not dispose of b<strong>at</strong>teries in a fire. They may explode. Check with<br />
local codes for possible b<strong>at</strong>tery disposal instructions.<br />
5. Do not disassemble any component of this product.<br />
SAVE THESE INSTRUCTIONS<br />
CAUTION<br />
Risk of explosion if b<strong>at</strong>tery is replaced by an incorrect type. Dispose of<br />
used b<strong>at</strong>teries according to the instructions. Do not open or mutil<strong>at</strong>e<br />
the b<strong>at</strong>tery, and disconnect the b<strong>at</strong>tery before shipping this product.<br />
The FCC Wants You To Know<br />
This equipment complies with Part 68 of the FCC rules and the<br />
requirements adopted by the ACTA. On the bottom of this equipment is<br />
a label th<strong>at</strong> contains, among other inform<strong>at</strong>ion, a product identifier in<br />
the form<strong>at</strong> US:AAAEQ##TXXXX. If requested, this number must be<br />
provided to the telephone company.<br />
An applicable Universal Service Order Codes (USOC) certific<strong>at</strong>ion for the<br />
jacks used in this equipment is provided (i.e., RJ11C) in the packaging<br />
with each piece of approved terminal equipment.<br />
A plug and jack used to connect this equipment to the premises wiring<br />
and telephone network must comply with the applicable FCC Part 68<br />
rules and requirements adopted by the ACTA. A compliant telephone<br />
cord and modular plug is provided with this product. It is designed to<br />
be connected to a comp<strong>at</strong>ible modular jack th<strong>at</strong> is also compliant. See<br />
install<strong>at</strong>ion instructions for details.<br />
The REN is used to determine the number of devices th<strong>at</strong> may be<br />
connected to a telephone line. Excessive RENs on a telephone line may<br />
result in the devices not ringing in response to an incoming call. In<br />
most but not all areas, the sum of RENs should not exceed five (5.0).<br />
To be certain of the number of devices th<strong>at</strong> may be connected to a line,<br />
as determined by the total RENs, contact the local telephone company.<br />
For products approved after July 23, 2001, the REN for this product is<br />
part of the product identifier th<strong>at</strong> has the form<strong>at</strong> US:AAAEQ##TXXXX.<br />
The digits represented by ## are the REN without a decimal point (e.g.,<br />
03 is a REN of 0.3). For earlier products, the REN is separ<strong>at</strong>ely shown<br />
on the label.<br />
If this equipment causes harm to the telephone network, the telephone<br />
company will notify you in advance th<strong>at</strong> temporary discontinuance of<br />
service may be required. But if advance notice isn't practical, the<br />
telephone company will notify the customer as soon as possible. Also,<br />
you will be advised of your right to file a complaint with the FCC if you<br />
believe it is necessary.<br />
The telephone company may make changes in its facilities, equipment,<br />
oper<strong>at</strong>ions or procedures th<strong>at</strong> could affect the oper<strong>at</strong>ion of the<br />
equipment. If this happens the telephone company will provide<br />
advance notice in order for you to make necessary modific<strong>at</strong>ions to<br />
maintain uninterrupted service.<br />
Please follow instructions for repairing, if any (e.g. b<strong>at</strong>tery<br />
replacement section); otherwise do not substitute or repair any parts<br />
of the device except as specified in this manual.<br />
Connection to party line service is subject to st<strong>at</strong>e tariffs. Contact the<br />
st<strong>at</strong>e public utility commission, public service commission or<br />
corpor<strong>at</strong>ion commission for inform<strong>at</strong>ion.<br />
This equipment is hearing aid comp<strong>at</strong>ible.<br />
Should you experience trouble with this equipment, please contact<br />
<strong>Uniden</strong> customer service <strong>at</strong> 800-297-1023. If the equipment is causing<br />
harm to the telephone network, the telephone company may request<br />
th<strong>at</strong> you disconnect the equipment until the problem is resolved.<br />
NOTICE: According to telephone company reports, AC electrical surges,<br />
typically resulting from lightning strikes, are very destructive to<br />
telephone equipment connected to AC power sources. To minimize<br />
damage from these types of surges, a surge arrestor is recommended.<br />
Changes or modific<strong>at</strong>ions to this product not expressly approved by<br />
<strong>Uniden</strong>, or oper<strong>at</strong>ion of this product in any way other than as detailed<br />
by the owner's manual, could void your authority to oper<strong>at</strong>e this<br />
product.<br />
This device complies with part 15 of the FCC rules. Oper<strong>at</strong>ion is subject<br />
to the following two conditions: (1) This device may not cause harmful<br />
interference, and (2) This device must accept any interference<br />
received, including interference th<strong>at</strong> may cause undesired oper<strong>at</strong>ion.<br />
Privacy of communic<strong>at</strong>ions, may not be ensured when using this phone.<br />
To insure the safety of users, the FCC has established criteria for the<br />
amount of radio frequency energy various products may produce<br />
depending on their intended usage. This product has been tested and<br />
found to comply with the FCC's exposure criteria. For body worn<br />
oper<strong>at</strong>ion, the FCC RF exposure guidelines were also met when used<br />
with the <strong>Uniden</strong> accessories supplied or designed for this product. Use<br />
of other accessories may not ensure compliance with FCC RF exposure<br />
guidelines and should be avoided.<br />
Radio Interference<br />
Radio interference may occasionally cause buzzing and humming in<br />
your cordless handset, or clicking noises in the base. This interference<br />
is caused by external sources such as TV, refriger<strong>at</strong>or, vacuum cleaner,<br />
fluorescent lighting, or electrical storm. Your unit is NOT DEFECTIVE. If<br />
these noises continue and are too distracting, please check around<br />
your home to see wh<strong>at</strong> appliances may be causing the problem. In<br />
addition, we recommend th<strong>at</strong> the base not be plugged into a circuit<br />
th<strong>at</strong> also powers a major appliance because of the potential for<br />
interference. Be certain th<strong>at</strong> the antenna on the unit is fully extended<br />
when needed.<br />
In the unlikely event th<strong>at</strong> you consistently hear other voices or<br />
distracting transmissions on your phone, you may be receiving radio<br />
signals from another cordless telephone or other source of interference.<br />
If you cannot elimin<strong>at</strong>e this type of interference, you need to change<br />
to a different channel.<br />
Precautions & Warranty<br />
www.uniden.com<br />
Precautions & Warranty [82]
Finally, it should be noted th<strong>at</strong> some cordless telephones oper<strong>at</strong>e <strong>at</strong><br />
frequencies th<strong>at</strong> may cause interference to nearby TVs and VCRs. To<br />
minimize or prevent such interference, the base of the cordless<br />
telephone should not be placed near or on top of a TV or VCR. If<br />
interference is experienced, moving the cordless telephone farther<br />
away from the TV or VCR will often reduce or elimin<strong>at</strong>e the interference.<br />
Cordless Telephone Privacy<br />
Cordless telephones are radio devices. Communic<strong>at</strong>ions between the<br />
handset and base of your cordless telephone are accomplished by<br />
means of radio waves which are broadcast over the open airways.<br />
Because of the inherent physical properties of radio waves, your<br />
communic<strong>at</strong>ions can be received by radio receiving devices other than<br />
your own cordless telephone unit. Consequently, any communic<strong>at</strong>ions<br />
using your cordless telephone may not be priv<strong>at</strong>e.<br />
One Year Limited Warranty<br />
Important: Evidence of original purchase is required for warranty<br />
service.<br />
WARRANTOR: UNIDEN AMERICA CORPORATION ("<strong>Uniden</strong>") ELEMENTS OF<br />
WARRANTY: <strong>Uniden</strong> warrants, for one year, to the original retail owner,<br />
this <strong>Uniden</strong> Product to be free from defects in m<strong>at</strong>erials and<br />
craftsmanship with only the limit<strong>at</strong>ions or exclusions set out below.<br />
LEGAL REMEDIES: This warranty gives you specific legal rights, and you<br />
may also have other rights which vary from st<strong>at</strong>e to st<strong>at</strong>e. This<br />
warranty is void outside the United St<strong>at</strong>es of America and Canada.<br />
PROCEDURE FOR OBTAINING PERFORMANCE OF WARRANTY: If, after<br />
following the instructions in the owner's manual you are certain th<strong>at</strong><br />
the Product is defective, pack the Product carefully (preferably in its<br />
original packaging). Disconnect the b<strong>at</strong>tery from the Product and<br />
separ<strong>at</strong>ely secure the b<strong>at</strong>tery in its own separ<strong>at</strong>e packaging within the<br />
shipping carton. The Product should include all parts and accessories<br />
originally packaged with the Product. Include evidence of original<br />
purchase and a note describing the defect th<strong>at</strong> has caused you to<br />
return it. The Product should be shipped freight prepaid, by traceable<br />
means, to warrantor <strong>at</strong>:<br />
<strong>Uniden</strong> America Service<br />
4700 Amon Carter Blvd.<br />
Fort Worth, TX 76155<br />
WARRANTY DURATION: This warranty to the original user shall<br />
termin<strong>at</strong>e and be of no further effect 12 months after the d<strong>at</strong>e of<br />
original retail sale. The warranty is invalid if the Product is (A)<br />
damaged or not maintained as reasonable or necessary, (B) modified,<br />
altered, or used as part of any conversion kits, subassemblies, or any<br />
configur<strong>at</strong>ions not sold by <strong>Uniden</strong>, (C) improperly installed, (D)<br />
serviced or repaired by someone other than an authorized <strong>Uniden</strong><br />
service center for a defect or malfunction covered by this warranty, (E)<br />
used in any conjunction with equipment or parts or as part of any<br />
system not manufactured by <strong>Uniden</strong>, or (F) installed or programmed by<br />
anyone other than as detailed by the owner's manual for this product.<br />
STATEMENT OF REMEDY: In the event th<strong>at</strong> the product does not conform<br />
to this warranty <strong>at</strong> any time while this warranty is in effect, warrantor<br />
will either, <strong>at</strong> its option, repair or replace the defective unit and return<br />
it to you without charge for parts, service, or any other cost (except<br />
shipping and handling) incurred by warrantor or its represent<strong>at</strong>ives in<br />
connection with the performance of this warranty. Warrantor, <strong>at</strong> its<br />
option, may replace the unit with a new or refurbished unit. THE<br />
LIMITED WARRANTY SET FORTH ABOVE IS THE SOLE AND ENTIRE<br />
WARRANTY PERTAINING TO THE PRODUCT AND IS IN LIEU OF AND<br />
EXCLUDES ALL OTHER WARRANTIES OF ANY NATURE WHATSOEVER,<br />
WHETHER EXPRESS, IMPLIED OR ARISING BY OPERATION OF LAW,<br />
INCLUDING, BUT NOT LIMITED TO ANY IMPLIED WARRANTIES OF<br />
MERCHANTABILITY OR FITNESS FOR A PARTICULAR PURPOSE. THIS<br />
WARRANTY DOES NOT COVER OR PROVIDE FOR THE REIMBURSEMENT OR<br />
PAYMENT OF INCIDENTAL OR CONSEQUENTIAL DAMAGES. Some st<strong>at</strong>es do<br />
not allow this exclusion or limit<strong>at</strong>ion of incidental or consequential<br />
damages so the above limit<strong>at</strong>ion or exclusion may not apply to you.<br />
[83] Precautions & Warranty www.uniden.com
I.C. Notice<br />
TERMINAL EQUIPMENT<br />
NOTICE: This equipment meets the applicable Industry Canada Terminal Equipment Technical Specific<strong>at</strong>ions.<br />
This is confirmed by the registr<strong>at</strong>ion number. The abbrevi<strong>at</strong>ion, IC, before the registr<strong>at</strong>ion number signifies<br />
th<strong>at</strong> registr<strong>at</strong>ion was performed based on a Declar<strong>at</strong>ion of Conformity indic<strong>at</strong>ing th<strong>at</strong> Industry Canada<br />
technical specific<strong>at</strong>ions were met. It does not imply th<strong>at</strong> Industry Canada approved the equipment.<br />
NOTICE: The Ringer Equivalence Number (REN) for this terminal equipment is marked on the equipment itself. The<br />
REN assigned to each terminal equipment provides an indic<strong>at</strong>ion of the maximum number of terminals<br />
allowed to be connected to a telephone interface. The termin<strong>at</strong>ion on an interface may consist of any<br />
combin<strong>at</strong>ion of devices subject only to the requirement th<strong>at</strong> the sum of the Ringer Equivalence Numbers of<br />
all the devices does not exceed five.<br />
RADIO EQUIPMENT<br />
The term "IC:" before the radio certific<strong>at</strong>ion number only signifies th<strong>at</strong> Industry Canada technical specific<strong>at</strong>ions were<br />
met.<br />
I.C. Notice<br />
Oper<strong>at</strong>ion is subject to the following two conditions: (1) this device may not cause interference, and (2) this device<br />
must accept any interference, including interference th<strong>at</strong> may cause undesired oper<strong>at</strong>ion of the device. "Privacy of<br />
communic<strong>at</strong>ions may not be ensured when using this telephone".<br />
www.uniden.com<br />
I.C. Notice [84]
Index<br />
A<br />
Anim<strong>at</strong>ions. . . . . . . . . . . . . . . . . 35<br />
Answering Machine<br />
Answering Mode. . . . . . . . . . . . 58<br />
Call screen . . . . . . . . . . . . . . . 61<br />
Message alert . . . . . . . . . . . . . 61<br />
Security code . . . . . . . . . . . . . 59<br />
Setting up menu . . . . . . . . . . . 59<br />
Anykey Answer . . . . . . . . . . . . . . 25<br />
Area Code . . . . . . . . . . . . . . . . . 27<br />
Audio Tone. . . . . . . . . . . . . . . . . 45<br />
Auto Talk . . . . . . . . . . . . . . . . . . 24<br />
B<br />
Backup b<strong>at</strong>tery . . . . . . . . . . . . . . 74<br />
Install<strong>at</strong>ion. . . . . . . . . . . . . . . . 7<br />
Banner . . . . . . . . . . . . . . . . . . . 25<br />
B<strong>at</strong>tery<br />
Replacement . . . . . . . . . . . . . . . 7<br />
C<br />
Calendar . . . . . . . . . . . . . . . . . . 47<br />
Call privacy . . . . . . . . . . . . . . . . 24<br />
Call screen . . . . . . . . . . . . . . . . . 61<br />
Call transfer fe<strong>at</strong>ure. . . . . . . . . . . 73<br />
Caller ID<br />
Call Waiting . . . . . . . . . . . . . . 39<br />
CIDCW . . . . . . . . . . . . . . . . . . 56<br />
CWDX . . . . . . . . . . . . . . . . . . . 39<br />
Color Scheme . . . . . . . . . . . . . . . 34<br />
Conference . . . . . . . . . . . . . . . . . 41<br />
D<br />
D<strong>at</strong>e & time . . . . . . . . . . . . . . . . 26<br />
Delete ringer . . . . . . . . . . . . . . . . 32<br />
De-registering the handset . . . . . . 80<br />
Dial mode . . . . . . . . . . . . . . . . . . 28<br />
Digital security code . . . . . . . . . . 14<br />
DirectLink. . . . . . . . . . . . . . . . . . 70<br />
Display option. . . . . . . . . . . . . . . 22<br />
Distinctive ID . . . . . . . . . . . . . . . 24<br />
E<br />
Earpiece volume. . . . . . . . . . . 43, 44<br />
Expanding your phone . . . . . . . . . 11<br />
F<br />
Find handset . . . . . . . . . . . . . . . . 46<br />
G<br />
General inform<strong>at</strong>ion . . . . . . . . . . . 76<br />
Global setup . . . . . . . . . . . . . . . . 26<br />
H<br />
Hands-free convers<strong>at</strong>ion . . . . . . . . 37<br />
Hanging up. . . . . . . . . . . . . . . . . 38<br />
Headset install<strong>at</strong>ion . . . . . . . . . . . 15<br />
Hold . . . . . . . . . . . . . . . . . . . . . 40<br />
Holster. . . . . . . . . . . . . . . . . . . . 14<br />
I<br />
I.C. notice . . . . . . . . . . . . . . . . . 84<br />
Important safety instructions. . . . . 82<br />
Intercom . . . . . . . . . . . . . . . . . . 72<br />
J<br />
joystick . . . . . . . . . . . . . . . . . . . 20<br />
K<br />
Key touch tone . . . . . . . . . . . . . . 23<br />
L<br />
Language . . . . . . . . . . . . 24, 35, 61<br />
LCD contrast . . . . . . . . . . . . . . . .23<br />
Liquid damage . . . . . . . . . . . . . . .81<br />
Low b<strong>at</strong>tery . . . . . . . . . . . . . . . . . 8<br />
M<br />
Making a call . . . . . . . . . . . . . . . .36<br />
Message Alert. . . . . . . . . . . . . . . .61<br />
Mute<br />
Handset ringer . . . . . . . . . . . . .45<br />
Microphone . . . . . . . . . . . . . . .45<br />
O<br />
Out going greeting<br />
Choosing . . . . . . . . . . . . . . . . .62<br />
Recording. . . . . . . . . . . . . . . . .62<br />
Out of range . . . . . . . . . . . . . . . .39<br />
P<br />
Phonebook<br />
Capacity. . . . . . . . . . . . . . . . . .54<br />
Copying entries . . . . . . . . . . . . .53<br />
Group . . . . . . . . . . . . . . . . . . .51<br />
Making calls . . . . . . . . . . . . . . .55<br />
Name. . . . . . . . . . . . . . . . . . . .50<br />
Number . . . . . . . . . . . . . . . . . .50<br />
Sort order. . . . . . . . . . . . . . . . .54<br />
Speed dial . . . . . . . . . . . . . . . .51<br />
Unique display . . . . . . . . . . . . .51<br />
Unique ring . . . . . . . . . . . . . . .50<br />
Power failure . . . . . . . . . . . . . . . .74<br />
Precautions . . . . . . . . . . . . . . . . .82<br />
Privacy mode . . . . . . . . . . . . . . . .24<br />
[85] INDEX www.uniden.com
R<br />
Receiving a call . . . . . . . . . . . . . 38<br />
Record ringer . . . . . . . . . . . . . . . 30<br />
Record Time . . . . . . . . . . . . . . . . 60<br />
Recording convers<strong>at</strong>ion . . . . . . . . 66<br />
Redialing a call. . . . . . . . . . . . . . 42<br />
Register the handset . . . . . . . . . . 12<br />
Reminder . . . . . . . . . . . . . . . . . . 47<br />
Remote oper<strong>at</strong>ion . . . . . . . . . . . . 68<br />
Reviewing message . . . . . . . . . . . 64<br />
Ring time. . . . . . . . . . . . . . . . . . 60<br />
Ringer Tone<br />
Changing title . . . . . . . . . . . . . 32<br />
Deleting . . . . . . . . . . . . . . . . . 32<br />
Playing. . . . . . . . . . . . . . . . . . 31<br />
Storing. . . . . . . . . . . . . . . . . . 31<br />
Ringer volume<br />
Base . . . . . . . . . . . . . . . . . . . 43<br />
Handset . . . . . . . . . . . . . . . . . 44<br />
Room/baby monitor. . . . . . . . . . . 71<br />
S<br />
Setting up<br />
Answering Machine. . . . . . . . . . 59<br />
Base unit . . . . . . . . . . . . . . . . . 9<br />
Telephone Line . . . . . . . . . . . . . 9<br />
Soft Key. . . . . . . . . . . . . . . . . . . 19<br />
Speaker phone . . . . . . . . . . . . . . 37<br />
Speaker volume<br />
Base . . . . . . . . . . . . . . . . . . . 43<br />
Handset . . . . . . . . . . . . . . . . . 45<br />
Storing a caller ID or redial number 52<br />
System Setup . . . . . . . . . . . . . . . 23<br />
T<br />
Themes. . . . . . . . . . . . . . . . . . . . 33<br />
Tone dial . . . . . . . . . . . . . . . . . . 46<br />
Transferring a call . . . . . . . . . . . . 73<br />
Troubleshooting. . . . . . . . . . . . . . 77<br />
U<br />
<strong>Uniden</strong>’s Cordless Telephone<br />
Customiz<strong>at</strong>ion Tool . . . . . . . . . . 15<br />
Unique ID. . . . . . . . . . . . . . . . . . 25<br />
Unique Ring . . . . . . . . . . . . . . . . 30<br />
W<br />
Wallpaper . . . . . . . . . . . . . . . . . . 33<br />
Warranty. . . . . . . . . . . . . . . . . . . 83<br />
www.uniden.com<br />
INDEX [86]
Memo<br />
[87] www.uniden.com
Remote Oper<strong>at</strong>ion Card<br />
CUT<br />
REMOTE OPERATION CARD<br />
CUT<br />
REMOTE OPERATION CARD<br />
Remote access away from<br />
home<br />
1. Call your phone number from a<br />
touch-tone phone.<br />
2. During the outgoing message,<br />
press 0 and enter your PIN code.<br />
The answering system announces<br />
the number of messages stored in<br />
memory and the voice prompts.<br />
3. To quit, hang up the phone.<br />
Turn on the answering<br />
system remotely<br />
1. Call your phone and let it ring<br />
10 times until you hear a beep.<br />
2. Press 0 and then enter your<br />
PIN code.<br />
3. Press 0 then 5 to stop<br />
the announcement.<br />
4. Press 0 then 6 to turn the<br />
answering system on.<br />
CUT<br />
REMOTE OPERATION CARD<br />
CUT<br />
REMOTE OPERATION CARD<br />
Remote access away from<br />
home<br />
1. Call your phone number from a<br />
touch-tone phone.<br />
2. During the outgoing message,<br />
press 0 and enter your PIN code.<br />
The answering system announces<br />
the number of messages stored in<br />
memory and the voice prompts.<br />
3. To quit, hang up the phone.<br />
www.uniden.com<br />
Turn on the answering<br />
system remotely<br />
1. Call your phone and let it ring<br />
10 times until you hear a beep.<br />
2. Press 0 and then enter your<br />
PIN code.<br />
3. Press 0 then 5 to stop<br />
the announcement.<br />
4. Press 0 then 6 to turn the<br />
answering system on.<br />
Remote access away from<br />
home<br />
1. Call your phone number from a<br />
touch-tone phone.<br />
2. During the outgoing message,<br />
press 0 and enter your PIN code.<br />
The answering system announces<br />
the number of messages stored in<br />
memory and the voice prompts.<br />
3. To quit, hang up the phone.<br />
Turn on the answering<br />
system remotely<br />
1. Call your phone and let it ring<br />
10 times until you hear a beep.<br />
2. Press 0 and then enter your<br />
PIN code.<br />
3. Press 0 then 5 to stop<br />
the announcement.<br />
4. Press 0 then 6 to turn the<br />
answering system on.<br />
Remote Oper<strong>at</strong>ion Card [88]<br />
Remote Oper<strong>at</strong>ion Card
CUT<br />
CUT<br />
Task<br />
Repe<strong>at</strong> a Message<br />
Playing Incoming Messages<br />
Skipping a Message<br />
Deleting a Message<br />
Stop Oper<strong>at</strong>ion<br />
Answering System On<br />
Memo Record/Stop<br />
Greeting Message Record/Stop<br />
Answer System Off<br />
Help<br />
Key<br />
Task<br />
Repe<strong>at</strong> a Message<br />
Playing Incoming Messages<br />
Skipping a Message<br />
Deleting a Message<br />
Stop Oper<strong>at</strong>ion<br />
Answering System On<br />
Memo Record/Stop<br />
Greeting Message Record/Stop<br />
Answer System Off<br />
Help<br />
Key<br />
CUT<br />
CUT<br />
Task<br />
Repe<strong>at</strong> a Message<br />
Playing Incoming Messages<br />
Skipping a Message<br />
Deleting a Message<br />
Stop Oper<strong>at</strong>ion<br />
Answering System On<br />
Memo Record/Stop<br />
Greeting Message Record/Stop<br />
Answer System Off<br />
Help<br />
Key<br />
Task<br />
Repe<strong>at</strong> a Message<br />
Playing Incoming Messages<br />
Skipping a Message<br />
Deleting a Message<br />
Stop Oper<strong>at</strong>ion<br />
Answering System On<br />
Memo Record/Stop<br />
Greeting Message Record/Stop<br />
Answer System Off<br />
Help<br />
Key<br />
[89] Remote Oper<strong>at</strong>ion Card www.uniden.com
At <strong>Uniden</strong>, we'll take care of you!<br />
Thank you for purchasing a <strong>Uniden</strong> product. If you have any questions or problems,<br />
please do not return this product to the place of purchase.<br />
Having Trouble?<br />
Our customer care specialists are here to help you! Visit our website <strong>at</strong> www.uniden.com or call<br />
our Customer Service Hotline <strong>at</strong> 1-800-297-1023, Mon-Fri, 7 a.m. to 7 p.m. or S<strong>at</strong>/Sun, 9<br />
a.m. to 5 p.m. CST. (The Customer Service Hotline is closed on holidays.)<br />
Need a Part?<br />
To order headsets, additional handsets, replacement b<strong>at</strong>teries or other accessories, visit<br />
our website <strong>at</strong> www.uniden.com or call 1-800-554-3988, Mon-Fri, 8 a.m. to 5 p.m. CST.<br />
p<br />
Help for our Special Needs Customers<br />
If you need special assistance due to a disability or have questions on the accessibility<br />
fe<strong>at</strong>ures of this product, please call 1-800-874-9314 (voice or TTY)<br />
May be covered under one or more of the following U.S. p<strong>at</strong>ents:<br />
4,797,916 5,381,460 5,426,690 5,434,905 5,491,745 5,493,605<br />
5,533,010 5,574,727 5,581,598 5,650,790 5,660,269 5,661,780<br />
5,663,981 5,671,248 5,696,471 5,717,312 5,732,355 5,754,407<br />
5,758,289 5,768,345 5,787,356 5,794,152 5,801,466 5,825,161<br />
5,864,619 5,893,034 5,912,968 5,915,227 5,929,598 5,930,720<br />
5,960,358 5,987,330 6,044,281 6,070,082 6,125,277 6,253,088<br />
6,314,278 6,418,209 6,618,015 6,671,315 6,714,630 6,782,098<br />
6,788,920 6,788,953<br />
Other p<strong>at</strong>ents pending.
FOR<br />
ACCESSORIES,<br />
GO ONLINE @<br />
WWW.UNIDEN.COM<br />
REGISTER ONLINE TODAY!<br />
THANK YOU FOR BUYING A UNIDEN PRODUCT.<br />
©2005 <strong>Uniden</strong> America Corpor<strong>at</strong>ion, Fort Worth, Texas. Contains additional foreign articles. Custom manufactured in China.<br />
UPZZ01746BA