Parent Portal - Stoughton High School
Parent Portal - Stoughton High School
Parent Portal - Stoughton High School

Create successful ePaper yourself
Turn your PDF publications into a flip-book with our unique Google optimized e-Paper software.
<strong>Parent</strong> <strong>Portal</strong> Account Creation and Overview<br />
<strong>Stoughton</strong> <strong>School</strong>s <strong>Parent</strong> <strong>Portal</strong> Information<br />
09/07/2011<br />
Open an Internet Browser and go to http://ps.stoughtonschools.org. The screen below<br />
will appear. If you have not created an account, you can create one now using the access<br />
code information sent to you by the school. You will need the access code information<br />
provided to you by the school in order to create an account.<br />
Creating a New Account:<br />
To begin creating your account, click the “Create Account” button.<br />
Page 1 of 12
<strong>Stoughton</strong> <strong>School</strong>s <strong>Parent</strong> <strong>Portal</strong> Information<br />
09/07/2011<br />
Creating a New Account, continued<br />
The Create <strong>Parent</strong> Account screen appears, as shown below. Enter your first name, last<br />
name, email address, desired username, and password in the spaces provided. The “bar”<br />
to the right of the password box indicates the strength of your chosen password. Please<br />
avoid using a “weak” password.<br />
In the “Link Students to Account” area, enter the name of your student, the Access ID,<br />
and Access Password provided to you by the school for that student, and choose the<br />
appropriate relationship from the drop down menu. If you have more than one student,<br />
enter the information for the other students on the following lines. When you are<br />
finished, click the “Enter” button at the bottom left of the screen.<br />
The screenshot below uses a fictional example to illustrate the process of completing the<br />
form.<br />
Page 2 of 12
<strong>Stoughton</strong> <strong>School</strong>s <strong>Parent</strong> <strong>Portal</strong> Information<br />
09/07/2011<br />
Logging into the <strong>Parent</strong> <strong>Portal</strong><br />
After clicking the “Enter” button, the login screen will appear. Enter your username and<br />
password, as shown below, and then click the “Sign In” button.<br />
Page 3 of 12
<strong>Stoughton</strong> <strong>School</strong>s <strong>Parent</strong> <strong>Portal</strong> Information<br />
09/07/2011<br />
Grades and Attendance:<br />
Once you have logged into the <strong>Parent</strong> <strong>Portal</strong>, the “Grades and Attendance” screen will<br />
appear, as shown below. The various screens available to you can be accessed by<br />
clicking the icons in the left menu area. There is help available by clicking the “Help”<br />
link in the upper right.<br />
The “Grades and Attendance” screen summarizes current attendance and grade<br />
information. Since this is a fictional student, no information is shown in this example.<br />
Page 4 of 12
<strong>Stoughton</strong> <strong>School</strong>s <strong>Parent</strong> <strong>Portal</strong> Information<br />
09/07/2011<br />
Attendance History:<br />
The “Attendance History” shows the student’s year to date attendance history for each<br />
class.<br />
Page 5 of 12
<strong>Stoughton</strong> <strong>School</strong>s <strong>Parent</strong> <strong>Portal</strong> Information<br />
09/07/2011<br />
Teacher Comments:<br />
The “Teacher Comments” screen shows the teacher comments for each reporting period.<br />
Page 6 of 12
<strong>Stoughton</strong> <strong>School</strong>s <strong>Parent</strong> <strong>Portal</strong> Information<br />
09/07/2011<br />
Account Preferences:<br />
The “Account Preferences” screen, Profile tab, allows you to change various settings<br />
related to your portal account, as shown below. Make any appropriate changes and then<br />
click “Save”.<br />
Page 7 of 12
<strong>Stoughton</strong> <strong>School</strong>s <strong>Parent</strong> <strong>Portal</strong> Information<br />
09/07/2011<br />
Account Preferences, continued:<br />
The Student tab on the Account Preferences screen allows you to add additional students<br />
to your portal account. Click the “Add+” button to add students.<br />
Page 8 of 12
<strong>Stoughton</strong> <strong>School</strong>s <strong>Parent</strong> <strong>Portal</strong> Information<br />
09/07/2011<br />
Demographic Change:<br />
The “Demographic Change” screen allows you to update basic demographic information,<br />
as shown below. Make any changes to the data shown, as appropriate, and then click<br />
“Submit”.<br />
The changes will be reviewed by the school for formatting and content, and then accepted<br />
as updates. This is a great way to keep the school informed of changes in your address or<br />
phone numbers.<br />
Page 9 of 12
<strong>Stoughton</strong> <strong>School</strong>s <strong>Parent</strong> <strong>Portal</strong> Information<br />
09/07/2011<br />
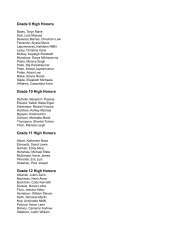
Honor Roll:<br />
The “Honor Roll” screen shows honor roll information for the 2010-2011 school year and<br />
following years. It is updated following the end of each reporting period.<br />
Page 10 of 12
<strong>Stoughton</strong> <strong>School</strong>s <strong>Parent</strong> <strong>Portal</strong> Information<br />
09/07/2011<br />
Student Schedule:<br />
The “Student Schedule” screen shows the student’s current class schedule, as shown<br />
below. Since this is a fictional student, there is no schedule information shown in the<br />
sample screen below.<br />
Page 11 of 12
<strong>Stoughton</strong> <strong>School</strong>s <strong>Parent</strong> <strong>Portal</strong> Information<br />
09/07/2011<br />
<strong>School</strong> Info:<br />
The “<strong>School</strong> Info” page provides basic contact information and term date information for<br />
the school, as shown below.<br />
Page 12 of 12