Octagon User instructions - sosecure.net
Octagon User instructions - sosecure.net
Octagon User instructions - sosecure.net

Create successful ePaper yourself
Turn your PDF publications into a flip-book with our unique Google optimized e-Paper software.
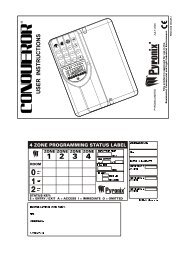
USER INSTRUCTIONS<br />
RKP II<br />
RKP<br />
PYRONIX LIMITED<br />
MAY 1997<br />
FOR UK AND EXPORT USE RDOC 289 A ISSUE 7
3\URQL[Ã/LPLWHG<br />
3\URQL[Ã+RXVH<br />
%UDLWKZHOOÃ:D\<br />
+HOODE\Ã5RWKHUKDP<br />
6Ã4
CONTENTS<br />
1. INTRODUCTION 4<br />
2 ACCESS LEVELS 4<br />
3. FEATURES 4<br />
4. FUNCTIONAL DESCRIPTION 5<br />
4.1 Operating Modes 5<br />
4.2 Entry / Exit Mode 5<br />
5. ZONES 6<br />
5.1 Engineer Programmable Zones 6<br />
5.2 24 Hour Zones 6<br />
6. CONTROLS AND FUNCTIONS 7<br />
7. USING THE OCTAGON AFTER PROGRAMMING 8<br />
7.1 Cleaner functions 8<br />
7.1.1 Full Setting The Panel 8<br />
7.1.2 Part Setting The Panel 8<br />
7.1.3 Unsetting The Panel 8<br />
7.1.4 Activating The Personal Attack (PA) Alarm 8<br />
7.1.5 Turning Chime On And Off 8<br />
7.2 Limited <strong>User</strong> Functions (<strong>User</strong> 2) 8<br />
7.2.1 Cleaner functions 8<br />
7.2.2 Deactivating Cleaner Zones 8<br />
7.2.3 Omitting Zones 9<br />
7.2.4 Changing Limited <strong>User</strong> Code 9<br />
7.3 Master <strong>User</strong> (<strong>User</strong> 1) 9<br />
7.3.1 Changing Cleaner Code 9<br />
7.3.2 Changing Limited <strong>User</strong> Code 9<br />
7.3.3 Changing Master <strong>User</strong> Code 9<br />
7.4 System Test Mode 9<br />
7.4.1 Walk Test 10<br />
7.4.2 Chime Programming 10<br />
7.4.3 Engineer Code Arming 11<br />
7.5 Cancelling A Power Failure 11<br />
7.6 Duress Code 11<br />
7.7 Event Log 12<br />
8. LED FUNCTIONS 14<br />
8.1 RKP II LED Functions 14<br />
9. CLEANING 14<br />
10. TROUBLE SHOOTING 15<br />
11. QUICK REFERENCE GUIDE (USER FUNCTIONS) 19<br />
RDOC289B Issue 7 3
1 INTRODUCTION<br />
The <strong>Octagon</strong> is a full featured intruder alarm control panel, based around a microprocessor with 8 fully programmable<br />
zones and 2 dedicated '24-hour' zones (Personal Attack alarm and a System-Tamper alarm.). It is operated via a 16<br />
- key remote keypad and has an arrangement of 3 LEDs and LED display to show the status of the system.<br />
All features are fully programmable and there are three levels of access to the system :<br />
Master <strong>User</strong> (user 1) factory default (1 2 3 4)<br />
Limited <strong>User</strong> (user 2) factory default (5 6 7 8) (if enabled)<br />
Cleaner Code factroy default (7 8 9 0) (if enabled)<br />
Engineer factory default (9 9 9 9)<br />
The Master <strong>User</strong> code gives access to all settings and unsetting facilities and also allows the changing of code numbers<br />
and testing of the system.<br />
The Limited <strong>User</strong> code gives access to the basic functions needed for everyday setting and unsetting the system.<br />
The Cleaner code can only set and unset the panel in programmed areas.<br />
The Engineer code gives total access to the system programming during day mode.<br />
2 ACCESS LEVELS<br />
Master <strong>User</strong> (user 1) enables:<br />
Limited <strong>User</strong> (user 2) enables:<br />
1.Chime programming.<br />
1. Panel setting and unsetting with a unique<br />
pass code<br />
2. Alteration of all access codes except engineers. 2. Changing user code 2<br />
3. Test mode 3. Omitting zones<br />
4. All user code 2 facilities 4. Setting and unsetting of the door chime<br />
facility<br />
Cleaner level enables:<br />
Engineer level enables:<br />
1. Panel setting and unsetting with a unique pass code 1. Changing engineers code<br />
2. All system programming<br />
3. Panel setting and unsetting, providing the<br />
panel is in day mode<br />
3 FEATURES<br />
4<br />
- 2 <strong>User</strong>-Level Codes, cleaner code and engineers code, all programmable<br />
- Fast-set facility<br />
- 8 Programmable alarm zones<br />
- 8 Zone Tampers<br />
- 4 Full set / Part set configurations<br />
- Personal Attack alarm zone<br />
- 16 key backlit keypad<br />
- 3 LEDs and LED display on RKP for immediate indication of panel status<br />
- Walk Test facility<br />
- System Test Function<br />
- Extension speaker volume control with alarm override<br />
- Separate Bell and Strobe outputs<br />
- Zone omit facility on exit<br />
- Part sets programmable as silent, time or instant<br />
- Digital Communicator outputs<br />
- Optional communicator delay / activation polarity<br />
- Customer / engineer reset<br />
- Two individual keyswitch inputs<br />
- Soak zones, Fire zones and 24hour zones<br />
- Non omitable zones<br />
- Up to four remote keypads<br />
- Additional zone on each keypad<br />
- Duress code<br />
- 100 event memory<br />
- Push to set input<br />
- Final door exit option
4 FUNCTIONAL DESCRIPTION<br />
4.1 Operating modes<br />
Day Mode This is the state of the panel when unset (not armed). Personal Attack and Tamper inputs, however, remain<br />
active 24 hours a day. (These are referred to as 24 hour zones). Day mode is identified by the U (unset) on<br />
the LED display.<br />
Set Modes When the panel is set (armed) an activation of any Access, Immediate or 24 hour zone will cause an alarm<br />
condition. When an alarm is generated the internal and external sounders will operate for the length of time<br />
programmed. The strobe will also be activated and will continue to operate after the bell time has expired,<br />
until the panel is reset.<br />
Fullset / Partset<br />
Whole sys<br />
Part set A:<br />
Part set B:<br />
Part set C:<br />
At the time of setting the control panel, any one of four set modes can be selected. i.e. Full set:<br />
tem armed; nobody on premises.<br />
All Part sets may be<br />
configured as fast set<br />
timed exit or night set<br />
4.2 Entry / Exit modes<br />
Entry When the panel is set and an entry zone is triggered the entry timer will begin to count down. During this period<br />
an entry tone (single repeated bleep) will be produced by the internal sounder. The tone will change to a dual<br />
repeated bleep when half the entry time has been reached.(two ply).<br />
Any zones which are programmed as Access zones will be ignored. If the user code is entered before the end<br />
of the count down period the panel will return to ‘day’ mode. If the timer is allowed to elapse before the user code<br />
is entered the panel will go into an alarm state. In this case the system needs to be ‘Unset’ then reset.<br />
Exit<br />
With the panel in ‘day’ mode if a user code is entered the exit timer will begin. If all the Immediate zones are<br />
clear, then the exit tone will be heard. Leave the protected area by the predetermined exit route.<br />
As you trigger access and entry / exit zones the tone will change to a high tone. When all the zones are clear,<br />
the exit tone will continue again until the end of the time-out period and the panel will arm. If the exit time is reached<br />
before all access and entry / exit zones are clear a warbling tone will be heard. The panel will arm when the entry<br />
/ exit zone is clear.<br />
5 ZONES<br />
5.1 Engineer Programming Zones<br />
Entry / Exit This is a zone which allows limited-time access to the premises in order to set or unset the system.<br />
Access This is a zone which, on setting the panel, allows access to the Entry / Exit zone. However, if the panel is set<br />
and an Access zone is triggered before an Entry / Exit zone then an alarm will be generated immediately.<br />
Immediate This is a zone which will create an immediate alarm when the panel is set.<br />
Omitted If a zone is programmed as an Omitted zone by the Engineer, then it is ignored by the panel. Zone 9 omits the<br />
RKP remote zone. It also allows the user to continue to use the alarm system even if a fault has been discovered<br />
on one or more zones. Omitted zones are only programmable for part set modes.<br />
Non Omitable Zone<br />
This is a zone that is programmed by the engineer. A zone programmed as a non omittable zone may<br />
not be omitted by the user. This enables vital areas to be protected at all times.<br />
Soak Zone<br />
Fire Zone<br />
A Soak zone is a zone which will not cause an alarm if triggered. However the activation will be saved<br />
in the log.<br />
If activated this will cause a pulsed bell and sounder activation in day or set modes. The fire LED will<br />
illuminate on RKP II.<br />
24 Hour Zone Will cause an instant alarm when the panel is in day or set modes.<br />
Cleaner Zone<br />
Push to set.<br />
If the panel is disarmed using the cleaner code these zones will remain active and cause an alarm if<br />
violated.<br />
A push to set zone will force the entry / exit timer to terminate to prevent the user from having to wait<br />
for the entry / exit period to finish.<br />
RDOC289C Issue 7 5
5.2 24 Hour Zones<br />
Personal Attack Triggering of the Personal Attack (P.A) zone will always cause a full alarm activation regardless of<br />
whether or not the panel is set. If silent P.A. is programmed, only the communicator will be<br />
activated.The P.A LED will illuminate on RKP II when the P.A is activated<br />
Tamper If a tamper fault is present in day mode a high tone will be heard. When a user code is entered<br />
the tamper LED will illuminate and the zone causing the tamper will be shown on the LED display<br />
If the tamper was caused by activation of the universal tamper zone then only the tamper LED will<br />
illuminate. If a user code is not entered before the bell time expires the internal speaker and bell will<br />
turn off and the system will rearm.<br />
Tamper<br />
If the panel has been set and a tamper fault occurs the system will go into full alarm condition. When<br />
a user code is entered the tamper LED will illuminate and the zone violated will be displayed . After<br />
the bell time has expired any further tamper faults will also cause alarm activation. The strobe will<br />
remain on until the panel is unset. A tamper alarm will also occur if the correct user code is not entered<br />
after three attempts.<br />
Tamper (Keypad)If the code is not entered successfully after the third attempt, the keypad will not accept anymore<br />
entries for 3.5 mins and a tamper will be generated. The tamper LED will flash on the RKPII when<br />
the keypad is locked out.<br />
EXPORT ONLY<br />
Tamper LED<br />
ResetThe tamper LED will remain on after a zone tamper, or system tamper. This can only be reset<br />
by entering engineer mode.<br />
6 CONTROLS AND FUNCTIONS<br />
Auto Rearm<br />
Walk test<br />
Event log<br />
After an alarm the panel will automatically reset itself when the bell timer has expired. Any zones<br />
which are still not clear after the bell time has expired will be omitted automatically.<br />
The walk test function verifies that all the intruder detectors on the alarm system are functioning<br />
correctly. When the walk test mode is enabled any activated zone will cause a chime and the LED<br />
display will indicate the relevant zone. In engineer walk test the alarm zones, tamper zones and<br />
personal attack zone activations will be recorded in the event log.<br />
The <strong>Octagon</strong> panel incorporates a memory log of the last 100 events and is accessible in master<br />
user mode. It will record panel setting personal attack alarms and will show which tamper and alarm<br />
zones have been triggered. Soak zones, user omitted zones and zones activated by the engineer<br />
walk test will also be displayed. The event log may be cleared by the <strong>User</strong> if he is permitted to do<br />
so by the engineer . All zone activations after an alarm event are recorded in the log.<br />
Keyswitch inputs Two Keyswitch inputs are available and these may be used for full setting and part setting the system.<br />
6
7 USING THE OCTAGON AFTER PROGRAMMING<br />
7.1. Cleaner Functions<br />
7.1.1 Full Setting The Panel<br />
To full set the system enter the cleaner code .<br />
The full set symbol<br />
will be displayed until the panel sets.<br />
7.1.2 Part Setting the Panel<br />
To part set the system enter the cleaner code<br />
followed by<br />
for part set A<br />
for part set B<br />
for part set C<br />
A part set symbol , OR will be displayed until the panel sets<br />
7.1.3 Unsetting The Panel<br />
To unset the system enter the cleaner code.<br />
The keypad display will show<br />
are activated at this time will create a full alarm.<br />
7.1.4 Activating Personal Attack (PA) Alarm<br />
To activate the PA alarm enter or<br />
which indicates that the system is not completely unset. Any cleaner zones which<br />
7.1.5 Turning Chime ON and OFF<br />
With the panel in day mode enter .<br />
As this feature is turned on a two tone chime will be given by the remote keypads and any extension speakers (if fitted),<br />
the chime LED will illuminate on the RKP II.<br />
With chime enabled any zones programmed to chime by the Master user will cause the same two tone chime to be given<br />
by the remote keypads and speakers. The chime zone number will also be displayed on the RKP. A chime caused by a<br />
RKP remote zone will be displayed as<br />
To turn off the chime facility enter<br />
7.2 LIMITED USER FUNCTIONS (user 2)<br />
7.2.1 Cleaner Functions<br />
The limited user has access to all the cleaner functions as well as those listed below. The <strong>Octagon</strong> control panel has to<br />
be in day mode for these additional features to be accessed.<br />
7.2.2 Deactivating Cleaner Zones<br />
If the control panel has been reset using the cleaner code the cleaner zones will still be active. If the limited user code<br />
is entered the display will change from to and all cleaner zones will be deactivated. The Cleaner cannot reset<br />
the panel if there has been an alarm activation.<br />
7.2.3 Omitting Zones<br />
If one or more "immediate" zones are triggered whilst in exit mode a warning tone will be produced and the zone number<br />
will be displayed. If the zone clears the warning tone will change to an exit tone and the full set / part set indicator will be<br />
displayed.<br />
If the zone does not clear and the warning tone continues the faulty zone can be omitted. If this is not done the system<br />
will not set.<br />
To omit a zone enter any user code<br />
followed by for part set A<br />
for part set B<br />
RDOC289D Issue 7<br />
for part set C as required.<br />
7
During the exit period enter . The display will clear and a rapid tone will be produced. Now enter the numbers<br />
of any zones which need to be omitted. Zone 9 will omit the remote RKP zone. Note: All remote keypad zones wil be<br />
omitted by entering number 9.The control panel will acknowledge these by displaying the zone number(s) selected.<br />
Now enter to allow the exit period to continue.<br />
7.2.4 Changing Limited <strong>User</strong> Code<br />
In day mode enter followed by the existing Limited user code . The keypad will bleep<br />
to acknowledge that this code is correct. Then enter the new Limited user code twice. After each input the keypad will<br />
give an acknowledgement bleep. If a code is not entered correctly the keypad will give an error tone and return to day<br />
mode.<br />
7.3 Master <strong>User</strong> Functions (USER 1)<br />
The master user has access to all the Limited user and cleaner functions as well as those listed below.<br />
7.3.1 Changing Cleaner Code<br />
In day mode enter followed by the Master user code . The keypad will bleep to<br />
acknowledge that the code is correct. Then enter the new Cleaner code twice. After each input the keypad will bleep.<br />
If the code is not entered correctly the keypad will emit an error tone and return to day mode.<br />
7.3.2 Changing Limited <strong>User</strong> Code<br />
In day mode enter<br />
followed by the Master user code. Then enter the new Limited user code twice.<br />
7.3.3 Changing Master <strong>User</strong> code<br />
In day mode enter followed by the Master user code . Then enter the new Master user code twice.<br />
7.4 System Test Mode<br />
This function performs a number of system tests which are listed below. In day mode enter<br />
The "unset" display will now flash Now enter user code .<br />
All display LEDs on the keypad will all turn on and the number display will show a flashing<br />
Now press The strobe output will be activated<br />
press The strobe output will turn off and the bell output will switch on<br />
press The bell output will turn off and any extension speakers fitted will sound<br />
press The extension speakers will turn off and the panel will return to day mode<br />
7.4.1 Walk Test<br />
To verify the operation of all detectors in the alarm system a user walk test feature has been included.<br />
To perform a walk test enter .<br />
The unset display will now flash Now enter the Master user code .<br />
If any zones are active a high tone will be generated from the keypad and the zone numbers will be displayed on the<br />
keypad.<br />
If all zones are inactive then a low tone will be heard.<br />
Enter to end walk test.<br />
Note: Unlike the Engineer walk test the Master user walk test will not enter zone activations into the event log.<br />
7.4.2 Chime Programming<br />
In order to increase system flexibility the chime programming may be performed by the Master <strong>User</strong>. Four chime options<br />
are available on the <strong>Octagon</strong> control panel and these are: Day mode.<br />
Part set A<br />
Part set B<br />
8<br />
Part set C
In day mode, any of the eight standard zones may be programmed to chime. In addition to this when the system is part<br />
set any omitted zones can also be programmed to chime. This allows the chime to operate at any time except when the<br />
control panel is full set. Chime is programmed as follows:<br />
In day mode enter .<br />
The keypad display will change to<br />
(flashing) to indicate that chime programming has been selected.<br />
Now enter the Master <strong>User</strong> code<br />
, the keypad will bleep to acknowledge that the code is correct.<br />
Next enter<br />
for Day mode<br />
for Part set A<br />
for Part set B<br />
for Part set C<br />
The keypad will bleep to acknowledge a key press. Now enter the numbers of the zones you wish to chime. Pressing<br />
will clear all chime zones and should be used if reprogramming is necessary. When all zone numbers have been entered<br />
press to return to day mode. Programming of another mode to chime will require the above sequence to be repeated.<br />
7.4.3 Engineer Code Arming<br />
The engineer may arm and reset the panel from day mode if the panel has previously been reset by the Master <strong>User</strong> Code.<br />
To arm panel enter<br />
. The unset display will now flash<br />
Now enter the Engineer code<br />
The panel will now arm<br />
Enter<br />
or<br />
or To part set the panel.<br />
7.5 Cancelling A Power Failure<br />
In day mode if the mains supply is interrupted the tamper LED and<br />
will flash and a tone will be generated by the<br />
remote keypad. To cancel this tamper alarm enter any user code.<br />
7.6 Duress Code<br />
If the last two digits of a user code are reversed when arming or disarming the panel, the digital communicator personal<br />
attack output is activated. The correct code must be entered to reset the PA communicator output.<br />
e.g. Master code<br />
Duress code<br />
RDOC289E Issue 7 9
7.7 Event Log<br />
The Master <strong>User</strong> may view the event log. To view the event log enter<br />
. The unset display will now flash<br />
Now enter the Master <strong>User</strong> code , the last zone activation will be displayed on the RKP.<br />
Key to scroll backwards<br />
to scroll forwards<br />
to clear log (if enabled by engineer)<br />
to exit to day mode.<br />
1. Indicates that the next event caused the alarm activation when the panel was in day mode.<br />
RKP II LED display layout RKP display layout<br />
2. Indicates that the next event caused the alarm activation when the panel was full set.<br />
3. Indicates that the next event caused the alarm activation when the panel was part set A.<br />
4. Indicates that the next event caused the alarm activation when the panel was part set B.<br />
5. Indicates that the next event caused the alarm activation when the panel was part set C.<br />
6. Indicates the panel was set<br />
7. Indicates a Personal Attack activation or a flashing ' P ' indicates an Engineer walk test activation.<br />
10
8. A number indicates a zone activation.<br />
9. A flashing number indicates a soak zone activation<br />
e.g. zone 6<br />
10. Followed by number shows an Engineer walk test activation.<br />
11. A number and the tamper LED indicates a tamper zone activation.<br />
e.g. zone 8<br />
12. The tamper LED indicates a bell or case tamper.<br />
e.g. zone 7<br />
13. Indicates an entry/exit activation of the remote keypad zones.<br />
14. followed by a number shows a user omitted zone (e.g. zone 4 was omitted here during the setting<br />
sequence).<br />
RDOC289F Issue 7 11
8 RKP LED FUNCTIONS<br />
Supply LED : Indicates a mains and/or battery supply<br />
Tamper LED : Indicates a tamper fault<br />
Tamper LED flashing : Indicates a keypad lockout for 3.5<br />
minutes<br />
Line Fail LED : Indicates a communicator line fault<br />
8.1 RKP II LED Functions<br />
All of the above functions, including the following:<br />
Fire LED : Indicates a fire alarm<br />
P.A LED : Indicates a personal attack alarm<br />
Intruder LED : Indicates a zone activation<br />
Engineer LED : When illuminated the engineer code is<br />
required to reset the<br />
panel<br />
Chime LED : Indicates that the chime function is on<br />
9 CLEANING<br />
DO NOT use strong detergents to clean this control panel. To remove any dirt or grime, wipe with a clean damp cloth ONLY<br />
10 TROUBLESHOOTING<br />
The following guide shows the most common displays given by the <strong>Octagon</strong> remote keypad. If an incorrect function code<br />
is entered and it is not known what input the control panel is expecting next, please wait. The control panel will only wait<br />
for approximately 1 minute before reverting back to either day mode or Engineer mode. If this does not work press ,<br />
then wait again.<br />
1 Panel unset (Day Mode)<br />
RKP LED display layout RKP LED display layout<br />
During Exit Mode the following four symbols are displayed flashing<br />
2 Full set indication<br />
3 Part set A<br />
4 Part set B<br />
5 Part set C<br />
6 Panel set<br />
7 Programming Mode (Press to return to day )<br />
12
8 Programmable functions returned to factory settings ( call Engineer)<br />
9 When the panel has been unset with the Cleaner Code a small 'u' is displayed.<br />
10 Mains Failure in Day Mode - providing system is battery backed a tone will be emitted.<br />
A<br />
and the tamper LED will flash for a second when arming the system.<br />
11. Telephone line fail<br />
12 Remote Zone open circuit.<br />
13 Battery Low / No Battery ( Day mode)<br />
14 Chime function activated<br />
15 No Battery / Low Battery / Power Fail<br />
When trying to arm the panel the tamper LED flashes and the tamper tone is emitted there is no battery / low<br />
battery or there is a power failure. If option 48 / 49 is set to 0 (default).<br />
For the following conditions the activation indicated will cause a continuous tone to be heard. Enter any user<br />
code once to display the system status. Enter the user code a second time to return to Day Mode (all tamper<br />
circuits must be closed before the system can return to Day Mode).<br />
13<br />
RDOC289G Issue 7
16 Tamper alarm (call Engineer).<br />
17 Tamper alarm . The LED display shows the number of the zone activated (call Engineer).<br />
18 PA Alarm. Enter any user code to reset the panel.<br />
19 Intruder alarm. The LED display shows the number of the zone activated.<br />
Enter any user code to reset the panel.<br />
20 Fire Alarm. Enter any user code to reset the panel.The LED display shows<br />
the number of the zone activated.<br />
21 Engineer code is required to reset the panel. The LED display shows<br />
the number of the zone activated.<br />
14
1 1 USER QUICK REFERENCE GUIDE<br />
RDOC289H Issue 7<br />
15