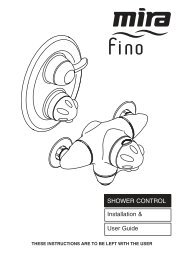
Qube Basin Mixer Fitting Instructions & Contents List - QS Supplies
Qube Basin Mixer Fitting Instructions & Contents List - QS Supplies
Qube Basin Mixer Fitting Instructions & Contents List - QS Supplies

Create successful ePaper yourself
Turn your PDF publications into a flip-book with our unique Google optimized e-Paper software.
AFTERCARE INSTRUCTIONS<br />
Your fitting has a high quality finish and should be treated with care<br />
to preserve the visible surfaces. All surface finishes will wear if not<br />
cleaned correctly, the only safe way to clean your mixer is to wipe<br />
with a soft damp cloth. Stains can be removed using washing up<br />
liquid. All bath cleaning powders and liquids will damage the surface<br />
of your fitting, even non-scratch cleaners.<br />
GUARANTEE<br />
All products are manufactured to the highest standards and a 5 year<br />
guarantee covers any defect in manufacture. As gold and special<br />
effect finishes are softer than chromium plate, special care must be<br />
taken when cleaning; a 3 year guarantee covers these finishes.<br />
NOTE: The 5 year guarantee on the valves is invalidated if damaged<br />
by any waterborne debris.<br />
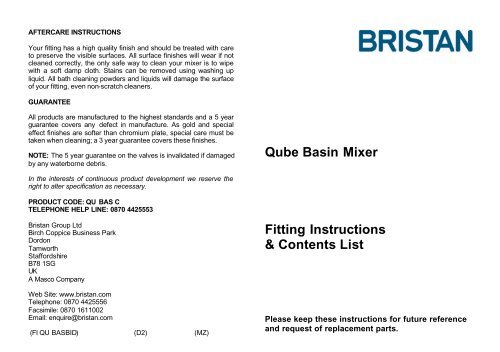
<strong>Qube</strong> <strong>Basin</strong> <strong>Mixer</strong><br />
In the interests of continuous product development we reserve the<br />
right to alter specification as necessary.<br />
PRODUCT CODE: QU BAS C<br />
TELEPHONE HELP LINE: 0870 4425553<br />
Bristan Group Ltd<br />
Birch Coppice Business Park<br />
Dordon<br />
Tamworth<br />
Staffordshire<br />
B78 1SG<br />
UK<br />
A Masco Company<br />
Web Site: www.bristan.com<br />
Telephone: 0870 4425556<br />
Facsimile: 0870 1611002<br />
Email: enquire@bristan.com<br />
(FI QU BASBID) (D2) (MZ)<br />
<strong>Fitting</strong> <strong>Instructions</strong><br />
& <strong>Contents</strong> <strong>List</strong><br />
Please keep these instructions for future reference<br />
and request of replacement parts.
WATER PRESSURE<br />
This mixer is suitable for use at all supply pressures. However for<br />
optimum use both the hot and cold supplies should be reasonably<br />
balanced. If the fitting is installed at low pressure (tank fed), then the<br />
minimum distance from the outlet of the nozzle to the underside of<br />
the cold tank should be approximately 2 metres to ensure adequate<br />
performance.<br />
This mixer should be installed in compliance with Water Regulations.<br />
Where the supplies are unbalanced, i.e. hot water from the cylinder<br />
tank / cold from the mains, approved check valves must be fitted in<br />
the supply pipes. For further details contact your Local Water<br />
Authority.<br />
CONTENTS<br />
1. Full rubber washer<br />
2. C-shaped rubber washer<br />
3. C-shaped metal washer<br />
4. Nut<br />
5. Threaded rod<br />
6. Flexible tail pipes<br />
7. Pop-up operating rod<br />
8 on; Waste assembly<br />
INSTALLATION<br />
1. Identify all components and check for completeness, particularly<br />
before arranging fitting.<br />
2. Fit the mixer body to the basin/bidet using the 'C' plate fixing kit.<br />
The full rubber washer (1) goes between the fitting and the<br />
basin/bidet, and the 'C' shaped rubber (2) and metal washers (3) on<br />
the underside of the basin/bidet, to be secured by the nut (4) and<br />
threaded rod (5).<br />
3. Fit the flexible tail pipes (6) to the inside of the fitting and connect<br />
the hot and cold supplies.<br />
4. Fit the pop up waste, with washer (10) above and washer (11)<br />
below the basin/bidet. It is recommended that a silicon sealant be<br />
applied to both sealing faces of washers 10 and 11. The plug height<br />
can be set by, adjusting the waste rod (9) and operating rod (7)<br />
connecting bracket (8), and the screw (12) in the base of the plug.<br />
5. Fully open the mixer in the mid position, letting it run for a few<br />
minutes and check all joints and connections for leaks.<br />
6. See over the page for aftercare instructions.<br />
MAINTENANCE<br />
If the fitting begins to drip:<br />
1. Isolate water supplies.<br />
2. Prise out handle cap, loosen grub screw and lift off the handle.<br />
3. Unscrew the shroud and brass retaining plate and lift out the<br />
cartridge complete with seal.<br />
4. Clean or replace cartridge, clean and grease seal and refit.<br />
Note: that there are locating pins on the bottom of the cartridge that<br />
fit in holes inside the tap, to ensure it is fitted the right way round.<br />
5. Refit the handle and tighten the grub screw. Replace the handle<br />
cap.<br />
6. If problem persists contact our helpline quoting the product code.<br />
Please Note: In the unlikely event you find a part missing please<br />
contact our Customer Service Help line on 0870 4425553 for<br />
immediate dispatch of part.