AST2 - Allen Sports USA
AST2 - Allen Sports USA
AST2 - Allen Sports USA

Create successful ePaper yourself
Turn your PDF publications into a flip-book with our unique Google optimized e-Paper software.
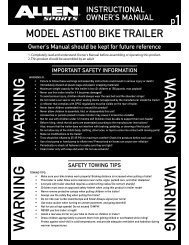
INSTRUCTIONAL<br />
OWNER’S MANUAL<br />
p 6<br />
Securing Child with 5-Point Safety Harness<br />
FOR ONE CHILD:<br />
STEP 1:<br />
WARNING!<br />
To avoid serious injury, children should always wear the seat belt, shoulder strap, and a helmet!<br />
Undo the lap belt buckle and seat the child in the CENTER of the trailer.<br />
Buckle the lap belt [A] over the child’s lap, and pull the strap until the belt is<br />
ONE CHILD:<br />
STEP 2:<br />
NOTE:<br />
Place the two center shoulder straps [C] over the child’s shoulders, and<br />
clip both straps into “D” Ring [D] of the center crotch strap. Adjust shoulder<br />
strap height of the child, then pull the straps until they are snug.<br />
Clip the outer shoulder strap on either side into the “D” Ring of the outer<br />
crotch strap directly below. This will keep the straps that are not<br />
FOR TWO CHILDREN:<br />
STEP 1:<br />
STEP 2:<br />
Undo the lap belt buckle and seat the children in the Left & Right seats of the<br />
trailer. Buckle the lap belt [A] over each child’s lap, and pull the strap until<br />
the belt is tight.<br />
Place the two center shoulder straps [B] over each child’s shoulders, and clip<br />
both straps into “D” Ring [C] of the center crotch strap. Adjust shoulder strap<br />
height of the straps until they are snug - you should be able to fit two average<br />
adult fingers between the belt and the child.<br />
TWO CHILDREN:<br />
NOTE:<br />
The buckle should be centered in your child’s abdomen. Hook the shoulder<br />
straps to the D-rings on the buckle and adjust the ladder locks so they fit snugly.<br />
WARNING!:<br />
STEP 1:<br />
Adjust the straps so that the crotch strap and shoulder straps meet at the child’s stomach level,<br />
NOT at the chest level!<br />
REMOVAL OF TRAILER<br />
Remove Safety strap by releasing D-Ring<br />
STEP 2:<br />
STEP 3:<br />
STEP 4:<br />
STEP 1:<br />
STEP 2:<br />
STEP 3:<br />
STEP 4:<br />
STEP 5:<br />
ANNUALLY:<br />
AS NEEDED:<br />
Remove QR Snap from hitch connection<br />
Pull trailer arm away from black hitch<br />
Black Hitch attached to axle can remain on the bicycle for easy reattachment of the trailer.<br />
Trailer Maintenance<br />
Your trailer will give you many years of service with minimal care. To ensure safe and dependable operation, we recommend<br />
the following regular maintenance. Before each ride:<br />
Check all fasteners to make sure that they are tight, and tighten or replace as needed.<br />
Make sure that wheels are fully secure on the frame. Wheels must be fully inserted to lock in place.<br />
Check tires for wear and proper inflation as listed on the tire sidewall. Use only hand-operated pump to avoid tire damage.<br />
Under- or over inflation can result in unsafe handling.<br />
Double check hitch attachment, making sure that QR Pin is locked, and that safety strap is in place.<br />
Check harness strap for wear, and made sure that buckles lock properly.<br />
Once a year, or sooner if needed, have the trailer inspected by a qualified bicycle mechanic for signs of wear or needed adjustment.<br />
Trailer can be cleaned with a mild detergent and water. Do not remove seat or cover for washing. Do not use harsh chemicals or water,<br />
as they may damage fabrics or the frame materials or surfaces.