Lesson 1 - LearningThroughMuseums
Lesson 1 - LearningThroughMuseums
Lesson 1 - LearningThroughMuseums

Create successful ePaper yourself
Turn your PDF publications into a flip-book with our unique Google optimized e-Paper software.
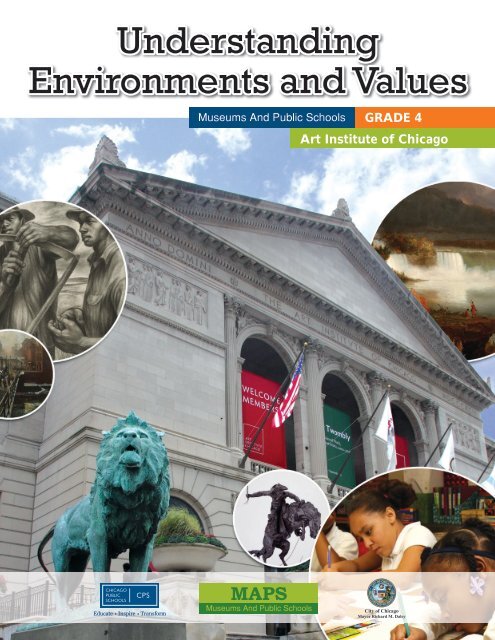
Understanding<br />
Environments and Values<br />
Museums And Public Schools<br />
GRADE 4<br />
Art Institute of Chicago<br />
Educate Inspire Transform<br />
MAPS<br />
Museums And Public Schools<br />
City of Chicago<br />
Mayor Richard M. Daley
Museums And Public Schools<br />
GRADE 4<br />
Art Institute of Chicago<br />
Educate Inspire Transform<br />
MAPS<br />
Museums And Public Schools<br />
City of Chicago<br />
Mayor Richard M. Daley
CITY OF CHICAGO<br />
Richard M. Daley<br />
Mayor, City of Chicago<br />
BOARD OF EDUCATION OF THE CITY OF CHICAGO<br />
Clare Muñana<br />
Vice President<br />
MEMBERS<br />
Norman R. Bobins<br />
Dr. Tariq Butt<br />
Alberto A. Carrero, Jr.<br />
Peggy A. Davis<br />
Roxanne Ward<br />
CHICAGO PUBLIC SCHOOLS<br />
Ron Huberman<br />
Chief Executive Officer<br />
Barbara Eason─Watkins, Ed.D.<br />
Chief Education Officer<br />
Diane H. Zendejas<br />
Chief Officer, Office of Language and Cultural Education<br />
Antonio J. Acevedo<br />
Deputy Officer, Office of Language and Cultural Education
Table of Contents<br />
06 Curriculum Overview<br />
09 <strong>Lesson</strong> 1 The Southwest: Picturing, Reading, and Writing<br />
about American Environments<br />
27 <strong>Lesson</strong> 2 Oceans and Rivers: Northeast Environments<br />
47 <strong>Lesson</strong> 3 People and Environments of the American West<br />
63 <strong>Lesson</strong> 4 The Midwest: The City and the Farm<br />
79 <strong>Lesson</strong> 5 Choices<br />
93 <strong>Lesson</strong> 6 Inferring Values<br />
105 <strong>Lesson</strong> 7 How to Read Symbols<br />
121 <strong>Lesson</strong> 8 A Visit to the Art Museum<br />
Art Institute of Chicago • 5
Curriculum Overview<br />
The Art Institute of Chicago MAPS Curriculum: Understanding Environments and Values<br />
<strong>Lesson</strong>s That Develop Reading and Writing Skills as Students Interpret Art to Understand<br />
and Communicate about Important Topics in Science and Social Studies<br />
<strong>Lesson</strong>s for 4th Grade<br />
Overview<br />
Students apply reading and writing skills as they learn about topics represented in<br />
artworks. The lessons complement the core curriculum in reading, science, social studies<br />
and writing.<br />
The lessons emphasize literacy development. Students reinforce reading skills as they<br />
infer main ideas of works of art and write about what they learn. Activities include<br />
vocabulary development and art-making in which students communicate the ideas they<br />
learn through their own drawings. Each lesson includes an Extended Writing question<br />
based on a relevant reading. Teachers may use the lessons in conjunction with language<br />
arts or content development.<br />
The lessons also can be used in conjunction with science or social studies curriculum<br />
so that students develop content knowledge as well as literacy skills. The topics of the<br />
lessons match fourth-grade content requirements.<br />
6 • Understanding Environments and Values
Curriculum Overview<br />
The Eight <strong>Lesson</strong>s<br />
<strong>Lesson</strong>s That Develop Literacy as Students Learn about Environments<br />
These three lessons build reading and writing as students focus on environments,<br />
aligning with ISAT science requirements and the CMSI curriculum—Earth Features<br />
and Changes, Land and Water. Those three lessons also correlate with the fourth grade<br />
social studies focus on geographic regions.<br />
• Picturing, Reading, and Writing about American Environments<br />
• Oceans and Rivers: Northeast Environments<br />
• People and Environments of the American West<br />
<strong>Lesson</strong>s That Develop Literacy as Students Learn about Themes of Social Studies<br />
These four lessons apply reading and writing skills as students analyze works of art<br />
that are related to themes aligned with SCRMA and trade books.<br />
• The City and the Country<br />
• Choices<br />
• Shared Values<br />
• How to Interpret Symbols: Maps and Images<br />
Field Trip Guide<br />
• Reading Art: A Trip to the Art Institute<br />
This lesson organizes a field trip to The Art Institute of Chicago that accompanies any<br />
of the other seven lessons. Teachers can choose either a self-guided tour or a docentguided<br />
tour.<br />
Art Institute of Chicago • 7
8 • Understanding Environments and Values
<strong>Lesson</strong> 1<br />
The Southeast:<br />
Picturing, Reading, and Writing<br />
about American Environments
<strong>Lesson</strong> 1<br />
The Southeast: Picturing, Reading, and<br />
Writing about American Environments<br />
Summary<br />
In this lesson, students interpret a painting of a plant that requires a warm environment to grow and<br />
survive. Specifically, they learn about the magnolia, which grows in the southeastern United States.<br />
Students analyze the ways the climate of a region affects plants and learn about the representation of<br />
nature in art as they create their own drawings of the plants of a selected environment. The lesson<br />
will support student literacy skills and can be related to a focus on the science of the environment or a<br />
social studies unit on regions of the United States. You may want to specifically schedule sessions on<br />
plants and environments in order to align this lesson with your science curriculum.<br />
Featured Artwork<br />
Martin Johnson Heade (American, 1819–1904)<br />
Magnolias on Light Blue Velvet Cloth, 1885/1895<br />
Oil on canvas<br />
Illinois Benchmarks<br />
Reading<br />
1.A.2b:<br />
1.B.2a:<br />
1.C.2e:<br />
1.C.2b:<br />
Writing<br />
3.B.2a:<br />
3.C.2a:<br />
Science<br />
12.B.1a:<br />
12.B.2b:<br />
Art<br />
25.B.2:<br />
26.B.2d:<br />
Clarify word meaning using context clues and a variety of resources including<br />
glossaries, dictionaries, and thesauruses.<br />
Establish purposes for reading: survey materials; ask questions; make predictions;<br />
connect, clarify, and extend ideas<br />
Explain how authors and illustrators use text and art to express their ideas<br />
Make and support inferences and form interpretations about main themes and topics.<br />
Generate and organize ideas using a variety of planning strategies.<br />
Write for a variety of purposes and for specified audiences in a variety of forms.<br />
Describe and compare characteristics of living things in relationship to their<br />
environments.<br />
Identify physical features of plants and animals that help them live in different<br />
environments<br />
Understand how elements and principles combine within an art form to express ideas.<br />
Demonstrate knowledge and skills to create works of visual art using problem solving,<br />
observing, designing, sketching, and constructing.<br />
10 • <strong>Lesson</strong> 1: The Southeast ‒ Picturing, Reading, and Writing about American Environments
English Language Learner Standards<br />
Standard 1 Reading: Arrange information on topics gathered from reading.<br />
Standard 2 Communication: Edit and revise own writing to produce final drafts.<br />
Objectives<br />
• Students will interpret a work of art.<br />
• Students will use expository writing to describe a plant represented in a painting.<br />
• Students will infer the purpose of an artist or writer in creating a work.<br />
• Students will create a work of art representing an environment.<br />
• Students will complete a visual glossary of terms and use those terms in writing.<br />
Background Information<br />
The artwork: Magnolias on Light Blue Velvet Cloth, 1885/1895<br />
The artist: Martin Johnson Heade (American, 1819–1904)<br />
Relevant Information<br />
• Heade’s painting shows a small bunch of magnolia blossoms placed on a velvet ground, as if on<br />
display. This kind of image is called a still life.<br />
• Although Heade lived in many parts of North and South America, he spent the last twenty years of<br />
his life in the southern state of Florida. Wherever he went, Heade liked to paint scenes from nature,<br />
either as big landscapes or close-up still-life paintings.<br />
• During his years in Florida, he painted a number of local, or indigenous, flowers in addition to the<br />
magnolia, including the Cherokee rose and the orange blossom.<br />
• By showing these flowers close-up and by themselves, Heade tells us that they are important in<br />
some way and that he wants us to admire them.<br />
• Heade painted with a style called scientific realism, which means that his goal was to show<br />
the subject as accurately and true to life as possible, as if you were looking at a photograph or you<br />
could actually touch or smell the flower.<br />
• The southern magnolia grows best in rich, moist, well-drained soils in the bottoms and low uplands<br />
of the Coastal Plains of the Southeastern United States (http://www.na.fs.fed.us/spfo/pubs/<br />
silvics_manual/Volume_2/magnolia/grandiflora.htm)<br />
You will find additional useful information from the following sources:<br />
The Art Institute of Chicago Web site<br />
• Information about Magnolias on Light Blue Velvet Cloth:<br />
http://www.artic.edu/aic/collections/artwork/100829<br />
http://www.artic.edu/artaccess/AA_American/index.html<br />
Art Institute of Chicago • 11
Additional Web sites<br />
• The U.S. Department of Agriculture, Forest Service: Southern Magnolia:<br />
http://www.na.fs.fed.us/spfo/pubs/silvics_manual/Volume_2/magnolia/grandiflora.htm<br />
• Tree of Life Web Project:<br />
http://tolweb.org/tree/phylogeny.html<br />
• Plant Files Database:<br />
http://davesgarden.com/guides/pf/go/2451/<br />
Web sites for Students<br />
• Plants:<br />
http://www.biology4kids.com/files/plants_main.html<br />
• Biology of Plants:<br />
http://www.mbgnet.net/bioplants/<br />
• Plants and our Environment:<br />
http://library.thinkquest.org/3715/<br />
Printed Materials (available in the Art Institute’s Crown Family Educator Resource Center<br />
http://www.artic.edu/aic/education/trc/index.html)<br />
• Barter, Judith A., Kimberly Rhodes, Seth A. Thayer and Andrew J. Walker. 1998. American Arts at<br />
the Art Institute of Chicago: From Colonial Times to World War I. Art Institute of Chicago/Hudson<br />
Hills Press.<br />
Day 1: Habitat—Interpreting a Painting in Words<br />
● Time Allotment<br />
45 minutes<br />
● Materials<br />
• Reproduction of Magnolias on Light Blue Velvet Cloth, 1885/1895<br />
Materials for each student:<br />
Copy of Art Reader organizer<br />
● Advance Preparation<br />
• Prepare to display the reproduction of Magnolias on Light Blue Velvet Cloth the in<br />
the classroom for student viewing.<br />
• Review the Background Information section of this lesson about Magnolias on Light Blue<br />
Velvet Cloth.<br />
12 • <strong>Lesson</strong> 1: The Southeast ‒ Picturing, Reading, and Writing about American Environments
● Vocabulary<br />
blossom<br />
climate<br />
detail<br />
environment<br />
habitat<br />
image<br />
indigenous<br />
inference<br />
landscape<br />
observe<br />
petal<br />
realism/scientific-realism<br />
still life<br />
● Introduction<br />
1. Ask students to make two lists: “What I know about plants” and “What I know about<br />
paintings.” Tell them to keep those lists because they will add more information to them at<br />
the end of the lesson.<br />
● Part 1: Reading the Painting<br />
1. Have students take a close look at Magnolias on a Light Blue Velvet Cloth using the first two<br />
sections of the Art Reader handout.<br />
2. After students have completed their Art Reader, begin a discussion by asking students to<br />
describe what they see or recognize in the image.<br />
3. Ask them to count how many different blossoms are shown. Have them discuss what is similar<br />
and what is different among the blossoms in the painting. In what stage of development is each<br />
blossom?<br />
4. Ask the students what they think the flowers might smell and feel like.<br />
5. Explain to the students that the artist painted this to look exactly like the actual flower—as if he<br />
had used a magnifying glass to examine it carefully—and this is called scientific realism. Ask<br />
the students to tell why they think it’s called “scientific.”<br />
6. Explain that the plant grows in the southeastern United States. Ask how it is different from<br />
flowers that grow in the Chicago environment. Then “think” out loud to infer with students why<br />
the flower would be so big—what kind of climate it would need (warm and rainy). Point out<br />
that this is the climate of the southeastern United States where the magnolia grows. Explain that<br />
the longer the growing season the bigger a plant can get and that most large plants need much<br />
water.<br />
7. Ask students how they think the artist felt about the flowers he was painting. Explain that even<br />
the choice of the flower itself is a clue that the artist likes that type of flower. Point out that the<br />
artist probably wanted to help people see how special the magnolia is through his painting.<br />
8. Begin a pictorial word wall. Include terms the students use to describe the overall painting and<br />
the individual blossoms. Add more words as the lesson continues. Students should illustrate<br />
the terms.<br />
Art Institute of Chicago • 13
Day 2: Interpreting a Poem and a Painting<br />
● Time Allotment<br />
45–60 minutes<br />
● Materials<br />
Materials for each student:<br />
Copy of Haiku Reader organizer<br />
Copy of Haiku Writer organizer (optional)<br />
● Vocabulary<br />
descriptive<br />
haiku<br />
image<br />
poetry<br />
● Procedure<br />
1. Give students copies of the Haiku Reader. Read the first poem aloud. If students are not<br />
familiar with this form of poetry, explain that haiku is a short poem that has a special pattern<br />
and that it originated in Japan, which is a country where they also would see magnolias. Then<br />
read the second poem aloud.<br />
2. Ask the students to select one of the poems and to draw a picture, or image, in the box<br />
provided, showing what the poet has written about in the haiku.<br />
3. Then have students exchange their drawings and decide which of the two haikus the other<br />
student drew. Ask the students what words in the poem helped them to decide what it looked like.<br />
4. Point out that the words the poets use are like the elements the artist uses. The artist used line,<br />
color, and shape to help us understand what the flower looked like just as the poet used words.<br />
5. To extend the learning about poetry and images, you may distribute the Haiku Writer and ask<br />
students to create their own haiku poems.<br />
Day 3: Reading and Writing about Plants and Places<br />
● Time Allotment<br />
45–60 minutes<br />
● Materials<br />
Materials for each student:<br />
Copy of the reading “Plants and Places”<br />
Copy of Words and Writing organizer<br />
14 • <strong>Lesson</strong> 1: The Southeast ‒ Picturing, Reading, and Writing about American Environments
● Vocabulary<br />
ecosystem<br />
habitat<br />
region<br />
summary<br />
● Procedure<br />
1. Give each student a copy of “Plants and Places” to read. Students can complete the reading<br />
individually or with a learning partner.<br />
2. After students complete the reading, ask them to summarize what they have learned. Remind<br />
them that a summary includes the most important information about a topic. “Think out loud”<br />
with the students and select information to include in a class summary that you put on the<br />
chalkboard.<br />
3. Ask students to identify words to add to the pictorial word wall for this lesson. Then give<br />
students the Words and Writing organizer to create their own pictorial glossary of important<br />
words based on today’s activity and those from previous days. They also can use that organizer<br />
to help pre-write their extended response to the “Plants and Places” reading.<br />
Day 4: Drawing Nature<br />
● Time Allotment<br />
45–60 minutes<br />
● Advance Preparation:<br />
If possible, arrange for students to go outside to locate and observe plants they will draw. If not<br />
possible, then get at least three plants or photos of plants to put on display in the classroom.<br />
● Materials<br />
Materials for each student:<br />
Drawing paper (may be plain white paper)<br />
Drawing materials (pencils, colored pencils or markers or crayons)<br />
Copy of Art Planner organizer<br />
● Vocabulary<br />
graphic<br />
line<br />
planner<br />
size<br />
shape<br />
sketch<br />
Art Institute of Chicago • 15
● Procedure<br />
1. Ask students what they think an artist does when creating a scientifically realistic image like<br />
Magnolias on Light Blue Velvet Cloth. Explain that a realistic painting shows something as it is<br />
in the natural world.<br />
2. Ask students to choose a plant or part of a plant to draw. Tell them they will draw a realistic<br />
picture of the plant they select.<br />
3. Give students time to first sketch out and plan their image with the Art Planner organizer.<br />
Focus this part of the lesson on planning and problem solving. Explain that this picture<br />
planner is like the pre-writing they do when they are going to write an essay.<br />
4. Review the students’ plans before they make their drawings.<br />
5. After students complete their drawings, ask them to add captions so you can make a plant book<br />
or display.<br />
Day 5: Writing about the Chicago Environment<br />
● Time Allotment<br />
45 minutes<br />
● Materials<br />
Materials for each student:<br />
Copy of Writing organizer<br />
● Vocabulary<br />
essay<br />
expository<br />
envision<br />
● Procedure<br />
1. Have students use the Writing organizer to pull together ideas and prepare to write expository<br />
essays about the Chicago environment. Tell them they will be writing about a real place.<br />
2. After students complete their plans, they should write their essays. Remind them that they want<br />
their readers to be able to envision the environment they have described so clearly that they<br />
could even draw a picture based on the essay.<br />
3. Encourage students to include vocabulary from the pictorial word wall in their writing.<br />
● Home Connection<br />
Students can take the Haiku Writer home and create haikus with their family. Each family member<br />
can choose their favorite flower and then collaborate on a haiku about it.<br />
● Assessment<br />
Ask students to explain in their own words the ideas they learned.<br />
Have students write a guide for other students about how you can show nature in a picture.<br />
16 • <strong>Lesson</strong> 1: The Southeast ‒ Picturing, Reading, and Writing about American Environments
● Expansion Activities<br />
• VOCABULARY DEVELOPMENT: Students make a pictorial nature word book, illustrating<br />
the terms they have learned.<br />
• RESEARCH: If students have Internet access, ask them to research and report on<br />
the environment and other plants of the south.<br />
• SCIENCE: Ask students to design a plant that would live in the habitat like that of<br />
the magnolia.<br />
• WRITING: Have students write a poem or paragraph about how they feel about the painting.<br />
This activity is adaptable to any painting.<br />
• FOR ENGLISH LANGUAGE LEARNERS: Have students make a three-column bilingual<br />
word chart, the word in English, the word in their own language, and a picture.<br />
• FOR STUDENTS WITH SPECIAL NEEDS: Partner or group students, varying performance<br />
and skill level and collaborate on activities.<br />
Art Institute of Chicago • 17
<strong>Lesson</strong> 1 Art Reader (1/2)<br />
ILS25A: I can analyze how an artist uses elements of visual art to communicate.<br />
ILS1B: I can analyze a visual communication (transferable to passages).<br />
Part One:<br />
Take a close look at this work of art. Be sure to look for longer than two minutes. In this chart, list<br />
ten things that you see or recognize.<br />
1. 6.<br />
2. 7.<br />
3. 8.<br />
4. 9.<br />
5. 10.<br />
Part Two:<br />
In this chart, describe the elements (color, line, size, shapes) of the work of art.<br />
Element of Art<br />
Describe How the Artist Used It<br />
color<br />
shapes<br />
size<br />
line<br />
18 • <strong>Lesson</strong> 1: The Southeast ‒ Picturing, Reading, and Writing about American Environments
<strong>Lesson</strong> 1 Art Reader (2/2)<br />
Part Three:<br />
Describe the mood and emotion of the work of art. How does it make you feel?<br />
Part Four:<br />
Explain how the artist uses elements of the work of art to make you feel that way. How did the artist<br />
create this mood?<br />
Art Institute of Chicago • 19
<strong>Lesson</strong> 1<br />
Haiku Reader<br />
ILS2A: I can analyze the literature that communicates ideas from different cultures.<br />
Here are two haiku poems. A poet wrote them hundreds of years ago. His name is Matsuo Munefusa.<br />
He wrote them in Japan. A haiku poem uses words in a special way. The poet uses them to help people<br />
understand and envision their idea. It is a kind of picture that you don’t see on the page. But you see it<br />
when you read the words and think about what they tell you.<br />
Directions:<br />
Read the two poems.<br />
Then choose one to illustrate (which means draw). Draw a picture that shows what you see when you<br />
read the poem. Draw the image you think the poet was thinking of.<br />
Then show your drawing to another student. Ask which poem you drew.<br />
The old pond.<br />
A frog leaps in.<br />
Splash!<br />
Lady Butterfly<br />
Perfumes her wings<br />
By floating<br />
Over the orchid.<br />
20 • <strong>Lesson</strong> 1: The Southeast ‒ Picturing, Reading, and Writing about American Environments
<strong>Lesson</strong> 1<br />
Haiku Writer<br />
ILS3C: I can write to communicate in different formats.<br />
Students at Pocantico School in Sleepy Hollow, New York, wrote these poems. They wrote them in three<br />
lines. They are haiku poems.<br />
Directions:<br />
Read their poems.<br />
Then write your own haiku poem.<br />
Write about the Chicago environment or another environment.<br />
Butterflies hatch.<br />
Bees drink the juice from<br />
flowers.<br />
Bees fly everywhere.<br />
Butterflies are flying<br />
Their orange wings touch<br />
the sun<br />
They perch on fresh leaves!<br />
Baseball is starting<br />
Spring is finally here yes!<br />
The bees are buzzing.<br />
By Andrea<br />
By Jaya<br />
By Kaydee<br />
My haiku will be about<br />
I will put these things in it to help people envision my idea.<br />
Here is my haiku.<br />
The first line has five syllables.<br />
The second line has seven syllables.<br />
The third line has five syllables.<br />
Art Institute of Chicago • 21
<strong>Lesson</strong> 1<br />
Plants and Places<br />
ILS1C: I can analyze the ideas and relationships in a passage<br />
Directions: Read this passage. Then answer the questions.<br />
Plants live in many different environments. Some live in the ocean. Some live in the desert. Plants are<br />
very important. Every environment needs plants. Animals need them. Many animals eat them. Many<br />
animals use them to make homes. Some animals make nests in plants.<br />
When you see a plant you can tell a lot about its environment, or where it lives. If the plant has big<br />
leaves and flowers, it lives in a warm environment. That plant needs warm sunny days to grow. It needs<br />
water, too. So that environment will be wet. That is part of the climate. Climate is what the weather is<br />
all year. It is how warm or cold the place is in winter, spring, summer, and fall. Wind is part of climate,<br />
too.<br />
Each state has a state flower. That state flower is a clue to the climate of that state. The state flower<br />
of Illinois is the violet. That is a small plant. It has little flowers. What is the climate of Illinois? We have<br />
hot summers. We have long cold winters. Plants start to grow here in spring. In summer most Illinois<br />
plants grow bigger. Then in fall they lose their flowers. Illinois is a Midwestern state. The magnolia<br />
could not live in a Midwestern state. It needs a different climate. If you look at the state flowers of<br />
Midwestern states you will see they have small flowers. The violet also is the state flower of Wisconsin.<br />
The cactus is the state flower of Arizona. That is a state in the southwestern United States. The<br />
saguaro cactus lives in the desert. A desert is a climate that has less than 10 inches of rain or snow all<br />
year. Arizona has a dry, hot climate. The cactus can live there. It has adapted to that hot, dry climate.<br />
Birds live there, too. Some birds live in the saguaro cactus. They make holes in the side of the plant. The<br />
Saguaro cactus cannot live outside in Illinois or Florida. It fits the hot dry desert climate.<br />
The magnolia is a plant that grows in a warm rainy climate. It has very big flowers. The artist Martin<br />
Heade painted pictures of magnolias when he lived in Florida. Many people think his paintings are<br />
beautiful. You will find magnolias in Florida and other states of the southeastern United States. You will<br />
see them in Mississippi. In fact, the magnolia is the state flower of Mississippi. It is the state flower of<br />
Louisiana, too.<br />
What is the main idea of this passage?<br />
Why do you think that is the main idea?<br />
Extended Response:<br />
Why is it important to learn about plants? Include information from this passage and your own experience<br />
in your answer. Write your answer on another piece of paper.<br />
22 • <strong>Lesson</strong> 1: The Southeast ‒ Picturing, Reading, and Writing about American Environments
<strong>Lesson</strong> 1<br />
Words and Writing Organizer: Plants and Places<br />
ILS1A and ILS3B: I can identify important vocabulary and use it to communicate about a topic.<br />
Directions:<br />
List six important words about plants and places.<br />
Write what each word means. Then draw a picture to show what it means.<br />
Then use these words to write about this topic.<br />
Word Explanation Picture<br />
Write to tell about plants and places. Include information you learned and information you knew. Add<br />
pictures you draw to help make your ideas clear.<br />
Art Institute of Chicago • 23
<strong>Lesson</strong> 1<br />
Art Planner<br />
ILS26B2D: I can create a work of art.<br />
Directions: Use this guide to organize and plan your own art making.<br />
What is the subject or topic of your picture?<br />
In this box, draw a sketch of what you want your finished picture to look like. Remember to plan for<br />
and cover the entire surface and all the edges or corners. If you want your work to fill a different shape<br />
than the box, first draw that shape in the box.<br />
List the materials you’ll need to make your art.<br />
Write a description of your picture.<br />
24 • <strong>Lesson</strong> 1: The Southeast ‒ Picturing, Reading, and Writing about American Environments
<strong>Lesson</strong> 1<br />
Writing Organizer<br />
ILS3B: I can organize a passage that communicates an idea.<br />
Directions: Use this organizer to plan your writing.<br />
What is the main idea you want to communicate in your writing?<br />
What are five things you want your reader to know?<br />
1.<br />
2.<br />
3.<br />
4.<br />
5.<br />
What sources will you use to find more facts?<br />
Make an outline for your writing.<br />
Introduction:<br />
Part 1:<br />
Part 2:<br />
Part 3:<br />
Conclusion:<br />
Use your sources to find more information.<br />
Then draft your report on another page. Add illustrations that you draw yourself.<br />
Art Institute of Chicago • 25
26 • <strong>Lesson</strong> 1: The Southeast ‒ Picturing, Reading, and Writing about American Environments
<strong>Lesson</strong> 2<br />
Oceans and Rivers:<br />
Northeast Environments
<strong>Lesson</strong> 2<br />
Oceans and Rivers: Northeast Environments<br />
Summary<br />
In this lesson students learn about the environment of the Northeast, especially the ways people live<br />
near and with the ocean and rivers of that region. They analyze works of art and then draw and write<br />
based on what they have learned.<br />
Featured Artworks<br />
Winslow Homer (American, 1836–1910)<br />
The Herring Net, 1885<br />
Oil on canvas<br />
30 1/8 x 48 3/8 inches<br />
Thomas Cole (American, 1801–1848)<br />
Distant View of Niagara Falls, 1830<br />
Oil on panel<br />
18 7/8 x 23 7/8 inches<br />
Illinois Benchmarks<br />
Reading<br />
1.A.2b:<br />
1.B.2a:<br />
1.C.2e:<br />
1.C.2b:<br />
5.A.2a:<br />
5.A.2c:<br />
Writing<br />
3.B.2a:<br />
3.C.2a:<br />
Science<br />
12.B.1a:<br />
12.B.2b:<br />
Clarify word meaning using context clues and a variety of resources including<br />
glossaries, dictionaries, and thesauruses.<br />
Establish purposes for reading: survey materials; ask questions; make predictions;<br />
connect, clarify, and extend ideas.<br />
Explain how authors and illustrators use text and art to express their ideas.<br />
Make and support inferences and form interpretations about main themes and topics.<br />
Formulate questions and construct a basic research plan.<br />
Create a variety of print and non-print documents to communicate acquired information<br />
for specific audiences.<br />
Generate and organize ideas using a variety of planning strategies.<br />
Write for a variety of purposes and for specified audiences in a variety of forms.<br />
Describe characteristics of environments.<br />
Identify physical features of plants and animals that help them live in different environments.<br />
28 • <strong>Lesson</strong> 2: Oceans and Rivers ‒ Northeast Environments
Social Studies<br />
17.A.2a: Locate, describe, and explain places, regions, and features on the earth.<br />
18.A.2: Explain ways in which artistic creations communicate about a culture.<br />
Art<br />
25.B.2:<br />
26.B.2d:<br />
Understand how elements and principles combine within an art form to express ideas.<br />
Demonstrate knowledge and skills to create works of visual art using problem solving,<br />
observing, designing, sketching, and constructing.<br />
English Language Learner Standards<br />
Standard 1 Reading: Arrange information on topics gathered from reading.<br />
Standard 2 Communication: Edit and revise own writing to produce final drafts.<br />
Objectives<br />
• Students will define and use vocabulary in expository writing.<br />
• Students will infer an artist’s or author’s intent for a work of art or writing.<br />
• Students will create a work of art that communicates about an environment.<br />
• Students will write to describe an environment.<br />
Background Information<br />
The artwork: Distant View of Niagara Falls, 1830<br />
The artist: Thomas Cole (American, 1801–1848)<br />
The topic: Living near Oceans and Rivers<br />
Relevant Information<br />
• Thomas Cole was born in England but immigrated to America in 1819, when he was 18 years old.<br />
• He visited Niagara Falls for the first time in 1829. He said, “I anticipated much—but the grandeur<br />
of the falls far exceeds anything I had been told of them.”<br />
• For Cole, Niagara Falls became a means for communicating a reverence for pristine, or pure,<br />
nature, untouched by man. Niagara represented the grandeur and the sacred in the American<br />
landscape.<br />
• Yet, this painting presents a nostalgic view of a once pristine natural treasure—Niagara Falls was<br />
already developed as a tourist destination in 1830. Factories, scenic overlooks, hotels, and tourists<br />
characterized the surrounding area.<br />
• The red autumn trees depicted are sugar maples, a tree that can be found throughout New England,<br />
New York, Pennsylvania, and the mid-Atlantic States. In the painting, they suggest the symbolic<br />
autumn, or fall, of both the untouched wilderness and the American Indian in the Eastern region of<br />
the United States.<br />
• The oncoming storm in the sky brings a threatening tone to an otherwise serene landscape. Like the<br />
autumn leaves, the dark clouds suggest the coming winter as a symbolic decline, or end.<br />
Art Institute of Chicago • 29
• On the cliff Cole posed two Native Americans, one kneeling and another standing, as if in<br />
reverence of this power of nature. The small size of the figures symbolizes the insignificance of<br />
man in the grand scheme of the natural world.<br />
The artwork: The Herring Net, 1885<br />
The artist: Winslow Homer (American, 1836–1910)<br />
The topic: Living near Oceans and Rivers<br />
Relevant Information<br />
• Winslow Homer was fascinated by the power of the sea.<br />
• He spent time in New England coastal towns during the 1870s and in 1881 traveled to England and<br />
a visited a small fishing village near the North Sea.<br />
• In 1884 the artist moved back to the United States and settled along the Atlantic shore in Prout’s<br />
Neck, Maine.<br />
• In his later career, during which he painted The Herring Net, Homer was interested in exploring<br />
the relationship between man and nature. He began painting hardy fisherfolk and the powerful<br />
waves of the sea.<br />
• The Herring Net depicts two anonymous fishermen struggling to pull a net of herring into their<br />
small boat as it is tossed among the waves of the Atlantic Ocean.<br />
• Along with halibut and cod, herring were the major catches for the local fisherman and represented<br />
an important part of the local economy in the northeastern United States.<br />
• Nature is depicted as dark and stormy. There is a feeling of isolation as the fishermen’s small boat<br />
is far away from the schooners in the background.<br />
• Homer depicts the physical exertion required of the fishermen’s task by placing one of the figures<br />
on the side of the boat to counterbalance the weight of the fish being pulled into the boat.<br />
• Homer painted the image as if we, the viewer, were also out at sea, experiencing the power of<br />
the dangerous sea, rather than on dry, stable land.<br />
You will find additional useful information from the following sources:<br />
The Art Institute of Chicago Web site<br />
• Further information about The Herring Net:<br />
http://www.artic.edu/aic/collections/artwork/25865<br />
• Art Explorer: Impressionism and Post-Impressionism:<br />
http://www.artic.edu/artexplorer/<br />
*Search for “The Herring Net” for text, lesson plans, and more.<br />
• Winslow Homer: The Color of Light (exhibition, 2008):<br />
http://www.artic.edu/aic/collections/exhibitions/homer/<br />
• Further information about Distant View of Niagara Falls:<br />
http://www.artic.edu/aic/collections/artwork/90048<br />
30 • <strong>Lesson</strong> 2: Oceans and Rivers ‒ Northeast Environments
• American Art Collection:<br />
http://www.artic.edu/artaccess/AA_American/index.html<br />
Additional Web sites<br />
• Winslow Homer in the National Gallery of Art:<br />
http://www.nga.gov/feature/homer/homersplash.htm<br />
• The U.S. Department of Agriculture, Forest Service: Sugar Maple:<br />
http://www.na.fs.fed.us/spfo/pubs/silvics_manual/volume_2/acer/saccharum.htm<br />
• Brief History of the Groundfishing Industry of New England:<br />
http://www.nefsc.noaa.gov/history/stories/groundfish/grndfsh1.html<br />
• World InfoZone: World > The Oceans > The Atlantic:<br />
http://worldinfozone.com/oceans.php?country=Atlantic<br />
• The John G. Shedd Aquarium: Educator Resources:<br />
http://www.sheddaquarium.org/teacherprogram_listings.html#educator_resources<br />
• Marine Bio: Marine Life:<br />
http://marinebio.org/<br />
• Niagara Falls State Park:<br />
http://www.niagarafallsstatepark.com/<br />
Web sites for Students<br />
• National Geographic: Environment > Oceans:<br />
http://environment.nationalgeographic.com/environment/habitats/ocean-profile.html<br />
• Save Our Seas: for Kids:<br />
http://www.saveourseas.com/minisites/kids/86.html<br />
• Kids.Net.Au > Encyclopedia > Atlantic Ocean:<br />
http://encyclopedia.kids.net.au/page/at/Atlantic_ocean<br />
Printed Materials (available in the Art Institute’s Crown Family Educator Resource Center<br />
http://www.artic.edu/aic/education/trc/index.html)<br />
• The Art Institute of Chicago. American Art Manual. Art Institute of Chicago, Department of<br />
Museum Education, 2008.<br />
• The Art Institute of Chicago. The Herring Net. Poster Packet. Art Institute of Chicago, Department<br />
of Museum Education, 2000.<br />
• Barter, Judith A., Kimberly Rhodes, Seth A. Thayer and Andrew J. Walker. 1998. American Arts at<br />
the Art Institute of Chicago: From Colonial Times to World War I. Art Institute of Chicago/Hudson<br />
Hills Press.<br />
Art Institute of Chicago • 31
Day 1: Interpreting a Painting<br />
● Time Allotment<br />
45 minutes<br />
● Materials<br />
• Reproduction of The Herring Net, 1885<br />
• Map of the state of Maine or the United States<br />
Materials for each student:<br />
Copy of Art Reader organizer<br />
● Advance Preparation<br />
• Prepare to display the reproduction of The Herring Net in the classroom for student viewing.<br />
• Review the Background Information section of this lesson about The Herring Net.<br />
● Vocabulary<br />
atmosphere<br />
din<br />
landscape<br />
mood<br />
respect<br />
reverence<br />
schooner<br />
● Procedure<br />
1. Have students take a close look at The Herring Net and have students complete the Art Reader<br />
organizer. Make sure that students take at least two minutes (and even up to five minutes) to<br />
look at the painting before they start to make notes.<br />
2. After students have completed their organizers, begin discussion by asking them to describe<br />
what they see or recognize in the image. Explain that the herring is a kind of fish.<br />
3. Ask students to discuss the mood of the painting. What elements does the artist include to<br />
create that mood? Ask how the artist uses color to contribute to the mood of the painting. Ask<br />
what other elements the artist uses to communicate.<br />
4. Explain that the painting shows a place off coast of the Atlantic Ocean. Make a list of what<br />
students know about the Atlantic Ocean. Then ask what they see in the painting that they could<br />
add to the list. Keep track of this list on the chalkboard.<br />
5. Ask students: What are the people in the painting doing? Are the men fishing for recreation or<br />
is it their job? What elements in the painting lead you to this conclusion?<br />
6. Use a map of Maine or the United States to show the state’s long coastline.<br />
32 • <strong>Lesson</strong> 2: Oceans and Rivers ‒ Northeast Environments
Day 2: Writing about the Ocean<br />
● Time Allotment<br />
60–75 minutes<br />
● Materials<br />
Materials for each student:<br />
8 ½ x 11 paper (for Ocean Life Research Report)<br />
Colored pencils<br />
List of websites students can use to find information about animal and plant life of<br />
the Atlantic (see Background Information section)<br />
Copy of Ocean Research organizer<br />
● Advance Preparation<br />
• Look for books in the school library about oceans.<br />
• Make arrangements for library time or computer access for student research activity.<br />
If computer access is not available for students, print out research materials from the Web<br />
ahead of time to distribute in class.<br />
● Vocabulary<br />
illustrate<br />
ocean<br />
research<br />
habitat<br />
● Procedure<br />
1. Discuss the role of the ocean as a habitat. Ask students to list the animals that live in the sea.<br />
Keep track of the list on the board.<br />
2. Give students the Ocean Research organizer. It guides them to conduct research about animal<br />
life in the Atlantic Ocean. Give students a list of Web sites to visit to help focus their research.<br />
Include sources listed in the Background Information section of this lesson as well as any<br />
additional sites that are appropriate.<br />
3. Allow students a short amount of time—approximately 5 minutes—to do some initial research<br />
before choosing one animal or plant living in the ocean to focus on. Have students use the<br />
Ocean Research organizer to guide their work and then write an Ocean Life Research Report<br />
on a separate page.<br />
4. Students will include a drawing of their animal in the Ocean Life Research Report. Provide<br />
colored pencils for students to use.<br />
5. Once students have competed their Ocean Life Research Report they can present a summary<br />
of the information to the rest of the class and share their knowledge. Then they can set up an<br />
exhibit of their drawings with captions that tell what is special about the animal.<br />
6. Create a pictorial word wall that includes words that students found during their ocean research<br />
and pictures they draw to illustrate the words.<br />
Art Institute of Chicago • 33
Day 3: Interpreting a Poem and a Painting<br />
● Time Allotment<br />
45–60 minutes<br />
● Materials<br />
Materials for each student:<br />
Plain white 8 ½ x 11 paper (for their poems)<br />
Colored pencils<br />
Copy of Words and Writing organizer<br />
Copy of Reading with Vision organizer<br />
● Vocabulary<br />
communicate<br />
poet<br />
vision<br />
● Procedure<br />
1. Distribute the Words and Writing organizer. Ask students to work in pairs and list three words<br />
that they have learned from the first two days of the lesson. Tell them that they will include<br />
other words when they finish today’s activities.<br />
2. Distribute the Reading with Vision organizer, which includes a poem. Read it aloud. Then ask<br />
students to draw the image they “see” as they read the poem.<br />
3. Ask students what the mood of the poem is. Then ask them how the poet communicates that<br />
mood.<br />
4. Relate the mood of this poem to the mood of The Herring Net. How are they similar? How are<br />
they different? What words used in the poem are illustrated in the painting?<br />
5. Ask students to add more words to the Words and Writing page and then to use those in a poem<br />
they write that tells how they feel about the ocean.<br />
6. Expand the pictorial word wall to include words from today’s activity.<br />
Day 4: Comparing and Contrasting<br />
● Time Allotment<br />
45 minutes<br />
● Materials<br />
• Reproduction of Distant View of Niagara Falls, 1830<br />
Materials for each student:<br />
Copy of Art Reader organizer<br />
34 • <strong>Lesson</strong> 2: Oceans and Rivers ‒ Northeast Environments
● Advance Preparation<br />
• Prepare to display the reproduction of Distant View of Niagara Falls in the classroom for<br />
student viewing.<br />
• Leave the reproduction of The Herring Net on display.<br />
• Review the Background Information section of this lesson about Distant View of Niagara<br />
Falls.<br />
● Vocabulary<br />
central focus<br />
compare<br />
contrast<br />
message<br />
mood<br />
Niagara Falls<br />
● Procedure<br />
1. Explain that many artists have painted natural environments and that today students will look at<br />
another painting that shows a natural scene. Explain that in order to present his opinion about<br />
nature, Thomas Cole painted Niagara Falls the way it would have looked before it became a<br />
tourist site. In fact, this once pure natural environment was already changed by people by the<br />
time he painted this picture in 1830.<br />
2. Have students take a close look at Distant View of Niagara Falls and complete the Art Reader<br />
organizer.<br />
3. After students have completed their organizers, begin discussion by asking students to describe<br />
what they noticed in the image.<br />
4. Ask students to discuss the mood of the painting. Ask how the artist used color to create a<br />
mood. Ask students to identify other elements the artist included to create that mood.<br />
5. Continue to explore the painting with these questions:<br />
• What is the subject of the painting?<br />
• Where are the people in the painting?<br />
• Are they the central focus of the painting? Why or why not?<br />
Explain that the two people, one kneeling and another standing, symbolize how powerful<br />
nature is compared to humans.<br />
6. Ask students to compare The Herring Net and Distant View of Niagara Falls. How are they<br />
alike? How are they different? What do you think each painter wanted us to understand?<br />
What is the message that you understand from each painting?<br />
Art Institute of Chicago • 35
Day 5: Reading and Writing about Nature<br />
● Time Allotment<br />
45 minutes<br />
● Materials<br />
Materials for each student:<br />
Copy of the reading “Looking at Nature”<br />
● Vocabulary<br />
analyze<br />
infer<br />
science<br />
social studies<br />
● Procedure<br />
1. Distribute the reading “Looking at Nature.” Students can complete it independently or with a<br />
partner.<br />
2. Discuss students’ responses to the questions at the end of the reading. Accept different<br />
statements of the main idea if students can support them.<br />
3. Ask students why someone would write this passage. Point out that just as an artist paints a<br />
picture for a reason a writer writes a passage for a reason. Ask why they think the writer wrote<br />
this passage about looking at nature. (Answers may include the idea of helping people<br />
understand how important art is.)<br />
● Home Connection<br />
Ask students to interview family members about the Chicago River and Lake Michigan.<br />
What animals do they think live there. What can people do to protect the lake and river?<br />
● Assessment<br />
Have students write an extended response based on what they have learned and what they already<br />
knew. The Extended Response organizer guides this writing.<br />
● Expansion Activities<br />
• VOCABULARY DEVELOPMENT: Ask students to make pictorial glossaries of the words<br />
they have learned.<br />
• WRITING: Students can write a poem or paragraph about how the paintings make them feel.<br />
• RESEARCH: Students can research bodies of water of the United States, including the Great<br />
Lakes, to learn more about the animals of those environments.<br />
• SCIENCE: Students can make food chain charts showing relationships among the plants and<br />
animals of the ocean.<br />
• FOR ENGLISH LANGUAGE LEARNERS: When possible, provide concrete examples of<br />
vocabulary words (pictures or actual examples) and use drawn images to represent vocabulary<br />
words.<br />
36 • <strong>Lesson</strong> 2: Oceans and Rivers ‒ Northeast Environments
• FOR STUDENTS WITH SPECIAL NEEDS: Partner or group students, varying performance<br />
and skill level, and collaborate on activities.<br />
Art Institute of Chicago • 37
<strong>Lesson</strong> 2 Art Reader (1/2)<br />
ILS25A: I can analyze how an artist uses elements of visual art to communicate.<br />
ILS1B: I can analyze a visual communication (transferable to passages).<br />
Part One:<br />
Take a close look at this work of art. Be sure to look for longer than two minutes. In this chart, list<br />
ten things that you see or recognize.<br />
1. 6.<br />
2. 7.<br />
3. 8.<br />
4. 9.<br />
5. 10.<br />
Part Two:<br />
In this chart, describe the elements (color, line, size, shapes) of the work of art.<br />
Element of Art<br />
Describe How the Artist Used It<br />
color<br />
shapes<br />
size<br />
line<br />
38 • <strong>Lesson</strong> 2: Oceans and Rivers ‒ Northeast Environments
<strong>Lesson</strong> 2 Art Reader (2/2)<br />
Part Three:<br />
Describe the mood and emotion of the work of art. How does it make you feel?<br />
Part Four:<br />
Explain how the artist uses elements of the work of art to make you feel that way. How did the artist<br />
create this mood?<br />
Art Institute of Chicago • 39
<strong>Lesson</strong> 2<br />
Ocean Research organizer<br />
ILS5A: I can locate and collect information about a topic and use it to explain the topic.<br />
Research is a word that has an important word inside it: search. You will search for information about<br />
an animal that lives in the ocean. Here are some Web sites you can use to find facts.<br />
National Geographic: Environment > Oceans:<br />
http://environment.nationalgeographic.com/environment/habitats/ocean-profile.html<br />
Save Our Seas: for Kids: http://www.saveourseas.com/minisites/kids/86.html<br />
Kids.Net.Au > Encyclopedia > Atlantic Ocean:<br />
http://encyclopedia.kids.net.au/page/at/Atlantic_ocean<br />
Start your research by choosing an ocean animal to learn about. Here is a list of some ocean animals<br />
you could learn about: seal, starfish, whale, herring, dolphin, tuna, penguin, or shark.<br />
What is your animal?<br />
Search for answers to questions about the animal you selected. Here are some questions. Add more<br />
questions of your own. Then look for answers in books and on the Internet if you can use a computer.<br />
Where does the animal live?<br />
What does it eat?<br />
How does it protect itself from being caught by predators? (Animals that eat other animals are called<br />
predators.)<br />
Your questions:<br />
After you get the answers, write an Ocean Life Research Report on a separate page.<br />
After you finish your report, draw a picture of your animal.<br />
40 • <strong>Lesson</strong> 2: Oceans and Rivers ‒ Northeast Environments
<strong>Lesson</strong> 2<br />
Reading with Vision<br />
ILS2A: I can analyze a poem.<br />
This is a poem about ocean fish. A poet often has an idea when he writes a poem. It is what the poet<br />
wants people to think about when they read the poem. When you read a poem you should think<br />
about the idea. You should try to see the idea by thinking about what the poem would look like if it<br />
were a picture.<br />
Directions: Read the poem. Then draw a picture that shows what the poet wanted people to understand.<br />
Poem<br />
Picture<br />
Fishes’ Evening Song,<br />
by Dahlov Ipcar<br />
Flip flap,<br />
Slip slap,<br />
Lip lap,<br />
Water sounds,<br />
Soothing sounds.<br />
We fan our fins<br />
As we lie<br />
Resting here<br />
Eye to eye.<br />
Water falls<br />
Drop by drop,<br />
Plip plop,<br />
Drip drop.<br />
Plink plunk,<br />
Splash splish<br />
Fish fins fan,<br />
Fish tails swish,<br />
Swish, swash, swish.<br />
This we wish…<br />
Water cold,<br />
Water clear,<br />
Water smooth,<br />
Just to sooth<br />
Sleeping fish.<br />
Write your own poem about a river, lake, or ocean with the Words and Writing organizer.<br />
Art Institute of Chicago • 41
<strong>Lesson</strong> 2<br />
Words and Writing organizer<br />
ILS3B: I can write to explain a topic.<br />
Directions<br />
List six important words about the ocean.<br />
Write what each word means. Then draw a picture to show what it means.<br />
Word Explanation Picture<br />
Next, write “to tell” about this topic. Write a poem that tells how you feel about the ocean. Include<br />
the words above and both information you have learned and you already knew. Add pictures you draw<br />
yourself to help make your ideas clear.<br />
42 • <strong>Lesson</strong> 2: Oceans and Rivers ‒ Northeast Environments
<strong>Lesson</strong> 2<br />
Looking at Nature<br />
ILS1B: I can analyze a nonfiction passage to identify and support a main idea.<br />
Directions: Read this passage. Then answer the questions.<br />
You live in a city, so sometimes it seems as if it is hard to see the natural environment. But you can see<br />
nature yourself. You can see it in parks. When you look at the natural environment, there are things<br />
that are hidden. So you need to look carefully. You will see how special it is.<br />
When you look at nature, you can see patterns. Animals have adapted or changed to live in different<br />
natural environments. One way they adapted is their coloring. Some animals are the same color as the<br />
place they live. So it is hard to see them. They aren’t hiding from you. They are hiding from animals that<br />
would eat them. An animal that hunts other animals is a predator. Even in oceans and lakes, animals<br />
need to hide from predators.<br />
Artists show you the world. Some artists show nature in their paintings. They want people to see how<br />
special nature is. The artists took time to visit a place. They drew what they saw. Then they painted<br />
pictures. They used colors, lines, and shapes to help people see that special place.<br />
Long ago there were no cameras. The only way to see nature from faraway places was from<br />
drawings and paintings. Artists would travel to these places. They would draw the places. They would<br />
help people learn about those environments. Today you can see other places on TV. But artists still help<br />
people learn about environments. They use colors, lines, and shapes to help people understand how<br />
special nature is.<br />
When you look at a painting you need to look carefully. When you see a painting of nature you<br />
should ask questions. What does the picture show about the place? What does the artist want me to<br />
understand? How does the artist want me to feel about nature? You can answer those questions<br />
yourself. You can find the answers by looking and thinking.<br />
What is the main idea of the passage?<br />
What are three reasons you think that is the main idea? Underline the three facts you read that<br />
tell you that is the main idea.<br />
Art Institute of Chicago • 43
<strong>Lesson</strong> 2<br />
Extended Response organizer<br />
ILS1C: I can write an extended response based on non-fiction content.<br />
Why is it important for people to learn about oceans and rivers? Write your answer. Use facts<br />
from what you learned and your own experience in your answer.<br />
Directions: List five important facts you learned from this lesson.<br />
What I Learned<br />
List three facts you already knew about oceans and rivers.<br />
What I Knew<br />
On another page, write your extended response. Include facts from this page in your answer.<br />
44 • <strong>Lesson</strong> 2: Oceans and Rivers ‒ Northeast Environments
Art Institute of Chicago • 45
46 • <strong>Lesson</strong> 2: Oceans and Rivers ‒ Northeast Environments
<strong>Lesson</strong> 3<br />
People and Environments of<br />
the American West
<strong>Lesson</strong> 3<br />
People and Environments of the American West<br />
Summary<br />
In this lesson, students apply skills of reading to interpret how two different works of art represent the<br />
western United States. They learn about two art forms—sculpture and painting—and then create their<br />
own artwork and write a poem to communicate about people in an environment.<br />
Featured Artworks<br />
Frederic Remington (American, 1861–1909)<br />
The Bronco Buster, modeled 1895; cast 1899<br />
Cast by Henry‒Bonnard Bronze Co.<br />
Bronze with brown patina<br />
Marsden Hartley (American, 1877–1943)<br />
The Last of New England—The Beginning of New Mexico, 1918/1919<br />
Oil on cardboard<br />
Illinois Benchmarks<br />
Reading<br />
1.A.2b:<br />
1.B.2a:<br />
1.C.2e:<br />
1.C.2b:<br />
Writing<br />
3.B.2a:<br />
3.C.2a:<br />
Clarify word meaning using context clues.<br />
Establish purposes for reading: survey materials; ask questions; make predictions;<br />
connect, clarify, and extend ideas.<br />
Explain how authors and illustrators use text and art to express their ideas.<br />
Make and support inferences and form interpretations about ideas and topics.<br />
Generate and organize ideas using a variety of planning strategies.<br />
Write for a variety of purposes and for specified audiences in a variety of forms.<br />
Social Studies<br />
17.C.2a: Describe how natural events in the physical environment affect human activities.<br />
18.A.2: Explain ways in which artistic creations communicate about a culture.<br />
Art<br />
25.B.2: Understand how elements and principles combine within an art form to express ideas.<br />
25.A.2d: Identify and describe the elements of two‒ and three‒dimensional space, figure‒ground,<br />
value and form; the principles of rhythm, size, proportion and composition; and the<br />
48 • <strong>Lesson</strong> 3: People and Environments of the American West
expressive qualities of symbol and story.<br />
26.B.2d: Demonstrate knowledge and skills to create works of visual art using problem solving,<br />
observing, designing, sketching and constructing.<br />
English Language Learner Standards<br />
Standard 1 Reading: Arrange information on topics gathered from reading.<br />
Standard 2 Communication: Edit and revise own writing to produce final drafts.<br />
Objectives<br />
• Students will identify and interpret characteristics of environments represented in a work of art.<br />
• Students will describe how an artwork relates to a geographic area or culture.<br />
• Students will compare and contrast works of art.<br />
• Students will use terms of art interpretation to describe how a work of art communicates ideas,<br />
feelings, mood, and character traits.<br />
• Students will analyze how two different artistic media, sculpture and painting, communicate.<br />
• Students will create a work of art representing a geographic area.<br />
Background Information<br />
The artwork: The Bronco Buster<br />
The artist: Frederic Remington (American, 1861–1909)<br />
The topic: Living in the Old West<br />
Relevant Information:<br />
• Remington’s sculpture of The Bronco Buster shows the fierce and wild movement of a bucking<br />
horse being tamed by a rugged cowboy.<br />
• Remington’s work celebrates the West as a place for only the strongest of men.<br />
• Although he left upstate New York several times to explore the West, his mythical, romantic<br />
artworks about cowboys, Native Americans, and soldiers are largely the result of his imagination—<br />
he created them in his New York studio.<br />
• With America facing increasing urbanization and modernization as settlers moved further<br />
westward, The Bronco Buster can be seen as an attempt to perpetuate the myth of the Old West—<br />
that there was still uncharted and wild territory to explore and conquer.<br />
• Remington was very successful as America’s leading illustrator of life on the western frontier for<br />
Harper’s Weekly, a magazine that was widely read.<br />
• He also wrote stories that were published in magazines. The magazines usually included his<br />
paintings to illustrate the stories.<br />
• Then he started to work as a sculptor.<br />
• He began making bronze sculptures because he could reproduce them more easily than paintings<br />
and sell the reproductions.<br />
Art Institute of Chicago • 49
The artwork: The Last of New England the Beginning of New Mexico<br />
The artist: Marsden Hartley (American, 1877–1943)<br />
The topic: The Environment of the West<br />
Relevant Information:<br />
• Marsden Hartley grew up in the East and often painted pictures of America, including landscapes.<br />
• The painting The Last of New England—the Beginning of New Mexico uses bold color and line to<br />
communicate how Hartley feels about the southwestern landscape.<br />
• Hartley loved the color and light that he found in New Mexico when he moved there from the East<br />
in 1918. He wrote that he felt like “an American discovering America” and saw the Southwest as<br />
unspoiled, beautiful, and rejuvenating.<br />
• The painting does not show the landscape exactly as it is but is from Hartley’s imagination.<br />
The greenery and tree stumps in the foreground represent the forests of the East leading into the<br />
vibrant hills of New Mexico in the background, even though these two regions are separated by<br />
thousands of miles in reality.<br />
You will find additional useful information from the following sources:<br />
Web sites<br />
• The Art Institute of Chicago<br />
Information about The Bronco Buster:<br />
http://www.artic.edu/aic/collections/artwork/97916<br />
• Information about The Last of New England—The Beginning of New Mexico:<br />
http://www.artic.edu/aic/collections/artwork/65925<br />
• American Art Collection:<br />
http://www.artic.edu/artaccess/AA_American/index.html<br />
• Window on the West: Chicago and the Art of the New Frontier, 1890–1940 (2003 exhibition):<br />
http://www.artic.edu/aic/exhibitions/window/overview.html<br />
Additional Web sites<br />
• Frederic Remington Art Museum:<br />
http://www.fredericremington.org/index.php<br />
• Marsden Hartley: American Modern (2000 exhibition): http://www.tfaoi.com/aa/2aa/2aa10.htm<br />
• Life on the Western Frontier:<br />
http://faculty.chass.ncsu.edu/slatta/cowboys/essays/front_life2.htm<br />
• The Great American West (40-minute documentary):<br />
http://www.hulu.com/the-great-american-west<br />
50 • <strong>Lesson</strong> 3: People and Environments of the American West
Web sites for Students<br />
• American West:<br />
http://www.americanwest.com/<br />
• Multicultural American West:<br />
http://www.wsu.edu:8080/~amerstu/mw/<br />
Printed Materials (available in the Art Institute’s Crown Family Educator Resource Center<br />
http://www.artic.edu/aic/education/trc/index.html)<br />
• The Art Institute of Chicago. American Art Manual. Art Institute of Chicago, Department of<br />
Museum Education, 2008.<br />
• The Art Institute of Chicago. American Art and Culture. Art Institute of Chicago, Department of<br />
Museum Education, 1995.<br />
• Barter, Judith A., Kimberly Rhodes, Seth A. Thayer and Andrew J. Walker. 1998. American Arts at<br />
the Art Institute of Chicago: From Colonial Times to World War I. Art Institute of Chicago/Hudson<br />
Hills Press.<br />
• Barter, Judith A., Sarah E. Kelly, Denise Mahoney, Ellen E. Roberts, Brandon K. Ruud, and<br />
Jennifer M. Downs. 2009. American Modernism at the Art Institute of Chicago: From World War I<br />
to 1955. Art Institute of Chicago/Yale University Press.<br />
• Barter, Judith A., and Andrew J. Walker. 2003. Window on the West: Chicago and the Art of the<br />
New Frontier 1890-1940. Exh. cat. Art Institute of Chicago/Hudson Hills Press.<br />
Day 1–2: Interpreting a Mood in a Painting<br />
● Time Allotment<br />
two days, 45 minutes each day (or two 45-minute segments in one day)<br />
● Materials<br />
• Reproduction of The Last of New England—The Beginning of New Mexico, 1918/1919<br />
• Reproduction of The Herring Net, 1885 *<br />
• Reproduction of Distant View of Niagara Falls, 1830 *<br />
* Reproductions of these two paintings are included in <strong>Lesson</strong> 3 of the MAPS Curriculum about<br />
the Northeast.<br />
Materials for each student:<br />
Paper for writing and to make a chart<br />
Paper, scissors, and glue sticks for students to make a “word picture”<br />
Art Institute of Chicago • 51
● Advance Preparation<br />
• Prepare to display the reproduction of the painting The Last of New England—The Beginning<br />
of New Mexico as well as reproductions of The Herring Net and Distant View of Niagara Falls<br />
in the classroom for student viewing.<br />
• Review the Background Information section of this lesson about The Last of New England—<br />
The Beginning of New Mexico.<br />
● Vocabulary<br />
adjective<br />
compare<br />
contrast<br />
environment<br />
express<br />
interpret<br />
mood<br />
Southwest<br />
● Procedure<br />
Part 1: Interpret<br />
1. Ask students what they know about the western United States.<br />
2. Then ask what they would put into a painting to show it.<br />
3. Display The Last of New England—The Beginning of New Mexico. Ask students what they<br />
notice first.<br />
4. Ask students to identify what they think are important parts of the painting, such as the clouds<br />
or hills, and discuss why the artist might have painted them the way he did.<br />
5. Explain that the artist exaggerated lines and colors in order to express his feelings about the<br />
landscape with the painting.<br />
6. Ask how the painting makes them feel. Explain that a painting has a mood just as a story or<br />
poem does and that the artist paints it in ways to emphasize that mood.<br />
7. Have students make a “word picture” of the painting. Students should write adjectives and<br />
nouns on small pieces of paper and then place them on a sheet of paper on which they construct<br />
the painting with words such as “white,” “billowing,” and other adjectives that describe the<br />
clouds, or “curved,” “brown,” “striped” and other words that describe the landform.<br />
Part 2: Compare and Contrast<br />
1. Explain that the artist painted this after he moved from the East of the United States to the<br />
Southwest.<br />
2. Next, ask what the environment in the Northeast is like. Display the two paintings from<br />
<strong>Lesson</strong> 3 about the Northeast and have students identify specific characteristics of<br />
the environment. Ask what the mood is of each of the paintings—and what the artists included<br />
in order to express that mood. They can refer to specific details in the paintings or to the way<br />
the artists used color, line, or any other artistic element.<br />
52 • <strong>Lesson</strong> 3: People and Environments of the American West
The Herring Net<br />
Mood: _____________________________________<br />
Elements the artist used to communicate mood:<br />
Distant View of Niagara Falls<br />
Mood: _____________________________________<br />
Elements the artist used to communicate mood:<br />
3. Make a two-column chart on the chalkboard with two headings: Southeast and Northeast.<br />
Ask students to make the same chart on paper and work with a partner, listing or drawing<br />
features of the environment represented in the artworks.<br />
4. Ask students to write a paragraph comparing and contrasting the two environments based on<br />
the paintings and their chart.<br />
Day 3–4: Communicating with Sculptures<br />
● Time Allotment<br />
2 days, 45 Minutes each day (or two 45-minute segments in one day); second segment may take<br />
60–75 minutes if students create sculptures.<br />
● Note<br />
Preview the lesson and decide if your class will create sculptures or not. If so, then prepare<br />
modeling clay in different colors, providing at least a half a pound for each student’s use. If not,<br />
the materials listed below will be sufficient for this portion of the lesson.<br />
● Materials<br />
• Reproduction of The Bronco Buster, modeled 1895; cast 1899<br />
Materials for each student:<br />
Copies of Art Reader, Landscape Maker, and Sculpture Planner organizer<br />
Image of The Bronco Buster for use in small groups (color copies are fine)<br />
Copy of the reading “The Environment of the West”<br />
● Advance Preparation<br />
• Prepare to display the reproduction of The Bronco Buster in the classroom for student viewing.<br />
• Review the Background Information section of this lesson about The Bronco Buster.<br />
● Vocabulary<br />
action<br />
character trait<br />
inference<br />
main idea<br />
medium<br />
Art Institute of Chicago • 53
perspective<br />
scale<br />
sculptor<br />
sculpture<br />
shape<br />
two-dimensional<br />
three-dimensional<br />
● Procedure<br />
Part 1: Interpreting a Sculpture<br />
1. Explain that reading a sculpture is like reading a painting. The viewer, or “reader,” uses<br />
information to make inferences and analyzes both the parts and the whole.<br />
2. Introduce The Bronco Buster as a sculpture. Explain that the students are seeing a photo of the<br />
sculpture but can see the real sculpture at the museum.<br />
3. Explain to the students that sculpture and painting are different forms, or mediums, of art. Each<br />
medium has different characteristics, but one of the main differences between these two is that<br />
paintings are two-dimensional and sculptures are three-dimensional, so the painter has to think<br />
about us seeing their art from just one side, or perspective, while the sculptor has to think about<br />
how it will look from different perspectives.<br />
4. List with students the things a sculptor would think about before making a sculpture of a<br />
person. If students do not suggest it, then add the following: main idea, character traits, and<br />
position or action.<br />
5. Point out that the sculptor also thinks about scale, line, color, and other elements of art.<br />
6. Distribute the Art Reader graphic organizer. Ask students to complete it individually then pair<br />
to share with another student. Then, as a class, share what students have noticed, referring to<br />
parts 1 and 2 of the Art Reader.<br />
7. Explain that The Bronco Buster shows us a particular type of work that people did when they<br />
settled the West, taming horses. Share information with students from the Background<br />
Information section as appropriate.<br />
8. Continue to discuss the sculpture by asking students to describe the person, animal, and action<br />
in the sculpture and to consider how this is communicated in a sculpture as contrasted with a<br />
painting.<br />
9. Remind students that painters and sculptors can create a mood with things like line, color,<br />
shapes, and scale. Ask what mood they feel when they look at this sculpture and how they<br />
think the sculptor communicates that mood. They should refer to parts 3 and 4 of the Art<br />
Reader.<br />
Part 2: Contextualizing a Sculpture<br />
1. Ask students to infer what they think the environment of The Bronco Buster would have<br />
looked like.<br />
2. List what students say would be part of that environment.<br />
3. Then distribute “The Environment of the West.” After students read it, ask them to add more<br />
information to their list about the environment.<br />
54 • <strong>Lesson</strong> 3: People and Environments of the American West
4. Distribute the Landscape Maker organizer. Ask students to use it to plan and then draw what<br />
they think you would see in a landscape that The Bronco Buster could have been part of.<br />
5. Give students a copy of the Sculpture Planner organizer to work on. Explain that their sculpture<br />
can be of any person or animal included in the reading “The Environment of the West.” It also<br />
can be of a person or animal they know based on their prior experience about the West. If time<br />
permits, have students actually make the sculpture.<br />
6. As homework, ask students to complete the drawing activities from the “See What You Read”<br />
portion of the “The Environment of the West” reading; explain that they will be drawing a<br />
picture showing the way it ‘was’ and a picture showing the way it is.<br />
Day 5: Word Pictures<br />
● Time Allotment<br />
45–60 minutes<br />
● Materials<br />
Materials for each student:<br />
Copy of Poem Writer organizer<br />
● Vocabulary<br />
envision<br />
image<br />
poet<br />
poetry<br />
● Procedure<br />
1. Remind students that poems, like paintings and sculptures, are art forms. Using the Poem<br />
Reader organizer, ask students to write a poem based on one of the three paintings or one<br />
sculpture they have learned about in the lesson. They should write their poem so that it<br />
includes vivid language that would help other students figure out which of the artworks they<br />
are presenting in their poem.<br />
2. Explain that their poem should help a reader envision a place, person, event, or idea.<br />
3. Encourage students to collaborate on their poems with a partner, each contributing to the<br />
other’s poems.<br />
4. Have students share their poems by having a read-aloud “poetry slam.” Then after each is<br />
read, students infer which artwork the poem represents.<br />
● Home Connection<br />
Ask students to watch for programs on television that present natural environments. Students<br />
should discuss the environments with their family to answer a big question: how is that<br />
environment different from Chicago?<br />
Art Institute of Chicago • 55
● Assessment<br />
Ask students to make a guide of how to “read” a sculpture, painting, or poem. Their explanation<br />
should include a comparison of how the “readings” of each art form are alike, as well as how<br />
each one requires the “reader” to look out for specific characteristics.<br />
● Expansion Activities<br />
• VOCABULARY DEVELOPMENT: Ask students to make a glossary of terms related to<br />
sculpture. Their glossary should include many terms that also would be found in a glossary<br />
about reading a painting, but should include additional terms such as three-dimensional.<br />
• WRITING: Ask students to write about the scene in The Bronco Buster from the point of view<br />
of the cowboy. They should tell what he was feeling and how difficult the work was.<br />
• RESEARCH: Have students conduct research about the West and write a paragraph about what<br />
they have learned. Students can share their paragraph with the class. To guide the research,<br />
make a K-W-L chart: list what students know; list topics they want to learn more about; then<br />
when they finish their research and write their paragraphs, they share it with the class<br />
(for the L).<br />
• SCIENCE: Ask students to create sketches of different environments like those included in this<br />
lesson. For example, they could make a sketch of the tundra or a rainforest. Encourage them<br />
to use things like line, color, form, and scale to help communicate both their knowledge of and<br />
feelings about the environment.<br />
• FOR ENGLISH LANGUAGE LEARNERS: When possible, provide concrete examples of<br />
vocabulary words (pictures or actual examples) and allow them to use drawn images to<br />
represent vocabulary words as well.<br />
• FOR STUDENTS WITH SPECIAL NEEDS: Partner or group students, varying performance<br />
and skill level, and collaborate on activities.<br />
56 • <strong>Lesson</strong> 3: People and Environments of the American West
<strong>Lesson</strong> 3 Art Reader (1/2)<br />
ILS25A: I can analyze how an artist uses elements of visual art to communicate.<br />
ILS1B: I can analyze a visual communication (transferable to passages).<br />
Part One:<br />
Take a close look at this work of art. Be sure to look for longer than two minutes. In this chart, list<br />
ten things that you see or recognize.<br />
1. 6.<br />
2. 7.<br />
3. 8.<br />
4. 9.<br />
5. 10.<br />
Part Two:<br />
In this chart, describe the elements (color, line, size, shapes) of the work of art.<br />
Element of Art<br />
Describe How the Artist Used It<br />
color<br />
shapes<br />
size<br />
line<br />
Art Institute of Chicago • 57
<strong>Lesson</strong> 3 Art Reader (2/2)<br />
Part Three:<br />
Describe the mood and emotion of the work of art. How does it make you feel?<br />
Part Four:<br />
Explain how the artist uses elements of the work of art to make you feel that way. How did the artist<br />
create this mood?<br />
58 • <strong>Lesson</strong> 3: People and Environments of the American West
<strong>Lesson</strong> 3<br />
The Environment of the West<br />
ILS1B: I can analyze a text to compare and contrast different situations.<br />
Long ago, the western part of the United States was open land. Today, where you see highways<br />
there were no roads. The land was hilly. There were great mountains. There were enormous fields,<br />
called plains. The bison, or buffalo, lived there. They roamed wherever they wanted. Eagles flew above<br />
the land. In summer it was hot and dry. In winter, it was windy. Parts of the environment were desert<br />
and so dry that only cactus could grow well. Snakes and lizards lived in the desert. They would come<br />
out at night when it was cooler. During the day they slept.<br />
For many years, Native Americans had lived in these lands. They had farmed. They had hunted<br />
animals. They had built homes. Some Native Americans built homes out of a kind of brick. They made<br />
the bricks from clay. They put them together into thick walls. Those walls would keep the homes cool<br />
during the day. They would keep the heat inside at night. When the sun went down, the desert would<br />
become cold. So it was good to have a way to keep heat inside.<br />
Settlers from the East came to this environment. They brought tools. They arrived in covered<br />
wagons. Oxen pulled the wagons. When the settlers came to a place where there was water, they<br />
would stop. They would camp there. Sometimes they chose to stay where they camped. They set up a<br />
small village. They would start to farm. They would hunt, too.<br />
Some people started to build ranches in the West. They would raise herds of cattle. The cowboys<br />
who worked for the ranch would ride with the cattle. They would watch over them. They might have<br />
a dog to help them. The dogs would help to herd the cattle. The land was wide open. The cattle might<br />
go for many miles to find grass to eat. The cowboys would herd them to places to get water, too. They<br />
were grown men, but they were called boys. They were called cowboys because they took care of the<br />
cows. They worked hard every day. They would get up early in the morning to start to herd the cattle.<br />
There was no rest until sundown.<br />
The cowboys had to protect the cows from predators, including wolves and coyotes that might<br />
come after the cattle at night. The cowboys might have to get up in the night to scare the predators<br />
away.<br />
Living in the West used to be all about living with nature. Today, you will see big highways. You’ll<br />
still see the mountains and the rivers. And herds of cattle still live on the ranches. But the cowboys<br />
today have trucks and motorcycles. The natural environment has stayed the same. Ways of living and<br />
working there have changed.<br />
See What You Read<br />
Draw a two-part picture.<br />
In part one, show what the West used to look like. In part two, show what it looks like today.<br />
Art Institute of Chicago • 59
<strong>Lesson</strong> 3<br />
Landscape Maker<br />
ILS26B2d: I can plan and create a sketch that communicates an idea.<br />
Directions: Use this page to plan and sketch a drawing of a landscape. A landscape is a picture of an<br />
environment. It shows the plants, including grasses, flowers, trees, and bushes, as well as the land, and<br />
it may show water and the sky, too. In your drawing, you will show the landscape that people would<br />
have seen in the West when the sculptor made The Bronco Buster.<br />
What will you include in your landscape to show the environment?<br />
Kinds of Plants Kinds of Land (can include bodies of water) The Sky<br />
Draw your sketch here. If you have time, you can paint the landscape, adding color to show more about<br />
what the environment looks like.<br />
60 • <strong>Lesson</strong> 3: People and Environments of the American West
<strong>Lesson</strong> 3<br />
Sculpture Planner<br />
ILS26B2d: I can plan a sculpture that communicates an idea.<br />
Just like painters, sculptors think about what they want people to understand when they make art.<br />
What person or animal will your sculpture show?<br />
What traits do you want people to understand from the sculpture? For example, you might select<br />
bravery for a person or strength for an animal.<br />
Sketch your sculpture here. Show what you want people to see when they look at it from three<br />
different views.<br />
From the Front From the Side From the Top<br />
Art Institute of Chicago • 61
<strong>Lesson</strong> 3<br />
Poem Writer—Write a Poem Based on a Painting<br />
ILS3C: I can create a poem based on a work of art.<br />
Choose a painting:<br />
(title)<br />
Write words that say what you think about the painting. What do you see? What do you like?<br />
Write one word in each box.<br />
What do you think the artist wants you to understand when you look at the painting?<br />
POEM<br />
Write a poem about the painting.<br />
62 • <strong>Lesson</strong> 3: People and Environments of the American West
<strong>Lesson</strong> 4<br />
The Midwest:<br />
The City and the Farm
<strong>Lesson</strong> 4<br />
The Midwest: The City and the Farm<br />
Summary<br />
In this lesson, students complete extended responses and descriptive paragraphs as they learn to “read”<br />
a painting, applying skills of reading to interpret paintings that represent urban and rural life. They<br />
develop critical thinking skills as they infer and support the main idea of a painting. They compare and<br />
contrast urban and rural life and summarize differences and then create their own images and writing<br />
to communicate what they have learned.<br />
Featured Artworks<br />
Alson Skinner Clark (American, 1876–1949)<br />
The Coffee House, 1905<br />
Oil on canvas<br />
38 x 30 inches<br />
Grant Wood (American, 1891–1942)<br />
American Gothic, 1930<br />
Oil on beaver board<br />
30 ¾ x 25 ¾ inches<br />
Illinois Benchmarks<br />
Reading<br />
1.B.2a:<br />
1.C.2e:<br />
1.C.2b:<br />
Writing<br />
3.B.2a:<br />
3.C.2a:<br />
Establish purposes for reading: survey materials; ask questions; make predictions;<br />
connect, clarify, and extend ideas.<br />
Explain how authors and illustrators use text and art to express their ideas.<br />
Make and support inferences and form interpretations about main ideas, themes,<br />
and topics.<br />
Generate and organize ideas using a variety of planning strategies.<br />
Write for a variety of purposes and for specified audiences in a variety of forms.<br />
Social Studies<br />
18.A.2:<br />
Explain ways in which artistic creations communicate about a culture.<br />
Art<br />
25.B.2:<br />
26.B.2d:<br />
Understand how elements and principles combine within an art form to express ideas.<br />
Demonstrate knowledge and skills to create works of visual art using problem solving,<br />
observing, designing, sketching and constructing.<br />
64 • <strong>Lesson</strong> 4: The Midwest ‒ The City and the Farm
English Language Learner Standards<br />
Standard 1 Reading: Arrange information on topics gathered from reading.<br />
Standard 2 Communication: Edit and revise own writing to produce final drafts.<br />
Objectives<br />
• Students will infer and support the main idea of a painting showing an urban scene.<br />
• Students will infer and support the main idea from a passage about urban life.<br />
• Students will compare and contrast paintings that represent urban and rural life.<br />
• Students will analyze how an artist uses techniques to communicate an idea.<br />
• Students will write an extended response about a painting and passage.<br />
• Students will plan and create a poem and a picture representing urban life based on their experience.<br />
Background Information<br />
The artwork: The Coffee House<br />
The artist: Alson Skinner Clark (American, 1876–1949)<br />
The topic: The City and the Farm<br />
Relevant Information:<br />
• Alson Skinner Clark was a native Chicagoan, but also worked in and painted urban scenes of Paris<br />
and London. In 1905, when he painted The Coffee House, he was part of a trend in Chicago and<br />
other major urban centers in America to capture a city’s unique identity.<br />
• The Coffee House shows people crossing over the State Street Bridge in Chicago. The viewer is<br />
looking south.<br />
• The painting depicts warehouses rather than a coffee shop. At the time Clark painted it in 1905,<br />
there were warehouses along the river for storage of goods, including coffee, reflecting Chicago’s<br />
heavily industrial character.<br />
• It is wintertime. There are ice floes in the river and snow on the ground communicating the cold<br />
weather.<br />
• The smoke from factories and the thick clouds darken the sky and the size of the buildings creates<br />
heavy dark shadows. The overall appearance of the painting is dark and dirty, despite a small bit of<br />
sunshine that manages to break through the clouds.<br />
• It is hard to see many details about the people crossing the bridge, but some of them are<br />
well-dressed. They may be coming from the new department stores such as Marshall Field’s just<br />
south of this area on State Street.<br />
The artwork: American Gothic<br />
The artist: Grant Wood (American, 1891–1942)<br />
The topic: The City and the Farm<br />
Relevant Information:<br />
• Grant Wood was born and spent much of his life in Iowa.<br />
Art Institute of Chicago • 65
• His paintings of life in the Midwest are well known and part of an art movement called Regionalism.<br />
Regionalist painters nostalgically recorded America’s rural areas and small towns, especially<br />
in the Midwest and South, during a time of rapid industrialization and urban growth for the country.<br />
The painters intended their images to be a positive force in an age of economic depression.<br />
• Painted in 1930, the painting shows a man and woman (likely a farmer and his daughter) posed in<br />
front of a farmhouse in rural Iowa. The architectural style of the house is called Carpenter Gothic,<br />
which partially explains the title of the painting. “Gothic” refers to a period in the late Middle Ages<br />
characterized by the use of the pointed arch, as seen in the second story window of the house<br />
behind the couple.<br />
• Although we cannot see the actual farm land, a portion of a red barn and the man’s overalls and<br />
pitchfork suggest that these are farm folk. A church steeple far in the background reminds the<br />
viewer of the religious values of many rural Americans.<br />
• The serious expressions on the faces of the figures suggest they are unhappy, but are more likely<br />
a reference to the common practice of early photographs, which had a long exposure time. It was<br />
very hard to hold a smile for such a long time, so many people didn’t.<br />
• The painting also includes many playful elements and patterns. For example, the rounded trees<br />
match the rounded frames of the man’s glasses, and the brown and white design on the woman’s<br />
apron are similar to that on the window curtain above her. By adding these playful touches, Grant<br />
Wood helps us see that these two people were not as unhappy as their faces might suggest.<br />
You will find additional useful information from the following sources:<br />
Web sites<br />
• The Art Institute of Chicago<br />
Information about American Gothic:<br />
http://www.artic.edu/aic/collections/artwork/6565<br />
http://www.artic.edu/artaccess/AA_Modern/pages/MOD_5.shtml<br />
• Information about The Coffee House:<br />
http://www.artic.edu/aic/collections/artwork/118283<br />
• American Art Collection:<br />
http://www.artic.edu/artaccess/AA_American/index.html<br />
Additional Web sites<br />
• Terra Foundation for American Art: Grant Wood:<br />
http://terraamericanart.org/collections/code/emuseum.asp?XXX_QS_XXX&newvalues=1&rawsea<br />
rch=constituentid/,/is/,/32/,/false/,/true&newstyle=single&newprofile=people&newsearchdesc=Gra<br />
nt%20Wood&newcurrentrecord=1&module=people<br />
• <strong>Lesson</strong> Plan for teaching about the Carl Sandburg poem “Chicago” (1916):<br />
http://edsitement.neh.gov/view_lesson_plan.asp?id=678<br />
* This lesson includes photos to compare and contrast with “The Coffee House.”<br />
• Chicago History Museum Web site:<br />
http://www.chicagohs.org/<br />
66 • <strong>Lesson</strong> 4: The Midwest ‒ The City and the Farm
Printed Materials (available in the Art Institute’s Crown Family Educator Resource Center<br />
http://www.artic.edu/aic/education/trc/index.html)<br />
• The Art Institute of Chicago. American Art Manual. Art Institute of Chicago, Department of<br />
Museum Education, 2008.<br />
• The Art Institute of Chicago. American Art and Culture. Art Institute of Chicago, Department of<br />
Museum Education, 1995.<br />
• Barter, Judith A., Kimberly Rhodes, Seth A. Thayer and Andrew J. Walker. 1998. American Arts at<br />
The Art Institute of Chicago: From Colonial Times to World War I. Art Institute of Chicago/<br />
Hudson Hills Press.<br />
• Barter, Judith A., Sarah E. Kelly, Denise Mahoney, Ellen E. Roberts, Brandon K. Ruud, and<br />
Jennifer M. Downs. 2009. American Modernism at the Art Institute of Chicago: From World War I<br />
to 1955. Art Institute of Chicago/Yale University Press.<br />
Days 1–3: Comparing and Contrasting a Painting and a Place<br />
● Time Allotment<br />
three days, 45 minutes each day (or three, 45-minute segments in one day); based on student work<br />
patterns, the extended response activity on day three may take 45–60 minutes.<br />
● Materials<br />
• Reproduction of The Coffee House, 1905<br />
Materials for each student:<br />
Copy of Art Reader organizer<br />
Copy of Main Idea Interpreter organizer<br />
Copy of Extended Response organizer<br />
● Advance Preparation<br />
• Prepare to display the reproduction of The Coffee House in the classroom for student viewing.<br />
• Review the Background Information section of this lesson about The Coffee House.<br />
• Preview the lesson and decide whether or not to use photos of Chicago in the early 1900s from<br />
the lesson plan for teaching about the 1916 Carl Sandburg poem “Chicago” (http://edsitement.<br />
neh.gov/view_lesson_plan.asp?id=678). If you decide to utilize the photographs, then you<br />
should add an activity in which students compare and contrast a photograph with The Coffee<br />
House.<br />
● Vocabulary<br />
infer<br />
interpret<br />
Art Institute of Chicago • 67
main idea<br />
mood<br />
scale<br />
technique<br />
urban<br />
● Procedure<br />
Part 1: Reading a Painting<br />
1. Show students The Coffee House by Alson Skinner Clark. Explain that it is called The Coffee<br />
House not because it shows a coffee shop but warehouses to store manufactured products, like<br />
coffee.<br />
2. Ask students to describe what they see in the image. What do they notice?<br />
3. Give students the Art Reader organizer to complete in think-pair-share structure. Guide students<br />
to complete each part so that they make notes individually on the Art Reader, then pair<br />
with a partner, and then share as you guide a class discussion.<br />
4. Emphasize the use of techniques, such as the way the artist chooses to use color, line, or shape,<br />
to create a mood. First, ask students what mood they inferred. Then discuss how the artist used<br />
these elements (color, line, shape, or scale) to create that mood.<br />
Part 2: Inferring the Main Idea and Charting an Extended Response<br />
1. Explain that interpreting a painting is like interpreting a poem or story. You need to take time<br />
to think about what the painter included and then think about what the painter wants you to<br />
understand.<br />
2. Guide students to infer one main idea, which is a part of their interpretation, from the painting.<br />
Point out that you can infer the main idea of a story or poem by noticing what the writer<br />
emphasizes.<br />
3. Have students complete the Main Idea Interpreter in think-pair-share structure. Also ask them<br />
what title (besides The Coffee House) they might give the painting that would tell its main idea.<br />
4. Give students the Extended Response organizer and explain that The Coffee House was painted<br />
more than 100 years ago. Ask them to prepare a compare and contrast Extended Response<br />
Chart based on the painting and their own experience.<br />
5. Have students keep their charts to use to write the extended response on Day 3 of the lesson.<br />
Part 3: Writing an Extended Response Based on a Painting<br />
1. Students use their charts from the previous day to write the extended response.<br />
2. Students exchange their extended responses and underline the information that the other<br />
students included from the painting and circle the information that students included from their<br />
experience.<br />
68 • <strong>Lesson</strong> 4: The Midwest ‒ The City and the Farm
Days 4–5: Comparing and Contrasting the City and the Farm<br />
● Time Allotment<br />
two days, 45 minutes each day (or two, 45‒minute segments in one day)<br />
● Materials<br />
• Reproduction of American Gothic, 1930<br />
Materials for each student:<br />
Copy of Mood Reader organizer<br />
Copy of Compare and Contrast organizer<br />
● Advance Preparation<br />
• Prepare to display American Gothic and The Coffee House in the classroom for student<br />
viewing.<br />
• Review the Background Information section of this lesson about American Gothic.<br />
● Vocabulary<br />
comparison<br />
conclude<br />
contrast<br />
descriptive writing<br />
gothic<br />
main idea<br />
rural<br />
summarize<br />
● Procedure<br />
Part 1<br />
1. Ask students to look at American Gothic and fill in the Art Reader organizer. They should fill<br />
out just the first two parts of the Art Reader. Then have students share their observations.<br />
2. Explain to them that the painting was made in 1930 and shows the kinds of people who lived<br />
in rural America almost 100 years ago. The artist grew up in rural Iowa and painted things that<br />
reminded him of that time. Ask them to list the things that are rural in the painting.<br />
3. Rather than have students finish the second half of the Art Reader, have them use the Mood<br />
Reader organizer to infer the mood of the painting American Gothic.<br />
4. As a class, compare and contrast the mood of the two paintings—The Coffee House and<br />
American Gothic.<br />
5. Ask students to infer what message about rural life that the artist, Grant Wood, was<br />
communicating.<br />
Art Institute of Chicago • 69
Part 2<br />
1. As a class, list some of the ways that the two paintings are alike. For example, they both show<br />
people. They both show a place.<br />
2. Then ask students to complete the Compare and Contrast organizer in pairs.<br />
3. Ask students to summarize what they conclude as a pair: are the two paintings more alike or<br />
more different—and why?<br />
Day 6: Descriptive Writing and Drawing<br />
● Time Allotment<br />
60–75 minutes<br />
● Materials<br />
Materials for each student:<br />
Copy of Expository Writing organizer<br />
8 ½ x 11 paper for expository paragraph<br />
● Vocabulary<br />
communicate<br />
descriptive<br />
expository<br />
main idea<br />
mood<br />
● Procedure<br />
1. Explain that students themselves will be the communicators in this session.<br />
2. Each student uses the Expository Writing organizer to plan a paragraph that describes a place,<br />
urban or rural.<br />
3. Students write the paragraphs and exchange them. Then students who receive the paragraphs<br />
underline the words and phrases that help them “see” the place the other student describes.<br />
4. Then each student draws a picture that illustrates his or her paragraph.<br />
5. You can create an exhibit of the students’ paragraphs and drawings on a bulletin board in the<br />
hallway so the entire school learns from your students.<br />
● Home Connection<br />
Students make a “Family Places” drawing collection. Students draw their current community. Then<br />
they draw places their family has lived in the past. They base these drawings on descriptions that<br />
their family members give them or photos of their family in the past.<br />
● Assessment<br />
Students write a guide to comparing and contrasting a painting and a place.<br />
70 • <strong>Lesson</strong> 4: The Midwest ‒ The City and the Farm
● Expansion Activities<br />
• VOCABULARY DEVELOPMENT: Have students make an illustrated glossary for urban and<br />
rural. First, they list words that are important to each type of region, such as factory or farm.<br />
Then they draw pictures to show those parts.<br />
• WRITING: Students write poems about the city of Chicago. They can use the Expository<br />
Writing organizer to prepare their poem.<br />
• RESEARCH: Students research Chicago’s past. They will find stories about Chicago in the<br />
past at the Chicago History Museum Web site (http://www.chicagohs.org/).<br />
• SCIENCE: Students can make a technology timeline for cities and farms, listing inventions<br />
that have changed ways of living and working in both places.<br />
• FOR ENGLISH LANGUAGE LEARNERS: When possible, provide concrete examples of<br />
vocabulary words (pictures or actual examples) and allow them to use drawn images to<br />
represent vocabulary words as well.<br />
• FOR STUDENTS WITH SPECIAL NEEDS: Partner or group students, varying performance<br />
and skill level, and collaborate on activities.<br />
Art Institute of Chicago • 71
<strong>Lesson</strong> 4 Art Reader (1/2)<br />
ILS25A: I can analyze how an artist uses elements of visual art to communicate.<br />
ILS1B: I can analyze a visual communication (transferable to passages).<br />
Part One:<br />
Take a close look at this work of art. Be sure to look for longer than two minutes. In this chart, list<br />
ten things that you see or recognize.<br />
1. 6.<br />
2. 7.<br />
3. 8.<br />
4. 9.<br />
5. 10.<br />
Part Two:<br />
In this chart, describe the elements (color, line, size, shapes) of the work of art.<br />
Element of Art<br />
Describe How the Artist Used It<br />
color<br />
shapes<br />
size<br />
line<br />
72 • <strong>Lesson</strong> 4: The Midwest ‒ The City and the Farm
<strong>Lesson</strong> 4 Art Reader (2/2)<br />
Part Three:<br />
Describe the mood and emotion of the work of art. How does it make you feel?<br />
Part Four:<br />
Explain how the artist uses elements of the work of art to make you feel that way. How did the artist<br />
create this mood?<br />
Art Institute of Chicago • 73
<strong>Lesson</strong> 4<br />
Main Idea Interpreter<br />
ILS1B: I can identify and support the main idea in an artwork—transferable to a text.<br />
A painting has a main idea. The artist uses pictures to tell you that idea. You need to infer the main<br />
idea. You look at the whole painting. Then you figure out the artist’s main idea.<br />
Look closely at the painting. What do you think the main idea is? Write it in the circle.<br />
Then in the boxes put the parts of the painting that show you what the main idea is. You can draw<br />
them or name them in the boxes.<br />
74 • <strong>Lesson</strong> 4: The Midwest ‒ The City and the Farm
<strong>Lesson</strong> 4<br />
Extended Response Organizer<br />
ILS1B: I can write an extended response based on a painting and my knowledge.<br />
The painting The Coffee House shows Chicago in 1905. Is Chicago today like Chicago in 1905?<br />
To answer, use this chart. You will write an extended response based on what you put in your chart.<br />
Ways Chicago Today Is Like Chicago in 1905<br />
What I see in the painting that is<br />
the same as today.<br />
Ways Chicago Today Is Different<br />
from Chicago in 1905<br />
What I see in the painting that is different.<br />
What I know is the same in my experience<br />
as it was then.<br />
What I know is different from my experience.<br />
What my answer will be:<br />
Chicago today is a lot like Chicago in 1905.<br />
Chicago today is very different from Chicago in 1905.<br />
Art Institute of Chicago • 75
<strong>Lesson</strong> 4<br />
Mood–Reader<br />
ILS25A2d: I can analyze an artist’s use of elements to communicate.<br />
Artists use techniques to give their paintings a mood. They use color. They use shades of colors.<br />
They use lines. They use size and scale. They use details.<br />
Directions: Look closely at the painting. Infer what you think the mood is. Then tell what the artist<br />
did to show that mood.<br />
Painting:<br />
My inference—I think the mood is<br />
List things the artist did to help show that mood in the painting.<br />
What the Artist Did<br />
How It Helps Show that Mood<br />
76 • <strong>Lesson</strong> 4: The Midwest ‒ The City and the Farm
<strong>Lesson</strong> 4<br />
Compare and Contrast Organizer<br />
ILS1B: I can compare and contrast.<br />
Directions:<br />
Use this chart to list ways that the two paintings are alike and different.<br />
We started the chart for you.<br />
Think about what you see in the paintings.<br />
Think about how the artist used techniques to paint them, too.<br />
The Coffee House<br />
How it is Different from<br />
American Gothic<br />
It shows a city.<br />
How They Are Alike<br />
Both paintings show what a<br />
place looks like.<br />
American Gothic<br />
How It is Different from<br />
The Coffee House<br />
It shows a farm.<br />
Art Institute of Chicago • 77
<strong>Lesson</strong> 4<br />
Expository Writing Organizer<br />
ILS3B: I can organize and write a paragraph.<br />
An expository writer uses words to explain or describe something.<br />
Directions: Use this page to organize an expository paragraph.<br />
Your paragraph will tell what someone would see if they saw a place.<br />
First, choose the kind of place you will describe: rural OR urban<br />
What is the main idea of your paragraph? What do you want people to understand about this kind of<br />
place?<br />
Then list parts of the place you will include in your paragraph.<br />
Part<br />
Adjectives<br />
Then for each part, list adjectives you will use to help people see what you are telling about the place.<br />
Then decide how you will start your paragraph.<br />
I will start by explaining<br />
Then decide how you will end it.<br />
I will end by telling<br />
Then write your paragraph on a separate sheet of paper.<br />
Then draw a picture to illustrate it. Show in your drawing the parts you tell about in your sentences.<br />
78 • <strong>Lesson</strong> 4: The Midwest ‒ The City and the Farm
<strong>Lesson</strong> 5<br />
Choices
<strong>Lesson</strong> 5<br />
Choices<br />
Summary<br />
In this lesson, students learn how to interpret the ideas expressed in an artist’s representation of<br />
contemporary life using skills that they also would apply when reading a text. The focus is a painting<br />
about the Great Migration, when African Americans chose to move to the northern part of the United<br />
States in search of improved working and living conditions. Students infer the motives of persons in a<br />
painting and analyze the context of the situation. They apply writing skills to explain their insights.<br />
Featured Artworks<br />
Walter Ellison (American, 1899–1977)<br />
Train Station, 1935<br />
Oil on cardboard<br />
8 x 14 in<br />
Illinois Benchmarks<br />
Reading<br />
1.A.2b:<br />
1.B.2a:<br />
1.C.2e:<br />
1.C.2b:<br />
Writing<br />
3.B.2a:<br />
3.C.2a:<br />
Clarify word meaning in a glossary.<br />
Establish purposes for reading: survey materials; ask questions; make predictions;<br />
connect, clarify, and extend ideas.<br />
Explain how authors and illustrators use text and art to express their ideas.<br />
Make and support inferences and form interpretations about main themes and topics.<br />
Generate and organize ideas using a variety of planning strategies.<br />
Write for a variety of purposes and for specified audiences in a variety of forms.<br />
Social Studies<br />
17.A.2b: Use maps to gather information about people and places.<br />
17.C.2b: Describe the relationships among location of resources, population distribution and<br />
economic activities.<br />
18.A.2: Explain ways in which artistic creations communicate about a culture.<br />
Art<br />
25.B.2:<br />
26.B.2d:<br />
Understand how elements and principles combine within an art form to express ideas.<br />
Demonstrate knowledge and skills to create works of visual art using problem solving,<br />
observing, designing, sketching and constructing.<br />
80 • <strong>Lesson</strong> 5: Choices
English Language Learner Standards<br />
Standard 1 Reading: Arrange information on topics gathered from reading.<br />
Standard 2 Communication: Edit and revise own writing to produce final drafts.<br />
Objectives<br />
• Students will analyze how visual art can communicate ideas.<br />
• Students will infer motives based on an analysis of a painting and its context.<br />
• Students will infer the main idea of a painting.<br />
• Students will use maps to imagine their own potential migration and the reasons behind these desires.<br />
• Students will locate and organize information about the Great Migration.<br />
• Students will explain migration in terms of resources and quality of life.<br />
• Students will create art based on their research and personal choices.<br />
Background Information<br />
The artwork: Train Station, 1935<br />
The artist: Walter Ellison (American, 1899–1977)<br />
The topic: Choices<br />
Relevant Information:<br />
• Walter Ellison’s painting Train Station shows African American and white travelers at a station<br />
bound for different cities.<br />
• Between 1910 and 1970 more than six million African Americans moved from the South to cities<br />
in the North to find better jobs and opportunities. This large movement of people is called the Great<br />
Migration.<br />
• Many came to live and work in Chicago, including Walter Ellison, who came to Chicago from<br />
Georgia in the 1920s. In fact, the station in the painting may be based on the station in Macon, from<br />
which Ellison likely departed for the North.<br />
• Train Station is divided into three sections by two large columns located in the foreground, or area<br />
closest to the viewer. These columns prevent African American and white passengers from<br />
mingling. Ellison used them to visually represent one of the themes of the painting, which is<br />
the impact of the segregation.<br />
• In the middle ground of the painting to the right, we see an African American woman enter an area<br />
labeled “Colored.” In the South, under segregation, blacks and whites were not able to use the same<br />
public facilities like water fountains, bathrooms, and restaurants and did not have equal access to<br />
educational and professional opportunities. Discriminatory laws called Jim Crow laws severely<br />
restricted opportunities for African Americans.<br />
• On the left, white passengers board trains traveling to vacation destinations in the South such as<br />
Miami and West Palm Beach. On the right, African American passengers wait for trains going north<br />
to cities like Chicago, New York, and Detroit.<br />
• The center section shows African American porters, or railroad employees who carry travelers’<br />
bags, assisting white passengers and directing an African American passenger to the trains heading<br />
north.<br />
Art Institute of Chicago • 81
• In Train Station, Walter Ellison uses trains to symbolize movement towards a brighter future and<br />
hope for prosperity, a device several other African American artists (such as Jacob Lawrence) were<br />
using as well.<br />
You will find additional useful information from the following sources:<br />
Web sites<br />
• The Art Institute of Chicago<br />
Further information about Train Station:<br />
http://www.artic.edu/aic/collections/artwork/105800<br />
http://www.artic.edu/artaccess/AA_AfAm/pages/AfAm_4.shtml<br />
http://www.artic.edu/webspaces/museumstudies/ms242/portfolio5.shtml<br />
Additional Web sites<br />
• Jacob Lawrence: Exploring Stories<br />
http://whitney.org/www/jacoblawrence/<br />
• <strong>Lesson</strong> plan on Migration and Emigration:<br />
http://www.moma.org/modernteachers/lesson.php?lessonID=64<br />
• Migration: The African American Mosaic:<br />
http://www.loc.gov/exhibits/african/afam008.html<br />
• Migration Information Source:<br />
http://www.migrationinformation.org/<br />
• U.S. State Department’s Population, Refugees and Migration website:<br />
http://www.state.gov/g/prm/<br />
Printed Materials (available in the Art Institute’s Crown Family Educator Resource Center<br />
http://www.artic.edu/aic/education/trc/index.html)<br />
• The Art Institute of Chicago. African American Art. Art Institute of Chicago, Department of<br />
Museum Education, 1997.<br />
• The Art Institute of Chicago. Art on the Move. Art Institute of Chicago, Department of Museum<br />
Education, 1996.<br />
• The Art Institute of Chicago. Telling Images: Stories in Art. Art Institute of Chicago, Department of<br />
Museum Education, 1996.<br />
• The Art Institute of Chicago. Train Station. Poster Packet. Art Institute of Chicago, Department of<br />
Museum Education, 2003.<br />
82 • <strong>Lesson</strong> 5: Choices
• Barter, Judith A., Sarah E. Kelly, Denise Mahoney, Ellen E. Roberts, Brandon K. Ruud, and<br />
Jennifer M. Downs. 2009. American Modernism at the Art Institute of Chicago: From World War I<br />
to 1955. Art Institute of Chicago/Yale University Press.<br />
Day 1: Interpreting a Painting<br />
● Time Allotment<br />
45 minutes<br />
● Materials<br />
• Reproduction of Train Station, 1935<br />
Materials for each student:<br />
Copy of Art Reader organizer<br />
● Advance Preparation<br />
• Prepare to display the reproduction of Train Station in the classroom for student viewing.<br />
• Review the Background Information section of this lesson about Train Station.<br />
● Vocabulary<br />
background<br />
composition<br />
emotion<br />
foreground<br />
Great Migration<br />
living conditions<br />
middle ground<br />
migration<br />
segregation<br />
subject matter<br />
● Procedure<br />
Part 1: Reading the Painting (20 minutes)<br />
1. Have students take a close look at Train Station using the first two sections of the Art Reader<br />
organizer. Make sure that they look at the painting for at least two minutes before they start<br />
writing.<br />
2. Ask students to share what they see in the painting.<br />
3. Ask the students to describe the people. What are they doing? Wearing? Why do you think<br />
(infer) they are traveling? Is there a mood or emotion that you feel is shown in this painting?<br />
Ask students to identify things in the painting that support their comments. (They may use the<br />
second half of the Art Reader to help with this set of questions).<br />
Art Institute of Chicago • 83
4. Make a three-column chart on the chalkboard. Then ask students to list what they see in each of<br />
the three parts of the painting that are divided by the columns. They should try to read the signs<br />
in the station and identify the different destinations for the trains.<br />
5. Ask students what is similar and what is different between the two sides of the painting. Ask<br />
them to infer what the artist is communicating on each side.<br />
Part 2: Connecting Art and Context (20 minutes)<br />
1. Introduce information about the Great Migration from the Background Information section of<br />
the lesson.<br />
2. Explain that a picture’s composition involves the way in which the artist arranges the people,<br />
places, and things in the image. Point out the foreground, middle ground, and background. Also<br />
point out that the columns and the details of the people in each section of the composition also<br />
help someone understand what is going on in the painting.<br />
3. Then ask students to infer who would be migrating in the painting—the people on the left or<br />
the right? Why?<br />
4. Ask students to infer the emotions of the people in the painting. First, they should identify the<br />
person by describing where he or she is located in the painting and what the person is doing,<br />
and what clothing he or she is wearing. Then ask them to infer the person’s feelings based on<br />
what the person is doing and where the person is located in the painting.<br />
Part 3: Vocabulary Development (5 minutes)<br />
1. List key words that students have used to discuss the painting, such as foreground and<br />
migration. Ask each student to start a vocabulary glossary of important words as homework.<br />
2. Also for homework, ask students to write about what they learned about the artwork, writing<br />
one sentence for each word from their glossary.<br />
Days 2–3: Relating Art and Context<br />
● Time Allotment<br />
two days, 45 minutes each day (or two, 45-minute segments in one day)<br />
● Materials<br />
Materials for each student:<br />
Color Me Dark: The Diary of Nettie Lee Love, the Great Migration North,<br />
by Patricia C. McKissack.<br />
Illustration Planner<br />
Pencils and paper to sketch<br />
● Advance Preparation<br />
• Keep the reproduction of Train Station on display in the classroom for student viewing.<br />
• Preview Color Me Dark, and identify sections you want to highlight with students. Choose a<br />
84 • <strong>Lesson</strong> 5: Choices
section that deals with the narrator’s life in the South. Choose another section that tells about<br />
her journey. Plan to read aloud from sections.<br />
● Vocabulary<br />
feelings<br />
decision<br />
expectation<br />
illustration<br />
narrative<br />
voice<br />
● Procedure<br />
Part 1: Learning about Migration<br />
1. Distribute copies of Color Me Dark: The Diary of Nellie Lee Love, The Great Migration North.<br />
2. Read a section aloud and ask students: “Whose voice do you hear?” “Why do you think the<br />
author wrote this way?” “What do you expect the other parts of the book to tell you?”<br />
3. Ask students to read a few more pages independently and to pair and share what they learned<br />
about: the situation in the South; the decision Nellie Lee Love made; and what her expectations<br />
were for her life in the North.<br />
4. Facilitate a discussion on Nellie’s life in the South and her travel to the North.<br />
Part 2: Connecting Passages and Paintings<br />
1. Ask students how the book and the painting are alike.<br />
2. Ask them to identify an important idea from the book.<br />
3. Ask if they think they can see the same idea in the painting—and how the artist communicates<br />
it (through composition and other details).<br />
4. Discuss how an illustration can help people understand ideas in a book.<br />
5. Ask students to draw a sketch of an idea that they understand from reading the book. Tell them<br />
to use the Illustrator Planner to plan the drawing.<br />
Days 4–5: Synthesis<br />
● Time Allotment<br />
two days, 45 minutes each day (or two, 45 minute segments in one day)<br />
● Materials<br />
Materials for each student:<br />
Art Planner<br />
“One Way Ticket” by Langston Hughes<br />
Letter Writing Organizer<br />
Art Institute of Chicago • 85
● Advance Preparation<br />
• Keep the reproduction of Train Station on display in the classroom for student viewing.<br />
• Preview “One Way Ticket” by Langston Hughes, and identify sections you want to highlight<br />
with students. Plan to read the poem aloud.<br />
● Vocabulary<br />
change<br />
destination<br />
journey<br />
sequence<br />
theme<br />
● Procedure<br />
Part 1: Illustrating a Journey<br />
1. Explain that the people traveling north in the painting did not just make a trip. They were<br />
making a journey. Emphasize that this journey is about change, that when the travelers reach<br />
the destination their life is different.<br />
2. Ask students to choose one person from the painting and draw a picture of where they think<br />
s/he will be going and how their life will be there. Give them the Art Planner to prepare their<br />
drawing.<br />
3. Ask them to write a caption for their artwork.<br />
Part 2: Communicating in a Poem<br />
1. Read the poem “One Way Ticket” aloud. Ask how it is like the painting Train Station. (You<br />
might explain that the artist who painted Train Station also illustrated works by the poet<br />
Langston Hughes, who wrote about the Great Migration and other important themes and events<br />
in African American history.) List ideas that the painting and the poem both communicate.<br />
2. Ask students to write a letter that the person they have chosen in the painting might have written<br />
to relatives after they reached their destination. They can use the Letter Writing organizer to<br />
plan their letter.<br />
● Home Connection<br />
Ask students to interview family members about journeys they have made or know about in which<br />
people migrated. Students can write narratives and illustrate those family journeys.<br />
● Assessment<br />
Ask students to write an extended response about what they have learned from this lesson. Ask<br />
them to respond to this question:<br />
• Based on what you learned and your own ideas, why was the Great Migration important to<br />
many people in the United States?<br />
Ask students to write a guide to interpreting a painting. Ask them to use the following questions to<br />
help develop the contents of their guide:<br />
86 • <strong>Lesson</strong> 5: Choices
• What kinds of things do you notice?<br />
• What kinds of questions do you ask yourself?<br />
● Expansion Activities<br />
• VOCABULARY DEVELOPMENT: Students make a “painter’s” vocabulary chart,<br />
including words the painter thinks about when preparing to paint, such as subject, represent,<br />
symbol, color, line, foreground.<br />
• WRITING: Students write what people in the painting might have said to each other during<br />
their journey.<br />
• RESEARCH: Students can research more about the Great Migration and the work of the artist<br />
Jacob Lawrence.<br />
• FOR ENGLISH LANGUAGE LEARNERS: When possible, provide concrete examples of<br />
vocabulary words (pictures or actual examples) and allow them to use drawn images to<br />
represent vocabulary words as well.<br />
• FOR STUDENTS WITH SPECIAL NEEDS: Partner or group students, varying performance<br />
and skill level, and collaborate on activities.<br />
Art Institute of Chicago • 87
<strong>Lesson</strong> 5 Art Reader (1/2)<br />
ILS25A: I can analyze how an artist uses elements of visual art to communicate.<br />
ILS1B: I can analyze a visual communication (transferable to passages).<br />
Part One:<br />
Take a close look at this work of art. Be sure to look for longer than two minutes. In this chart, list<br />
ten things that you see or recognize.<br />
1. 6.<br />
2. 7.<br />
3. 8.<br />
4. 9.<br />
5. 10.<br />
Part Two:<br />
In this chart, describe the elements (color, line, size, shapes) of the work of art.<br />
Element of Art<br />
Describe How the Artist Used It<br />
color<br />
shapes<br />
size<br />
line<br />
88 • <strong>Lesson</strong> 5: Choices
<strong>Lesson</strong> 5 Art Reader (2/2)<br />
Part Three:<br />
Describe the mood and emotion of the work of art. How does it make you feel?<br />
Part Four:<br />
Explain how the artist uses elements of the work of art to make you feel that way. How did the artist<br />
create this mood?<br />
Art Institute of Chicago • 89
<strong>Lesson</strong> 5<br />
Illustration Planner<br />
ILS25B: I can plan and create an illustration to communicate an idea. (Transferable to ILS3B—writing)<br />
Directions: Use this page to plan and sketch a drawing. Your drawing will show an idea you learned<br />
from a book.<br />
What is the idea?<br />
What will you include in your drawing to show it? This is like including information in a paragraph to<br />
help someone understand the main idea of your paragraph.<br />
What I Will Include<br />
Why—How It Will Help People See My Idea<br />
Draw your sketch here.<br />
90 • <strong>Lesson</strong> 5: Choices
<strong>Lesson</strong> 5<br />
One Way Ticket<br />
One Way Ticket<br />
By Langston Hughes<br />
1947<br />
I pick up my life<br />
And take it with me<br />
And I put it down in<br />
Chicago, Detroit,<br />
Buffalo, Scranton,<br />
Any place that is<br />
North and East?<br />
And not Dixie.<br />
I pick up my life<br />
And take it on the train<br />
To Los Angeles, Bakersfield,<br />
Seattle, Oakland, Salt Lake,<br />
Any place that is<br />
North and West?<br />
But not South.<br />
I am fed up<br />
With Jim Crow laws,<br />
People who are cruel<br />
And afraid,<br />
Who lynch and run,<br />
Who are scared of me<br />
And me of them.<br />
I pick up my life<br />
And take it away<br />
On a one-way ticket?<br />
Gone up North,<br />
Gone out West,<br />
Gone!<br />
Art Institute of Chicago • 91
<strong>Lesson</strong> 5<br />
Letter Writing Organizer<br />
ILS3B: I can write to communicate an idea.<br />
Directions: Use this organizer to plan your writing.<br />
To whom are you writing?<br />
What do you want them to understand?<br />
What information and examples will you include?<br />
How will you start your letter?<br />
How will you end your letter?<br />
Now write your letter on another page.<br />
92 • <strong>Lesson</strong> 5: Choices
<strong>Lesson</strong> 6<br />
Inferring Values
<strong>Lesson</strong> 6<br />
Inferring Values<br />
Summary<br />
In this lesson, students apply skills of language arts to infer values represented in art. They write and<br />
draw to communicate about values. They examine works of art from different countries to infer values<br />
that the art communicates. They find that while each culture is different there are common core values<br />
that cross cultures and time periods. The lesson develops language arts skills and social studies content<br />
and can be an opportunity to support social-emotional learning about the importance of values.<br />
Featured Artworks<br />
Diego Rivera (Mexican, 1886–1957)<br />
The Weaver, 1936<br />
Tempera and oil on canvas<br />
26 x 42 in<br />
Charles Wilbert White (American, 1918–1979)<br />
Harvest Talk, 1953<br />
Charcoal drawing<br />
66.1 x 99.2 cm<br />
Mary Cassatt (American, 1844–1926)<br />
The Child’s Bath, 1893<br />
Oil on canvas<br />
39 ½ x 26 in<br />
Illinois Benchmarks<br />
Reading<br />
1.B.2a:<br />
1.C.2e:<br />
1.C.2b:<br />
Writing<br />
3.B.2a:<br />
3.C.2a:<br />
Establish purposes for reading: survey materials; ask questions; make predictions;<br />
connect, clarify, and extend ideas.<br />
Explain how authors and illustrators use text and art to express their ideas.<br />
Make and support inferences and form interpretations about main themes and topics.<br />
Generate and organize ideas using a variety of planning strategies.<br />
Write for a variety of purposes and for specified audiences in a variety of forms.<br />
Social Studies<br />
18.A.2:<br />
Explain ways in which artworks communicate about a culture.<br />
94 • <strong>Lesson</strong> 6: Inferring Values
Art<br />
25.B.2:<br />
26.B.2d:<br />
Understand how elements and principles combine within an art form to express ideas.<br />
Demonstrate knowledge and skills to create works of visual art using problem solving,<br />
observing, designing, sketching and constructing.<br />
English Language Learner Standards<br />
Standard 1 Reading: Arrange information on topics gathered from reading.<br />
Standard 2 Communication: Edit and revise own writing to produce final drafts.<br />
Objectives<br />
• Students will compare and contrast different artworks.<br />
• Students will identify the main idea in a painting.<br />
• Students will analyze how authors and artists use elements of their art to communicate values in a<br />
work of art or writing.<br />
• Students will identify the values of a culture represented in an artwork.<br />
• Students will create their own drawings to communicate their values.<br />
Background Information<br />
The artwork: The Weaver<br />
The artist: Diego Rivera (Mexican, 1886–1957)<br />
The topic: Inferring Values<br />
Relevant Information:<br />
• Diego Rivera’s paintings emphasize the dignity of farmers and laborers. Many of his works were<br />
large murals that were publicly displayed for everyone to see. They were meant for the common<br />
people to celebrate their importance.<br />
• In the years following the Mexican Revolution, he began to paint such works in both Mexico and<br />
cities in the United States, such as New York, Detroit, and San Francisco.<br />
• The Weaver is a smaller painting with a theme similar to many of Rivera’s murals. He wanted to<br />
promote native Mexican traditions such as weaving and spinning, and grinding of corn for tortillas.<br />
His figures celebrate the skill and grace of such traditional art forms and crafts.<br />
• There is not very much in the room with the woman weaving. Rivera has focused on her pose, her<br />
loom, and her intense concentration on her work. The colors used highlight her presence and her<br />
work. She is not only the subject matter, but she is important and she is heroic.<br />
• Rivera’s artworks are like windows into Mexico; you can learn about the culture, heritage,<br />
conflicts, and values that are central to its history.<br />
The artwork: Harvest Talk<br />
The artist: Charles Wilbert White (American, 1918–1979)<br />
The topic: Inferring Values<br />
Art Institute of Chicago • 95
Relevant Information:<br />
• Born and raised on Chicago’s South Side, White was gifted as a child and studied art at settlement<br />
house art classes as well as at the School of the Art Institute of Chicago.<br />
• He lived in Mexico for a while in the 1940s and was inspired by Diego Rivera, who painted the<br />
struggles and dignity of workers.<br />
• By depicting images of ordinary black men and women, White communicated his experience of the<br />
courage and morality of African Americans. He said, “I’ve only painted one picture in my entire<br />
life… I see my totality of 300 years of history of black people through one little fraction …<br />
a family … my family… I don’t try to record it, but use it symbolically to make a broad universal<br />
statement about the search for dignity … the history of humanity.”<br />
• This artwork shows two southern rural farmhands as they sharpen a scythe in silence during fall<br />
harvest. Their powerful figures recall those of revolutionary Mexican murals, and are made more<br />
imposing by their placement so close to the front of the picture.<br />
• Through the use of powerful lines, shading, and scale, White has portrayed heroic and beautiful<br />
human forms. He shows how strong the workers are and that their work is important. He shows<br />
their dignity, their strength, and their commitment.<br />
The artwork: The Child’s Bath<br />
The artist: Mary Cassatt (American, 1844–1926)<br />
The topic: Inferring Values<br />
Relevant Information:<br />
• Mary Cassatt was born and raised in Pennsylvania but spent much of her adult life as a painter in<br />
France.<br />
• The Child’s Bath shows the subject matter for which Cassatt is most famous: woman and child.<br />
• Here, we see a woman bathing a young girl’s feet in a basin of water as she rests on the woman’s<br />
lap.<br />
• Although it is clear that a woman is bathing a child, we are not exactly sure where the bath is<br />
taking place. By noticing the patterned rug and sofa in the background, we can hypothesize that<br />
they are not in a bathroom but more likely a sitting room or bedroom. This was common during<br />
the time this painting was made.<br />
• In addition to images of bathing, Cassatt’s art depicts children being dressed, read to, and held.<br />
This focus on the intimate moments between women and children coincides with the era’s social<br />
and scientific views on raising children properly and tending to their health.<br />
You will find additional useful information from the following sources:<br />
Web sites<br />
• The Art Institute of Chicago<br />
Information about The Weaver:<br />
http://www.artic.edu/aic/collections/artwork/151363<br />
• Information about Harvest Talk:<br />
http://www.artic.edu/aic/collections/artwork/111810<br />
96 • <strong>Lesson</strong> 6: Inferring Values
• Information about The Child’s Bath:<br />
http://www.artic.edu/aic/collections/artwork/111442<br />
http://www.artic.edu/artaccess/AA_Impressionist/pages/IMP_6.shtml<br />
• Art Explorer: Impressionism and Post-Impressionism:<br />
http://www.artic.edu/artexplorer/<br />
*Search for “The Child’s Bath” for text, videos, lesson plans, and more.<br />
Printed Materials (available in the Art Institute’s Crown Family Educator Resource Center<br />
http://www.artic.edu/aic/education/trc/index.html)<br />
• The Art Institute of Chicago. African American Art. Art Institute of Chicago, Department of<br />
Museum Education, 1997.<br />
• The Art Institute of Chicago. American Art Manual. Art Institute of Chicago, Department of<br />
Museum Education, 2008.<br />
The Art Institute of Chicago. Harvest Talk. Poster Packet. Art Institute of Chicago, Department of<br />
Museum Education, 1999.<br />
• Barter, Judith A., Sarah E. Kelly, Denise Mahoney, Ellen E. Roberts, Brandon K. Ruud, and<br />
Jennifer M. Downs. 2009. American Modernism at the Art Institute of Chicago: From World War I<br />
to 1955. Art Institute of Chicago/Yale University Press.<br />
Day 1: Inferring Values<br />
● Time Allotment<br />
45 minutes<br />
● Materials<br />
• Reproduction of The Weaver, 1936<br />
Materials for each student:<br />
Copy of Inferring Values organizer<br />
● Advance Preparation<br />
• Prepare to display the reproduction of The Weaver in the classroom for student viewing.<br />
• Review the Background Information section of this lesson about The Weaver.<br />
• Decide whether you want to include other works of art that are included in other lessons. While<br />
they are aligned specifically with activities and outcomes for the other MAPS lessons, they also<br />
can be used with this lesson because students can infer the values represented in those other<br />
paintings as well as the three featured in this lesson.<br />
Art Institute of Chicago • 97
● Vocabulary<br />
dignity<br />
infer<br />
loom<br />
respect<br />
subject<br />
techniques<br />
value<br />
● Procedure<br />
1. Discuss the concept of values with students, and make a list of values they believe are<br />
important. (Note: “Value” may also refer to the degree of light or dark in a color. In this<br />
lesson, the more general meaning of “values” as a set of principles or standard of behavior will<br />
be used.)<br />
2. Explain that in this lesson they will infer the values that an artist represents in a work of art.<br />
3. Display the reproduction of The Weaver and distribute the Inferring Values organizer. Students<br />
can complete it individually or with a partner. (You may want to use the first two sections of<br />
the Art Reader organizer to get students familiar with the painting before they work on the<br />
Inferring Values organizer).<br />
4. Ask students what they have inferred—what values does the painting communicate?<br />
5. If students do not identify the value of the dignity of work, suggest it. Explain that all work is<br />
important, and therefore every worker should be respected and have dignity. Explain that the<br />
weaver is working carefully, with dedication and skill. Ask them to find information in the<br />
painting that supports the idea that the dignity of work is an important value of the weaver.<br />
6. Explain that the artist shows the weaver performing one of the traditional crafts and practices<br />
of Mexico, his home country. He is proud of her work and wants to communicate that to the<br />
viewer of his paintings.<br />
7. Discuss techniques used by the artist to show that work is important to the weaver.<br />
For example, where does the artist position the weaver and her loom? What is she looking at?<br />
Why?<br />
8. Infer with the students what the weaver might be thinking as she weaves.<br />
Day 2: Comparing Values Across Cultures<br />
● Time Allotment<br />
45 minutes<br />
● Materials<br />
• Reproduction of Harvest Talk, 1953<br />
Materials for each student:<br />
Copy of Inferring Values organizer<br />
98 • <strong>Lesson</strong> 6: Inferring Values
● Advance Preparation<br />
• Prepare to display the reproduction of Harvest Talk in the classroom for student viewing.<br />
• Review the Background Information section of this lesson about Harvest Talk.<br />
● Vocabulary<br />
compare<br />
culture<br />
diversity<br />
evidence<br />
scythe<br />
● Procedure<br />
1. Provide background information about Harvest Talk that you think is relevant for the students<br />
to interpret it. Include the information about the context—that it shows two workers<br />
sharpening a scythe, or curved blade, which they use to cut the tall grasses in the field at<br />
harvest time. Explain to them that this was painted during a time in America when African<br />
Americans were fighting for their civil rights and facing discrimination.<br />
2. Ask students what they think the two workmen might have said to one another, or what their<br />
talk might have been about.<br />
3. Ask students to use the Inferring Values organizer to identify values represented by Harvest<br />
Talk.<br />
4. Then discuss with the students the values they inferred. Accept any values that students<br />
identify with evidence, and emphasize that an artwork can communicate different values to<br />
different people.<br />
5. If the students do not suggest it, then explain that this artwork also is about the dignity of work.<br />
Tell students that the dignity of work was the main idea that Charles White wanted to<br />
communicate through the artwork. Ask them to identify evidence of that value in the work.<br />
6. Explain that you are pointing out the dignity of work as a value to show that some values are<br />
shared by different cultures since they saw the same value in The Weaver.<br />
Days 3–4: Core Values<br />
● Time Allotment<br />
two days, 45 minutes each day (or two, 45-minute segments on one day)<br />
● Materials<br />
• Reproduction of The Child’s Bath, 1893<br />
Materials for each student:<br />
Copy of Inferring Values organizer (optional)<br />
Copy of Picturing Values organizer<br />
Copy of Writing to Communicate Values organizer<br />
Colored Pencils (optional for Picture Values organizer)<br />
Art Institute of Chicago • 99
● Advance Preparation<br />
• Prepare to display the reproduction of The Child’s Bath in the classroom for student viewing.<br />
• Review the Background Information section of this lesson about The Child’s Bath.<br />
● Vocabulary<br />
children<br />
represent<br />
responsibility<br />
society<br />
● Procedure<br />
Part 1: Identifying Core Values<br />
1. Ask students to infer the values represented in The Child’s Bath.<br />
2. You may distribute the Inferring Values organizer or have students complete this interpretation<br />
in small groups or as a class since they already will have analyzed two artworks using the same<br />
guide.<br />
3. Discuss the students’ insights based on the painting.<br />
4. Students should infer that caring for children and human relationships are valued. Point out<br />
that in every society children have a special position, that parents and other caregivers have<br />
responsibility for their care.<br />
5. Explain that there are values that are important to every culture. We already saw that the<br />
dignity of work can be a shared value across cultures. So can the value of caring for children.<br />
Part 2: Communicating Values in Pictures<br />
1. Distribute the Picturing Values organizer. Ask students to identify a core value that they<br />
believe that they share with other cultures. Then have them plan and draw a picture to show<br />
that value.<br />
2. Distribute the Writing to Communicate Values organizer and have students complete their work<br />
individually. Then, have them pair to share about the values they want to share about with third<br />
grade students.<br />
3. Set up an exhibit of student pictures and writing.<br />
● Home Connection<br />
Ask students to make a values coloring book for a younger child. They start by choosing a few<br />
values and then draw outlines of pictures that represent the values they have chosen. Then they can<br />
work with a younger sister or brother, cousin, or friend to help them color in the outline and talk<br />
about the values that the pictures show.<br />
● Assessment<br />
Ask students to make a guide to inferring values from a painting. They should include steps such<br />
as looking at the picture to see what it includes; looking for things people are doing; inferring how<br />
carefully they are doing them; inferring why they are doing them.<br />
100 • <strong>Lesson</strong> 6: Inferring Values
● Expansion Activities<br />
• VOCABULARY DEVELOPMENT: Students can create a picture that illustrates important<br />
values, a visual word wall of values that are essential for social emotional development.<br />
• WRITING: Students can write a poem that communicates a core value.<br />
• RESEARCH: Students can research values represented visually by different cultures. That can<br />
include, for example, researching the Adinkra symbols of the Asante people of West Africa<br />
(http://www.adinkra.org/htmls/adinkra_index.htm).<br />
• FOR ENGLISH LANGUAGE LEARNERS: Involve students in creating charts that represent<br />
values in three languages: their own home language, English, and an icon or drawing.<br />
• FOR STUDENTS WITH SPECIAL NEEDS: Partner or group students, varying performance<br />
and skill level, and collaborate on activities.<br />
Art Institute of Chicago • 101
<strong>Lesson</strong> 6<br />
Inferring Values<br />
ILS1B: I can infer values.<br />
You can tell what a person’s values are from what the person says and does. You also can infer the values<br />
of a person that an artist paints.<br />
Directions: Use this chart to tell the values that you see in a work of art.<br />
What I See ‒ Literal<br />
Value I Infer<br />
What is the person doing?<br />
What is the person looking at?<br />
What is the person wearing?<br />
What is in the place where the person is?<br />
What else do I notice?<br />
What else do I notice?<br />
What do you infer the artist wanted you to understand about this person’s values?<br />
102 • <strong>Lesson</strong> 6: Inferring Values
<strong>Lesson</strong> 6<br />
Picturing Values<br />
ILS26B: I can communicate values through a picture.<br />
Directions: Choose a value that you think is very important. Then think of a way you could show it in<br />
a picture. Include people in your picture.<br />
Plan it here.<br />
What is the value?<br />
Who will you include?<br />
Person What will the person be doing? How will the person look?<br />
Place<br />
Describe the place.<br />
Draw or sketch the place and the people here. If you have time, you can color the picture to show your<br />
ideas even more clearly.<br />
Art Institute of Chicago • 103
<strong>Lesson</strong> 6<br />
Write to Communicate Values<br />
ILS3C: I can communicate an idea in a speech.<br />
Directions: Write a short speech or letter about a value that you think is very important. It is a<br />
speech or letter you will give to third grade students.<br />
Value:<br />
Why I think it is important to everyone:<br />
How I will start my speech:<br />
Examples I will use to explain why it is important:<br />
How I will end my speech:<br />
Write your speech.<br />
Then read it aloud or send it as a letter to the third grade class.<br />
Then make a drawing or poster showing your ideas.<br />
104 • <strong>Lesson</strong> 6: Inferring Values
<strong>Lesson</strong> 7<br />
How to Read Symbols
<strong>Lesson</strong> 7<br />
How to Read Symbols<br />
Summary<br />
In this lesson, students learn how both artists and mapmakers use lines, symbols, and color to<br />
communicate. They apply skills of classification and inference to interpret two works of art that<br />
represent places through specialized maps. They describe a place they know from a story or<br />
experience. Then they use symbols to design a map to show that place.<br />
Featured Artworks<br />
Artist unknown (United States, Indiana)<br />
Bedcover Entitled “Map”, c. 1920<br />
Cotton with ink drawings and lettering<br />
74 ¼ x 89 inches<br />
Artist unknown (Europe or United States)<br />
Hanging Entitled "Map of the Middle West", 1931<br />
Linen embroidered with wool and silk yarns<br />
21 ¾ x 34 ½ inches<br />
Illinois Benchmarks<br />
Reading<br />
1.B.2b:<br />
1.C.1d:<br />
1.C.2e:<br />
1.C.2f:<br />
Writing<br />
3.B.2a:<br />
3.C.2a:<br />
Use description, compare/contrast of nonfiction texts to improve comprehension.<br />
Summarize content of reading material.<br />
Explain how authors and illustrators use text and art to express their ideas.<br />
Connect information presented in tables, maps and charts to text.<br />
Generate and organize ideas using a variety of planning strategies.<br />
Write for a variety of purposes and for specified audiences in a variety of forms.<br />
Social Studies<br />
17.A.2b: Use maps to gather information about people, places and environments.<br />
18.A.2: Explain ways in which artistic creations communicate about a culture.<br />
Art<br />
25.B.2:<br />
26.B.2d:<br />
Understand how elements and principles combine within an art form to express ideas.<br />
Demonstrate knowledge and skills to create works of visual art using problem solving,<br />
observing, designing, sketching and constructing.<br />
106 • <strong>Lesson</strong> 7: How to Read Symbols
English Language Learner Standards<br />
Standard 1 Reading: Arrange information on topics gathered from reading.<br />
Standard 2 Communication: Edit and revise own writing to produce final drafts.<br />
Objectives<br />
• Students will identify and explain the meaning of symbols used in artistic representations of maps.<br />
• Students will compare and contrast two different maps.<br />
• Students will define and use vocabulary in expository writing explaining the use of symbols.<br />
• Students will draw maps of fictional or actual places, using symbols to communicate features.<br />
Background Information<br />
The artwork: Bedcover Entitled “Map”, c.1920<br />
The artist: Unknown. Made in Indiana, United States<br />
Relevant Information:<br />
• Textiles, or objects primarily made of natural or synthetic materials, are all around us—we wear<br />
them as clothes, use them to cushion our chairs, beds and sofas, and even display them as art.<br />
• Bedcover Entitled “Map” illustrates a full-scale map of the United States of America in the early<br />
1900s. If we count the states, we notice that 48 are listed. In addition, Canada, Mexico, and Cuba<br />
are included as well as the Atlantic Ocean, Pacific Ocean, and the Gulf of Mexico.<br />
• When we view this work of art it is clear that we are looking at the United States and its<br />
neighboring countries because we can recognize the shapes that identify the geographic borders of<br />
each state and the entire country. This makes the map accurate, or true to life.<br />
• The artist uses color as a symbol to provide additional information about the map: states’ names<br />
are sewn, or embroidered, in black, while the paths of rivers appear in blue and travel routes are<br />
stitched in brown thread.<br />
• By presenting the map as a bedcover, the artist gives us clues about its potential uses and how art<br />
can be integrated in our everyday lives. Bedcover Entitled “Map” not only offers geographic<br />
information, but it provides warmth and comfort as an everyday object and it showcases the artist’s<br />
skill in the decorative arts.<br />
• It is safe to assume that the person who made Bedcover Entitled “Map” was probably not a<br />
professional cartographer, or a person who makes maps on paper, but someone who used maps as<br />
inspiration. Many artists have used maps as source material, producing both literal interpretations<br />
of place and fantastic scenes of imaginary lands.<br />
The artwork: Hanging Entitled “Map of the Middle West”, 1931<br />
The artist: Unknown. Made in Europe or the United States<br />
Relevant Information:<br />
• The embroidered Hanging Entitled “Map of the Middle West” features the states of the Midwest<br />
region.<br />
Art Institute of Chicago • 107
• Unlike Bedcover Entitled “Map”, this textile provides specific details relating to each state in the<br />
Midwest. The artist uses a series of symbols that represent facts and observations about the people,<br />
climate and natural resources specific to the area. Here, we learn about the native plants and<br />
animals, industries, popular modes of transportation, architecture, communities, and fashion of<br />
the time and from the region.<br />
• Similar to Bedcover Entitled “Map”, the artist has used color to identify specific elements of the<br />
map: state borders and names appear in black and rivers and lakes are in blue. This use of color is<br />
an example of the universal language of maps.<br />
• The inclusion of resources and its focus on the Midwest region also classify Hanging Entitled<br />
“Map of the Middle West” as a thematic and resource map because it reflects common themes or<br />
ideas associated with the region and highlights its specific resources.<br />
You will find additional useful information from the following sources:<br />
Web sites<br />
• The Art Institute of Chicago<br />
Information about Hanging Entitled “Map of the Middle West”:<br />
http://www.artic.edu/aic/collections/artwork/104656<br />
• Information about Bedcover Entitled “Map”:<br />
http://www.artic.edu/aic/collections/artwork/158432<br />
Additional Web sites<br />
• Map Quilts by Leah Evans:<br />
http://leahevanstextiles.com/<br />
• Enchanted Learning.com—United States: Facts, Maps and State Symbols:<br />
http://www.enchantedlearning.com/usa/states/<br />
• Map Symbol Library:<br />
http://www.map-symbol.com/sym_lib.htm<br />
• Field Museum of Natural History, Chicago MAPS: Finding Our Place in the World<br />
(exhibition, 2007-2008):<br />
http://www.fieldmuseum.org/maps/index.html<br />
• Color Landform Maps:<br />
http://fermi.jhuapl.edu/states/states.html<br />
• National Geographic Map Collection:<br />
http://maps.nationalgeographic.com/maps/print-collection-index.html<br />
108 • <strong>Lesson</strong> 7: How to Read Symbols
Printed Materials (available in the Art Institute’s Crown Family Educator Resource Center<br />
http://www.artic.edu/aic/education/trc/index.html)<br />
• The Art Institute of Chicago. Bedcover with Cigar or Tobacco Box Rectangles. Poster Packet. Art<br />
Institute of Chicago, Department of Museum Education, 2001.<br />
Day 1: Applying Reading Skills to Interpret Visual Symbols<br />
● Time Allotment<br />
60–75 minutes<br />
● Materials<br />
• Reproduction of Hanging Entitled “Map of the Middle West”, 1931<br />
• Reproduction of Bedcover Entitled “Map”, c. 1920<br />
• Chart paper or chalkboard (you will need to use this chalkboard section throughout the three<br />
days of the lesson)<br />
Materials for each student:<br />
Copy of Art Chart: Symbols organizer<br />
Copy of Symbols Show and Tell organizer<br />
● Advance Preparation<br />
• Prepare to display the reproductions of Hanging Entitled “Map of the Middle West” and<br />
Bedcover Entitled “Map” in the classroom for student viewing.<br />
• Review the Background Information section of this lesson about Hanging Entitled “Map of the<br />
Middle West” and Bedcover Entitled “Map.”<br />
● Vocabulary<br />
accurate<br />
compare<br />
contrast<br />
infer<br />
interpret<br />
map<br />
represent<br />
symbol<br />
textile<br />
● Procedure<br />
1. Write the heading “What We Know about Symbols” on a sheet of chart paper or the<br />
chalkboard. Ask students what they know about symbols and list their responses. Explain that<br />
you will add more as they learn.<br />
2. Ask students to look closely at the two works of art for five minutes. Then give them the Art<br />
Art Institute of Chicago • 109
Chart: Symbols organizer. They can work in pairs or individually to complete the observation<br />
section at the top.<br />
3. Introduce information discussing the type of art (textiles) and its purpose (a map).<br />
4. Ask the students to list two ways the textile maps are alike and different—the bottom half of<br />
the Art Chart.<br />
5. Discuss how and why people make and use maps to show important features of a place.<br />
6. Ask students to infer why the people who made these maps made them the way they did.<br />
7. Ask the students to analyze the maps. What do the colors, words, images, and shapes represent<br />
in the two works? What do they symbolize? What do the student infer that the symbols show<br />
about the United States?<br />
8. Then give students the Symbols Show and Tell organizer to complete with a partner.<br />
9. Conclude the session by adding students’ statements to the “What We Know about Symbols”<br />
list.<br />
Day 2: Analyzing and Inferring Ideas from Symbols<br />
● Time Allotment<br />
45-60 minutes<br />
● Materials<br />
Materials for each student:<br />
Copy of the reading “Symbols, Maps and Art”<br />
Copy of the Summarize What you Learned organizer (this is optional; it can be used to<br />
organize the Extended Response)<br />
● Vocabulary<br />
artist<br />
comparison<br />
contrast<br />
mapmaker<br />
map key<br />
summarize<br />
● Procedure<br />
1. Explain that a summary is a way of telling the most important parts of something.<br />
2. Guide students to make a class summary of what they learned from the first day of the lesson.<br />
3. Give each student a copy of the reading “Symbols, Maps, and Art.” Students can complete the<br />
reading and related questions independently or with a learning partner.<br />
4. Discuss what students learned and prepare another class summary of this session’s learning.<br />
5. Add more notes to the “What We Know about Symbols” list.<br />
110 • <strong>Lesson</strong> 7: How to Read Symbols
Day 3: Communicating about Places with Symbols<br />
● Time Allotment<br />
60–75 minutes<br />
Note: Preview the lesson and decide if you want to expand the map-making activity by providing<br />
additional materials such as yarn and tape to physically connect points on a map or add borders. If<br />
not, the materials listed below will be sufficient for this portion of the lesson.<br />
● Materials<br />
Materials for each student:<br />
Plain white 8 ½” x 11” paper<br />
Pencil<br />
Colored markers, pencils, or crayons<br />
Copy of Pre-Planner organizer<br />
Copy of Map Maker organizer<br />
Copy of Words and Writing organizer<br />
Fiction or non-fiction texts that include descriptions of a place (you may use books from the<br />
SCRMA or another series or trade books from the classroom or school library)<br />
● Advance Preparation<br />
• Prepare to display the reproduction of Hanging Entitled “Map of the Middle West” in<br />
the classroom for student viewing.<br />
• Review the Background Information section of this lesson about Hanging Entitled “Map of<br />
the Middle West.”<br />
● Vocabulary<br />
compare<br />
contrast<br />
fiction<br />
map key<br />
plan<br />
● Procedure<br />
1. Demonstrate how to make a map by making one on the chalkboard. Choose a familiar place to<br />
map. It can be a real place or a fictional place such as a place they read about.<br />
2. First, list things you want to show about the place. Remind students of the kinds of things that<br />
Hanging Entitled “Map of the Middle West” shows about the United States. Then ask students<br />
to suggest symbols that could stand for those parts.<br />
3. Make a map key. Put the symbols in the key and note what they represent.<br />
4. List different places students can represent with maps. Set up the list in two columns, fictional<br />
and real. Ask students to suggest places.<br />
5. Give each student the Pre-Planner organizer. Ask them to choose a place to show in their map.<br />
They can work individually or with a partner. They should complete the Pre-Planner first and<br />
then create the map. Encourage students to be creative.<br />
Art Institute of Chicago • 111
6. Ask students to explain their maps to other students. They can do so in a class session or by<br />
writing a caption that you post with the map on a bulletin board. They may also want to<br />
include a map key to help others understand the symbols they use in their maps.<br />
● Home Connection<br />
Students can bring small objects from home such as cookie cutters, small toys, or plastic utensils to<br />
contribute to serve as sources for generating symbols. They can also complete their projects if they<br />
were not able to finish them.<br />
● Assessment<br />
• Ask students to write about what they have learned about symbols. Start this writing with the<br />
Words and Writing organizer. You also can assess with the Summarize What You Learned<br />
organizer.<br />
● Expansion Activities<br />
• VOCABULARY DEVELOPMENT: In addition to using the Words and Writing organizer,<br />
students can create a pictorial word wall.<br />
• WRITING: Students can write a poem or paragraph about how they feel about the two textiles.<br />
(This activity is adaptable to any painting.)<br />
• RESEARCH: Students can research different states and make their own map of the Midwest,<br />
using symbols to show important features of each state.<br />
• SCIENCE: Students can make a habitat map, creating symbols that represent the features of<br />
the habitat.<br />
• FOR ENGLISH LANGUAGE LEARNERS: When possible, provide concrete examples of<br />
vocabulary words (pictures or actual examples) and allow students to use drawn images or<br />
gestures to represent vocabulary words as well.<br />
• FOR STUDENTS WITH SPECIAL NEEDS: Partner or group students, varying performance<br />
and skill level, to collaborate on activities.<br />
112 • <strong>Lesson</strong> 7: How to Read Symbols
<strong>Lesson</strong> 7<br />
Art Chart: Symbols<br />
ILS25A: I can identify symbols. (Transferable to 1B)<br />
Directions: Look at each of the two maps.<br />
Then list what you see in each one. List 5 things you notice for each one.<br />
Map<br />
Map of the Middle West<br />
1 1<br />
2 2<br />
3 3<br />
4 4<br />
5 5<br />
Compare:<br />
How are the two maps alike? Tell two ways they are alike.<br />
Contrast:<br />
How are the two maps different? Tell two differences.<br />
A symbol is something that stands for something else. It represents something.<br />
Look at both maps to see what symbol they use for water. It is the color blue. Look at both maps to find<br />
another symbol they both use for the same thing.<br />
What is the symbol?<br />
What does it represent?<br />
Art Institute of Chicago • 113
<strong>Lesson</strong> 7<br />
Symbols Show and Tell<br />
ILS25A: I can analyze and use symbols. (Transferable to 1B)<br />
Directions: Find symbols in the two maps.<br />
List the symbol by drawing it or describing it.<br />
Then tell what it represents—what it stands for.<br />
Symbol<br />
What It Represents<br />
What symbols would you use to show something important about Chicago?<br />
First, list what you would want people to understand.<br />
Then think of a symbol you would use to show that on a map of Chicago.<br />
What a Chicago Map Should Show<br />
Symbol I Would Use to Show It<br />
114 • <strong>Lesson</strong> 7: How to Read Symbols
<strong>Lesson</strong> 7<br />
Symbols, Maps, and Art: Read to Learn<br />
ILS1B: I can compare and contrast based on information in a text.<br />
Directions: Read this passage. Then answer the questions on another piece of paper.<br />
Mapmakers use symbols. A mapmaker uses lines to show things. Those lines may represent streets.<br />
They could stand for borders. A border divides two places. On a map of the United States you see lines<br />
that divide the states. Those are borders. Usually they are shown in black. Mapmakers use other colors<br />
as symbols. They use blue to show water. They also use pictures as symbols. The mapmaker may put a<br />
picture of an airplane. That would show an airport. They could put a train. That would show a train<br />
station.<br />
Many artists use symbols. A painter may put a dark cloud in a painting. That dark cloud stands for a<br />
problem. A painter may use color as a symbol. The painter may use yellow to show happiness. A painter<br />
may use gold to show a person is rich. The painter may put a rainbow in a painting. That rainbow is a<br />
symbol. It shows that the storm is over.<br />
There are some maps that are art. They show places. They are special maps. Artists make them.<br />
About 100 years ago an artist made a bedcover. It was made for people to use. It was special. It was not<br />
like most bedcovers. The artist sewed it as a big map. It showed the United States. The artist used black<br />
thread to show borders. The artist used brown thread to show routes. Routes are ways people travel<br />
between places. You have a route you take to school. The bedcover map showed routes people traveled<br />
across the United States.<br />
There is another cloth map called Map of the Middle West. Art that is on cloth is called textile.<br />
This textile shows some of the states. It uses blue to show water. It uses black to show borders. It uses<br />
pictures to show what is special about these states. It has a corn plant on Illinois. Illinois farms grow<br />
corn. That plant is a symbol. It shows that corn is important. It has other symbols. It shows many things.<br />
People learned from it. It shows what is important in the states included in this map.<br />
When you paint a picture, you can use symbols. You can use colors to show feelings. You can use<br />
symbols to show ideas. You could paint a dove. A dove is a bird. When people see a dove they think<br />
about peace. You could paint a rainbow. That would show happiness. You could paint a big sun. That<br />
could show happiness, too, or warmth.<br />
You could paint a map of the United States. You could use color to show climate. You could paint<br />
states with cold climates gray. You could paint warm states red. People could learn from your map. You<br />
could add more symbols. You could show many facts with pictures. It would be a map. And it would be<br />
art, too.<br />
Write a Comparison/Contrast Paragraph<br />
Answer these questions: How are maps and paintings alike? How are they different?<br />
Extended Response<br />
Based on what you read and what you knew, why do you think it is important to understand symbols?<br />
Give an example of why it is important in everyday life. Give an example of why it is important in art.<br />
Art Institute of Chicago • 115
<strong>Lesson</strong> 7<br />
Summarize What You Learned about Symbols<br />
ILS5A: I can summarize.<br />
Directions: List three important facts you learned about symbols from the reading.<br />
Write them in your own words.<br />
What I Read<br />
A summary tells what is important about a topic. Write a one-paragraph summary about symbols.<br />
116 • <strong>Lesson</strong> 7: How to Read Symbols
<strong>Lesson</strong> 7<br />
Pre-Planner: What will your map show?<br />
ILS26B: I can plan the use of color and symbols to communicate.<br />
Directions: Use this page to plan a map of a real place or a place in a story.<br />
What place will you show?<br />
What do you want someone to understand by looking at your map?<br />
List what is important about the place in the left column. Tell how you will show it in the right column.<br />
What Is Important about the Place?<br />
How I Will Show It<br />
How will you use color as a symbol?<br />
What other symbols will you use?<br />
Art Institute of Chicago • 117
<strong>Lesson</strong> 7<br />
Map Maker<br />
ILS17B: I can use a map to communicate about a place.<br />
Directions: Give your map a title. Put symbols you will use in the key. Draw each symbol. Write words<br />
that tell what it means. Then use the rest of the page to show the place.<br />
Title:<br />
Key<br />
Symbol<br />
What it means<br />
118 • <strong>Lesson</strong> 7: How to Read Symbols
<strong>Lesson</strong> 7<br />
Words and Writing Organizer: Symbols<br />
ILS5A: I can write to communicate about a topic.<br />
Directions: We put one word on the chart. List 5 other important words about the topic.<br />
Write what each word means. Then draw a picture to show what it means. Then write about what you<br />
know about symbols. Use another page for your writing.<br />
Word Explanation Picture<br />
symbol<br />
Write to tell about symbols. Explain how people use them. Include examples of different symbols. Use<br />
your words in your writing.<br />
Art Institute of Chicago • 119
120 • <strong>Lesson</strong> 7: How to Read Symbols
<strong>Lesson</strong> 8<br />
A Visit to the Art Museum
<strong>Lesson</strong> 8<br />
A Visit to the Art Museum<br />
Summary<br />
In this lesson, students visit the art museum to view works of art from the MAPS curriculum.<br />
The lesson prepares them for the visit and provides a structured activity to enhance learning in the<br />
classroom after the visit 1 . Students learn vocabulary and skills necessary to read works of art and will<br />
write an expository essay. Students will see art from a variety of geographical regions and cultures and<br />
design a museum of their own based on their experience.<br />
Featured Artworks<br />
Teacher-guided museum visit:<br />
The teacher works with the Art Institute staff liaison to select works of art for students to view in<br />
the museum. Works of art included in the MAPS curriculum are recommended.<br />
Docent-guided museum visit:<br />
Docents offer an “Art from Many Places” tour that introduces students to works of art from<br />
different parts of the world and different time periods. Teachers should notify docents ahead of<br />
time by phone that they are using the MAPS curriculum and to be sure to include some artworks<br />
from the MAPS lessons in the tour.<br />
Illinois Benchmarks<br />
Reading and Writing<br />
1.B.2a: Establish purpose for reading: survey materials; ask questions; make predictions;<br />
connect, clarify, and extend ideas.<br />
1.B.2c: Continuously check and clarify for understanding (eg. In addition to previous skills,<br />
clarify terminology and seek additional information).<br />
1.C.2b: Make and support inferences and form interpretations about main themes and topics.<br />
1.C.2e: Explain how authors and illustrators use text and art to express their ideas (e.g., points<br />
of view, design hues, metaphor).<br />
3.B.2a: Generate and organize ideas using a variety of planning strategies (e.g., mapping,<br />
outlining, drafting).<br />
3.C.2a: Write for a variety of purposes and for specific audiences in a variety of forms<br />
including narrative (e.g., fiction, autobiography), expository (e.g., reports, essays),<br />
and persuasive writing (e.g., editorials, advertisements).<br />
5.A.2a: Formulate questions and construct a basic research plan.<br />
1 Ideally, this lesson should come later in the school year, after the students have covered the four regions of the United States.<br />
If accomplished in sequence, students may have the opportunity to see some of the works of art in the museum they have learned about<br />
in the classroom. However, the lesson is broadly conceived and can work at any point in the school year.<br />
122 • <strong>Lesson</strong> 8: A Visit to the Art Museum
5.C.2a:<br />
5.C.2b:<br />
Create a variety of print and non-print documents to communicate acquired information<br />
for specific audiences.<br />
Prepare and deliver oral presentations based on inquiry or research purposes.<br />
Social Studies<br />
18.A.2:<br />
Explain ways in which language, stories, folk tales, music, media and artistic creations<br />
serve as expressions of culture.<br />
Art<br />
25.A.1d: Identify the elements of line, shape, space, color, and texture; the principles of<br />
repetition and pattern; and the expressive qualities of mood, emotion and pictorial<br />
representation.<br />
25.A.2d: Identify and describe the elements of two- and three-dimensional space, figure/ground,<br />
value and form; the principles of rhythm, size, proportion and composition; and the<br />
expressive qualities of symbol and story.<br />
25.B.2: Understand how elements and principles combine within an art form to express ideas.<br />
26.A.2e: Describe the relationship among media, tools/technology and processes.<br />
26.B.2d: Demonstrate knowledge and skills to create works of visual art using problem solving,<br />
observing, designing, sketching, and constructing.<br />
27.B.2: Identify and describe how the arts communicate the similarities and differences among<br />
various people, places, and times.<br />
English Language Learner Standards<br />
Standard 1 Reading: Arrange information on topics gathered from reading.<br />
Standard 2 Communication: Edit and revise own writing to produce final drafts.<br />
Objectives<br />
• Students will understand the art museum and its purpose.<br />
• Students will experience original works of art.<br />
• Students will engage in close looking and discussion about works of art from a variety of<br />
geographical locations and cultures.<br />
• Students will reflect on what they experienced at the museum and relate it to their own lives.<br />
• Students will design and write about a museum in which to display a personal collection.<br />
Background Information<br />
All field trips to the Art Institute must be scheduled online (http://www.artic.edu/aic/education/tours/<br />
index.html). Teachers have two options when registering for a tour: they can have a museum<br />
docent-guided tour or they can lead their own, teacher-guided tour.<br />
For docent-guided tours, the assigned docent will call the teacher approximately two weeks in<br />
advance of the tour date to discuss curricular needs and any other details. At this time, teachers must<br />
identify themselves as part of the MAPS program.<br />
Art Institute of Chicago • 123
For teacher-guided museum tours, you must consult with the MAPS staff liaison at the museum to<br />
plan your tour. He/she will help you select works of art to view, plan a path through the museum, and<br />
organize related activities.<br />
For additional information about works of art in the museum’s collections and planning a visit with<br />
students, the Art Institute’s website has various resources:<br />
General website:<br />
www.artic.edu/aic<br />
Student Programs:<br />
http://www.artic.edu/aic/education/tours/index.html<br />
Teacher Programs:<br />
http://www.artic.edu/aic/education/teachers.html<br />
Search the museum’s collections:<br />
http://www.artic.edu/aic/collections/<br />
Classroom lesson plans and museum self-guides:<br />
http://www.artic.edu/aic/education/trc/lessonplans.html<br />
On-line modules (including videos):<br />
http://www.artic.edu/aic/education/onlinelearning/index.html<br />
Additionally, the Crown Family Educator Resource Center (http://www.artic.edu/aic/education/trc/<br />
index.html) at the Art Institute has a library of printed and electronic resources about the museum’s<br />
collection to help you plan a museum visit or additional classroom activities.<br />
Day 1: Preparing to visit the museum<br />
● Time Allotment<br />
45 minutes<br />
● Materials<br />
• Reproductions of artworks (select from works from the MAPS curriculum that you plan to see<br />
when you visit the museum)<br />
• Video “Your Museum Visit”<br />
● Advance Preparation<br />
• Prepare to show the video “Your Museum Visit.”<br />
• Register for a student tour to the Art Institute online and review Background Information<br />
section of the lesson.<br />
124 • <strong>Lesson</strong> 8: A Visit to the Art Museum
● Vocabulary<br />
museum<br />
collect<br />
collection<br />
display<br />
docent<br />
gallery<br />
label<br />
original (artwork)<br />
preserve<br />
● Procedure<br />
1. Explain to students that a museum is a place that collects, preserves, displays, and studies<br />
important things from human history. For example, the Shedd Aquarium collects, preserves,<br />
and displays sea life, and the Field Museum collects, preserves, and displays things like<br />
fossils and artifacts from natural history. The Art Institute of Chicago is an art museum, which<br />
collects, preserves, and displays original works of art such paintings, sculptures, drawings and<br />
photographs made by artists from all around the world and different periods of time.<br />
2. Ask students if they or members of their family have collections of their own. What kinds of<br />
things do they collect? Make a list of on the chalkboard of student responses. How do they<br />
protect their collections? How do they display their collections? Do they have them set up in<br />
their bedroom or stored and shown to people only on special occasions?<br />
3. Have students view “Your Museum Visit.”<br />
4. After the video is over, review important information about the visit with your students and ask<br />
them to talk about what they are most looking forward to seeing or doing in the museum.<br />
Day 2: Field Trip to the Museum<br />
● Time Allotment<br />
3‒4 hours<br />
● Procedure<br />
You know best what procedures your school has for taking field trips regarding permission slips,<br />
buses, and other details. Be sure to arrive at your scheduled time and a greeter will meet you at the<br />
student entrance to the Art Institute. Remind students of the rules in the museum:<br />
• the art is for looking, not touching<br />
• no food, drink, or gum<br />
• walk, don’t run<br />
• stick together<br />
• use inside voices<br />
• pencils only<br />
Art Institute of Chicago • 125
Day 3: Reflection about Field Trip<br />
● Time Allotment<br />
45 Minutes<br />
● Materials<br />
• Reproductions of MAPS (or other) artworks seen in the museum<br />
• Colored pencils (for museum drawing)<br />
Materials for each student:<br />
Copy of My Museum organizer<br />
● Vocabulary<br />
museum<br />
collection<br />
● Procedure<br />
1. Ask students to describe their experience at the Art Institute. Ask: what did you see? Whom<br />
did you speak to? What did we do? Discuss both artworks that they saw in the museum as<br />
well as the environment: what did the building look like? How big was the museum? Who<br />
were some of the other people you saw at the museum?<br />
2. Review the list from the first day of the lesson of the things that students and their families<br />
collect. Distribute the My Museum organizer and have students answer the questions about<br />
creating a museum of their personal collections. They should draw a picture of their museum<br />
and may use colored pencils to enliven it.<br />
3. Have students pair to share about their museums and then share out with the class. Display<br />
their work around the classroom to create a class exhibit.<br />
126 • <strong>Lesson</strong> 8: A Visit to the Art Museum
<strong>Lesson</strong> 8<br />
My Museum<br />
Directions: Use this sheet to help you plan your museum.<br />
What kinds of things are in your museum?<br />
How do you take care of the objects in your museum?<br />
Where is your museum located?<br />
What is the name of your museum?<br />
Who might visit your museum?<br />
Use the box below to sketch the front of your museum and the surrounding area.<br />
Art Institute of Chicago • 127
128 • Understanding Environments and Values
Art Institute of Chicago • 129
Art Institute of Chicago<br />
Understanding<br />
Environments and Values<br />
Educate Inspire Transform<br />
MAPS<br />
Museums And Public Schools<br />
City of Chicago<br />
Mayor Richard M. Daley