
Create successful ePaper yourself
Turn your PDF publications into a flip-book with our unique Google optimized e-Paper software.
<strong>Upholstering</strong> <strong>MX</strong>-5<br />
<strong>Seats</strong><br />
The most common reason you might want<br />
to re-upholster your seats is to install a<br />
custom, aftermarket leather interior. After<br />
all, the factory leather comes in a very<br />
limited number of colors. (Tan, tan, red (in<br />
'93), and tan.) Or your stock cloth seats<br />
might be a bit faded and pilled, and you<br />
just bought a used set from someone else<br />
who just upgraded to leather. Whatever<br />
the reason, you can pay an upholstery<br />
shop several hundred pounds to do the<br />
work, or you can tackle it yourself. The job isn't especially skill intensive,<br />
however it requires a lot of patience, 6 to 8 hours of your time, and maybe<br />
couple of Band-Aids.<br />
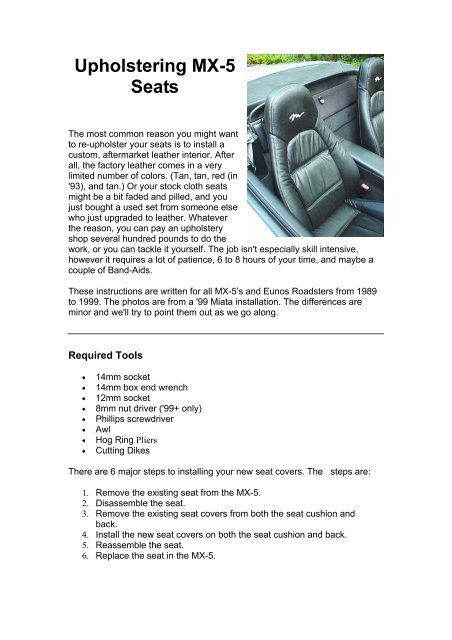
These instructions are written for all <strong>MX</strong>-5’s and Eunos Roadsters from 1989<br />
to 1999. The photos are from a '99 Miata installation. The differences are<br />
minor and we'll try to point them out as we go along.<br />
a<br />
Required Tools<br />
• 14mm socket<br />
• 14mm box end wrench<br />
• 12mm socket<br />
• 8mm nut driver ('99+ only)<br />
• Phillips screwdriver<br />
• Awl<br />
• Hog Ring Pliers<br />
• Cutting Dikes<br />
There are 6 major steps to installing your new seat covers. The steps are:<br />
1. Remove the existing seat from the <strong>MX</strong>-5.<br />
2. Disassemble the seat.<br />
3. Remove the existing seat covers from both the seat cushion and<br />
back.<br />
4. Install the new seat covers on both the seat cushion and back.<br />
5. Reassemble the seat.<br />
6. Replace the seat in the <strong>MX</strong>-5.
You can feel free to remove and later install both seats of the <strong>MX</strong>-5 at one<br />
time, but we strongly recommend completing steps 2-5 for the passenger seat<br />
before starting step 2 on the driver seat.<br />
Step 1: Remove the existing seat from the <strong>MX</strong>-5.<br />
This holds for both the driver and passenger seats, and applies to all 1989-<br />
1999 <strong>MX</strong>-5’s.<br />
Remove all loose items from on and around your seats. Remove the floor<br />
mats. Remove any items from the map pocket behind the passenger seat.<br />
Remove any loose items from the parcel shelf behind the seats. Be sure your<br />
<strong>MX</strong>-5 is parked in a safe location where you can open the doors all the way,<br />
and leave the car for at least one day.<br />
If your <strong>MX</strong>-5 has headrest speakers, disconnect the speaker wiring harness.<br />
For factory installed speakers, there is usually a plastic connector either at<br />
the bottom of the back of the seat back, or under the seat. For aftermarket<br />
speakers, there are a variety of possibilities. On some cars, you may actually<br />
have to remove the speakers first, and fish the wiring out<br />
from the seat.<br />
Each seat slides on tracks. Each track is held to the floor by<br />
one large bolt in the front, and one in the back. On a few<br />
<strong>MX</strong>-5s, plastic covers are installed over these bolts. Slide<br />
the seat all the way back. You should see the bolts in the<br />
front of the seat tracks. If there are covers over the bolts,<br />
pop them off. Use a 14mm socket to remove these bolts.<br />
These bolts can be installed very tightly. I strongly<br />
recommend you use a 6-point socket instead of a 12-point<br />
socket. This will reduce your chances of rounding the socket head. You can<br />
get a 6-point socket (often called an impact socket, as they are used on<br />
impact wrenches) at most hardware stores.<br />
Slide the seat all the way forward, and tilt the seat back<br />
forward. You should see the bolts in the back of the<br />
two seat tracks. Remove these bolts with your 14mm<br />
socket.<br />
Set all 4 bolts in a secure, convenient location where<br />
you will find them<br />
later. We like to just put them back in the holes they came out of.<br />
The seat is now loose in the car. Be sure the seatbelts are out of the way.<br />
Carefully lift the seat up. Be sure there is no wiring still holding the seat to the<br />
car. Carefully lift the seat up and out of the car. If your top is up, you will need<br />
to tilt the seat side to side. Be careful not to scratch anything (door panel,<br />
center console, etc.) with the seat tracks as you remove the seat.<br />
Both seats are removed in the same fashion.
Step 2: Disassemble the seat.<br />
You will need a large, clean indoor surface on which to work. Unless you<br />
have a large work bench or large table which you are willing to possibly<br />
damage, you will probably need to use the floor. Remember, the bottom of<br />
the seat has metal tracks which can scratch your floors!<br />
You will now remove the seat back from the cushion. Be sure the seat back is<br />
titled all the way forward. You may suffer severe injuries if you do not tilt the<br />
seat forward, and the tilt mechanism later springs closed.<br />
Be sure as you remove all the parts, screws, and bolts, from the seats that<br />
you keep track of where you put them. Small plastic Zip-Loc sandwich bags<br />
are great for storing small parts.<br />
Disconnect any wires, such as the headrest speaker wires, which may<br />
connect the seat back to the seat cushion. Often these wires are attached to<br />
the metal pan under the seat with plastic clips and electrical tape. It is usually<br />
easier to remove the electrical tape than the actual<br />
clips.<br />
The back of the seat is held to the seat cushion on<br />
each side. Start by removing the single Phillips head<br />
screw (the '99 has an 8mm nut) with large washer from<br />
the hinge point on the side of the seat which does<br />
NOT have the seat tilt lever. You can leave the rest of<br />
the plastic parts in place for now.<br />
On the tilt lever side of the seat, remove the two visible Phillips head screws<br />
from the plastic shroud which covers the tilt<br />
mechanism. On the seat back is a smaller plastic<br />
cover partially under the larger shroud. Rotate the<br />
shroud slightly to expose the Phillips head screw which<br />
holds the small cover to the seat back. Remove the<br />
Phillips head screw and slide the smaller plastic cover<br />
upwards and off the metal tilt arm attached to the seat<br />
back. You should now see the two large bolts which<br />
hold the seat back to the metal arm of the tilt mechanism. Remove these two<br />
bolts with your 14mm socket.<br />
Looking down from above the seat, rotate the side of<br />
the seat back you just unbolted either forward or<br />
backward so that the seat back moves free of the tilt<br />
mechanism metal arm. Now slide the seat back<br />
sideways out of the hinge point on the other (non-tilt<br />
arm) side. The seat back should now be free and clear<br />
from the seat cushion. Set it down in a safe place.
On the non-tilt arm side of the seat cushion, push the round plastic fitting out<br />
of the hole where the seat was attached. Then slide the plastic cover up and<br />
off the short metal arm.<br />
Back on the tilt-arm side of the seat, rotate the plastic<br />
shroud enough to access the two large bolts which<br />
hold the tilt arm mechanism to the seat pan. You will<br />
need to pull/pry up on the plastic shroud as you rotate<br />
it around. Be gentle when you so this - do not force the<br />
shroud or it may break! You will need to do one bolt at<br />
a time. While you may be able to access these bolts<br />
with a 14mm socket wrench, the likelihood is that you will need to use a<br />
14mm box-end wrench to get them off. Do NOT attempt to move the tilt arm<br />
or pull the tilt lever. Severe injury may result!<br />
Once the two bolts are out, the tilt arm mechanism and its shroud should be<br />
free of the seat cushion. Set it aside.<br />
Finally, remove the seat tracks from the metal pan of<br />
the seat cushion. Turn the seat cushion over. Be<br />
careful not to scratch anything or damage the short<br />
seat's metal arm. Study the tracks and the metal wire<br />
which connects the track sliding mechanism. Keep<br />
your fingers out of the mechanism or risk injury! Each<br />
track is attached to the metal pan with one bolt at the<br />
front, and one at the back. Slide the tracks all the way forward to expose the<br />
two bolts which hold the back of the tracks to the seat pan. Use a 12mm<br />
socket to remove the bolts. Now slide the tracks all the way back to expose<br />
the bolts at the front. Remove these bolts with your 12mm socket. You can<br />
now lift the tracks off the seat pan. Set them down in a safe location. Do not<br />
bend or kink the slide mechanism's metal wire!<br />
The seat is now disassembled.<br />
Step 3: Remove the existing cloth seat covers from both the<br />
seat cushion and back.<br />
Both the OEM cloth seat covers and the new seats are attached to the actual<br />
seat mechanisms (the pan, foam, etc.) by upholstery staples known in the<br />
trade as hog rings. The seat cushion of the <strong>MX</strong>-5 is held to the pan and<br />
cushion foam by approximately 25 rings, and the back is held by<br />
approximately 35 rings. To remove the existing cloth covers, you will need to<br />
cut these rings.<br />
First of all, you MUST wear some kind of safety glasses or goggles when<br />
cutting these rings. They will fly in many directions as you cut them. It is<br />
recommended that you use a towel and place it over each ring as you cut it.<br />
This will prevent them from flying off. Another suggestion is to use a magnetic<br />
pointer (or even a magnetic screwdriver) to fish any and all loose pieces of<br />
ring out from the foam of the seat.
The hog rings can be very difficult to cut. It can be done using regular ‘side<br />
cutters’, but it requires a LOT of hand strength and brute force. Instead, if<br />
you can, use a pair of compound action cutters with a straight tip, such as<br />
aircraft tin snips. These cut much more easily than side cutters. You can find<br />
these kinds of cutters at most hardware stores for about £10. (There are<br />
several different kinds of cutting heads available - try to get as straight and<br />
small a tip as you can. Be sure you can take the cutters back if they do not<br />
work for you.)<br />
Start with the seat cushion. Turn the cushion over so<br />
that you can work on the metal pan. Use your cutting<br />
tool to cut all the hog rings holding the existing seats to<br />
the pan. Notice where these rings are - make a<br />
diagram if you need to remember the locations. Use<br />
your towel to cover each ring as you cut it so that it<br />
doesn't fly off. Throw the cut rings in the trash. Once<br />
all the rings are cut, pull the cloth fabric over the edge of the seat so that it is<br />
free of the metal pan. You should now be able to lift the seat cushion foam<br />
(with the cloth still attached) up and off of the metal seat pan. You will need to<br />
work the cloth up off the short metal arm at the back of seat - be sure it<br />
doesn't get caught up on that.<br />
The seat cushion cover is attached to the TOP of the<br />
foam cushion along three lines (4 lines for the '99), two<br />
running front to back along the sides, and one running<br />
side to side at the rear (and one running side to side at<br />
the front on the '99). Fold the cloth up and over the<br />
center of the seat so you can see the rings on the sides<br />
of the seat. Notice how they are attached to a metal<br />
wire embedded in the foam. Again, make a diagram if necessary. Cut these<br />
rings, along the sides of the top of the seat cushion, being sure to cover them<br />
so they don't fly off. You may want to use a magnet to fish any loose pieces<br />
out of the foam. Finally, cut the rings along the back of the top of the cushion<br />
in the same fashion. You should not be able to lift the cloth seat completely<br />
clear of the foam seat cushion. Keep it handy as a reference when you are<br />
ready to install the new seat covers.<br />
Now move to the seat back. (Ignore this step for the '99.) Unzip the headrest<br />
of the seat back and remove the panel which covers the headrest speakers.<br />
Remove the headrest speakers, if any, from the headrest and set them in a<br />
safe place. Be sure you know how to reinstall them.<br />
Turn the seat back upside down and start at the<br />
bottom. You will notice that there are three pieces of<br />
the cover here - the center portion of the seat back<br />
and the two side bolsters. These are clipped to the<br />
back of the seat back cover with the usual hog rings.<br />
Cover these rings when you cut them, and remove<br />
them from the seat.
Turn the seat back over and fold up the center flap. It is held to the foam<br />
insert with hog rings, so cut them in the usual fashion and remove the insert.<br />
Each side bolster cover is attached to the seat likewise with several hog<br />
rings, and there are several rings up at the top of the center seat area.<br />
Finally, from inside the headrest, cut the three or four hog rings below the<br />
headrest speaker recesses. The seat back cover can now be pulled up and<br />
off the seat back. The cloth covers should now be off the seats.<br />
Step 4: Install the new seat covers on both the seat cushion and<br />
back.<br />
Important note: the driver's side seat cover is different from the passenger's<br />
side. Be sure you know which is which before you proceed. If you have<br />
trouble, match up the new seat covers to the ones you just removed. Look for<br />
which side of the seat bottom cover has a slit for the metal arm. The seat back<br />
is more difficult to differentiate. The only thing we could find is a small<br />
difference in the material at the seat bottom. Looking at it from the back on the<br />
bottom, the left side flap is slightly different from the right side flap. This is<br />
difficult to explain. You'll have to match them up to see.<br />
You will now install the new seat covers. Start by comparing each new piece<br />
with the corresponding original cloth piece. Start with the seat cushion. Each<br />
cushion is manufactured with a slit in the seat where the short metal arm of<br />
the seat pan will protrude. If the foam backing is not also split under the seat<br />
cover, then use a sharp blade to slit the foam so that the arm can later be slid<br />
through. Also notice that there are many holes and slits in the original cloth.<br />
These are not replicated in leather seats. However, later you will need to<br />
make a few holes in the leather to accommodate attachment bolts. You do<br />
not need to do that now.<br />
Each new piece of the cover also contains several types of attachment<br />
material, known as listing and welting. The outer exposed attachments<br />
generally consist of a strip of vinyl with a nylon cord along the edge. Many of<br />
the inner attachments consist of a folded fiber-cloth strip sewn lengthwise<br />
along the seam. These strips can be reinforced with the supplied wire.<br />
Start by placing the seat cushion cover loosely over the foam cushion.<br />
Straighten the cover on the foam. Leave the bolsters folded up for the<br />
moment. Press the seams on the butt of the seat into those parts of the<br />
cushion. Check the sides and the front and back of the center of the seat<br />
cushion area. Be sure everything is fit and straight. (Also be sure you have<br />
the correct cover for the seat you are working on!)<br />
Once the cover is in place, you can start attaching the hog rings.<br />
Start on top at the back of the center portion of the seat. Install a<br />
similar number of hog rings as those you removed, generally 3-5<br />
rings. To install the rings, use your hog ring pliers. Place a ring in<br />
the fitted nose of the pliers. Choose where you plan to install the<br />
new ring - generally in the same location you removed one.<br />
Carefully poke one end of the ring through the attachment
welting/listing. Then, pressing firmly into the seam, push the pliers all the way<br />
down until you are confident the ring brackets the wire embedded in the seat<br />
itself. Then, still pressing down, squeeze the pliers until the ring closes<br />
around the wire, thereby fastening the new seat cover to the seat itself.<br />
Check your connection. You may find you missed the wire and got only foam.<br />
If necessary, cut the ring out and try again. Fastening hog rings requires a<br />
touch that comes with experience and practice. Be patient.<br />
After doing the rear, do each of the sides on top of the center seat cushion.<br />
Then fold over the bolsters covers onto the foam bolsters. Work each bolster<br />
at a time, being sure the foam is pushed all the way up into the cover. The<br />
tendency for the cover will be to not fit smoothly on the bolster, which will be<br />
scrunched up inside it. Pull the cover over so that the bolster is all the way<br />
inside the seams of the cover. Work the foam to be sure it is not bunched up.<br />
Then work out any kinks in the bolster cover so that it is smooth over the<br />
foam underneath. The fit of the new leather is not designed to be as taut as<br />
the original covers.<br />
Caution: The edges of the metal seat pan are very sharp! This is why we<br />
mentioned the Band-Aids in the beginning.<br />
Now place the foam insert back in the metal seat pan. You may need to work<br />
the cover over the metal arm. You will need to press down firmly because<br />
the slit in the new leather is cut just a little bit smaller than the arm itself. Be<br />
sure the edges of the metal pan are pressed into the slits on the bottom of<br />
the foam cushion. Be sure the fit is good. Once firmly placed on the pan, you<br />
can fold over all the edges of the cover including the front, rear, and sides.<br />
Turn the seat cushion over so you can work on the metal pan. Before you<br />
start attaching the new cover to the bottom of the pan, locate all the bolt<br />
holes you will later need to access when putting the seats back together.<br />
There are two bolt holes on the side of the pan (opposite side from the short<br />
metal arm) where the tilt mechanism will later be attached. There are also the<br />
four bolt holes on the bottom of the pan where the sliding tracks will be<br />
bolted. Some of these will be covered by the new leather. Don't poke holes in<br />
the leather now, because it will move as you attach it, but be sure you can<br />
find these bolt holes later without seeing them!<br />
On the bottom of the seat, pull the sides tight and place the welting near the<br />
hog ring attach points. If you want the seat to be tighter, you can actually fold<br />
the welting under the seat cover and pull it tighter. Start fastening the seats to<br />
the pan with hog rings at the side attach points. Do both sides and be sure<br />
the seat is still straight and firm. Check your progress as you go. After doing<br />
the sides, do the rear. Finishing up the corners is the trickiest part. It is kind of<br />
like wrapping a birthday present, trying to get the paper folded and cleanly<br />
taped so that your box looks nice. The same is true here. You may want to<br />
experiment, with one piece of leather over another, or perhaps even folding<br />
them under and butting them together. You may even want to attach one<br />
piece of leather directly to another without attaching them to the pan. Do not<br />
be too concerned if some of the padding or welting ultimately shows -<br />
remember this is under the seat on the floor! Fold over the front and rear of
the seat cushion, making your package look as pretty as possible, and<br />
attaching at the various hog ring points.<br />
Your seat cushion should now be covered in new leather!<br />
The seat back is covered in a similar fashion, but it is<br />
extremely critical that you make sure the cover is straight.<br />
Check your progress all along the way! If you are off by<br />
even a fraction of an inch, the seats will look very obviously<br />
crooked because of the horizontal stripes across the back,<br />
which will now be sloping.<br />
Now for the seat back. Start by sliding the cover over the<br />
seat. If there are headrest speaker wires in the seat, be sure they are<br />
properly in place. Be sure you have the correct cover. After sliding the cover<br />
most of the way onto the seat, make a first pass at getting it straight. Turn the<br />
seat over and look at the way the back of the cover fits onto the seat back.<br />
Be sure all the seams at the edges line up with the actual edge of the back of<br />
the seat back. Then turn the seat back to the front. Look at the stitched<br />
seams on the edge bolsters and be sure they are even on both sides. Press<br />
the foam bolsters of the seat into the cover and pull the cover tight. Again,<br />
press and push until everything is straight and smooth. Continually check to<br />
make sure the cover is straight on the back. If you want, lay the foam insert<br />
back in the seat back and check the fit of the center panels - be sure the lines<br />
look straight. Also, before you start stapling hog rings, you might want to<br />
familiarize yourself with the location of the two bolt holes on the tilt arm side<br />
of the seat back, and the metal pivot rod on the other side. You will need to<br />
later make holes in the leather at these three locations. A good tip for making<br />
it easier to slide the cover on is to use a liberal coating of silicone spray.<br />
After making your first pass at placing and positioning the cover, start stapling<br />
hog rings. Work in reverse order from when you removed the originals. Start<br />
with the rings up in the headrest. After they are done, double check the<br />
entire cover and pull it down again tight on the seat. Inside the center seat<br />
back area, place the rings in the top of the recess. Then work the side<br />
bolsters one at a time. Finally, place the center foam insert firmly back into<br />
the recess in the seat back, and tuck the leather in over it. Then, while<br />
keeping the foam from sliding on the cover, fold it up so you can attach the<br />
cover to the foam insert with hog rings on each side.<br />
Turn the seat back over, and pull the back down tight while pulling the center<br />
and bolsters up from the front. Look up under the flap at the bottom of the<br />
back, and locate the attachment welting/listing. The front and back will be<br />
stapled to each other without actually being attached to the seat itself. And<br />
again, as you did on the cushion, decide how to make your package look<br />
prettiest. Generally it is wisest to start with the center, but not complete its<br />
edges until you are ready to do the bolsters. When stapling the back, you<br />
may find it easiest to poke the hog ring through the listing on the back side of<br />
the cover (which is hidden under the flap) and then bring the front around to<br />
meet it, or do the opposite, putting the staple through the welting from the<br />
front and then reaching in to grab the back. Do what works best for you.
After the center is started you can move to the bolsters and finish up the job.<br />
The cover is now attached to the seat back. Make sure it is straight! Your<br />
seat cushion and back are now both finished being covered.<br />
Step 5: Reassemble the seat<br />
Reassembly is basically the reverse of the disassembly in Step 2. Begin with<br />
the seat bottom cushion. Turn the cushion over so the bottom is exposed. Reattach<br />
the tracks, taking care not to bend the wire between them. Depending<br />
on the seat covers, the bolt holes for the tracks may or may not be cut. If the<br />
bolt holes are covered with seat material, you'll have to poke a hole in them.<br />
Feel around until you locate the holes. Punch through them with an awl, then<br />
open them up with scissors or a razor blade until the holes are just a tad<br />
larger than the bolt holes. Install the tracks with the 12mm bolts.<br />
The '99 track also has two 14m bolts on the side where the seat belt receiver<br />
attaches. Again, carefully locate the bolt holes, open them up with an awl and<br />
scissors, and tighten the track on the side.<br />
Find the bolt holes on the tilt-arm side of the seat cushion and open them up.<br />
Carefully lifting the plastic cover to expose the 14mm bolts, re-attach the tiltarm<br />
to the side of the seat cushion. A box-end wrench works best here.<br />
Tighten the bolts.<br />
On the non tilt-arm side, push the round plastic grommet back into the metal<br />
arm.<br />
You're now ready to attach the seat back to the<br />
cushion. On the non-tilt arm side of the seat back, there<br />
is a metal protrusion which will slide into the grommet.<br />
Cut the material to allow the metal piece to come<br />
through. Once the metal part is free, slide it into the<br />
grommet and secure it with the Phillips head screw (or<br />
8mm bolt if its a '99.) Don't tighten it all the way yet.<br />
Line up the seat back with the tilt-arm mechanism. Get a<br />
rough idea of where the holes should be. Then feel around<br />
for the two 14mm bolt holes in the seat back side. We found<br />
the best way was to place the seat back into position and<br />
use an awl to punch through the holes. Again, open up the<br />
holes a bit with a blade or scissors and re-attach the seat<br />
back to the tilt-arm. Tighten the two bolts, then go back to<br />
the non tilt-arm side and tighten the screw.<br />
Slide the plastic cover back over the tilt-arm with the two 14mm bolts.<br />
Carefully rotate the larger plastic cover to expose the hole at the bottom of the<br />
smaller plastic cover Secure it at the bottom with the Phillips head screw.<br />
Then secure the larger cover with the two Phillips head screws removed way<br />
back when you started.
Step 6: Reinstall the seats<br />
If you've gotten this far and you still need to read these instructions in order to<br />
complete the job, you may be in trouble. Why? Because you're done with all the hard<br />
stuff and all you have to do is bolt the seats back into the car! Four more 14mm bolts<br />
and you're done! Just don't forget which is the passenger's seat and which is the<br />
driver's seat! Now sit back and admire your handiwork, and rejoice in the fact that<br />
you just saved several hundred dollars and probably ended up with a better job!