
You also want an ePaper? Increase the reach of your titles
YUMPU automatically turns print PDFs into web optimized ePapers that Google loves.
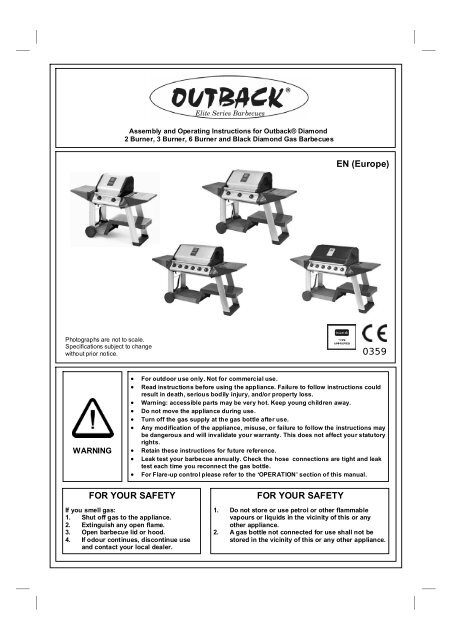
Elite Series <strong>Barbecues</strong><br />
Assembly and Operating Instructions for <strong>Outback</strong>® Diamond<br />
2 Burner, 3 Burner, 6 Burner and Black Diamond Gas <strong>Barbecues</strong><br />
EN (Europe)<br />
Photographs are not to scale.<br />
Specifications subject to change<br />
without prior notice.<br />
0359<br />
WARNING<br />
• For outdoor use only. Not for commercial use.<br />
• Read instructions before using the appliance. Failure to follow instructions could<br />
result in death, serious bodily injury, and/or property loss.<br />
• Warning: accessible parts may be very hot. Keep young children away.<br />
• Do not move the appliance during use.<br />
• Turn off the gas supply at the gas bottle after use.<br />
• Any modification of the appliance, misuse, or failure to follow the instructions may<br />
be dangerous and will invalidate your warranty. This does not affect your statutory<br />
rights.<br />
• Retain these instructions for future reference.<br />
• Leak test your barbecue annually. Check the hose connections are tight and leak<br />
test each time you reconnect the gas bottle.<br />
• For Flare-up control please refer to the ‘OPERATION’ section of this manual.<br />
FOR YOUR SAFETY<br />
If you smell gas:<br />
1. Shut off gas to the appliance.<br />
2. Extinguish any open flame.<br />
3. Open barbecue lid or hood.<br />
4. If odour continues, discontinue use<br />
and contact your local dealer.<br />
FOR YOUR SAFETY<br />
1. Do not store or use petrol or other flammable<br />
vapours or liquids in the vicinity of this or any<br />
other appliance.<br />
2. A gas bottle not connected for use shall not be<br />
stored in the vicinity of this or any other appliance.
Parts List<br />
Quantities vary according to model purchased. Specifications subject to change without prior notice. For more<br />
details on hardware, please see ‘Hardware Reference Diagram’.<br />
HOOD<br />
BODY<br />
TROLLEY<br />
HARDWARE<br />
CODE PART<br />
QTY<br />
<strong>Outback</strong>® Diamond<br />
2 Burner<br />
<strong>Outback</strong>® Diamond<br />
3 Burner<br />
<strong>Outback</strong>® Diamond<br />
6B / Black Diamond<br />
A1 Hood Handle 1 <br />
A2 Hood (Pre-Assembled to Body) 1 <br />
A3 Hood Panel 1 <br />
A4 Heat Indicator and Nuts 1 <br />
B1 Barbecue Body 1 <br />
B2 Burner 2 3 6<br />
B3 Control Panel 1 <br />
B4 Knob 2 3 6<br />
B5 Drip Tray 1 <br />
B6 Drip Pan 1 <br />
B7 Foil Liner 1 <br />
B8 Lava Rock/Basket 2 <br />
B9 Grill 2 <br />
B10 Griddle 1 <br />
B11 Hose (if supplied) <br />
B12 Warming Basket 1 <br />
C1 L/H Side Shelf 1 <br />
C2 Side Shelf Shield 1 <br />
C3 Front Left Endcap 1 <br />
C4 Rear Left Endcap 1 <br />
C5 Utensil Tray 2 <br />
C6 R/H Side Shelf 1 <br />
C7 R/H Insert 1 <br />
C8 Front Left Leg 1 <br />
C9 Rear Left Leg 1 <br />
C10 Front Right Leg 1 <br />
C11 Rear Right Leg 1 <br />
C12 Bottom Slat Assembly 1 <br />
C13 Base Tray 1 <br />
C14 Gas Bottle Holder 1 <br />
C15 Trolley Foot 1 <br />
C16 Hubcap 2 <br />
C17 Wheel 2 <br />
C18 Locknut 2 <br />
C19 Axle 1 <br />
C20 Retaining Rod 1 <br />
C21 Gas Bottle Strap 1 <br />
C22 Side Shelf Hook 2 <br />
D1 Countersunk Screw, M4x15 4 <br />
D2 Screw, M6x15 24 <br />
D3 Washer 4 <br />
D4 Screw, M6x35 16 <br />
D5 Screw, 1/4UNCx12 6 <br />
Pre-Assembled Component<br />
Quantity varies according to model purchased<br />
Appearance, size, and construction may differ according to model purchased<br />
2
Parts Diagrams<br />
Quantities vary according to model purchased. Specifications subject to change without prior notice. For more<br />
details on hardware, please see ‘Hardware Reference Diagram.’<br />
B12<br />
B9<br />
B10<br />
B8<br />
C22<br />
A2<br />
A3<br />
A4<br />
A1<br />
C1<br />
C2<br />
C4<br />
C5<br />
B1<br />
B2<br />
C6<br />
C7<br />
B11<br />
C3<br />
B3<br />
B4<br />
C9<br />
B5<br />
C21<br />
C8<br />
B6<br />
B7<br />
C13<br />
C20<br />
C12<br />
C11<br />
C10<br />
C19<br />
C14<br />
C15<br />
C17<br />
C18<br />
C16<br />
3
Hardware Reference Diagram<br />
Specifications subject to change without prior notice.<br />
D4<br />
D2<br />
D2 (screw)<br />
D1<br />
D2<br />
D3(washer)<br />
D5<br />
4
Assembly<br />
IMPORTANT!<br />
• Tools Required: Medium size flat blade or Phillips/Crosspoint screwdriver, adjustable spanner or metric<br />
spanner set<br />
• The assembly of this barbecue requires 2 people.<br />
• Carefully unpack the trolley box and remove all internal packaging before commencing assembly.<br />
• Carefully remove the box lid from the body box and remove all internal packaging and parts inside the body.<br />
• The inlet connection of the gas rail assembly on the BBQ body is lower than the body. You must never allow<br />
the pipe to rest on the ground during assembly as serious damage could result. We recommend the body is<br />
left sitting in the box until required for assembly to trolley.<br />
• Whilst every care is taken in the manufacture of this product, care must be taken during assembly in case<br />
sharp edges are present.<br />
1<br />
Attach the Rear Right Leg (C11) to the Trolley Foot (C15). The legs are a push fit onto the trolley foot and<br />
on the gas bottle holder. In case of difficulty, they may need tapping lightly with a soft face mallet. Take<br />
care not to damage parts.<br />
2<br />
Attach the Front Right Leg (C10) to the Trolley Foot (C15)<br />
5
3<br />
Attach the Bottom Slat Assembly (C12) to the Base Tray (C13) using the Screws (D2).<br />
4<br />
Attach the leg assembly to the Base Tray (C13) using the Screws (D2).<br />
6
5<br />
Threaded<br />
Insert<br />
Attach the Front Left Leg (C8) and Rear Left Leg (C9) to the Gas Bottle Holder (C14).<br />
Note: Threaded inserts must be facing in the direction shown!<br />
6<br />
Align the Gas Bottle Holder (C14) with the Slat Assembly (C12).<br />
7
7<br />
Attach Attach the the Gas Gas Bottle Bottle Holder Holder (C14) (C14) to the to the Bottom Bottom Slat Slat Assembly (C12) (C12) using using the the Screws (D2)<br />
and Washers (D3).<br />
(D2) and Washers (D3).<br />
8<br />
Insert the axle (C19) through the clamping brackets on the gas bottle holder (C14) and tighten the clamp<br />
screws. Take care not to over tighten these screws which will damage the plastic Gas Bottle Holder<br />
8
9<br />
Place the Wheels (C17) onto the Axle (C19) and secure with Locknuts (C18).<br />
10<br />
Carefully turn the completed trolley over, right side up.<br />
9
11<br />
CAUTION! Care must be taken to ensure hood does not fall open<br />
unexpectedly or that the hood surface is damaged when set on the ground.<br />
Carefully turn the Barbecue Body (B1) upside down and remove the Drip Tray (B5). Attach the<br />
R/H Side Shelf (C6) to the Barbecue Body (B1) using the Screws (D2).<br />
12<br />
Attach the Front Left Endcap (C3) to the Body (B1) using the Screws (D2).<br />
10
13<br />
Attach the Rear Left Endcap (C4) to the Body (B1) using the Screws (D2).<br />
14<br />
CAUTION! Care must be taken to ensure hood does not fall open unexpectedly.<br />
Carefully turn the Barbecue Body (B1) over right-side-up.<br />
11
15<br />
Carefully lay the Barbecue Body (B1) onto the tops of the legs. The tops of the legs should slot into the<br />
endcaps. When done correctly, the barbecue should be able to stand on its own weight.<br />
WARNING: DO NOT RELEASE THE BARBECUE BODY WHILE THE BARBECUE HAS NOT BEEN<br />
PROPERLY SEATED. THIS MAY RESULT IN INJURY OR DAMAGE TO YOUR BARBECUE.<br />
16<br />
Secure the Legs (C8), (C9), (C10), (C11) to the Endcaps (C3), (C4) and the R/H<br />
Side Shelf (C6) using the Screws (D4).<br />
12
17<br />
Attach the Side Shelf Shield (C2) to the endcaps using the Countersunk Screws (D1).<br />
18<br />
Attach the Side Shelf Hook (C22) to the L/H Side Shelf (C1) using the Screws (D5),<br />
Hook the side shelf to the endcaps.<br />
13
19<br />
Lay the Utensil Trays (C5) into their positions on either side of the barbecue body.<br />
20<br />
Place the Wheel Hubcaps (C16) onto the sides of the Wheels (C17)<br />
14
21<br />
Slide the loops of the Gas Bottle Strap (C21) onto the Retaining Rod (C20). Secure<br />
the Rod (C20) to the trolley legs using the Screws (D2).<br />
Ensure the strap is threaded through the buckle correctly. It must hold the gas bottle<br />
firmly in place onto the barbecue.<br />
22<br />
Slide the Drip Tray (B5) into place underneath the barbecue body.<br />
15
23<br />
Place the Foil Liner (B7) into the Drip Pan (B6) and slide into place.<br />
24<br />
Remove the plastic wrap from the Lava Rock Baskets (B8) and lay them carefully into the body<br />
ensuring that they lie level within the body. Lay the Grills (B9) and Griddle (B10) into place.<br />
2 Burner Configuration: Left half - Grill, Lava Rock; Right half - Grill, Lava Rock;<br />
3/6 Burner Configuration: Left two-thirds - Grills, Lava Rock; Right third - Griddle.<br />
16
25<br />
Connect the gas hose (if supplied) to the BBQ. Ensure the mating faces of the connection are clean and<br />
not damaged. Do not use any sealing tape, paste, or liquid on the joint. The nut must be tightened with<br />
the use of a spanner. Do not use force which may damage the assembly.<br />
26<br />
Leak Test Diagram<br />
Assembly is now complete.<br />
All joints and connections must now be leak tested before using the barbecue.<br />
For details of leak testing, please refer to instructions on Page 19.<br />
Number of valves to be leak tested will vary with model of barbecue.<br />
17
ESSENTIAL INFORMATION<br />
Please read instructions before using your barbecue.<br />
BEFORE YOU USE YOUR BARBECUE (also see installation)<br />
• Perform a leak test. This is the only safe and sure way to detect any gas leaking from joints and<br />
connections of the barbecue after assembly. Follow the leak test instructions on page 21. Check that the<br />
gas hose is free of any tension, twisting, cuts, or cracks.<br />
• Make sure your barbecue is in a safe place. It must be outdoors, on level ground and not below ground<br />
level. Ensure that the barbecue is at least 1 metre away from any flammable materials, including trees and<br />
fences and that there are no heat sources near the barbecue (cigarettes, open flames, spark etc.)<br />
• Check that you have the correct gas bottle and regulator for your barbecue and that the gas bottle is<br />
placed correctly in the gas bottle holder provided. Never place the gas bottle directly underneath the<br />
barbecue.<br />
GETTING STARTED (also see operation)<br />
• Open the hood of your barbecue. Never light your barbecue with the hood closed. Turn the gas regulator<br />
or gas bottle valve to the ‘on’ position. Push in the control knob of the burner you want to light and turn it<br />
anti clockwise until resistance is felt. Wait 4 seconds and then continue turning the control knob until a<br />
click is heard. Repeat if necessary until the burner is alight. Light all other burners in the same way<br />
making sure each burner is alight before attempting to light the next. IF ANY BURNER FAILS TO LIGHT,<br />
TURN OFF THE GAS AT THE BURNERS AND THE GAS BOTTLE, WAIT FIVE MINUTES AND TRY<br />
AGAIN. If the burners cannot be lit using the ignition system, turn to the manual lighting instructions under<br />
operation.<br />
• Once the burners are lit, turn all the burners to the high setting for 3-5 minutes to pre-heat the barbecue.<br />
This should be done before each session. When pre-heating is complete, cooking can begin taking extra<br />
care if the burners are used in the high position.<br />
• To prevent food sticking we recommend that you use a long handled brush to apply a light coat of cooking<br />
oil to the grills and griddles before each barbecue session.<br />
• Flare-ups may occur during cooking and can be controlled by applying salt directly onto the lava rock<br />
making sure your hands are protected from the heat.<br />
• If a fat fire should occur during cooking, and if safe to do so, turn off the burners and the gas at the gas<br />
bottle and wait for the fire to go out. Do not pull out the drip tray or douse with water.<br />
• Never douse a barbecue with water.<br />
• Never move a barbecue when lit.<br />
• Never leave a lit barbecue unattended<br />
• Never handle hot parts with unprotected hands<br />
• Keep children, animals, and elderly people a safe distance from a lit barbecue.<br />
WHEN YOU HAVE FINISHED COOKING (also see care and maintenance)<br />
• Turn all the burners to the high position for 3 to 5 minutes to burn off any food residue from the cooking<br />
surfaces and burners. When the barbecue has cooled, the burnt residue can be easily removed using a<br />
damp, non abrasive cloth on the cooking surfaces and a wire brush on the burners. Never use any<br />
abrasive material on porcelain finishes. The grills and griddles are not dishwasher safe.<br />
• We do not recommend washing lava rock, the step described above should remove most food residue<br />
from the lava rock.<br />
• When the barbecue has cooled, scrape away any food and fat residue from the drip tray and discard.<br />
Empty and clean the Foil Liner. These routines must be completed after each session.<br />
STORAGE<br />
• Ensure the barbecue is properly cooled.<br />
• Always disconnect the gas bottle and store it in a safe place, never store a gas bottle indoors or on its side.<br />
• Store the barbecue in a cool dry place. The detachable side shelf can be removed to save space during<br />
storage.<br />
• Cover the burners with foil to keep the burner holes free from insects or other debris.<br />
• If you intend to leave your barbecue outside make sure it is protected from the elements by a heavy duty<br />
cover, these are available from most <strong>Outback</strong>® stockists.<br />
18
IMPORTANT INFORMATION<br />
• Modification of the barbecue may be dangerous, is not permitted and will nullify any warranty.<br />
• This product is for outdoor use only. Do not use indoors. Do not use below ground level.<br />
• Do not store Gas bottles below ground level. LP gas is heavier than air so if a leak occurs the gas will<br />
collect at a low level and could ignite in the presence of a flame or spark.<br />
• Do not store or use LP gas bottles on their side as this could allow liquid gas into the supply pipes with<br />
serious results.<br />
• Leak test your barbecue annually. Leak test the hose connections each time you reconnect the gas bottle.<br />
• Always turn off the gas at the gas bottle when not in use.<br />
• Do not use aerosols near this barbecue.<br />
GAS, REGULATOR AND HOSE<br />
This barbecue can run on propane butane or butane/propane mixed LPG (liquid petroleum gas) bottled gas.<br />
For optimal performance we recommend the use of propane gas. Butane gas can be used but it may restrict<br />
the heat output available from the burners, particularly when the gas temperature falls below +10 degrees<br />
Celsius. If in doubt, please consult your gas dealer/distributor.<br />
Hose<br />
• Check that the gas hose does not touch any part of the barbecue that may become hot during operation.<br />
• If the hose shows any sign of damage it must be replaced with a hose that is suitable for use with LPG<br />
(liquid petroleum gas) and meets the National Standards for the country of use.<br />
• The length of hose should not exceed 1.5 metres.<br />
Please note: the date on the orange hose(if supplied) is the date of manufacture – not the expiry date.<br />
You must have the correct gas bottle, regulator, and hose for the barbecue to operate safely and<br />
efficiently. Use of an incorrect or faulty regulator is dangerous and will invalidate the warranty on this<br />
product. If you are unsure, please check with your local gas dealer.<br />
INSTALLATION<br />
Precautions:<br />
• Only use this barbecue in a well-ventilated outdoor area.<br />
• Check that the barbecue is not placed UNDER any combustible surface.<br />
• The sides of the barbecue should never be closer than 1 metre to any combustible material.<br />
• Do not obstruct any ventilation openings in the barbecue body<br />
• Confirm all control knobs are in the off position before connecting the regulator.<br />
• When changing the gas bottle, the gas bottle must be kept away from any sources of ignition.<br />
• Always connect the regulator in accordance with the regulator and gas bottle suppliers instructions.<br />
LEAK TESTING<br />
Always perform a leak test in a well-ventilated area.<br />
Step 1 - Confirm all control knobs are in the off position.<br />
Step 2 - Detach the barbecue control panel located across the front of the barbecue body by pulling off the<br />
control knobs and removing the control panel retaining screws.<br />
Step 3 - Turn on the gas at the gas bottle or regulator<br />
Step 4 - Check for leaks by brushing a solution of ½ water and ½ liquid detergent over all the gas system<br />
joints, including all valve connections, hose connections, and regulator connections.<br />
Step 5 - If bubbles form over any of the joints there is a leak<br />
• Turn off the gas<br />
• Retighten all joints<br />
• Repeat test<br />
• If bubbles form again do not use the barbecue and contact your local <strong>Outback</strong> distributor for assistance.<br />
OPERATION<br />
Your barbecue is not designed to be used with more than 50% of the cooking area as a solid plate – this<br />
includes baking dishes. If more than 50% of your cooking area is covered by a solid cooking surface, the<br />
barbecue could overheat causing damage that is not covered by warranty.<br />
19
Grill cooking<br />
The burners heat the lava rock beneath the grill that, in turn, heats the food. The natural juices produced<br />
during cooking fall onto the lava rock and vaporise to form smoke. The smoke then rises and ‘bastes’ the food,<br />
giving it that unique barbecued flavour.<br />
Griddle plate cooking<br />
The burners heat the griddle plate directly, which then cooks the food on contact. Griddle plates enable the<br />
cooking of smaller items that would, otherwise, fall through the grill. They can also be used for searing cuts of<br />
meat or cooking food like eggs that would not be possible to cook on a grill. Griddles can also be used to heat<br />
pans.<br />
Roasting<br />
If your barbecue is supplied with a roasting hood rather than a lid you are able to roast or bake in a similar way<br />
as in a conventional gas oven. For best results place the food you wish to bake or roast in a metal baking tray<br />
and set it on one side of the cooking grill. Turn the burners directly under the food to the ‘OFF’ position and<br />
the burners opposite the food to the ‘Medium’ setting. Close the hood and this will form an oven to cook the<br />
food ‘indirectly’. Monitor the temperature using the heat indicator on the hood. If the internal heat becomes<br />
too high, turn the burners to the ‘low’ position. It is not necessary or advisable to have all of the burners on<br />
high when the hood is closed. If the hood is opened during cooking to check on the progress of the food,<br />
please allow extra cooking time for the barbecue to regain its temperature. Take care when opening the hood<br />
as hot steam can be released on opening.<br />
Warming Basket<br />
Warming baskets are a convenient way to keep cooked food warm or to warm items such as bread rolls. It is<br />
advisable to place food to the front of the warming basket to avoid the possibility of juices and fat running<br />
down the back of your barbecue. Always check that your warming basket is properly fitted before use.<br />
Rotisserie Operating Instructions (Optional accessory)<br />
• Carefully remove the cast iron cooking surfaces and the warming rack from the barbecue.<br />
• Slide one of the spit forks onto the spit rod and tighten its thumb screw to secure it into place. Insert the<br />
pointed end of the spit rod into the meat being cooked and slide the meat towards the center of the rod.<br />
Make sure the fork is fully into the meat. Slide the other fork onto the rod, into the meat, and tighten the<br />
thumb screw once in place. For optimal rotisserie cooking, food must be placed securely onto the middle of<br />
the spit rod and balanced so that the rotisserie can rotate freely without interference from any barbecue<br />
surfaces. Any loose sections of meat should be secured so they do not hang down and interfere with the<br />
rotation of the spit rod. Do not overload the rotisserie. A chicken or joint of meat of approximately 2kg<br />
should be the maximum.<br />
• Insert the pointed end of the spit rod into the motor. Lay the other end of the spit rod onto the opposite<br />
bracket.<br />
• Light the grill as specified in your barbecue’s instructions.<br />
• Turn on the rotisserie motor to begin rotisserie cooking. The hood has been designed so that it may be<br />
closed during rotisserie cooking.<br />
• Always cook foods on the lowest flame setting to avoid burning or overcooking.<br />
Flare-up control ***Very Important Notice ***<br />
Flare-ups occur when meat is barbecued, and its fat and juices fall upon the hot lava rock. Smoke of<br />
course helps give food its barbecued flavour, but it is best to avoid excessive flare-up to prevent food being<br />
burned. To control flare-ups, it is ABSOLUTELY ESSENTIAL to trim away excess fat from meat and<br />
poultry before grilling, use cooking sauces and marinades sparingly and try to avoid very cheap cuts of<br />
meat or meat products as these tend to have a high fat and water content. Also, the burners should always<br />
be placed on the low setting during cooking. When flare-ups do occur, they can usually be extinguished by<br />
applying baking soda or salt directly onto the lava rocks. Always protect your hands when handling<br />
anything near the cooking surface of the barbecue, and take care to protect yourself from the flames.<br />
Always protect your hands when handling anything near the cooking surface of the barbecue and take<br />
care to protect yourself from the flames. If a fat fire occurs, please see the instructions under the following<br />
heading of this manual.<br />
20
Fat Fires<br />
The Foil Liner must be emptied and the drip tray cleaned of food debris after each cooking session. If the<br />
barbecue is to be used for large gatherings, it will be necessary to turn off and cool the barbecue every two<br />
hours to remove food debris from the drip tray and clean out the Foil Liner, the time between cleaning may<br />
need to be reduced if very fatty foods or cheap meat products are being cooked. Failure to do this may result<br />
in a fat fire, which may cause injury and could seriously damage the barbecue.<br />
In the event of a fat fire;<br />
• If safe to do so, turn all control knobs to the ‘off’ position<br />
• Turn off the gas at the gas bottle<br />
• Keep everyone at a safe distance from the barbecue and wait until the fire has burnt out.<br />
• Do not close the hood of the barbecue.<br />
• NEVER DOUSE A BARBECUE WITH WATER. IF AN EXTINGUISHER IS USED, IT SHOULD BE A<br />
POWDER TYPE.<br />
• DO NOT REMOVE THE DRIP TRAY<br />
• If the fire does not seem to be abating or appears to be worsening, contact your local Fire Brigade for<br />
assistance.<br />
<strong>Manual</strong> ignition instructions<br />
• Insert a long, lit match through the match-lighting hole in the right hand side of the body of the barbecue<br />
until the lit end is alongside the right hand burner. Push and turn the right hand control knob anti-clockwise<br />
to the high position taking care to protect yourself from flames.<br />
• When the burner is lit turn the remaining burners from right to left.<br />
• Confirm that each burner is lit before turning on the next burner<br />
• If the right hand burner fails to light, turn off the gas and contact your local <strong>Outback</strong> dealer.<br />
CARE AND MAINTENANCE<br />
Never handle hot parts of the BBQ with unprotected hands.<br />
Never douse the BBQ with water when its surfaces are hot.<br />
General<br />
• Regularly clean your BBQ between uses and especially after extended periods of storage.<br />
• Do not leave the BBQ uncovered and exposed to the elements when not in use. Heavy duty covers are<br />
available as an accessory from your <strong>Outback</strong> ® stockist. Even when stored outside or inside with a cover it<br />
is possible for mould to grow on any fat remaining on parts of the BBQ. This should be cleaned off smooth<br />
surfaces with hot soapy water.<br />
• Lava rock can be cleaned by lighting the burners on full for 3 to 5 minutes. This should be done with the<br />
hood in the raised position. Heavily impregnated lava rock should be turned over so that the dirty side<br />
faces the burners in order to burn off any residue.<br />
• The wooden shelf, shelf insert and bottom slats are made from hardwood ideally suited to outside<br />
conditions. Hardwood will naturally weather and change its appearance and it is quite natural for small<br />
cracks to appear on the surface of the wood. The wood should be regularly inspected and any weathered<br />
or damaged surfaces should be recoated promptly with Yacht varnish or an external grade Polyurethane<br />
varnish. Follow the varnish manufacturer’s instructions for preparation and application.<br />
• All screws and bolts should be checked and tightened if necessary on a regular basis.<br />
Burner<br />
Provided that they are operating correctly, in normal usage, burning off the residue after cooking will keep the<br />
burners clean. The burners should be removed and cleaned annually, or whenever heavy build-up is found, to<br />
ensure that there are no signs of blockage (debris, insects) in either the burner portholes or the primary air<br />
inlet of the burners. Use a pipe cleaner to clear obstructions. When refitting the burners, be careful to check<br />
that the neck of the burner fits over the valve outlet.<br />
21
Cleaning<br />
Material Where used Cleaning Method Recommended<br />
Stainless Centre hood panel Clean using hot soapy water or with the use of a suitable<br />
Steel Hood cleaning product following the manufacturers instructions.<br />
Burners<br />
Any food debris should be removed on a regular basis.<br />
For detailed burner instructions refer to MAINTENANCE<br />
on Page 22.<br />
Porcelain Grills Enamel is a thin, glass based coating fused onto metal and<br />
enamel Griddles as such needs to be treated with care. Cooking oil, together<br />
with fat from food being cooked can turn to carbon as a<br />
result of heating and result in black flakes coming away<br />
from the cooking surfaces. These are not harmful.<br />
Porcelain should be cleaned using hot soapy water or with<br />
the use a suitable cleaning product following the<br />
Manufactures instructions. Due to the weight of the grills<br />
and griddle, we do not recommend cleaning in a<br />
dishwasher.<br />
Chrome Warming rack Wash with hot soapy water. A chrome cleaner may<br />
plated<br />
be used if required. To prevent rusting, wipe with<br />
cooking oil after rinsing and drying.<br />
Wood Shelves and Wipe with a cloth wrung out in hot soapy water and dry.<br />
shelf inserts<br />
Plastic Trolley excluding Wipe with a cloth wrung out in hot soapy water and dry.<br />
Paint wooden shelving Excess fat and food debris can be removed from inside the<br />
Body<br />
body using a plastic or wooden scraper. Do not use<br />
Utensil trays<br />
abrasives. If rust appears on the body it should be treated<br />
with a suitable rust inhibitor and painted with a heat<br />
resistant paint.<br />
Galvanised Drip tray Excess fat and food debris must be removed using a<br />
steel Foil Liner plastic or wooden scraper. This needs to be carried<br />
out between each use of the BBQ. Excessive build<br />
up is likely to lead to a fat fire which can be<br />
hazardous and damage the BBQ. This is not a fault<br />
in the BBQ and therefore is not covered by the<br />
terms of the warranty.<br />
If required, the tray and foil liner can be washed in<br />
hot soapy water.<br />
22
Troubleshooting<br />
Problem Possible Cause Solution<br />
Burners will not light LP gas bottle is empty Replace with full gas bottle<br />
using the ignition system<br />
Faulty regulator<br />
Have regulator checked or replaced<br />
Obstructions in burners<br />
Obstructions in gas jets<br />
or gas hose<br />
Electrode wire is loose or<br />
disconnected on electrode<br />
or ignition unit<br />
Electrode or wire is damaged<br />
Faulty integral igniter<br />
Incorrect electrode gap/<br />
Bent collector box<br />
Clean burners<br />
Clean jets and gas hose<br />
Reconnect wire<br />
Change electrode and wire<br />
Replace gas valve complete<br />
with integral igniter<br />
The gas collector box around the<br />
electrode needs to be in line with<br />
the burner with a gap of 3 to 4mm<br />
between the end of the electrode<br />
and the tag on the end of the<br />
collector box. Realign the collector<br />
box as required.<br />
Burner will not light LP gas bottle is empty Replace with full gas bottle<br />
with a match<br />
Faulty regulator<br />
Have regulator checked or replaced<br />
Obstructions in burners<br />
Obstructions in gas jets<br />
or gas hose<br />
Clean burners<br />
Clean jets and gas hose<br />
Low flame or flashback (fire LP gas bottle too small Use larger gas bottle<br />
In burner tube - a hissing or<br />
roarIng noise may be heard) Obstructions in burners Clean burners<br />
Obstructions in gas jets<br />
or gas hose<br />
Windy conditions<br />
Clean jets and gas hose<br />
Use BBQ in a more sheltered<br />
position<br />
Gas valve knob difficult Integral ignition system jammed Replace gas valve complete<br />
to turn Gas valve jammed with integral igniter<br />
23
Technical Specifications<br />
Model Name<br />
CE<br />
Approval<br />
Heat Input<br />
Burners<br />
Injector<br />
Size<br />
Gas /<br />
Pressure<br />
<strong>Outback</strong>®<br />
Diamond<br />
2 Burner<br />
0359<br />
359AS128<br />
7.87kW 2 1.04<br />
Butane/<br />
28mbar<br />
Propane/<br />
37mbar<br />
<strong>Outback</strong>®<br />
Diamond<br />
3 Burner<br />
0359<br />
359AS128<br />
11.8kW 3 1.04<br />
Butane/<br />
Propane<br />
30mbar<br />
<strong>Outback</strong>®<br />
Diamond<br />
6 Burner<br />
<strong>Outback</strong>®<br />
Black Diamond<br />
0359<br />
359AS128<br />
0359<br />
359AS128<br />
15.75kW<br />
15.75kW<br />
6<br />
0.81<br />
Butane/<br />
Propane<br />
50mbar<br />
Butane/<br />
Propane<br />
36mbar<br />
Countries of Use:<br />
I 3+ (28-30/37) BE, CY, CZ, EE, FR, GR, IE, IT, LV, LT, LU, PT, SK, ES, CH, GB, RO<br />
I 3B/P(30) BG, CY, CZ, DK, EE, FI, GR, LV, LT, LU, MT, NL, NO, SK, SI, SE, TR, IS<br />
I 3B/P(50) AT, DE, HU, SK, CH<br />
I 3B/P(36) PL<br />
For reference and correspondence, record your serial number here.<br />
(See sticker on side of barbecue body.)<br />
Serial No.__________________<br />
This number may be required when ordering spare parts or<br />
accessories. A part reference number may also be required where<br />
applicable.<br />
24<br />
Published November 2007