Assembly and Operating Instructions for Phoenix 4 Burner Black and ...
Assembly and Operating Instructions for Phoenix 4 Burner Black and ...
Assembly and Operating Instructions for Phoenix 4 Burner Black and ...

Create successful ePaper yourself
Turn your PDF publications into a flip-book with our unique Google optimized e-Paper software.
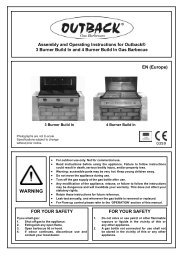
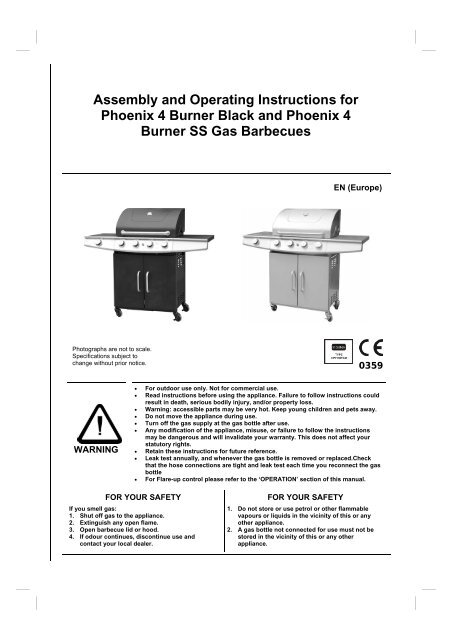
<strong>Assembly</strong> <strong>and</strong> <strong>Operating</strong> <strong>Instructions</strong> <strong>for</strong><br />
<strong>Phoenix</strong> 4 <strong>Burner</strong> <strong>Black</strong> <strong>and</strong> <strong>Phoenix</strong> 4<br />
<strong>Burner</strong> SS Gas Barbecues<br />
EN (Europe)<br />
Photographs are not to scale.<br />
Specifications subject to<br />
change without prior notice.<br />
0359<br />
WARNING<br />
• For outdoor use only. Not <strong>for</strong> commercial use.<br />
• Read instructions be<strong>for</strong>e using the appliance. Failure to follow instructions could<br />
result in death, serious bodily injury, <strong>and</strong>/or property loss.<br />
• Warning: accessible parts may be very hot. Keep young children <strong>and</strong> pets away.<br />
• Do not move the appliance during use.<br />
• Turn off the gas supply at the gas bottle after use.<br />
• Any modification of the appliance, misuse, or failure to follow the instructions<br />
may be dangerous <strong>and</strong> will invalidate your warranty. This does not affect your<br />
statutory rights.<br />
• Retain these instructions <strong>for</strong> future reference.<br />
• Leak test annually, <strong>and</strong> whenever the gas bottle is removed or replaced.Check<br />
that the hose connections are tight <strong>and</strong> leak test each time you reconnect the gas<br />
bottle<br />
• For Flare-up control please refer to the ‘OPERATION’ section of this manual.<br />
FOR YOUR SAFETY<br />
If you smell gas:<br />
1. Shut off gas to the appliance.<br />
2. Extinguish any open flame.<br />
3. Open barbecue lid or hood.<br />
4. If odour continues, discontinue use <strong>and</strong><br />
contact your local dealer.<br />
FOR YOUR SAFETY<br />
1. Do not store or use petrol or other flammable<br />
vapours or liquids in the vicinity of this or any<br />
other appliance.<br />
2. A gas bottle not connected <strong>for</strong> use must not be<br />
stored in the vicinity of this or any other<br />
appliance.
1. Parts List<br />
Quantity varies according to model purchased. Specifications subject to change without prior notice. For<br />
more details on hardware, please see the corresponding ‘Hardware Reference Diagram’.<br />
<strong>Phoenix</strong> 4 <strong>Burner</strong> <strong>Phoenix</strong> 4 <strong>Burner</strong><br />
CODE PART QTY<br />
<strong>Black</strong><br />
Stainless Steel<br />
A1 Hood (Pre-Assembled to Body) 1 <br />
HOOD<br />
BODY<br />
TROLLEY<br />
HARDWARE<br />
A2 Hood H<strong>and</strong>le 1 <br />
A3 Heat Indicator <strong>and</strong> Nuts 1 <br />
A4 Warming Rack 1 <br />
B1 Barbecue Body 1 <br />
B2 <strong>Burner</strong> 4 <br />
B3 Control Panel 1 <br />
B4 Knob 4 <br />
B5 Hose (if supplied) <br />
B6 Flame Tamer 4 <br />
B7 Cooking Grill 3 <br />
B8 Drip Tray Left Bracket 1 <br />
B9 Drip Tray Right Bracket 1 <br />
B10 Drip Tray H<strong>and</strong>le 1 <br />
B11 Drip Tray 1 <br />
B12 Ignition Button 1 <br />
C1 Side <strong>Burner</strong> Shelf 1 <br />
C2 Side <strong>Burner</strong> Grid 1 <br />
C3 Right Side Shelf 1 <br />
C4 Left Front Leg 1 <br />
C5 Left Rear Leg 1 <br />
C6 Right Front Leg 1 <br />
C7 Right Rear Leg 1 <br />
C8 Upper Body Support 1 <br />
C9 Cabinet Side Panel 3 <br />
C10 Cabinet Side Panel (with hole) 1 <br />
C11 Left Door 1 <br />
C12 Right Door 1 <br />
C13 Door H<strong>and</strong>le 2 <br />
C14 Basket 1 <br />
C15 Cabinet Back Panel 1 <br />
C16 Cabinet Bottom Panel 1 <br />
C17 Gas Bottle Support 1 <br />
C18 Caster 2 <br />
C19 Lockable Caster 2 <br />
C20 Electronic Ignition <strong>Assembly</strong> 1 <br />
C21 Heat Shield 1 <br />
D1 ST4.0x10 Screw 35 <br />
D2 M4x10 Bolt 4 <br />
D3 M6x15 Bolt 16 <br />
D4 M6x40 Bolt 16 <br />
D5 M6 Nut 12 <br />
Pre-Assembled Component<br />
Quantity varies according to model purchased<br />
Appearance, size, <strong>and</strong> construction may differ according to model purchased<br />
2
2. Parts Diagram<br />
Quantity varies according to model purchased. Specifications subject to change without prior notice. For<br />
more details on hardware, please see the corresponding ‘Hardware Reference Diagram’.<br />
A4<br />
A3<br />
A1<br />
A2<br />
B7<br />
B6<br />
C2<br />
B1<br />
C1<br />
B2<br />
C3<br />
B4<br />
B3<br />
B12<br />
B5<br />
B8<br />
B11<br />
B9<br />
C20<br />
C21<br />
B10<br />
C13<br />
C4<br />
C10<br />
C5<br />
C8<br />
C7<br />
C9<br />
C6<br />
C11<br />
C15<br />
C12<br />
C16<br />
C14<br />
C18<br />
C17<br />
C19<br />
3
3. Hardware Reference Diagram<br />
Specifications subject to change without prior notice.<br />
CODE PART ILLUSTRATION QTY<br />
CODE PART ILLUSTRATION QTY<br />
D1<br />
ST4.0x10<br />
Screw 35<br />
D4<br />
M6x40<br />
Bolt 16<br />
D2<br />
M4x10<br />
Bolt 4<br />
D5<br />
M6 Nut<br />
12<br />
D3<br />
M6x15<br />
Bolt 16<br />
4
4. <strong>Assembly</strong><br />
IMPORTANT!<br />
• TOOLS NEEDED FOR ASSEMBLY: Medium size flat blade or Phillips/Crosspoint screwdriver,<br />
adjustable spanner or metric spanner set<br />
• The assembly of this barbecue requires 2 people.<br />
• Carefully unpack the trolley <strong>and</strong> body boxes <strong>and</strong> remove all internal packaging be<strong>for</strong>e commencing<br />
assembly. All loose items including the flame tamer <strong>and</strong> warming rack must be removed from the body.<br />
• Whilst every care is taken in the manufacture of this product, care must be taken during assembly in<br />
case sharp edges are present.<br />
• Please read the Important In<strong>for</strong>mation section carefully be<strong>for</strong>e assembly <strong>and</strong> use of your<br />
barbecue.<br />
1<br />
Left Cabinet Panel <strong>Assembly</strong><br />
Right Cabinet Panel <strong>Assembly</strong><br />
Attach the Legs (C4,C5,C6,C7) to the Cabinet Side Panels (C9,C10) using ST4.0x10 Screws (D1)<br />
as shown.<br />
2<br />
ST4.0x10 Screw<br />
M6x40 Bolt <strong>and</strong> M6 Nut<br />
Attach the left / right cabinet panel assembly to the Cabinet Bottom Panel (C16) using<br />
ST4.0x10 Screws (D1), M6x40 Bolts (D4) <strong>and</strong> M6 Nuts (D5) as shown.<br />
5
3<br />
Attach the Cabinet Back Panel (C15) to the assembled portion of the cabinet using the ST4.0x10<br />
Screws (D1).<br />
NOTE: These screw holes have weld nuts, so no nuts are required <strong>for</strong> these screws.<br />
4<br />
Attach the Upper Body Support (C8) to the<br />
front legs using M6x15 Bolts (D3).<br />
Attach the Gas Bottle Support (C17) to the<br />
cabinet bottom panel using the M6x15 Bolts<br />
(D3) <strong>and</strong> M6 Nuts (D5).<br />
6
5<br />
Screw the Casters (C18) into the left legs <strong>and</strong> the Lockable Casters (C19) into the right legs.<br />
Carefully turn the completed cabinet over, right side up.<br />
6<br />
Carefully place the Barbecue Body (B1) onto the cabinet structure <strong>and</strong> fix using M6x40 Bolts (D4) as<br />
shown.<br />
WARNING: DO NOT RELEASE THE BARBECUE BODY WHILE THE BARBECUE HAS NOT BEEN<br />
PROPERLY SEATED. THIS MAY RESULT IN INJURY OR DAMAGE TO YOUR BARBECUE.<br />
CAUTION! Care must be taken to ensure the hood or lid does not fall open unexpectedly or<br />
becomes damaged when it is set on the ground.<br />
7
7<br />
Connect the gas hose to the barbecue.<br />
Ensure the mating faces of the connection are clean <strong>and</strong> not damaged. Do not use any<br />
sealing tape, paste, or liquid on the connection. The nut must be tightened with the use of<br />
a spanner. Do not use <strong>for</strong>ce which may damage the assembly.<br />
8<br />
Attach the Side <strong>Burner</strong> Shelf (C1) <strong>and</strong> Right Side Shelf (C3) to the barbecue body using M6x15<br />
Bolts (D3), making sure that the side burner shelf is fixed onto the left side of the body.<br />
8
9<br />
Insert M4x10 Bolts (D2) through the side burner shelf <strong>and</strong> side of the Control<br />
Panel (B3) <strong>and</strong> tighten. Repeat this process <strong>for</strong> the right side shelf.<br />
10<br />
Fix the Electronic Ignition <strong>Assembly</strong> (C20) <strong>and</strong> Heat Shield (C21) to the front left leg by<br />
inserting two ST4.0x10 Screws (D1) through the electronic ignition assembly <strong>and</strong> heat<br />
shield <strong>and</strong> screw into the front left leg.<br />
9
11<br />
Connect the wires to the electronic ignition<br />
assembly as shown in the diagram to the<br />
right.<br />
Insert the electronic ignition battery (not supplied)<br />
into the battery compartment, ensuring<br />
the battery is correctly installed according to<br />
the (+) (-) markings.<br />
<strong>Phoenix</strong> 4 <strong>Burner</strong> <strong>Black</strong> / Stainless Steel<br />
Electronic Ignition <strong>Assembly</strong> Diagram<br />
<strong>Black</strong><br />
<strong>Black</strong> <strong>Black</strong><br />
<strong>Black</strong><br />
<strong>Black</strong><br />
9V Battery<br />
(not included)<br />
Wire<br />
Switch<br />
<strong>Black</strong> Wires<br />
(With Large Leads)<br />
12<br />
Connect the gas hose to the Side <strong>Burner</strong> Shelf (C1) as shown.<br />
Ensure the mating faces of the connection are clean <strong>and</strong> not damaged. Do not use any<br />
sealing tape, paste, or liquid on the connection. The nut must be tightened with the use<br />
of a spanner. Do not use <strong>for</strong>ce which may damage the assembly.<br />
10
13<br />
Attach Drip Tray Right Bracket (B9) to legs using ST4.0x10 Screws (D1) as shown.<br />
Repeat above process <strong>for</strong> Drip Tray Left Bracket (B8).<br />
14<br />
Fit the Doors (C11, C12) to the cabinet by depressing the spring pins <strong>and</strong> placing<br />
into the cabinet.<br />
Attach the Basket (C14) onto the right door as shown.<br />
11
15<br />
Carefully lay the Flame Tamer (B6) into the body ensuring it lies level within the body. Lay the<br />
Grills (B7) into place.<br />
NOTE: No lava rock is required when using the flame tamer.<br />
16<br />
Insert the Drip Tray (B11) by sliding it underneath the barbecue body.<br />
12
17<br />
18<br />
Place the Side <strong>Burner</strong> Grid (C2) onto the<br />
side burner shelf.<br />
Attach the Warming Rack (A4) to Barbecue<br />
Body (B1) as shown.<br />
ASSEMBLY IS NOW COMPLETE.<br />
PROCEED TO THE NEXT PAGE FOR INSTRUCTIONS ON OPERATION AND<br />
MAINTENANCE<br />
ALL JOINTS AND CONNECTIONS MUST NOW BE LEAK TESTED BEFORE USING<br />
THE BARBECUE.<br />
Leak test annually, <strong>and</strong> whenever the gas bottle is removed or replaced.<br />
LEAK TESTING<br />
Always per<strong>for</strong>m a leak test in a well-ventilated area.<br />
Step 1 - Confirm all control knobs are in the off position.<br />
Step 2 - Detach the barbecue control panel located across the front of the barbecue body<br />
by pulling off the control knobs <strong>and</strong> removing the control panel retaining screws.<br />
Step 3 - Turn the gas on / open the gas control valve on the gas bottle or regulator<br />
Step 4 - Check <strong>for</strong> leaks by brushing a solution of ½ water <strong>and</strong> ½ liquid detergent / soap<br />
over all the gas system joints, including all valve connections, hose connections, <strong>and</strong> regulator<br />
connections.<br />
Step 5 - NEVER USE AN OPEN FLAME to test <strong>for</strong> leaks at any time.<br />
Step 6 - If bubbles <strong>for</strong>m over any of the joints there is a leak<br />
• Turn off the gas supply at the gas bottle<br />
• Retighten all joints<br />
• Repeat test<br />
• If bubbles <strong>for</strong>m again do not use the barbecue <strong>and</strong> contact your local Outback distributor<br />
<strong>for</strong> assistance.<br />
13
5. Important In<strong>for</strong>mation<br />
Please read these instructions carefully<br />
be<strong>for</strong>e assembly <strong>and</strong> use of your barbecue.<br />
Retain these instructions <strong>for</strong> future<br />
reference.<br />
This product is <strong>for</strong> outdoors use only. Do not<br />
use indoors.<br />
Do not use the barbecue or store gas bottles<br />
below ground level. LP gas is heavier than<br />
air so if a leak occurs the gas will collect at a<br />
low level <strong>and</strong> could ignite in the presence of<br />
a flame or spark.<br />
For use with LPG bottled gas only. A<br />
suitable regulator must be used <strong>for</strong> Butane,<br />
propane or mixes.<br />
Remove plastic wrap from any part be<strong>for</strong>e<br />
lighting.<br />
Do not use within 1m of any flammable<br />
structure or surface. Do not use under any<br />
combustible surface.<br />
LP gas bottles should never be placed<br />
directly underneath the barbecue.<br />
LP gas bottles should never be stored or<br />
used laid on their side, in the horizontal<br />
position. A leak would be very serious <strong>and</strong><br />
liquid could enter the gas line with serious<br />
result.<br />
Never store gas bottles indoors<br />
Open the barbecue hood or lid be<strong>for</strong>e<br />
lighting.<br />
Once lit, do not move the barbecue until it<br />
has completely cooled, after use.<br />
This barbecue must not be left unattended<br />
when lit.<br />
The hood or lid h<strong>and</strong>le can become very hot.<br />
Grip only the centre of the h<strong>and</strong>le. Always<br />
use oven gloves when cooking or carrying<br />
out any adjustments to the barbecue.<br />
Use purpose designed barbeque tools with<br />
long, heat resistant h<strong>and</strong>les.<br />
Use caution when opening the hood or lid,<br />
as hot steam inside is released upon<br />
opening.<br />
Parts of this barbecue become very hot –<br />
care must be taken, especially when<br />
children, elderly people, <strong>and</strong> animals are<br />
present.<br />
Turn off the gas supply at the gas bottle<br />
after use.<br />
Never cover a barbecue until it has<br />
completely cooled.<br />
Use this barbecue only on a stable, flat<br />
surface.<br />
Be<strong>for</strong>e you use your barbecue, per<strong>for</strong>m a<br />
leak test. This is the only safe <strong>and</strong> sure way<br />
to detect any gas leaking from joints <strong>and</strong><br />
connections of the barbecue after assembly.<br />
Leak test annually, <strong>and</strong> whenever the gas<br />
bottle is removed or replaced.<br />
Do not store flammable materials near this<br />
barbecue.<br />
Do not use aerosols near this barbecue.<br />
Failure to follow the manual’s instructions<br />
could result in serious injury or damage.<br />
Modification of the barbecue may be<br />
dangerous, is not permitted <strong>and</strong> will nullify<br />
any warranty.<br />
If you have any queries regarding these<br />
instructions, contact your local dealer.<br />
6. Gas, Regulator <strong>and</strong> Hose<br />
This barbecue can use either propane or<br />
butane or propane/ butane mixed LPG (liquid<br />
petroleum gas) bottled gas. Propane bottles,<br />
will supply gas all year round, even on cold<br />
winter days. Butane bottles will supply sufficient<br />
gas in summer, but it may affect the<br />
per<strong>for</strong>mance of the barbecue <strong>and</strong> restrict the<br />
heat output available from the burners,<br />
particularly once the gas temperature starts to<br />
fall below +10°C. A spanner may be required to<br />
change gas bottles. Check that you have the<br />
correct gas bottle <strong>and</strong> regulator <strong>for</strong> your<br />
barbecue.<br />
Ensure that the gas bottle is placed correctly<br />
into the gas bottle support provided. This is<br />
located inside the cabinet.<br />
• The hose should hang freely with no bends,<br />
twisting, tension, folds, or kinks that could<br />
obstruct free flow of gas. Always inspect<br />
the hose <strong>for</strong> cuts, cracks, or excessive wear<br />
be<strong>for</strong>e use.<br />
• Apart from the connection point, no part of<br />
the hose should touch any hot barbecue<br />
parts. If the hose shows any sign of<br />
damage it must be replaced with a hose<br />
suitable <strong>for</strong> use with LPG which meets the<br />
national st<strong>and</strong>ards <strong>for</strong> the country of use.<br />
• The length of hose should not exceed 1.5<br />
metres. N.B.-The date on the orange hose<br />
(if supplied) is the date of manufacture, not<br />
the expiry date.<br />
YOU MUST HAVE THE PROPER<br />
REGULATOR AND BOTTLE IN ORDER FOR<br />
14
THE BARBECUE TO OPERATE SAFELY AND<br />
EFFICIENTLY. USE OF AN INCORRECT OR<br />
FAULTY REGULATOR IS DANGEROUS AND<br />
WILL INVALIDATE ANY WARRANTY. Please<br />
consult your local gas dealer <strong>for</strong> the most<br />
suitable gas bottles <strong>and</strong> regulators.<br />
7. Installation<br />
7.1. Selecting a Location<br />
This barbecue is <strong>for</strong> outdoor use only <strong>and</strong><br />
should be placed in a well-ventilated area, <strong>and</strong><br />
on a safe <strong>and</strong> even surface. Never place your<br />
barbecue below ground level. Take care to<br />
ensure that it is not placed UNDER any<br />
combustible surface. The sides of the barbecue<br />
should NEVER be closer than 1 metre from any<br />
combustible surface, including trees <strong>and</strong> fences<br />
<strong>and</strong> that there are no heat sources near the<br />
barbecue (cigarettes, open flames, spark etc.).<br />
Keep this barbecue away from any flammable<br />
materials!<br />
7.2. Precautions<br />
Do not obstruct any ventilation openings in the<br />
barbecue body.<br />
Should you need to install or change the gas<br />
bottle, confirm that the barbecue is switched off,<br />
<strong>and</strong> that there are no sources of ignition<br />
(cigarettes, open flame, sparks, etc.) near<br />
be<strong>for</strong>e proceeding.<br />
The casters should always have the brakes on<br />
when the barbecue is in use.<br />
7.3. Connecting a Gas Hose to the Barbecue<br />
Connect the gas hose to the gas rail inlet on the<br />
left h<strong>and</strong> side of the barbecue. Do not<br />
overtighten. Do not use any sealing tape, paste<br />
or liquid on the connection.<br />
7.4. Fixing a Regulator to the Gas Bottle<br />
Confirm all barbecue control knobs are in the off<br />
position. Connect the regulator to the gas bottle<br />
according to your regulator <strong>and</strong> bottle dealer’s<br />
instructions.<br />
8. Operation<br />
8.1. Warnings<br />
Be<strong>for</strong>e proceeding, make certain that you<br />
underst<strong>and</strong> the IMPORTANT<br />
INFORMATION section of this manual.<br />
Your barbecue is not designed to be used<br />
with more than 50% of the cooking area as a<br />
solid plate — this includes baking dishes.<br />
Full coverage will cause excessive build-up<br />
of heat <strong>and</strong> damage the barbecue. This is<br />
not covered by warranty.<br />
8.2. Preparation Be<strong>for</strong>e Cooking<br />
To prevent foods from sticking to the cooking<br />
surface, please use a long h<strong>and</strong>led brush to<br />
apply a light coat of cooking or vegetable oil<br />
be<strong>for</strong>e each barbecuing session. (Note:<br />
When cooking <strong>for</strong> the first time, paint colours<br />
may change slightly as a result. This is normal<br />
<strong>and</strong> should be expected.)<br />
Line the drip tray with aluminium foil, then place<br />
a uni<strong>for</strong>m layer of clean, dry s<strong>and</strong> 1cm deep<br />
into the tray. This will absorb excess cooking<br />
fat, thus making cleanup easy.<br />
8.3. Lighting the Barbecue<br />
• Open the barbecue <strong>and</strong> side burner hood<br />
or lid be<strong>for</strong>e lighting. Never light your<br />
barbecue or side burner with the hood or lid<br />
closed.<br />
• Ensure all knobs are in the off position.<br />
Open the gas control valve on the gas<br />
bottle or regulator.<br />
• Push the control knob of the burner you<br />
wish to light <strong>and</strong> turn it to the high position.<br />
Push <strong>and</strong> hold in the igniter button in the<br />
centre of the control panel <strong>for</strong> 4 to 5<br />
seconds to light the burner.<br />
• Ignite any of the remaining burners in any<br />
order, as needed. Confirm each burner is<br />
alight be<strong>for</strong>e igniting another burner.<br />
• If burner fails to ignite after following above<br />
procedure, turn all the knobs to the off<br />
position. Close the gas valve on the gas<br />
bottle. Wait 5 minutes. Reattempt all of the<br />
above steps. If the barbecue still fails to<br />
light, please refer to the manual ignition<br />
instructions below.<br />
• After ignition, turn the burners to the high<br />
position <strong>for</strong> 3-5 minutes in order to pre-heat<br />
the barbecue. This should be done be<strong>for</strong>e<br />
each cooking session. The hood or lid<br />
should be open during preheating.<br />
• After completion of preheating, turn all<br />
burners to the low position <strong>for</strong> best cooking<br />
results.<br />
8.4. Manual Ignition <strong>Instructions</strong><br />
• Open the barbecue <strong>and</strong> side burner hood<br />
or lid be<strong>for</strong>e lighting. Never light your<br />
15
arbecue or side burner with the hood or lid<br />
closed.<br />
• Ensure all knobs are in the off position.<br />
Open the gas control valve on the gas<br />
bottle or regulator.<br />
• Insert lit match through the right matchlighting<br />
hole on the underside of the<br />
barbecue body <strong>and</strong> place near rightmost<br />
burner porthole.<br />
• Push <strong>and</strong> turn the rightmost control knob<br />
anti-clockwise to the high position, taking<br />
care to protect yourself from the flames.<br />
• When the right burner is lit, turn the<br />
remaining burners on from right to left.<br />
• Confirm that each burner is alight be<strong>for</strong>e<br />
turning on the next burner.<br />
• To light the side burner place the lit end of<br />
a long match alongside the side burner.<br />
Push <strong>and</strong> turn the side burner control knob<br />
anti-clockwise to the high position, taking<br />
care to protect yourself from the flames.<br />
• If a burner fails to ignite, contact your<br />
local dealer <strong>for</strong> assistance.<br />
• After ignition, turn the burners to the high<br />
position <strong>for</strong> 3-5 minutes in order to preheat<br />
the barbecue. This should be done<br />
be<strong>for</strong>e each cooking session. The hood or<br />
lid should be open during preheating.<br />
• After completion of preheating, turn all<br />
burners to the low position <strong>for</strong> best cooking<br />
results.<br />
8.5. Grill Cooking<br />
The burners heat up the flame tamer<br />
underneath the grill, which in turn heats the<br />
food on the grill. The natural food juices<br />
produced during cooking fall onto the flame<br />
tamer below <strong>and</strong> vaporise. The subsequent<br />
rising smoke bastes the food, as it travels<br />
upwards, imparting that unique barbecued<br />
flavour.<br />
8.6. Roasting Hood Cooking<br />
Barbecues equipped with a roasting hood give<br />
the option to <strong>for</strong>m an ‘oven’ <strong>for</strong> roasting or<br />
baking food, such as joints of meat or whole<br />
chickens, etc. More even cooking of food will<br />
actually be achieved by using the barbecue with<br />
the hood down. However, this should only be<br />
done with the burners on low.<br />
For best results, place the food you wish to<br />
bake or roast on a metal baking tray <strong>and</strong> set it<br />
on one side of the cooking grill.<br />
Turn the burner directly under the food to the<br />
OFF position <strong>and</strong> turn all other burners to a<br />
LOW to MEDIUM position.<br />
Close the hood to cook the food ‘indirectly’.<br />
Avoid lifting the hood unnecessarily as heat is<br />
lost every time the hood is opened. If the hood<br />
is opened during cooking please allow extra<br />
time <strong>for</strong> the barbecue to regain its temperature<br />
<strong>and</strong> complete the cooking. Use the temperature<br />
gauge (if applicable) to monitor the heat of the<br />
barbecue.<br />
If the internal heat becomes too high, turn the<br />
burners down to the low position. It is not<br />
necessary or advisable to have all of the<br />
burners on high when the hood is closed.<br />
DO NOT ALLOW YOUR BARBECUE TO<br />
OVERHEAT. Take care when opening the hood<br />
as hot steam can be released on opening.<br />
8.7. Warming Rack (where supplied)<br />
Warming racks are a convenient way to keep<br />
cooked food warm or to warm items such as<br />
bread rolls. It is advisable to place food<br />
(particularly fatty foods) to the front of the<br />
warming rack to avoid the possibility of juices<br />
<strong>and</strong> fat running down the back of your<br />
barbecue. Always check that your warming<br />
rack is properly fitted be<strong>for</strong>e use.<br />
8.8. Rotisserie <strong>Operating</strong> <strong>Instructions</strong><br />
(Optional accessory, hooded models only)<br />
1. Carefully remove the cooking surfaces <strong>and</strong><br />
the warming rack (where supplied) from the<br />
barbecue.<br />
2. If applicable, slide the lava rock in baskets<br />
to the centre of the barbecue body. It is<br />
over this area that the meat will be cooked.<br />
3. Slide one of the spit <strong>for</strong>ks onto the spit rod<br />
<strong>and</strong> tighten its thumb screw to secure it into<br />
place. Insert the pointed end of the spit rod<br />
into the meat being cooked <strong>and</strong> slide the<br />
meat towards the centre of the rod. Make<br />
sure the <strong>for</strong>k is fully into the meat. Slide the<br />
other <strong>for</strong>k onto the rod, into the meat, <strong>and</strong><br />
tighten the thumb screw once in place. For<br />
optimal rotisserie cooking, food must be<br />
placed securely onto the middle of the spit<br />
rod <strong>and</strong> balanced so that the rotisserie can<br />
rotate freely without interference from any<br />
barbecue surfaces. Any loose sections of<br />
meat should be secured so they do not<br />
hang down <strong>and</strong> interfere with the rotation of<br />
the spit rod. Do not overload the rotisserie.<br />
A chicken or joint of meat of approximately<br />
2kg should be the maximum.<br />
16
4. Insert the pointed end of the spit rod into<br />
the motor. Lay the other end of the spit rod<br />
onto the opposite bracket.<br />
5. Light the grill as specified in your<br />
barbecue’s instructions.<br />
6. Turn on the rotisserie motor to begin<br />
rotisserie cooking. The hood has been<br />
designed so that it may be closed during<br />
rotisserie cooking.<br />
7. Always cook foods on the lowest flame<br />
setting to avoid burning or overcooking.<br />
8 . 9 . F l a r e - U p C o n t r ol<br />
*** Very Important Notice ***<br />
Flare-ups occur when meat is barbecued, <strong>and</strong><br />
its fat <strong>and</strong> juices fall upon the hot flame tamer.<br />
Smoke of course helps give food its barbecued<br />
flavour, but it is best to avoid excessive flare-up<br />
to prevent food being burned. To control flareups,<br />
it is ABSOLUTELY ESSENTIAL to trim<br />
away excess fat from meat <strong>and</strong> poultry be<strong>for</strong>e<br />
grilling, use cooking sauces <strong>and</strong> marinades<br />
sparingly <strong>and</strong> try to avoid very cheap cuts of<br />
meat or meat products as these tend to have a<br />
high fat <strong>and</strong> water content. Also, the burners<br />
should always be placed on the low setting<br />
during cooking.<br />
When flare-ups do occur, they can usually be<br />
extinguished by applying baking soda or salt<br />
directly onto the flame tamer. Always protect<br />
your h<strong>and</strong>s when h<strong>and</strong>ling anything near the<br />
cooking surface of the barbecue <strong>and</strong> take care<br />
to protect yourself from the flames.<br />
If a fat fire occurs, please see the instructions<br />
given below.<br />
8.10. Fat Fires<br />
Empty <strong>and</strong> clean the drip tray (<strong>and</strong> foil liner, if<br />
applicable) of food debris after each cooking<br />
session. If the barbecue is to be used <strong>for</strong> large<br />
gatherings, it will be necessary to turn off <strong>and</strong><br />
cool the barbecue every two hours to remove<br />
food debris from the drip tray (<strong>and</strong> foil liner, if<br />
applicable) <strong>and</strong> clean it out. The time between<br />
cleaning may need to be reduced if very fatty<br />
foods or cheap meat products are being<br />
cooked. Failure to do this may result in a fat<br />
fire, which may cause injury <strong>and</strong> could seriously<br />
damage the barbecue.<br />
In the event of a fat fire:<br />
• If safe to do so, turn all control knobs to the<br />
‘off’ position<br />
• Turn off the gas supply at the gas bottle<br />
• Keep everyone at a safe distance from the<br />
barbecue <strong>and</strong> wait until the fire has burnt<br />
out.<br />
• Do not close the hood or lid of the barbecue.<br />
• NEVER DOUSE A BARBECUE WITH<br />
WATER. IF AN EXTINGUISHER IS USED,<br />
IT SHOULD BE A POWDER TYPE.<br />
• DO NOT REMOVE THE DRIP TRAY<br />
• If the fire does not seem to be abating or<br />
appears to be worsening, contact your local<br />
Fire Brigade <strong>for</strong> assistance.<br />
8.11. End of Cooking Session<br />
After each cooking session, turn the barbecue<br />
burners to the “high” position <strong>and</strong> burn <strong>for</strong> 5<br />
minutes. This procedure will burn off cooking<br />
residue, thus making cleaning easier. Make<br />
sure the hood or lid is open during this process.<br />
8.12. Turning Off Your Barbecue<br />
When you have finished using your barbecue,<br />
turn all the control valves fully clockwise to the<br />
“Off” position, then switch off the gas at the<br />
bottle.<br />
Wait until the barbecue is sufficiently cool<br />
be<strong>for</strong>e closing its hood or lid.<br />
9. Care <strong>and</strong> Maintenance<br />
Regularly clean your barbecue between uses<br />
<strong>and</strong> especially after extended periods of<br />
storage. Ensure the barbecue <strong>and</strong> its<br />
components are sufficiently cool be<strong>for</strong>e<br />
cleaning. Do not leave the barbecue exposed to<br />
outside weather conditions or stored in damp,<br />
moist areas.<br />
Never h<strong>and</strong>le hot parts with unprotected<br />
h<strong>and</strong>s.<br />
Never douse the barbecue with water when<br />
its surfaces are hot.<br />
In order to extend the life <strong>and</strong> maintain the<br />
condition of your barbecue, we strongly<br />
recommend that the unit be covered when left<br />
outside <strong>for</strong> any length of time, especially during<br />
the winter months. Heavy-duty barbecue covers<br />
<strong>and</strong> other accessories are available from your<br />
local stockist.<br />
Even when your barbecue is covered <strong>for</strong> its<br />
protection, it must be inspected on a regular<br />
basis as damp or condensation can <strong>for</strong>m which<br />
17
may result in damage to the barbecue. It may<br />
be necessary to dry the barbecue <strong>and</strong> the<br />
inside of the cover. It is possible <strong>for</strong> mould to<br />
grow on any fat remaining on parts of the<br />
barbecue. This should be cleaned off smooth<br />
surfaces with hot soapy water.<br />
Any rust that is found that does not come into<br />
contact with the food should be treated with a<br />
rust inhibitor <strong>and</strong> painted with barbecue paint or<br />
a heat resistant paint. Chrome plated warming<br />
racks etc. should be coated with cooking oil.<br />
9.1. Cooking Surfaces & Warming Rack<br />
When the barbecue has cooled, clean with hot<br />
soapy water. To remove any food residue, use<br />
a mild cream cleaner on a non-abrasive pad.<br />
Do not use scouring pads or powders as they<br />
can permanently damage the finish. Rinse well<br />
<strong>and</strong> dry thoroughly. Due to the weight of the<br />
cooking surfaces, we do not recommend<br />
cleaning in a dishwasher.<br />
A chrome cleaner may be used on chrome<br />
parts if required. To prevent rusting, wipe with<br />
cooking oil after rinsing <strong>and</strong> drying.<br />
9.2. <strong>Burner</strong><br />
Provided that they are operating correctly, in<br />
normal usage, burning off the residue after<br />
cooking will keep the burners clean.<br />
The burners should be removed <strong>and</strong> cleaned<br />
annually, or whenever heavy build-up is found,<br />
to ensure that there are no signs of blockage<br />
(debris, insects) in either the burner portholes or<br />
the primary air inlet of the burners. Use a pipe<br />
cleaner to clear obstructions.<br />
When refitting the burners, be careful to check<br />
that the neck of the burner fits over the valve<br />
outlet.<br />
9.3. Flame Tamer (where supplied)<br />
Remove any food residue from the flame tamer<br />
surface with a plastic or wooden scraper or<br />
brass wire brush. Do not use a steel scraper or<br />
wire brush. Clean with hot soapy water <strong>and</strong><br />
rinse well.<br />
9.4. Drip Tray<br />
After every use, empty <strong>and</strong> clean the drip tray of<br />
any fat or food particles, using a plastic or<br />
wooden scraper if necessary.<br />
<strong>and</strong> severely damage the barbecue. This is not<br />
a fault in the barbecue <strong>and</strong> is there<strong>for</strong>e not<br />
covered by the terms of the warranty. If<br />
required, the tray can be washed in hot soapy<br />
water.<br />
9.5. Barbecue Body<br />
Regularly remove excess grease or fat from the<br />
barbecue body using a cloth wrung out in hot<br />
soapy water <strong>and</strong> dry thoroughly. Excess fat <strong>and</strong><br />
food debris can be removed from inside the<br />
body using a soft plastic or wooden scraper. It<br />
is not necessary to remove all the grease from<br />
the body. If you need to clean fully, use hot<br />
soapy water <strong>and</strong> a cloth, or nylon-bristled brush<br />
only. Do not use abrasives. Remove cooking<br />
surfaces <strong>and</strong> burners be<strong>for</strong>e full cleaning. Do<br />
not immerse the gas controls or manifold in<br />
water. Check burner operation after carefully<br />
refitting into body.<br />
A stainless steel cleaner may be used on<br />
stainless steel parts if required.<br />
9.6. Barbecue Hood or Lid<br />
Use a non-abrasive cloth or pad <strong>and</strong> clean with<br />
hot, soapy water. Do not use scouring pads or<br />
powders as they can permanently damage the<br />
finish.<br />
9.7. Fixings<br />
All screws <strong>and</strong> bolts, etc. should be checked<br />
<strong>and</strong> tightened on a regular basis.<br />
9.8. Storage<br />
Ensure the barbecue is properly cooled be<strong>for</strong>e<br />
covering or storing. Store your barbecue in a<br />
cool dry place.<br />
Cover the burners with aluminium foil in order to<br />
prevent insects or other debris from collecting in<br />
burner holes.<br />
If the barbecue is to be stored indoors, the gas<br />
bottle must be disconnected <strong>and</strong> left outside.<br />
The gas bottle should always be stored outside,<br />
in a dry, well-ventilated area, away from any<br />
sources of heat or ignition. Do not let children<br />
tamper with the bottle.<br />
When using the barbecue after extended<br />
periods of storage follow the cleaning<br />
procedures.<br />
Failure to keep it clean, <strong>and</strong> excessive build up<br />
can result in a fat fire. This can be hazardous<br />
18
10. Technical Specifications<br />
Notes:<br />
CE<br />
Approval<br />
Heat<br />
Input<br />
<strong>Burner</strong>s<br />
Injector<br />
Size<br />
Gas /Pressure<br />
Outback®<br />
<strong>Phoenix</strong><br />
4 <strong>Burner</strong><br />
<strong>Black</strong><br />
0359<br />
359BR665<br />
13.0<br />
kW<br />
4<br />
0.90mm<br />
0.90mm<br />
0.89mm<br />
0.84mm<br />
28-30 mbar Butane<br />
or 37 mbar Propane<br />
30 mbar LPG mixture<br />
37 mbar LPG mixture<br />
50 mbar LPG mixture<br />
Outback®<br />
<strong>Phoenix</strong><br />
4 <strong>Burner</strong><br />
Stainless<br />
Steel<br />
0359<br />
359BR665<br />
13.0<br />
kW<br />
4<br />
0.90mm<br />
0.90mm<br />
0.89mm<br />
0.84mm<br />
28-30 mbar Butane<br />
or 37 mbar Propane<br />
30 mbar LPG mixture<br />
37 mbar LPG mixture<br />
50 mbar LPG mixture<br />
Side<br />
<strong>Burner</strong><br />
0359<br />
359BR665<br />
2.8<br />
kW<br />
1<br />
0.84mm<br />
0.84mm<br />
0.81mm<br />
0.79mm<br />
28-30 mbar Butane<br />
or 37 mbar Propane<br />
30 mbar LPG mixture<br />
37 mbar LPG mixture<br />
50 mbar LPG mixture<br />
Gas Consumption:<br />
<strong>Phoenix</strong> 4 <strong>Burner</strong> <strong>Black</strong>: 935g/hr<br />
<strong>Phoenix</strong> 4 <strong>Burner</strong> Stainless Steel: 935g/hr<br />
Side <strong>Burner</strong>: 201g/hr<br />
Countries of Use:<br />
I 3+ (28-30/37) BE, CY, CZ, EE, FR, GR, IE, IT, LV, LT, LU, PT, SK, ES,<br />
CH, GB, RO<br />
I 3B/P(30) BG, CY, CZ, DK, EE, FI, GR, HR, LV, LT, LU, MT, NL, NO,<br />
SK, SI, SE, TR, IS<br />
I 3B/P(50) AT, DE, HU, SK, CH<br />
PL<br />
I 3B/P(37)<br />
Specifications subject to change without prior notice.<br />
19
11. Troubleshooting<br />
Problem Possible Cause Solution<br />
<strong>Burner</strong>s will not light using<br />
the ignition system<br />
<strong>Burner</strong> will not light with a<br />
match<br />
Low flame or flashback<br />
(fire in burner tube— a<br />
hissing or roaring noise<br />
may be heard)<br />
Gas valve knob difficult to<br />
turn<br />
LP gas bottle is empty<br />
Faulty regulator<br />
Obstructions in burner<br />
Obstructions in gas jets or gas<br />
hose<br />
Electrode or ignition button wire is<br />
loose or disconnected on electrode or<br />
ignition unit<br />
Electrode or wire is damaged<br />
Incorrect electrode gap/ Bent collector<br />
box<br />
Poor connection of battery in<br />
Ignition assembly<br />
LP gas bottle is empty<br />
Faulty regulator<br />
Obstructions in burner<br />
Obstructions in gas jets or gas<br />
hose<br />
LP gas bottle too small<br />
Obstructions in burner<br />
Obstructions in gas jets or gas<br />
hose<br />
Windy conditions<br />
Gas valve jammed<br />
Replace with full bottle<br />
Have regulator checked or replaced<br />
Clean burner<br />
Clean jets <strong>and</strong> gas hose<br />
Reconnect wire<br />
Change electrode <strong>and</strong> wire<br />
The gas collector box around the<br />
electrode needs to be in line with the<br />
burner with a gap of 3 to 4mm between<br />
the end of the electrode <strong>and</strong> the tag on<br />
the end of the collector box. Realign<br />
the collector box as required.<br />
Ensure battery is firmly pushed onto<br />
connectors<br />
Replace with full bottle<br />
Have regulator checked or replaced<br />
Clean burner<br />
Clean jets <strong>and</strong> gas hose<br />
Use larger bottle<br />
Clean burner<br />
Clean jets <strong>and</strong> gas hose<br />
Use barbecue in a more sheltered<br />
position<br />
Replace gas valve<br />
For reference <strong>and</strong> correspondence, record your serial number here.<br />
(See sticker on side of barbecue body.)<br />
Serial No.__________________<br />
This number may be required when ordering spare parts or accessories.<br />
A part reference number may also be required where applicable. Published December 2008<br />
20