Technical Support - Cal Spas
Technical Support - Cal Spas
Technical Support - Cal Spas

Create successful ePaper yourself
Turn your PDF publications into a flip-book with our unique Google optimized e-Paper software.
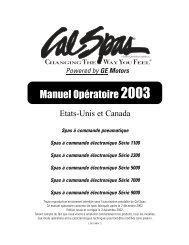
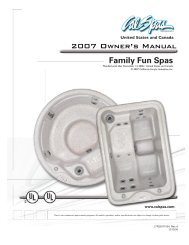
2003 Owner’s Manual<br />
USA and Canada<br />
Victory Series<br />
1500 Electronic<br />
Duplication without written consent is strictly prohibited.<br />
This Owner’s Manual is for spas manufactured after May 19, 2003<br />
Revised June 27, 2003<br />
Due to continuous improvement program, all models, operation, and/or specifications are subject to change without prior notice.<br />
LTR17000174
Table of Contents<br />
Safety Instructions ................................................................................................2<br />
Basic Spa Information ..........................................................................................4<br />
Quick Reference Information ................................................................................5<br />
Set-Up and Delivery Instructions ..........................................................................7<br />
110 Volt Installation Information ..........................................................................8<br />
220 Volt Installation Information ..........................................................................9<br />
Starting Up Your Portable Spa ............................................................................11<br />
Filter Maintenance Portable <strong>Spas</strong> ........................................................................12<br />
General Operation Instructions............................................................................13<br />
1500 Electronic Spa Control Operation ..............................................................15<br />
1500 Self- Diagnostics ........................................................................................17<br />
Clear Water Chemical Maintenance Plan ............................................................19<br />
Frequently Asked Chemical Questions................................................................33<br />
2003 Victory Spa Series Warranty Information ..................................................35<br />
Winterizing and Draining Your <strong>Cal</strong> Spa..............................................................37<br />
Replacement Parts Reference Card ....................................................................38<br />
1
IMPORTANT SAFETY INSTRUCTIONS<br />
When installing and using this electrical equipment, basic safety precautions should always be<br />
followed, including the following:<br />
READ AND FOLLOW ALL INSTRUCTIONS<br />
WARNING: To reduce the risk of injury, do not permit children to use this product unless they are<br />
supervised at all times.<br />
All 110 volt spas require a DEDICATED 20 AMP GFCI SERVICE. Do not use extension cords.<br />
Note: This may require a licensed electrician to upgrade your standard receptacle and/or circuit<br />
breaker.<br />
All 220 volt spas require a DEDICATED 50 AMP GFCI SERVICE WITH FOUR # 6 AWG<br />
COPPER WIRES.<br />
DANGER RISK OF ACCIDENTAL DROWNING: Extreme caution must be exercised to prevent<br />
unauthorized access by children. To avoid accidents, ensure that children cannot use the spa unless<br />
they are closely supervised at all times (Keep the spa cover on and locked when not in use. See<br />
instructions enclosed with your cover).<br />
DANGER –RISK OF INJURY: The suction fittings in this spa are sized to match the specific<br />
water flow created by the pump. Should the need arise to replace the suction fittings or the pump,<br />
be sure that the flow rates are compatible.<br />
DANGER RISK OF INJURY: Never operate spa if the suction fittings or filter baskets are broken<br />
or missing.<br />
DANGER RISK OF INJURY: Never replace suction fitting with one rated less than the flow rate<br />
marked on the original suction fitting.<br />
DANGER-RISK OF ELECTRIC SHOCK: Install spa at least 5 feet (1.5m) from all metal surfaces.<br />
As an alternative, a spa may be installed within 5 feet of metal surfaces if each metal surface is<br />
permanently bonded by a minimum No. 8 AWG solid copper conductor to the outside of the spas<br />
control box.<br />
DANGER -RISK OF ELECTRICAL SHOCK: Do not permit any electrical appliances, such as a<br />
lights, telephones, radios, televisions, and etc., within 5 feet (1.5m) of spa. Never attempt to<br />
operate any electrical device from inside the spa.<br />
2
Important Safety Instructions (Continued)<br />
WARNING RISK OF INJURY:<br />
a.)<br />
Before entering a spa, the user should measure the water temperature with an accurate thermometer, since the<br />
tolerance of water temperature-regulating devices varies.<br />
b.) The spa water should never exceed 104°F (40°C). Water temperatures between 100°F (38°C) and 104°F<br />
(40°C) are considered safe for a healthy adult. Lower water temperatures are recommend for young<br />
children, and when spa use exceeds 10 minutes.<br />
c.)<br />
d.)<br />
e.)<br />
f.)<br />
Since excessive water temperatures have a high potential for causing fetal damage during early months of<br />
pregnancy, pregnant or possibly pregnant women should always check with a physician prior to spa usage.<br />
The use of alcohol, drugs or medication before or during spa use may lead to unconsciousness<br />
with the possibility of drowning.<br />
Persons suffering from obesity or with a medical history of heart disease, low or high blood<br />
pressure, circulatory system problems or diabetes should consult a physician prior to spa usage.<br />
Persons using medications should consult a physician before using a spa since some<br />
medication may induce drowsiness while other medication may affect heart rate, blood<br />
pressure and circulation.<br />
HYPERTHERMIA:<br />
Hyperthermia occurs when the internal temperature of the body reaches a level several degrees above<br />
normal body temperature of 98.6˚F. (37˚C)<br />
Symptoms of Hyperthermia Include:<br />
Dizziness<br />
Fainting<br />
Drowsiness<br />
Lethargy<br />
Increase in internal body temperature<br />
The Effects of Hyperthermia Include:<br />
Unawareness of impending hazards<br />
Failure to perceive the need to exit the spa<br />
Physical inability to exit the spa<br />
Fetal damage in pregnant women<br />
Unconsciousness resulting in the possibility of drowning<br />
WARNING: The use of alcohol, drugs or medication can greatly increase the risk of fatal hyperthermia.<br />
Save these instructions.<br />
3
Basic Spa Information<br />
Your new <strong>Cal</strong> Spa has been engineered with a high-powered water pump that pushes water through various therapy jets, which<br />
will relax even the tightest of muscles. In addition to the water pressure, you can add air into the spa water with air venturies<br />
handles located seat side that increase the intensity of your massage.<br />
Do not be afraid to push buttons or turn knobs to learn about your new <strong>Cal</strong> Spa, as it is built with quality materials and excellent<br />
craftsmanship.<br />
The following operating and maintenance instructions are very important and must be followed carefully. With the proper care<br />
and maintenance, your <strong>Cal</strong> Spa will provide you with years of satisfaction and performance.<br />
The filtering of your spa is very important, this alone will cut down cleaning time and use of excess chemicals. We have<br />
pre-programmed two filter cycles of two hours every twelve hours. This can be increased to five hours every twelve hours by<br />
your <strong>Cal</strong> <strong>Spas</strong> authorized service technician for heavy spa usage.<br />
It is very important to keep the spa covered when not in use for three reasons. The first is heating efficiency; covered spas use<br />
less electricity in maintaining your set temperature. The second is to protect your spas finish from the suns ultraviolet rays.<br />
Covering your spa is mandatory to maintain warranty coverage. And again, to prevent children from falling and drowning.<br />
Operating your new <strong>Cal</strong> Spa equipped with an electric heater correctly will ensure efficient operation. The most efficient<br />
operating method is as follows:<br />
1. When not in use the spa cover should be securely fastened<br />
2. Set spas operating temperature within 5 degrees of desired usage temperature and raise temperature one to two hours prior to<br />
usage. (This method is only for spa usage under 2 hours a week)<br />
3. If spa usage exceeds two hours a week, set temperature should remain at desired usage temperature.<br />
4. The air venturi handles should be used sparingly. When open, water temperature drops quite rapidly and can also dissipate<br />
chemicals.<br />
Note: Allowing the water temperature to lower more than 10 degrees below desired usage temperature and reheating prior to<br />
usage will cause the heater to operate longer than it normally would maintaining the desired temperature.<br />
The filter needs to be cleaned on a regular basis. This is very simple and only takes a few minutes. The result is increased water<br />
clarity and equipment longevity. (See pages 12 for filter cleaning instructions.)<br />
The spa water level is very important to the operation of your spa. If the water level is too low or too high, your spa won’t run or<br />
clean properly. (The water level should be to the middle of the “skimmer area” when no one is in the water.)<br />
We recommend that your spa water be changed every 4 to 6 months. You may find the need to change your spa water more often<br />
with heavy use. When empty, your spa should be cleaned with a non-abrasive cleaner, such as “<strong>Cal</strong> <strong>Spas</strong> All Surface Cleaner,”<br />
then rinsed thoroughly.<br />
When draining your spa, turn off the power to the spa and attach a garden hose to the hose bib fixture located on the floor of the<br />
equipment area.<br />
When filling your spa, always fill through the skimmer filter canister. Only use regular tap water. DO NOT USE SOFT WATER.<br />
<strong>Spas</strong> built in the winter months may be delivered with the bleeder valves removed from the pumps and taped inside the control<br />
box. We remove the bleeder valves after water testing at the factory to prevent possible freeze damage during shipping. Prior to<br />
filling your spa for the first time, make sure you replace the air bleeder valves and check the equipment area for any unions that<br />
might have loosened during shipment.<br />
In addition to your portable spas’ redwood cabinet, you may have purchased a gazebo, cabana, steps or any other redwood<br />
accessory. We recommend that you protect them by applying a high quality redwood protectant, and repeat as specified in the<br />
directions. This is mandatory to maintain warranty coverage.<br />
4
Quick Reference Information<br />
Set Up and Delivery:<br />
Electrical:<br />
1. 110-volt spas will require a 20 amp dedicated receptacle.<br />
2. 220-volt spas will require a 50 amp dedicated GFCI breaker.<br />
3. See Pages 8 through 10 for more information.<br />
Surface and Pad Requirements for <strong>Spas</strong> and Gazebos:<br />
1. Your new portable spa and or gazebo must be placed on a uniformly firm, flat and level concrete pad.<br />
We recommend a 3” thick slab.<br />
2. See Page 7 for more information<br />
General Start-up Information:<br />
1. Once your spa is placed on an approved surface and is connected to the correct electrical service, inspect all plumbing<br />
connections in the equipment area of your spa. These connections may have loosened during shipment.<br />
2. To fill spa, place a garden hose into the skimmer / filter canister. Fill spa up to half way up the skimmer / filter area.<br />
3. Open the air relief valve, located on located on the front of the pump housing in the equipment area.<br />
4. After the air bubbles stop coming out of the air relief valve, tighten valve until closed (Do not over tighten).<br />
5. Once water level is correct, turn on the spa's power at the GFCI breaker (220-Volt <strong>Spas</strong>). 110-Volt spas must be<br />
connected to the proper 20 Amp electrical service.<br />
6. The spa will perform a diagnostic check, and power up in 30 seconds.<br />
7. All electronically controlled spas will default to 100°F and filter for two (2) hours twice a day.<br />
8. The spa is now ready for use.<br />
Filter Cycle Set-up Information:<br />
Start-up<br />
1. All electronically controlled spas will default to filter cycle of 2 hours every 12 hours (Two hours twice a day)<br />
2. Filter cycle start times are set when the spa is powered up for the first time or any time the power is reset. i.e.<br />
the GFCI is tripped and reset, or there is a temporary power outage.<br />
Example:<br />
If you turned on your spa at 2:00PM, your filter cycles would be 2:00PM to 4:00PM and 2:00AM to 4:00AM.<br />
3. Changing you filter times is as easy as turning the power to spa off, and back on at the time of day you wish you<br />
filtration cycles to start.<br />
4. Most chose their filter cycles to run from 8:00PM to 10:00PM and 8:00AM to 10:00AM to avoid interrupting spa usage<br />
and or sleep.<br />
5
Quick Reference Information (Continued)<br />
General Chemical Maintenance Information: (500-Gallon Spa)<br />
Start-up:<br />
a. Add 3 oz. of “Iron Out” or 16 oz. of “Metal Protector”.<br />
b. Add 2 oz. of “Sodium Bromide”.<br />
c. Add 2 oz. of “Oxidizer Shock”.<br />
d. Add 3 to 4 Bromine tablets to a “mostly” closed floater.<br />
Note: DO NOT PLACE BROMINE TABLETS IN SKIMMER BASKET.<br />
Weekly:<br />
1. Test spa water with test strips for the following items twice a week:<br />
a. Bromine: Acceptable Range without a <strong>Cal</strong> Zone Ozonator is between Three (3) to Five (5).<br />
b. Bromine: Acceptable Range with a <strong>Cal</strong> Zone Ozonator is between One (1) to Three (3).<br />
c. Chlorine: Acceptable Range without a <strong>Cal</strong> Zone Ozonator is between Three (3) to Five (5).<br />
d. Chlorine: Acceptable Range with a <strong>Cal</strong> Zone Ozonator is between One (1) to Three (3).<br />
e. pH acceptable Range is between 7.2 to 7.8 P.P.M.<br />
f. Alkalinity: Acceptable Range is between 80 to 120 P.P.M.<br />
2. Add one to two bromine tablets. Usage varies with water temperature and bather loads.<br />
3. Add 2 oz. of “Oxidizing Shock”. Always follow directions on the container.<br />
(Do not use chlorinating shock.)<br />
4. Add 2 oz. “Stain & Scale Defense” or 3 oz. of “Iron Out” as directed on the container.<br />
5. Add “pH Up”, if needed. Always follow directions on the container.<br />
6. Add “Alkalinity Up”, if needed. Always follow directions on the container.<br />
7. Add “pH Down”, if needed. Always follow directions on the container.<br />
BI-Weekly:<br />
1. Follow the weekly instructions, and the following.<br />
2. Clean the filter cartridge. (See the “Filter Maintenance” section on pages 12)<br />
3. Visually inspect the equipment area for the following:<br />
a. Equipment area is clean. (Cabinet vents are unobstructed)<br />
b. Ozonator operation. (Ozonator only during filtration cycles and low speed operation)<br />
c. Inspect Pumps, Plumbing, Unions, and Ozone check valves for leakage.<br />
Note: Component failure as a result of leaks not promptly reported will void the warranty.<br />
Important Chemical Notice<br />
Before the use of any chemicals, C.A.I. recommends all spa users to consult with their physician for possible allergic reactions to the<br />
corresponding chemicals. C.A.I. also recommends consulting with your local <strong>Cal</strong> <strong>Spas</strong> Dealer for a chemical program that is best suited for your local water condition,<br />
climate and usage habits.<br />
6
Set-Up and Delivery Instructions<br />
Getting Ready for Delivery and Set-up of Your New <strong>Cal</strong> Spa<br />
Planning For Delivery of Your Portable Spa:<br />
a. Your 110-Volt spa will require a 20 amp dedicated receptacle.<br />
b. Your 220-volt spa will require a 50 amp dedicated GFCI circuit breaker.<br />
c. If you have any doubts, have your electrical system checked by a qualified, licensed electrician.<br />
Surface and Pad Requirements for <strong>Spas</strong> and Gazebos:<br />
a. Your new portable spa and /or gazebo must be placed on a uniformly firm, flat and level concrete pad. We require<br />
a 3” thick cement slab. Gazebos assembled on surfaces either not flat or level will result in windows and doors<br />
closing improperly.<br />
b. If the location of your spa is going to be near a sprinkler system, make sure you adjust the sprinkler heads away<br />
from the spa and or Gazebo. As water continually sprayed on the spa cabinet or in the equipment area may cause<br />
wood or electrical component damage.<br />
Requirements for Decking, Gates and Balconies:<br />
a. All decking must be able to support 150 pounds per square foot.<br />
b. Surrounding area gates must be self-closing and self-latching (<strong>Cal</strong>ifornia Requirements).<br />
c. Balconies must be constructed to current state and local codes. (Spa load requirements are 150 pounds per<br />
squarefoot)<br />
The delivery crew will need the following list of information prior to delivery of your spa:<br />
a. Clearance through gates, around gas meters, fireplace, air conditioners or other obstacles.<br />
b. Measure the height between ground and lowest point of roof eaves.<br />
7
110 Volt Installation Information<br />
Always Follow Applicable Local, State, Federal Codes and Guidelines.<br />
1. Use only a dedicated electrical line with a 20-amp breaker.<br />
2. Do not use an extension cord.<br />
3. Always use a weatherproof/covered receptacle.<br />
4. Never have your spa with in 10 feet to the receptacle.<br />
5. Do not bury the power cord.<br />
6. A damaged cord must be replaced before next usage.<br />
7. All 110-volt spas must have a GFCI. This can either be a 20 Amp GFCI receptacle or a GFCI cord and plug kit (CKIT110).<br />
8. GFCI plug should be tested prior to every use. To test the GFCI plug version, please follow these easy instructions:<br />
Note: Spa should be already plugged in and operational.<br />
1. Press the button marked “Test” on the GFCI. The GFCI will trip and the spa will stop operating<br />
2. Press the button marked “Reset” on the GFCI. The GFCI will reset and the spa will turn back on in about 5 seconds.<br />
3. The spa is now safe to use.<br />
If the GFCI should turn off (trip) while the spa is in use, press the reset button. If the GFCI will not reset, unplug the<br />
GFCI and call your local Showroom/Dealership for service. DO NOT USE SPA.<br />
110 Volt / 20 Amp GFCI Plug<br />
8
220 Volt Installation Information<br />
All 220-volt spas are required to have a GFCI breaker and should only be wired by a licensed electrician. To ensure proper<br />
wiring of your GFCI, please follow the wiring diagrams on pages 9 and 10.<br />
1. Always Follow Applicable Local, State, Federal Codes and Guidelines.<br />
2. Your new 220 volt CAL SPA requires a DEDICATED 50 AMP GFCI SERVICE WITH FOUR # 6 AWG COPPER WIRES<br />
This will include a black and red wire for your incoming power, a white wire used for your neutral and a green wire for<br />
your ground.<br />
Note: #6 AWG wire acceptable on wire run up to 100’. Wire run over 100’ must increase wire to # 4 AWG.<br />
3. Please note that this is the only acceptable electrical wiring procedure. <strong>Spas</strong> wired in any other way will void your<br />
warranty and may result in serious injury.<br />
Before each use of your spa you should check the GFCI. During this test the spa should be operational.<br />
1. Press the test button on the GFCI. The GFCI will trip and the spa will shut off.<br />
2. Wait 30 seconds and reset the GFCI breaker. This is done by turning the breaker off and then back on. Your spa will be<br />
operational in about 5 seconds.<br />
3. Your spa is now safe to use.<br />
G.F.C.I. Hook-Up<br />
9
Starting Up Your Portable Spa<br />
Filling and Powering-up Your <strong>Cal</strong> Spa:<br />
1. Once spa is placed on an approved surface and is connected to the correct electrical service, inspect all plumbing<br />
connections in the equipment area of your spa. These connections may have loosened in shipment.<br />
2. If equipped, open all gate valves or slice valves in the equipment area.<br />
Note: Before operating the spa these valves must be in the up or open position.<br />
3. Remove filter basket and cartridge from skimmer / filter canister.<br />
4. Place a garden hose in the skimmer / filter canister and continue filling your spa with Regular Tap Water up to the<br />
Water Level line or half way up the skimmer area.<br />
5. Open the air relief valve located on the front of the pump housing.<br />
6. After the air bubbles stop coming out of the air relief valve, hand tighten valve until closed (Do not over tighten).<br />
7. Once the water is at the correct level, turn on the power at the GFCI breaker.<br />
Note: Ensure110-Volt spas are connected to the proper electrical outlet.<br />
8. The spa will perform a diagnostic check for 30 seconds. Once complete, the spa will automatically operate at filter<br />
speed and continue heating until the spa water temperature reaches 100˚F. (This is every electronically controlled spas<br />
default temperature).<br />
9. Re-install filter and filter basket into skimmer / filter canister.<br />
10. The spa is now ready for use.For operation instructions see the “1500 Electronic Operation” sections of this manual on<br />
pages 15 through 17.<br />
Important Notes:<br />
Be careful not to over tighten plumbing fittings.<br />
Never run spa with gate valves closed or without water circulating for long periods of time.<br />
Never fill your spa with soft water. Soft water makes it impossible to maintain the proper water chemistry and may cause the<br />
water to foam and ultimately harm your spas finish and void your warranty.<br />
11
Filter Maintenance<br />
Portable <strong>Spas</strong>:<br />
Filtration starts on electronically controlled spas as soon as the pumps are primed and water flow is steady. As the flow<br />
of water goes through the filter, dirt and debris is removed and accumulated in the filter cartridge. As the filter cartridge<br />
accumulates minerals, dirt and debris, water flow is lessened and jet performance is reduced. This can cause your spa to<br />
not to run or heat properly.<br />
Clean Your Filter Regularly and Replace as Needed.<br />
Filter Cleaning<br />
Your new <strong>Cal</strong> Spa has been designed for quick and easy filter maintenance. The filter cartridge should be cleaned once<br />
a week.<br />
1. Turn the power off at the breaker.<br />
2. Remove the filter(s) cover (If equipped).<br />
3. Remove the filter(s) basket (Align flat areas on filter basket and canister).<br />
4. Remove the filter(s) by Pulling up and Out, clean filter with a garden hose.<br />
a. Hold filter vertically.<br />
b. Spray the filter cartridges with a pressure nozzle, starting from the top and spraying down each pleat.<br />
c. Turn filter cartridge over and repeat step 4.b.<br />
d. Reinstall the filter cartridge in reverse order of removal.<br />
5. Deep clean filter cartridge(s) every month. Use only a <strong>Cal</strong> <strong>Spas</strong> approved filter-cleaning chemical.<br />
12
General Operating Instructions<br />
Your new <strong>Cal</strong> Spa is very versatile, you can direct the flow of water and air through various locations throughout your spa.<br />
The following list of features are available on most spas:<br />
Air Venturies<br />
Air Venturies are the smaller knobs located around the top of your spa. Each one will let you add a mixture of air in with the<br />
jet pressure. This is accomplished by simply rotating the air venturi handle to the left (Counter clockwise) to increase the<br />
amount of airflow through the jets. To decrease the amount of airflow through the jets, simply rotate the handle to the right<br />
(Clockwise).<br />
Air Venturies<br />
Adjustable Jets<br />
Almost all of the jets in your spa are adjustable. Rotating the face of an adjustable jet to the left (Counter clockwise) will<br />
decrease the amount of water flow through the jet. Rotating the face of an adjustable jet to the right (Clockwise) will increase<br />
the amount of water flow through the jet.<br />
Note: Neck jets will be reversed when adjusting pressure.<br />
Adjustable Jets<br />
13
General Operating Instructions (Continued)<br />
<strong>Cal</strong> Zone Quest 1000 Ozonator (Available on V-300, though V-800 spas)<br />
Your new <strong>Cal</strong> Zone Quest 1000 Ozonator is a state-of-the-art bacteria killing machine. This unit will assist you in maintaining clean and<br />
clear spa water, while saving you time and expense with spa chemicals.<br />
Operation<br />
Your <strong>Cal</strong> Zone Quest 1000 Ozonator will automatically operate during the filter cycles and any other time the spa is running on low<br />
speed. The Ozone Indicator light on Quest 1000 ozonator itself will glow purple letting you know that the system is operational.<br />
Note: Due to the nature of the ozone light, it is difficult to see the light in daylight. This lens should be checked at night or in a shaded<br />
condition.<br />
<strong>Cal</strong> Zone Quest 1000 Ozonator<br />
14
1500 Electronic Operation<br />
Temperature Adjustment (Range 80°F to 104°F)<br />
The display screen will always display the actual water temperature.<br />
Example: The actual water temperature is 100°F, the topside display will read 100.<br />
To display the set temperature, simply depress the Temp pad and the temperature setting will flash on and off on the display panel. While<br />
the display is flashing, each time you depress the Temp pad the set temperature will increase one degree. Allow the display to revert back<br />
to the actual water temperature, then depressing the Temp pad again, allows you to decrease the set temperature by one degree with each<br />
press of the Temp pad.<br />
Standard Heating Mode<br />
Your new spa is equipped with a “Standard Heating Mode” feature that gives you complete control of the heating system.<br />
When the spa is powered up, the heating system will automatically activate. Whenever the water temperature drops more than one degree<br />
below the set temperature, the heating system will automatically activate and continue to operate until the spa has regained the temperature<br />
loss.<br />
Jet / Light Controls (One Pump Systems)<br />
Depress the Jets pad once to activate the spa light<br />
Depress the pad a second time to activate the spa light and the low speed pump.<br />
Depress the pad a third time to activate the spa light and the high-speed pump.<br />
Depress the pad a fourth time to run the high-speed pump with the spa light off.<br />
Depress the pad a fifth time to turn off the high-speed pump.<br />
Jet / Light Controls (Two Pump Systems)<br />
Depress the pad a once to activate the low speed of pump 1.<br />
Depress the pad a second time to activate the pump1 high speed.<br />
Depress the pad a third time to activate pump 1 and pump 2 on high speed.<br />
Depress the pad a fourth time to activate the spa light, while pump 1 and 2 are on high speed.<br />
Depress the pad a fifth time to allow the spa light to stay on, while both pump 1 and 2 high speeds to turn off.<br />
Depress the pad a sixth time to turn off the the spa light.<br />
Automatic Time outs<br />
The low-speed pump will automatically turn itself off after 30 minutes, if it’s not turned off manually.<br />
The high-speed pump will automatically turn itself off after 30 minutes, if it’s not turned off manually.<br />
The spa light will automatically turn itself off after 4 hours, if it’s not turned off manually.<br />
15
1500 Electronic Operation (Continued)<br />
Setting Filtration Cycles<br />
Your spa will automatically filter itself twice a day. Set to the filtration time, turn off the power to the spa and turn it back on at the time<br />
of day you would like the filtration cycles to start at the GFCI Breaker.<br />
Example: If you power-up your spa at 12 Noon, your filtration cycles will start at 12 noon and 12 Midnight.<br />
The first cycle will start after the spa is powered up. The second filtration cycle will begin twelve hours later. The filter cycle duration is<br />
preset for 2 hours. If spa usage is heavy, your <strong>Cal</strong> <strong>Spas</strong> authorized service technician can reconfigure your system to run two five hour filter<br />
cycle.<br />
120/240 Conversion<br />
The 1500 series spa is a convertible system. The conversion from 120 Volts to 240 Volts must be performed by a licensed/bonded<br />
electrician. See 120 to 240 volt conversion instructions, located on the inside cover of the control box.<br />
Note: Only spas equipped with 1.5 BHP pumps may be converted to 120 Volt. <strong>Spas</strong> with 2.0BHP pumps or larger can only be operated on<br />
240 volt services.<br />
120 Volt Heater Operation<br />
When connected as a 120-Volt spa, the heater will only operate when the spa motor is on low speed or filtration speed. Once the<br />
high-speed motor is engaged, the heater will automatically disengage.<br />
240 Volt Heater Operation<br />
When connected as a 240-Volt spa, the spa heater will operate on either low-speed or high-speed. The heater will operate until the set temperature<br />
is reached.<br />
16
Self-Diagnostics<br />
Display Messages for the 1500 Series <strong>Spas</strong><br />
Message Meaning Action Required<br />
“Overheat” The spa has<br />
shut down. Either the spa<br />
has reached a temperature of<br />
112˚F or the High-limit<br />
sensor has detected<br />
overheating in the heater<br />
manifold.<br />
DO NOT ENTER THE SPA WATER.<br />
Remove the spa cover and let the water<br />
cool. At 110˚F, the spa should<br />
automatically reset. If the spa does not<br />
automatically reset, press any pad on the<br />
topside control panel. If the spa still<br />
won’t reset, turn off the power and call<br />
your local authorized service center.<br />
“FL” A pressure switch has<br />
detected a loss of water<br />
flow.<br />
Check the filter for debris.<br />
If it’s dirty, clean it. (See page 14 for<br />
cleaning instructions) If the problem<br />
persist, call your local authorized<br />
service center.<br />
“Sensor” Spa has shut down.<br />
The Hi-limit/Temperature<br />
sensor has malfunctioned.<br />
<strong>Cal</strong>l your local authorized<br />
service center.<br />
ELECTRICAL RATING FOR 1500 SERIES SPAS<br />
120/240 Volt Convertible<br />
120 Volts<br />
15 Amps<br />
60 Hertz<br />
2 Wires plus Ground<br />
Min. Supply conductor 20 Amp<br />
Circuit Breaker 20 Amps<br />
For units bearing the UL mark the power supply cord is provided with integral GFCI.<br />
For units bearing the C-UL mark, the power supply cord is not provided. Field wiring leads are provided inside<br />
the conduit body with a minimum of 6-inches in length.<br />
240 Volt<br />
40 Amps (Must use a 40Amp GFCI Circuit Breaker)<br />
60 HTZ<br />
4 Wire Min. 8 AWG Copper<br />
17
<strong>Cal</strong> <strong>Spas</strong> Clear Water Plan <br />
Great spa water is easily achieved when the right chemicals are used and a Clear Water Plan is implemented.<br />
The key to clean, clear, safe water is to fully understand how spa water reacts to users, operation and chemicals.<br />
This Clear Water Plan will help give you that understanding.<br />
IMPORTANT Chemical Safety Notices:<br />
Chemical Directions:<br />
• All directions in this program are calculated for <strong>Cal</strong> <strong>Spas</strong> chemicals only. Other chemicals may have similar<br />
names and/or usage descriptions. However, all chemicals are manufactured differently, increasing the likelihood<br />
of under or over dosing spa chemicals.<br />
• Failure to follow chemical directions may result in serious injury, sickness and even death.<br />
Chemical Usage:<br />
• Always introduce chemicals to spa water with all pumps operating on high speed.<br />
• Apply chemicals to the center of spa water.<br />
• Always wear protective clothing and eyewear when handling chemicals.<br />
• Spa users that notice skin irritation must immediately suspend spa usage and consult their physician.<br />
• Pregnant women should consult their physician prior to using a spa for both chemical and temperature recommendations<br />
Chemical Storage:<br />
• Chemicals must be stored completely out of the reach of children in an area that is well vented, cool, and dry.<br />
• Failure to provide a proper area for chemical storage may result in serious injury, sickness, fire, explosion and<br />
even death.<br />
Physical Chemical Hazards:<br />
• Do not allow chemicals to come in contact with skin, eyes or clothing. As mentioned previously, always wear<br />
rubber gloves, protective eyewear and clothing to reduce the risk of chemical contact and irritation.<br />
• Remove and wash clothing that may have been exposed to chemical contact prior to wearing again.<br />
• Inhaling or digesting chemicals will cause serious injury, sickness, and even death.<br />
• Do not mix chemicals. Mixing chemicals together may cause chemical reactions that vary from poor water conditions<br />
to fire and explosion.<br />
44
Safety:<br />
<strong>Cal</strong> <strong>Spas</strong> Clear Water Plan <br />
1. This plan and its chemical dosages are intended for <strong>Cal</strong> <strong>Spas</strong> Chemicals only. Most chemical manufactures use different chemical formulas<br />
and strengths. <strong>Cal</strong> <strong>Spas</strong>’ chemicals are specially formulated to provide proper chemical balance at lower dosages. Compare<br />
labels and dosages and see for yourself. You will get greater protection and performance with <strong>Cal</strong> <strong>Spas</strong> Chemicals.<br />
2. Read and follow all printed instructions listed on bottles, packages and owner’s manual.<br />
3. Read and follow all printed instructions listed in chemical start-up kits. If Applicable, start-up kit chemicals are often more concentrated<br />
that the over the counter full size bottles.<br />
4. Do Not Exceed Chemical Dosages Per Gallon as listed in the owner’s manual, chemical bottles, packages, and kits. Most chemical<br />
instructions are figured for a 500 gallon spa. However, most spas hold less than 500 gallons. Always use less than the recommended<br />
amount of any chemical. It is much easier to add additional chemicals than it is to remove excess chemicals from the spa water.<br />
REMEMBER, LESS IS MORE WHEN DEALING WITH SPA CHEMICALS.<br />
5. Never mix any chemicals together.<br />
6. Never change chemical brands or types without completely draining, flushing and thoroughly cleaning the spa, pillows, and cover<br />
first.<br />
7. Be careful not to add certain chemicals on the same day. (Refer to printed instructions on the chemical bottles, packages and Clear<br />
Water Plan.)<br />
8. Always protect eyes while introducing chemicals into the spa. A slight breeze may cause powdered chemicals to blow into eyes.<br />
Pouring liquids may cause chemicals to splash into eyes. (Protective eyewear should always be worn when handling chemicals)<br />
9. In the event of overdosing a sanitizing chemical (Chlorine , Bromine, etc.), immediately turn off power to the spa and proceed to<br />
drain spa water into a safe locally approved area. Carefully rinse pillows, jets, and spa surface with regular tap water. (Avoid spraying<br />
water directly into the equipment area.) Refill spa to proper water level, turn power back on, and then set the filtration time to<br />
“F6”. This will allow water to completely circulate to minimize the risk of chemical damage to your spa. (See setting filtration section<br />
of the owner’s manual for more information.)<br />
Why is a Chemical Plan Important<br />
Time and Expense:<br />
A better understanding of spa chemicals and their usage will help protect you from ugly, unsafe water and the expense associated with<br />
clean up. In some cases, it is less expensive to drain the spa and start over than it is to add additional chemicals and filtration time cleaning<br />
up bad spa water.<br />
Chemical Damage:<br />
The most common reason for spa failure is chemical abuse or customer neglect. For example, the pump seal used on a typical spa is the<br />
same pump seal used to pump acid solutions for chemical companies. Yet this same pump seal will fail in numerous spas because the<br />
owners were not following a chemical plan. Chemical damage is not covered by <strong>Cal</strong> <strong>Spas</strong> limited warranty. So, in addition to wasted<br />
expenses on excess chemicals, you will find yourself with a huge expense of replacing chemically damaged parts. Even the brand(s) of<br />
spa chemicals that claim that they are not as harsh as chlorine or bromine, in fact, are. If you venture off some of these chemicals plans,<br />
the damage to your spa can be twice what chlorine or bromine damage would be.<br />
The Bottom line:<br />
It pays to stick with a simple chemical plan and use a measuring cup rather than the conventional, “Yep, that looks like about 2 ounces”.<br />
It sounds funny... but it is a huge issue, that can be easily avoided.<br />
45
Stay with the Plan<br />
Staying with the Plan:<br />
Spa owners who enjoy the cleanest water with a minimum time investment, all have one thing in common: they use, and stay with a simple<br />
chemical plan. Most chemical manufactures offer a maintenance plan printed in a small booklet, which contains nothing more than<br />
how much to use. The <strong>Cal</strong> <strong>Spas</strong>’ Clear Water Plan describes not only what and when, but why you need to use a particular chemical.<br />
Avoiding Problems:<br />
Spa water issues cannot be fixed immediately. It is much easier, less expensive, and a lot less time consuming to maintain spa water, than<br />
it is to troubleshoot and correct water issues. Ask yourself, which is easier, less expensive, and more convenient? Changing the oil in<br />
your car four (4) times a year, or replacing the car every two (2) years.<br />
A chemical maintenance plan for your spa is not much different. Follow the <strong>Cal</strong> <strong>Spas</strong>’ Clear Water Plan, or replace your spa every two<br />
years. We know you don’t want to become a chemists. You just to enjoy your new spa. That is why the <strong>Cal</strong> <strong>Spas</strong>’ Clear Water plan is so<br />
effective. Just 15 minutes, three days a week and you are ensuring your spa’s future.<br />
Clear Water Plan Advantages:<br />
1. Chemical use is minimal.<br />
2. Chemical odor is almost non-existent.<br />
3. Pillows, Spa Covers, and Filter lids last for years.<br />
4. Spa usage is more enjoyable.<br />
5. Water is always clean, clear and safe.<br />
6. Little time invested.<br />
7. No smock required (Chemist Joke).<br />
Spa vs. Small Pool?<br />
Most people think of spas as nothing more than a small pool. In fact, nothing could be further from the truth. If anything, spas are more<br />
like an overgrown bathtub.<br />
An average pool contains 30,000 gallons of water and operates at approximately 70˚ F (20˚ C).<br />
An average spa only contains 350 gallons of water and operates at 100˚ F (38˚ C).<br />
Since spas have more than 100 times less water than a swimming pool, they are very easily contaminated by bathers.<br />
Example:<br />
Although spa users don’t realize it, they perspire a lot. An average person using a spa for one hour will leave approximately 3 pints of<br />
perspiration per 350 gallons. A swimmer exercising in a pool leaves approximately one pint of perspiration per 30,000 gallons.<br />
This and other body waste such as skin, oil, and personal hygiene products are left in a very small amount of hot water. The spa becomes<br />
prime environment for bacterial growth. In addition, water evaporates leaving a stronger concentration of T.D.S. (Total Dissolved<br />
Solids).<br />
As stated before, spas are nothing like swimming pools. The former needs more attention than you may have first thought.<br />
This information is not meant to scare you. It is to make you aware of why a chemical maintenance plan is so important.<br />
Most chemical programs don’t provide this type of information to the average spa user. When in reality, without knowing what the possibilities<br />
are, you won’t be able to prevent problems from occurring or correct them easily.<br />
<strong>Cal</strong> <strong>Spas</strong> believes educated spa owners are more able of recognizing a potential problem and correcting it with little effort. Thus, improving<br />
the overall spa experience.<br />
46
Filters and Filtration:<br />
Exclusive Bio-Clean Filter Cartridge:<br />
The average filter cartridge is designed to remove dirt, sand, minerals, phosphates, bather waste and other solids from the spa.<br />
Unfortunately, some spa owners fail to include filter cleaning as part of their chemical maintenance plan. Filters accumulate debris and<br />
become prime areas for bacteria growth.<br />
The <strong>Cal</strong> <strong>Spas</strong> Exclusive Bio-Clean filter is the only antibacterial filter cartridge on the market today. What does this mean to you?<br />
Having a filter cartridge that prevents bacteria growth is simply added protection for those times you forget to clean the filter. We recommend<br />
that you only replace your spas filter cartridge with a Bio-Clean filter cartridge for ensured protection and peace of mind.<br />
Why do I need to Clean the Filter Cartridge?<br />
Even though the Bio-Clean filter can protect itself from bacterial growth, it still needs to be cleaned on a regular basis to maximize your<br />
spas performance and ensure that heating and filtration systems are functioning correctly. Most filter canisters are manufactured with a<br />
bypass. When a filter becomes full of debris, the bypass will open allowing water to flow around rather than through the filter. When<br />
this happens, your daily filtration cycles are no longer effective. Another casualty of a dirty filter cartridge, is the loss of water temperature.<br />
The spas heating system will only function with the proper amount of water flow through the system. An overloaded filter, can<br />
cause the heating system to become inoperable.<br />
Cleaning the Filter Cartridge:<br />
In addition to spraying the filter with a high pressure nozzle, deep cleaning the filter cartridge is also necessary. Even if the filter cartridge<br />
may appear clean, you will still need to deep clean it regularly. Minerals and other contaminates are very difficult to see and can<br />
get lodged deep into the filter fibers causing water flow issues.<br />
You will need to have an extra filter cartridge on hand for the deep cleaning process. It is necessary to always have one filter either<br />
cleaning or drying, and the other installed in the spa. This process will double the filter cartridges overall life and performance.<br />
Filter Cleaning:<br />
1. Place the dirty filter into a bucket with 8 oz. of Liquid<br />
Filter Cartridge Clean.<br />
2. Soak for a minimum of 24 hours.<br />
3. Remove filter and spray clean with a water hose, and<br />
allow the filter to dry thoroughly. (Drying time should be<br />
a minimum of two days prior to reinstalling.)<br />
4. Reinstall as described in the Clear Water plan.<br />
Filtration:<br />
Filtration is one of the most important steps you can take ensuring clean, clear water. Regardless of what some people may think, it is far<br />
more inexpensive to fix water clarity problems by filtering your spa than it is to use excessive amounts of chemicals, filtration times,<br />
and/or water replacement.<br />
<strong>Cal</strong> <strong>Spas</strong>’ filtration system simply draws contaminated water through the (Exclusive) Bio-Clean filter removing debris from the water. It<br />
then pumps the newly cleaned water back into the spa through various jets.<br />
<strong>Spas</strong> equipped with the optional, Quest 2000 Ozonator will also receive ozone injection into the filtered water for further protection<br />
against contaminates during filtration cycles.<br />
Filtration also ensures that chemicals are mixed thoroughly through the water, increasing performance.<br />
Filtration Cycles:<br />
All electronically controlled spas run two filter cycles every day, one every twelve hours. Either the low speed of a two speed pump or<br />
separate filter pump will perform the filtration function. We strongly recommend that you set your spas filtration time to the “F4” setting.<br />
(See the “Setting Filtration Cycles” section in the owner’s manual.) This will allow the spa to filter for four (4) hours every twelve hours.<br />
If it seems like a lot, just remember the pool analogy.<br />
47
Cloudy Water:<br />
Cloudy Water:<br />
Everyone experiences cloudy water at one time or another.<br />
The number one cause of cloudy water is the spa user and the things they bring into the spa. As discussed before, the average spa holds<br />
only 350 gallons of water. What you bring into the spa will stay in the water for some time. Think of the spa as a thorough body wash.<br />
Everything that is in your clothes, skin and hair will be washed off and left in the spa water causing cloudy water.<br />
1. Never wash the clothes that you wear into the spa in laundry detergent or fabric softener. Laundry detergent and fabric softener stays<br />
in your clothes no matter how well you rinse them. This causes cloudy and foamy water that is almost impossible to clean up. The<br />
only thing you can do is wait for it to filter out. Adding Spa Brite, in this case, will only further delay the spas ability to clear up.<br />
2. Never enter the spa with sunscreen or lotion on your skin. Oil is very difficult to remove from the water, and can cause a reaction<br />
with some of the chemicals that you may add to your spa, further causing a cloudy water condition. It is best to rinse off prior to<br />
entering the spa.<br />
3. Use caution when adding any chemicals to correct a problem. Most cloudy water problems are made worse by the spa owner adding<br />
chemical after chemical to correct a cloudy water problem that normally would have cleared up with a little Oxidizer Shock and filtration<br />
time.<br />
4. Remember, swimming pool chemicals are completely different than spa chemicals. Entering a spa with wet clothes from a<br />
swimming pool can cause a possible chemical reaction to either the spa user and/or the spa water. Always rinse thoroughly when<br />
transferring between a swimming pool and a spa.<br />
5. Clean the spas filter(s) regularly as described in the <strong>Cal</strong> <strong>Spas</strong> Clear Water Plan.<br />
Spa Brite: (Water Clarifier)<br />
Spa Brite:<br />
This chemical is used to help clear up cloudy water.<br />
The problem that most spa owners run into is being able to identify when Spa Brite should be used and when it should not be used.<br />
Spa Brite’s only purpose is to draw very light debris together and making them large enough to be caught in the filter.<br />
If your water clarity issue is caused by excessive amounts of oils, soap, or bacteria elements, Spa Brite will only add to the clarity problem;<br />
an oily, clumpy mess will form around the entire water level of the spa.<br />
How to use Spa Brite:<br />
1. Make sure that your clarity issue is not of an oily, soapy, or bacterial nature. (See Filter, Enzyme Oil Gone, or Oxidizer Shock<br />
sections for these issues.)<br />
2. Add 2 oz. of Spa Brite to a spa running on filter speed. Allow spa to filter until water is clear. We recommend placing your spa in<br />
filter mode “FC” (24Hour filtration Mode) during this time. (This may take some time, so be patient. See the Setting Filtration<br />
Cycles section in your owner’s manual.)<br />
3. Clean filter thoroughly between, and after each application of Spa Brite.<br />
48
Enzyme Oil Gone: (Oil Remover)<br />
Enzyme Oil Gone:<br />
This chemical will help break-down excessive amounts of body and other oils in the spa water.<br />
Body oil, perspiration, lotions and tanning oil will quickly accumulate in your spa if your not careful.<br />
The best solution is prevention. Always watch what goes onto your body because it will eventually end up in your spa water.<br />
How to Use Enzyme Oil Gone:<br />
1. Add 1/2 oz. of Enzyme Oil Gone to a spa running on filter speed. Allow spa to filter until the spa water no longer feels or looks<br />
oily. We recommend placing your spa in filter mode “FC” (24 Hour Filtration Mode) during this time.<br />
(See the Setting Filtration Cycles section in your owners manual.)<br />
2. You may find the need to add this product to your weekly chemical maintenance plan. If so, simply repeat step one (1) once a<br />
week. (Weekly dosages do not generally require additional filtration time.)<br />
Water Temperature and Its Effects:<br />
Water Temperature:<br />
The actual water temperature will greatly effect how efficient your spas chemistry is.<br />
Here is an example of what hot water can do to your water and chemicals.<br />
Hot Spa Water: (100˚ - 104˚ F)<br />
1. Increases water evaporation.<br />
2. Increases chemical dissipation.<br />
3. Increases amount of spa user waste.<br />
4. Accumulation of minerals and salts.<br />
5. Increases Total Dissolved Solids (TDS).<br />
As you can imagine, there is an inverse effect with cooler water temperatures.<br />
Does this mean that you should not operate your spa at higher water temperatures? No. We just want you to be aware that your chemical<br />
usage will increase or decrease with the actual water temperature.<br />
Water pH and its Effects:<br />
Water pH: (Potential Hydrogen)<br />
pH is the measurement of the acidic level of water. The normal range of your spas pH level is between 7.2 to 7.8 and can be tested with<br />
simple test strips. What will happen to my spa with pH levels either too high or too low?<br />
Low pH:<br />
The lower your pH, the more acidic your water will become. That’s right. Acid! Effects of low pH are, dissolving or pitting heaters, manifolds,<br />
pump seals, and in some cases the acrylic finish itself.<br />
High pH:<br />
The effects of high pH are increased scaling, calcium deposits, cloudy water, clogged filters and effectiveness of you sanitizers: Chlorine<br />
and Bromine.<br />
What Affects the pH:<br />
Everything that is introduced into the spa water has its own pH level, including you. All of these different pH levels can cause conflict<br />
with the spa waters ability to maintain its correct pH levels.<br />
49
Water pH and its Effects: (Cont.)<br />
Example:<br />
Spa owners that use their spa three (3) or four (4) times a week will have lower pH than spa owners who use their spa once or twice a<br />
week. Even the sanitizers (Bromine, Chlorine, etc.) that you use can effect the water’s pH levels. Did you know that Bromine has a pH<br />
level of 3.0 while chlorine has a pH level of 7.1. Other types of sanitizers have pH levels so low, it’s like adding straight acid to your spa.<br />
Be very careful of what you are putting into your water.<br />
Chlorine Users:<br />
Chlorine is very sensitive to pH levels. Readings higher than 7.8 will cause chlorine users to use twice the amount of chlorine to maintain<br />
a proper level. If your are using excessive amounts of chlorine with little effect, check the pH and Total Alkalinity levels.<br />
Controlling pH:<br />
Controlling pH: (Potential Hydrogen)<br />
1. Always follow printed instructions on the bottle and/or packages.<br />
2. Always adjust Total Alkalinity and Sanitizers first.<br />
3. Chlorine users will generally use more “pH / Alkalinity Down.”<br />
4. Bromine users will generally use more “pH / Alkalinity Up.”<br />
5. Make sure test strips are not wet or outdated prior to testing.<br />
6. Never test immediately after using oxidizer shock.<br />
(Allow 30 minutes of circulation with the spa cover half off prior to testing.)<br />
7. Always add chemicals when the pump(s) are on high speed.<br />
8. Always premix “pH Alkalinity Down” chemicals in half a bucket of water prior to introducing them to the spa.<br />
9. Never attempt to adjust pH or Total Alkalinity in large increments. Adjustments are made easier, and will stay set longer if you make<br />
them in small increments.<br />
Do Not Use Vinegar or Baking Soda to adjust pH and Total Alkalinity:<br />
Vinegar:<br />
You would need to use 100 times the amount of vinegar to equal 1/2 oz. of <strong>Cal</strong> <strong>Spas</strong> “pH / Alkalinity Down”. Vinegar will also add a<br />
large amount of organic waste in the spa water requiring the need for more sanitizers.<br />
Baking Soda:<br />
Although very similar to common baking soda, “pH / Alkalinity Up” is different. The primary difference is pH Alkalinity Up’s ability to<br />
dissolve quickly. Common baking soda will cause a paste like substance to accumulate on the floor and seats of your spa.<br />
What is Total Alkalinity?<br />
Water Total Alkalinity:<br />
Total Alkalinity is the basic capacity of the spa water to resist change in the pH.<br />
When the alkalinity is low, the pH and alkalinity will change very easily with bather use or chemical adjustment. The opposite will happen<br />
when the alkalinity is high. It will take a lot of bathers or chemicals to change the pH and alkalinity levels.<br />
The optimum Total Alkalinity level is between 80 to 100 parts per million (ppm).<br />
50
Controlling The Total Alkalinity:<br />
Controlling The Total Alkalinity:<br />
1. Always follow printed instructions on the bottle and/or packages.<br />
2. Always adjust Total Alkalinity and Sanitizers first even if it throws the pH further off.<br />
3. Chlorine users will generally use more “pH / Alkalinity Down.”<br />
4. Bromine users will generally use more “pH / Alkalinity Up.”<br />
5. Make sure test strips are not wet or outdated prior to testing.<br />
6. Never test immediately after using oxidizer shock. (Allow 30 minutes of circulation with the spa cover half off prior to testing.)<br />
7. Always add chemicals when the pump(s) are on high speed.<br />
8. Always premix “pH Alkalinity Down” chemicals in half a bucket of water prior to introducing them to the spa.<br />
9. Never attempt to adjust pH or Total Alkalinity in large increments. Adjustments are made easier, and will stay set longer if you make<br />
them in small increments.<br />
You will be using the same chemicals to lower the pH and Total Alkalinity. (<strong>Cal</strong> “<strong>Spas</strong> pH / Alkalinity Down” and “pH / Alkalinity UP.”)<br />
This does create concern with some people of throwing off one level to correct another.<br />
It is recommended to throw off the pH level in an effort to adjust the alkalinity level properly first. This will make it easier to adjust and<br />
maintain the pH.<br />
Questions and Answers<br />
Q: My pH is low and the Total Alkalinity is high. What do I do?<br />
A: Add small amounts of “pH / Alkalinity Down” to bring down the alkalinity level first. Be sure to allow plenty of circulation and<br />
standing time for the waters chemical levels to change. This may take anywhere from one (1) to three (3) hours depending on the<br />
size of the adjustment. (Smaller adjustment amounts are always better than larger adjustments.) Then you may start adjusting the pH<br />
back up, by using “pH / Alkalinity Up”in small amounts at a time.<br />
Q: My pH is high and the Total Alkalinity is low. What do I do?<br />
A: Add small amounts of “pH / Alkalinity UP” to bring up the alkalinity level first. Be sure to allow plenty of circulation and standing<br />
time for the waters chemical levels to change. This may take anywhere from one (1) to three (3) hours depending on the size of the<br />
adjustment. (Smaller adjustment amounts are always better than larger adjustments.) Then you may start adjusting the pH back<br />
down by using “pH / Alkalinity Down” in small amounts at a time.<br />
<strong>Cal</strong>cium and Scale:<br />
<strong>Cal</strong>cium is one of the few minerals that does not dissolve in hot water. In fact, hotter water makes calcium more of a solid, gritty, chalky<br />
substance that attaches itself to the acrylic finish, heater, and everywhere else in the spa. We refer to these conditions as “Scaling”. High<br />
pH can also increase the effects of this condition. If left untreated, scaling causes heater, pump, and jet failures; all, of which, are not covered<br />
by the spa warranty.<br />
Prevention and Treatment:<br />
1. Never allow the spas water temperature to exceed 104˚F.<br />
2. Check the pH levels and adjust if necessary at least 3 times a week.<br />
3. Never allow the pH level to exceed 7.8.<br />
4. Use “Metal Protector” every time you fill your spa. (See printed instructions on Bottle.)<br />
5. Use “Stain and Scale Defense” weekly as described in the Clear Water Plan.<br />
6. Applying <strong>Cal</strong> <strong>Spas</strong> “Fast Sheen” to the spas acrylic surface when you drain and clean your spa will greatly help your spas finish protect<br />
itself from scale build-up.<br />
<strong>Cal</strong>cium Clean-up:<br />
Unfortunately, there is very little that can help you remove calcium or scale completely in a spa. Prevention is the key.<br />
Cleaning:<br />
When you drain the spa, clean the surface with <strong>Cal</strong> <strong>Spas</strong> “All Purpose Cleaner” and rinse well.<br />
51
<strong>Cal</strong>cium Hardness: (Hard and Soft Water)<br />
Do Not Use Soft Water When Filling Your Spa<br />
This is primarily for two reasons.<br />
1. Soft water tends to be very unstable. This means that locking-in pH and Total Alkalinity levels becomes difficult.<br />
2. Soft water becomes quite foamy with very little turbulence. No amount of “Foam Gone” will stop it from foaming for very long.<br />
What does this mean?<br />
Your spas water needs to have some hardness to it.. If you live in an area where the water source is soft, you will need to add 1 oz. of<br />
“Liquid Hardness Increaser” to raise water hardness level 7 ppm at a time. This will make your water more manageable.<br />
Please follow all printed instructions on the bottle and use in very small increments.<br />
Well Water (Very Hard Water)<br />
In some areas, the water that you have may be very hard (i.e. well water). If this is so, fill half of the spa with hard water and the other<br />
half with soft water from a water softener.<br />
Metal Protector (Mineral Control at Start-up)<br />
Your <strong>Cal</strong> <strong>Spas</strong>’ Clear Water Plan recommends draining and refilling of your spa every three (3) to four (4) months. Upon doing so, you<br />
will want to add 3 oz. of Metal Protector to the center of the spa. Make sure all of the jets are on high speed.<br />
Metal Protector will hold the active minerals in the newly added spa water in a state of “Solution”. The term solution means that minerals<br />
in the water are being held in a suspended state, keeping them from bonding to anything in the spa and causing damage. Mineral control<br />
is a critical part of maintaining spa components’ performance and longevity.<br />
In addition to fill-up protection from minerals, the Clear Water Plan also recommends the weekly maintenance of mineral protection.<br />
This is accomplished by a adding a weekly dosage of Stain and Scale Defense. (See the following page for more information.)<br />
DO NOT USE SPA BRITE OR LIKE PRODUCTS, ON THE SAME DAY YOU ADD METAL PROTECTOR TO THE WATER. Adding<br />
these chemicals on the same day will result in cloudy water.<br />
Stain and Scale Prevention (Weekly Mineral Control)<br />
As part of your <strong>Cal</strong> <strong>Spas</strong>’ Clear Water Plan, weekly protection from minerals are also highly recommended. Add water to your spa weekly,<br />
replacing water that has evaporated or spilled over.<br />
Due to water replacement and overall chemical fluctuation, Stain and Scale Defense is an important part of weekly spa maintenance to<br />
prevent minerals from damaging spa components and effecting performance.<br />
Weekly Dosage:<br />
Add 2 oz. of Stain and Scale Defense weekly directly to the center of the spa with all of the jets on high speed.<br />
DO NOT USE SPA BRITE OR LIKE PRODUCTS, ON THE SAME DAY YOU ADD STAIN AND SCALE DEFENSE TO THE<br />
WATER. Doing so will result in cloudy water.<br />
52
Foam Gone (Foam Prevention and Assistance)<br />
As mentioned on previous pages, foamy spa water can be caused by soft water. However, the most common causes of foamy water are<br />
the users themselves and the things they bring into the spa. (i.e. clothes, shampoo, and oils.)<br />
Products such as Foam Gone, only mask the problem of foamy water. There is no single chemical that will remove foam from your spa<br />
water. The only thing that removes contaminant’s that cause foamy water is plenty of filtration, future prevention, and patience.<br />
Foamy Water Prevention:<br />
1. Never wash the clothes that you wear into the spa in laundry detergent or fabric softener. Laundry detergent and fabric softener stays<br />
in your clothes no matter how well you rinse them. This causes cloudy and foamy water that is almost impossible to clean up. The<br />
only thing you can do is wait for it to eventually filter out.<br />
Note: Adding water clarifier in this case will only further delay the spas ability to clear-up.<br />
2. Never enter the spa with sunscreen or lotion on your skin. Oil is very difficult to remove from the spa water, and can cause a reaction<br />
with some of the chemicals that you may add to your spa. In addition, soap and shampoo residues that are normally left on your<br />
body after a shower, only increase foamy and cloudy water. It is best to rinse off prior to entering the spa in these cases.<br />
Use of Foam Gone:<br />
Foam Gone should be used sparingly. This product does not remove foam from your water, it only offers a temporary solution.<br />
The recommended amount requires one gentle squeeze of the Foam Gone bottle to each of the heavy foaming areas.<br />
Be sure to avoid applying Foam Gone near the immediate filter area of your spa; it is only effective in the main area. Once filtered out,<br />
the water will start to foam in a short amount of time, causing you to use more Foam Gone.<br />
Tip: Add 3 oz. of Foam Gone and 29 oz. of water into a 32 oz. spray bottle and spray where needed.<br />
Vinyl & Leather Cleaner (Cover and pillow maintenance)<br />
Due to the constant punishment your spa cover and pillows receive, you should protect them by applying Vinyl & Leather Cleaner as a<br />
part of monthly maintenance. <strong>Cal</strong> <strong>Spas</strong>’ Vinyl & Leather Cleaner is specifically designed to protect spa covers and pillows from chemical<br />
and ultraviolet damage. It accomplishes this without leaving an oily residue behind that is normally associated with common automotive<br />
vinyl protectants.<br />
Use of Vinyl & Leather Cleaner:<br />
<strong>Cal</strong> <strong>Spas</strong>’ Vinyl & Leather Cleaner should be used sparingly. Incorrect product usage may cause water clarity issues.<br />
Spa Covers:<br />
1. Remove spa cover from spa.<br />
2. Allow spa cover to dry completely.<br />
3. Spray Vinyl & Leather Cleaner to cover evenly and wipe dry.<br />
4. Allow spa cover to dry completely.<br />
5. Reinstall cover on spa.<br />
Pillows:<br />
1. Wipe pillows dry with a soft cloth.<br />
2. Carefully spray Vinyl & Leather Cleaner directly onto pillow.<br />
3. Wipe pillows dry.<br />
4. Allow pillows to dry completely.<br />
Important: Do not use automotive vinyl protectants on spa covers or pillows. These products are generally oil based and will cause<br />
severe water clarity issues that are difficult to correct.<br />
53
Multi-Purpose Cleaner (Spa finish cleaning)<br />
<strong>Cal</strong> <strong>Spas</strong>’ Multi-Purpose Cleaner is an essential part of maintaining your spas finish. Through normal use, the spa’s finish can accumulate<br />
dirt, oil, and calcium causing a rough feel and unsightly scum lines. <strong>Cal</strong> <strong>Spas</strong>’ Multi-Purpose Cleaner is a low detergent, non-abrasive<br />
cleaner specifically formulated to clean the spa without damaging its acrylic finish. The most effective solution to minimize cleaning time<br />
is prevention. When the following steps are followed, the spas finish will actually start to resist most of the elements that cause calcium<br />
build-up and make scum line cleanup easier:<br />
Prior to Spa Start-up and Refilling:<br />
1. Spray <strong>Cal</strong> <strong>Spas</strong>’ Multi-Purpose Cleaner directly to the spas finish.<br />
2. Wipe clean with a clean soft cloth.<br />
3. Repeat on heavily calcified areas.<br />
4. Wipe spa thoroughly with a wet sponge, rinsing often in a bucket of clean water.<br />
5. Allow spa to dry completely.<br />
6. Apply a coat of <strong>Cal</strong> <strong>Spas</strong>’ Fast Sheen to the spa entire finish with a soft cloth or sponge.<br />
7. Allow Fast Sheen to dry until white and powdery.<br />
8. Buff clean with a soft cloth, rotating frequently.<br />
Periodic Maintenance:<br />
1. Spray <strong>Cal</strong> <strong>Spas</strong>’ Multi-Purpose Cleaner directly to the spas finish.<br />
2. Wipe clean with a clean soft cloth.<br />
3. Wipe spa thoroughly with a wet sponge, rinsing often in a<br />
bucket of clean water.<br />
Use of <strong>Cal</strong> <strong>Spas</strong>’ Multi-Purpose Cleaner:<br />
<strong>Cal</strong> <strong>Spas</strong>’ Multi-Purpose Cleaner should not be spayed directly into the spa water. Incorrect product usage may cause water clarity issues.<br />
Fast Sheen: (Spa finish protecting wax)<br />
<strong>Cal</strong> <strong>Spas</strong> Fast Sheen is an essential part of maintaining your spas finish. Through normal use, the spas finish can accumulate dirt, oil, and<br />
calcium causing a rough feel and unsightly scum lines.<br />
<strong>Cal</strong> <strong>Spas</strong> Fast Sheen is a non-oil based wax that is specifically formulated to protect the spas finish from the chemicals and minerals associated<br />
with normal spa use.<br />
The most effective solution to minimize cleaning time, is prevention. When the following steps are followed, the spas finish will actually<br />
start to resist most of the elements that cause calcium build-up and make scum line cleanup easier:<br />
Prior to Spa Start-up and Refilling:<br />
1. Spray <strong>Cal</strong> <strong>Spas</strong>’ Multi-Purpose Cleaner directly to the<br />
spas finish.<br />
2. Wipe clean with a clean soft cloth.<br />
3. Repeat on heavily calcified areas.<br />
4. Wipe spa thoroughly with a wet sponge, rinsing often in a<br />
bucket of clean water.<br />
5. Allow spa to dry completely.<br />
6. Apply a coat of <strong>Cal</strong> <strong>Spas</strong>’ Fast Sheen to the spa’s entire<br />
finish with a soft cloth or sponge.<br />
7. Allow Fast Sheen to dry until white and powdery.<br />
8. Buff clean with a soft cloth, rotating frequently.<br />
Important:<br />
<strong>Cal</strong> <strong>Spas</strong> Fast Sheen should not be used on spas full of water. Only apply to a clean, cool, dry surfaces. Incorrect product usage may<br />
cause water clarity issues.<br />
54
Sanitizers: (Bromine and Chlorine)<br />
How Sanitizers Work:<br />
Sanitizers such and Bromine and Chlorine, basically kill bacteria and other organic waste by breaking them down to unharmful levels,<br />
thus eliminating them from the water.<br />
You will need to know how each sanitizer performs this task to maximize their efficiency.<br />
Bromine:<br />
Bromine is generally in tablet form, and requires a small plastic floater to dissolve slowly into the spa water.<br />
With a proper understanding of how it works, it is quite an effective sanitizer, with a bonus of low chemical orders.<br />
Unlike chlorine, bromine can breakdown bacteria and other contaminates to a safe level, then move on to other contaminates with a low<br />
burnout rate.<br />
The problem that most spa owners have with bromine is that they don’t follow a chemical plan, allowing the bromine tablets to completely<br />
dissolve out of the floater. This causes bromine level to go up and down like a Yo Yo.<br />
Not what you want from a sanitizer.<br />
As mentioned before, bromine dissolves slowly into the water. The proper way to manage a bromine system is the following:<br />
Sanitizers: (Bromine and Chlorine)<br />
Bromine Management: (500 Gallon <strong>Spas</strong> at 100˚ F)<br />
Start-up:<br />
1. Add 2 oz. of Go Bro into the spa with all of the jets on high speed. This is your base bromine level as the tablets will take awhile to<br />
dissolve enough to manage 500 gallons of water.<br />
2. Add 2 oz. of Oxidizer Shock into the spa with all of the jets on high speed and the spa cover at least half off for 30 min. This will<br />
remove any organic materials that may have been left in the plumbing lines after its last draining.<br />
3. Start by placing 3 to 4 bromine tablets into 95% closed plastic floater and place into the spa. (Do not place bromine tablets into the<br />
filter basket.)<br />
Weekly:<br />
1. Test Bromine level with test strips. Note: Bromine Test<br />
levels will vary if spa is equipped with Quest 2000<br />
Ozonator.<br />
Test Levels With Quest 2000 Ozonator:<br />
Test Levels Without Quest 2000 Ozonator:<br />
1 to 3 Parts Per Million (ppm)<br />
3 to 5 Parts Per Million (ppm)<br />
2. Add one or two bromine tablets to the floater weekly.<br />
You want to replenish the same amount of bromine tablets equal to the tablet dissolve rate. (Dissolve rate will be faster at higher water<br />
temperatures and slower at lower temperatures.) NEVER LET BROMINE TABLETS RUN COMPLETELY OUT OF THE FLOATER.<br />
3. Add 2 oz. of Oxidizer Shock weekly into the spa with all of the jets on high speed and the spa cover at least half off for 30 minutes.<br />
This will remove organic material from the spa water, freeing-up your sanitizer to attack more bacteria, and other waste. This improves<br />
your sanitizers performance level, reduces spa odor, and refreshes your spa water.<br />
55
Sanitizers: (Bromine and Chlorine)<br />
Chlorine:<br />
Chlorine is generally in liquid form. However, in spa applications you will only want to use Granular Chlorine. This is primarily due to<br />
Chlorine type and strengths. Unlike Bromine, chlorine can only breakdown bacteria and other contaminates to a safe level once, prior to<br />
burning out. The problem that most spa owners have with chlorine, is that levels either get too low from neglect, or too high from trying<br />
to play chemical catch-up. As with all spa chemicals, LESS IS MORE. Take your time whenever adding chemicals to the spa water.<br />
Allowing proper filtration time and adding chemicals slowly, will greatly improve the length of your spa life and performance. You cannot<br />
super chlorinate spas and expect them to last. Be patient and stay with the plan.<br />
Granular Chlorine:<br />
Weekly:<br />
1. Test Chlorine level with test strips. Note: Chlorine Test levels will vary if spa is equipped with Quest 2000 Ozonator.<br />
Test Levels With Quest 2000 Ozonator:<br />
Test Levels Without Quest 2000 Ozonator:<br />
0.5 to 1 Parts Per Million (ppm)<br />
1 to 3 Parts Per Million (ppm)<br />
2. Add 1 to 2 tablespoons of <strong>Cal</strong> <strong>Spas</strong>’ Granular Chlorine to the spa water weekly. Chlorine dissipation rate will be faster at higher water<br />
temperatures and slower at lower temperatures.<br />
3. Add 2 oz. of Oxidizer Shock weekly into the spa with all of the jets on high speed and the spa cover at least half off for 30 minutes.<br />
This will remove organic material from the spa water, freeing-up your sanitizer to attack more bacteria, and other user waste . This<br />
act greatly improves your sanitizers performance level and reduces spa odor.<br />
Oxidizer Shock:<br />
Shock:<br />
All shock is not created equal. The most common shock you will find in pool and home improvement stores is Chlorinating Shock. This<br />
will destroy your spas Jets, Pillows, Pump Seals and worse. The only shock that you should put in your spa is <strong>Cal</strong> <strong>Spas</strong>’ Oxidizer Shock!<br />
Oxidizer shock is the safe, easy way to maintain either Bromine or Chlorine spa chemical plans. By using 1 oz. weekly, you are removing<br />
burnt-out chemicals, bacteria, and other organic material from you spas water. This will drastically improve chemical productiveness,<br />
spa odor, and minimize chemical irritation.<br />
Using Oxidizer Shock:<br />
1. 1 oz. of <strong>Cal</strong> <strong>Spas</strong> Oxidizer Shock* Weekly.<br />
2. 1 oz. of <strong>Cal</strong> <strong>Spas</strong> Oxidizer Shock* after heavy bather loads.<br />
3. 1 oz. of <strong>Cal</strong> <strong>Spas</strong> Oxidizer Shock* if water has a strong odor.<br />
*Spa must be running with all of the jets on high for 30 minutes with the cover half off. If necessary you may repeat Oxidizer Shock<br />
treatments in 30 minute intervals.<br />
Big Water Clarity Issue?<br />
1. Identify the water clarity issue first: Is it Soap, Oil, Bacterial, or Chemical Imbalance.<br />
2. Select the proper treatment.<br />
3. Clean the filter cartridge and increase the amount of filtration until the water clears-up.<br />
4. Add 1 oz. of Oxidizer Shock at a time, in 30 minute intervals, with the spa cover at least half off. Make sure all of the jets are on high.<br />
5. Be patient! With few exceptions, spa water will not clean or clear-up overnight. Cloudy water requires proper identification, the correct<br />
treatment, and plenty of filtration.<br />
56
<strong>Cal</strong> <strong>Spas</strong> Clear Water Plan (Start up)<br />
Prior to filling a spa for the first time or after a routine draining, you will want to follow this start-up plan to extend water life and performance.<br />
If you are following either Bromine or Chlorine Clear Water plans, you will notice that both start up processes are the same with the<br />
exception of step 4.<br />
As with all chemical dosages listed in the Clear Water Plan, start up dosages are intended for 500 gallon spas. Please adjust chemical<br />
dosages to the gallon capacity of your<br />
particular spa.<br />
Start up: (500 Gallon <strong>Spas</strong>)<br />
1. Clean spa thoroughly with <strong>Cal</strong> <strong>Spas</strong> Multi-Purpose Cleaner.<br />
2. Apply a protective coat of <strong>Cal</strong> <strong>Spas</strong> Fast Sheen to the Acrylic surface.<br />
3. Fill spa to proper water level with normal tap water. (Do not use soft water.)<br />
4. Bromine Plan: Add 2 oz. of <strong>Cal</strong> <strong>Spas</strong> Go Brom to establish a Bromine base level Chlorine Plan: Add two tablespoons of <strong>Cal</strong> <strong>Spas</strong><br />
Granular Chlorine to the spa water .<br />
5. Pour in 3 oz. of <strong>Cal</strong> <strong>Spas</strong> Metal Protector to the center of the spa.<br />
6. Sprinkle 2 oz. of <strong>Cal</strong> <strong>Spas</strong> Oxidizer Shock in the center of the spa and leave spa uncovered and turn on the jets for 30 minutes prior to<br />
recovering.<br />
7. Allow 24 hours prior to testing and implementing the Bromine or Chlorine Clear Water Plans.<br />
<strong>Cal</strong> <strong>Spas</strong> Clear Water Plan (Bromine)<br />
Bromine users<br />
This plan and its chemical dosages are intended for <strong>Cal</strong> <strong>Spas</strong>’ Chemicals only. Most chemical manufactures use different chemical formulas<br />
and strengths. Only <strong>Cal</strong> <strong>Spas</strong>’ chemicals are specially formulated to provide proper chemical balance at lower dosages. Compare<br />
labels and dosages and see for yourself. You will get greater protection and performance with <strong>Cal</strong> <strong>Spas</strong>’ Chemicals.<br />
Always read and follow all printed instruction on chemical bottles and packages.<br />
Day One (Monday)<br />
1. Test spa water using test strips. (Be sure to check the expiration date prior to use.)<br />
2. Add two bromine tablets to floater. (Amount of tablets needed will vary with water temperature.)<br />
3. Adjust Total Alkalinity, then pH if needed. (See pH and Alkalinity sections for more information)<br />
4. Add 2 oz. of Stain and Scale Defense.<br />
5. Pull the dirty filter from the spa and place into Liquid Filter Cleaner solution.<br />
6. Place your extra, cleaned, fully dried filter cartridge in the spa.<br />
7. Vacuum your spa with the <strong>Cal</strong> <strong>Spas</strong> Vac.<br />
Day Two (Wednesday)<br />
1. Test spa water using test strips. (Be sure to check the expiration date prior to use.)<br />
2. Adjust Total Alkalinity, then pH if needed. (See pH and Alkalinity sections for more information.)<br />
4. Pull the filter from Liquid Filter Cleaner solution, hose it off and allow to dry.<br />
57
<strong>Cal</strong> <strong>Spas</strong> Clear Water Plan (Bromine cont.)<br />
Day Three (Friday)<br />
1. Test spa water using test strips. (Be sure to check the expiration date prior to use.)<br />
2. Check bromine floater for sufficient amount of bromine tablets. (Add one if necessary.)<br />
3. Adjust Total Alkalinity, then pH if needed. (See pH and Alkalinity sections for more information.)<br />
4. Add 1 oz. of Oxidizer Shock. (See Oxidizer Shock section for more information.)<br />
Every Month:<br />
1. Inspect equipment area for leaks, rodents, and insects.<br />
Every 3 to 4 Months:<br />
1. Drain and clean your spa with Multi Purpose Cleaner.<br />
2. Polish the acrylic surface with Fast Sheen.<br />
3. Clean and treat spa cover, pillows and Ultra Spa Cabinets with Cover Protector.<br />
Every 6 Months:<br />
1. Clean and treat redwood spa cabinets and gazebos with Nu-Spa redwood stain renewer & brightener.<br />
<strong>Cal</strong> <strong>Spas</strong> Clear Water Plan (Chlorine)<br />
This plan and its chemical dosages are intended for <strong>Cal</strong> <strong>Spas</strong>’ Chemicals only. Most chemical manufacturers use different chemical<br />
formulas and strengths. Only <strong>Cal</strong> <strong>Spas</strong>’ chemicals are specially formulated to provide proper chemical balance at lower dosages.<br />
Compare labels and dosages and see for yourself. You will get greater protection and performance with <strong>Cal</strong> <strong>Spas</strong>’ Chemicals.<br />
Always read and follow all printed instruction on chemical bottles and packages.<br />
Day One (Monday)<br />
1. Test spa water using test strips. (Be sure to check the expiration date prior to use.)<br />
2. Add two tablespoons Granular Chlorine. (Chlorine dissipation will vary with water temperature.)<br />
3. Adjust Total Alkalinity, then pH if needed. (See pH and Alkalinity sections for more information.)<br />
4. Add 2 oz. of Stain and Scale Defense.<br />
5. Pull the dirty filter from the spa and place into Liquid Filter Cleaner solution.<br />
6. Place your extra, cleaned, fully dried filter cartridge in the spa.<br />
7. Vacuum your spa with the <strong>Cal</strong> <strong>Spas</strong> Vac.<br />
Day Two (Wednesday)<br />
1. Test spa water using test strips. (Be sure to check the expiration date prior to use.)<br />
2. Adjust Total Alkalinity, then pH if needed. (See pH and Alkalinity sections for more information.)<br />
4. Pull the filter from Liquid Filter Cleaner solution hose it off and allow to dry.<br />
<strong>Cal</strong> <strong>Spas</strong> Clear Water Plan (Chlorine cont.)<br />
Day Three (Friday)<br />
1. Test spa water using test strips. (Be sure to check the expiration date prior to use.)<br />
2. Add two tablespoons Granular Chlorine. (Chlorine dissipation will vary with water temperature.)<br />
3. Adjust Total Alkalinity, then pH if needed. (See pH and Alkalinity sections for more information.)<br />
4. Add 1 oz. of Oxidizer Shock (See Oxidizer Shock section for more information.)<br />
Every Month:<br />
1. Inspect equipment area for leaks, rodents, and insects.<br />
Every 3 to 4 Months:<br />
1. Drain and clean your spa with Multi Purpose Cleaner.<br />
2. Polish the acrylic surface with Fast Sheen.<br />
3. Clean and treat spa cover, pillows and Ultra Spa Cabinets with Cover Protector.<br />
Every 6 Months:<br />
1. Clean and treat redwood spa cabinets and gazebos with Nu-Spa redwood stain, renewer & brightener.<br />
58
Frequently Asked Chemical Questions:<br />
Q: My pH is High and my Alkalinity is low, What do I do?<br />
A: Adjust your Alkalinity first, even if it throws the pH further off. Use “pH / Alkalinity Up” or “pH / Alkalinity Down” adjust and stabilize<br />
you Total Alkalinity level. This will make it easier to adjust you pH levels later and allow them to remain stable longer.<br />
Q: When is the best time to use Oxidizer Shock?<br />
A: Every week, as described in <strong>Cal</strong> <strong>Spas</strong>’ Clear Water Plan, and after heavy bather loads. You may use <strong>Cal</strong> <strong>Spas</strong>’ Oxidizer Shock as<br />
often as you like, as long as you allow you spa to run for 30 minutes with the spa cover at least half off.<br />
Q: How long is the shelf life of Bromine?<br />
A: As with any chemical you will want to store them in a cool, dry place. When properly stored, bromine will last one year.<br />
Q: Do I need Metal Protector and Stain and Scale Defense?<br />
A: Yes. Water sources are becoming more and more mineralized. These chemicals are every bit as important to your spa as Bromine or<br />
Chlorine are.<br />
Q: My skin is becoming irritated after spa use. Why?<br />
A: You are not using your <strong>Cal</strong> <strong>Spas</strong>’ Oxidizer Shock enough and/or your sanitizer level is too high. Because the spa and its chemicals<br />
will strip some of your bodies oils away. We recommend that you use a moisturizer after spa use. If you still have skin irritation after<br />
these steps, see your doctor.<br />
Q: How long should I wait to enter the spa after adding chemicals?<br />
A: With <strong>Cal</strong> <strong>Spas</strong>’ Chemicals, the longest you will need to wait is one (1) hour.<br />
Q: What is the sand like substance in the bottom of my spa?<br />
A: Oxidized contaminant’s. <strong>Spas</strong> equipped with the Quest 2000 Ozonator will produce this generally after initial fill up and water additions.<br />
The debris is just oxidized solids that were in the water that are now visible. Simply vacuum them out as a part of you weekly<br />
plan.<br />
If you have any questions that were not answered in this guide, please call your local <strong>Cal</strong> <strong>Spas</strong> Dealer. They have plenty<br />
experience dealing with your local water chemistry and can offer the most efficient solution for you water issues.<br />
59
<strong>Cal</strong> <strong>Spas</strong> Chemicals<br />
BROMINE/CHLORINE<br />
STARTER KIT<br />
#CHE07000290/#CHE07000295<br />
When use as directed,<br />
this product is effective as<br />
a spa and hot tub sanitizer<br />
and disinfectant.Treats<br />
250 Gallons for up to 3<br />
weeks.<br />
VINYL & LEATHER<br />
CLEANER<br />
#CHE07000620<br />
Specifically designed to<br />
protect spa covers and<br />
pillows from chemical and<br />
ultraviolet damage.<br />
FAST SHEEN<br />
#CHE07000610<br />
Unique water based,<br />
chemically reactive silicone<br />
sealant and polish.<br />
Seals, shines and protects<br />
spa surfaces.<br />
BROMINATING<br />
TABLETS<br />
#CHE07000760/#CHE07000770<br />
Sanitizer, disinfectant for<br />
<strong>Spas</strong> and Hot Tubs.<br />
CHLORINATING<br />
GRANUALS<br />
#CHE07000865/#CHE07000880<br />
When use as directed,<br />
this product is effective as<br />
a spa and hot tub water<br />
disinfecting agent.<br />
GO BROM<br />
#CHE07000830<br />
Establishes a bromide<br />
bank in spas and hot tubs.<br />
FILTER CARTRIDGE<br />
CLEANER<br />
#CHE07000690<br />
Breaks down organic an<br />
inorganic material.<br />
Removes calcium scale<br />
and mineral deposits.<br />
LIQUID HARDNESS<br />
INCREASER<br />
#CHE07000250<br />
Increases water hardness<br />
to reduce corrosion. Helps<br />
reduce foaming.<br />
SPA BRITE<br />
#CHE07000580/#CHE07000590<br />
Clears up cloudy water in<br />
spas and hot tubs.<br />
Effective at all spa and hot<br />
tub temperatures.<br />
FOAM GONE<br />
#CHE07000800/#CHE07000810<br />
Breaks up existing foam in<br />
spa water. Effective at all<br />
spa and hot tub temperatures.<br />
pH-ALKALINITY<br />
UP<br />
#CHE07000720/#CHE07000730<br />
Helps Maintain pH in <strong>Spas</strong><br />
and Hot Tubs.<br />
pH-ALKALINITY<br />
DOWN<br />
#CHE07000750<br />
Lowers pH in <strong>Spas</strong><br />
and Hot Tubs.<br />
ENZYME FORMULA<br />
#CHE07000600/#CHE07000605<br />
Emulsifies and biodegrades<br />
bodily oils, suntan<br />
lotion and other contaminant’s<br />
found in spas and<br />
hot tubs.<br />
METAL PROTECTOR<br />
#CHE07000630/#CHE07000640<br />
Controls water discoloration<br />
caused by minerals.<br />
Special Extra Strength<br />
formula for spas and hot<br />
tubs.<br />
STAIN AND SCALE<br />
PREVENTION<br />
#CHE07000650#/CHE07000660<br />
Prevents minerals from<br />
damaging spa components<br />
and effecting performance.<br />
OXIDIZER<br />
SHOCK<br />
#CHE07000680/#CHE07000710<br />
Destroys organic<br />
contaminant’s and odor<br />
causing wastes.<br />
TO ORDER CAL SPAS’ CHEMICALS PLEASE CALL<br />
1-800-CALSPAS
L I M I T E D<br />
This Limited Warranty is effective for Victory Series spas manufactured after May 9, 2003<br />
T E N Spa Shell / Structural Warranty:<br />
10YEARS<br />
Victory <strong>Spas</strong>: C.A.I. warranties against the loss of water through<br />
the spa shell due to defects in materials and workmanship for a<br />
period of ten years from the original date of purchase.<br />
F I V E<br />
5YEARS<br />
Equipment Warranty:<br />
Victory Series <strong>Spas</strong>: C.A.I. warranties the spas electrical and electronic<br />
component-specifically, the control system, pumps, and air<br />
blowers against malfunction due to defects in materials and workmanship<br />
for a period of five years from the original date of purchase.<br />
T E N<br />
F I V E<br />
5YEARS<br />
5 Year Interior Surface Warranty:<br />
Victory Series <strong>Spas</strong>: C.A.I. warranties the standard Acrylic /<br />
standard Quarite interior surfaces from cracks, blisters, peeling,<br />
discoloration and lamination for a period of five years from the<br />
original date of purchase.<br />
F I V E<br />
5YEARS<br />
Plumbing Warranty:<br />
Victory Series <strong>Spas</strong> : C.A.I. warranties the sure-flo jet inserts and<br />
all factory installed plumbing and “Eliminator” wet end from loss of<br />
water due to defects in materials and workmanship for a period of<br />
five years from the original date of purchase.<br />
Spa Cabinet:<br />
C.A.I. warranties the spa cabinet to be free from defects in material and<br />
workmanship for a period of ninety days from the original date of purchase.<br />
Seasonal check and surface cracks are not considered defects in<br />
material or workmanship, as they are normal characteristics of all wood.<br />
Surface stain is specifically excluded from this warranty.<br />
Extent of Warranty<br />
This Limited Warranty is only valid on portable models<br />
delivered in the continental United States and extends<br />
through the selling<br />
dealer to the original purchaser at the original site of<br />
installation. This guarantee becomes valid at time of<br />
purchase and ends either by specified time-frame listed<br />
above, owner transfer, or relocation.<br />
Warranty Exclusions & Limitations<br />
This guarantee is void if the spa has been subject to<br />
negligence, alteration, misuse, abuse, repairs by non-<br />
C.A.I. authorized representatives, incorrect electrical<br />
installation, acts of God (including but not limited to<br />
acts of nature and surrounding environments) and any<br />
other cases beyond the control of C.A.I. Please refer<br />
to the owner's manuals for examples of exclusions<br />
and of common acts invalidating this guarantee.<br />
Legal Remedies<br />
This Limited Warranty gives you specific legal rights<br />
and you may have other rights, which may vary from<br />
state to state.<br />
Warranty Performance<br />
In the event of a malfunction or defect covered under the<br />
terms of this guarantee, the factory authorized selling<br />
dealer is responsible for performing all necessary repairs.<br />
To obtain service, contact the authorized selling dealer.<br />
In the event the consumer is unable to obtain<br />
satisfactory customer service from the authorized selling<br />
dealer, written notification must be given to the C.A.I.<br />
Customer Relations Department within (10) ten days of<br />
the reported failure. There will be no charge for parts or<br />
labor on a covered item. However, the authorized service<br />
agent may assess a reasonable travel or mileage charge<br />
per service call. If C.A.I. determines that repair of a<br />
covered item is not feasible, C.A.I. reserves the right to<br />
replace the defective merchandise with merchandise<br />
equal in value to the original purchase price. In the event<br />
of any guarantee replacement, all removal, replacement,<br />
installation and shipping costs are the responsibility of<br />
the spa owner.<br />
Disclaimers<br />
This Limited Warranty provided herein is made with<br />
the express understanding that the spa is not an<br />
essential device or medical device as defined under<br />
State and Federal Law. C.A.I. shall not be liable for<br />
loss of use of the spa or other incidental or consequential<br />
costs, expense or damages, which may<br />
include but are not limited to removal of permanent<br />
deck or other custom fixtures or the necessity for<br />
crane removal. Any implied guarantee shall have<br />
duration equal to the duration of the applicable<br />
guarantee stated above. Under no<br />
circumstances shall C.A.I. or any of its representatives<br />
be held liable for injury to any person or damage to<br />
any property, however arising.<br />
This Limited Warranty is effective for Victory Series spas manufactured after May 9, 2003<br />
Customer Service<br />
For customer service, contact the authorized selling<br />
dealer immediately. If you need additional information<br />
or assistance, please contact the C.A.I Customer<br />
Relations Department at 1462 East Ninth Street,<br />
Pomona, CA 91766, or call (800) 225-7727<br />
www.calspas.com<br />
1462 East Ninth Street ◆ Pomona, CA 91766<br />
(909) 623-8781<br />
®<br />
Rev: 05/06/03
2003 Warranty Information:<br />
See your selling dealer for a copy of the applicable warranty, details, and any questions you may have regarding the warranty<br />
coverage on your spa.<br />
Warranty Limitations: The 2003 Limited Warranty is void if the spa has been subject to negligence, alteration, misuse,<br />
abuse, repairs by non- C.A.I. authorized representatives, incorrect electrical installation, acts of God and any other cases<br />
beyond the control of C.A.I. Examples of common acts invalidating this warranty include but are not limited to:<br />
Use of spa in a non-residential application.<br />
Scratches caused by normal use.<br />
Operation of spas water temperature outside of the range of 32°F and 118°F.<br />
Damage caused by incorrect water level (Low, Overflow, Etc.)<br />
Damage caused by extreme weather conditions. (Freeze, Heat, Etc.)<br />
Damage caused by dirt, sand, and calcium.<br />
Damage caused by clogged filter cartridges. See filter cleaning recommendations in this owner’s manual.<br />
Damage caused by continued operation of the spa with either known or an unknown problem.<br />
Damaged caused by tri-chlor, acids, chlorine tablets, and any other spa chemicals not authorized by C.A.I.<br />
Damage caused by improper water chemistry. (High levels of chlorine, bromine, calcium, pH and other excessive chemical<br />
levels)<br />
Damage caused by direct sun light. <strong>Spas</strong> should always be covered when not in use.<br />
Damage caused as a result of failure to follow operating instructions as defined in this owner’s manual.<br />
Damage caused by Incorrect electrical installation, electrical brown outs, voltage spikes, or operation of spa out of voltage<br />
range by more than (+) or (-)10%.<br />
<strong>Spas</strong> improperly installed inground or placed on non-approved surfaces. See page 5 in this Owner’s manual for details.<br />
This Limited Warranty applies only to spas normally used for personal, family, or household purposes.<br />
This Limited Warranty specifically excludes Commercial <strong>Spas</strong>.<br />
Warranty Exclusions:<br />
Replaceable service items such as filters, pump seals, light bulbs, ozonator cartridge, jet inserts, spa covers, and filter covers<br />
are specifically excluded from the 2003 limited warranty.<br />
C.A.I. warranties its electrical heater from defects in material and workmanship for a period of one year from the<br />
original date of purchase.<br />
Spa covers and stereo systems are delivered with their own manufacture warranty. For more info, Please see their warranties<br />
in the owner’s information package that was delivered with your spa for more information.<br />
Customer Service: For customer service, contact the authorized selling dealer immediately. If you need additional<br />
information or assistance, please contact the C.A.I Customer Relations Department at 1462 East Ninth St. Pomona, CA.<br />
91766, or call 909-623-8781<br />
The 2003 Limited Warranty is effective for Victory Series spas manufactured after May 19, 2003<br />
36
Winterizing<br />
In many areas of the country the temperature drops below 32˚F. C.A.I. recommends that you always have your spa full of<br />
water and running at normal spa temperatures (80˚F to 100˚F). This will help reduce the risk of freezing in your spa and your<br />
spa's equipment.<br />
IMPORTANT WARNING<br />
If you find the need to drain your spa, please be aware of the potential of freezing in your spa's equipment and plumbing.<br />
Even if the directions below are followed perfectly, there is no guarantee that your spa will not suffer freeze damage and void<br />
warranty coverage.<br />
Cold Climate Draining:<br />
Open all filters and filter baskets.<br />
Remove filter(s)<br />
Drain your spa completely.<br />
Remove drain plugs from the front of pump(s).<br />
Disconnect the unions from both sides of the pump.<br />
Use a wet/dry vacuum to blow any remaining water out of the jets and plumbing lines.<br />
Use a soft towel to remove any remaining water in the spa, filter canister, and equipment area.<br />
Cover your spa with a good spa cover and all-weather tarp, to ensure rain or snow can not enter the spa.<br />
If your have a Gas Heater, you will need to follow the winterizing instructions for your particular heater in the owner’s<br />
manual. This manual will be delivered inside your gas heater.<br />
Draining Your Spa:<br />
Your spa should be drained every 4 to 6 months, and refilled with fresh tap water. The following is the recommended method<br />
for draining your spa.<br />
Portable <strong>Spas</strong><br />
Turn off power.<br />
Open all filters and filter baskets.<br />
Remove filter(s).<br />
Hook up the female end of a garden hose to the spas drain fitting and the other end in a convenient place for draining.<br />
*(Locate white hose in the bottom of the equipment area, remove cap and connect garden hose.)<br />
Let spa drain completely, then remove garden hose and replace the drain cap.<br />
LTR17000174<br />
37
Replacement Part Reference Card:<br />
SHELL:<br />
1. Granite Repair Kit Galaxy Green: ACR03400020<br />
2. Spa Cover: V-100:ACC01000590 V-200/300:ACC1001250<br />
V400/500/700/800:ACC01000910 V600:ACC01000200<br />
CABINET:<br />
1. Equipment Acces Panel: V-100:WOO27500484 V-200/300:WOO27513051<br />
2. Front Panel: V-100: N/A V-200/300:WOO27513049<br />
3. Side Panel: V-100:WOO27500402 V-200/300:WOO27513052<br />
3. Corner Panel: V-100: N/A V-200/300:WOO27504382<br />
4. Equipment Acces Panel: V400/500/700/800:WOO27513044 V600:WOO27513044<br />
5. Front Panel: V400/500/700/800:WOO27513045 V600:WOO27513048<br />
6. Side Panel: V400/500/700/800:WOO27513043 V600:WOO27513047<br />
7. Corner Panel: V400/500/700/800:WOO27518761 V600:WOO27518761<br />
8. Stainless Steel Screw: All Victory Model:HAR13200010<br />
PLUMBING:<br />
1. Euro Jet Insert: PLU21702702<br />
2. Micro Jet Insert: PLU21702403<br />
3. Maxi Jet Insert: PLU21702404<br />
4. Storm Jet Insert: PLU21702411<br />
5. Air Venturi: PLU21700375<br />
6. On / Off Drain Valve: PLU21400350<br />
7. Ozone Check Valve: OZO18300031<br />
8. 50 Sq. Ft. Filter Cartridge: FIL11100190<br />
9. Floating Weir Skimmer Assy: FIL11700138<br />
10. Temperature Sensor Housing: ELE09900240<br />
EQUIPMENT:<br />
1. 1.5 BHP 120 Volt Pump Complete (V-100/200): PUM22000390<br />
2. 2.0 BHP 240 Volt Pump Complete(V-400): PUM22000830<br />
3. 5.0 BHP 240 Volt Pump Complete (V-300/500/600/700/800): PUM22000927<br />
4. Pump Abatement Pad (All): PUM22900210<br />
5. 1500 Topside Control Panel (All): ELE09200774<br />
6. 1500 Control Box (V-100 through 700): ELE09000199<br />
7. 1500 Control Box (V800): ELE09000201<br />
7. 4.0kW Heater manifold w/ Heater (All): HEA14100040<br />
8. Pressure Switch (All): ELE09500200<br />
9. Heater Gasket 2” (All): HEA14700030<br />
10. 12 Volt Light Bulb (All): LIT16300000<br />
11. 12 Volt LED Multi Color Light Upgrade (All): LIT16000145<br />
12. 240V to 120V Conversion Kit (CKIT110) ELE09700086<br />
WWW.<strong>Cal</strong>spas.com or 800-225-7727