Manual - BBQ Grills, Gas Grills Singapore
Manual - BBQ Grills, Gas Grills Singapore
Manual - BBQ Grills, Gas Grills Singapore

Create successful ePaper yourself
Turn your PDF publications into a flip-book with our unique Google optimized e-Paper software.
<strong>Gas</strong> Barbecues<br />
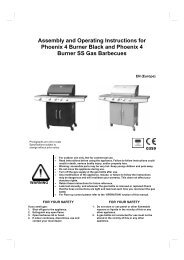
Assembly and Operating Instructions for<br />
Outback® Omega 100, Omega 200, and Omega 300 <strong>Gas</strong> Barbecues<br />
EN (Europe)<br />
Omega 100 Omega 200<br />
Omega 300<br />
Photographs are not to scale.<br />
Specifications subject to change<br />
without prior notice.<br />
0359<br />
WARNING<br />
• For outdoor use only. Not for commercial use.<br />
• Read instructions before using the appliance. Failure to follow instructions could<br />
result in death, serious bodily injury, and/or property loss.<br />
• Warning: accessible parts may be very hot. Keep young children away.<br />
• Do not move the appliance during use.<br />
• Turn off the gas supply at the gas bottle after use.<br />
• Any modification of the appliance, misuse, or failure to follow the instructions may<br />
be dangerous and will invalidate your warranty. This does not affect your statutory<br />
rights.<br />
• Retain these instructions for future reference.<br />
• Leak test your barbecue annually. Check the hose connections are tight and leak<br />
test each time you reconnect the gas bottle.<br />
• For Flare-up control please refer to the ‘OPERATION’ section of this manual.<br />
FOR YOUR SAFETY<br />
If you smell gas:<br />
1. Shut off gas to the appliance.<br />
2. Extinguish any open flame.<br />
3. Open barbecue lid or hood.<br />
4. If odour continues, discontinue use and<br />
contact your local dealer.<br />
FOR YOUR SAFETY<br />
1. Do not store or use petrol or other flammable<br />
vapours or liquids in the vicinity of this or any<br />
other appliance.<br />
2. A gas bottle not connected for use shall not be<br />
stored in the vicinity of this or any other appliance.
A. Parts List<br />
Quantities vary according to model purchased. Specifications subject to change without prior notice. For more<br />
details on hardware, please see the corresponding Hardware Reference Diagram for your barbecue model.<br />
Body<br />
Assembly<br />
Upper<br />
Trolley<br />
Lower<br />
Trolley<br />
Hardware<br />
OUTBACK® OMEGA RANGE<br />
CODE PART QTY OMEGA 100 OMEGA 200 OMEGA 300<br />
A1 Flame Tamer 1 <br />
A2 Burner 1 <br />
A3 Hood Handle 1 <br />
A4 Hood 1 <br />
A5 Body 1 <br />
A6 Grease Cup Holder 1 <br />
A7 Grease Cup 1 <br />
A8 Cooking Grill 1 <br />
A9 <strong>Gas</strong>ket 8 <br />
A10 Upper Hinge Bracket 2 <br />
A11 Lower Hinge Bracket 2 <br />
A12 <strong>Gas</strong> Collector Box 1 <br />
A13 Main Electrode 1 <br />
A14 Warming Rack 1 <br />
B1 Control Panel 1 <br />
B2 Igniter Button 1 <br />
B3 Knob 2 <br />
B4 Body Handle 1 <br />
B5 U-Bar 2 <br />
B6 Hose (if supplied) <br />
B7 Plastic Side Shelf 2 1<br />
B8 Side Burner Knob 1 <br />
B9 Side Burner Grid 1 <br />
B10 Side Burner Shelf 1 <br />
B11 Side Burner Head 1 <br />
B12 Side Burner Electrode 1 <br />
C1 Short Leg 2 <br />
C2 Axle 2 <br />
C3 Wheel 2 <br />
C4 Hubcap 2 <br />
C5 Screen 1 <br />
C6 Long Support Rod 2 <br />
C7 Stopper 2 <br />
C8 Long Leg 2 <br />
C9 Short Support Rod 2 <br />
C10 Bottom Shelf 1 <br />
D1 ST4.0x10 Screw 2 <br />
D2 M5x10 Bolt 2 <br />
D3 M6x15 Bolt 4 <br />
D4 M6x25 Bolt 4 <br />
D5 M6x30 Bolt 4 <br />
D6 M6x40 Bolt 8 <br />
D7 M6x50 Bolt 4 <br />
D8 Axle-Clip 2 <br />
D9 M6 Keps Nut 4 20 20<br />
D10 Shelf Spacer 8 <br />
<br />
<br />
Pre-Assembled<br />
Quantity and specification varies according to model purchased.<br />
2
B1. Parts Diagram: Omega 100<br />
Quantities vary according to model purchased. Specifications subject to change without prior notice.<br />
For more details on hardware, please see ‘Hardware Reference Diagram: Omega 100.’<br />
A8<br />
A1<br />
A3<br />
Pre-assembled body unit includes<br />
the following individual parts:<br />
A2 A4 A5 A10 B1 B2<br />
B3<br />
A11 A12 A13 A14<br />
B5<br />
B6<br />
B6<br />
B4<br />
A6<br />
A7<br />
C1<br />
C5<br />
C8<br />
C6<br />
C9<br />
C4<br />
C3<br />
D8<br />
C2<br />
C7<br />
3
B2. Hardware Reference Diagram: Omega 100<br />
Specifications subject to change without prior notice.<br />
C2<br />
D8<br />
D3<br />
D7<br />
D4, D9<br />
D5<br />
4
C1. Parts Diagram: Omega 200<br />
Quantities vary according to model purchased. Specifications subject to change without prior notice.<br />
For more details on hardware, please see ‘Hardware Reference Diagram: Omega 200.’<br />
A8<br />
A1<br />
A3<br />
Pre-assembled body unit includes<br />
the following individual parts:<br />
A2 A4 A5 A10 B1 B2<br />
A11 A12 A13 A14 B5 B6<br />
B3<br />
B6<br />
B7<br />
A6<br />
A7<br />
C1<br />
C5<br />
C8<br />
C6<br />
C10<br />
C7<br />
D8<br />
C4 C3 C2<br />
5
C2. Hardware Reference Diagram: Omega 200<br />
Specifications subject to change without prior notice.<br />
C2<br />
D8<br />
D4, D9<br />
D5, D9<br />
D6, D9, D10<br />
D7, D9<br />
6
D1. Parts Diagram: Omega 300<br />
Quantities vary according to model purchased. Specifications subject to change without prior notice.<br />
For more details on hardware, please see ‘Hardware Reference Diagram: Omega 300.’<br />
A8<br />
A1<br />
A3<br />
Pre-assembled body unit includes<br />
the following individual parts:<br />
A2 A4 A5 A10 B1 B2<br />
A11 A12 A13 A14 A15 B6<br />
B3<br />
B8<br />
B5<br />
B9<br />
B10<br />
B6<br />
A6<br />
B7<br />
B11<br />
B12<br />
A7<br />
C1<br />
C5<br />
C8<br />
C10<br />
C7<br />
D8<br />
C4 C3 C2<br />
7
D2. Hardware Reference Diagram: Omega 300<br />
Specifications subject to change without prior notice.<br />
C2<br />
D8<br />
D4, D9<br />
D5, D9<br />
D6, D9, D10<br />
D7, D9<br />
8
E. Assembly<br />
TOOLS NEEDED FOR ASSEMBLY:<br />
Medium size flat blade or Philips/crosspoint screwdriver, adjustable spanner or metric spanner set<br />
Please lay out all nuts and bolts and check lengths before assembling.<br />
Whilst every care is taken in the manufacture of this product, care must be taken during assembly in case sharp<br />
edges are present.<br />
1<br />
Omega 100 Omega 200 Omega 300<br />
2<br />
Omega 100 Omega 200 Omega 300<br />
C8<br />
C1<br />
Warning: Care must be taken to ensure hood does not fall open unexpectedly.<br />
9
3<br />
Omega 100 Omega 200 Omega 300<br />
C8<br />
C1<br />
NOTE: Ensure that the legs with the Velcro attached to them are at the front of the<br />
barbecue.<br />
4<br />
Omega 100 Omega 200 Omega 300<br />
D4<br />
D9<br />
D4<br />
D9<br />
D4<br />
D9<br />
D4<br />
D9<br />
10
5<br />
Omega 100 Omega 200 Omega 300<br />
Omega 200, Omega 300 users skip this step and proceed directly to Step 7.<br />
D7<br />
C6<br />
D7<br />
6<br />
Omega 100 Omega 200 Omega 300<br />
D5<br />
C9<br />
D5<br />
11
7<br />
Omega 100 Omega 200 Omega 300<br />
Omega 100 users skip this step and proceed directly to Step 8.<br />
D5<br />
D9<br />
C1<br />
D7<br />
D9<br />
8<br />
Omega 100 Omega 200 Omega 300<br />
C3<br />
D8<br />
C2<br />
C4<br />
12
9<br />
Omega 100 Omega 200 Omega 300<br />
Omega 200, Omega 300 users skip this step and proceed directly to Step 10.<br />
D3<br />
B4<br />
10<br />
Omega 100 Omega 200 Omega 300<br />
Omega 100 users skip this step and proceed directly to Step 13.<br />
Omega 200 users perform this step for both left and right side shelves.<br />
D9<br />
D10<br />
B7<br />
D6<br />
13
11<br />
Omega 100 Omega 200 Omega 300<br />
Omega 100, Omega 200 users skip this step and proceed directly to Step 13.<br />
B10<br />
D9<br />
D10<br />
D6<br />
Fit the side burner venturi tube over the gas<br />
valve outlet. This is a loose fit and not a gas<br />
tight seal. Then attach side burner shelf as<br />
shown in the diagram.<br />
Connect ignitor wire to pushbutton lead.<br />
12<br />
Omega 100 Omega 200 Omega 300<br />
B9<br />
14
13<br />
Omega 100 Omega 200 Omega 300<br />
A7<br />
Insert grease cup into wire cup holder.<br />
14<br />
Omega 100 Omega 200 Omega 300<br />
A1<br />
15
15<br />
Omega 100 Omega 200 Omega 300<br />
A8<br />
16<br />
Omega 100 Omega 200 Omega 300<br />
A3<br />
D2<br />
D2<br />
16
17<br />
Omega 100 Omega 200 Omega 300<br />
C5<br />
ASSEMBLY IS NOW COMPLETE.<br />
PROCEED TO THE NEXT PAGE FOR INSTRUCTIONS ON<br />
OPERATION AND MAINTENANCE.<br />
REFER TO THE LEAK TEST INSTRUCTIONS ON PAGE 19.<br />
17
F. Important Information<br />
Please read these instructions carefully<br />
before assembly and use.<br />
• Retain these instructions for future<br />
reference.<br />
• For outdoors use only – do not use indoors.<br />
Do not use below ground level.<br />
• For use with LPG bottled gas only. A<br />
suitable regulator must be used for Butane,<br />
propane or mixes.<br />
• Do not use within 1m of any flammable<br />
structure or surface.<br />
• LP gas bottles should not be placed directly<br />
underneath the barbecue.<br />
• LP gas bottles must not be stored or used in<br />
the horizontal position. A leak would be<br />
very serious and liquid could enter the gas<br />
line.<br />
• When igniting barbecue open its hood<br />
before lighting.<br />
• Do not move the barbecue while alight.<br />
• This barbecue must not be left unattended<br />
when lit.<br />
• The hood handle can become very hot.<br />
Grip only the centre of the handle. Use of a<br />
cooking glove is advised.<br />
• Use caution when opening the hood, as hot<br />
steam inside is released upon opening.<br />
• Parts of this barbecue become very hot –<br />
care must be taken when children, elderly<br />
people, and animals are present.<br />
• Always turn off the gas bottle when the<br />
barbecue is not in use.<br />
• Never cover a barbecue until it has<br />
completely cooled.<br />
• Leak test annually, and whenever the gas<br />
bottle is removed or replaced.<br />
• Do not store flammable materials near this<br />
barbecue.<br />
• Do not use aerosols near this barbecue.<br />
• Failure to follow the manual’s instructions<br />
could result in serious injury or damage.<br />
• Modification of the barbecue may be<br />
dangerous, is not permitted and will nullify<br />
any warranty.<br />
• If you have any queries regarding these<br />
instructions, contact your local dealer.<br />
G. <strong>Gas</strong> and Regulator<br />
This barbecue can use either propane or<br />
butane LPG bottled gas. Propane bottles, will<br />
supply gas all year round, even on cold winter<br />
days. A spanner may be required to change<br />
gas bottles. Butane bottles, will supply<br />
sufficient gas in summer, but performance of<br />
the barbecue may be affected once the gas<br />
temperature starts to fall below +10°C. The<br />
bottle should never be stood on the trolley<br />
base and placed directly under the barbecue.<br />
<strong>Gas</strong> bottles should never be stored or used<br />
laid on their side. Never store gas bottles<br />
indoors.<br />
YOU MUST HAVE THE PROPER<br />
REGULATOR AND BOTTLE IN ORDER FOR<br />
THE BARBECUE TO OPERATE SAFELY<br />
AND EFFICIENTLY. USE OF AN<br />
INCORRECT OR FAULTY REGULATOR IS<br />
DANGEROUS AND WILL INVALIDATE ANY<br />
WARRANTY. Please consult your local gas<br />
dealer for the most suitable gas bottles and<br />
regulators.<br />
H. Installation<br />
H1. Selecting a Location<br />
This barbecue is for outdoor use only and<br />
should be placed in a well-ventilated area.<br />
Take care to ensure that it is not placed<br />
UNDER any combustible surface. The sides of<br />
the barbecue should NEVER be closer than 1<br />
metre from any combustible surface. Keep this<br />
barbecue away from any flammable materials!<br />
H2. Precautions<br />
Do not obstruct any ventilation openings in the<br />
barbecue body. Position the gas supply bottle<br />
on level ground next to the barbecue and<br />
safely away from any source of heat. Should<br />
you need to change the gas bottle, confirm that<br />
the barbecue is switched off, and that there are<br />
no sources of ignition (cigarettes, open flame,<br />
sparks, etc.) near before proceeding. Inspect<br />
the gas hose to ensure it is free of any twisting<br />
or tension. The hose should hang freely with<br />
no bends, folds, or kinks that could obstruct<br />
free flow of gas. Apart from the connection<br />
point, no part of the hose should touch any hot<br />
barbecue parts. Always inspect the hose for<br />
cuts, cracks, or excessive wear before use. If<br />
the hose is damaged, it must be replaced with<br />
hose suitable for use with LPG and meet the<br />
national standards for the country of use. The<br />
length of the hose shall not exceed 1.5m. N.B.-<br />
The date on the orange hose (if supplied) is<br />
the date of manufacture, not the expiry date.<br />
18
H.3 Fixing a <strong>Gas</strong> Hose to the Barbecue<br />
Connect the gas hose to the gas rail inlet on<br />
the left hand side of the barbecue. Do not<br />
overtighten. Do not use any sealing tape or<br />
liquid on the connection.<br />
H4. Fixing a Regulator to the <strong>Gas</strong> Bottle<br />
Confirm all barbecue control knobs are in the<br />
off position. Connect the regulator to the gas<br />
bottle according to your regulator and bottle<br />
dealer’s instructions.<br />
H5. Leak Testing (To be performed in a<br />
well-ventilated area.)<br />
Confirm all control knobs are in the off position.<br />
Open the gas control valve on the bottle or<br />
regulator. Check for leaks by brushing a<br />
solution of ½ water and ½ soap over all gas<br />
system joints, including all valve connections,<br />
hose connections and regulator connections.<br />
NEVER USE AN OPEN FLAME to test for<br />
leaks at anytime. If bubbles form over any of<br />
the joints, there is a leak. Turn off the gas<br />
supply and retighten all joints. Repeat test. If<br />
bubbles form again, do not use the barbecue.<br />
Please contact your local dealer for<br />
assistance. Leak test annually, and whenever<br />
the gas bottle is removed or replaced.<br />
I. Operation<br />
I1. Warning<br />
• Before proceeding, make certain that you<br />
understand the IMPORTANT<br />
INFORMATION section of this manual.<br />
I2. Preparation Before Cooking<br />
To prevent foods from sticking to the cooking<br />
grill, please use a long handled brush to apply<br />
a light coat of cooking or vegetable oil before<br />
each barbecuing session. (Note: When<br />
cooking for the first time, paint colours may<br />
change slightly as a result. This is normal<br />
and should be expected.)<br />
I3. Lighting the Barbecue<br />
• Open the barbecue hood.<br />
• Ensure all knobs are in the off position.<br />
Open the gas control valve on the gas<br />
bottle or regulator.<br />
• Push and turn the leftmost control knob to<br />
the high position. Press the ignition button<br />
rapidly several times until left portion of the<br />
burner is lit. If burner fails to ignite, turn<br />
control knob to the off position and turn gas<br />
off at the bottle or regulator. Wait five<br />
minutes, then repeat the above steps. After<br />
successful lighting of the left side, ignite the<br />
remaining portion of the burner. If the<br />
burner fails to ignite after following above<br />
procedure, turn all the knobs to the off<br />
position. Close the gas valve on the gas<br />
bottle. Wait 5 minutes, then repeat the<br />
above steps. If the barbecue still fails to<br />
light, please refer to the manual ignition<br />
instructions in section below.<br />
• After ignition, the burner should be burned<br />
at the high position for 3-5 minutes in order<br />
to preheat the barbecue. This process<br />
should be done before every cooking<br />
session. The hood (where applicable)<br />
should be open during preheating.<br />
• After completion of preheating, turn the<br />
burner to the low position for best cooking<br />
results.<br />
I4. <strong>Manual</strong> Ignition Instructions<br />
• Open the barbecue hood.<br />
• Insert lit match through the match-lighting<br />
hole on the right side of the barbecue.<br />
• Push and turn the rightmost control knob<br />
anti-clockwise to the high position.<br />
• After the right portion of the burner is lit,<br />
light the remaining portion of the burner.<br />
• If burner fails to ignite, contact your local<br />
dealer for assistance.<br />
• After ignition, the burner should be burned<br />
at the high position for 3-5 minutes in order<br />
to preheat the barbecue. This process<br />
should be done before every cooking<br />
session. The hood (where applicable)<br />
should be open during preheating.<br />
• After completion of preheating, turn the<br />
burner to the low position for best cooking<br />
results<br />
I5. Grill Cooking<br />
The burner heats up the flame tamer<br />
underneath the grill, which in turn heats the<br />
food on the grill. The natural food juices<br />
produced during cooking fall onto the hot flame<br />
tamer below and vaporise. The subsequent<br />
rising smoke bastes the food, as it travels<br />
upwards, imparting that unique barbecued<br />
flavour. More even cooking of food will be<br />
achieved by using the <strong>BBQ</strong> with the hood<br />
down. This should only be done with the<br />
burners on low.<br />
19
I6. Roasting Hood Cooking<br />
Barbecues equipped with a roasting hood give<br />
the option of cooking with hood closed to form<br />
an ‘oven’ for roasting food, such as joints of<br />
meat, whole chickens, etc.<br />
When the hood is closed, a large amount of<br />
heat is trapped inside the barbecue. Thus, it is<br />
IMPORTANT to make sure that the burner is<br />
turned to the low position to prevent burning of<br />
the food and damaging the barbecue. Avoid<br />
lifting the hood unnecessarily as heat is lost<br />
every time the hood is opened. DO NOT<br />
ALLOW YOUR BARBECUE TO OVERHEAT.<br />
I 7 . F l a r e - U p C o n t r o l<br />
*** Very Important Notice ***<br />
Flare-ups occur when meat is barbecued,<br />
and its fat and juices fall upon the hot flame<br />
tamer. Smoke of course helps give food its<br />
barbecued flavour, but it is best to avoid<br />
excessive flare-up to prevent food being<br />
burned. To control flare-ups, it is<br />
ABSOLUTELY ESSENTIAL to trim away<br />
excess fat from meat and poultry before<br />
grilling, use cooking sauces and marinades<br />
sparingly and try to avoid very cheap cuts of<br />
meat or meat products as these tend to have<br />
a high fat and water content. Also, the<br />
burners should always be placed on the low<br />
setting during cooking. When flare-ups do<br />
occur, they can usually be extinguished by<br />
applying baking soda or salt directly onto the<br />
flame tamer. Always protect your hands when<br />
handling anything near the cooking surface of<br />
the barbecue, and take care to protect<br />
yourself from the flames.<br />
If a fat fire should occur in the drip tray, turn<br />
all knobs to the off position, turn off the gas at<br />
the bottle, and wait for the fire to go out.<br />
NEVER pull out the drip tray or douse with<br />
water.<br />
I8. End of Cooking Session<br />
After each cooking session, turn the<br />
barbecue burner to the “high” position and<br />
burn for 5 minutes. This procedure will burn<br />
off cooking residue, thus making cleaning<br />
easier. Make sure the hood is open during<br />
this process.<br />
I9. Turning Off Your Barbecue<br />
When you have finished using your<br />
barbecue, turn all the control valves fully<br />
clockwise to the “Off” position, then switch off<br />
the gas at the bottle. Wait until the barbecue<br />
is sufficiently cool before closing its hood.<br />
J. CARE AND MAINTENANCE<br />
Regularly clean your barbecue between uses<br />
and especially after extended periods of<br />
storage. Ensure the barbecue and its<br />
components are sufficiently cool before<br />
cleaning. Do not leave the barbecue exposed<br />
to outside weather conditions or stored in<br />
damp, moist areas.<br />
• Never douse the barbecue with water when<br />
its surfaces are hot.<br />
• Never handle hot parts with unprotected<br />
hands.<br />
In order to extend the life and maintain the<br />
condition of your barbecue, we strongly<br />
recommend that the unit be covered when left<br />
outside for any length of time, especially during<br />
the winter months. Heavy-duty Outback®<br />
barbecue covers and other accessories are<br />
available from you local Outback® stockist.<br />
J1. Cooking Grill<br />
Clean with hot soapy water. To remove any<br />
food residue, use a mild cream cleaner on a<br />
non-abrasive pad. Rinse well and dry<br />
thoroughly.<br />
J2. Burner Maintenance<br />
In normal usage, burning off the residue after<br />
cooking will keep the burner clean. The burner<br />
should be removed and cleaned annually, or<br />
whenever heavy build-up is found, to ensure<br />
that there are no signs of blockage (debris,<br />
insects) in either the burner portholes or the<br />
venturi tubes. Use a pipe cleaner to clear<br />
obstructions. A wire brush can be used to<br />
remove corrosion from the burner surfaces.<br />
When refitting the burner, be careful to check<br />
that the venturi tubes of the burner fit over the<br />
valve outlets.<br />
J3. Barbecue Hood<br />
Use a non-abrasive cloth or pad and clean with<br />
hot, soapy water. Do not use scouring pads or<br />
powders as they can permanently damage the<br />
finish.<br />
20
J4. Barbecue Body<br />
Regularly remove excess grease or fat from<br />
the barbecue body with a soft plastic or<br />
wooden scraper. It is not necessary to remove<br />
all the grease from the body. If you need to<br />
clean fully, use hot soapy water and a cloth, or<br />
nylon-bristled brush only. Remove cooking<br />
surfaces and burners before full cleaning. Do<br />
not immerse the gas controls or manifold in<br />
water. Check burner operation after carefully<br />
refitting into body.<br />
J5. Flame Tamer<br />
Remove any food residue from the flame<br />
tamer surface with a plastic or wooden scraper<br />
or brass wire brush. Do not use a steel scraper<br />
or wire brush. Clean with hot soapy water and<br />
rinse well.<br />
J6. Fixings<br />
All screws and bolts, etc. should be checked<br />
and tightened on a regular basis.<br />
J7. Storage<br />
Store your barbecue in a cool dry place. Cover<br />
the burners with aluminium foil in order to<br />
prevent insects or other debris from collecting<br />
in burner holes. If the barbecue is to be stored<br />
indoors, the gas bottle must be disconnected<br />
and left outside. The gas bottle should always<br />
be stored outside, in a dry, well-ventilated<br />
area, away from any sources of heat or<br />
ignition. Do not let children tamper with the<br />
bottle.<br />
K. Technical Specifications<br />
Outback®<br />
Omega 100<br />
Outback®<br />
Omega 200<br />
Outback®<br />
Omega 300<br />
Side<br />
Burner<br />
CE<br />
Approval<br />
0359<br />
359BL239<br />
0359<br />
359BL239<br />
0359<br />
359BL239<br />
0359<br />
359BL239<br />
<strong>Gas</strong> Consumption:<br />
Omega 100: 446g/hr<br />
Omega 200: 446g/hr<br />
Omega 300: 446g/hr<br />
Side Burner: 165g/hr<br />
Heat<br />
Input<br />
Burners<br />
6.2kW 1<br />
6.2kW 1<br />
6.2kW 1<br />
Injector<br />
Size<br />
0.89mm<br />
2.3kW 1 0.74mm<br />
<strong>Gas</strong> /<br />
Pressure<br />
Butane/<br />
28mbar<br />
Propane/<br />
37mbar<br />
Butane/<br />
Propane<br />
30mbar<br />
Butane/<br />
Propane<br />
50mbar<br />
Butane/<br />
Propane<br />
36mbar<br />
Countries of Use:<br />
I 3+ (28-30/37) BE, CY, CZ, EE, FR, GR, IE, IT, LV, LT, LU, PT, SK, ES,<br />
CH, GB, RO<br />
I 3B/P(30) BG, CY, CZ, DK, EE, FI, GR, LV, LT, LU, MT, NL, NO, SK, SI,<br />
SE, TR, IS<br />
I 3B/P(50) AT, DE, HU, SK, CH<br />
I 3B/P(36) PL<br />
Specifications are subject to change without prior<br />
notice.<br />
21
L. Troubleshooting<br />
Problem Possible Cause Solution<br />
Burner will not light using the<br />
ignition system<br />
LP gas cylinder is empty<br />
Faulty regulator<br />
Obstructions in burner<br />
Obstructions in gas jets or gas hose<br />
Electrode wire is loose or disconnected on<br />
electrode or ignition unit.<br />
Replace with full cylinder<br />
Have regulator checked or replaced<br />
Clean burner<br />
Clean jets and gas hose<br />
Reconnect wire<br />
Electrode or wire is damaged<br />
Change electrode and wire<br />
Faulty pushbutton ignitor<br />
Change ignitor<br />
Burner will not light with a match LP gas cylinder is empty Replace with full cylinder<br />
Low flame or flashback (fire in<br />
burner tube— a hissing or roaring<br />
noise may be heard)<br />
Faulty regulator<br />
Obstructions in burner<br />
Obstructions in gas jets or gas hose<br />
LP gas cylinder too small<br />
Have regulator checked or replaced<br />
Clean burner<br />
Clean jets and gas hose<br />
Use larger cylinder.<br />
Obstructions in burner<br />
Clean burner<br />
Obstructions in gas jets or gas hose Clean jets and gas hose<br />
Windy conditions.<br />
Use <strong>BBQ</strong> in a more sheltered position<br />
<strong>Gas</strong> valve knob difficult to turn <strong>Gas</strong> valve jammed Replace gas valve<br />
For reference and correspondence, record<br />
your serial number here.<br />
(See sticker on side of barbecue body.)<br />
Serial No.__________________<br />
This number may be required when<br />
ordering spare parts or accessories. A part<br />
reference number may also be required<br />
where applicable.<br />
Published December 2007<br />
22