SY250F Chassis - Scorpa
SY250F Chassis - Scorpa
SY250F Chassis - Scorpa

You also want an ePaper? Increase the reach of your titles
YUMPU automatically turns print PDFs into web optimized ePapers that Google loves.
Manuel de l’<br />
<strong>Chassis</strong><br />
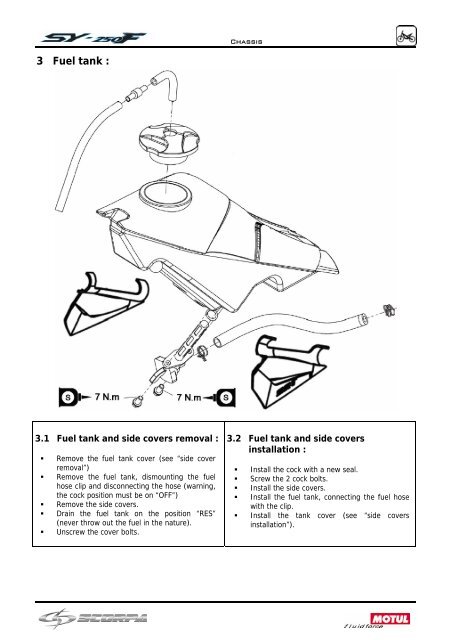
3 Fuel tank :<br />
3.1 Fuel tank and side covers removal :<br />
• Remove the fuel tank cover (see “side cover<br />
removal”)<br />
• Remove the fuel tank, dismounting the fuel<br />
hose clip and disconnecting the hose (warning,<br />
the cock position must be on “OFF”)<br />
• Remove the side covers.<br />
• Drain the fuel tank on the position “RES”<br />
(never throw out the fuel in the nature).<br />
• Unscrew the cover bolts.<br />
3.2 Fuel tank and side covers<br />
installation :<br />
• Install the cock with a new seal.<br />
• Screw the 2 cock bolts.<br />
• Install the side covers.<br />
• Install the fuel tank, connecting the fuel hose<br />
with the clip.<br />
• Install the tank cover (see “side covers<br />
installation”).<br />
6