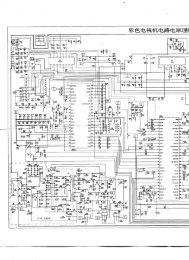
SLV-SE85/SF90/SF99
SLV-SE85/SF90/SF99
SLV-SE85/SF90/SF99

Create successful ePaper yourself
Turn your PDF publications into a flip-book with our unique Google optimized e-Paper software.
2-6-2. Normal Audio System Adjustment• Make adjustment in the SP mode unless otherwise specified.• Use a normal VHS cassette tape for adjustment.2-6-2-1. ACE Head AdjustmentRefer to the VHS mechanical adjustment manual (SMECHANISM) (9-921-647-11).2-6-2-2. Frequency Response Check[Adjustment purpose]Confirm that the frequency characteristics are within thespecification.ModeRecording and playback (SP mode)SignalMeasurement PointMeasuring InstrumentSpecified Value1: 400Hz, –27.5dBs2: 7kHz, –27.5dBsLINE1 A(L) OUT (CN500 3 pin) orLINE1 A(R) OUT (CN500 1 pin)Audio level meter0 ± 3dBNote: Perform “E-E Output Level Check” of “Hi-Fi Audio System Check”before this adjustment.Switch setting:INPUT SELECT ................................... L2[Check method]1) Input a 400Hz, –27.5dBs signal to both L and R channels ofAUDIO LINE 2 terminal.2) Record the signal in the SP mode.3) Input a 7kHz, –27.5dBs signal to both L and R channels ofAUDIO LINE 2 terminal.4) Record the signal in the SP mode.5) Playback the recorded section.6) Press the AUDIO MONITOR button of the remote commanderand select the normal audio mode (STEREO indicator on thedisplay window turns off.).7) Check that the 7kHz signal level against to the 400Hz signallevel satisfies the specified value.6-6E