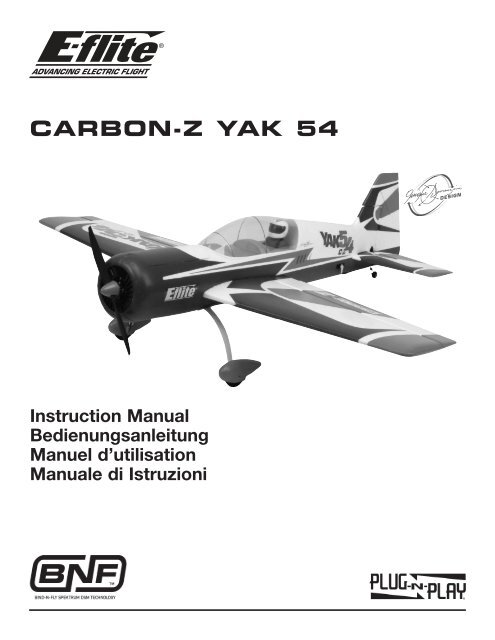
Carbon-Z Yak 54 - HobbyTown USA
Carbon-Z Yak 54 - HobbyTown USA
Carbon-Z Yak 54 - HobbyTown USA
You also want an ePaper? Increase the reach of your titles
YUMPU automatically turns print PDFs into web optimized ePapers that Google loves.
EN®Charging the Flight BatteryYour E-flite <strong>Carbon</strong>-Z <strong>Yak</strong> <strong>54</strong> comes with a DC balancingcharger and 4S Li-Po battery. You must charge theincluded Li-Po battery pack with a Li-Po specific chargeronly (such as the included charger). Never leave thebattery and charger unattended during the chargeprocess. Failure to follow the instructions properlycould result in a fire. When charging, make certainthe battery is on a heat-resistant surface. Charge thebattery pack while you are assembling the aircraft. Youwill need the flight battery to confirm proper aircraftoperation in future steps.DC Li-Po Balancing Charger Features• Charges 3-to 4-cell lithium polymer battery packs• Variable charge rates from 500mAh to 3-amp• Simple single push-button operation• LED charge status indicator• LED cell balance indicator• Audible beeper indicates power and charge status• 12V accessory outlet input cordSpecifications• Input power: 12V DC, 3-amp• Charges 3- to 4-cell Li-Po packs with minimumcapacity of 500mAh4S 14.8V 2800mAh Li-Po Battery PackThe E-flite 4S Li-Po battery pack features a balancinglead that allows you to safely charge your battery packwhen used with the included E-flite Li-Pobalancing charger.The Battery Charging Process1. Charge only batteries that are cool to the touch andare not damaged. Look at the battery to make sureit is not damaged e.g., swollen, bent, broken orpunctured.2. Attach the input cord of the charger to theappropriate power supply (12V accessory outlet).3. When the Li-Po charger is correctly powered up,there is an approximate 3-second delay, then anaudible “beep” and the green (ready) LED will flash.4. Turn the control on the Amps selector so the arrowpoints to the charging rate required for the Battery.(See chart, for example the <strong>Yak</strong> <strong>54</strong> 2800mAh Li-Pobattery will charge at 3.0 amps.) DO NOT change thecharge rate once the battery begins charging.5. Move the cell selector switch to 3-cell or 4-cell foryour battery.6. Connect the Balancing Lead of the Battery to the3-cell (4 pins) or 4-cell (5 pins) Charger port.7. The green and red LEDs may flash during thecharging process, when the charger is balancingcells. Balancing prolongs the life of the battery.8. When the battery is fully charged, an audible beepwill sound for about 3 seconds, and the green LEDwill shine continuously.9. Always unplug the battery from the chargerimmediately upon completion of charging.CAUTION: Overcharging a battery can cause a fire.WARNING: Failure to use the proper charger for aLi-Po battery can result in serious damage, and if leftcharging long enough, will cause a fire. ALWAYS usecaution when charging Li-Po batteries.WARNING: Selecting a charge rate higher than 1x(one times) the battery capacity may cause a fire.Battery Capacity Maximum Charge Rate500-1000mAh500mA1000-1500mAh1A1500-2000mAh 1.5A2000-2500mAh 2.0A3000mAh + 3.0ALow Voltage Cutoff (LVC)When a Li-Po battery is discharged below 3V percell, it will not hold a charge. The <strong>Carbon</strong>-Z <strong>Yak</strong> <strong>54</strong>Electronic Speed Control protects the flight batteryfrom over-discharge using Low Voltage Cutoff (LVC).Before the battery charge decreases too much, LVCremoves power from the motor. Power to the motorpulses, showing that some battery power is reservedfor flight control and safe landing.When the motor pulses, please land the aircraftimmediately and recharge the flight battery.Disconnect and remove the Li-Po battery from theaircraft after use to prevent trickle discharge. Fullycharge your Li-Po battery before storing it.During storage make sure battery charge does not gobelow 3V per cell.Note: The speed control is programmed for 4S LVC.5
ENBinding Procedure Reference Table1. Read transmitter instructions for binding to a receiver (location of transmitter’s Bind control).2. Make sure transmitter is powered off.3. Install a bind plug in the receiver Batt/Bind port.4. Connect the flight battery to the ESC.5. Turn the ESC switch on to power the receiver. The receiver LED will begin to flash rapidly.6. Power on the transmitter while holding the transmitter bind button or switch. Refer to your transmitter’s manualfor binding button or switch instructions.7. The receiver light will go from flashing rapidly to flashing slowly. After 5–10 seconds the light will become solidindicating the receiver is bound to the transmitter.8. Remove the bind plug from the receiver.9. Safely store the bind plug (some owners attach the bind plug to their transmitter using two-part loops and clips).10. The receiver will keep the binding to the transmitter until a bind plug is put in the receiver Batt/Bind port.* The throttle will not arm if the transmitter’s throttle control and throttle trim are not put at the lowest position.If you encounter problems, obey binding instructions and refer to transmitter troubleshooting guide for otherinstructions. If needed, contact the appropriate Horizon Product Support office.Installing Landing Gear3. Install fairing plates.Note: You may remove fairings for flying the<strong>Carbon</strong>-Z <strong>Yak</strong> <strong>54</strong> from a rough runway.1. Press together landing gear legs and put landinggear support in slot in bottom of fuselage.4. Install left (marked “L”) and right (marked “R”)landing gear fairings on the landing gear supportsand fuselage using 4 small screws.2. Release landing gear when support is fullyinstalled in the fuselage slot.7
Installing WingsEN4. Secure left wing to fuselage using screws.1. Put the wing tube in the round hole in the wingslot of the fuselage.2. Put left wing on the wing tube.3. Move the wing on the tube into the slot in thefuselage while putting the aileron controlconnector in the fuselage.5. Install the right wing using the steps above.6. Attach the 2 aileron connectors to the aileronY-harness in the fuselage.Note: There is no difference between the 2 connectionson the Y-harness. Left and right servolead connectors do not have to be connected to aparticular side of the Y-harness.If using flaperon/dual aileron transmitterprogramming, you can remove the Y-harness. Theaileron leads will connect to AILE and AUX1 whenusing flaperon/dual aileron.Installing Rudder2. Put the rudder linkage clevis in the hole on thecontrol horn.1. Attach the rudder to the hinge rod. Put the screwin the bottom of the hinge rod.NOTICE: Do not tighten the screw too much. Therudder will not move easily if the screw is tightenedtoo much.8
Removing the Control SurfacesTo remove the control surfaces, follow the stepslisted below:Elevator1. Disconnect the clevis from the control horn.2. Remove the machine screws located on thebottom of the horizontal stabilizer. Then removethe horizontal stabilizer from the fuselage.ENAilerons1. Disconnect the ball-link from the control horn.2. Remove the machine screw located on the bottomof the wing. Then carefully remove the wing fromthe fuselage.Note: You will need to unplug the aileron servo leadbefore removing the wing.3. Remove the screw located on the hinge line at theroot of the horizontal stabilizer.3. Remove the two screws located on the hinge line.One is located at the wing tip and the other atthe root.4. Carefully separate the elevator from the horizontalstabilizer.Note: The outer hinge is not open.4. Carefully separate the aileron from the wing.Note: To reinstall the elevator to the horizontalstabilizer follow the steps listed above in reverse.Note: To reinstall the aileron to the wing, follow thesteps listed above in reverse.RudderReverse the steps located in the “Installing Rudder”section for rudder removal.11
Removing Propeller Adapter,Propeller and SpinnerEN4. Remove the propeller from the prop adapter collet.Note: The information on this page is formaintenance of the <strong>Yak</strong> <strong>54</strong>. Spinner, propeller andpropeller adapter damage can result fromaircraft crashes.CAUTION: DO NOT handle propeller parts whilethe flight battery is connected to the ESC. Personalinjury could result.1. Remove the screw in the spinner.5. Remove the spinner backplate from the propadapter collet.2. Remove the spinner cone.3. Use an adjustable wrench to loosen and removethe propeller nut.6. Remove the swage plate from the propadapter collet.7. Remove the prop adapter collet from themotor shaft.Motor and ESC RemovalNote: The information on this page is formaintenance of the <strong>Carbon</strong>-Z <strong>Yak</strong> <strong>54</strong>. Damageto these parts can result from aircraft crashes.Installation of the motor is in reverse order of thesteps listed below. You must remove the propellerand spinner from the motor (EFLM7300) beforeremoving the motor from the aircraft.CAUTION: DO NOT handle the motor or ESCwhile the flight battery is connected to the ESC.Personal injury could result.1. Remove the battery hatch from the fuselage.2. Disconnect the 3 motor wires located on thebottom of the fuselage near the ESC.123. Remove the 4 outermost screws on the “X”mount, and slide the motor out of the nose.
ENNote: The <strong>Carbon</strong>-Z <strong>Yak</strong> <strong>54</strong> is a high-performanceaircraft, designed to handle the stresses of highenergyaerobatic flight. Due to the construction of the<strong>Carbon</strong>-Z <strong>Yak</strong> <strong>54</strong>, the airframe is capable of handlinghigh G maneuvers.TakeoffChoose a large open area with a smooth surface fortakeoff. Confirm your transmitter dual rate switch isset to LOW rates for takeoff. Point the nose of theaircraft into the wind.LandingSet to Low Rate, start the landing approach byreducing throttle to 1/4 or less to slow the aircraft. Flythe aircraft down to about 1-2 feet above the runway.Slowly reduce power until the throttle is in the offposition. Apply up elevator as the aircraft settlesto the runway. The <strong>Carbon</strong>-Z <strong>Yak</strong> <strong>54</strong> can do a mainlanding gear landing, or two-point landing, where theaircraft touches down on the main wheels first andthe tailwheel is off the ground. The <strong>Carbon</strong>-Z <strong>Yak</strong> <strong>54</strong>can also land in three-point attitude when all threewheels touch the runway at the same time.RepairsThanks to the construction of the <strong>Carbon</strong>-Z <strong>Yak</strong> <strong>54</strong>,repairs to the foam can be made using virtually anyadhesive (hot glue, regular CA, epoxy, etc). Whenparts are not repairable, see the Replacement PartsList for ordering by item number.Note: The <strong>Carbon</strong>-Z <strong>Yak</strong> <strong>54</strong> can be taken apart andput back in the box for storage or transportation.2010 Official Academy of Model Aeronautics Safety CodeEffective January 1, 2010GENERAL1. A model aircraft shall be defi ned as a nonhumancarrying device capable of sustained flightin the atmosphere. It shall not exceed limitationsestablished in this code and is intended to beused exclusively for recreational orcompetition activity.2. The maximum takeoff weight of a model aircraft,including fuel, is 55 pounds, except for those flown under the AMA Experimental Aircraft Rules.3. I will abide by this Safety Code and all rulesestablished for the flying site I use. I will notwillfully fly my model aircraft in a reckless and/ordangerous manner.4. I will not fl y my model aircraft in sanctionedevents, air shows, or model demonstrations untilit has been proven airworthy.5. I will not fl y my model aircraft higher thanapproximately 400 feet above ground level, whenwithin three (3) miles of an airport withoutnotifying the airport operator. I will yield theright-of-way and avoid fl ying in the proximity offull-scale aircraft, utilizing a spotter whenappropriate.6. I will not fl y my model aircraft unless it isidentified with my name and address, or AMAnumber, inside or affi xed to the outside of themodel aircraft. This does not apply to modelaircraft fl own indoors.7. I will not operate model aircraft with metal-bladepropellers or with gaseous boosts (other than air),nor will I operate model aircraft with fuelscontaining tetranitromethane or hydrazine.8. I will not operate model aircraft carryingpyrotechnic devices which explode, burn, orpropel a projectile of any kind. Exceptions includeFree Flight fuses or devices that burn producingsmoke and are securely attached to the modelaircraft during flight. Rocket motors up to aG-series size may be used, provided they remainfirmly attached to the model aircraft during flight.Model rockets may be flown in accordance withthe National Model Rocketry Safety Code;however, they may not be launched from modelaircraft. Officially designated AMA Air ShowTeams (AST) are authorized to use devices andpractices as defined within the Air Show AdvisoryCommittee Document.9. I will not operate my model aircraft while underthe influence of alcohol or within eight (8) hoursof having consumed alcohol.10. I will not operate my model aircraft while usingany drug which could adversely affect my abilityto safely control my model aircraft.11. Children under six (6) years old are only allowedon a flightline or in a fl ight area as a pilot orwhile under fl ight instruction.12. When and where required by rule, helmets mustbe properly worn and fastened. They must beOSHA, DOT, ANSI, SNELL or NOCSAE approvedor comply with comparable standards.RADIO CONTROL1. All model flying shall be conducted in a mannerto avoid over fl ight of unprotected people.2. I will have completed a successful radioequipment ground-range check before the firstflight of a new or repaired model aircraft.3. I will not fly my model aircraft in the presence ofspectators until I become a profi cient flier, unlessI am assisted by an experienced pilot.4. At all flying sites a line must be established, infront of which all flying takes place. Onlypersonnel associated with flying the modelaircraft are allowed at or in front of the line. In thecase of airshows demonstrations straight linemust be established. An area away from the linemust be maintained for spectators. Intentionalflying behind the line is prohibited.5. I will operate my model aircraft using only radiocontrol frequencies currently allowed by theFederal Communications Commission (FCC).Only individuals properly licensed by the FCC areauthorized to operate equipment on AmateurBand frequencies.14
ENFREE FLIGHT1. I will not launch my model aircraft unless I amat least 100 feet downwind of spectators andautomobile parking.2. I will not fl y my model aircraft unless the launcharea is clear of all individuals except mymechanic, offi cials, and other fl iers.3. I will use an effective device to extinguish anyfuse on the model aircraft after the fuse hascompleted its function.CONTROL LINE1. I will subject my complete control system(including the safety thong where applicable) toan inspection and pull test prior to flying. Thepull test will be in accordance with the currentCompetition Regulations for the applicable modelaircraft category. Model aircraft not fitting aspecific category shall use those pull-testrequirements as indicated for Control LinePrecision Aerobatics.2. I will ensure that my flying area is clear of allutility wires or poles and I will not fly a modelaircraft closer than 50 feet to any abovegroundelectric utility lines.3. I will ensure that my fl ying area is clear of allnonessential participants and spectators beforepermitting my engine to be started.Please see your local or regional modelingassociation’s guidelines for proper, safe operation ofyour model aircraft.Troubleshooting GuideProblem Possible Cause SolutionAircraft will not respond to throttlebut responds to other controlsExtra propeller noise or extravibrationReduced flight time or aircraftunderpoweredLED on receiver flashes quicklywith bind plug installed andaircraft cannot be controlled bytransmitterControl surface does not move,or is slow to respond to controlinputs.Controls reversedMotor loses powerMotor power pulses then motorloses power• ESC is not armed.• Throttle channel is reversed• Damaged spinner, propeller,motor or motor mount• Loose propeller and spinner parts• Propeller installed backwards• Flight battery charge is low• Propeller installed backwards• Flight battery damaged• Transmitter too close to aircraft• Transmitter bound to anotheraircraft• Batteries in transmitter low• Control surface, control horn,linkage or servo damage• Wire damaged or connectionsloose• Channels need to be reversed inthe transmitter• Damage to motor, or battery• Loss of power to aircraft• ESC uses default soft Low VoltageCutoff (LVC)• Lower throttle stick and throttle trimto lowest settings.• Reverse throttle channel ontransmitter• Replace damaged parts• Tighten parts for propeller adapter,propeller and spinner• Remove and install propellercorrectly• Completely recharge flight battery• Remove and install propellercorrectly• Replace flight battery and obeyflight battery instructions• Move powered transmitter a fewfeet from aircraft, disconnect andconnect flight battery to aircraft andre-bind.• Bind transmitter to aircraft receiver• Replace transmitter batteries• Replace or repair damaged partsand adjust controls• Do a check of connections forloose wiring• Do the Control Direction Test andadjust controls for aircraft andtransmitter• Do a check of batteries, transmitter,receiver, ESC, motor and wiring fordamage (replace as needed)• Land aircraft immediately andRecharge flight batteryLED on receiver flashes slowly • Power lost to receiver • Check connection from ESC toreceiver• Check servos for damage• Check linkages for binding15
Replacement PartsENHere is a list of replacement parts to repair or keep your <strong>Carbon</strong>-Z <strong>Yak</strong> <strong>54</strong> flying. These parts are available at yourlocal hobby shop or from Horizon Hobby (www.horizonhobby.com). Please try your local hobby shop first. Bysupporting them, they will be there when you need them. Or you can call our consumer salesline at 1 800 338 4639.Number Description NotesEFLA1060 60-Amp Pro Switch-Mode BEC Brushless ESC This is the ESC for the <strong>Carbon</strong>-Z <strong>Yak</strong> <strong>54</strong>EFLB28004S30 E-Flite 2800mAh 14.8V 30C Li-Po battery Recommended for size, weight and power in <strong>Carbon</strong>-Z <strong>Yak</strong> <strong>54</strong> BNFEFLC3015 3- to 4-cell 12V DC Li-Po Battery Charger with This is the charger included in the <strong>Carbon</strong>-Z <strong>Yak</strong> <strong>54</strong> BNFBalancerEFLM7300 BL25 Brushless Outrunner Motor, 1000KvEFLM7301 Motor Shaft: BL25 OutrunnerEFLM7302 Prop Adapter: <strong>Carbon</strong>-Z <strong>Yak</strong> <strong>54</strong>EFLP12525E 12 x 5.25 Prop: <strong>Carbon</strong>-Z <strong>Yak</strong> <strong>54</strong>EFL1008001 Right Wing Panel: <strong>Carbon</strong>-Z <strong>Yak</strong> <strong>54</strong> Includes right wing panel, right aileron, hinges and control hornEFL1008002 Left Wing Panel: <strong>Carbon</strong>-Z <strong>Yak</strong> <strong>54</strong> Includes left wing panel, left aileron, hinges and control hornEFL1008003 Painted Fuselage: <strong>Carbon</strong>-Z <strong>Yak</strong> <strong>54</strong> Includes fuselage, vertical fi n, firewall, canopy, and landinggear mountEFL1008004 Horizontal Stabilizer, Right: <strong>Carbon</strong>-Z <strong>Yak</strong> <strong>54</strong> Includes right horizontal stabilizer, right elevator, hinges and controlhornsEFL1008005 Horizontal Stabilizer, Left: <strong>Carbon</strong>-Z <strong>Yak</strong> <strong>54</strong> Includes left horizontal stabilizer, left elevator, hingesEFL1008006 Rudder: <strong>Carbon</strong>-Z <strong>Yak</strong> <strong>54</strong> Includes rudder, hinges and control hornEFL1008007 Battery Hatch: <strong>Carbon</strong>-Z <strong>Yak</strong> <strong>54</strong> Includes the battery hatch and magnetsEFL1008008 Radio Hatch: <strong>Carbon</strong>-Z <strong>Yak</strong> <strong>54</strong> Includes the radio hatchEFL1008009 Canopy: <strong>Carbon</strong>-Z <strong>Yak</strong> <strong>54</strong>EFL1008010 Wheel Pants: <strong>Carbon</strong>-Z <strong>Yak</strong> <strong>54</strong>EFL1008011 Pushrods with Clevis: <strong>Carbon</strong>-Z <strong>Yak</strong> <strong>54</strong>EFL1008012 <strong>Carbon</strong> Fiber Wing Tube: <strong>Carbon</strong>-Z <strong>Yak</strong> <strong>54</strong>EFL1008013 <strong>Carbon</strong> Fiber Stabilizer Tube: <strong>Carbon</strong>-Z <strong>Yak</strong> <strong>54</strong>EFL1008014 Pilot: <strong>Carbon</strong>-Z <strong>Yak</strong> <strong>54</strong>EFL1008015 Landing Gear Plates: <strong>Carbon</strong>-Z <strong>Yak</strong> <strong>54</strong>EFL1008016 Main Landing Gear Wire: <strong>Carbon</strong>-Z <strong>Yak</strong> <strong>54</strong>EFL1008017 Landing Gear Fairings: <strong>Carbon</strong>-Z <strong>Yak</strong> <strong>54</strong>EFL1008018 Main Wheels: <strong>Carbon</strong>-Z <strong>Yak</strong> <strong>54</strong>EFL1008019 Tail Wheel Set: <strong>Carbon</strong>-Z <strong>Yak</strong> <strong>54</strong>EFL1008020 Spinner: <strong>Carbon</strong>-Z <strong>Yak</strong> <strong>54</strong>EFL1008021 Servo Arm: <strong>Carbon</strong>-Z <strong>Yak</strong> <strong>54</strong>EFL1008022 Decal Sheet: <strong>Carbon</strong>-Z <strong>Yak</strong> <strong>54</strong>EFL1008023 Servo Extension Set: <strong>Carbon</strong>-Z <strong>Yak</strong> <strong>54</strong> Includes servo extensions for ailerons, elevator, rudder and ESCEFL1008024 Motor Mount with Screws: <strong>Carbon</strong>-Z <strong>Yak</strong> <strong>54</strong> Includes motor mount, motor screws and fi rewall screwsEFL1008025 Screw Set: <strong>Carbon</strong>-Z <strong>Yak</strong> <strong>54</strong> Includes all screws for the airframe. Individual parts do not includescrews except where noted.Note: When replacing servos, we recommend tying a string to the servo lead before removing the servo.This allows you to easily reinstall the servo and lead.16
Contact InformationENCountry ofPurchaseUnited Statesof AmericaUnited KingdomGermanyFranceHorizon Hobby Address Phone Number / Email AddressHorizon Service Center(Electronics andengines)Horizon ProductSupport (All otherproducts)Horizon Hobby LimitedHorizon TechnischerServiceHorizon Hobby SAS4105 Fieldstone RdChampaign, Illinois61822 <strong>USA</strong>4105 Fieldstone RdChampaign, Illinois61822 <strong>USA</strong>Units 1-4 Ployters RdStaple TyeHarlow, EssexCM18 7NSUnited KingdomHamburger Str. 1025335 ElmshornGermany14 Rue Gustave EiffelZone d’Activité du RéveilMatin91230 Montgeron877-504-0233Online Repair Request visit:www.horizonhobby.com/repairs877-504-0233productsupport@horizonhobby.com+44 (0) 1279 641 097sales@horizonhobby.co.uk+49 4121 46199 66service@horizonhobby.de+33 (0) 1 60 47 44 70infofrance@horizonhobby.comCompliance Information for the European UnionDeclaration of Conformity(in accordance with ISO/IEC 17050-1)No. HH2010080903Product(s):Item Number(s):Equipment class: 1<strong>Carbon</strong>-Z <strong>Yak</strong> <strong>54</strong> BNF/PNPEFL10080/EFL10075The object of declaration described above is in conformity with the requirements of the specifications listedbelow, following the provisions of the European R&TTE directive 1999/5/EC:EN 301 489-1, 301 489-17General EMC requirementsEuropean EMC Directive 2004/108/EC:EN55022EN55024Radio disturbance characteristicsImmunity characteristicsSigned for and on behalf of:Horizon Hobby, Inc.Champaign, IL <strong>USA</strong>Aug. 09, 2010Steven A. HallVice PresidentInternational Operations andRisk ManagementHorizon Hobby, Inc.Instructions for disposal of WEEE by users in the European UnionThis product must not be disposed of with other waste. Instead, it is the user’s responsibility to disposeof their waste equipment by handing it over to a designated collections point for the recycling of wasteelectrical and electronic equipment. The separate collection and recycling of your waste equipment atthe time of disposal will help to conserve natural resources and ensure that it is recycled in a mannerthat protects human health and the environment. For more information about where you can dropoff your waste equipment for recycling, please contact your local city office, your household wastedisposal service or where you purchased the product.18
© 2010 Horizon Hobby, Inc.E-Flite ® products are distributed exclusively by Horizon Hobby, Inc.The Spektrum trademark is used with permission of Bachmann Industries, Inc.E-flite, <strong>Carbon</strong>-Z, DSM2, Bind-N-Fly and Plug-N-Play are trademarks or registered trademarks of Horizon Hobby, Inc.Patents PendingCreated 9/10 27300


