You also want an ePaper? Increase the reach of your titles
YUMPU automatically turns print PDFs into web optimized ePapers that Google loves.
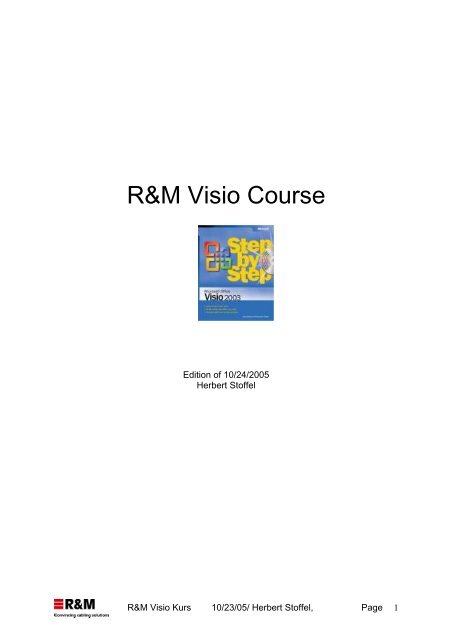
R&M <strong>Visio</strong> <strong>Course</strong><br />
Edition of 10/24/2005<br />
Herbert Stoffel<br />
R&M <strong>Visio</strong> Kurs 10/23/05/ Herbert Stoffel, Page 1
R&M <strong>Visio</strong> <strong>Course</strong><br />
In this crash course (with a limited time available) you will learn the basic functions,<br />
tips and tricks for efficiently working with Microsoft <strong>Visio</strong> and R&M <strong>Visio</strong> Shapes.<br />
1. Accessing <strong>Visio</strong><br />
1.1. Starting the program<br />
If you would like to create R&M specific drawings, it is recommended that you start<br />
up the appropriate drawing template on the desktop.<br />
General start up of <strong>Visio</strong>:<br />
• Click on the Windows button START.<br />
• Select the menu item VISIO under Microsoft Office PROGRAMS.<br />
R&M <strong>Visio</strong> Kurs 10/23/05/ Herbert Stoffel, Page 2
Main <strong>Visio</strong> Screen<br />
Menu bar<br />
Symbol bar<br />
Stencil<br />
Shape<br />
Status<br />
1.2. The three different file types<br />
There are three different types of file:<br />
• Drawing (*.vsd) d = drawing<br />
• Stencil (*.vss) s = stencil<br />
• Template (*.vst) t= template<br />
Measuring scale<br />
Working area<br />
R&M <strong>Visio</strong> Kurs 10/23/05/ Herbert Stoffel, Page 3<br />
Drawing sheet
1.3. Working with stencils<br />
Open stencils:<br />
Close stencil:<br />
Right mouse button on stencil - close<br />
Shapes<br />
A basic concept of <strong>Visio</strong> is that as little as possible should be drawn, i.e. as many<br />
parts and elements of a drawing should be available from so-called stencils. In <strong>Visio</strong>,<br />
these elements are called shapes. A shape can have any kind of form.<br />
A new shape is best prepared from a similar existing shape, which is changed and<br />
subsequently filed again in a stencil.<br />
R&M <strong>Visio</strong> Kurs 10/23/05/ Herbert Stoffel, Page 4
Exercise 1:<br />
Create a new stencil<br />
FILE – SHAPES – NEW STENCIL<br />
Draw a new shape (e.g. rectangle)<br />
Drag the new shape into the new stencil<br />
You can label the new shape in the stencil, save the stencil, and thus you can reuse<br />
the shape.<br />
Placing shapes<br />
In the stencil, point the mouse on the symbol of the shape you require.<br />
Drag the symbol onto the drawing sheet.<br />
Now, a thin frame appears, which indicates where the shape will be put. You can<br />
leave the shape where you will need it.<br />
This way, you can place as many shapes from as many stencils as you like on your<br />
drawing sheet.<br />
This procedure of dragging and dropping something is called “drag & drop“ and can<br />
be used frequently and versatilely in Windows applications.<br />
A shape must be selected to be moved again.<br />
This is how you select several shapes:<br />
Click on the first shape.<br />
Press the SHIFT key.<br />
Now click on all other shapes that are to be selected<br />
or:<br />
point the mouse immediately above the outermost shape.<br />
Draw a frame around the shapes that are to be selected.<br />
This is how you select all shapes and objects:<br />
CRTL + a)<br />
R&M <strong>Visio</strong> Kurs 10/23/05/ Herbert Stoffel, Page 5
Moving shapes:<br />
Simply move with the mouse<br />
Parallel moving of a shape<br />
Select the desired shape.<br />
Keep the SHIFT key pressed down and place the shape again. Now, you can<br />
move the shape only in a parallel direction (horizontally or vertically).<br />
If the CTRL and SHIFT keys are simultaneously pressed, the shape is<br />
being copied and moved in a parallel direction at the same time.<br />
In other words, press SHIFT then the CTRL key and move the item.<br />
If this is followed by pressing the F4 key, the last operation will be repeated.<br />
In this way you can easily copy shapes parallel to each other and at the same<br />
distance from each other.<br />
Exercise 2:<br />
Draw a panel with 30 connections as shown in the picture<br />
Changing shapes<br />
Although the objective is to use as many existing shapes as possible, these must<br />
often be adapted to specific requirements. Various tools and operations are available<br />
for this process.<br />
R&M <strong>Visio</strong> Kurs 10/23/05/ Herbert Stoffel, Page 6
2. Tools<br />
A tool is an aid allowing you to perform operations with the mouse.<br />
Align function<br />
(raster) on/off<br />
Standard pointer<br />
Automatic connector<br />
Connection point<br />
Insert text<br />
Rotate text block<br />
Shape stamp<br />
Align function (raster) on/off<br />
Glue function<br />
on/off<br />
Rectangle/square<br />
Ellipse/circle<br />
Line<br />
Arc<br />
Freehand drawing<br />
Pencil<br />
Format painter<br />
Glue function<br />
on/off<br />
Standard pointer Automatic connector<br />
Connection point<br />
Rectangle/square<br />
For selecting, moving and changing shapes<br />
For creating connections between shapes. Connection point:<br />
glue point for one-dimensional shapes<br />
For entering and editing text<br />
Rotate text block: rotate or move text<br />
For multiple insertion of shapes from a stencil<br />
Switch align function on or off on the raster<br />
Switch glue function on or off<br />
For drawing rectangular shapes use SHIFT key > Square<br />
For drawing elliptical shapes use SHIFT key > Circle<br />
For drawing straight lines<br />
For drawing arc segments<br />
For drawing wavy lines<br />
Ellipse/circle<br />
Insert text<br />
Rotate text block<br />
Shape stamp<br />
For drawing circle segments and for moving control points and<br />
angular points<br />
R&M <strong>Visio</strong> Kurs 10/23/05/ Herbert Stoffel, Page 7<br />
Line<br />
Arc<br />
Pencil<br />
Freehand drawing
1.4. Changing a shape<br />
Exercise 3:<br />
Change a rectangle by using the standard pointer and the pencil<br />
Rotate shape<br />
Exercise 4:<br />
Rotate a rectangle by using the rotating point<br />
Also try to move the rotation center point<br />
Tilting/mirroring shapes<br />
R&M <strong>Visio</strong> Kurs 10/23/05/ Herbert Stoffel, Page 8
In the foreground/background<br />
Exercise 5:<br />
Create these two shapes and check the foreground and background function<br />
Behavior of shapes<br />
One-dimensional shape Two-dimensional shape<br />
R&M <strong>Visio</strong> Kurs 10/23/05/ Herbert Stoffel, Page 9
Exercise 6:<br />
Change a two-dimensional shape (rectangle) into a one-dimensional shape<br />
Protect the height<br />
R&M <strong>Visio</strong> Kurs 10/23/05/ Herbert Stoffel, Page 10
Formatting shapes<br />
You can format the shapes contained in your drawing by changing one or more<br />
attributes of the shapes.<br />
Basically, a distinction must be made between a closed (left) and an open (middle<br />
and right) shape.<br />
The following three elements can be formatted on shapes:<br />
• Lines<br />
• Fill area (only in closed shapes)<br />
• Text and text block<br />
This is how you format one (or several) shape(s):<br />
or<br />
• Mark the shape(s).<br />
• Select the formats from the toolbar<br />
Call up the appropriate dialog box in the FORMAT menu.<br />
Formattings can also be transferred to other shapes.<br />
This is how you transfer formats:<br />
• Mark the shape from which you want to transfer formats to another shape.<br />
• Click on the FORMAT PAINTER symbol.<br />
• Click on the shape to which you want to transfer the formatting.<br />
Double click on the FORMAT PAINTER symbol.<br />
In this way you can successively transfer the formats to several shapes. Via<br />
ESC you return to the standard pointer as the mouse symbol.<br />
Exercise 6:<br />
Test the FORMAT PAINTER function.<br />
R&M <strong>Visio</strong> Kurs 10/23/05/ Herbert Stoffel, Page 11
Lines<br />
The following attributes can be defined for lines:<br />
• Line color<br />
• Line thickness<br />
• Line pattern<br />
• Line end<br />
Fill area<br />
To define the fill area of a shape, proceed the same way as for line formatting.<br />
The following attributes can be defined for the fill area:<br />
• Fill color<br />
• Fill pattern<br />
• Shading color<br />
Exercise 7:<br />
Put an arrow at the end of one line. The beginning must have a bullet<br />
Exercise 8:<br />
Create this shape with the use of various formatting possibilities<br />
1.5. Text<br />
This is how you add text to a shape:<br />
• Mark the shape.<br />
R&M <strong>Visio</strong> Kurs 10/23/05/ Herbert Stoffel, Page 12
• Enter the required text.<br />
If you enter text in this manner, everything that is already written in the shape will be<br />
overwritten.<br />
This is how you edit text in a shape:<br />
• Click on the shape<br />
• Change the text format<br />
Rotating or moving text<br />
• Mark the shape containing text.<br />
• Select the Rotate Text shape<br />
• Move or rotate the text<br />
Exercise 9:<br />
Put text on one line, font: red, 18 pt. (text above the line)<br />
Put text into a rectangle, font: red, 18 pt. (text in the upper left corner)<br />
Stand-alone text<br />
• Select the TEXT TOOL<br />
• Position the cursor<br />
• Enter the text.<br />
R&M <strong>Visio</strong> Kurs 10/23/05/ Herbert Stoffel, Page 13
1.6. Connectors<br />
Connectors are shapes which can be glued between two 2D shapes. Such a<br />
connection remains in place even if the two 2D shapes are moved.<br />
Connectors are 1D shapes. Therefore, they have end points. You glue these end<br />
points to connection points on the 2D shapes and thus create a connection.<br />
Automatic connector tool<br />
The AUTOMATIC CONNECTOR tool allows you to create connections. If you<br />
create a connection with this tool, a universal connection is selected by default.<br />
Exercise 10:<br />
Create this drawing<br />
Take a rectangular shape (with connection points) from the following stencil:<br />
Shape <strong>Visio</strong> Extras – Drawing Tools<br />
Connect with the automatic connector<br />
Subsequently move the left square to the right (note the skipped line)<br />
Inside connectors<br />
Some shapes have a special kind of connector: inside connectors. These belong<br />
permanently to the appropriate shapes and are positioned with control handles. The path of<br />
the connector is programmed by the shape.<br />
Exercise 11:<br />
Creating a simple network diagram<br />
Select shapes: Shapes Network - Network<br />
and peripheral devices<br />
R&M <strong>Visio</strong> Kurs 10/23/05/ Herbert Stoffel, Page 14
1.7. Connection points<br />
Connection points are small blue crosses, which are used to glue together elements.<br />
Positioning with: connection point tool, select shape, CTRL, put point (x) on the<br />
element.<br />
Exercise 12:<br />
Set connection points according to the picture, copy rectangle, draw line in between<br />
and then test glue function<br />
1.8. Groups<br />
In <strong>Visio</strong>, several shapes can be grouped into a unit. Grouping of shapes is<br />
particularly recommended if they are frequently used together.<br />
R&M <strong>Visio</strong> Kurs 10/23/05/ Herbert Stoffel, Page 15
1.9. Aligning shapes<br />
Select all shapes to be aligned<br />
Followed by: Shape – Align shape<br />
Exercise 13:<br />
Testing<br />
R&M <strong>Visio</strong> Kurs 10/23/05/ Herbert Stoffel, Page 16
1.10. Volume operation<br />
These operations allow you to combine a shape consisting of various parts to a<br />
Boolean operation. A new shape emerges via this operation.<br />
Exercise 14:<br />
Create a new shape with the TOTAL VOLUME operation<br />
R&M <strong>Visio</strong> Kurs 10/23/05/ Herbert Stoffel, Page 17
3. Working with the R&M specific stencils and shapes<br />
All current R&M components are contained in the R&M stencils.<br />
Appropriate VS-83 distribution cabinet dispositions, as well as basic diagrams, can<br />
be created very easily.<br />
Exercise 15:<br />
Drawing a distribution cabinet disposition based on the enclosed sample disposition<br />
LWL 24x 50/125<br />
LWL 8x 9/125<br />
U72 20X4<br />
Datei:<br />
<strong>Visio</strong>Document<br />
Erstellt von:<br />
Sth<br />
<strong>Visio</strong> Kurs<br />
40x cat6/s<br />
Erstelldat.: Änd.-Dat.:<br />
14.10.05<br />
R&M <strong>Visio</strong> Kurs 10/23/05/ Herbert Stoffel, Page 18


