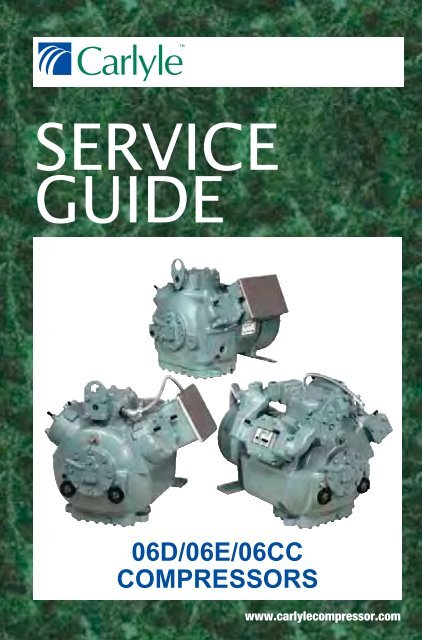
SERVICE GUIDE - Carlyle
SERVICE GUIDE - Carlyle
SERVICE GUIDE - Carlyle

You also want an ePaper? Increase the reach of your titles
YUMPU automatically turns print PDFs into web optimized ePapers that Google loves.
TEST PRESSURES - Each <strong>Carlyle</strong> 06D/E/CCcompressor is pressure tested at our factory. The “LS”pressures are for the low side of the compressor. The“HS” pressures are for the high side of the compressors.CE MARK - This CE Mark indicates this compressorcomplies with the European CE Mark requirements.SERIAL NUMBER - The unique number given toeach compressor. This number, along with the modelnumber and special order number, is normally all thatis needed to obtain information about or order a servicereplacement compressor.SERIAL NUMBER BAR CODE - For <strong>Carlyle</strong> internaluse only.ELECTRICAL CHARACTERISTICS - are shown forall semi-hermetic compressors. Voltages are shown withrespective operating ranges for both 50 and 60 cycleoperation. Electrical phase and LRA (Locked RotorAmps) information is also provided.MANUFACTURING NUMBER - For <strong>Carlyle</strong> internaluse only.MANUFACTURING NUMBER BAR CODE - For<strong>Carlyle</strong> internal use only.7
1.3 — Compressor Serial Number SignificanceALL NEW COMPRESSORSExample: S/N 3695J0012336 95 J 00123Numerical SequencePlant Location: J = Syracuse, U = AtlantaYear of Manufacture: 93, 94, 95, etc.Week of Manufacture: 01 thru 52 Begin Jan.1stALL <strong>SERVICE</strong> COMPRESSORSExample: S/N 3602UD012336 02 U D 0123Numerical SequenceCompressor Type: D, EPlant Location: M = Atlanta, P = Phoenix,U = Atlanta (after 4/2001)Year of Manufacture: 93, 94, 95, etc.Week of Manufacture: 01 thru 52. Begin Jan. 1stNEW AND <strong>SERVICE</strong> REPLACEMENTCOMPRESSORS BUILT BETWEENNOV. 1968 - OCT. 1978Example: A2J0001A 2 J* 0001Numerical SequencePlant Location: J = SyracuseYear of Manufacture: 9= 69, 0 = 70, 1 = 71, etc.Month of Manufacture: A=Jan, B=Feb, etc.; skip I;M=Dec*An “X”, “A” or “P” in this location indicates service compressor.8
1.4 — <strong>Carlyle</strong> OEM Compressor WarrantyOriginal OEM compressors are warranted to be free fromdefects in material and workmanship for a period of12 months from the date of original installation, or20 months from the date of manufacture, whichevercomes first.When a service compressor is used to replace an originalcompressor, the remaining portion of the first-year OEMwarranty is transferred to the service compressor (withinthe United States and Canada).Equipment may carry an extended OEM warranty if thatwarranty has been purchased from the OEM. The OEMissues the extended warranty, not <strong>Carlyle</strong> or its distributors,and the OEM is responsible for providing the enduser with the credit.If returning a compressor:• place all parts back into compressor• seal all compressor openings (oil leakage may createan environmental hazard)NOTE: Opening a compressor for observation or determinationof failure does not void warranty.9
1.5 — Service Billing and CreditReturns of in-warranty parts should be made to thesame Local <strong>Carlyle</strong> Distributor who supplies thesereplacement parts.Local <strong>Carlyle</strong> Distributors will sell parts and servicecompressors only to credit-approved accounts (exceptfor cash sales).1.6 — <strong>Carlyle</strong> Compressor Connection Program, Partsand Stocking PolicyThe <strong>Carlyle</strong> Compressor Connection program is afree service created to assist users in locating servicereplacements through our national distribution network.The program supports finding replacement compressorsfor reported installations, ensuring availability atthe designated distributorship closest to the end-user’slocation. <strong>Carlyle</strong> Customer Service Representatives canprovide assistance in locating the necessary distributor24 hours a day, 365 days a year.• U.S.A., Puerto Rico - 1 (800) GO-CARLYLE (462-2759)• Canada - 1 (800) 258-1123• Mexico - 001 (800) 462-27592.0 — START-UP, TROUBLESHOOTING,AND <strong>SERVICE</strong>2.1 — Technical Assistance - <strong>Carlyle</strong> OEMCompressors<strong>Carlyle</strong> Compressor Division sells compressors toOEMs (Original Equipment Manufacturers) that designand build the finished system. The OEM is the expert10
on the entire system, including the <strong>Carlyle</strong> compressor.All system or compressor questions should be directedfirst to the OEM or the OEM’s local representative.If questions cannot be answered by the OEM or thisService Guide, please contact the <strong>Carlyle</strong> engineeringgroup.The following recommended start-up procedure for<strong>Carlyle</strong> 06D, 06E, and 06CC compressors will helpeliminate initial compressor failures caused by floodedstart, floodback, and running out of oil.The Troubleshooting Procedures section (Section 2.3,pages 20 to 31) will help pinpoint compressor andsystem problems.The Service Procedures section (Section 2.4, pages32 to 43) covers the replacement of valve plates andgaskets, service to the bearing head assembly containingthe oil pump, and a clean-up procedure to followin case of motor burnout. Most other internal servicerequires replacement of the compressor.2.2 — Recommended Start-Up ProcedureReliability data of <strong>Carlyle</strong>’s 06D, 06E, and 06CCrefrigeration compressors indicate that at least half ofcompressor failures occur during the first two to fourmonths of operation. Many of these failures occurduring the initial start-up of the unit. In other cases,troubled start-ups lead to compressor damage severeenough to cause premature failures. The major causesof failures of these compressors are flooded start,floodback, and running out of oil. Most of thesefailures can be avoided by using more care duringthe initial start-up of the compressors. Therefore, thefollowing start-up procedure for 06D, 06E and 06CCcompressors is provided.11
Use only <strong>Carlyle</strong> approved oil appropriate for therefrigerant being used. Sections 3.6 and 3.7 onpages 69-72 list all the approved oils. Section 3.11 onpage 73 notes the correct oil pump pressure in relation toage of the compressor.3. Leak test, evacuate, and dehydrate the system.4. Charge the system. When initially charging the high sideof the system with liquid refrigerant, all service valvesshould be closed (front seated). This will preventrefrigerant from migrating to the compressor crankcaseand into the oil, causing a flooded start.The system is now charged and ready for start-up.Recheck the oil levels and add or remove oil as necessary.Open (backseat) the discharge service valve andany oil equalization lines on parallel systems. Open thesuction service valve 1/2 to 1 turn, or enough to allowthe compressor to run without tripping the low-pressureswitch. This is to prevent damage to the compressor fromany liquid refrigerant floodback.5. On water-cooled condensing systems, open water supplyvalve and allow water to reach condenser. On air-cooledcondensing systems, turn condenser fan on when thecompressor unit is started.6. Ensure that all evaporator connections are opened andfans started.7. On systems with more than one compressor in parallel,start one compressor at a time.15
COMPRESSOR START-UP1. After circuit breaker and control circuit switches areplaced in the ON position and the compressor starts,listen for unusual sounds. If unusual sounds are heard,shut down the compressor, investigate the cause, andcorrect. Possible problems are:• excessive vibration• excessive oil• liquid slugging• low oil2. After the compressor has run 10 to 15 minutes and noliquid floodback is evident, completely open suctionservice valve. The other compressors within the systemshould be started in the same manner.3. To ensure operating oil levels are within acceptablelimits, closely observe the oil level in the compressorsuntil the system has stabilized. During operation allrefrigeration systems will lose some compressor oil to thesystem because:• All systems have a film of oil on the inside surfaceof the piping. At start-up, the lines are dry and theoil which coats the lines comes from the compressorcrankcase.• Oil also traps in the low refrigerant velocity area ofthe system and must be made up by adding oil to thesystem. On systems with hot gas defrost, inspect thecompressor for excessive oil after the defrost cyclehas been completed.The oil lost to the system must be replaced, but take carenot to add too much. The 06E and 06CC (50 to 99 Cfm)compressors have been successfully started in supermarketrefrigeration configurations by adding only 1 quart16
(liter) of additional oil per compressor. The amount to beadded will vary depending on the system, but keeping theoil level between 1/8 and 3/8 level in the sight glass willeliminate the chance of excessive oil charges.! CAUTIONAdding excessive oil to the 06E and 06CC (50 to 99 cfm)compressors can cause blown gasket problems.When CFC or HCFC refrigerants are used with mineralor alkylbenzene oils, foam in the sight glass normallyindicates either that there is serious liquid refrigerantfloodback or that the running gear is hitting the oil due toa very high oil level. Very high oil levels are caused byeither too much oil or excessive liquid refrigerant in thecrankcase. HFC refrigerants and POE oils do not foameasily, so there will be less indication in the sight glass ofeither liquid refrigerant floodback or too much oil in thesystem.!CAUTIONLiquid refrigerant should never be allowed to flood backto the compressor. It may wash out bearings and damagegaskets. If liquid floodback is occurring, adjust theexpansion valve or make other adjustments as necessaryto eliminate this condition.NOTE: One possible cause of flooding is impropercontrol of the defrost cycle. Ensure defrost cycles arestaggered so no more than one third of the system is ondefrost at any time.COMPRESSOR OPERATING LIMITSFigures 1A and 1B show the components and typicaloperating ranges of the <strong>Carlyle</strong> 06D, E and 06CCcompressors.17
Fig. 1A –– Typical 06D, E Operating Limits18
Fig. 1B –– Typical 06CC Operating Limits19
2.3 — Troubleshooting Procedures! DANGERBefore attempting service work on the compressor, thefollowing safety precautions must be strictly observed.Failure to follow these instructions could result inserious personal injury or death. See Warning Label.Follow recognized safety practices and wear protectivegoggles.Do not operate compressor or provide electric power to thisunit unless the compressor terminal box cover is in place andsecured.Do not provide power to unit or turn on compressor unlesssuction and discharge service valves are open.Do not remove the compressor terminal box cover until allelectrical sources have been disconnected.! DANGERWhen leak-testing semi-hermetic compressors, checkaround the terminal box COVER. Test around thewire entry point(s) of the COVER because refrigerantis likely to concentrate there. Do not remove theterminal cover to perform this leak testing becausebodily injury or death can result from fire and/orexplosion if cover is removed or unsecured beforepower is disconnected and pressure is relieved.Electrical terminal pins may blow out, causinginjury and fire.20
COMPRESSOR ISOLATIONIf you have determined there is no refrigerant leakaround the terminals and the compressor must be replaced,proceed beginning with Step 1:1. Shut off suction and discharge service valves to isolatecompressor and slowly remove all refrigerant incompressor. Appropriate service practices should befollowed to properly reclaim refrigerant removed fromthe compressor.2. Disconnect all electrical wiring to compressor.3. Unbolt suction and discharge service valves fromcompressor.REMINDER: These valves may be sealing offrefrigerant from the rest of the system. Do not openthese valves without first determining whether there isrefrigerant in the system.21
Troubleshooting Guide - 06D,06E and 06CC Compressors22
31LEGENDEPR - Evaporator Pressure RegulatorTXV - Thermostatic Expansion Valve
2.4 — Service ProceduresThe service section covers replacement of valve platesand gaskets, service to the bearing head assemblycontaining the oil pump, and a clean-up procedure tofollow in case of motor burn out. Most other internalservice requires replacement of the compressor.REMOVE, INSPECT AND REPLACE CYLINDERHEAD AND VALVE PLATE ASSEMBLYTo test for leaking discharge valves or blown cylinderhead or valve plate gaskets:1. Pump compressor down.2. Observe suction and discharge pressure equalization.If valves are leaking or a gasket is blown, thepressure will equalize rapidly.Maximum allowable discharge pressure drop is 3 psiper minute after initial drop of 10 to 15 psi in firsthalf minute.New reed valves may require 24 to 48 hour run-intime to seat completely.A compressor bank (head) with a blown gasket canalso usually be detected by touch since the headtemperature will normally be much hotter than a bankwith good gaskets.3. If there is an indication of loss of capacity, anddischarge valves are functioning properly, removevalve plate assembly and inspect suction valves.NOTE: This test procedure is not applicable tocompressors equipped with pressure actuatedunloader valves due to rapid pressure equalizationrate. Inspect suction and discharge valves by disassemblingvalve plate.32
DISASSEMBLY1. Disassemble cylinder heads by removing cylinder headbolts. Leave at least 2 bolts partially threaded to preventany problems if refrigerant is accidentally left in thecompressor under pressure. To separate the cylinder headfrom the valve plate, pry up between the head and valveplate. When the cylinder head is separated from the compressorbody remove the last threaded bolts.! CAUTIONDo not hit the cylinder head to break it free of thevalve plate. This may shear the valve plate dowel pins.Sheared dowel pins usually require that the compressorbe replaced.2. Inspect cylinder heads for warping, cracks, or damage togasket surfaces. Replace if necessary.3. After the cylinder head is off, the valve plate may beremoved as follows:a. Remove one valve stop cap screw and loosen theother.b. Swivel valve stop to allow access to hole from whichthe cap screw was removed.c. Re-insert cap screw and tighten to break valve plateaway from compressor. (Jack screw method, see Fig.2.) For 06E valve plates, pry against the raised tab tobreak valve plate away from the compressor.33
Fig. 2 –– Disassembly of Valve Plate(Standard Efficiency Valve Plate Shown)4. Pry up along sides of valve plate to remove valve platefrom crankcase. This provides access to suction reedvalves (see Fig. 3). Remove suction valves from dowelpins. On 06D and 06CC (16 to 37 Cfm) compressors,also remove the suction valve positioning springs (seeFig. 4).5. Inspect components for wear or damage. If replacementis necessary, replace as a complete assembly. Individualparts must not be interchanged. Alignment of highefficiency discharge valves is critical for proper seating.See Sections 3.27 to 3.29, pages 84-87 for applicablereplacement valve plate packages.34
Fig. 3 –– Valve Plate Removed(06E Refrigeration Valve Plate Shown)Fig. 4 –– Suction Valve and PositioningSprings in Place (06D Shown)35
REASSEMBLY1. If reassembling existing components, do not interchangevalves or turn them over. They must be reassembledin their original position. Install the suction valvepositioning springs (06CC size 16 to 37 Cfm and 06Dcompressors only) on dowel pins. Assemble positioningsprings with spring ends bearing against cylinder deck(Fig. 4), spring bow upward.2. Install suction valve on dowel pins as follows:a. 06D compressors: install suction valves on top ofpositioning springs as mentioned in Step 1 above.b. 06E compressors: if compressor uses a suctionvalve and a backer valve (looks like a 1/2 a suctionvalve), backer valve must be installed beforeinstalling full size suction valve (Fig. 5).Fig. 5 –– Piston, Suction Valve, and BackerPositions (06E)36
3. Install new valve plate gasket. Using proper hold-downtorque will prevent leaks.a. Fiber gaskets can be installed dry or lightly oiled.Do not soak gaskets in oil. If an oil-soaked gasket isoverheated, it will bind to the metal, making the valveplate and/or the head difficult to remove.b. Metal gaskets must be installed dry.4. Place valve plate on cylinder deck.5. Install cylinder head gasket.NOTE: The center cylinder heads and unloader sideheads use different gaskets from the plain side head. Toconfirm the gasket is correct, place it over the cylinderhead and verify all exposed machined surfaces will becovered by the gasket.a. Line up the gasket with the cylinder head and valveplate.b. 06E compressor: secure the center rib with a cap screwand washer and torque to 4 to 6 ft-lbs. (5 to 8 Nm).6. Replace cylinder head. To prevent high to low side leak incenter of cylinder head gasket, torque 06D cylinder headcap screws to 30 to 35 ft-lbs. (40 to 48 Nm), and 06E cylinderhead cap screws to 90-100 ft-lbs. (122 to 136 Nm).NOTE: Torque bolts in an alternating sequence pattern(top to bottom, left to right). Do not torque bolts in acircular pattern.37
7. Certain high compression ratio applications develophigh discharge gas temperatures which may cause thecylinder head and fiber valve plate gaskets to develop aset. Under these conditions the cap screws may losehold-down torque. It is recommended that all gear capscrews be re-torqued 24 hours after new fiber gasketsare installed.NOTE: Compressors with metal core gaskets do notrequire re-torque.REMOVE, INSPECT AND REPLACE BEARING HEADASSEMBLYAn oil pressure tap is located in the bearing head assemblyused on all 06D refrigeration duty, newer 06D A/C duty, andall 06E refrigeration and A/C duty compressors (Fig. 6 andFig. 7).For 06D, E, CC oil pressure, see page 73, Section 3.11.The oil pump assembly is contained in the pump end bearinghead aluminum casting. The pump end main bearing is amachined part of this casting. No insert bearing is required.38
Fig. 6 –– Removing Pump End Bearing Head(06D Compressor)1. a. To disassemble, first remove four (4) cap screws fromthe bearing head cover plate and remove the oil feedguide vane and spring.b. Remove the two (2) drive segment cap screws fromthe end of the crankshaft (see Fig. 6 and Fig. 7). Thesescrews must be removed before the bearing head canbe removed.2. Remove the eight (8) cap screws holding the bearing headassembly to the crankcase. Remove the bearing headassembly by pulling forward.39
Fig. 7 –– Removing Pump End Bearing Head(06E Compressor)3. Inspect the bearing surfaces for evidence of wear ordamage. If bearing surface is worn or scored, or if theoil pump is defective, the complete bearing head must bereplaced (see replacement bearing head package listedbelow).While bearing head is removed, inspect internal runninggear for obvious problems (broken rods or pistons).40
4. To reassemble, bolt the bearing head to the crankcase.Bolt torque:• 06CC, 16 to 37 Cfm, and all 06D: 30 to 35 ft-lb.(40 to 48 Nm)• 06CC, 50 to 99 Cfm, and all 06E: 55 to 60 ft-lb.(75 to 81 Nm)5. Bolt the drive segment (replace if worn) to the crankshaft.Bolt torque:• No. 10 Screw: 4 to 6 ft-lb. (5 to 8 Nm)• 1.4 in. (6 mm) screw: 12 to 15 ft-lb. (16 to 20 Nm)IMPORTANT: The 1/4 in. snorkle tube should faceaway from the crankshaft (Fig. 6).6. Insert the oil feed guide vane with the large diameterinward. Place the oil feed vane spring over smalldiameter of guide vane (do not install spring beforeinstalling guide vane). Install pump cover plate (bolttorque: 16 to 20 ft-lb. or 22 to 27 Nm).NOTE: Do not over-torque or aluminum threads inbearing head could be stripped.41
MOTOR BURNOUT CLEAN-UP PROCEDUREWhen a hermetic motor burns out, the stator winding decomposes andforms carbon, water, and acid, which contaminate refrigerant systems.These contaminants must be removed from the system to prevent repeatmotor failures. See <strong>Carlyle</strong>/Carrier recommendation procedures forclean-up after burnout in semi-hermetic compressors - literature #020-262.! WARNINGBefore attempting service work on the compressor, see safetyprecautions listed in Section 2.3, pages 20 to 31, and on compressorterminal box cover. Also follow any installation instructionsprovided with the replacement compressor. Failure to followthese instructions could result in equipment damage or seriouspersonal injury.1. Determine cause of burnout and make necessary corrections.a. Inspect control box for blown fuses, welded starter contacts,welded overload contacts or burned out heater elements.b. Inspect compressor terminal plate for burned or damagedterminals and insulation, and shorted or grounded terminals.c. Inspect unit wiring for loose power connections.d. Check for power supply fluctuation beyond design limits(voltage too high or too low). If power supply is a problem,provide the appropriate system protector.2. Close compressor suction and discharge service valves andremove the refrigerant from the compressor using environmentallyapproved methods. Leave remaining refrigerant in system.3. Remove damaged compressor and replace.a. Remove suction and discharge shut-off valve bolts and allother connections to damaged compressor.b. Remove damaged compressor and replace with a newcompressor.c. On severe motor burnouts, be sure shut-off valves and suctionor discharge lines are not contaminated. If contaminated, they42
should be thoroughly cleaned or replaced before connecting toreplacement compressor.4. Install new liquid line filter-drier. If the system has a suction linefilter-drier, replace the core.5. Evacuate and dehydrate replacement compressor. Ensure oil incompressor is at the proper level.NOTE: Since most new and service compressors are now shippedwithout oil in the crankcase, you must check to see if there is oil.Adding or charging oil is usually easier prior to installing thecompressor.• If there is no oil, add the appropriate oil for the service. Oilcharges are listed in Sections 3.1 to 3.3, pages 62-67.• If there is oil, determine if it is compatible with the refrigerant.If the oil is not compatible, use the drain connection to removethe oil. Dispose of the removed oil following the appropriateenvironmental guidelines. Since the compressor has not beenrun, a thorough draining is all that is needed to remain withinthe limits of residual oil levels. There is no need to “flush” thecompressor with the replacement oil. Once the oil is removed,add the appropriate oil (see above).6. Place compressor in operation. After 2 to 4 hours of operation,inspect compressor oil for discoloration and/or acidity. If oil showssigns of contamination, replace oil and filter-driers and clean thesuction strainer.NOTE: When testing for moisture and acidity be sure the test kitused is appropriate for the refrigerant (CFC, HCFC, or HFC) andthe oil (mineral, alkylbenzene, or POE) in the system. Carrier’sTotal Test Kit is accurate for CFC and HCFC air-conditioningapplications. If used with POE oils, Total Test Kit will indicate acid,but is not an accurate indicator of moisture.7. Inspect oil daily for discoloration and acidity. If oil stays clean andacid-free, the system is clean. If oil shows signs of contamination,change oil, change filter-drier, and clean suction strainer. If filterdrieror suction strainer is dirty or discolored, repeat this step untilsystem is cleaned.43
2.5 –– Connection Points, - 06D, 06E, and 06CCCompressorsNOTE: Bolt sizes and thread pitch: Compressors are built using Englishunit bolts. The bolts have no exact metric equivalents. Therefore, to preventpossible cross-threading, loose bolts, or damage to threaded portions of thecasing, comparable metric measurements are not included.Fig. 8 –– 06D 2-Cylinder CompressorConnection Points44
NOTES:1. Bolt sizes and thread pitch: Compressors are built using English unitbolts. The bolts have no exact metric equivalents. Therefore, to preventpossible cross-threading, loose bolts, or damage to threaded portions of thecasing, comparable metric measurements are not included.2. The 13 and 16 Cfm service compressors are made with dual suction ports.Fig. 9 –– 06D 4-Cylinder Compressor (13 and 16 Cfm)Connection Points45
NOTE: Bolt sizes and thread pitch: Compressors are built using Englishunit bolts. The bolts have no exact metric equivalents. Therefore, to preventpossible cross-threading, loose bolts, or damage to threaded portions of thecasing, comparable metric measurements are not included.Fig. 10 –– 06D 4-Cylinder Compressor (18 and 20 Cfm)Connection Points46
NOTE: Bolt sizes and thread pitch: Compressors are built using Englishunit bolts. The bolts have no exact metric equivalents. Therefore, to preventpossible cross-threading, loose bolts, or damage to threaded portions of thecasing, comparable metric measurements are not included.Fig. 11 –– 06D 6-Cylinder Compressor (24, 25, 28, 37 and41 Cfm) Connection Points47
TEMPERATURE SENSORCYLINDER HEADDISCHARGE GASCYLINDER HEADCOOLING FANMOUNTING STUDS(06ER MODELS ONLY)DISCHARGE VALVELOCATIONLIFTING LUG(NEW MODELS ONLY)NAMEPLATE LOCATIONCRANKCASE MOTORBARREL-LEFT SIDE1/4" NPT HIGHPRESSURECONNECTION1/4" NPT LOWPRESSURECONNECTIONFACTORY SUPPLIEDSCHRADER TYPEFITTING(DO NOT ADD OIL HERE)BLANK PLATEREMOVE FOREQUALIZING LINEOR OIL FLOATCONNECTION1/4" NPT OIL PUMPPRESSURE CONNECTIONOIL PRESSURE ACCESS TEETO BE INSTALLED IN THIS CONNECTIONHIGH SIDE CONNECTION OF OIL7/16"-20 SAE OIL DRAINPRESSURE SWITCH TO BE CONNECTEDCONNECTIONTO FLARED END OF INSTALLED TEECRANKCASE OIL SUMPOIL LEVEL SIGHTGLASSINTERCHANGEABLEWITH BLANK PLATESUCTION VALVELOCATION(ON MOTOR END COVER)1/4" NPT OR5/8-18 SAE OIL DRAINCRANKCASE MOTCOMPARTMENT6:00 POSITIONCRANKCASE MOTORBARRELBEARING HEAD(CONTAINS OIL PUMP)1/4" NPT (2) CONNECTIONS(1) ABOVE SIGHTGLASS(1) ABOVE BLANK PLATEUSED FOR:A) OIL FILL CONNECTIONB) LOW SWITCH OIL SAFETYSWITCH CONNECTIONCRANKCASE HEATER(ACCESSORY)INSERTS INTO WELLIN BOTTOM COVERNOTE: Bolt sizes and thread pitch: Compressors are built using Englishunit bolts. The bolts have no exact metric equivalents. Therefore, to preventpossible cross-threading, loose bolts, or damage to threded portions of thecasing, comparable metric measurements are not included.Fig. 12 –– 06E 4-Cylinder Compressor (50 and old 66 Cfm)Connection Points48
NOTE: Bolt sizes and thread pitch: Compressors are built using Englishunit bolts. The bolts have no exact metric equivalents. Therefore, to preventpossible cross-threading, loose bolts, or damage to threaded portions of thecasing, comparable metric measurements are not included.Fig. 13 –– 06E 6-Cylinder Compressor (65, 75, 99 Cfm)Connection Points49
NOTE: Bolt sizes and thread pitch: Compressors are built using Englishunit bolts. The bolts have no exact metric equivalents. Therefore, to preventpossible cross-threading, loose bolts, or damage to threaded portions of thecasing, comparable metric measurements are not included.Fig. 14A –– 06CC Compressor (16 to 37 Cfm), 06D BodyPump End Connection Points50
IF AVALABLE USEPORT ON <strong>SERVICE</strong>VALVE TO DESUPERHEATLIQUID INJECTION FITTINGPN 2TA1004NOTE: Bolt sizes and thread pitch: Compressors are built using Englishunit bolts. The bolts have no exact metric equivalents. Therefore, to preventpossible cross-threading, loose bolts, or damage to threaded portions of thecasing, comparable metric measurements are not included.Fig. 14B –– 06CC Compressor (16 to 37 Cfm), 06D BodyMotor End Connection Points51
NOTE: Bolt sizes and thread pitch: Compressors are built using Englishunit bolts. The bolts have no exact metric equivalents. Therefore, to preventpossible cross-threading, loose bolts, or damage to threaded portions of thecasing, comparable metric measurements are not included.Fig. 15A–– 06CC Compressor (50 to 99 Cfm), 06E BodyPump End Connection Points52
IF AVAILABLE USEPORT ON <strong>SERVICE</strong>VALVE TO DESUPERHEATLIQUID INJECTION FITTINGPN 2TA1004NOTE: Bolt sizes and thread pitch: Compressors are built using Englishunit bolts. The bolts have no exact metric equivalents. Therefore, to preventpossible cross-threading, loose bolts, or damage to threaded portions of thecasing, comparable metric measurements are not included.Fig. 15B –– 06CC Compressor (50 to 99 Cfm), 06E BodyMotor End Connection Points53
2.6 –– Cross-Sectional View, 06D Semi-Hermetic Compressor54
2.7 –– Cross-Sectional View, 06E Semi-Hermetic Compressor55
2.8 –– Exploded View – 6-Cylinder 06D CompressorComplete parts breakdownshown for referenceonly. Some partsmay be pictured priorto design changes andnot all parts are availableas replacements.LEGEND2 – Terminal Box Cover3 – Terminal Box4 – Terminal Plate Assembly9 – Grommet (for power leads)14 – Suction Service Valve15 – Suction Service Valve Seal Cap16 – Suction Service Valve Gasket17 – Suction Service Valve Bolt18 – Suction Service Valve Bolt Washer19 – Discharge Service Valve20 – Discharge Service Valve Seal Cap21 – Discharge Service Valve Gasket22 – Discharge Service Valve Bolt23 – Discharge Service Valve Bolt Washer29 – Standard Side Bank Cylinder Head56
30 – Center Bank Cylinder31 – Standard Side Bank Cylinder HeadGasket (Unloader Side BankHead not shown)33 – Center Bank Cylinder Head Gasket34 – Cylinder Head Cap Screw35 – Cylinder Head Cap Screw Gasket36 – Oil Filter Screen Assembly37 – Oil Suction Tube38 – Oil Relief Valve Assembly40 – Oil Level Sight Glass Assembly41 – Oil Level Sight Glass Gasket44 – Motor End Cover45 – Motor End Cover Gasket46 – Motor End Cover Cap Screw47 – Motor End Cover Cap Screw Washer48 – Bottom Cover Plate49 – Bottom Plate Gasket50 – Bottom Plate Cap Screw51 – Bottom Plate Cap Screw Washer52 – Compressor Foot53 – Compressor Foot Screw54 – Compressor Foot Everlockwasher55 – Suction Strainer Assembly56 – Oil Bypass Plug57 – Oil Return Check Valve Assembly58 – Pump End Bearing Head Assembly59 – Bearing Head60 – Pump Rotor64 – Pump Rotor Retaining Ring66 – Drive Segment67 – Oil Feed Guide Vane68 – Oil Feed Vane Spring69 – Cover Plate70 – Cover Plate Cap Screw71 – Cover Plate Cap Screw Gasket72 – Cover Plate Gasket73 – Bearing Head Gasket74 – Cap Screws & Lockwashers75 – Cap Screws & Lockwashers76 – Cap Screws & Lockwashers77 – Cap Screws & Lockwashers78 – Bearing Head Cap Screw79 – Bearing Head Cap Screw Washer80 – Crankshaft81 – Thrust Washer82 – Spirol Pin83 – Rotor Drive Key84 – Rotor Washer85 – Rotor Lockwasher86 – Equalizer Tube Assembly87 – Piston Assembly91 – Oil Ring (Not All Models)92 – Compression Ring93 – Connecting Rod & Cap Assembly94 – Connecting Rod Cap Screw96 – Suction Valve97 – Suction Valve Positioning Spring98 – Discharge Valve99 – Discharge Valve Stop100 – Valve Plate Gasket101 – Discharge Valve Stop Cap Screw102 – Discharge Valve Stop Lockwasher103 – Valve Plate Dowel104 – Oil Drain Plug, (New Design SAEFitting and O-Ring)57
2.9 –– Exploded View – 6-Cylinder 06E CompressorComplete parts breakdownshown for referenceonly. Some partsmay be pictured priorto design changes andnot all parts are availableas replacements.LEGEND1 – Compressor Motor – Stator and Rotor2 – Motor Key3 – Rotor Plate Washer4 – Rotor Lock Washer5 – Rotor Lock Bolt6 – Motor Lock Bushing7 – Roll Pin8 – Acorn Nut and Gasket58
10 – Terminal Box Assembly12 – Terminal Plate Assembly14 – Terminal Bolt Assembly18 – Compressor Crankcase19 – Motor End Cover20 – Cylinder Head - Center Bank21 – Cylinder Head - Side Bank(Unloader Head Not Shown)22 – Internal Relief Valve23 – Crankcase Oil Filter Screen24 – Oil Sight Glass Assembly25 – Oil Sight Glass “O” Ring Gasket26 – Oil Sight Glass Screw27 – Oil Sight Glass Lock Washer28 – Pipe Plug Gasket (Hex Head)29 – Bottom Cover Plate30 – Pump End Bearing Head Assembly31 – Pump Rotor32 – Pump Vane33 – Pump Vane Spring34 – Pump Vane Spring Guide35 – Retaining Spring Guide36 – Oil Feed Guide Vane37 – Oil Feed Guide Vane Spring38 – Oil Pump Drive Segment39 – Screw, Soc Head 1/4 – 28 x 5/8-in.40 – Screw, Soc Head #10 – 32 x 1/2-in.41 – Cover Plate42 – Cover Plate Cap Screw43 – Oil Relief Piston44 – Crankshaft45 – Bearing Washer46 – Piston Rings (Oil and Compression)47 – Piston, Piston Pin and Retaining Ring Assembly48 – Connecting Rod and Cap Assembly49 – Valve Plate Assembly50 – Valve Plate51 – Discharge Valve Stop52 – Discharge Valve53 – Valve Stop Support54 – Cap Screw, Valve Stop55 – Suction Valve (Backers For A/C Models Not Shownsee Fig. 5, page 36)56 – Check Valve (Use Only with Parallel CompressorInstallations)59
2.10 – Torque Guide – 06D and 06CC (16 to 37 Cfm)Compressors(CC) - Compound cooling compressors only Torque for jam nut #3 for compressors manufacturedNM - Newton meter (metric torque rating) after 0203J--. For compressors built before thisSAE - Society of Automotive Engineers jumper bar must be under jam nut #3 or Loctite #089*See Fig. 17 page 111, for jam locations.applied to jam nut #2, or use 12 ft. lb.NOTE: Bolt sizes and thread pitch: Compressors are built using English unit bolts. The bolts haveno exact metric equivalents. Therefore, to prevent possible cross-threading, loose bolts, or damage tothreaded portions of the casing, comparable metric measurements are not included.60
2.11 – Torque Guide – 06E and 06CC (50 to 99 Cfm)CompressorsSee Table 2.10 for Notes and Legend (page 60).61
3.0 – COMPRESSOR AND PARTS DATA3.1 – 06D Series Compressors – Physical Data (page 1 of 2)* Cylinder head fan required at SST of -20 Deg. F. (-29 deg. C.) and below for R-404A/R-507 and R-502.† Cylinder head fan required at SST of 0 Deg. F. (-18 deg. C.) and below for R-22.(a) Approximate condensing temperature ranges. CHECK ACTUAL PERFORMANCE DATA FOR ANY NEW APPLICATIONESPECIALLY AT OR NEAR UPPER OR LOWER LIMIT: L.T.=70 to 120 Deg.F. (21 to 49 Deg.C.), M.T.=80 to 130 Deg.F.(27 TO 54 Deg.C.) and H.T. (R-22 only) = 80 TO 150 Deg.F. (27 to 66 Deg.C.).(b) The 06DR 109 single phase compressor has a 3 HP (2.2 kW) motor.(c) Service compressors have dual suction service valve locations, one on motor end and one near the oil pump.62
3.1 – 06D Series Compressors – Physical Data (page 2 of 2)63
3.2 – 06E Series Compressors – Physical Data (page 1 of 2)* Cylinder head fan required at SST of -20 Deg. F. (-29 deg. C.) and below for R-404A/R-507 and R-502.† Cylinder head fan required at SST of 0 Deg. F. (-18 deg. C.) and below for R-22.(a) Approximate condensing temperature ranges. CHECK ACTUAL PERFORMANCE DATA FOR ANY NEW APPLICATION,ESPECIALLY AT OR NEAR UPPER OR LOWER LIMIT: L.T.=70 to 120 Deg.F. (21 to 49 Deg.C.), M.T.=80 to 130 Deg.F.(27 TO 54 Deg.C.) and H.T. (R-22 only) = 80 TO 150 Deg.F. (27 to 64 Deg.C.).(d) The models shown are new oil-less models. Models with oil had a 0, 1 or 2 in the 5th digit of the model number.(e) The 06ER166 and 06EM266 models are no longer built new, but service replacements are built and available. For new applications, the06ER166 and 06EM266 models have been replaced by the 06ER465 and 06EA565.64
3.2 – 06E Series Compressors – Physical Data (page 2 of 2)65
3.3 – 06CC Series Compressors – Physical Data (page 1 of 2)(f) Approximate condensing temperature ranges. CHECK ACTUAL PERFORMANCE DATA FOR ANY NEW APPLICATION,ESPECIALLY AT OR NEAR UPPER OR LOWER LIMIT: L.T. = 70 to 130 Deg.F. (21 to 55 Deg.C.).(g) To provide a 6-cylinder body needed for Compound Cooling, the normal 4-cylinder model 16, 18 and50 Cfm compressors are built using the 24, 18, and 65 Cfm 6-cylinder bodies respectively. Theactual Cfm reduction is achieved by modifying the running gear.(h) R404A/R-507 CANNOT be used in the small “D” body size Compound Cooling compressors (16 to 37 Cfm), manufactured priorto Serial No. 2099J.(i) R-134a and R-12 CANNOT be used in any Compound Cooling compressor.66
3.3 – 06CC Series Compressors – Physical Data (page 2 of 2)67
3.4 — 06D, E High Efficiency (H.E.) CompressorsHigh efficiency compressors were phased in between1985 and 1987. A high efficiency compressor can beidentified as follows:All 06D H.E. compressors (new or service replacement)have the number “3” in the 11th digit of the model number.See page 3 for examples.The 06E compressor model numbers did not change. Todetermine if a 06E compressor is high efficiency, checkthe serial number. The following serial numbers indicatehigh efficiency:06EA models start with S/N 4585J...06EM models start with S/N 0786J...06ER models start with S/N 2287J...All 06CC compressors are H.E. design.All service compressors are high efficiency, except forsome “D” body units without a “3” in the 11th digit of themodel numbers.NOTE: The 06E H.E. valve plates are identified by anelongated ear protruding from the side of the valve plate,in contrast to the standard efficiency valve plates whichhave one (A/C - EM, EZ, etc.,) or two (refrigeration - ER,EY) rounded ears.3.5 — Compressor Bodies Without OilIn 1995 <strong>Carlyle</strong> began supplying new and service compressorswith no oil in the crankcase due to the introductionof HFC/POE systems. This eliminates the need todrain mineral oil from the crankcase when alkylbenzeneor POE oil is to be used. POE oil is very hygroscopic(will readily pick up and retain moisture68
from the air) and should be added just prior to systemstart-up only. See Section 2.2, page 11 for <strong>Carlyle</strong>approved system start-up instructions and Section 3.6below for the proper refrigerant oils.3.6 — Refrigerants and Oils for 06D, E CompressorsThe introduction of HFC/POE systems has led toconfusion as to what refrigerants and oils are approvedfor use in <strong>Carlyle</strong> compressors. For 06CC compressors,see Section 3.7, page 72. The following sections listapproved refrigerants and oils for <strong>Carlyle</strong> 06D, Ecompressors:Refer to the following chart for Totaline ® Part Numbers foravailable oils:* Do not use in lowtemperature applications.The following MINERAL/ALKYLBENZINE are approved oilsfor CFCs and HCFCs:Note: <strong>Carlyle</strong> does not recommend the use of POE oil with R-22.Totaline............................... P903-2001Witco..................................Suniso 3GSShrieve Chemical.................. Zerol 150Texaco Capella..................WFI-32-150IGI Petroleum Ind........... CRYOL -150FOR CFCs AND HCFCs:<strong>Carlyle</strong> has approved the use of R-12, R-500, R-502,and R-22. Selected OEMs of ultra low temperatureequipment are approved to use R-13 and R-503 (contact<strong>Carlyle</strong> Engineering for correct oil).69
FOR HCFC BLENDS:<strong>Carlyle</strong>’s engineering efforts were directed towardtesting the new HFC refrigerants, not the interimHCFC blends. <strong>Carlyle</strong> provides tentative approvals ofthe following blends based on tests by the refrigerantmanufacturer and feedback from field applications, noton testing undertaken by <strong>Carlyle</strong>:• For Low Temperature applications: R-402A(HP-80) and R408A (FX10).• For Medium Temperature applications: R-401A(MP-39), R-402B (HP-81) and R409A (FX56).NOTE: <strong>Carlyle</strong> compressors require alkylbenzene oil,such as Totaline ® P903-2001or Shrieve Chemical-Zerol150, whenever an HCFC blend is used. In a retrofitapplication the amount of mineral oil cannot exceed25% when mixed with alkylbenzene. <strong>Carlyle</strong> does notrecommend the use of POE lubricants with HCFCblends.! WARNINGA number of HCFC blends are not approved.Some may create a hazardous situation. <strong>Carlyle</strong>requires all refrigerants used in our compressorsto be A1/A1 (low flammability/low toxicity). Therating is based on ASHRAE 34 safety standard.Not all A1/A1 refrigerants are approved for use in<strong>Carlyle</strong> compressors. Some of the refrigerants orblends available are either flammable (A1/A2 or A1/A3) and/or toxic (A1/B1 or A1/B3). Some A1/A1refrigerants can change ratings if contaminated. Anyreplacement refrigerant must operate with the samepressure levels and temperature ranges as the CFC orHCFC being replaced. Do not use any refrigerantnot specifically approved in this guide unlessyou have obtained approval from the <strong>Carlyle</strong>Compressor engineering department.70
FOR HFCs:<strong>Carlyle</strong> has approved R-134a, R404A, R-507, and R-407C.The following POLYOL-ESTER (POE) are approvedoils for HFCs:Totaline ® (see Note 5).......P903-1001, 1701Castrol (see Note 5).............................. E68ICI Emkerarate................................RL68HCPI.............................................. CP-2916SCPI................................................ Solest 68BP Marine Enersyn.........................MP-S68All POE oils are very hygroscopic (will readily pick upand retain moisture from the air) and should be usedcompletely once the container is opened. It is extremelydifficult to reseal the oil container effectively enough toprevent moisture absorption, which in turn forms damagingacids.NOTES:1. The use of any non-approved refrigerant may bedangerous and will void the warranty.2. Using the wrong type or weight of oil for therefrigerant selected will void the warranty.3. Follow the refrigerant and/or oil manufacturerinstructions when installing or retrofitting.4. Contact the <strong>Carlyle</strong> Compressor engineeringdepartment before using any refrigerant or oil notlisted in this guide as approved for use in a <strong>Carlyle</strong>semi-hermetic compressor.5. Castrol SW68 (Totaline ® P903-1001) is approved foruse in Carrier chiller applications as well as Carrierand <strong>Carlyle</strong> semi-hermetic compressors for airconditioning and medium temperature applications.Castrol SW68 (Totaline ® P903-1001) cannot beused in any new low temperature refrigerationapplications using <strong>Carlyle</strong> OEM semi-hermeticcompressors. Castrol E68 is approved for use in<strong>Carlyle</strong> OEM compressors for low, medium, andhigh temperature ranges.6. All HFC/POE applications require a crankcase heater.7. Moisture must be kept below 50 ppm for POE oils.8. In retrofit applications, a high flow oil pump isrequired.71
3.7 — Refrigerants and Oils for 06CC CompressorsAll 06CC compressors are approved for R-22, R-404Aand R-507 except compressors in the 16 to 37 Cfmrange. Compressors in this size range cannot be usedwith R-404A and R-507 prior to Serial No. 2099J----without installing a retrofit compressor valveplate(Part No. 06CY660-002) kit. See Section 3.6 on page69 for further information about refrigerants and oils.See Section 3.6 on pages 69 & 71 for the correct oil foreach refrigerant. Contact <strong>Carlyle</strong> Engineering for correctoil for R-23 and R-508A (SUVA 95).3.8 — Oil and Refrigerant Change-Out ProceduresTo change from a CFC or HCFC to either an HFC or anHCFC blend, follow the refrigerant and oil manufacturerinstallation procedures. Select a <strong>Carlyle</strong> approvedrefrigerant and appropriate oil as noted in Sections 3.6and 3.7 above. System cleanliness is extremely important.To ensure a trouble-free change out, <strong>Carlyle</strong>Engineering has made specific guidelines available. Westrongly recommend a copy of our guidelines be requestedand procedures carefully followed to avoid problems.3.9 — Oil Viscosity and Pour PointsThe viscosity of oils used in <strong>Carlyle</strong> reciprocatingcompressors is ISO 68 (centistoke) for all POE oils and150 Saybolt Seconds Universal (150 SSU or 150 SUS) orISO 32 for mineral and alkylbenzene oils. Using oil witha different viscosity without approval from the <strong>Carlyle</strong>Engineering Department will void the warranty.The oils listed in Sections 3.6 and 3.7 and the viscositylisted above can be used down to -40°F (-40°C). Ifyour system runs at a lower temperature, please contact<strong>Carlyle</strong> Engineering for an oil recommendation.72
3.10 — Oil AdditivesNo oil additive is allowed without written approval fromthe <strong>Carlyle</strong> Engineering Department. The use of anyunauthorized additive will void the warranty.3.11 — Oil PressureAll new 06D, E, CC compressors are supplied with oilsafety switch connections. <strong>Carlyle</strong> has introduced a newhigh flow oil pump and changed oil pressure specificationsdue to changes in lubricants and refrigerants. Thefollowing data notes the proper oil pressure range basedon the compressor’s date of manufacture:STARTING MARCH 1994 WITH S/N 1094J ANDLATER:• For new OEM 06D and 06CC (16 to 37 Cfm) compressors,the pressure is 18 to 26 psi (1.2 to 1.8 Bars)• For new OEM 06E and 06CC (50 to 99 Cfm) compressors,the pressure is 18 to 34 psi (1.2 to 2.3 Bars)• Note that service compressors did not receive the newpump until serial number starting with S/N 2994M andlater.BETWEEN MAY 1984 AND MARCH 1994 ORBETWEEN S/N 2084J AND 1094J:• For all 06D, E, CC compressors, the oil pressure is 16to 22 psi (1.1 to 1.5 Bars)BEFORE MAY 1984 OR BEFORE S/N 2084J:• For all 06D/E compressors, the oil pressure is 12 to18 psi (0.8 to 1.2 Bars)• For more information about the high flow oil pump, seeSection 3.12.73
3.12 — High Flow Oil Pump (Bearing Head)<strong>Carlyle</strong> introduced a new high flow oil pump to provideimproved lubrication with the new HFC refrigerantsand POE lubricants. The pump is a durable, automaticallyreversible, high flow design. The high flow designimproves lubrication, especially with the new HFC/POEcombination, and provides improved lubrication in thecase of a flooded start. This oil pump is standard on allnew and service compressors. See Section 3.11 abovefor details on oil pressure. For service replacement, authorizedservice locations will have the new high flow oilpump only. See Section 3.13 below.3.13 — Replacement Oil Pump/Pump End Bearing PackageThe oil pump and pump end bearing are an integral partcalled the pump end bearing head. If either the oil pumpor the bearing requires replacement, order part as notedbelow:NOTE: The above pump end bearing head packages include a bearing head with thehigh side oil safety switch connection. This pump is recommended for all CFC, HCFC,and HFC refrigeration applications.74
3.14 — Oil Safety Switch<strong>Carlyle</strong> uses as standard the 120-second time delay oilsafety switch, as this time period is preferred for HFC/POE systems. This is a change from the 45 to 60-secondtime delay used previously with CFC and HCFC systems.It is not necessary to change out the older, shortertime delay switch unless the unit is converted to an HFC/POE system.The oil safety switch protects the compressor whenlubrication is lost for more than 120 seconds. Theswitch closes the control circuit at start-up allowingthe compressor to run for 120 seconds. Operating oilpressure must reach 11 psi above suction pressurewithin 120 seconds for the switch to remain closed,which allows the compressor to run. If the operating oilpressure falls to 4 psi above suction for longer than120 seconds, the switch will open the control circuit,shutting down the compressor.<strong>Carlyle</strong> has approved the following oil safety switchesfor all applications with 06D, E, CC compressors:• Danfoss - Type MP54. See details below• Penn/Johnson electronic switch - P44575
Use of an oil safety switch is recommended/required by<strong>Carlyle</strong> as noted in the chart below:3.15 — 06CC, 06E Discharge Gas Cylinder HeadTemperature Sensor & 06E Pressure Relief ValveAll OEM <strong>Carlyle</strong> 06EA, EM, ER compressors since 1982are equipped with a discharge gas temperature sensor.The sensor is installed in the discharge or center head onall six-cylinder (three-head) models. The four cylinder06Es (two heads) have the sensor in the left side headas viewed from the oil pump end. All 06CC compressorshave the sensor located in the discharge (high stage)head.Pressure Relief ValveAll 06E compressors and all 06CC 50-00cfm compressorsare equipped with a pressure relief valve thatrelieves from discharge pressure to crankcase pressure. Itis located under the center cylinder head on all 6 cylinder06E and 06CC compressors, and under the dischargeservice valve on all 4 cylinder 06E compressors. Therelief valve is sealed with a metal gasket:Part Number DescriptionEB51FN272 400psi Relief Valve (differential pressure)6G65-1251 Relief Valve, GasketAn 11/16" drag link socket can be useful for removing/installing the relief valve.76
When the discharge gas temperature in the cylinder headexceeds the sensor trip setting (see below), the sensor willopen the control circuit and shut off the compressor. Thehead sensor must be wired into the control circuit by theOEM and is pilot duty only at 240V = 0.52A, at 115V =1.04A. The sensors are threaded into the head without awell. Therefore, when changing a sensor, the compressormust first be isolated and evacuated.NOTES:1. Since 1993 all Carrier 06 series air conditioningcompressors have been made without a sensor. All<strong>Carlyle</strong> OEM 06 series compressors are equipped witha sensor.2. Starting in mid-1998 all <strong>Carlyle</strong> OEM compressors,including 06EA, EM, ER and all 06CC models, arebuilt using the HN68GA242 sensor. The change to asingle sensor model is due to the increased use of HFCrefrigerants, which operate at lower temperatures.3.16 — 06D, E Cylinder Head Cooling FansCylinder head cooling fans are recommended on all applicationswhere the saturated suction temperature (SST)is below 0°F (-18°C). A cylinder head cooling fan mustbe used for all R-22 single stage applications77
elow 0°F (-18°C) and all R404A/507 single stage applicationsbelow -25°F (-32°C). A cylinder head coolingfan is recommended (but not required) for any two-stage(Compound Cooling) applications.3.17 — Capacity Control Accessory Packages(Suction Cut-Off Unloading Type)The following suction cut-off capacity control packagesare available to field convert those 06D, 06E compressorswithout unloading. With the exception of the 06D2-cylinder models, these packages can be added to anynew, replacement, or existing 06D or 06E compressors.See Fig.16.NOTE: Before adding a suction cut-off control packageto a compressor currently without unloading, consider allline piping sizes and design to ensure proper oil returnto compressor with reduced (unloaded) refrigerant flowrates.78
CAPACITY CONTROL PACKAGES* Coil NOT included, order separately (see Section 3.18).† Special Allen head wrench to change valve is part number 06EA680036.NOTES:1. Each package unloads 2 cylinders (1-step) and includes (1) cylinderhead assembly with applicable unloader valve (electric or pressure) andnecessary gaskets.2. When adding the suction cut-off unloading feature to any compressor,it is no longer necessary to change the valve plate. The suction cut-offmethod of unloading functions independently of the valve plate.3. To avoid interfering with hi-lo pressure connections or cylinder headsensor, install the unloader cylinder head as follows (viewed from P.E.of compressor):06D 4-cyl - left hand cylinder deck06E 4-cyl - right hand cylinder deck06D, 06E 6-cyl - either cylinder deck (both when applicable)4. Unloader valve gasket part number 06EA501253.5. Unloader is not available for 06CC compressors.79
LOADED OPERATIONUNLOADED OPERATIONFig. 16–– Loaded and Unloaded Operation3.18 — Capacity Control Coil Packages (06D, E)COIL PAGEPART NUMBEREF19ZE120 (06DA402784)EF19ZE240 (06DA401794)EF19ZE024 (06DA401844)VOLTAGE120-1-50/60208/240-1-50/6024-1-50/6080
3.19 — Crankcase Heater DataCrankcase heaters help reduce refrigerant migration tothe compressor during shut-down. Crankcase heaters aredesigned to raise the temperature in the compressor oilcompartment approximately 15 to 25°F (8 to 14°C). <strong>Carlyle</strong>recommends crankcase heaters be wired so the heater isenergized only when the compressor shuts off. Crankcaseheaters should be “ON” initially for 24 hours before startingthe compressor. All HFC/POE applications require acrankcase heater.STRAP-ON HEATERS:Mounted externally to the underside of the stamp steelbottom plate. Install axially using (2) bottom plate bolts plusbrackets and screws in package. Used on 06D( )808, 109,013, 313, and 316 compressors. All strap-on heaters are 50watts.INSERTION HEATERS:Insert into cast well (hole) in cast iron bottom plate.Circular clip with barbs secures heater. Used on 06D( )718,818, and 820 4-cylinder compressors, all 6-cylinder 06Dcompressors, all 06E and all 06CC compressors. Insertionheaters are available in 125 and 180 watt sizes.NOTES:1. Insertion heaters use AS8IVF056 tubular clip.2. Thermal grease is provided and must be used with 180 watt heaters (grease packet P/N38AQ680001).81
3.20 — Compressor Mounting DataMounting packages are available to mount individual compressors.Package contains mounting springs, threaded studs,snubbers, spring cups, nuts, and washers for (1) compressor.COMPRESSOR MOUNTING PLATE PACKAGENo. 06EA660096This universal mounting plate will accommodate any size06D, 06E, and 06CC compressor. Mount plate to existingbase and mount the <strong>Carlyle</strong> compressor to the plate. Packageincludes pre-drilled mounting plate, spacers, and template.3.21 — Compressor Service Valves (06D, E, CC)* Valve packages consist of (1) service shut-off valve and required gasket and mounting bolts.NOTE: Sensor Valve packages required with <strong>Carlyle</strong> Sentinel module.Adapter for 06CC Liquid Injection Port PN 2TA1004.3.22 — Service Valve Gaskets (06D, E, CC)* Service package contains 12 gaskets.82
3.23 — Oil Drain Plug AdapterAll new compressors, except for 06D( )808, 109, 013,313, and 316 models, are built with a 7/16-20 SAE fittingand O-ring as the oil drain plug. <strong>Carlyle</strong> offers an oildrain adapter, P/N DE14CA126, which replaces the SAEplug. This adapter allows the installation of a 1/4in. NPTangle valve as a drain fitting.3.24 — Sight Glass Adapters for Oil Equalization3.25 — Replacement Sight Glass/Installation Tool** 5F20-152 sight glass assembly includes 5F20-1631 gasket.3.26 — Replacement Motor End Mounting Foot83
3.27 — Gaskets – Cylinder Head and Valve Plate06D COMPRESSORS1: Cylinder head gasketsGASKETTYPEa. Side bank, no unloadingb. Side bank, with unloading (suction cut-off design)c. Side bank, with unloading (hot gas bypass design)d. Center bank2: Valve plate gasketsa. Standard 2" diameter cylinder boreb. Old design 1-13/16" diameter cylinder borec. Blank-off (special) used only on old standard 16 Cfm modelswith suction valve at P.E. and using H.E. valve plates06E COMPRESSORS1. Cylinder head gasketsa. Side bank, no unloadingb. Side bank, with unloading (Suction cut-off design)c. Side bank, with unloading (hot gas bypass design)d. Center bank (standard or reversed)2. Valve plate gasketsa. H.E., low temperature (ER, EY) .028"/.036"b. H.E., medium temperature (EM, EZ) .067"/.072"c. H.E., high temperature (EA, ET) .067"/.072"d. Old standard, low temperature (ER, EY) .035"/.041"e. Old standard, medium temperature (EM, EZ) .035"/.041"f. Old standard, high temperature (EA, EX) .067"/.072"PART NUMBER05GA50221305GA50222305GA50218305GA50217305DA5001536D40-107306DA50292306EA50330406EA50333406EA50331406EA503314Package #06ER660012contains(1)06EA501853 gasket/(2)suction valves06EA504884 (fiber) or06EA506414 (metal)06EA50488406ER66001206ER66001206EA50488406CC COMPRESSORS16 to 37 Cfm50 to 99 Cfma . Cylinder headb . Valve platec.Suction manifoldd . Interstage manifolde.Liquid injectionf. Interstage tube05GA50221305DA5001536D40-1131*6D40-1131*6D23-1421*6D23-1421*a . Cylinder head06EA503304b. . Valve plate06EA504884c Suction manifold6D68-1131*d . Interstage manifold6D68-1131*ẹf . Liquid injection6D23-1421*Interstage tube6D68-1131** Service package contains 12 gaskets.NOTE: “H.E.” and “Old Standard” are designations based on date of manufacture; see Section 3.4 p.68 for details.84
3.28 — MiscellaneousTerminal Plate GasketCOMPRESSOR USAGEGASKET06D, 06CC (16 TO 37 CFM)06E, 06CC (50 TO 99 CFM)6D40-10616G45-1082Sensor Block Gasket (Used between transducer sensorblock and bearing head with Johnson P445 (06DA660115)oil safety switch)COMPRESSOR USAGEGASKET06D, 06E, 06CC 6DA680063Electrical Terminal Barrel Nut Tool (Socket tool used forinstallation of terminal nuts)COMPRESSOR USAGEGASKETAll 06D, 06CC (16 TO 37 cfm) P920-000985
3.29 — Valve Plate Packages, Service Replacement<strong>Carlyle</strong> began installing high efficiency valve plates inthe mid 1980’s. With a few exceptions noted, the valveplates fit all current and older <strong>Carlyle</strong> compressors.Check notes below the table for exceptions.* Includes relief valve for both low stage banks.NOTES:1. <strong>Carlyle</strong> recommends the 06ER660017 service replacement valve plate kit for all 06ERcompressors in low temperature environmental chamber applications (see Note 6).2. All high efficiency (units with a “3” in the 11th digit of the model number) 06DR013 and06DM313, 06DR316, and 06DM316 models have a 2" diameter cylinder bore and use theabove valve plate kits. Older 13 and 16 cfm (prior to 1985) models have a 1-13/16" diameterbore and cannot use these valve plate kits. Kits for these models are no longer available.Suction reed valve (part no. 6D45-1072) and discharge reed valve (part no. 6D75-1062) can beused for valve plate field repair.3. Hot gas bypass unloading requires a special valve plate kit with gaskets as follows:06D..................06DA66013106E..................06EA660105The <strong>Carlyle</strong> recommended suction cut-off unloading does not require a special valve plate.Suction cutoff unloading uses the standard high efficiency valve plate kit, which includes theneeded gasket.86
4. Service valve plate kits include:(1) valve plate assembly, (2) suction reed valves, (3) cylinder head gaskets (side, center andsuction gas unloading), (1) valve plate gasket; and for 06D compressors there are (2) suctionvalve position springs.5. All new high efficiency 06DM, 06DA, and 06CC (16 to 37 Cfm) compressors have flat toppistons. All new high efficiency 06DR and 06ER compressors have one step contoured pistons.All new high efficiency 06EM, 06EA, and 06CC (50 to 99 Cfm) compressors have two-stepcontoured pistons.6. The outer edges of the valve plates have “ears” that are visible when installed on thecompressor. All new high efficiency valve plates have one elongated “ear” versus one or tworounded “ears” on the older standard efficiency valve plates. Note the valve plate supplied inpackage 06ER660017 for environmental chambers has two rounded ears.3.30 — Muffler RecommendationsMufflers can reduce discharge gas pulsation and effectivelyeliminate vibration problems downstream. Theyshould be placed as close to the compressor as possibleto maximize efficiency and minimize vibration. Mufflersshould be:• used on all 06E 66 and 99 Cfm compressor models.• used on all 06E compressors with capacity control.• considered for use with all 06D 37 and 41 Cfmcompressor models.• considered for use with all 06D 6-cylinder compressorswith capacity control.Mufflers can be mounted horizontally or vertically.87
3.31 — Electrical AccessoriesBOX PACKAGE - This consists of terminal box, cover,and necessary mounting components.TERMINAL LUG PACKAGE - This consists of 6screw-on terminal lugs with set screws. Strip power wire1/2 in., insert into terminal lugs, and secure in place withset screw.TERMINAL PLATE JUMPER PACKAGE FOR 06E,06CC 50 TO 99 Cfm - This package consists of jumperbars, terminal nuts and instructions to interconnectterminal studs for proper motor starting (P/W or X/L)and voltage.NOTE: With 06E multi-volt (208/230/460) compressors, the 460-volt motor can beconnected only for across-the-line start. A compressor with a distinct 460-volt motor(or designated P/W) must be used for part-winding start.88
3.32 — Baffle Plate RecommendationsBaffle plates can be used to reduce compressor dischargegas pulsations. Recommended baffle plate assemblies areshown below. These plates are designed to createa 6 to 10 psi (0.4 to 0.7 Bars) pressure drop in thedischarge gas. Use only the baffle plate recommendedfor the application. These baffle plates, sandwiched betweentwo gaskets, are installed between the compressordischarge service valve and the compressor crankcase orcylinder head. For further details, see <strong>Carlyle</strong> OEM BulletinsNo. 118 and 119.* Includes baffle plate and 2 gaskets.† For single-stage application. When using as booster application, use medium temperaturebaffle plate.3.33 — Interstage Pressure Tables(06CC Compressors Only)All 06CC compressors are a two-stage design. Therefore,the pressure measurements are suction, interstage, anddischarge. The following tables list the interstagepressures using R-22 and R-404A/507 refrigerants.89
90* Indicates Vacuum.NOTE: 1 BAR = 100 kPa or 1 ATM (Atmosphere) Pressure
91* Indicates Vacuum.NOTE: 1 BAR = 100 kPa or 1 ATM (Atmosphere) Pressure
4.0 — ELECTRICAL DATA4.1 — 06DR 3 Phase Electrical Specifications92
MAXkW93LEGENDLRA - Locked Rotor AmpsMCC - Maxmium Continuous CurrentRLA - Rated Load Amps* The last two digits of the compressor model number may vary. See page 3.NOTES:1. RLA (rated load amps) value shown for new high efficiency models is MCC ÷ 1.56 = RLA. Use thisrecommended (and minimum) RLA value to determine nameplate stamping, minimum contactor sizing and wire sizing.2. Compressor operating amps at any specific conditions can only be determined from a performance curve.3. RLA values for 06D compressor protected by a calibrated circuit breaker will depend on must-trip value of circuit breaker.4. Ohm values shown for resistance are approximate and shown for reference only. Motors from different vendors and motorsof different efficiencies can differ up to 15% from data shown.
4.2 — 06DM, DA 3 Phase Electrical SpecificationsMAXkW94
LEGENDLRA - Locked Rotor AmpsMCC - Maxmium Continuous CurrentRLA - Rated Load Amps* The last two digits of the compressor model number may vary. See page 3.NOTES:1. RLA (rated load amps) value shown for new high efficiency models is MCC ÷ 1.56 = RLA. Use thisrecommended (and minimum) RLA value to determine nameplate stamping, minimum contactor sizingand wire sizing.2. Compressor operating amps at any specific conditions can only be determined from a performance curve.3. RLA values for 06D compressor protected by a calibrated circuit breaker will depend on must-trip value of circuit breaker.4. Ohm values shown for resistance are approximate and shown for reference only. Motors from different vendors and motors of different efficiencies can differ up to 15% from data shown.95
4.3 — 06DR, DM Single Phase Electrical Specifications96
*The last two digits of the compressor model number may vary. See page 3.97
4.4 — 06ER, EY 3 Phase Electrical SpecificationsMAXkW* The last two digits of the compressor model number may vary. See page 4. The fifth digit in ( ) of the compressor model numberrepresents models with or without oil. 0, 1, 2 signifies older models with oil; 3, 4, 5 signifies newer models without oil. See page 4.98
LEGEND:LRA - Locked Rotor AmpsM.H. - Must Hold AmpsM.T. - Must-Trip AmpsPW - Part-Winding (Start)RLA - Rated Load AmpsXL - Across-the-Line (Start)NOTES:1. Compressor must-trip (M.T.) amps and RLA values are maximum figures.2. LRA values for PW second winding = 1/2 the LRA -XL value.3. 3-Pole XL circuit breakers shown, other 3-Pole XL alternates and 6-Pole PW breakers available. Terminal lugs for circuit breakers available inpackage 06EA660152.4. Recommended RLA value shown is determined by: circuit breaker must trip value ÷ 1.40. Use this recommended (and minimum) RLA value todetermine name plate stamping, minimum contactor sizing, and wire sizing. RECOMMENDED RLA FOR 06E COMPRESSORS EQUALS: MUST-TRIP (M.T.) OF CARLYLE APPROVED OVERCURRENT DEVICE BEING USED ÷ 1.40.5. 06ER166 New OEM Models no longer produced, replaced by 06ER165.6. Compressor operating amps at any specific condition can only be determined from a performance curve.7. Ohm values for resistance are approximate and shown for reference purposes only. Motors from different vendors and motors of different efficienciescan differ up to 15% from data shown.99
4.5 — 06EM, EZ 3 Phase Electrical Specifications* The last two digits of the compressor model number may vary. See page 4. The fifth digit in ( ) of the compressor model numberrepresents models with or without oil. 0, 1, 2 signifies older models with oil; 3, 4, 5 signifies newer models without oil. See page 4.100
LEGEND:LRA - Locked Rotor AmpsM.H. - Must Hold AmpsM.T. - Must-Trip AmpsPW - Part-Winding (Start)RLA - Rated Load AmpsXL - Across-the-Line (Start)NOTES:1. Compressor must-trip (M.T.) amps and RLA values are maximum figures.2. LRA values for PW second winding = 1/2 the LRA -XL value.3. 3-Pole XL circuit breakers shown, other 3-Pole XL alternates and 6-Pole PW breakers available. Terminal lugs for circuit breakers available inpackage 06EA660152.4. Recommended RLA value shown is determined by: circuit breaker must trip value ÷ 1.40. Use this recommended (and minimum) RLA value todetermine name plate stamping, minimum contactor sizing, and wire sizing. RECOMMENDED RLA FOR 06E COMPRESSORS EQUALS:MUST-TRIP (M.T.) OF CARLYLE APPROVED OVERCURRENT DEVICE BEING USED ÷ 1.40.5. 06EM266 New OEM Models no longer produced, replaced by 06EA265.6. Compressor operating amps at any specific condition can only be determined from a performance curve.7. Ohm values for resistance are approximate and shown for reference purposes only. Motors from different vendors and motors of different efficienciescan differ up to 15% from data shown.101
4.6 — 06EA, ET 3 Phase Electrical Specifications* The last two digits of the compressor model number may vary. See page 4. The fifth digit in ( ) of the compressor model numberrepresents models with or without oil. 0, 1, 2 signifies older models with oil; 3, 4, 5 signifies newer models without oil. See page 4.102
LEGEND:LRA - Locked Rotor AmpsM.H. - Must Hold AmpsM.T. - Must-Trip AmpsPW - Part-Winding (Start)RLA - Rated Load AmpsXL - Across-the-Line (Start)NOTES:1. Compressor must-trip (M.T.) amps and RLA values are maximum figures.2. LRA values for PW second winding = 1/2 the LRA -XL value.3. 3-Pole XL circuit breakers shown, other 3-Pole XL alternates and 6-Pole PW breakers available. Terminal lugs for circuit breakers available inpackage 06EA660152.4. Recommended RLA value shown is determined by: circuit breaker must trip value ÷ 1.40. Use this recommended (and minimum) RLA value todetermine name plate stamping, minimum contactor sizing, and wire sizing. RECOMMENDED RLA FOR 06E COMPRESSORS EQUALS:MUST-TRIP (M.T.) OF CARLYLE APPROVED OVERCURRENT DEVICE BEING USED ÷ 1.405. Compressor operating amps at any specific condition can only be determined from a performance curve.6. Ohm values for resistance are approximate and shown for reference purposes only. Motors from different vendors and motors of different efficienciescan differ up to 15% from data shown.103
4.7 — 06CC (16 to 37 Cfm) 3 Phase Electrical SpecificationsMAXkW104
LEGENDLRA - Locked Rotor AmpsMCC - Maxmium Continuous CurrentRLA - Rated Load AmpsNOTES:1. RLA (rated load amps) value shown for new high efficiency models is MCC ÷ 1.56 = RLA. Use thisrecommended (and minimum) RLA value to determine nameplate stamping. Minimum contactor sizing and wire sizing.2. Compressor operating amps at any specific conditions can only be determined from a performance curve.3. RLA values for 06D compressor protected by a calibrated circuit breaker will depend on must-trip value of circuit breaker.4. Ohm values shown for resistance are approximate and shown for reference only. Motors from different vendors and motors of different efficienciescan differ up to 15% from data shown.105
4.8 – 06CC (50 to 99 Cfm) 3 Phase Electrical Specifications106
LEGEND:LRA - Locked Rotor AmpsMCC-Maximum Continuous CurrentRLA-Rated Load AmpsNOTES:1. Compressor must-trip (M.T.) amps and RLA values are maximum figures.2. LRA values for PW second winding = 1/2 the LRA -XL value.3. 3-Pole XL circuit breakers shown, other 3-Pole XL alternates and 6-Pole PW breakers available. Terminal lugs for circuit breakers available inpackage 06EA660152.4. Recommended RLA value shown is determined by: circuit breaker must trip value ÷ 1.40. Use this recommended (and minimum) RLA value todetermine name plate stamping, minimum contactor sizing, and wire sizing. RECOMMENDED RLA FOR 06CC COMPRESSORS EQUALS:MUST-TRIP (M.T.) OF CARLYLE APPROVED OVERCURRENT DEVICE BEING USED ÷ 1.40.5. Compressor operating amps at any specific condition can only be determined from a performance curve.6. Ohm values for resistance are approximate and shown for reference purposes only. Motors from different vendors and motors of different efficienciescan differ up to 15% from data shown.107
4.9 — 06D Compressor Overloads** Based on new high efficiency (H.E.) extended voltage compressor models.† Voltage is 3 Phase 60 cycle, unless noted as single-phase 60 cycle.** Two overloads in parallel in legs 1 and 3.NOTE: Most 06D compressors have internal thermostat installed in motor and wire across terminals 8 and 9 at theterminal block. It trips (opens) control circuit at 221°F (105°C) and resets at 181°F (83°C)108
4.10 — Electrical Hook-UpConsult wiring diagram located inside compressor terminalbox cover and reference diagrams shown below forwiring hook-up connection locations. See 3.31, pg 88 forTerminal Box Packages.06D COMPRESSORS06DSinglePhaseSingle Phase Internal Thermostat06DThreePhase* 3rd overload required on some compressors. See 4.9 06D compressor overloads.Three Phase Across-The-Line StartInternal Thermostat109
06E COMPRESSORS(ACROSS-THE-LINE [XL] START)See Fig.17, page 111, for detailed view ofterminal post arrangement.110
06E COMPRESSORS(PART WINDING START)Fig. 17 – Terminal PostArrangement, Detail View (06Eand 06CC 50 to 99 Cfm)111
4.11 — Voltage and Current UnbalanceVOLTAGE UNBALANCE (Maximum 2%)Voltage unbalance can cause motors to overheat and fail.Below is the recommended method for determining voltageunbalance.Example: Supply voltage is 240-3-60AB = 243 voltsBC = 236 voltsAC = 238 volts243 + 236 + 238Average Voltage =3= 7173= 239 voltsDetermine maximum deviation from average voltage:(AB) 243 – 239 = 4 volts(BC) 239 – 236 = 3 volts(AC) 239 – 238 = 1 voltMaximum deviation is 4 volts.Determine % voltage unbalance:4% Voltage unbalance = 100 x239= 1.7%This amount of phase unbalance is satisfactory as it isbelow the maximum allowable of 2%.IMPORTANT: If the supply voltage phase unbalanceis more than 2%, contact your local electric utilitycompany immediately.112
CURRENT UNBALANCE (Maximum 10%)Voltage unbalance will cause a current unbalance, buta current unbalance does not necessarily mean that avoltage unbalance exists. A loose terminal connection ora build-up of dirt or carbon on one set of contacts (usingthe example of L1 as the problem leg) would cause ahigher resistance on that leg (L1) than on L2 and L3. Thecurrent follows the path of least resistance, so the currentincreases in legs L2 and L3. Higher current causes moreheat to be generated in the motor windings.Percent (%) of current unbalance is calculated in thesame way as voltage unbalance (see the previous section),with a maximum acceptable current unbalance of10%.5.0 COMPRESSOR <strong>SERVICE</strong> WORKSHEETS<strong>Carlyle</strong> recommends that the Compressor Service Worksheets(pages 114 and 115) be copied (and enlarged, if preferred)and filled out for each compressor at initial start-upand each time the compressor is serviced. Comparing thedata from current worksheets to past records will allow theservice technician to diagnose system changes and preventcompressor failures. This information is also very useful inpreventing a repeat failure.113
06D, 06E Compressor Service WorksheetMechanic:____________________ Date: ________________From Compressor Nameplate:Model No.: _________________________________________Serial No.: _________________________________________Motor No.: _________________________________________Voltage: ___________________________________________Allow compressor to run for 30 minutes, then obtain the pressures andbody temperature at the locations shown below. Check for proper oilreturn in sight glass.COMPRESSOR VOLTAGE/AMP VALUESPH VOLTAGE CURRENTC-R:___________________ C:___________________1φ C-S:___________________ R:___________________R-S:___________________ S:___________________3φL 1-L 2:_________________L 1-L 3:_________________L 2-L 3:_________________L 7-L 8:_________________L 7-L 9:_________________L 8-L 9:_________________L 1:__________________L 2:__________________L 3:__________________PART WINDINGL 7:__________________L 8:__________________L 9:__________________Make copies of this worksheet to record data at initial start-up and whenever the compressor is serviced.Legend: C - Common R - Run S - Start114
06CC Compressor Service WorksheetMechanic:____________________ Date: ________________From Compressor Nameplate:Model No.: _________________________________________Serial No.: _________________________________________Motor No.: _________________________________________Voltage: ___________________________________________Allow compressor to run for 30 minutes, then obtain the pressures andbody temperature at the locations shown below. Check for proper oilreturn in sight glass.See Compressor Operating Limits, page 19.COMPRESSOR VOLTAGE/AMP VALUESPH VOLTAGE CURRENTC-R:___________________ C:___________________1φ C-S:___________________ R:___________________R-S:___________________ S:___________________3φL 1-L 2:_________________L 1-L 3:_________________L 2-L 3:_________________L 7-L 8:_________________L 7-L 9:_________________L 8-L 9:_________________L 1:__________________L 2:__________________L 3:__________________PART WINDINGL 7:__________________L 8:__________________L 9:__________________Make copies of this worksheet to record data at initial start-up and whenever the compressor is serviced.Legend: C - Common R - Run S - Start115
Service Guide IndexPage06CC (16 to 37 CFM) 3 Phase Electrical Specifications.................................... 10406CC (50 to 99 Cfm) 3 Phase Electrical Specifications..................................... 10606CC (16 to 37 Cfm) Torque Guide..................................................................... 6006CC (50 to 99 Cfm) Torque Guide..................................................................... 6106CC Compressor 16 to 37 Cfm Model, Connection Points — Motor End......... 5106CC Compressor 16 to 37 Cfm Model, Connection Points — Pump End......... 5006CC Compressor 50 to 99 Cfm Model, Connection Points — Motor End......... 5306CC Compressor 50 to 99 Cfm Model, Connection Points — Pump End......... 5206CC Compressor Model Numbers....................................................................... 506CC Compressors — Physical Data.................................................................. 6606CC Service Worksheet................................................................................... 11506D 2-Cylinder Compressor, Connection Points................................................. 4406D 4-Cylinder Compressor (13 and 16 Cfm), Connection Points...................... 4506D 4-Cylinder Compressor (18 and 20 Cfm), Connection Points...................... 4606D 6-Cylinder Compressor (24, 28, and 37 Cfm), Connection Points............... 4706D 6-Cylinder Compressor, Exploded View....................................................... 5606D Compressor, Cross-Sectional View.............................................................. 5406D Compressor Model Numbers......................................................................... 306D Compressor Overloads.............................................................................. 10806D Compressors — Physical Data.................................................................... 6206D Compressors — Torque Guide..................................................................... 6006D, E Service Worksheet................................................................................. 11406DM, DA 3 Phase Electrical Specifications........................................................ 9406DR 3 Phase Electrical Specifications............................................................... 9206DR, DM Single-Phase Electrical Specifications............................................... 9606E 4-Cylinder Compressor (50 and old 66 Cfm), Connection Points................. 4806E 6-Cylinder Compressor (65, 75, 99 Cfm), Connection Points...................... 4906E 6-Cylinder Compressor, Exploded View....................................................... 5806E Compressor, Cross-Sectional View.............................................................. 55116
06E Compressor Model Numbers.......................................................................... 406E Compressors — Physical Data..................................................................... 6406E Compressors — Torque Guide..................................................................... 6106EA, ET 3 Phase Electrical Specifications....................................................... 10206ER, EY 3 Phase Electrical Specifications........................................................ 9806EM, EZ 3 Phase Electrical Specifications...................................................... 100Additives, Oil........................................................................................................ 73Alkylbenzene Oil, Use with CFC, HCFC, and HCFC Blends............................... 69Baffle Plates......................................................................................................... 89Bearing Head (Oil Pump), Replacement Procedures.......................................... 38Bearing Head, High Flow Oil Pump..................................................................... 74Bearing Head, Pump End.................................................................................... 39Bearing Head, Replacement................................................................................ 38Billing and Credit.................................................................................................. 10Capacity Control Unloading Accessory Packages............................................... 78Capacity Control Coil Packages.......................................................................... 80<strong>Carlyle</strong> Compressor Connection.......................................................................... 10CFCs, Approved for Use...................................................................................... 69Cfm Designation.................................................................................................... 5Change Out Procedures, Oil & Refrigerant.......................................................... 72Clean-Up.............................................................................................................. 42Compressor Isolation........................................................................................... 21Compressor Model Number Significance.............................................................. 3Compressor Mounting Data................................................................................. 82Compressor Problems — see “Troubleshooting”................................................. 20Compressor Weight............................................................................................. 63Compressors without Oil...................................................................................... 68Connection Points, 06CC 16 to 37 Cfm Models............................................ 50, 51Connection Points, 06CC 50 to 99 Cfm Models............................................ 52, 53Connection Points, 06D 2-Cylinder Models......................................................... 44Connection Points, 06D 4-Cylinder Models................................................... 45, 46Connection Points, 06D 6-Cylinder Models......................................................... 47Connection Points, 06E 4-Cylinder Models......................................................... 48117
Connection Points, 06E 6-Cylinder Models......................................................... 49Crankcase Heaters.............................................................................................. 81Current Unbalance............................................................................................. 113Cycling, Continuous — Typical Causes............................................................... 23Cycling, Intermittent — Typical Causes............................................................... 23Cylinder Head, Blown.......................................................................................... 23Cylinder Head Cooling Fans................................................................................ 77Cylinder Head Disassembly................................................................................. 33Cylinder Head Gasket — Failure Causes............................................................ 23Cylinder Head Gaskets........................................................................................ 84Cylinder Head Reassembly................................................................................. 36Discharge Gas Temperature Sensor.................................................................... 76Electrical Hookup, 06D Compressors................................................................ 109Electrical Hookup, 06E Compressors — Across-the-Line Start......................... 110Electrical Hookup, 06E Compressors — Part Winding Start.............................111Electrical Specifications....................................................................................... 92Flooding — Typical Causes................................................................................. 24Gasket, Terminal Plate......................................................................................... 85Gaskets, Cylinder Head and Valve Plates........................................................... 84Gaskets, Service Valves...................................................................................... 82Gaskets, Leak Testing.......................................................................................... 32HCFC Blends, Approved for Use......................................................................... 70HCFCs, Approved for Use................................................................................... 69Heaters, Crankcase............................................................................................. 81Help — Where to Get More................................................................................... 1HFCs, Approved for Use...................................................................................... 71High Efficiency Compressors, 06D, E.................................................................. 68Insertion Heaters.................................................................................................. 81Interstage Pressure Tables (06CC)...................................................................... 89Jumper Plate Packages Connection............................................................ 88, 110Locked Rotor, Cycling On — Typical Causes...................................................... 27Low Compressor Capacity................................................................................... 22Metric Conversions and Measurements................................................................ 5Mineral Oils, To Use With CFC and HCFC Refrigerants...................................... 69118
Model Number................................................................................................... 3, 6Motor Burnout...................................................................................................... 27Motor Barrel Interconnection................................................................................ 13Motor End Mounting Foot.................................................................................... 83Motor Burnout — Clean-up Procedure................................................................ 42Motor Protection Tripping — Typical Causes....................................................... 26Mounting Data, Compressor................................................................................ 82Mounting Plate, Compressors.............................................................................. 82Mufflers................................................................................................................ 87Nameplate Significance......................................................................................... 6OEM....................................................................................................................... 9Oil & Refrigerant Change Out Procedures........................................................... 72Oil Additives......................................................................................................... 73Oil Charge............................................................................................................ 63Oil Control — Parallel Compressor Applications............................................ 13, 28Oil Control — Motor Barrel Interconnections....................................................... 13Oil Drain Plug Adapter......................................................................................... 83Oil Level in Sight Glass........................................................................................ 12Oil Operating Levels............................................................................................ 12Oil Pressure......................................................................................................... 73Oil Pressure Problems — Typical Causes........................................................... 26Oil Pump – See Bearing HeadOil Safety Switch.................................................................................................. 75Oil Viscosity and Pour Points............................................................................... 72Oils, Approved for Use......................................................................................... 69Operating Limits, Typical — 06CC....................................................................... 19Operating Limits, Typical — 06D, E..................................................................... 18Overloads for 06D Compressors....................................................................... 108Parallel Compressor Applications, Oil Control..................................................... 28Parts Identification — 06D Compressor, Exploded View..................................... 56Parts Identification — 06E Compressor, Exploded View..................................... 58Physical Data — 06CC Compressors.................................................................. 66Physical Data — 06D Compressors.................................................................... 62Physical Data — 06E Compressors..................................................................... 64119
Pipe Rattles — Typical Causes............................................................................ 25Piston, Suction Valve, and Backer Positions........................................................ 36POE Oils, To Use with HFC Refrigerants............................................................. 71Pump End Bearing Head..................................................................................... 39Pre Start-Up Procedures...................................................................................... 12Rated Load Amps (RLA)...................................................................................... 92Refrigerant and Oil Change-Out Procedures....................................................... 72Refrigerants and Oils for 06CC Compressors..................................................... 72Refrigerants and Oils for 06D, E Compressors.................................................... 69Serial Number........................................................................................................ 8Service Billing...................................................................................................... 10Service Procedures.............................................................................................. 32Service Procedures — Bearing Head (Oil Pump)................................................ 38Service Procedures — Cylinder Head and Valve Plate Assembly....................... 32Service Procedures — Motor Burnout Clean Up................................................. 42Service Valve Gaskets......................................................................................... 82Service Valves...................................................................................................... 82Service Worksheet, 06CC.................................................................................. 115Service Worksheet, 06D, E................................................................................ 114Sight Glass Adapters — Oil Equalization............................................................. 83Sight Glass, Oil Level........................................................................................... 12Sight Glass Replacement — Installation Tool...................................................... 83Special Order Number........................................................................................... 7Start-Up — Before Starting.................................................................................. 12Start-Up — Recommended Procedures.............................................................. 11Start-Up, Compressor.......................................................................................... 16Start-Up, Troubleshooting and Service................................................................ 10Start-Up, Will Not Start......................................................................................... 22Strap-On Heaters................................................................................................. 81Suction Cut-Off Control........................................................................................ 78Suction Valve....................................................................................................... 36Technical Assistance, OEM.................................................................................. 10Technical Assistance, To Get................................................................................. 1Terminal Lug Package......................................................................................... 88120
Terminal Plate Gasket.......................................................................................... 85Terminal Plate Jumper Bars, 06E........................................................................ 88Terminal Posts....................................................................................................111Torque Guide — 06D and 06CC (16 to 37 Cfm) Compressors............................ 60Torque Guide — 06E and 06CC (50 to 99 Cfm) Compressors............................ 61Troubleshooting................................................................................................... 20Troubleshooting — 06CC Desuperheater Connection Hot.................................. 31Troubleshooting — 06CC Discharge Pressure = Intermediate Pressure............ 31Troubleshooting — 06CC Economizer Connection Hot....................................... 31Troubleshooting — 06CC High Midstage Pressure............................................. 31Troubleshooting — 06CC Intermediate Pressure = Discharge Pressure............ 31Troubleshooting — 06CC Low Midstage Pressure.............................................. 31Troubleshooting — Cannot Pull Down................................................................. 22Troubleshooting — Compressor Isolation Procedures........................................ 21Troubleshooting — Cycling, Continuous.............................................................. 23Troubleshooting — Cycling, Intermittent.............................................................. 23Troubleshooting — Cylinder Head Gasket........................................................... 23Troubleshooting — Desuperheater Connection Hot, 06CC................................. 31Troubleshooting — Discharge Temperature Sensor............................................ 26Troubleshooting — Economizer Connection Hot, 06CC...................................... 31Troubleshooting — Flooding................................................................................ 24Troubleshooting — Locked Rotor, Cycling On..................................................... 27Troubleshooting — Low Discharge Pressure....................................................... 24Troubleshooting — High Midstage Pressure, 06CC............................................ 31Troubleshooting — Low Midstage Pressure, 06CC............................................. 31Troubleshooting — Low On Capacity.................................................................. 22Troubleshooting — Low or No Oil Pressure......................................................... 26Troubleshooting — Low Suction Pressure........................................................... 24Troubleshooting — Motor Burnout....................................................................... 27Troubleshooting — Motor Protection Tripping...................................................... 26Troubleshooting — No Oil Pressure.................................................................... 26Troubleshooting — Noisy Compressor................................................................ 25Troubleshooting — Oil Safety Switch Tripping..................................................... 30Troubleshooting — Parallel Systems................................................................... 28121
Troubleshooting — Pipe Rattle............................................................................ 25Troubleshooting — Running Hot.......................................................................... 29Troubleshooting — Sight Glass, Low or Empty................................................... 30Troubleshooting — Starting Problems................................................................. 22Troubleshooting — Valve Plates.......................................................................... 23Troubleshooting — Will Not Start......................................................................... 22Troubleshooting Guide......................................................................................... 22Unloading — Capacity Control............................................................................. 78Valve Plate Gaskets............................................................................................. 84Valve Plate Gaskets, Blown................................................................................. 23Valve Plate Disassembly...................................................................................... 33Valve Plate Packages.......................................................................................... 86Valve Plates — Failure Causes............................................................................ 23Valve Plates — Replacement Procedures........................................................... 32Valve Plates — Leak Testing................................................................................ 32Voltage Unbalance............................................................................................. 112Warranty................................................................................................................. 9Weight, Compressor............................................................................................ 63122
COMPLIMENTS OF:CARLYLE COMPRESSOR DIVISION • © CARRIER CORPORATIONP.O. Box 4808 • Syracuse New York 13221www.carlylecompressor.comIn U.S., Puerto Rico: 1-800-GO-CARLYLE (1-800-462-2759)In Canada: 1-800-258-1123Manufacturer reserves the right to discontinue or change at any time, specificationsor designs and prices without notice and without incurring obligations.Rev 7/08 Lit No: 020-611