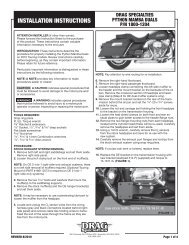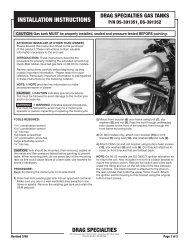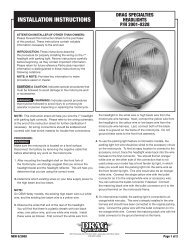
INSTALLATION INSTRUCTIONS
INSTALLATION INSTRUCTIONS
INSTALLATION INSTRUCTIONS

You also want an ePaper? Increase the reach of your titles
YUMPU automatically turns print PDFs into web optimized ePapers that Google loves.
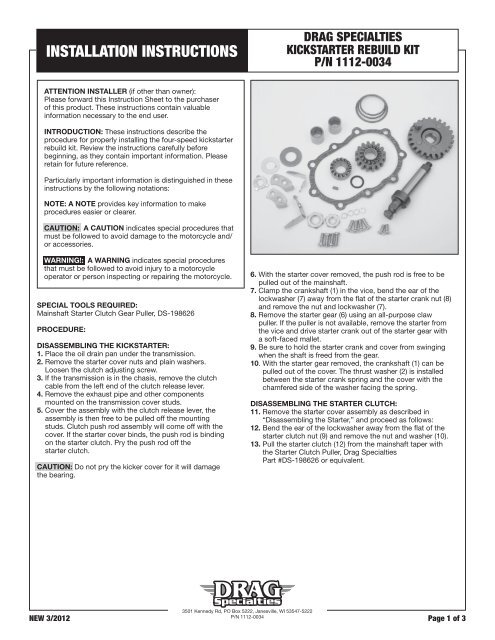
<strong>INSTALLATION</strong> <strong>INSTRUCTIONS</strong>DRAG SPECIALTIESKICKSTARTER REBUILD KITP/N 1112-0034ATTENTION INSTALLER (if other than owner):Please forward this Instruction Sheet to the purchaserof this product. These instructions contain valuableinformation necessary to the end user.INTRODUCTION: These instructions describe theprocedure for properly installing the four-speed kickstarterrebuild kit. Review the instructions carefully beforebeginning, as they contain important information. Pleaseretain for future reference.Particularly important information is distinguished in theseinstructions by the following notations:NOTE: A NOTE provides key information to makeprocedures easier or clearer.CAUTION: A CAUTION indicates special procedures thatmust be followed to avoid damage to the motorcycle and/or accessories.WARNING!: A WARNING indicates special proceduresthat must be followed to avoid injury to a motorcycleoperator or person inspecting or repairing the motorcycle.SPECIAL TOOLS REQUIRED:Mainshaft Starter Clutch Gear Puller, DS-198626PROCEDURE:DISASSEMBLING THE KICKSTARTER:1. Place the oil drain pan under the transmission.2. Remove the starter cover nuts and plain washers.Loosen the clutch adjusting screw.3. If the transmission is in the chasis, remove the clutchcable from the left end of the clutch release lever.4. Remove the exhaust pipe and other componentsmounted on the transmission cover studs.5. Cover the assembly with the clutch release lever, theassembly is then free to be pulled off the mountingstuds. Clutch push rod assembly will come off with thecover. If the starter cover binds, the push rod is bindingon the starter clutch. Pry the push rod off thestarter clutch.CAUTION: Do not pry the kicker cover for it will damagethe bearing.6. With the starter cover removed, the push rod is free to bepulled out of the mainshaft.7. Clamp the crankshaft (1) in the vice, bend the ear of thelockwasher (7) away from the flat of the starter crank nut (8)and remove the nut and lockwasher (7).8. Remove the starter gear (6) using an all-purpose clawpuller. If the puller is not available, remove the starter fromthe vice and drive starter crank out of the starter gear witha soft-faced mallet.9. Be sure to hold the starter crank and cover from swingingwhen the shaft is freed from the gear.10. With the starter gear removed, the crankshaft (1) can bepulled out of the cover. The thrust washer (2) is installedbetween the starter crank spring and the cover with thechamfered side of the washer facing the spring.DISASSEMBLING THE STARTER CLUTCH:11. Remove the starter cover assembly as described in“Disassembling the Starter,” and proceed as follows:12. Bend the ear of the lockwasher away from the flat of thestarter clutch nut (9) and remove the nut and washer (10).13. Pull the starter clutch (12) from the mainshaft taper withthe Starter Clutch Puller, Drag SpecialtiesPart #DS-198626 or equivalent.3501 Kennedy Rd, PO Box 5222, Janesville, WI 53547-5222P/N 1112-0034NEW 3/2012 Page 1 of 3
<strong>INSTALLATION</strong> <strong>INSTRUCTIONS</strong>DRAG SPECIALTIESKICKSTARTER REBUILD KITP/N 1112-0034CAUTION: Use of the wrong type of puller to removethe starter clutch gear may cause damage to thetransmission mainshaft.14. With the starter clutch removed, the starter clutchkey (11), the starter mainshaft gear (13) and thestarter clutch spring (14) are free to be removed fromthe mainshaft.CLEANING, INSPECTION AND REPAIR:15. Wash all parts except the gasket (3) in a solvent andblow dry with compressed air.16. Examine the teeth on the starter clutch and thestarter gear (13), ratchet the teeth on the mainshaftgear and starter clutch. The teeth should be sharpedged;if the teeth are rounded or mushroomed andthe rider has experienced ratchet slip, replace theworn parts.17. If the starter clutch nut has previously been drawndown too tight, the starter clutch may be cracked.If cracked, it is usually difficult to get the starterclutch out of the clutch release bearing whendisassembling the starter cover.18. Position the mainshaft gear (13) on the shaft andcheck the play. If obviously loose replacethe bushing.19. Insert the starter crankshaft in the starter cover andcheck the play. If the play is appreciable, press outthe bushings (4) and install new parts.20. If the transmission was leaking oil out of the startercrank, install the oil seal/O-ring (5).21. The bushings are pressed in with the outsideends just flush with the bushing boss on the outersurfaces of the cover.22. Check the clutch push rod bearing for wear. Replacethe unit that grinds, feels rough or loosewhen rotated.ASSEMBLING THE STARTER:27. Install the starter crank spring and thrust washer (2) on thestarter crankshaft (1) with the chamfered side facing thespring. Apply a film of light grease on the oil seal (5) andthe starter crankshaft before installing.28. Install the starter crank gear. When viewing the end of thegear, the notch on the crankshaft (1) should be in the 12o’clock position and the dowel pin on the gear should bein the 7 o’clock position.29. Install the lockwasher (7) and the nut (8) and tighten thenut to 50 to 60 ft.-lbs. of torque.30. Bend the tab on the washer up against the flat on the nut.31. Before the starter cover is installed, the push rodassembly is inserted into the cover. Insert the smalldiameter end of the push rod into the mainshaft.32. With the oil slinger/throwout bearing in the cover andusing the push rod as a guide, move the cover assemblyinto place.33. The dowel pin on the starter gear must clear the front ofthe starter crank stop (19).34. Tighten all of the cover nuts to 13 to 16 ft.-lbs. of torque.35. Install the starter crank and tighten the crank bolt to 25 to30 ft.-lbs. of torque.36. Wind the spring by turning it with a pliers clockwise andhooking the end onto the starter crank stud.37. Refill the unit with 1 1 /2 pints of preferred transmission oil.38. Install the clutch cable into the release arm.39. Adjust the clutch and check for proper operation.40. Adjust the rear brake pedal.ASSEMBLING THE STARTER CLUTCH:23. Coat the gasket with the gasket sealer and positionon the gear box.24. Lubricate the mainshaft with engine oil and slip thespring and mainshaft gear over the shaft.CAUTION: The bushing must be loose enough on themainshaft to allow the gear to slide under the force ofthe compressed starter clutch spring. If necessary, linethe ream bushing to achieve free fit.25. Position the starter clutch, drive in the starter clutchkey and assemble the remainder of the parts in thereverse order of disassmebly.26. Tighten the nut to 50-60 ft.-lbs.3501 Kennedy Rd, PO Box 5222, Janesville, WI 53547-5222P/N 1112-0034NEW 3/2012 Page 2 of 3