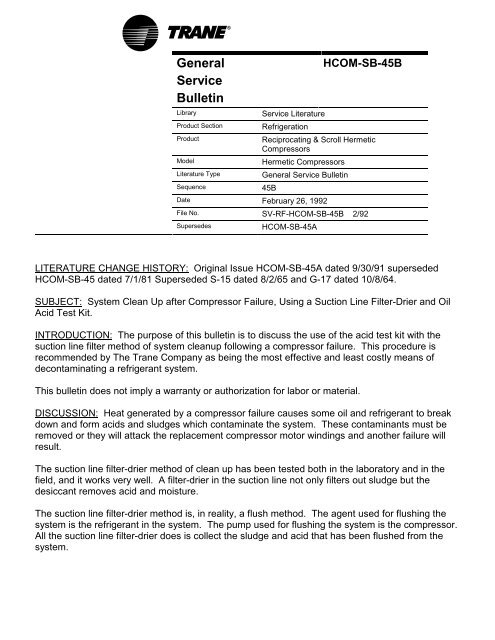
System Clean Up_hcom.. - HVAC.Amickracing
System Clean Up_hcom.. - HVAC.Amickracing
System Clean Up_hcom.. - HVAC.Amickracing

Create successful ePaper yourself
Turn your PDF publications into a flip-book with our unique Google optimized e-Paper software.
Filter-Drier CoreThese cores for use with steelactivated carbon to afford optimum contaminantreplaceable core shells in Table 10-1.cleanup following a motor burnout. This ingredientalso provides wax and resin control on R-22 andSC-48 Standard Capacity BlockR-502 low temperature applications.This block provides system protection* Water capacities to suit specific system conditionsfrom water and acids in the majority* Exceptional acid capacities for normal systemof general purpose applications. It isprotection, or to effectively cleanup following aused singly or in multiples in shells ofcompressor burnout.48 through 192 cubic inches. * Wax removal capabilities, if desired, for R-22or R-502 low temperature applications, or forHC-48 & 100 High Capacity Block* Physical dimensions and gasket sets that permitA filter-drier block similar to the SC-48interchangeability with competitive products.except with much greater water capacitiesfor critical applications or where systemconditions indicate the presence of anFilter-drier cores provide specific systemabnormal amount of water.protection from soluble contaminants – water,acids, waxes – according to the specificBB-48 & 100 Burnout Blockapplication requirements. In addition, theyA filter-drier block possessing waterprovide filtration capabilities of solidcapacities comparable to the highcontaminants as small as 25 microns. Thesecapacity block, and also featuringreplaceable filter-drier blocks are designedfor use in liquid line service or for installationin the suction line to obtain the ultimatein burnout cleanup performance.Table 12-1 --- Capacities_________________________________________________________Water Capacity --- DropsTraneType R-12 R-22 R-502 Case PartNumber Description 75F 125F 75F 125F 75F 125F Qty. Number___SC-48 Standard Capacity 774 340 293 223 340 223 12 COR-0018HC-48 High Capacity 964 558 524 436 558 436 12 COR-0019BB-48 Burnout Block 775 515 480 400 515 430 12 COR-0020HC-100 High Capacity 1870 1050 980 810 1050 810 4 COR-0021BB-100 Burnout Block 1750 1120 1000 810 1110 875 4 COR-0022NOTE: Water capacities are based on an equilibrium point dryness of 15 ppm for R12, 60 ppm for R22 and 30 ppm for R502 20drops of water = 1 gram = 1cc.Table 12-2 – Replaceable Filter-Drier Blocks________________________________________Filter Effective Surface Liquid Refrigerant Capacity________Drier Desiccant Filter Filter R12 R22 R502___Block Size Volume Area 75F 125F 75F 125F 75F 125F_48 48 cu. in. 69 sq.in. 33 oz. 30 oz. 30 oz. 27 oz. 31 oz. 27 oz.100 100 cu. in. 110 sq. in. 50 oz. 45 oz. 45 oz. 41 oz. 47 oz. 42 oz.Table 12-3 – Replaceable Filter-Drier Block_________________________Filter-Drier Dimensions Shipping WeightBlock Size A B C Filter Area Lbs. Ea.48 5½ 1 49 /64 3 23 /32 69 sq. in. 1½ _______100 6½ 2 1 /16 4 13 /16 110 sq. in. 4________See installation instructions on page 16.
* DRIER INSTALLATIONRemove the failed compressor or motor and any driers before installing the suction line filter drier;any length of suction line between the drier and compressor must be cleaned.Do not install replaceable core shells in a manner that they can become oil traps, suction line shellsinstalled in the wrong location with the cores removed can trap a lot of oil!On scroll compressors that are manifolded together there must be 18 inches between the filterdrier outlet and the oil separator tee in the suction line. It is recommended that the oil in thecompressor that has not failed be changed. The reasons for this are: (1) the oil must be removedbefore the oil equalizer line can be connected and (2) the oil on the non-failed compressor is alsocontaminated if the oil in the failed compressor is contaminated. Scrolls use Trane OIL 15. Referto IOM literature or HCOM-SB-4F for amount, or for more information on oils.On unitary heat pumps, the discharge line from the compressor to the 4-way valve should beremoved and cleaned. At the same time, the 4-way valve should be inspected for cleanliness.Severe burnouts will contaminate the 4-way valve so badly that it will have to be replaced. If theburn-out is not too severe, the 4-way valve may be acceptable or may be cleaned manually ifnecessary. The clean-up filter drier should be installed in the suction line between the 4-way valveand the compressor. This is necessary because this short length of line is always a suction line. Ifthe drier is installed on the other side of the 4-way valve, it would be in the hot gas line when theunit is heating mode.The liquid line drier should always be replaced or one should be installed if there is none to protectthe metering device, and to remove moisture.Consider installing isolation valves so that the refrigerant charge can be isolated from service filterdriers on systems that are severely contaminated.* BRAZINGProper brazing techniques are essential when working on refrigeration systems. The followingfactors should be kept in mind when forming sweat connections.When copper is heated in the presence of air, copper oxide forms. To prevent copper oxide fromforming inside the tubing during brazing, sweep inert gas, such as dry nitrogen, through the tubing.Nitrogen displaces air in the tubing and prevents oxidation of the interior surfaces. A nitrogen flowof one to three cubic feet per minute is sufficient to displace the air. Use a pressure regulatingvalve and flow meter to control the flow.Ensure that the tubing surfaces to be brazed are clean and that the ends of the tubes have beencarefully reamed to remove any burrs.Make sure the inner and outer tubes of the joint are symmetrical and have a close clearance,providing an easy slip fit. If the joint is too loose, the tensile strength of the connection will besignificantly reduced. The overlap distance should be equal to the diameter of the inner tube.Protect components from heat by wrapping with a damp cloth. Also move line insulation andgrommets away from the joints since excessive heat can damage these components.If flux is used, apply it sparingly to the joint. Excess flux will contaminate the refrigeration system.Apply heat evenly over the length and circumference of the joint. The entire joint should becomehot enough to melt the brazing material.
Use brazing materials approved for refrigeration systems. 40 to 45% silver brazing alloy should beused on dissimilar metals.Begin brazing when the joint is hot enough to melt the brazing rod. The hot copper tubing, not theflame should melt the rod.Continue to apply heat around the circumference of the joint until the brazing material is drawn intothe joint by capillary action, making a mechanically sound and gas-tight connection. Remove thebrazing rod as soon as a complete fillet is formed to avoid possible restriction on the inside of thetube.Visually inspect the connection after brazing to locate any pin holes or crevices in the joint. Theuse of a mirror is advisable and can make locating leaks easier.* LEAK TESTINGWhen leak testing the unit, the following safety precautions must be observed:WARNING! DO NOT WORK IN A CLOSED AREA WHERE REFRIGERANT OR NITROGEN MAY BELEAKING. A SUFFICIENT QUANTITY OF VAPORS MAY BE PRESENT TO CAUSE PERSONALINJURY. PROVIDE ADEQUATE VENTILATION.WARNING! DO NOT USE OXYGEN, ACETYLENE, OR AIR IN PLACE OF DRY NITROGEN FOR LEAKTESTING. A VIOLENT EXPLOSION WILL RESULT WHICH COULD CAUSE SERIOUS INJURY ORDEATH.WARNING! ALWAYS USE A PRESSURE REGULATOR, VALVES, AND GAUGES TO CONTROLCYLINDER AND LINE PRESSURES WHEN PRESSURE TESTING THE SYSTEM. EXCESSIVEPRESSURES MAY CAUSE LINE RUPTURES, EQUIPMENT DAMAGE, OR AN EXPLOSION WHICHCOULD RESULT IN PERSONAL INJURY OR DEATH.Initial leak test should be performed using dry nitrogen and soap bubbles. Apply it to each jointthen visually inspect the joint with a mirror. If a halide torch or electronic leak detector is used andthe system is pressurized with refrigerant, reclaim the refrigerant prior to evacuation. If the systemis left pressurized with refrigerant, the pressure in the system will change approximately 3 psig witheach degree change in ambient temperature.CAUTION: DO NOT EXCEED 200 PSIG WHEN LEAK TESTING THE SYSTEM.* EVACUATIONFor field evacuation, use a rotary-style vacuum pump capable of pulling a vacuum of 100 micronsor less.When hooking the vacuum pump to a refrigeration system, it is important to manifold the pump toboth the high and low of the system (liquid line access valve and compressor suction accessvalve). Follow the pump manufacturer’s directions for the proper methods of using the vacuumpump.CAUTION: DO NOT UNDER ANY CIRCUMSTANCES, USE A MEGOHM METER OR APPLY POWERTO THE WINDINGS OF THE COMPRESSOR WHILE IT IS UNDER A DEEP VACUUM. IN THERARIFIED ATMOSPHERE OF A VACUUM, THE MOTOR WINDINGS CAN BE DAMAGED.
The lines used to connect the pump to the system should be copper and the largest diameter that can practically beused. Using larger line sizes within minimum flow resistance can significantly reduce evacuation time. Rubber orsynthetic hoses are not recommended for system evacuation because they have moisture absorbing characteristicswhich result in excessive rates of out gassing and pressure rise during standard vacuum test. This makes it impossibleto determine if the unit has a leak, excessive residual moisture, or continual or high rate of pressure increase due to thehoses.An electric micron vacuum gauge should be installed in the common line ahead of the vacuum pump shut off valve, asshown in figure 2. Close valves B and C, and open valve A. After several minutes, the gauge reading will indicate theminimum blank off pressure which the pump is capable of pulling. Rotary pumps should produce vacuums of less than100 microns.Open valves B and C, evacuate the systems to a pressure of 500 microns or less. Once 500 microns or less isobtained with valve A closed, a time verses pressure rise should be performed. The maximum allowable rise over a 15minute period is 200 microns.If the pressure rise is greater than 200 microns but levels off to a constant value, excessive moisture is present. If thepressure steadily continues to rise, a leak is indicated. Figure 3 illustrates three possible results of time versestemperature rise checks.Figure 2Typical Vacuum PumpHook-upFigure 3Time-vs-Pressure RiseAfter Evacuation
* OBTAINING OIL SAMPLESTake an oil sample after the first four hours of operation and test it to determine the condition of the system. Oilsamples can be taken directly from the oil serviced valves on systems so equipped. On systems without such valves,an oil sample may be obtained by one of the methods shown in figures 4, 5, and 6, only about an ounce of oil isrequired for the acid test. Figure 4 can be used if the suction line filter drier is installed in a vertical position with apressure tap installed at the outlet, a sufficient amount of oil may be obtained for acid testing. Be sure to purge theremaining oil from the trap, in order not to contaminate the next sample. Figure 5 illustrates the use of oil sample tubethat can be installed on the bottom of the suction line, again be sure to purge the remaining oil from the tube in ordernot to contaminate the next sample. Figure 6 uses items readily available in the field, and can be connected to thesuction and discharge lines with a service manifold. When the oil level is visible in the sight glass, isolate the trap anddrain off the oil sample.Figure 4 Figure 5Figure 6