Self Holding Tapers - Home Metal Shop Club
Self Holding Tapers - Home Metal Shop Club
Self Holding Tapers - Home Metal Shop Club

Create successful ePaper yourself
Turn your PDF publications into a flip-book with our unique Google optimized e-Paper software.
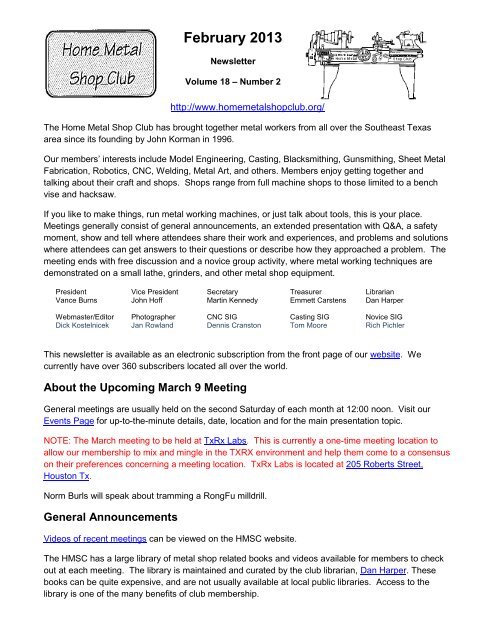
February 2013NewsletterVolume 18 – Number 2http://www.homemetalshopclub.org/The <strong>Home</strong> <strong>Metal</strong> <strong>Shop</strong> <strong>Club</strong> has brought together metal workers from all over the Southeast Texasarea since its founding by John Korman in 1996.Our members’ interests include Model Engineering, Casting, Blacksmithing, Gunsmithing, Sheet <strong>Metal</strong>Fabrication, Robotics, CNC, Welding, <strong>Metal</strong> Art, and others. Members enjoy getting together andtalking about their craft and shops. <strong>Shop</strong>s range from full machine shops to those limited to a benchvise and hacksaw.If you like to make things, run metal working machines, or just talk about tools, this is your place.Meetings generally consist of general announcements, an extended presentation with Q&A, a safetymoment, show and tell where attendees share their work and experiences, and problems and solutionswhere attendees can get answers to their questions or describe how they approached a problem. Themeeting ends with free discussion and a novice group activity, where metal working techniques aredemonstrated on a small lathe, grinders, and other metal shop equipment.PresidentVance BurnsVice PresidentJohn HoffSecretaryMartin KennedyTreasurerEmmett CarstensLibrarianDan HarperWebmaster/EditorDick KostelnicekPhotographerJan RowlandCNC SIGDennis CranstonCasting SIGTom MooreNovice SIGRich PichlerThis newsletter is available as an electronic subscription from the front page of our website. Wecurrently have over 360 subscribers located all over the world.About the Upcoming March 9 MeetingGeneral meetings are usually held on the second Saturday of each month at 12:00 noon. Visit ourEvents Page for up-to-the-minute details, date, location and for the main presentation topic.NOTE: The March meeting to be held at TxRx Labs. This is currently a one-time meeting location toallow our membership to mix and mingle in the TXRX environment and help them come to a consensuson their preferences concerning a meeting location. TxRx Labs is located at 205 Roberts Street,Houston Tx.Norm Burls will speak about tramming a RongFu milldrill.General AnnouncementsVideos of recent meetings can be viewed on the HMSC website.The HMSC has a large library of metal shop related books and videos available for members to checkout at each meeting. The library is maintained and curated by the club librarian, Dan Harper. Thesebooks can be quite expensive, and are not usually available at local public libraries. Access to thelibrary is one of the many benefits of club membership.
February 2013 - <strong>Home</strong> <strong>Metal</strong> <strong>Shop</strong> <strong>Club</strong> Newsletter - V. 18 No. 2We need more articles for the monthly newsletter! If you would like to write an article, or would like todiscuss writing an article, please contact the Webmaster, Dick Kostelnicek. In the September HMSCboard meeting, the board elected to waive membership fees during the next membership renewal cyclefor those providing newsletter articles.Ideas for programs at our monthly meeting are always welcome. If you have an idea for a meetingtopic, or if you know someone that could make a presentation, contact the Vice President John Hoff.Recap of the February 16 General MeetingBy Martin Kennedy, with photos by Jan RowlandThirty one members and four guests fromthe University of Houston MechanicalEngineering department – JohnathanGuerro, Ryan Williams, Marlon Arboledaand Nick Baiamonte, attended the 12:00noon meeting at the Parker WilliamsCounty Library. President Vance Burnsled the meeting.The membership discussed meetinglocations. Suggested locations were theTxRx Labs facility and several libraries - Eldridge, Stella Link and Montrose. Martin Kennedy made abrief presentation describing the TxRx Labs facility based on a visit by the Officers, and John Hoffdescribed the libraries that he had visited. The membership voted on having the next meeting at TxRx.The results were15 votes for TxRx and 4 against.Three topics were requested for future meetings: threading, making gears and cutting tool geometry.Safety MomentVance Burns recounted an incident at a lab he visited. Two workers were installing PVC pipe using acordless guillotine type cutter. On a dare, one guy stuck his finger in the cutter and the other workerpulled the trigger. The guy watched as the cutter slowly cut off the end of his finger.Another hint was to listen for pitch changes when using machinery. A change in pitch can indicate theonset of a problem.Rich Pichler said that a good way to not leave the drill chuck in a drill press was to use a spring loadedsafety chuck. He also mentioned that it was good to have a face shield close to the tools requiring it sothat it was readily available.Norm Burls explained that when using cut off saws, it is necessary to wear both eye AND hearingprotection. The saws make loud noises that can damage your hearing.2
February 2013 - <strong>Home</strong> <strong>Metal</strong> <strong>Shop</strong> <strong>Club</strong> Newsletter - V. 18 No. 2Kevin Capps reminded us to NOT wear gloves when using drills. He saw someone lose three fingerswith a hob saw because his gloves became entangled in the tool bit.PresentationKevin Capps is the owner of J3 Precision Urethane, located in Willis, TX.Kevin’s company manufactures urethane products from molds that hemachines in-house. Ninety-five percent of his customers are in the oilfield.Making the molds requires a different thought process than machining a part.The mold is the inverse of the desired part. Kevin begins with blueprints of theparts. He works with the designer by provides input on features that can makeit easier to make the part in urethane.Kevin usually does nothave mold drawings forthe part. This is aspecialized field, and only a few people inHouston can make mold drawings. To make themold, he reverse engineers the drawing. Thebiggest challenge making molds is figuring outhow to split and make removable components sothat mold can be removed after casting. Also, there is an approximately 2% shrinkage that must beaccounted for in the mold design.The molds are usually made of aluminum, but can also be made ofurethane. Urethane molds are cheaper, but don't last as long. Kevin doesmost of the machining himself, although he sometimes contracts out workfor wire EDM. A typical mold takes more than 6 hours to make.The molds are open cast molds, not injectionmolds. For casting, polyurethane is mixed fromtwo parts - a polymer and a catalyst, which aremixed just before casting at a temperature ofabout 220°. The mold is also at the sametemperature. A silicon based mold releasecompound is applied as an aerosol. Theurethane is then poured into the mold. Varioustechniques are used to prevent bubbles frombeing entrained in the liquid, including mold design, mold preparation, careful mixing of the urethane,and sometimes even vacuum pouring. It takes about 15 minutes before the part can be removed fromthe mold. The completed product is allowed to cure for 16 hours at 220°.Kevin showed several examples of molds, including a complicated hydrocyclone mold.3
February 2013 - <strong>Home</strong> <strong>Metal</strong> <strong>Shop</strong> <strong>Club</strong> Newsletter - V. 18 No. 2Show and TellDick Kostelnicek brought in a disk that he thought might be a rotary file. One of the members identifiedit as a wheel used for milling flour.Joe Williams showed some more types of micrometers to augument theones shown last month by Dick Kostelnicek. He had an inspectionmicrometer that fit through a hole to measure wall thickness, a threadmicrometer made for a limited range of Sellers threads, a small ½-inchmicrometer that he said was very useful and a set of inside boremicrometers.Tom Moore found some unusual tools in the back of his bottom drawer. Thefirst was identified as a front and back chamfering tool missing cutters. Healso had some tapered taps of different threads.Martin Kennedy brought in a knurling tool that he made. He was impressed withone of the knurling tools he saw when making videos of several tools in action.This tool was easy to set up and consistently made good knurls. Martin’s versionincorporated floating heads to make it even easier to set up. The tool waschallenging to make, as it employed several precision dovetails and left and righthand screw threads. Click here for the knurler plans.Mike Winkler demonstrated a speed loader for a 22 rifle with brass screwsrepresenting the bullets and a tube representing the gun.Ray Etheridge, the executor for Ed Gladkowski’s estate, updated us onthe disposition of the estate. He brought in the Colt Baxter steam enginethat Ed had nearly completed, as well as a huge binder of notes andpictures that were used for the design. Ray said that Ed worked withoutdrawings, as he had not found any in the documentation.Phil Lipoma made a presentationbased on his newsletter article lastmonth by showing several tools andtechniques he used for stampingand engraving. As well as using a rotary table, he modified severallathes to allow them to be able to index.Tom Darragh made a vice to hold a gun barrel for removal of the receiver.4
February 2013 - <strong>Home</strong> <strong>Metal</strong> <strong>Shop</strong> <strong>Club</strong> Newsletter - V. 18 No. 2Problems and Solutions / Ask the BlacksmithFour UH Mechanical Engineering students made a presentation showing their Capstone Project todesign and build an automated Rope Climbing Device. The device has application in sports, militaryand search and rescue. The basic design is a winch motor with an attached battery that drives aspecial pulley that engages the rope.They had specific questions around how to build the special pulley that grasps the rope. MembersmadeKarl Schuler showed pictures of a 1:12 scalemodel of the 1855 Novelty Works Gothic steamengine that he built from castings. He wanted tomachine the 17" flywheel so that it looked like itwas made of segmented castings. Severalsuggestions were offered.A member said that he was thinking about buyinga knee mill. He was concerned about the height,since his garage has a steel lintel. It wassuggested that he consider a mill with a rotatinghead, as it can be put horizontal while moving.Another member mentioned that U-haul has asuper low trailer designed for motorcycles, ratedat 1600 lb, and 10-inches off the ground that might prove helpful. It was also suggested that he mightwant to consider removing a section of the garage wall temporarily.A member was looking at indexing tables and asked about considerations for buying one. He wantedto know more about normal uses and how that should affect selection. It was recommended to use a60:1 head. A discussion ensued about how you can get literally billions of combinations with compoundindexing if you have multiple plates. It was mentioned that a cheap spin indexer might be all heneeded.Rich Pichler showed his drill/mill optical centering device. He said that through it, a scribed line lookedlike the Grand Canyon. The finest line he could make was using a #4 sewing needle and that was0.002". He asked why you might want to measure to ten thousandths (0.0001") accuracy. After somediscussion, the conclusion was that ten thousandths accuracy was generally not needed in hobbyistuse.Novice SIG ActivitiesRich Pichler and the novice group demonstrated drilling techniques.5
February 2013 - <strong>Home</strong> <strong>Metal</strong> <strong>Shop</strong> <strong>Club</strong> Newsletter - V. 18 No. 2Making a Small Pinion GearBy J. R. WilliamsA friend brought a small Hardinge H-4 Index unit tomy shop (left photo). It was missing a keycomponent: a small pinion shaft with a handleused to retract an internal index pin. Carefulmeasurement and checking gear calculationsshowed it to be 6-tooth, 18-pitch. The OD of thegear fits snugly into a hole in the unit’s casting.Gear cutters come in sets of 8 cutters forproducing gears from 12 teeth to rack (a straight orinline gear). A number 8 cutter generates 12 and13 teeth and the number one cuts 135 teeth up torack. No cutters are listed for a 6 tooth gear.Time to resort tothe old fall-backposition: handgrind a singletooth fly cutterwithout thebenefit of a pattern. I calculated the tooth depth and width andground a high speed steel tool bit to fit the gear tooth proportions. Aquick trial run, using a section of aluminum rod, produced a roughgear; close but no exactly correct (right photo). With a little moregrinding on the cutter and by using a steel blank, I produced a gear that after a little dressing workedjust fine. All that remained was to machine a slot for a guide screw with a cross-hole and set screw forthe handle.This project was a good exercise in making an odd shaped small part. I’ve made a small brass gearfor a washing machine timer drive, a gear for a trailer jack, a splined drive shaft section for a GT-6automobile and a few timing belt pulleys and gears, but this one was the most difficult. It ‘s a simpleproject to cut gears with a standard gear cutter but a bit more challenging doing it with a single point flycutter.The above photo shows the repaired Hardinge H-4 Index unit with the index plunger engaged into therear index plate. The plate has blind holes that are not visible from the outside.Epilog - A replacement part was found late in the project(left photo). The OD of the gear teeth section is 0.440inch and the head is ¾-inch.6
February 2013 - <strong>Home</strong> <strong>Metal</strong> <strong>Shop</strong> <strong>Club</strong> Newsletter - V. 18 No. 2<strong>Self</strong> <strong>Holding</strong> <strong>Tapers</strong>By Dick KostelnicekAs mechanics, we encounter machine spindles that hold tooling and cutters via a tapered fit. Manysuch tapers are so called “self-holding”. In other words, they firmly hold a tapered arbor without slip ina socket of similar shape. The Morse, Brown & Sharpe, Jacobs and Jarno tapers are self-holding. The5C, R8 and NMTB or NT are examples of self-releasing, sometimes called “fast” tapers. Fast tapersrequire a key and drawbar or threaded ring to keep them secured.Just by pressing a self-holding tapered arbor into a like tapered spindle gets it held in place. Theharder you push on it, the tighter it becomes stuck. How does that happen? Well, it’s by friction andthe small taper angle. First, recall the definition of the coefficient ofstatic friction. When we push on a block of weight W that rests on aflat surface, it will remain stationary until a large enough force F justbegins to move it (see sketch at left). The numerical ratio F/W is calledthe coefficient of static friction and depends mostly on the material androughness of the block and surface. Neither the weight of the blocknor the amount of contact surface area will appreciably affect the numerical value of F/W.Now, an alternative way to determine the coefficient of static friction is toincline the surface and note the angle ɵ where the block just starts slidingdown the hill (see drawing at right). At this incline, F = W sin(ɵ) and S = Wcos(ɵ). The Ratio F/S = tan(ɵ). Hence, F/S, which is defined as thecoefficient of friction, is just equal to the trigonometric tangent of the inclineangle.Now, consider a tapered sleeve fitted over a similar tapered arbor. The half angle or incline of the taperis again denoted by the angle ɵ (see drawing below). As long as the tangent of the half taper angle isless than the coefficient of friction between the sleeve and the arbor, it will provide a self-holding taper.When the half taper angle is greater than the coefficient of friction, the socket will drop out from thesocket by its own accord, no matter how hard they were pressed together.So, what is the value of the half taper angle that separatesself-holding from fast tapers? The coefficient of friction forsteel-on-steel is between 0.15 and 0.6. It’s toward thesmaller value for ground hardened steel, and so, a half taperangle of about 8.5 degrees separates self-holding from fasttapers. The tangent of the half angle of the self-holdingMorse taper is 0.025, corresponding to an angle of 1.4 degrees. The fast NMTB half angle tapertangent is 0.3, corresponding to an angle of about 16.7 degrees.Sometimes a fast taper gets stuck and may require a tap on the draw bar to release an arbor or collet.This can happen on highly polished and oiled spindles and collets, and often results more from surfacetension and atmospheric pressure rather than the frictional property of a “self holding” taper. Thetapered R8 collet has a half taper angle of 8.5 degrees, right on the border of being either “self-holding”or “fast”.7
February 2013 - <strong>Home</strong> <strong>Metal</strong> <strong>Shop</strong> <strong>Club</strong> Newsletter - V. 18 No. 2Painting the Monarch 10EE LatheBy Martin KennedyI recently purchased a 1943 vintage Monarch 10EE lathe. It ran, but needed some electrical andmechanical work to get it back to original condition. Additionally, the paint job was in terrible condition.It had been repainted only once in 70 years,and that had evidentially been many yearsback.Lathe on day of purchaseThe first step in painting the lathe was cleaningit. This was a much bigger job than I originallythought. Every surface of the lathe wascovered with oil and grease to the point thatjust brushing up against the lathe left mecovered in oil. There was swarf in every nookand cranny, including quite a bit inside whatshould have been sealed compartments in thelathe base. I spoke to someone that hadowned the lathe about 10 years earlier, and hesaid that when he got it, it had been in storagefor a long time, and he had spent many dayscleaning it. It must have been really bad!For the cleaning, I started by removing all theloose swarf and gunk. I scraped especiallyheavy deposits with a putty knife. I then sprayed three cans of Gunk Engine Brite Engine Degreaser onthe outside of the lathe and on the inside of the base. I let it sit for about an hour.Cleaning was made more difficult because the lathe is too heavy to move very much. All of thecleaning was done inside my garage. This was problematic because the next step was to water blastthe lathe. I hung plastic tarps from the track for the garage door to somewhat protect the inside of thegarage. I put on some old clothes, and had at it with the water blaster. It was a good thing that I hungthe tarps, because most of what I did with the water blaster moved the oil and grease from the lathe tome and to the tarps!The Gunk Engine Degreaser got a lot of the oil, but it left a thin oily film. To remove this, I used Clean-Rite Purple Power Cleaner/Degreaser and lots of paper towels. This degreaser works well, and is soldunder a variety of names. All contain Sodium Hydroxide, Sodium Metasilicate and 2-butoxyethanol.You should have good ventilation when using cleaners containing 2-butoxyethanol. It’s a good idea toread the MSDS.I read a lot about painting lathes on the internet. On one end of the scale, people (mostly resellers) dida rudimentary cleaning job and painted over the old paint on the outside of the lathe without anydisassembly. On the other end, people stripped the equipment to bare metal. They completelydisassembled the lathe. Since these lathes are made of cast iron, which has a somewhat rough finish,8
February 2013 - <strong>Home</strong> <strong>Metal</strong> <strong>Shop</strong> <strong>Club</strong> Newsletter - V. 18 No. 2they then filled in all the irregularities on the outside of the lathe with various types of bondo andsanded to an automobile-quality smoothness. They then painted the outside and inside of the lathe.I decided to do something in between. I sanded the entire outside of the lathe. I used 100 and 150 gritsandpaper. I used a palm sander for the flat surfaces, and sanded the remainder by hand. I didn’t takethe paint to bare metal, except where it already was bare. I tried to sand to make it as smooth aspossible where the paint had chipped. I didn’t use any type of filler. The only thing that I did fill wassome old tapped holes that had been added and were not necessary for my use. I used JB WeldKwikSteel, which I find very good for filling drill holes. I did remove the carriage and all parts that couldbe unbolted or removed. This sanding took several days.Note that older equipment may have been painted with lead-based fillers. I didn’t sand the filler coat offthe machine where it was present. I did use a respirator when I was sanding.Next, I set up a “paint booth” by hanging plastic in the garage again. I wiped down the lathe withMineral Spirits. I ended up pulling the gearbox because it was weeping oil at the seams. The Monarchhas several places where there are passages that drain into the sump, and I cleaned out all of these. Iremoved most cap screws and bolts, since I didn’t want to paint the heads.I drained oil from all five of the reservoirs. I taped up everywhere I didn’t want to paint. I plugged all ofthe holes where parts had been removed. I made aluminum plugs to fill some of the openings. Icleaned out all of the drain passages and plugged them with paper towels. I was ready to paint.I read up on several types of paint. The consensus seemed to be that you should use epoxy. Someepoxies are two part, with a hardener. There are water-based and oil-based epoxies. Some of the twopart epoxies require forced air breathing systems because they use isocyanate in the hardner, andhave VERY toxic fumes. These paints are not really appropriate for home shop use. Again, carefullyread the MSDS.I ended up using an oil-based one part enamel. I found that the downside of this type of paint is that ittakes a really long time to get really hard. It dries to the touch in a day, but after more than a month, it’sstill not completely dry. If I had it to do again, I would be tempted to use one of the two-part epoxies.One disadvantage of this is that I had three sessions of touch-up painting after I finished painting, andthat’s easier when you don’t have to mix up the paint.I considered using a primer coat. I got different advice on this, but ultimately decided to prime, since Ihad several spots with bare metal. The paint I used was from Benjamin Moore. The primer was SuperSpec HP Universal Alkyd <strong>Metal</strong> Primer, and the top coat was Super Spec HP Urethane Alkyd GlossEnamel. I bought a gallon of each and ended up using about ½ gallon of the primer and 2/3 gallon ofthe top coat. The paint costs about $50/gallon.The lathe was originally painted with a dark grey primer coat and a lighter grey top coat. I’ve workedmy whole life around grey equipment, and I wanted some other color. I considered dark and light blue,dark and light green, and red. I settled on a light green, as I like the color and I think it goes well withthe rounded Art Deco design of the lathe. The specific shade I used was Woodland Hills Green #543.The paint gun I used was an inexpensive Central Pneumatic HVLP gravity feed spray gun from HarborFreight. It worked well. I put on two coats of primer. It dries quickly, so I didn’t have problems with it9
February 2013 - <strong>Home</strong> <strong>Metal</strong> <strong>Shop</strong> <strong>Club</strong> Newsletter - V. 18 No. 2wanting to run. I lightly sanded between coats. I then put on two top coats. The paint is fairly thick, soalthough it will run if you stay on one spot, it’s fairly easy to keep this from happeningLathe after taping and one coat of primeAll the miscellaneous parts after one top coatMany of the parts that I left unpainted required morecleaning than just wiping them down. The dozen or soknobs used on the doors are made, I believe, of cast zinc.They were very dull and had a layer of corrosion. I spunthem in another lathe and used a Scotch Brite hand pad toshine them up. Many of the other parts were cleaned withthe Scotch Brite hand pads. I cleaned up the screw headson a Scotch Brite wheel. I sanded the nameplates on avery flat surface with some 600 grit sandpaper to bring outthe text. I read that these parts will quickly become greyagain, and some people have chrome plated the plates.I think that the lathe paint job came out well! It’s almost toopretty to use. Almost. Even though it’s not automotivesmooth,the relatively thick top coats covered up a lot ofCompleted paint jobsins. After a month, the paint is much harder. I think that it’ll dry to a very hard finish, but it may take afew more months and some hot, dry weather.Here are some detail photos of the lathe. That’s a DRO assembly hanging off the back.10