the Flashing Kit - Step-by-Step Guide - The Rooflight Company
the Flashing Kit - Step-by-Step Guide - The Rooflight Company
the Flashing Kit - Step-by-Step Guide - The Rooflight Company

Create successful ePaper yourself
Turn your PDF publications into a flip-book with our unique Google optimized e-Paper software.
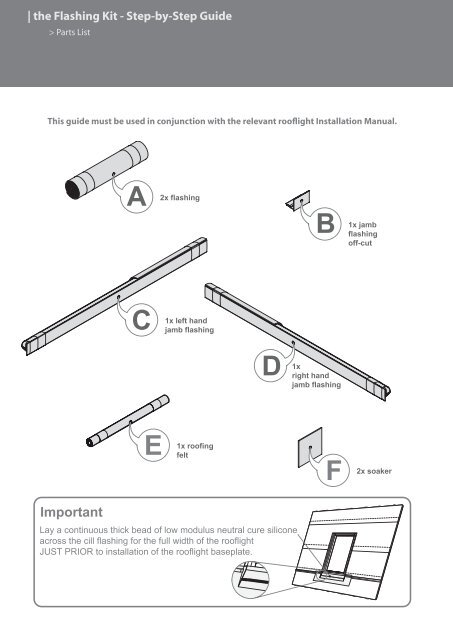
| <strong>the</strong> <strong>Flashing</strong> <strong>Kit</strong> - <strong>Step</strong>-<strong>by</strong>-<strong>Step</strong> <strong>Guide</strong>> Parts ListThis guide must be used in conjunction with <strong>the</strong> relevant rooflight Installation Manual.A2xflashingB1x jambflashingoff-cutC1xleft handjamb flashingD 1xright handjamb flashingE1xroofingfeltF2xsoakerImportantLay a continuous thick bead of low modulus neutral cure siliconeacross <strong>the</strong> cill flashing for <strong>the</strong> full width of <strong>the</strong> rooflightJUST PRIOR to installation of <strong>the</strong> rooflight baseplate.