the Flashing Kit - Step-by-Step Guide - The Rooflight Company
the Flashing Kit - Step-by-Step Guide - The Rooflight Company
the Flashing Kit - Step-by-Step Guide - The Rooflight Company

You also want an ePaper? Increase the reach of your titles
YUMPU automatically turns print PDFs into web optimized ePapers that Google loves.
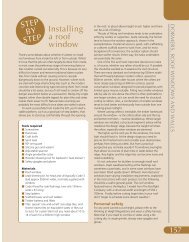
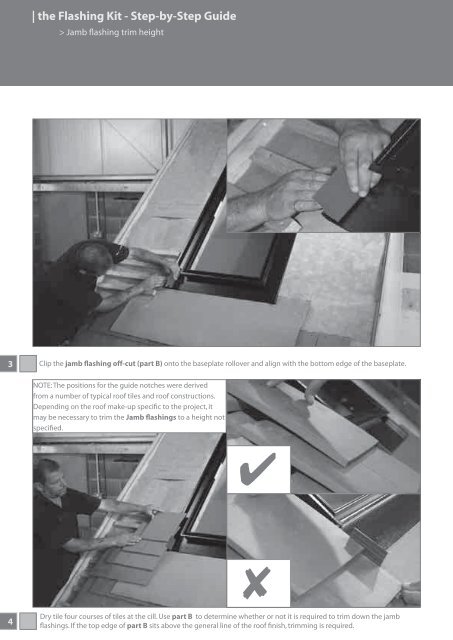
| <strong>the</strong> <strong>Flashing</strong> <strong>Kit</strong> - <strong>Step</strong>-<strong>by</strong>-<strong>Step</strong> <strong>Guide</strong>> Jamb flashing trim height3Clip <strong>the</strong> jamb flashing off-cut (part B) onto <strong>the</strong> baseplate rollover and align with <strong>the</strong> bottom edge of <strong>the</strong> baseplate.NOTE: <strong>The</strong> positions for <strong>the</strong> guide notches were derivedfrom a number of typical roof tiles and roof constructions.Depending on <strong>the</strong> roof make-up specific to <strong>the</strong> project, itmay be necessary to trim <strong>the</strong> Jamb flashings to a height notspecified.4Dry tile four courses of tiles at <strong>the</strong> cill. Use part B to determine whe<strong>the</strong>r or not it is required to trim down <strong>the</strong> jambflashings. If <strong>the</strong> top edge of part B sits above <strong>the</strong> general line of <strong>the</strong> roof finish, trimming is required.