User Information Manual: Q Series Condensing Boiler English - Rinnai
User Information Manual: Q Series Condensing Boiler English - Rinnai
User Information Manual: Q Series Condensing Boiler English - Rinnai

You also want an ePaper? Increase the reach of your titles
YUMPU automatically turns print PDFs into web optimized ePapers that Google loves.
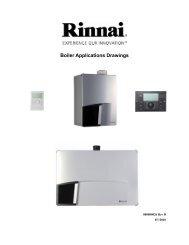
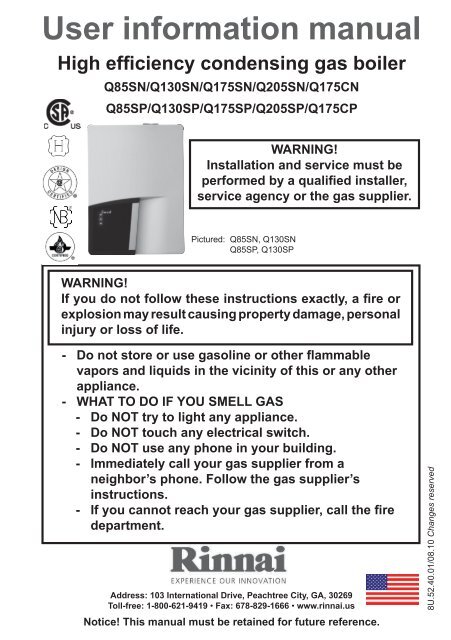
<strong>User</strong> information manualHigh efficiency condensing gas boilerQ85SN/Q130SN/Q175SN/Q205SN/Q175CNQ85SP/Q130SP/Q175SP/Q205SP/Q175CPWARNING!Installation and service must beperformed by a qualified installer,service agency or the gas supplier.Pictured: Q85SN, Q130SNQ85SP, Q130SPWARNING!If you do not follow these instructions exactly, a fire orexplosion may result causing property damage, personalinjury or loss of life.- Do not store or use gasoline or other flammablevapors and liquids in the vicinity of this or any otherappliance.- WHAT TO DO IF YOU SMELL GAS- Do NOT try to light any appliance.- Do NOT touch any electrical switch.- Do NOT use any phone in your building.- Immediately call your gas supplier from aneighbor’s phone. Follow the gas supplier’sinstructions.- If you cannot reach your gas supplier, call the firedepartment.Address: 103 International Drive, Peachtree City, GA, 30269Toll-free: 1-800-621-9419 • Fax: 678-829-1666 • www.rinnai.usNotice! This manual must be retained for future reference.8U.52.40.01/08.10 Changes reserved
Contents of instructionsThese instructions contain important information for the safe use of <strong>Rinnai</strong>Q-<strong>Series</strong> gas boilers.These user instructions are intended for the owner or responsible tenant ofthe premises where the boiler is installed.Subject to technical changesChanges may be made to the illustrations, process steps and technical dataas a result of our policy of continuous improvement without prior notice.Updating of documentationPlease contact us if you have any suggestions for improvements orcorrections.Find our contact details on the back of this manual.Operating instructions <strong>Rinnai</strong> Q-<strong>Series</strong>2
Safety and general instructionsDesignated useHazard definitionsPlease observe these instructions in the interestof your own safety.The boiler is designed to heat water for a centralheating system and, if applicable, generatingdomestic hot water. The boiler is delivered witha burner controller pre-installed.The boiler canbe fitted with a modulating outdoor reset controlARV12 (included), a room controller RS100(optional), a zone controller (optional) or anOn/Off thermostat or relay panel end switch(accessories).The following defined terms are used throughoutthe documentation to bring attention to thepresence of hazards of various risk levels.Notices give important information concerning theoperation of the product.! DANGERDANGER:Indicates the presence of hazards thatwill cause severe personal injury, death orsubstantial property damage.! WARNING! CAUTIONiNOTICEWARNING:Indicates the presence of hazards thatcan cause severe personal injury, death orsubstantial property damage.CAUTION:Indicates presence of hazards that will orcan cause minor personal injury or propertydamage.NOTICE:Indicates special instructions on installation,operation or maintenance that are importantbut not related to personal injury or propertydamage.Operating instructions <strong>Rinnai</strong> Q-<strong>Series</strong>3
These operating instructions describe theoperation of the <strong>Rinnai</strong> Q-<strong>Series</strong> condensinggas boilers. This manual is for the end user. Forinstallation and servicing there is a installation &servicing instructions manual for the installer.Read this manual fully before operating the boiler.In case of doubt or errors contact your installer.The manufacturer reserves the right to changethe specifications and dimensions without priornotice.Work on the boiler must be carried out by a Statelicenced contractor, (Ref: Gas Safety Installationand Use) using correctly calibrated instrumentswith current test certification.Operating instructions <strong>Rinnai</strong> Q-<strong>Series</strong>4
SafetyFOR YOUR SAFETY READ BEFORE OPERATINGWARNING: If you do not follow these instructionsexactly, a fire or explosion may result causingproperty damage, personal injury or loss of life.A. This appliance does not have a pilot. It is equipped with an ignition device which automaticallylights the burner. Do NOT try to light the burner by hand.B. BEFORE OPERATING smell all around the appliance area for gas. Be sure to smell next to the floorbecause some gas is heavier than air and will settle on the floor.WHAT TO DO IF YOU SMELL GAS- Do NOT try to light any appliance.- Do NOT touch any electrical switch.- Do NOT use any phone in your building.- Immediately call your gas supplier from a neighbor’s phone. Follow the gas supplier’sinstructions.- If you cannot reach your gas supplier, call the fire department.C. Use only your hand to push in or turn the gas control knob. Never use tools.If the knob will not push in or turn by hand, don’t try to repair it, call a qualified service technician.Force or attempted repair may result in a fire or explosion.D. Do not use this appliance if any parts have been under water. Immediately call a qualified servicetechnician to inspect the appliance and to replace any part of the control system and any gascontrol which has been under water.OPERATING INSTRUCTIONS1. STOP! Read the safety information above this label.2. Turn off al electrical power of the appliance.3. Set the thermostat or other operating control to the lowest setting.4. This appliance is equipped with an ignition devicewhich automatically lights the burner.<strong>Manual</strong> Gas Valve (Main valve)Do NOT try to light the burner by hand.5. Close main gas shut off valve.6. Wait (5) minutes to clear out any gas. Then smell forgas. Including near the floor.If you smell gas, STOP! Follow “B” in the safetyinformation above on this label.If you don’t smell gas, go to the next step.7. Open main shut off valve.8. Set the thermostat or other operation control to desired setting.9. Turn on all electric power to the appliance.CLOSEOPEN10. If the appliance will not operate, follow the instructions “To Turn Off Gas To Appliance” and call yourservice technician or gas supplier.TO TURN OFF GAS TO APPLIANCE1. Turn off all electric power to the appliance if service is to be performed.2. Set the thermostat or other operating control to the lowest setting.3. Close main gas shut off valve.8U.34.01.00 / 05.09Operating instructions <strong>Rinnai</strong> Q-<strong>Series</strong>5
Description of the boilerThe <strong>Rinnai</strong> Q boiler is a room sealed, condensingand modulating central heating boiler. The Q175Chas an integrated domestic hot water feature.The boiler is provided with a integrated controlsystem. Because an outdoor sensor is connectedto the boiler, the boiler works weather dependantly.This means that the boiler control measures theoutside temperature and flow temperature. Withthis data the boiler calculates the optimal flowtemperature for the installation.When the boiler is connected to an RS100 roomthermostat information can be retrieved from theboiler. For more information about the <strong>Rinnai</strong>thermostats. Please refer to the user manuals.RS100On the bottom left side of the front panel there is asmall door. Through the transparent panel you cansee the boiler status on the display. After openingthis door you will find the function buttons.On the following pages you will find the explanationof the function buttons and display messages.Operating instructions <strong>Rinnai</strong> Q-<strong>Series</strong>7
Explanation of the function buttons1237456iNOTICEOnly qualified personel who are trained forthese boilers are permitted to make alterationsin the controller to chronolize the boiler to theinstallation.8Operating instructions <strong>Rinnai</strong> Q-<strong>Series</strong>8iNOTICEWhen the pump is switchedon continuously it can leadto undesired heating up ofthe central heating systemduring the summer.iNOTICE1. Display.See following pages for further information.2. ON-OFF SwitchThis switch turns the power supply to the boileron or off.3. Central Heating program button.Switching the Central Heating on or off (Ledon/off);4. Hot Water program button.Switching the Domestic Hot Water (DHW)facility on or off (Led on/off);5. Pump program button.When the pump program LED is ON, the pumpis switched into a continuous circulation mode.When the pump mode is switched OFF, LED isoff the pump is control by the boiler processor.In most situations it is best to leave the pumpmode OFF and let the boiler control cycle thepump as needed.During freezing temperatures it is possible (whenthere is no outside sensor connected), to manuallyplace the circulation pump in constant circulationmode, thus reducing the chance of freezing pipes(garage, attic or other cold spaces / rooms) whichare sensitive to frost.
6 Mode-button.Only for Service personel7 Step-button.After briefly pressing, the water pressure canbe retrieved.After pressing for 5 seconds it switches fromthe Good-state to technical read out and viceversa (see following pages);8 Reset-button.When a fault occurs it will be shown by theflashing E (Error) with a number code afterwhich the boiler is shut down. After pressingthe reset key you can try to start the boileragain. If the error message keeps occurringcontact your installer.! WARNINGDO NOT attempt to make repairs or removeany of the boiler panels. Contact a qualifiedservice agency to make necessary repairs oradjustments.Operating instructions <strong>Rinnai</strong> Q-<strong>Series</strong>9
The boiler displayTwo boiler displays, “Good or Technical” see below.Goodor standard read out.During this reading the display will only show whatis necessary. Under normal circumstances thedisplay will give a Good reading. In case of afault this will be shown with, alternate display ofGood, with an E or BL code. See further "Errors,maintenance and warranty" .TechnicalThe second way is a technical read out. In normalsituations the following will be shown:• on the left the status in which the boiler is active(see bottom of this page);• on the right the supply temperature in °F;• the water pressure in the installation in PSI.When a message (E or BL code) is necessary thiswill be shown instead of the technical read out.To switch over from the Good-state to theTechnical read out (and vice versa):- Press 5 sec. on the STEP-button.Operation indication(in the first display position by technical read out)Operating instructions <strong>Rinnai</strong> Q-<strong>Series</strong>100123456789ANo heat demandFan pre/post purgeIgnition phaseBurner active on central heatingBurner active on DHWFan checkBurner off when room thermostat is demandingPump overrun phase for central heatingPump overrun phase for hot waterBurner off because of to high flow temperatureAutomatic de-aeration program (Press no button for 17 min.)
Water pressure in the central heating systemThe installation will function optimally with a waterpressure of between 16 and 18 PSI.If the water pressure drops below 12 PSI, thedisplay will show FILL. During this message theboiler will remain functioning at a reduced level.After replenishing the system (see followingchapter) just above 22 PSI the message FILLwill disappear and the boiler will function normallyagain.When the water pressure drops below 10 PSI, thedisplay will show a flashing FILL text.The boiler will shut down and will function normallyagain after replenishing the system to just above22 PSI.Message ' Water pressuretoo low' on your RS100thermostat.On the display of the RS100a low water pressure canbe indicated. For furtherinformation see the relevantuser manual.To retreive the water pressure on the display fromthe Good reading:- Press the Step key once briefly.The water pressure will be shown.Press the Step key briefly to return to the Goodreading.Water pressure is too high (>42 PSI), if HIGHindication remains continuously visible, the boileris taken out of operation. The installation pressureneeds to be decreased by draining water until thepressure is between 16 and 18 PSI.Operating instructions <strong>Rinnai</strong> Q-<strong>Series</strong>11
Replenishing the central heating systemThe central heating installation needs to be filled with potable (drinking)water. For topping up the installation you use the filling loop according to thefollowing procedure:iNOTICEContact your installer if your installation is notprovided with a filling loop.1 Switch all functions off (heating, DHW and pump);2 Briefly push the 'STEP'-button: P x.x = water pressure in PSI;3 Slowly open the filling loop (Indication on display increases);4 Fill up slowly to between 16 and 18 PSI;5 STOP appears on the display;6 Close the filling loop;7 De-aerate the complete installation , start at the lowest point;8 Check the water pressure and if necessary top it up;9 Close the filling loop;10 Activate functions required (heating , DHW and/or pump );11 If A xx appears on the display, wait for 17 minutes;12 Check the waterpressure and if necessary top it up to 16 to 18 PSI13 Close the filling loop;Operating instructions <strong>Rinnai</strong> Q-<strong>Series</strong>1214 Press the ‘STEP’-button;15 Be sure that the filling loop is closed.After the automatic de-aeration programm (A xx) is finished the boiler willreturn to the Good reading or Technical reading.
The boiler will not function directly. The automatic de-aeration program of about17 minutes will start after one of the three program buttons is pressed. The displaywill show where A stands for Automatic de-aeration program Active andthe number on the right indicates the actual water temperature of the boiler.Check the water pressure regularly and top up the installation whennecessary.The working pressure of the installation should be between 16 and 18 PSIIt can take a while before all air has disappeared from a filled installation.Especially in the first week noises can be heard which indicate the presence ofair. The automatic air vent in the boiler will remove the air, which means the waterpressure will reduce during this period and therefore topping up with water willbe necessary to adjust the flow water temperatureTurning the boiler offHoliday period:Adjust the thermostat* to the holiday period. Seethe user thermostat manual. The hot water facilitycan be switched off by means of the programbutton on the control panel.Re-setting the central heating system:Holiday* If you have a RS100thermostat it is providedwith a holiday program.The holiday period can beadjusted on the thermostatitself. The central heatingand DHW supply areswitched off during thatperiod. There is also theoption that only the centralheating is switched off. Withall of these possibilities thefrost protection system isactive.Switch off the three program buttons ,, when these are activated. Switch off thepower supply. When the boiler is being drainedone should take into account that a part of theheating water will remain in the boiler. When riskof frost arises one should take care that theremaining central heating water in the boiler doesnot freeze.Operating instructions <strong>Rinnai</strong> Q-<strong>Series</strong>13
Error, maintenance and warrantyiiiiNOTICENOTICENOTICENOTICEIf a fault is detected the boiler will be blocked.This will be reflected, by an alternate display ofGood, with an E of Error or a BL of Blocking anda number code.You can try to reset the boiler by pressing theReset key once. If the problem remains pleasecontact your installer and inform them aboutthe fault and give them the number code.If you discover any leaks from the boilercontact your installer.We advise you to obtain a service contractwith your installer for regular maintance andadjustment to keep your boiler safe and ingood condition.The casing of the boiler consists of metaland plastic parts which can be cleaned with anormal non abrasive cleaning agent.Periodic cleaning of the condensate collection anddisposal system must be carried out.9Before putting the boiler into operation afterperiodic cleaning fill the condensate trap with1.27 cups / 300 ml of water.Operating instructions <strong>Rinnai</strong> Q-<strong>Series</strong>148710Step 1: Condensate trap- First remove the condensation cup (7); Checkthis for impurities. If there are no impurities itis not necessary to clean the condensate cup- Grease the O-rings again with acid free O-ringgrease to make fitting easier;- If there is a leak at the condensation cup (7) ortray (9) the complete condensate trap unit (10)has to be replaced by # 809000054;Step 2: Refitting is done in reverse order.Note that all gaskets seal completely.
iNOTICEMaintenance or changes to the appliance may onlybe carried out by a qualified technician.You can find the warranty conditions in the warranty cardwhich is supplied with the boiler.Operating instructions <strong>Rinnai</strong> Q-<strong>Series</strong>15
Details of your installer:Name of installer:Address:Contact:Phone number:Phone number outside business hours:800000010 08/2010Distributor for the USA<strong>Rinnai</strong> America Corporate • 103 International Drive • Peachtree City, GA 30269To l l F r e e : ( 8 0 0 ) 6 2 1 - 9 4 1 9 • Te l : ( 6 7 8 ) 8 2 9 - 1 7 0 0 • F a x : ( 6 7 8 )8 2 9 - 1 6 6 6 • E - m a i l : i n f o @ r i n n a i . u s • I n t e r n e t : w w w . r i n n a i . u sE. & O. E.This renewed publication cancels all previous installation instructions. The company reserves the right to change the specifications and dimensions without prior notice.