
Create successful ePaper yourself
Turn your PDF publications into a flip-book with our unique Google optimized e-Paper software.
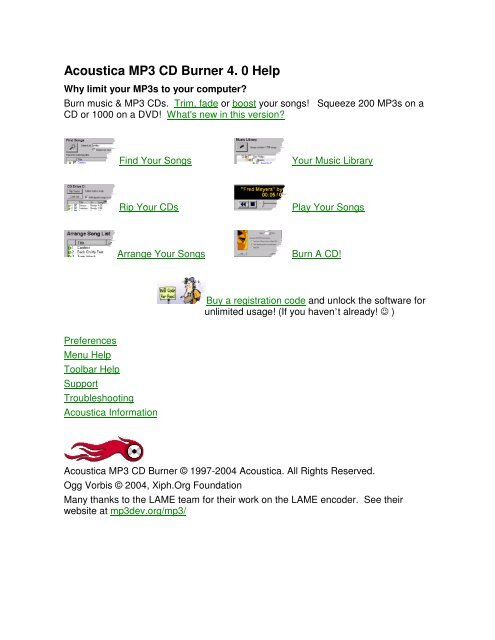
<strong>Acoustica</strong> <strong>MP3</strong> <strong>CD</strong> <strong>Burner</strong> <strong>4.</strong> 0 <strong>Help</strong>Why limit your <strong>MP3</strong>s to your computer?Burn music & <strong>MP3</strong> <strong>CD</strong>s. Trim, fade or boost your songs! Squeeze 200 <strong>MP3</strong>s on a<strong>CD</strong> or 1000 on a DVD! What's new in this version?Find Your SongsYour Music LibraryRip Your <strong>CD</strong>sPlay Your SongsArrange Your SongsBurn A <strong>CD</strong>!Buy a registration code and unlock the software forunlimited usage! (If you haven’t already! )PreferencesMenu <strong>Help</strong>Toolbar <strong>Help</strong>SupportTroubleshooting<strong>Acoustica</strong> Information<strong>Acoustica</strong> <strong>MP3</strong> <strong>CD</strong> <strong>Burner</strong> © 1997-2004 <strong>Acoustica</strong>. All Rights Reserved.Ogg Vorbis © 2004, Xiph.Org FoundationMany thanks to the LAME team for their work on the LAME encoder. See theirwebsite at mp3dev.org/mp3/
Buy / Registration<strong>Acoustica</strong> <strong>MP3</strong> <strong>CD</strong> <strong>Burner</strong> has a trial period of 7 days without any restrictions! Afterthat, you will need to purchase a registration code to continue using the software.Please don’t let the above happen to our programmers! All joking aside, we haveput many hours into this software and we hope that you decide to purchase thesoftware!Benefits of Registration• Unlimited and unrestricted usage: burn & rip away!• Support <strong>Acoustica</strong> and future products of the same caliber.You can purchase a registration code right now and automatically receive aregistration code in your email within minutes.BUY NOW!To purchase a registration code, click the "Buy Now On-line" item from the "<strong>Help</strong>"menu or the "BUY" button on the toolbar.If you don’t have the software up now, visit the website to purchase a code. Go towww.acoustica.comPurchase methods• Credit card• Pay pal• Snail mail
The price of registration is not much more than the cost of a large pizza! The pricemay actually vary which is why it isn’t listed here. (More instructions are on thewebsite.)
<strong>Acoustica</strong>, IncAddress:Website:<strong>Acoustica</strong>P.O. Box 728Oakhurst, CA 93644USAwww.acoustica.comInfo:<strong>Acoustica</strong> was founded in 1998 and is located inthe foothills of the Yosemite Valley. <strong>Acoustica</strong>'smission is to create high quality, intuitive andpowerful software. We value diligence, creativityand innovation. We are embracing Internettechnology and the new world that it iscreating! We also have this curious idea thatSOFTWARE SHOULD BE EASY TO USE!
System RequirementsOperating SystemRecommended processorRAMSoundcard<strong>CD</strong> RecorderHard-disks: Win95/Win98/WinNT/WinME/Win2K/WinXP: Pentium II 400 or better**: Uses about 3-4 MB’s of RAM: optional: recommended. (USB/SCSI/IDE). See list.: If converting to WAV first, it requires up to 700 MBfree** AMD based systems are also supported. Slower systems will find that it works fine
SupportFor the most recent support information, please see the website.http://www.acoustica.com/mp3-cd-burner/support.htm
What’s New?This section contains the new changes, additions, and fixes from previous versions.(We started this for version 2.998 of the software.)Version <strong>4.</strong>0• New burning engines. More supported recorders!• Burn on fly for Goldenhawk engine! No more converting to WAV!• Automatic fading out for incomplete songs• Can trim songs to cut unwanted silence or applause, etc.• Fade in/out and overlap tracks to create the ultimate in custom mixes.• Automatic boost for better volume balancing -• EQ each song and burn them that way.• OGG support• Brand new 32 bit sound engine – high quality for superior audio results. Even low bitrate fileswill not degradate in quality.• Much improved ‘import’ / sound scan system.• Can now set which columns you see in the "Song List"• Ability to delete database• "Add All Found" button on find interface.• Visual waveform eye-candy on player window.• Interface improvements• Important bug fixes – including some serious bug fixes.Version 3.01 build 66• Detached Gear engine from main install – it is now an optional installation.• New Goldenhawk engine 3.9F – more supported recorders.• Bug fixesVersion 3.0• MAJOR Update! Now supports <strong>MP3</strong> <strong>CD</strong>s! Fit 200+ songs on a <strong>CD</strong> or 2000+ songs on a DVD!Note that you will need an <strong>MP3</strong> player capable of playing <strong>MP3</strong>s, WMAs and/or WAVs.Computers will also be able to play back <strong>MP3</strong> <strong>CD</strong>s!• More supported <strong>CD</strong>RW drives and DVD burners with both engines (Gear & Goldenhawk)!• Progress/fill meter shows you visually how much room you have left on the <strong>CD</strong>!• New splash screen• Important fix for some recorders that would not ‘finalize’• Bug fixes!Version 2.998• Brand new – high end <strong>CD</strong> burning/ripping. This engine includes automatic support for new <strong>CD</strong>
ecorders and burning <strong>CD</strong>s on the fly. No more converting to WAV files unless you actuallywant to! The only drawback to this engine is that the ripping may be a tad slower as we go to atemp WAV file first, as well as we lose the ability to burn <strong>CD</strong>-text. Also, ripping to memoryshould be included in that version. The new <strong>CD</strong> engine comes with its own ASPI and we shouldsee many of the ASPI errors go away. Note that you can also switch to the old <strong>CD</strong> burningengine if you want to do <strong>CD</strong>-text.• Adds support for Microsoft’s WMA format. (This assumes that they are not digitally protectedvia DRM.) Will rip to WMA and will burn non-DRM WMA files.• Adds more control to import logic. Can select which folders it searches AND which folders tonever search.• Faster startup and improved the speed of import and library operations.• Miscellaneous bug fixes.
Find Your SongsThere are many ways you can load songs into <strong>Acoustica</strong> <strong>MP3</strong> <strong>CD</strong> <strong>Burner</strong>.Find them Add them Drag them in from WindowsRip themScan For SongsFinding your songsFind a Specific FileFind By Specific Directory or FolderFind By File TypePlaying Your Found SongsSorting Your Found SongsEdit Tag InfoLocate Song In LibraryDelete a song from the LibraryIf you don’t see the "Find Songs" window pictured below, click theon the toolbar.buttonThe software will first search your Music Library for matches. After that, it will scanyour computer for new songs. As it finds new songs, it will add them to your MusicLibrary and if it matches the query, it will show up in the results. Note that if you donot want it to scan your computer for new songs, that aren’t already in your library,uncheck the "Search for new songs" item.Find a Specific FileYou can search for a song by its title, artist or genre. For example, if you are lookingfor songs by "Billy Bragg" you can type ‘bragg’ in the "Search for" field without thesingle quotes. Then press the ‘Search’ button.
Just click the songs you wish to add to the Song List to be burned to a <strong>CD</strong>. Onceselected, the checkbox will appear checked and the text will turn blue. Or,alternatively, you can click the "Add Found>>" button to add all found songs to theSong List.Find By Specific Directory or FolderYou may also search for songs by directory or folder name.For example, if you had a bunch of music files in a folder called ‘My Music’, youcould search for those files by typing ‘My Music’ in the "Search for" field. This isuseful if you don’t remember the exact name of a song, but know where it is stored.Playing Your Found SongsYou can play and preview your songs directly from the Find window. Just click thebutton next to the song. See more on playback …Sorting your found songs
You can sort the songs by clicking one of the column headers. Click the columnheader again and it will sort it in the opposite direction.The screen shot above shows where to click to sort by that column header.Find By File TypeYou can also select what file type you would like to filter the search by. Forexample, if you need to find WAV files, make sure to search on ".wav" or if you arelooking for WMA files, search on ".wma".Adding songsIf you know where you songs are, you can quickly add them directly into <strong>Acoustica</strong><strong>MP3</strong> <strong>CD</strong> <strong>Burner</strong>. To do this, click the "Add" buttonon the toolbar or theAdd button on the right side. You can also select "Add Songs" from the"Song List" menu.A standard window will pop up and allow you to navigate to your songs folder. Selectone or many songs to load.Drag them in from WindowsYou can drag songs from a Windows folder and then drop them onto the <strong>Acoustica</strong><strong>MP3</strong> <strong>CD</strong> <strong>Burner</strong> window.
To do this, double click "My Computer" and navigate to the folder with your <strong>MP3</strong>s.Highlight one or many <strong>MP3</strong>s. Click on the blue or selected area of one of the filesand then move the mouse over the <strong>Acoustica</strong> <strong>MP3</strong> <strong>CD</strong> <strong>Burner</strong> window. When thecursor has a + underneath it, you should release the mouse and your files will beimported.In addition, you can drag entire folders in! The software will automatically createfolders and load in all the contained songs, including songs in sub-folders.Edit Tag InfoYou can edit a track’s tag information (track name, artist, album, genre, year orcomment) by right clicking the song and selecting "Edit Tag Info" from the right clickmenu. This brings up the Edit Tag Info window.Locate Song In LibraryYou can quickly locate a song in your music library by right clicking on a song andclicking "Locate Song In Library" from the right click menu. This will cause the librarytab to be displayed and the track will be highlighted in gray.Delete from LibraryThis is a useful option if you find a song, which you would not like to show up in yoursearch results. Rather than go into the library tab to delete it, you can click "Deletefrom Library" on the right click menu, to have it removed. Note that you will still needto go to the Library menu and select "Empty Trash" to permanently remove it.
Your Music LibraryThe Music Library will contain all the songs on your computer, which includes:• Songs you downloaded• Songs from <strong>CD</strong>s you ripped.• Recordings you created• Anything in <strong>MP3</strong>, OGG, WMA or WAV format that is longer than 1 minute(1 minute is the default minimum length and can be changed in the Preferences.)Any changes made can be undone if you make a mistake. Simply click "Ctrl+Z" toundo and "Ctrl+Y" to redo any changes.If you don’t see the "Music Library" window pictured below, click thebutton on the toolbar.Scanning For SongsBrowsing Your LibraryRetagging Your SongsQuick RetagDeleting SongsPlaying Songs in the Music LibraryClean LibraryDelete LibraryScanning For SongsThe software will automatically look for new songs on your computer. If you havedownloaded or copied new songs to your computer, you’ll need to scan them into<strong>Acoustica</strong> <strong>MP3</strong> <strong>CD</strong> <strong>Burner</strong>.Click the "Scan" button to start scanning for eligible songs. By default, it will look for<strong>MP3</strong>, WMA, OGG & WAV files over 1 minute in length. You can change where andwhat it scans by changing the "Sound Scan" Preferences.Browsing Your LibraryYou can browse your library in 2 ways:• By Artist and album
(Sting, Alanis, Bach, Toad, Miles Davis, etc.)• By Genre (or style)(Jazz, Blues, Rock, Classical, etc.)To browse by artist, click the + sign by the "Browse by Artist" item. It will expand andshow you all of your artists. Then click the + near an artist you’d like to expand andit will show you all albums and songs under that artist.The above shows the Music library in action. In this case we have selected 4 songsunder "Alicia Keys".Retagging Your SongsIn a perfect world, we wouldn’t have to do retag our music, but in many cases thesongs that you download or rip aren’t titled or tagged correctly.Simply right click on a song to correct any erroneous information and the followingdialog box will appear.
You can edit the song information for individual songs this way.• Title (The name of the song)• Artists (self explanatory)• Album (self explanatory)• Year (The year the <strong>CD</strong> was made.)• Track (original track number on the album)• Genre (The style of music)• Comment (Whatever you’d like)In addition to editing a single song, you can correct albums and artists by rightclicking on them and editing their information.Quick RetagOne of the neatest tricks in quickly retagging or fixing your music library is by dragand drop.
In this example, I have 2 albums related to Sting . One is lower case and one isupper case. I simply click on ‘sting’ and drag it onto ‘Sting’ with the capital S, andviola, the small case ‘sting’ and all of it’s songs and folders are automaticallyretagged to be correct.You can also do this with individual songs or albums or for reorganizing by genre.Deleting SongsYou can use the Music Library to clean up songs that you don’t want. Simply rightclick on an artist, album or song and click "Delete". Alternatively, you can drag anddrop artists, albums or songs onto the trash icon.If you accidentally delete a song, simply click "Ctrl+Z" for undo. (Alternatively, youcan select "Undo" from the "Edit" menu.)Deleting these songs do not delete them permanently from your hard drive. Theyare simply in the <strong>MP3</strong> <strong>CD</strong> <strong>Burner</strong> ‘trash’. To permanently remove these songs,albums and artists, click "Empty Trash" on the Trash icon or by clicking "EmptyTrash" from the "Library" menu.What happens when you click "Empty Trash"? There are 3 options.• The first choice will actually move the songs into the Window’s "Recycle Bin".** BE WARNED AND BE CAREFUL – Some of the sounds could beimportant to some programs and games on your computer and couldcause them not to run properly. Make sure that these songs are ok todelete! <strong>Acoustica</strong> cannot be held responsible for any lost sound filesthat are deleted this way.** The final step is to go right click on your Window’s Recycle Bin and select "Empty Recycle Bin"• The second choice removes the song(s) from your library, but does notremove the songs from your computer. After removing it, it brings up thePreferences "Sound Scan" screen which allows you to add a directory to the"Exclude List" so that the song is not re-scanned. Why would you do this? Ifthe sound scan is picking up songs from a game for example, you can addthe game directory to the "Exclude List". IE: If you had a ton of songs from agame located at C:\Program Files\Star Wars\ then you could simply add this
directory and they won’t be picked up again in the next scan!• The third choice simply removes the song from the library. The next time asound scan occurs, it will re-import the song!Playing Songs In Your LibraryOnce you’ve amassed a collection of songs, it’s nice to be able to play them!Simply click the play icon to start a song playing.Playback modes• Continuous play – will automatically advance to the next song.• Random play – If continuous play is on, the next song will be a totally randomselection from anywhere in your library.I like to play in continuous and random play to keep things fresh when I’m workingalong. For more on playback, click here.Cleaning The LibraryGet out the broom and dustpan! Not. This process simply removes any songsthat can no longer be found on your computer. (They’ve either moved or were on atemporary device like network drive, <strong>CD</strong> drive, etc.) To clean your music library,select "Clean Library" from the "Library" menu.Deleting The LibraryIf you’ve imported a bunch of songs that are of the wrong length, or wrong directory,it’s sometimes easier to just start over and delete the library. Select "Delete Library"from the "Library" menu. (Note that this will cause the software to restart, so you’llneed to save any work.)
Rip Your <strong>CD</strong>sRipping is the process in which you can copy audio track(s) from your personal <strong>CD</strong>s.You can rip an individual song or all the tracks from a <strong>CD</strong>. To rip a <strong>CD</strong>, click on the"Rip <strong>CD</strong>" toolbar button or click a <strong>CD</strong> tab. ( These tabs are above the playbackcontrols and would be called <strong>CD</strong> Drive D or <strong>CD</strong> Drive E, depending on your computer’s setup.)After you have the <strong>CD</strong> ripping window up, you should put in a music <strong>CD</strong> to rip.NOTE: Another program may pop up and try to play it or record it, but you shouldclick it away.There are several phases to ripping a <strong>CD</strong>:1. Identify Your <strong>CD</strong> Automatically! (Or Manually)2. Select Your Songs To Rip3. Rip Your Songs<strong>4.</strong> Speed Rip(The above shows the <strong>CD</strong> Ripping area with 9 unidentified tracks.)If you are having problems ripping, see the troubleshooting area.
Identify Your <strong>CD</strong><strong>MP3</strong> <strong>CD</strong> <strong>Burner</strong> will automatically attempt to locate your <strong>CD</strong> through the Internet!The software will attempt to connect with a "FreeDB" server to get the information.Note that you may want to switch to a closer freedb server via the Preferences.Make sure that you are connected to the Internet before this process starts. (It willattempt to connect to the freedb 3 times.) There are a few different outcomesdepending on the situation.1. Your <strong>CD</strong> is identified without any problems. (The best)2. Your <strong>CD</strong> is identified, but there are several possible matches.(In this case, select the appropriate album and then click OK)3. Your <strong>CD</strong> is identified, but there is some missing information such as the year ofthe <strong>CD</strong> or the genre of the <strong>CD</strong>.(If this is the case, it will ask you if you’d like to fill in the missing info.)<strong>4.</strong> A match could not be found and you have to enter in the information by hand!Even this process is relatively easy!
To enter in the <strong>CD</strong> information by hand, right click on a <strong>CD</strong> track and select "EditTag Information". The interface is set up so that you can enter in the artist,album, year and genre once and then simply type in each track name withoutleaving the window.a. Click on the Artist area and type in the artist’s name.b. Press tab to get to the Album field or click Album and enter the albumname.c. Repeat this process for Year and Genre.d. Then click the Title edit box and enter the title for the tracke. To get to the next track, simply click "Next >>" or Press the ALT buttonand the ‘N’ keyf. Continue until all tracks have been named and then Click the Save button!The "Look Up" button can be used to try to identify the <strong>CD</strong> later in case the Internetwas not active or the freedb server was busy, etc.In some cases, the artist, album or track information that comes back will be partiallywrong or totally wrong. If this is the case, you should manually edit it to be correct.
Select Your Songs To RipThis is as simple as clicking the song so that it is "checked"By default, <strong>MP3</strong> <strong>CD</strong> <strong>Burner</strong> selects all songs to rip.If you only wish to rip 1 or 2 tracks, simply right click on <strong>CD</strong> track list and select"Deselect All Tracks". Then click the tracks that you’d like to rip.If you have already ripped a track and wish to rip it again, you can click "Mark alltracks as ‘un-ripped’" which will allow you to re-rip the track.Rip Your SongsThis is as simple as clicking the "Rip Tracks" button on the window (or Ctrl+R). Yoursongs will be ripped in the <strong>MP3</strong> format by default. To change the format, you shouldgo into the Preferences. (<strong>MP3</strong>, OGG, WMA and WAV can be selected.) If the "Addripped songs to Song List" is checked, the song will be copied to the Song List once itis completed.Freshly ripped songs will automatically be added to your library. The following imageshows a rip in progress.An orange color represents that a track has been ripped.Problems can crop up when ripping! In some cases, you may have pops or artifactsin the ripped track and in other cases; it may not be able to rip a track. Here aresome things to try.• Clean the <strong>CD</strong>, especially if it is dusty or has spilt milk on it. ;-)• If you have 2 <strong>CD</strong> drives, try ripping it in the other <strong>CD</strong> drive. (Some drives aremore tolerant of errors than others.)• If there is a lot of popping, run an anti-pop or click removal software program.(It may not help all cases, though.)• Shut down other programs, including screensavers and virus checkers to freeup your computer’s resources.• Try ripping to WAV format, instead of <strong>MP3</strong> or WMA. (This requires less
computer power.)• Change your ASPI layer. (If you are not using the Gear engine and are usingthe Goldenhawk engine.) If you are using <strong>Acoustica</strong>, try un-checking it to usethe default Window’s ASPI layer.• Try changing some of the ripping preferences in the Preferences.oooChanging Jitter from ‘Auto’ to "ON" may help. (It will also go slower)Lowering the rip speed may help with errorsChanging the error correction to retry more times may help as well.Speed RipIf you are interested in ripping <strong>CD</strong>s as fast as possible and size is not an issue, youshould choose this option. IE: You have lots of available hard drive space, youshould choose to rip to WAV files. Note that you will use up about 10 MB per minuteof audio.Go into the Preferences by clicking Preferences from the File menu. Click the"Ripping Tracks" item and then click "Temporary WAV files only" or change thesetting in "Store in format" to WAV.
Play Your SongsThe playback controls are shown below.Use this button to rewind the current song and start playback from thebeginning. If less than 4 seconds have played, it will start playback of the previoussong.Use this button to start playback of the next song. (Find or Arrange window.)/ Use these buttons to start and stop playback.You can use the slider to restart the playback from a given offset.Playback ModesThere 2 modes when playing back songs.Continuous – This mode will play songs indefinitely. If it reaches the end of a songlist, it will start over from the beginning.Random – If in continuous mode, this will cause a totally random song to play next.The song that the software will choose to play next will be from the last window thatthey clicked the button on. For example, if you click the button on the MusicLibrary window, then the subsequent songs will be picked from the Music Library.Note that if there is only 1 song in the active window, such as the Find or Song Listwindow, then that song will play continuously. (You never know, someone out theremay have intended that. )Songs can be set up to fade from one to another, as well. For more info on this setthe Fader to "Mix Tracks".
Arrange Your SongsOnce you have found your songs, you can rearrange their order in a few differentways. You also have the choice of making either an audio <strong>CD</strong> or a <strong>MP3</strong> <strong>CD</strong>.Audio or <strong>MP3</strong> <strong>CD</strong>?Moving SongsShuffleSortingDeleting SongsAdding SongsPlaying SongsUndo & RedoCopy & PasteCopy Track InformationSetting Song Volume/Boost/EQTrimming/Fading/Mixing SongsOpen Containing FolderEdit Tag InfoLocate Song in LibraryDelete a Song from the Music LibraryThis screen shot shows the "Song List" interface.
Audio or <strong>MP3</strong> <strong>CD</strong>?The main new addition to the Song List, is that now you have a choice of the typeand size of <strong>CD</strong> you’d like to create! This is an important choice, as you need tomake sure that it will play on your <strong>CD</strong> player. To choose the type of <strong>CD</strong>, click eitherthe "Audio <strong>CD</strong>" or "<strong>MP3</strong> <strong>CD</strong>" radio button.Audio <strong>CD</strong>This is the type of <strong>CD</strong> that plays in 100% of all <strong>CD</strong> players. This is the kind of <strong>CD</strong>that you buy at the music store. You are limited to 21, 74 or 80 minutes of audio.(Note that you can’t have more than 100 different tracks, which is a limit of the audio<strong>CD</strong> spec.) If you leave it on "Auto", put in a blank <strong>CD</strong>R before starting a burn and itwill automatically detect how much room you have.)
<strong>MP3</strong> <strong>CD</strong>/DVDThe <strong>MP3</strong> <strong>CD</strong> stores actual <strong>MP3</strong>, or WMA files just as if they were on a hard drive. Itis not readable by normal <strong>CD</strong> players. However, if you have an <strong>MP3</strong> <strong>CD</strong> player, youwill be able to play up to 200 songs on a single <strong>CD</strong>!The number of songs that you can fit on a <strong>MP3</strong> <strong>CD</strong> depends on how big the songsare in terms of MB, instead of length in time.The above shows the how the "Song List" looks when you choose "<strong>MP3</strong> <strong>CD</strong>". Thetop window shows your folders and the bottom window shows the contents of the
currently selected folder.You can do the following things in "<strong>MP3</strong> <strong>CD</strong>" mode.• Create and rename folders• Move folders by dragging them to new parent folders.• Move songs from one folder to another by selecting them and then draggingthem to a new folder above.• Select from 185 MB, 650 MB, 700 MB <strong>CD</strong>s, or <strong>4.</strong>7 GB DVD project sizes.The first time you select "<strong>MP3</strong> <strong>CD</strong>" mode, you will start the <strong>MP3</strong> <strong>CD</strong> wizard whichlets you choose the best settings for your <strong>MP3</strong> <strong>CD</strong>, including bit rates & audioformats that your player supports, file order preservation and folder options. Youcan also change these settings in the "<strong>MP3</strong> <strong>CD</strong>" section under the Preferences.See <strong>MP3</strong> <strong>CD</strong> WizardMoving SongsTo move a song, click on it and then drag it to the new position. You will see a blueunderline, which shows where the song will move once the mouse is released.Alternatively, you may use the up arrow or down arrow to move theselected song(s) up or down.In "<strong>MP3</strong> <strong>CD</strong>" mode, you can also drag songs above into a different folder.ShuffleShuffle is a quick way to arrange your tracks into a new random order. To shuffleyour tracks, select "Shuffle" from the "Song List" menu.
Cross FaderYou can fade songs when in "Audio <strong>CD</strong>" mode. When in "Audio <strong>CD</strong>" mode, click the"X-Fader" button launch the Cross Fader dialog . The cross fader is aquick way to get fades and overlaps set for all songs in the "Song List". After that,you can fine-tune your fades and mixing via the "Trims, Overlaps & Fades" window.SortingYou can sort by each column header by clicking on it. Here are the columns you cansort by.Title – The title track of the song.Length – The length of the track.Status – Ready, Preparing, Converting, Burning, Burned, Missing, etc.Album - The album for the track.Artist – The artist.Genre- The style or genre of the track.Type – The file type (WAV, WMA or <strong>MP3</strong>).Format – The bit-rate or sample rate of the track.Size – The size in bytes, KB or MB of the track.Track # - The <strong>CD</strong> track # that corresponds with the original <strong>CD</strong> track, usually.Location – The folder and filename.Deleting SongsYou can delete a song by clicking the song followed by selecting "Delete" or "Cut"from the "Edit" menu [Ctrl+X].
Alternatively, you can also press the Del buttondelete a track.or press the [Delete] key toTo delete all the songs in your list, select "Remove All Songs" from the "Song List"menu.Undo & RedoMake a mistake? You spent all day looking for a specific song and you just deletedit! No problem! Select "Undo" from the "Edit" menu and your song will re-appear.[Ctrl+Z]You can then re-do what you just ‘undid’ by selecting "Redo" from the "Edit" menu.[Ctrl+Y]Copy & PasteIf you want to have more than one instance of a particular track, select the track andthen select "Copy" from the "Edit" menu [Ctrl+C]. To paste a copy, select "Paste"from the "Edit" menu. [Ctrl+V].When you paste to an external program, such as a <strong>CD</strong> label creation package, it willpaste the textual track information such as track name, artist and length.Setting Song Volume/Boost/EQThis allows you to change the overall strength, volume and tone of a song. It will beburned to <strong>CD</strong> as you hear it. Click the "Audio FX" button or right click on asong and select "Adjust Track Volume/Boost/EQ" This brings up theVolume/Boost/EQ dialog.
NOTE: Use this option sparingly as you may introduce distortion. If all your songssound low in volume, you should simply turn up your speakers or adjust yourWindow's volume mixer.Trimming/Fading/Mixing SongsThis allows you to do some limited editing with your songs. You can trim them to getrid of unwanted applause or long silence intros. You can fade songs and overlapthem with adjoining songs for seamless mixes. Click the "Mixing" buttonright click on a song and select "Overlaps, Trims & Fades". This brings up theOverlaps, Trims and Fade dialog.orNOTE: If you are creating an <strong>MP3</strong> <strong>CD</strong>, the software will ignore the overlap settingand only burn the trims and fades. (<strong>MP3</strong> <strong>CD</strong> Players do not support continuous playwithout pauses.)Open Containing FolderThis is convenient if you want to open the folder in Windows where the song isstored. You might use this if there is a song in your library which you wish to deleteor rename.Right click on a track and then select "Open Containing Folder" from the pop upmenu.Alternatively, you can select "Open Containing Folder" from the "Song List" menuwhen the track is selected.Playing Specific Songs From the Arrange WindowEach track has a playback buttonthat will start playback for that track.
The above screen shot shows where the playback button is.Click here for more on playing songs.Copy Track InformationEach track has associated track information such as the track number, the trackname, the artist and the track length. You can copy this text into the clipboard inorder to use it in other programs such as <strong>CD</strong> label makers.To copy the track information of a specific track, click the track to select it. Thenselect "Copy" from the "Edit" menu [Ctrl+C]. Now go to your favorite program andpaste it in by selecting "Paste" from the "Edit" menu [Ctrl+V].You may also select multiple tracks by holding down the Shift or Control key andclicking the desired tracks. Once you have made your selections, click "Copy" fromthe "Edit" menu to copy them.To copy all track information, just select "Copy Track Information To Clipboard" fromthe "Edit" menu.Edit Tag InfoYou can edit a track’s tag information (track name, artist, album, genre, originaltrack, year and comment) by right clicking the song and selecting "Edit Tag Info"from the right click menu. This brings up the Edit Tag Info window.Locate Song In Library
You can quickly locate a song in your music library by right clicking on a song andclicking "Locate Song In Library" from the right click menu. This will cause the librarytab to be displayed and the track will be highlighted in gray.Delete from LibraryThis is a useful option if you find a song in your song list, which you accidentallyimported from a search or the library tab. Rather than go into the library tab todelete it, you can click "Delete from Library" on the right click menu, to have itremoved. Note that you will still need to go to the Library menu and select "EmptyTrash" to permanently remove it.
Trimming, Fading and Mixing Your SongsOne of the features that sets <strong>Acoustica</strong> <strong>MP3</strong> <strong>CD</strong> <strong>Burner</strong> apart from the competitionis the ability to edit the mix on a very detailed level.Bring up this window by right clicking on a song and selecting "Overlaps, Trims &Fades" or by clicking thebutton.The image below shows the ‘Overlaps, Trims & Fades" dialog.Trimming Your SongsIf you have an extra long applause or unnecessary silence, you can trim or edit it outby simply clicking and changing the "Trim Start" or "Trim End". To hear the trim, clickeither "Preview In" or "Preview Out". (Note that if you have the option to"Automatically Remove Silence" turned on, some songs may already be trimmed.)Fading Your SongsIf you have an extra long applause or an incomplete song, you can make it soundvery smooth by simply adding a fade. You can set the "Fade In" and "Fade Out". Tohear the fades, click either "Preview In" or "Preview Out".Overlapping Your SongsBy changing the "Overlap" setting, you can mix the current and subsequent song.Usually, this works well in combination with fading. To hear the overlapped area,click "Preview Mix". Note that it will start a few seconds earlier than the overlap area.
Automatic Overlapping And FadingIf you want all songs to automatically mix and fade, click the on the toolbarand select "Mix Tracks". Choose an overlap and fade. All songs will be automaticallyfaded and mixed with these changes. Any new songs added to the Song List willhave these settings, as well.Navigating Your SongsWhen you are adjusting the mix, it is very handy to go back and forth from track #1 totrack #2, etc. Click the "Previous" and the "Next" buttons to navigate between tracks.(For example, when working on a fade between 2 tracks, you will also need to adjustthe fade in of the second track.)<strong>MP3</strong> <strong>CD</strong> Note: When making an <strong>MP3</strong> <strong>CD</strong>, if you want to hear trims and fades, youmust make sure to choose "Specify Settings" and then click the option "Use trim,volume, EQ, Boost, fading & normalization settings". Also, be warned that this willcause the "Convert" stage to take a long time, as it will have to re-render into new<strong>MP3</strong> files. (Overlapping and mixing will not be preserved in <strong>MP3</strong> <strong>CD</strong> mode!)
Setting Volume, Boost & EQYou can adjust the volume, boost and EQ of a song. (These settings are appliedwhen burning <strong>CD</strong>s!)Bring up this window by right clicking on a song and selecting "Adjust TrackVolume/Boost/EQ" or by clicking thebutton.VolumeIf a song isn’t loud enough, adjust the volume to bring it up or down. Click "Reset" toreturn it back to 100%.BoostBoost will increase the "loudness" of a song by squashing the higher volume partsand bringing up the lower volume parts. Click "Use Boost" to turn on boost for thecurrent song. (The effect approaches the sound of the booming voice of a radio DJon the extreme side. For those that know more about audio technology, Boost isreally dynamic compression.)LevelThe Boost Level specifies the threshold to start boosting songs. The higher itis, the more it will boost. Be careful, adjusting this setting, as you mayintroduce distortion, especially if you set it above 65%.PowerThis is the ratio that the song is boosted. For example, if a portion of a song isfound to be below the "Level", it is then adjusted by the "Power" setting.ResetThis returns the boost settings to the default settings. (Of course, turning offboost will make sure to not alter the original audio.)EqualizationBy turning on EQ, you’ll be able to adjust 10 frequency bands that will affect thetone of the song. This is similar to adjusting the graphic equalizer on a stereosystem amplifier. You may also choose a preset such as "Boost Bass", "BoostTreble", etc.NOTE: We recommend that you use this sparingly. Don’t try adjusting the song toyour specific computer speakers. The speakers that you play your <strong>CD</strong> on maysound totally different!
<strong>MP3</strong> <strong>CD</strong> Note: When making an <strong>MP3</strong> <strong>CD</strong>, if you want to hear these changes, youmust make sure to choose "Specify Settings" and then click the option "Use trim,volume, EQ, Boost, fading & normalization settings". Also, be warned that this willcause the "Convert" stage to take a long time, as it will have to re-render into new<strong>MP3</strong> files.
Burn A <strong>CD</strong>!You’ve got your songs arranged the way you want. You are ready to create yourcustom <strong>CD</strong>! Note that you will have to have a supported <strong>CD</strong> recorder in order toburn a <strong>CD</strong> or DVD.Note: Did you want to burn an <strong>MP3</strong> <strong>CD</strong> or an Audio <strong>CD</strong>? You can select this andthe media size on the Song List screen. More …Specifying the Silence Between the TracksBlend or Mix Adjacent Tracks Radio DJ style!Selecting Too Much AudioBurn OptionsBurn ProcessSpecifying the Silence Between The Tracks**This only applies to "Audio <strong>CD</strong>" mode.** Before you burn, you can fine-tune howyou want your <strong>CD</strong> to sound. You can set it up to have several seconds of silence orno silence between tracks. If you are feeling fancy you can even have it mixbetween tracks just as they do on the radio.To set the amount of silence or no silence between tracks, select "Fader Settings"from the "Song List" menu or click the "Cross Fader" buttonthe "Fader Settings" as shown below.. This brings up
Select the setting you would like and then click "OK".Blend or Mix Adjacent Tracks Radio DJ Style!**This only applies to "Audio <strong>CD</strong>" mode.** You can create a <strong>CD</strong> where the tracksmix into each other. Click "Cross Fader Settings" from the "Song List" menu or clickthe "Fader" button on the toolbar.
Click the "Mix tracks" radio button. You can set the overlap and fade time. Overlaptime specifies the amount of time that songs overlap each other.[overlap][ Song A ------------------------------][-------------------------------Song B]The overlap length sets how long the songs cut overlap each other.The fade time specifies how long it takes to transition to the next song. Generally,shorter fades work better, especially with songs with heavy rhythm.Selecting Too Much Audio
After clicking "Burn <strong>CD</strong>!" from the "Song List" menuor clicking the "Burn <strong>CD</strong>"button on the toolbar,you may see a window titled "Selected Audio Will Not Fit!"If you have more than maximum minutes of audio selected, you can do one of threethings.1. Fade out the extra audio. Choose the length of the fade. The default is 2seconds.2. Cut off the extra audio. It may not sound graceful…but the option is available.3. Cancel the dialog and remove some tracks and then try to burn again.Burn OptionsAfter clicking the Burn button, the "Burn Audio <strong>CD</strong>!" window comes up with severaloptions that you can set. To start burning, click the "Start" button.
<strong>Burner</strong> SpeedNumber of CopiesConvert All Tracks To WAV Files FirstTest Burn ModeTest And Then Burn ModeBurn <strong>CD</strong> Mode
<strong>CD</strong> <strong>Burner</strong> OptionsConvert all tracks to WAV files first.**This only applies to "Audio <strong>CD</strong>" mode.** This option will ensure that alltracks are first converted to WAV files before being written to the <strong>CD</strong>. Youare required to check this option if you are mixing between tracks.<strong>Burner</strong> SpeedThis defaults to "Max" which is the maximum speed possible on your <strong>CD</strong>recorder. 1X speed recording is comparable to the amount of timenecessary to playback an audio <strong>CD</strong>. Since an audio <strong>CD</strong> holds 74 minutes, itwill take 74 minutes to record an entire <strong>CD</strong> at 1X speed. An 8X speedrecorder will take 74/8 minutes, which is about 9 minutes. If you are luckyenough to have a 16X speed burner, it will take about <strong>4.</strong>5 minutes to recordan entire <strong>CD</strong>!If you are having problems recording a <strong>CD</strong> or if you wish to do other thingsduring a burn, such as browsing the web, you should choose a lower burnspeed.Make (Number Of Copies)If you are making more than one copy, change this control to the number ofcopies you wish to make. You will be prompted to insert the blank audio <strong>CD</strong>swhen needed<strong>CD</strong> <strong>Burner</strong> Mode
Test burn. A test burn will simulate an actual burn without using a blank<strong>CD</strong>-R. You will be required to put a <strong>CD</strong>-R in, but it will not use the burn laseron the <strong>CD</strong>-R. It is mainly a test to see if the data can be delivered to the <strong>CD</strong>recorder quickly enough to avoid ‘data starvation’ or the famous ‘bufferunder run’ error.Test and then burn if successful test. This will perform a test and then ifthe test goes smoothly, it will start the burn without any user interaction.Burn <strong>CD</strong>! This will go straight to burning an audio <strong>CD</strong>. (No tests will beperformed in this mode.)Burn ProcessThe burn process involves a few steps. The screen shot below shows the burn/testprogress window.
The burn process consists of several stages.1. All audio files must be "Prepared". <strong>Acoustica</strong> <strong>MP3</strong> <strong>CD</strong> <strong>Burner</strong> analyzes all songsto determine the exact length.2. Some or all tracks will be converted to WAV files first. The tracks may beconverted if they need to be normalized or auto-trim settings or trimmed. Seethe Preferences to set these parameters.3. Burn or test begins.<strong>4.</strong> Each track is burnt or test-burnt.5. Burn or test finalizes.You can abort at any time by clicking on the "Abort" button. If burning, aborting afterstage 3 will result in an unusable <strong>CD</strong>. (<strong>Acoustica</strong> <strong>MP3</strong> <strong>CD</strong> <strong>Burner</strong> will ask you if youare sure you want to abort, though.)
Toolbar <strong>Help</strong>NewCreates a fresh, new session. Any songs in the Song List window areremoved.OpenBrings up a window allowing you to open a previous burn session (.cbsfile)SaveSaves the current burn session. If you haven’t saved it yet, <strong>Acoustica</strong><strong>MP3</strong> <strong>CD</strong> <strong>Burner</strong> will ask you for a name and location to store it to.Burn <strong>CD</strong>Will bring up the "Burn Audio <strong>CD</strong>!" window.<strong>CD</strong> LabelWill launch <strong>Acoustica</strong> <strong>CD</strong> Label Maker, if it is installed. To install<strong>Acoustica</strong> <strong>CD</strong> Label Maker, visit http://www.acoustica.comFindWill toggle showing the Find window on and off.LibraryWill toggle showing the Music Library window on and off.Rip <strong>CD</strong>Will toggle showing the <strong>CD</strong> ripping windows on and off.AddLet’s you add songs from a folderX-FaderBrings up Cross Fader dialogBUYClick this button to purchase the software! Follow the instructionsdetailed here.
File MenuNew Song ListCreates a new song list with a new title.Short Cut: Ctrl + NOpen Song List…Opens an existing song list made previously with <strong>Acoustica</strong> <strong>MP3</strong> <strong>CD</strong> <strong>Burner</strong>Short Cut: Ctrl + OSave Song ListSaves the current Song List. If nothing was saved before, it will prompt you for a file name.Short Cut: Ctrl + SSave Song List As…Saves the song list in a specified location.Preferences…Opens the Preference window.Recent <strong>Acoustica</strong> <strong>MP3</strong> <strong>CD</strong> <strong>Burner</strong> SessionsExitThis is not an actual menu item. However, the 8 most recently used <strong>Acoustica</strong> <strong>MP3</strong> <strong>CD</strong> <strong>Burner</strong> session will appear underthe File menu. Just click one of this previous <strong>Acoustica</strong> <strong>MP3</strong> <strong>CD</strong> <strong>Burner</strong> sessions and it will load into the session.This quits the program.
Edit MenuUndoRedoCutCopyPasteDeleteSelect AllUse this if you made a mistake or want to go back to a previous state. Undoable actions include adding tracks, deletingtracks, moving tracks, sorting tracks, shuffling tracks, renaming tracks, and re-setting a track’s volume. More.Short Cut: Ctrl + ZUse this if you want to go back to a state before an undo. Undoable actions include adding tracks, deleting tracks,moving tracks, sorting tracks, shuffling tracks, renaming tracks, and re-setting a track’s volume. More …Short Cut: Ctrl + YThis will remove the selected track or tracks from the Arrange window. The track or tracks will also be placed on theclipboard for pasting if desired. Relevant textual track information is also copied to the clipboard.Short Cut: Ctrl + XThis will copy the selected track or tracks from the Arrange window. The track or tracks will also be placed on theclipboard for pasting. Relevant textual track information is also copied to the clipboard.Short Cut: Ctrl + CThis will paste any tracks in the clipboard into the Arrange window.Short Cut: Ctrl + VThis will remove any selected tracks from the Arrange windowShort Cut: Delete keyThis will select all tracks in the Arrange windowShort Cut: Ctrl + ACopy Track Information To ClipboardThis will copy all textual track information to the clipboard. This can be pasted into other programs such as a <strong>CD</strong> labelingsoftware package.Show ToolbarThis lets you toggle the toolbar from being visible to not being visible, and vice versa.
Find MenuShow/Hide Find TabThis lets you toggle the Find Songs tab from being visible to not being visible, and vice versa.Start SearchThis will begin a search. It will search on the text in the "Search for" field on the Find Songs tab.Add All Found Songs To Song ListAdds all found songs currently in the Find tab to the Song List window.Short Cut: Ctrl + I
<strong>CD</strong> MenuShow <strong>CD</strong> DriveThis lets you toggle the <strong>CD</strong> Drive tab(s) being visible to not being visible, and vice versa. A sub menu will pop up with alist of your <strong>CD</strong> drives so that you can select the desired <strong>CD</strong> Drive. See <strong>CD</strong> ripping for more …Play/Stop TrackThis will play the currently selected <strong>CD</strong> track. Note that if you don’t hear the music, you may need to adjust your Window’s mixer settings.Rip TracksThis will start ripping the currently selected tracks from the current <strong>CD</strong> Drive.Short Cut: Ctrl + RSelect/Deselect This TrackThis will select or deselect the current track. ( A selected track will have a check in it’s checkbox and will be ripped when"Rip Tracks" is pressed.)Deselect All Tracks / Select All Tracks To Be RippedThis will select or deselect all tracks. ( A selected track will have a check in it’s checkbox and will be ripped when "RipTracks" is pressed.)Edit Tag InformationThis will edit the <strong>CD</strong> tag information for the currently selected track. See more on this …Mark All as UncopiedThis will allow you to re-rip any tracks that you’ve already ripped. This is useful if you’ve ripped the songs in the wrongformat, etc.Look Up Album InfoThis will look up the song track information for the currently selected <strong>CD</strong> drive.Erase <strong>CD</strong>RW…If a <strong>CD</strong>RW is in the <strong>CD</strong>/DVD writer, this will do a quick erase on the <strong>CD</strong>RW . (This may take up 2 minutes)
Song List MenuCross Fader Settings…ShuffleThis brings up the Cross Fader window.This will re-arrange your tracks in a random order.Add Songs…This lets you import specific files from specific folders. More …Short Cut: Ctrl + TRemove All SongsThis will remove all songs from the "Song List" window.Edit Tag InformationThis will bring up the Edit Tag window on the currently selected song in the Song ListAdjust Track Volume/Boost/EQThis will bring up a window allowing you to change the volume, boost and EQ on the selected track. More …Overlap, Trims & FadesThis will bring a window allowing you to adjust the trims, fades and mixing for the most recently selected track. More …Open Containing FolderThis will open the folder in Windows containing the file for the most recently selected track. More …Audio <strong>CD</strong> ModeThis option will be checked if the Song List is currently in Audio <strong>CD</strong> mode. (<strong>MP3</strong> <strong>CD</strong> Mode will be checked when thisunchecked) More …<strong>MP3</strong> <strong>CD</strong> ModeThis option will be checked if the Song List is currently in <strong>MP3</strong> <strong>CD</strong> mode. (Audio <strong>CD</strong> Mode will be checked when thisunchecked) More …Launch <strong>MP3</strong> <strong>CD</strong> WizardBurn <strong>CD</strong>!This brings up the <strong>MP3</strong> <strong>CD</strong> Wizard. More …This will bring up the "Burn Audio <strong>CD</strong>!" window, a click away from burning your <strong>CD</strong>.Short Cut: Ctrl + B
Player MenuPlay / StopThis will start playback from the previously stopped song or from the last song selected in the Arrange window. If the lastsong selected was in the Find window, it will start playback from the Find window. Of course, if a song is currentlyplaying, it will stop playback.Previous SongNext SongThis will play the previously played song. (This will not work if in "Random Playback" mode though)This will play the next song. (If in "Random Playback" mode, this could be any song on the list.)Random PlaybackIf this is checked it will cause <strong>Acoustica</strong> <strong>MP3</strong> <strong>CD</strong> <strong>Burner</strong> to playback songs in a random order. Otherwise, the next songplayed will be the next one down the list.Continuous PlaybackIf this is checked, when the currently playing song is finished, <strong>Acoustica</strong> <strong>MP3</strong> <strong>CD</strong> <strong>Burner</strong> will start playing the next song.If this is not checked, playback will stop when the current song finishes.Adjust Master Volumes…This brings up the Window’s soundcard mixer control, which allows you to adjust your Wave, MIDI, <strong>CD</strong>, auxiliary andmaster volumes for your soundcards. You should adjust this first and then raise or lower the volume of your speakers forbest results.
<strong>Help</strong> Menu<strong>Help</strong> With This SoftwareThis is where you are now. I hope you are enjoying the software!Go To <strong>CD</strong>BURNER.COMThis will launch your default web browser with the website cdburner.com. You should connect to the Internet in yourusual fashion if your browser does not connect you automatically.Buy Now On-LineThis brings up the screen where you can purchase a registration code to unlock the software for unlimited usage.Depending on the method you register, a registration code will be delivered at any time of the day or night in a matter ofminutes! More …Enter Registration CodeThis brings up the screen where you can enter your purchased registration code into the software.Check For New Version…This option will contact our website to see if there is a new version of <strong>Acoustica</strong> <strong>MP3</strong> <strong>CD</strong> <strong>Burner</strong> available. Upgrades arefree for the life of the product!<strong>Acoustica</strong> Software ProductsThis option will bring up a submenu with some of our other products. (<strong>Acoustica</strong> <strong>MP3</strong> Audio Mixer, <strong>Acoustica</strong> <strong>MP3</strong> ToWave Converter PLUS, <strong>Acoustica</strong> <strong>CD</strong> Label Maker, and the <strong>Acoustica</strong> Power Pack)About <strong>Acoustica</strong> <strong>MP3</strong> <strong>CD</strong> <strong>Burner</strong>…This brings up a window with copyrights, credits and contact information for <strong>Acoustica</strong>.
PreferencesThe preferences are settings that aren’t changed that often.To access the Preferences, click "Preferences" from the "File" menu. There are 6different sections. Just click on the section you’d like as seen above. After clickingthe section, the right hand portion of the screen will show the details.GeneralAudio ProcessingClipboard<strong>CD</strong>/DVD <strong>Burner</strong><strong>MP3</strong> <strong>CD</strong>sRipping TracksSound ScanRemote Database
General PreferencesUse small toolbarCheck this to save vertical screen real estate on the toolbar. (It shrinks the toolbar.)Create log fileA log file will be created during operation of the software so that errors or programdefects can be tracked. If you feel you have found a bug or are having technicalproblems, please send us your ‘cdburner-log.txt’ file located in your <strong>Acoustica</strong> <strong>MP3</strong><strong>CD</strong> <strong>Burner</strong> directory.<strong>CD</strong> Rip/Burn EngineThis option will only be visible if the Gear <strong>CD</strong> Burning engine has been installed.The Gear engine is a separate install. To install it, please visithttp://www.acoustica.com/mp3-cd-burner/support.htm. Burning and ripping <strong>CD</strong>s is adifficult process. We license two technologies to burn <strong>CD</strong>s (Gear & Goldenhawk).For support reasons, we give you a choice of the engine. We recommend that youuse the Gear engine. Note that if you want to burn <strong>CD</strong>-Text, you will need to switchto Goldenhawk.Use <strong>Acoustica</strong>’s ASPI driver**This only applies if you are using the Goldenhawk engine, as Gear has it’s ownpre-installed ASPI drivers.** If this option is checked, the software will attempt to usespecial ASPI drivers supplied by <strong>Acoustica</strong>’s web page. The ASPI layer is how thesoftware communicates with the <strong>CD</strong> drives. (Note that these special ASPI driversare not part of the default download.) Seehttp://www.acoustica.com/mp3-cd-burner/support.htm for more info.Show Song List ColumnsChoose which columns to show in the Song List window.TitleLength (In Time)StatusAlbumArtistGenreType (<strong>MP3</strong>, OGG, etc.)Format (Bitrate, channels, etc.)Size (Megabytes)
Track # (Original Track Number)Location (File location)
Audio Processing PreferencesAutomatically Boost Songs That Need ItAutomatically Check For Incomplete SongsNormalize Track VolumesAutomatically Remove SilenceAdvancedAutomatically Boost Songs That Need ItWhen you add a song to the Song List, the software will parse it and analyze it tosee if it needs a boost. Basically, if the song’s relative ‘loudness’ is too low, it willapply some boost automatically. This saves you from potentially embarrassing andfrustrating experiences of burning a song and having to constantly adjust the volumedial!Boost SettingChoose from Light, Medium and Strong. Light boost may not be overtlyaudible, whereas Strong boost might cause a mild amount of distortion.Warn Me When A Song Is Automatically BoostedWhen the software is done parsing a song, this will pop up a dialog to warnyou that it has been boosted. The song will also show the boost symbol next toit:Automatically Check For Incomplete SongsThe software will scan the song to determine if it is incomplete or cut-off too early.This can happen due to partial downloads, partial rips, etc. When a song isdetermined to be incomplete, you will see the symbol next to it.The algorithm works by testing the volume level for the last 20 milliseconds of thesong. If it is beyond a threshold value, it will notify you that it may be a possibleincomplete song. The threshold value can be set from 0% (absolute silence) to100% (half max volume) The default setting is 12%For those downloading their music, this is a useful option to help avoid burningpartial songs!Warn About Incomplete Songs
When the software is done parsing a song and it is incomplete, the softwarewill pop up a dialog to warn you that it might be incomplete. You will have theoption of playing the very end of the sound.Fade Out Incomplete SongsIf a song is determined to be incomplete, it will automatically fade it out so thatit sounds less abrupt. (A very nice feature for songs that are 90% there, etc.)You can specify how long the fade should be.Normalize Track VolumesWhat is normalization? It is a technique to take a low-volume recording and boost itsvolume so that it matches other volumes.<strong>Acoustica</strong> <strong>MP3</strong> <strong>CD</strong> <strong>Burner</strong> will normalize a track if its volume is different by thespecified percentage. Enter a percentage cut-off level that will cause sounds to benormalized.You can also choose what source <strong>Acoustica</strong> <strong>MP3</strong> <strong>CD</strong> <strong>Burner</strong> will use to measure thevolume level. It can measure against the loudest track or the loudest volumepossible.Low volume songs are ‘normalized’ to sound consistent with other tracks.Automatically Remove SilenceWhat is auto-trim silence? It is a technique to remove silence at the beginning andend of a song. If you want to make sure that you don’t have silence between tracks,set this to a low number.If the silence is not automatically trimmed, you can always select the sound and thenclick "Overlaps, Trims & Fades" to adjust the trim.Advanced
Set the # of playback buffers and buffer size. If you are experience gaps are staticwhen using the software to listen to songs, try increasing the buffer size. If you’dlike the wave form display to be more responsive when playing back sounds, lowerthe buffer size.
Clipboard PreferencesThese options control the text that is copied into the clipboard when you copy a trackin the Song List.Copy track # - the track’s number or order on the <strong>CD</strong> is copied into the clipboardCopy track length – the track’s length in time is copied into the clipboardCopy track title – the track’s title is copied into the clipboard. Also see renamingtracks.Copy artist – the track’s artist field is copied into the clipboardHow to copy track information<strong>Acoustica</strong> <strong>CD</strong>/DVD Label MakerIf you’re looking for an industrial strength <strong>CD</strong>/DVD label maker that makes <strong>CD</strong>labeling fun & easy, try out <strong>Acoustica</strong> <strong>CD</strong>/DVD Label Maker. It integrates seamlesslywith <strong>Acoustica</strong> <strong>MP3</strong> <strong>CD</strong> <strong>Burner</strong> and includes over 1000 custom art <strong>CD</strong> & DVDlabels! Try out <strong>Acoustica</strong> <strong>CD</strong>/DVD Label Maker!
<strong>CD</strong>/DVD <strong>Burner</strong> PreferencesClick on a topic for more help.<strong>CD</strong> Writer DevicePlay sound when finishedBurn-ProofEject disc when recording is done<strong>CD</strong>-TextAdvancedAuto insert notificationSync Data TransferDisconnect<strong>CD</strong> Writer DeviceIf you have more than one <strong>CD</strong> recorder, this control allows you to select betweenthem. It also shows the recorder name, model and firmware version.Eject disc when recording is done.This option instructs the <strong>CD</strong> recorder hardware to eject the disc when recording isfinished. Due to varying support, this may not work on all <strong>CD</strong> recorders.Play sound when <strong>CD</strong> is finished.Check this if you want to hear a sound play when a burn succeeds or fails. Thesounds are stored in the <strong>Acoustica</strong> <strong>MP3</strong> <strong>CD</strong> <strong>Burner</strong> directory. You can replacethese sounds with your own sounds. The success sound is called "success.wav"and the burn fail sound is called "failure.wav"Use <strong>CD</strong>-Text (If supported)Some <strong>CD</strong> players will show track and title information during playback. Note that notall <strong>CD</strong>/DVD recorders support <strong>CD</strong>-Text. Look for the <strong>CD</strong>-TEXT logo on your <strong>CD</strong>player to see if its supports <strong>CD</strong>-Text. (Usually, the Sony brand <strong>CD</strong> players show<strong>CD</strong>-text. This will be enabled if the current <strong>CD</strong> Writer device supports <strong>CD</strong>-Texttechnology)Use Burn-Proof (If supported)Burn proof technology ensures successful burns. It is highly recommended to leavethis option checked! (Incidentally, I’m not sure why you would turn off Burn-Proof,except for troubleshooting perhaps.) Burn-Proof is also known as Just-Link. (Thiswill be enabled if the current <strong>CD</strong> Writer Device supports Burn-Proof technology)ADVANCED
Auto insert notificationThis reflects your <strong>CD</strong>-recorders auto insert notification setting. Auto insertnotification is how your computer automatically starts playing audio <strong>CD</strong>s youput in the drive. Unfortunately, this is also what causes burn failures,especially during the first 5% of the burn.Disabling or enabling auto insert notification will require a reboot to take affect.** Packet writing programs such as Direct<strong>CD</strong> by Adaptec require that auto insert notification ison.DisconnectDisconnect should be turned off for SCSI <strong>CD</strong>-recorders, as they run moreefficiently this way.Disabling or enabling auto Disconnect will require a reboot to take affect.*** This feature is disabled for Windows 2000 and must be enabled/disabled manually.Sync Data TransferSync Data Transfer should be turned off for SCSI <strong>CD</strong>-recorders, as they runmore efficiently this way.Disabling or enabling auto Sync Data Transfer will require a reboot to takeaffect.*** This feature is disabled for Windows 2000 and must be enabled/disabled manually.
<strong>MP3</strong> <strong>CD</strong>s PreferencesThis preference page allows you to quickly set up rules that specify how your <strong>MP3</strong><strong>CD</strong>s will be created. You might choose to run the wizard instead.You can set the following <strong>MP3</strong> <strong>CD</strong> burn modes:STANDARDThis will attempt to burn the most compatible <strong>MP3</strong> <strong>CD</strong>.• Play List order is preserved! Songs will be renamed to "01-My Song","02-Blues Traveler", "03-Rocking Out", etc. (This ensures that thealphabetical order will be the same as the Play List order.)• Converts WAVs, OGGs and WMAs into <strong>MP3</strong>. (Most <strong>MP3</strong> <strong>CD</strong> players support<strong>MP3</strong>, and some support the other formats. In this way, the potentiallyunsupported files are converted to the most common format.)• Trimming, Fading, EQ, Normalization, Volume and Boost settings areIGNORED.FAST (Default)This is the fastest option. Songs get burned "as is".• Play List order is not preserved. Songs will play alphabetically on <strong>MP3</strong> <strong>CD</strong>players.• Trimming, Fading, EQ, Normalization, Volume and Boost settings areIGNORED.• Fastest optionSPECIFYThis option allows you to specify the exact settings for your <strong>MP3</strong> <strong>CD</strong>s.• Supported formats. <strong>MP3</strong>? WMA? If your <strong>MP3</strong> <strong>CD</strong> player supports <strong>MP3</strong>, clickthe box next to <strong>MP3</strong>. Click the "Settings" next to the checkbox to set the minand max bit-rate and whether or not it supports VBR, etc.• Convert unsupported formats to? Set this option to the destination format forany files that that need to be converted. ** Note that you can specify thedestination format bit rate by clicking the "Settings" button next to the formatyou’ve chosen. (Note that OGG and WAV are not destination formats, bydesign.)• My player supports folders. Click this if your player supports folders and thenclick "Settings" to specify further options, including how to handle sub-foldersand the maximum # of songs and folders, possible.• Play order preservation. More on this …• Maximum file name length. (Some <strong>MP3</strong> <strong>CD</strong> Players may not support the full
63 characters for each file name.)
Ripping Tracks PreferencesRip your <strong>CD</strong>s to <strong>MP3</strong>, WMA, OGG or WAV files.Rip songs to folderStore songs in folder with artist's nameUse artist in song's file nameUse album in song's file nameUse track number in song's file namePlay sound when done rippingRip SpeedJitter CorrectionError Handling During RipsRip files to (format)Rip songs to folderYou can specify the folder where you want your freshly ripped songs to go.Depending on the other options you have selected, the software may createsub-folders by the artist’s name. To change the folder, click "Change" and select anew folder. (Note: you may want to change your ‘rip folder’ to be on your largesthard drive.)Store songs in folder with artist’s name<strong>MP3</strong> <strong>CD</strong> <strong>Burner</strong> will create a sub folder with artist’s name and put all ripped trackswithin this folder. The default location is "My Music" under your My Documentsfolder.Use artist in song’s file nameThis option will cause the software to create the ripped file to be called somethinglike "Bubba Smith – My Silly Dog.mp3". The artist is "Bubba Smith" and the track is"My Silly Dog"Use album in song’s file nameThis option will cause the software to create the ripped file to be called somethinglike "Bubba Smith - Whole Lot Of Fish - My Silly Dog.mp3" or "Whole Lot Of Fish -My Silly Dog.mp3" depending on your other options. The artist is "Bubba Smith", thealbum is "Whole Lot Of Fish" and the track is "My Silly Dog"Use track number in song’s file nameThis option will cause the software to create the ripped file to be called something
like "Bubba Smith - Whole Lot Of Fish - 1. My Silly Dog.mp3". The artist is "BubbaSmith", the album is "Whole Lot Of Fish" and the track is "My Silly Dog"Play sound when done rippingWhen the rip finishes, this option will play a sound. This is helpful if you are out ofthe room and want to know when the rip is done! There really isn’t much more tosay about this one. Rip SpeedThis allows you to set the speed of the rip. The default is "Max" which is themaximum speed possible for your <strong>CD</strong> drive. You may choose a slower speed formore accurate rips.Jitter CorrectionDrinking too much coffee? This feature will help you calm down! Seriously,some <strong>CD</strong> drives cannot seek or move to an exact time offset on the <strong>CD</strong> and, thus, itis possible to have errors when copying a track. By default, <strong>MP3</strong> <strong>CD</strong> <strong>Burner</strong>automatically detects whether or not it needs jitter correction.• If needed – This is the default.• No - Do not use jitter correction. (Faster, possible inaccurate rips.)• Yes – Use jitter correction. (Slower, more accurate rips.)Note that jitter options are grayed out when the Gear engine is being used. (Thedefault.)Error Handling During RipsIt is possible to have a rip error if a track especially if the <strong>CD</strong> is dirty or scratched.By default, <strong>MP3</strong> <strong>CD</strong> <strong>Burner</strong> will attempt to re-read the erroneous track info 10 times.The other options are:• Ignore Them – Ignore errors and rip as if nothing happened. • Retry – This will retry reading the erroneous area for the given # of times.• Abort – This option will halt the rip if an error occurs.Rip files to (format)This allows you to set the file format in which your freshly ripped files are created.
• Temporary Wave files – This option is for those that simply want to copytracks for burning <strong>CD</strong>s. These files will not be added to your Music Library.(The temporary WAV files are stored in your temp folder and will have the.tmp extension.)• Store in format- This option is the default and will cause the ripped songs tobe added to your Music Library. In addition, you can choose the file format torip to.ooooo<strong>MP3</strong> – The default format. (<strong>MP3</strong>s are compressed to about 10 timessmaller than WAV files for a similar quality)WAV – Uncompressed audio format. (Ripping will be much fasterbecause there is no compression necessary. However, the file size willbe around 40MB per song!)WMA – This is Microsoft’s format and is generally smaller than <strong>MP3</strong>s,although not as supported. Microsoft claims it is ½ the size of anequivalent <strong>MP3</strong>.OGG – A royalty and patent free format. Sound quality is great even atlow bit rates! (Encoding to OGG is slow, but the quality is great!)Settings – This will allow you to adjust more settings for the format youare ripping to, including the tag type.
Sound Scan Preferences<strong>MP3</strong> <strong>CD</strong> <strong>Burner</strong> will constantly be adding new songs into your Music Library foundon your computer’s hard drive. These options allow you to set the parameters ofwhat gets ‘imported’ into your library. ( Note that there is a big difference in the way3.0 and <strong>4.</strong>0 worked.)Types of SongsClick the type and minimum length of the files that you’d like to add. For now, youcan choose to import <strong>MP3</strong>, WAV, OGG & WMA files. (Note that it only supportsnon-DRM protected WMA files.)Where should the scan for new songs?This allows you to specify the folders to scan for new songs that you may havedownloaded, created or ripped. (Songs ripped with <strong>MP3</strong> <strong>CD</strong> <strong>Burner</strong> areautomatically added to the library)• Search entire computer<strong>MP3</strong> <strong>CD</strong> <strong>Burner</strong> will search the rest of your computer for music files. Thisincludes all hard drives and any networked drives, as well. In this mode, itsearches your entire computer. You can specify directories to not search inthis mode.oooSearch network drives<strong>MP3</strong> <strong>CD</strong> <strong>Burner</strong> will search any networked drives. You may want toturn this off if you find that your imports are taking longer and you don’treally care about searching networked drives.Search on my desktopYour desktop and sub folders on the desktop will be searched for newmusic files.View Exclude ListThis brings a list of directories that you do not want to search for newsongs. Examples would include temporary directories, game folders.If you want to speed up your search add as many directories as youcan think of, especially larger directories. ( Note that if you had a rootdirectory such as "C", this will not search C or any folders under Cwhich might not be the intended result!)• Search these folders ONLYThis allows you to add directories to search. The sound scan will searchthese directories and all subdirectories under them. For example, if all of yourmusic was in "C:\My Music" in sub-directories such as "C:\My Music\Artist1"and "C:\My Music\Artist2\", etc., you’d add this "C:\My Music\". The soundscan would search this folder and all sub-directories. The order is importantand it will start searching in the top directory and finish with the last.
ooSuggest Folders…These will scan your computer for folders that contain the word "mp3","music" and add them automatically to the directory list. (This can bevery useful and it’s quick.)Up, Down, Remove, AddThese buttons allow you to re-arrange the list of folders.
Remote Database PreferencesThe remote database is freedb.org . It is a FREE online database of 1000’s and1000’s or <strong>CD</strong> albums and track information. When you put a <strong>CD</strong> in your <strong>CD</strong> drive,our software queries the database in order to get the artist, album and trackinformation.MANY, MANY thanks to the people and volunteers behind freedb.org!Automatically get album informationThis option will cause <strong>MP3</strong> <strong>CD</strong> <strong>Burner</strong> to query freedb.org as soon as a new <strong>CD</strong> isput in a <strong>CD</strong> drive. It will cause your computer to dial or connect to the Internet. Ifyou do want it to look up the information automatically, uncheck this option.Update site listThere are many mirrors of the freedb.org database hosted around the world. It ispossible that freedb.freedb.org is too far from your location and does not alwaysestablish a connection.Click this button to retrieve a full list of official freedb sites hosted around the world.Use this freedb siteSelect the site from which you’d like to retrieve album, artist and track informationfor your <strong>CD</strong>s. If you only see one site, click the "Update site list". You will see ashort description and location of the site when you click on the site.
Supported <strong>CD</strong> Recorders<strong>Acoustica</strong> <strong>MP3</strong> <strong>CD</strong> <strong>Burner</strong> supports many <strong>CD</strong> recorders. If your recorder is a newmodel and is not automatically supported, we may have released an updated versionthat supports your recorder. To check for a new version select "Check For NewVersion" from the "<strong>Help</strong>" menu in <strong>Acoustica</strong> <strong>MP3</strong> <strong>CD</strong> <strong>Burner</strong>. (The best way to tell ifyour <strong>CD</strong> recorder is supported is to just run our <strong>Acoustica</strong> <strong>MP3</strong> <strong>CD</strong> <strong>Burner</strong> on themachine.)The latest list of supported recorders can be found athttp://www.acoustica.com/mp3-cd-burner/support/supportedcdrs.htm<strong>CD</strong> Text Supported RecordersIMPORTANT: <strong>CD</strong>-Text is not available if you are using the Gear engine.<strong>CD</strong>-Text supported recorders (Assuming you are using the Goldenhawk <strong>CD</strong> burning engine. See above)Hewlett Packard 7500 / 8100 / 8200 / M820e / 9100 / 9200Plextor 4220T (requires firmware 1.02 or higher)Plextor 8220TRicoh 7040 (requires firmware 1.20 or higher)Ricoh 7060 / 7080 / 8040 / 9060Sony CRX100E / CRX110E / CRX120E / CRX140E / CRX140STeac <strong>CD</strong>-R56S / <strong>CD</strong>-R58S (requires firmware 1.0J or higher)Note that other recorders may support <strong>CD</strong>-Text although not mentioned in this helpdocument.
Supported <strong>CD</strong> Recorders<strong>Acoustica</strong> <strong>MP3</strong> <strong>CD</strong> <strong>Burner</strong> supports many <strong>CD</strong> recorders. If your recorder is a newmodel and is not automatically supported, we may have released an updated versionthat supports your recorder. To check for a new version select "Check For NewVersion" from the "<strong>Help</strong>" menu in <strong>Acoustica</strong> <strong>MP3</strong> <strong>CD</strong> <strong>Burner</strong>. (The best way to tell ifyour <strong>CD</strong> recorder is supported is to just run our <strong>Acoustica</strong> <strong>MP3</strong> <strong>CD</strong> <strong>Burner</strong> on themachine.)The latest list of supported recorders can be found athttp://www.acoustica.com/mp3-cd-burner/support/supportedcdrs.htm<strong>CD</strong> Text Supported RecordersIMPORTANT: <strong>CD</strong>-Text is not available if you are using the Gear engine.<strong>CD</strong>-Text supported recorders (Assuming you are using the Goldenhawk <strong>CD</strong> burning engine. See above)Hewlett Packard 7500 / 8100 / 8200 / M820e / 9100 / 9200Plextor 4220T (requires firmware 1.02 or higher)Plextor 8220TRicoh 7040 (requires firmware 1.20 or higher)Ricoh 7060 / 7080 / 8040 / 9060Sony CRX100E / CRX110E / CRX120E / CRX140E / CRX140STeac <strong>CD</strong>-R56S / <strong>CD</strong>-R58S (requires firmware 1.0J or higher)Note that other recorders may support <strong>CD</strong>-Text although not mentioned in this helpdocument.
How to uninstall <strong>Acoustica</strong> <strong>MP3</strong> <strong>CD</strong> <strong>Burner</strong>To uninstall <strong>Acoustica</strong> <strong>MP3</strong> <strong>CD</strong> <strong>Burner</strong>, make sure to exit <strong>Acoustica</strong> <strong>MP3</strong> <strong>CD</strong> <strong>Burner</strong>if you are in it.Click the Window’s "Start" button, followed by "Programs", followed by "<strong>Acoustica</strong><strong>MP3</strong> <strong>CD</strong> <strong>Burner</strong>", followed by "Uninstall".Follow the instructions and the software will be removed from your system.
Creating an 80 Minute <strong>CD</strong>First, make sure that your <strong>CD</strong>-recorder supports 80-minute audio <strong>CD</strong>s. Not all<strong>CD</strong>-recorders support 80 minute <strong>CD</strong>-Rs! If you are not sure, consult your<strong>CD</strong>-recorder’s documentation or visit the manufacturer’s website for help.If the software does not properly recognize that there is an 80-minute <strong>CD</strong>-R in thedrive, click the "Size" control on the "Song List" window and set it to "80 min".IMPORTANT: You must put an 80 minute <strong>CD</strong>-R in the drive. Some <strong>CD</strong>-recordersonly record up to 78 minutes 30 seconds. When you find out how much audio yourrecorder supports, make sure to not go over the limit or your burn may fail and youmay end up with an unusable <strong>CD</strong>.
<strong>CD</strong> Burning ProblemsIt won't finish the burn or test! You end up with an unusable <strong>CD</strong>!The burn fails right after it has started burning the first track (Try turning off ‘Autoinsert notification)!I've tried everything. What else can I do to get it to burn successfully?It fails right after the burn/test starts!It won’t finish the burn or test! You end up with an unusable <strong>CD</strong>! What’shappening and what can you do about it?It is crucial to not use any software when burning or test-burning an audio <strong>CD</strong>. The<strong>CD</strong> recorder must have a non-interruptible stream of audio data. If it is interruptedthe burn will fail.Here’s what you can do to avoid a failed burn or test-burn.• Try test burns before doing actual burns!• Enable "Burn-Proof" in the Preferences (<strong>CD</strong>/DVD Recorder) if available!(This is enabled by default.)• Lower your burn speed. Your computer may not be able to keep up withthe demands of your <strong>CD</strong> recorder. For example, if you are burning at 8X,reduce it to 4X. Disable virus checkers and screen savers.• Select the "Convert to wav files first" option on the Burn window.• Do not use any other programs during a burn.• Do not use your computer during a burn.• Make sure that your computer is well ventilated. <strong>CD</strong> Recorders canoverheat.Burn Fails - How to turn off ‘Auto insert notification’You may need to disable something called "Auto Insert Notification" (AIN) for your<strong>CD</strong> recorder. The problem is that when the table of contents is being recorded,Window’s suddenly "sees" the new <strong>CD</strong> and tries to read it, which can cause theburn to fail.To disable Auto Insert Notification, click the Preferences menu item from the Filemenu. Uncheck the "Auto Insert Notification" item and click OK. You will have toreboot.
Note that after disabling AIN, when you put a <strong>CD</strong> into your drive, it will not recognizeit unless you go to My Computer and double click the <strong>CD</strong> drive.You can always turn AIN back on by re-checking the AIN checkbox. Also, when youuninstall <strong>MP3</strong> <strong>CD</strong> <strong>Burner</strong> it will reset AIN to the original setting.I’ve tried everything. What else can I do to get it to burn successfully?1. Go into your System Control Panel by clicking the Start button, followed by"Settings" followed by "Control Panels". Then double click the "System"control panel to bring it up. Click on the "Device Manager" tab.2.Click the + next to "<strong>CD</strong>ROM"3.Your <strong>CD</strong> drive or drives will look different. Select your <strong>CD</strong>-recorder andthen click the "Properties" button.
<strong>4.</strong>The properties page will appear. Click on the "Settings" tab. If you see the"DMA" option checked, uncheck it and then click "OK". (You may have toreboot.)5. Also, if you have a SCSI <strong>CD</strong> recorder, you can improve the efficiency ofSCSI recorders by making sure "Disconnect" and "Sync data transfer" ischecked. Click "OK" and you may have to re-boot.It fails right after the burn/test starts!Here are some things to try.• Uncheck "<strong>CD</strong> Text" on the "Burn Audio <strong>CD</strong>!" window if the option ischecked.• Disable "Auto Insert Notification"
Ripping ProblemsI cannot see a <strong>CD</strong> tab to rip from!Skips and pops are in my ripped tracks!I cannot see a <strong>CD</strong> tab to rip from!This is most likely because you do not have an ASPI layer properly installed. Rerunthe installer and reboot.Skips and pops are in my ripped tracks!Older <strong>CD</strong> drives (readers) do not have the ability to seek properly to a position on a<strong>CD</strong> and, thus, if they get out of sync, it will produce a pop in the audio. Here aresome things to try.• Make sure the <strong>CD</strong> is clean and does not have scratches on it. (It may bepermanently damaged and there may be no way to avoid the pop.)• Try turning the "Jitter" setting to "ON" in the Preferences on the "RippingTracks" section. (Ripping may be more accurate, but slower.)• Try ripping the <strong>CD</strong> on another <strong>CD</strong> drive if you have more than one.• Shut down other programs, including screensavers and virus checkers to freeup your computer’s resources.• Try ripping to WAV format, instead of <strong>MP3</strong>, OGG or WMA. (This requires lesscomputer power.)• Change your ASPI layer. (This only applies if you are using the GoldenhawkRip/Burn engine.) If you are using the <strong>Acoustica</strong> ASPI, try un-checking it touse the default Window’s ASPI layer.• Try purchasing and installing a new <strong>CD</strong> Drive. (Writers and readers are prettyinexpensive these days.)• Contact our support staff @http://www.acoustica.com/mp3-cd-burner/support.htm
Playback ProblemsThe <strong>CD</strong> has recorded successfully, but won't play in my home or car stereo <strong>CD</strong>player!I can't hear any audio when I try to play songs within <strong>Acoustica</strong> <strong>MP3</strong> <strong>CD</strong> <strong>Burner</strong>!My <strong>MP3</strong> <strong>CD</strong> is playing tracks back in the wrong order!The <strong>CD</strong> recorded successfully, but it won’t play in my home or car stereo <strong>CD</strong>player! Did you make sure to use a <strong>CD</strong>-R disc? Many people mistakenly use a<strong>CD</strong>-RW. Some newer audio <strong>CD</strong> players will support <strong>CD</strong>-RWs, but when in doubtuse a <strong>CD</strong>-R!If you burned a <strong>MP3</strong> <strong>CD</strong>, you will not be able to play it in an older <strong>CD</strong> player. The<strong>CD</strong> player needs to have the <strong>MP3</strong> logo or it must be capable of playing <strong>MP3</strong> orWMA files!I can’t hear any audio when I try to play songs within <strong>Acoustica</strong> <strong>MP3</strong> <strong>CD</strong><strong>Burner</strong>!You need to check the following settings.• Make sure your speakers are plugged in, turned on and connected to yourcomputer! (This happens to the best of us. )• Check your Window's volume mixer and make sure that the Wave volumeand Master volume are up and not muted.• Make sure you have the updated and latest sound drivers which you canget and install from your soundcard’s manufacturers website. Afterinstalling the new soundcard drivers, you may need to re-boot.My <strong>MP3</strong> <strong>CD</strong> is playing tracks back in the wrong order!<strong>MP3</strong> <strong>CD</strong>s can fit many <strong>MP3</strong>s and WMA files on to a single <strong>CD</strong> or DVD. However,<strong>MP3</strong> <strong>CD</strong> players play the songs in alphabetical order! If these tracks are chapters inan audio book, it will play in the wrong order! Make sure to go into the <strong>MP3</strong> <strong>CD</strong>wizard and select "Specify". On page 5, you’ll need to set it to preserve the fileorder. You’ll need to burn a new <strong>CD</strong> after these settings have been applied.
General QuestionsHow many songs can be burned on a <strong>CD</strong>?Once I burn a <strong>CD</strong>, can I burn more songs on it later?In the Find interface, can I search for a directory or a special programs <strong>MP3</strong> files?What type of blank media should I burn or record to?How many songs can be burned on a <strong>CD</strong>?You can have a maximum of 100 songs on a <strong>CD</strong>. However, most people will be ableto add about 13 – 20 songs per <strong>CD</strong>. The main limit is that a <strong>CD</strong> can only hold 74 or80 minutes of audio. (Time limit depends on the actual physical <strong>CD</strong>-R disc. Somesupport 74 minutes and some support 80 minutes. Burning an 80-minute <strong>CD</strong>-Rrequires that your <strong>CD</strong>-Recorder hardware supports it.)Once I burn a <strong>CD</strong> can I burn more songs on it later?No. <strong>Acoustica</strong> <strong>MP3</strong> <strong>CD</strong> <strong>Burner</strong> burns in Disc-At-Once mode and always closes thesession at the end of burning the disc. You should have all your songs arrangedbefore burning.In the Find interface, can I search for a directory or a special programs <strong>MP3</strong>files?If your songs are stored in a folder called "My Music" and you just want to find all ofthose songs. Just enter "my music" into the "Search For" field and then press the"Search" button.If you are looking for songs created by a special program and they are stored in aspecial directory such as "Audiocatalyst", you can search on ‘audiocatalyst’.What type of blank media should I burn or record to?If you want it to be usable on any standard home or car stereo, you should use ablank <strong>CD</strong>-R disc. (You can use <strong>CD</strong>-RW, but they are only supported on some of themore modern audio <strong>CD</strong> players.)