Gravure Printing.pdf
Gravure Printing.pdf
Gravure Printing.pdf

Create successful ePaper yourself
Turn your PDF publications into a flip-book with our unique Google optimized e-Paper software.
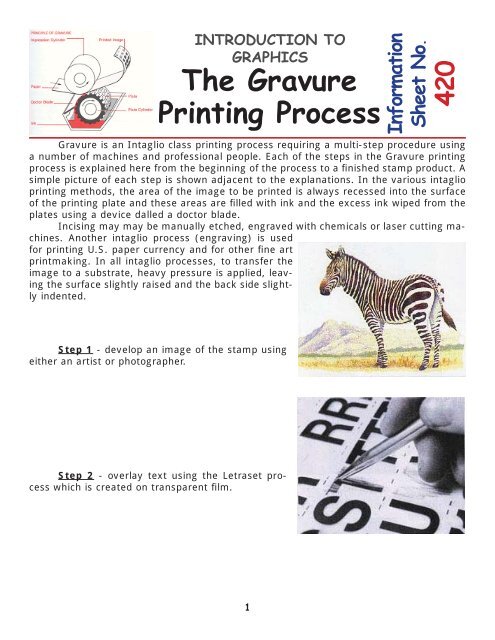
INTRODUCTION TOGRAPHICSThe <strong>Gravure</strong><strong>Printing</strong> ProcessInformationSheet No.420<strong>Gravure</strong> is an Intaglio class printing process requiring a multi-step procedure usinga number of machines and professional people. Each of the steps in the <strong>Gravure</strong> printingprocess is explained here from the beginning of the process to a finished stamp product. Asimple picture of each step is shown adjacent to the explanations. In the various intaglioprinting methods, the area of the image to be printed is always recessed into the surfaceof the printing plate and these areas are filled with ink and the excess ink wiped from theplates using a device dalled a doctor blade.Incising may may be manually etched, engraved with chemicals or laser cutting machines.Another intaglio process (engraving) is usedfor printing U.S. paper currency and for other fine artprintmaking. In all intaglio processes, to transfer theimage to a substrate, heavy pressure is applied, leavingthe surface slightly raised and the back side slightlyindented.Step 1 - develop an image of the stamp usingeither an artist or photographer.Step 2 - overlay text using the Letraset processwhich is created on transparent film.1
Step 3 & 4 - combines the text overlay createdin step 2 and the image created in step 1. The textoverlay is placed over the artwork to indicate to theprinter the position of the text and stamp frame inrelation to the artwork.Step 5 - present the text overlay and stampimage created in the previous steps to the printer forreview.Step 6 - setup the artwork on a copyboard soit can be photographed or on a scanner to create andigital image.Step 7 - If using film, focus the lens on theartwork and then photograph the it. This will combinethe stamp image with the text2
Step 8 - use a scanner to separate the colorsof the photographed combined image.Step 9 - when the stamp is ready for printing,it goes through the step-and-repeat machinewhich multiplies the single stamp image many timesto make up a stamp sheet. The step-and-repeat distance(pitch) has been previously punched onto atape.Step 10 - The tape created in step 9 is insertedinto the step-and-repeat machine. Once inside themachine, the tape tells the machine how far apart toposition the stamps on the film.3
Step 11 - the stamp sheet film is now placedin a holding frame. The stamp design was enlargedto 250% in step 10Step 12 - the holding frame is inserted intostep-and-repeat machine.Step 13 - The lens in the step-and-repeat machinereduces the image on the film to final stampsize, and “steps and repeats” it onto the film.Step 14 - The film is retouched to remove allmarks that do not form part of the stamp design.4
Step 15 - A copper cylinder is prepared for imagetransfer.Step 16 - the image is transferred from thefilm to the copper cylinder.Step 17 - the image is etched by the etchingmachine.Step 18 - the completed etched image on thecylinder surface.Step 19 - checking the etched cylinder for defectsprior to printing.5
Step 23 - The printed stamp sheets are cut tosize with a guillotine cutter. They are now ready to bedelivered to Post Offices for distribution.Note: Technical information and Pictures were taken form Setempe Philatelic Magazine published by the South African Postal Service.7