ZE-NC2010 Installation instructions CAN-Bus update V13 - Zenec
ZE-NC2010 Installation instructions CAN-Bus update V13 - Zenec
ZE-NC2010 Installation instructions CAN-Bus update V13 - Zenec
- No tags were found...
You also want an ePaper? Increase the reach of your titles
YUMPU automatically turns print PDFs into web optimized ePapers that Google loves.
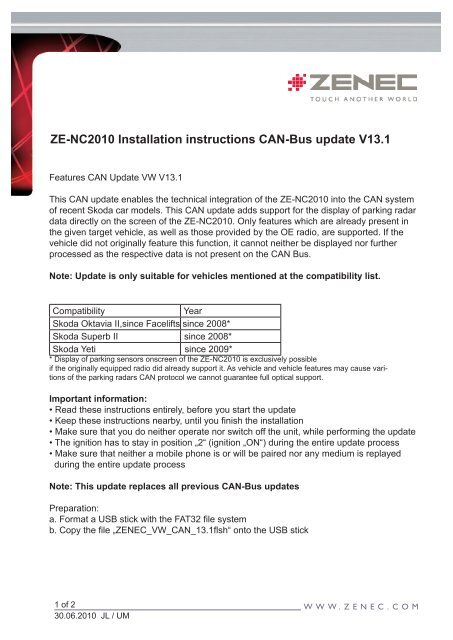
<strong>ZE</strong>-<strong>NC2010</strong> <strong>Installation</strong> <strong>instructions</strong> <strong>CAN</strong>-<strong>Bus</strong> <strong>update</strong> <strong>V13</strong>.1Features <strong>CAN</strong> Update VW <strong>V13</strong>.1This <strong>CAN</strong> <strong>update</strong> enables the technical integration of the <strong>ZE</strong>-<strong>NC2010</strong> into the <strong>CAN</strong> systemof recent Skoda car models. This <strong>CAN</strong> <strong>update</strong> adds support for the display of parking radardata directly on the screen of the <strong>ZE</strong>-<strong>NC2010</strong>. Only features which are already present inthe given target vehicle, as well as those provided by the OE radio, are supported. If thevehicle did not originally feature this function, it cannot neither be displayed nor furtherprocessed as the respective data is not present on the <strong>CAN</strong> <strong>Bus</strong>.Note: Update is only suitable for vehicles mentioned at the compatibility list.CompatibilityYearSkoda Oktavia II,since Facelifts since 2008*Skoda Superb II since 2008*Skoda Yeti since 2009** Display of parking sensors onscreen of the <strong>ZE</strong>-<strong>NC2010</strong> is exclusively possibleif the originally equipped radio did already support it. As vehicle and vehicle features may cause varitionsof the parking radars <strong>CAN</strong> protocol we cannot guarantee full optical support.Important information:• Read these <strong>instructions</strong> entirely, before you start the <strong>update</strong>• Keep these <strong>instructions</strong> nearby, until you finish the installation• Make sure that you do neither operate nor switch off the unit, while performing the <strong>update</strong>• The ignition has to stay in position „2“ (ignition „ON“) during the entire <strong>update</strong> process• Make sure that neither a mobile phone is or will be paired nor any medium is replayedduring the entire <strong>update</strong> processNote: This <strong>update</strong> replaces all previous <strong>CAN</strong>-<strong>Bus</strong> <strong>update</strong>sPreparation:a. Format a USB stick with the FAT32 file systemb. Copy the file „<strong>ZE</strong>NEC_VW_<strong>CAN</strong>_13.1flsh“ onto the USB stick1 of 230.06.2010 JL / UM
<strong>Installation</strong> of the <strong>CAN</strong>-<strong>Bus</strong> <strong>update</strong>a. Plug the prepared USB stick into your <strong>ZE</strong>-<strong>NC2010</strong>.b. Switch on the <strong>ZE</strong>-<strong>NC2010</strong> via the ignition. Note: The ignition has to stay inposition „2“ during the entire <strong>update</strong> process.c. Switch into the „radio“ mode using the FM/AM key.d. Open the setup menu and tap „Misc“. Tap the arrow icon on the lower right handto get onto page two, where you can find the entry „<strong>CAN</strong> Update“. Choose it andacknowledge with „OK“.e. The <strong>CAN</strong> <strong>update</strong> starts and will approximately take five minutes.The status isdisplayed on-screen. Make sure that the unit does neither get operated, nor in anycase, gets powered off during the <strong>update</strong>.Do not turn the ignition off during this process!f. A message that the process has been finished will be displayed on-screen after the<strong>update</strong>.g. Subsequently, completely disconnect the car battery for at least five minutes inorder to reset all control circuits. Reconnect it and do a software version check.Checking the <strong>CAN</strong>-<strong>Bus</strong> software versionAfter the <strong>CAN</strong>-<strong>Bus</strong> <strong>update</strong>, performing a version control is mandatory. (Setup> Version> page 2> Version). Only the version number of the ADP part is important. This numberis trailing the version designation of the MCU_V. After a succesfully performed <strong>update</strong> itshould display: ADP: 13.1. Should the displayed version deviate, repeat the <strong>update</strong> processuntil success.2 of 230.06.2010 JL / UM


