en/ACS800-04/U4 Hardware Manuals - VAE ProSys sro
en/ACS800-04/U4 Hardware Manuals - VAE ProSys sro
en/ACS800-04/U4 Hardware Manuals - VAE ProSys sro

You also want an ePaper? Increase the reach of your titles
YUMPU automatically turns print PDFs into web optimized ePapers that Google loves.
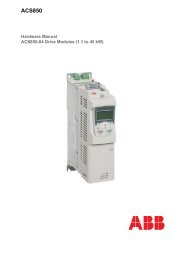
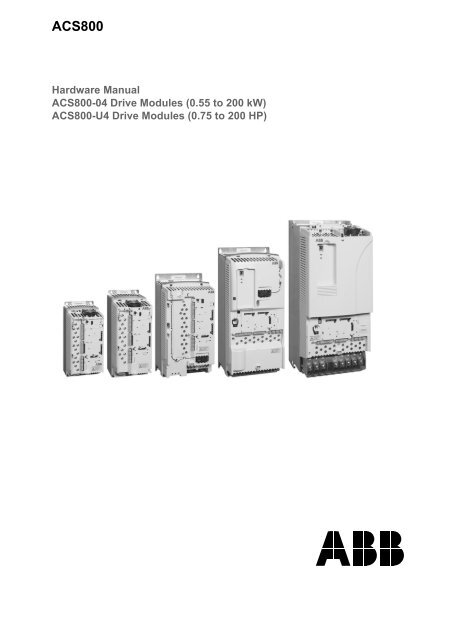
<strong>ACS800</strong>-<strong>04</strong> Drive Modules0.55 to 200 kW<strong>ACS800</strong>-<strong>U4</strong> Drive Modules0.75 to 200 HP<strong>Hardware</strong> Manual3AFE68372984 Rev E ENEFFECTIVE: 31.03.2008© 2008 ABB Oy. All Rights Reserved.
2NEW (page 24): Type codeThe table below contains the new option code definition for the Safe torque offfunction.CodeDescription+Q967 Safe torque off (STO)CHANGED (page 25): Main circuit and control / DiagramX41 - Prev<strong>en</strong>tion of unexpected start (+Q950, AGPS board) or Safe torque off(+Q967, ASTO board)NEW (page 49): Emerg<strong>en</strong>cy stopNote: If you add or modify the wiring in the drive safety circuits, <strong>en</strong>sure that theappropriate standards (e.g. IEC 61800-5-1, EN 62061, EN/ISO 13849-1 and -2) andthe ABB guidelines are met. After making the changes, verify the operation of thesafety function by testing it.NEW (page 51): Safe torque offThe drive supports the Safe torque off (STO) function according to standardsEN 61800-5-2:2007; EN/ISO 13849-1:2008, IEC 61508, and EN 62061:2005. Thefunction also corresponds to an uncontrolled stop in accordance with category 0 ofEN 602<strong>04</strong>-1 and prev<strong>en</strong>tion of unexpected start-up of EN 1037.The STO may be used where power removal is required to prev<strong>en</strong>t an unexpectedstart. The function disables the control voltage of the power semiconductors of thedrive output stage, thus prev<strong>en</strong>ting the inverter from g<strong>en</strong>erating the voltage requiredto rotate the motor (see the diagram below). By using this function, short-timeoperations (like cleaning) and/or maint<strong>en</strong>ance work on non-electrical parts of themachinery can be performed without switching off the power supply to the drive.Update Notice
3Update Notice
4WARNING! The Safe torque off function does not disconnect the voltage of the mainand auxiliary circuits from the drive. Therefore maint<strong>en</strong>ance work on electrical partsof the drive or the motor can only be carried out after isolating the drive system fromthe main supply.Note: The Safe torque off function can be used for stopping the drive in emerg<strong>en</strong>cystop situations. In the normal operating mode, use the Stop command instead. If arunning drive is stopped by using the function, the drive will trip and stop by coasting.If this is not acceptable, e.g. causes danger, the drive and machinery must bestopped using the appropriate stopping mode before using this function.Note concerning perman<strong>en</strong>t magnet motor drives in case of a multiple IGBTpower semiconductor failure: In spite of the activation of the Safe torque offfunction, the drive system can produce an alignm<strong>en</strong>t torque which maximally rotatesthe motor shaft by 180/p degrees. p d<strong>en</strong>otes the pole pair number.Note: If you add or modify the wiring in the drive safety circuits, <strong>en</strong>sure that theappropriate standards (e.g. IEC 61800-5-1, EN 62061, EN/ISO 13849-1 and -2) andthe ABB guidelines are met. After making the changes, verify the operation of thesafety function by testing it.CHANGED (pages 67-68): Connecting the control cables / TerminalsFrame sizes R2 to R4:X41 - Terminal for optional Prev<strong>en</strong>tion of unexpected start (+Q950) or optional Safetorque off (+Q967)Frame sizes R5 and R6:X41 for Prev<strong>en</strong>tion of unexpected start (+Q950, AGPS board) or for Safe torque off(+Q967, ASTO board)NEW (page 77): Safe torque off (+Q967), ASTO boardWARNING! Dangerous voltages can be pres<strong>en</strong>t at the ASTO board ev<strong>en</strong> wh<strong>en</strong> the24 V supply is switched off. Follow the Safety instructions on the first pages of thismanual and the instruction in this chapter wh<strong>en</strong> working on the ASTO board.Make sure that the drive is disconnected from the mains (input power) and the24 V source for the ASTO board is switched off during installation andmaint<strong>en</strong>ance. If the drive is already connected to the mains, wait for 5 min afterdisconnecting mains power.Update Notice
5Connect the optional ASTO board as follows:• Remove the cover of the <strong>en</strong>closed ASTO unit by undoing the fixing screws (1).• Ground the ASTO unit via the bottom plate of the <strong>en</strong>closure or via terminal X1:1 ofthe ASTO board.• Connect the cable delivered with the kit betwe<strong>en</strong> terminal block X2 of the ASTOboard (2) and drive terminal block X41.• Connect a cable betwe<strong>en</strong> connector X1 of the ASTO board (3) and the 24 Vsource.• Fast<strong>en</strong> the cover of the ASTO unit back with screws.12X2X124 V3Note: Location of the X41 terminal block varies according to the drive frame size,see page 67.Note: Maximum cable l<strong>en</strong>gth betwe<strong>en</strong> ASTO terminal block X2 and drive terminalblock is restricted to 3 m.For technical data, see section ASTO-11C in chapter Technical data.Update Notice
6The diagram below shows the connection betwe<strong>en</strong> the ASTO board and the drivewh<strong>en</strong> it is ready. For an example diagram of a complete Safe torque off circuit, seepage 3 (in this Update Notice).3AUA0000069101NEW (page 84): Installation check-listThe following step has be<strong>en</strong> added to the ELECTRICAL INSTALLATION procedure:Modules with the Safe torque off option (+967) only (ASTO board): The Safe torque offcircuit is completed and the supply voltage for ASTO-11C board is 24 V.Update Notice
7NEW (page 109): ASTO-11CNominal input voltage 24 V DCNominal input curr<strong>en</strong>t 40 mA (20mA per channel)X1 terminal sizes 4 x 2.5 mm 2Nominal output curr<strong>en</strong>t 0.4 AX2 terminal block type JST B4P-VHAmbi<strong>en</strong>t temperature 0...50°CRelative humidity Max. 90%, no cond<strong>en</strong>sation allowedDim<strong>en</strong>sions (with 167 x 128 x 52 mm (Height x Weight x Depth)<strong>en</strong>closure)Weight (with <strong>en</strong>closure) 0.75 kgNEW (page 109): Ambi<strong>en</strong>t conditionsModules with option +Q967: the installation site altitude in operation is 0 to 2000 m.Operationinstalled for stationary useInstallation site altitude [...]Modules with option +Q967:0 to 2000 mCHANGED (page 117): Dim<strong>en</strong>sional drawings / What this chapter containsDim<strong>en</strong>sional drawings of the <strong>ACS800</strong>-<strong>04</strong>/<strong>U4</strong>, flange mounting kits, AGPS board andASTO board are shown below. The dim<strong>en</strong>sions are giv<strong>en</strong> in millimetres and [inches].NEW/CHANGED (page 129): Dim<strong>en</strong>sional drawings / AGPS and ASTOboardsThe dim<strong>en</strong>sions of the AGPS and ASTO boards are the same.Update Notice
8Update Notice
5Safety instructionsWhat this chapter containsThis chapter contains the safety instructions which you must follow wh<strong>en</strong> installing,operating and servicing the drive. If ignored, physical injury or death may follow, ordamage may occur to the drive, the motor or driv<strong>en</strong> equipm<strong>en</strong>t. Read the safetyinstructions before you work on the unit.Use of warnings and notesThere are two types of safety instructions throughout this manual: warnings andnotes. Warnings caution you about conditions which can result in serious injury ordeath and/or damage to the equipm<strong>en</strong>t. They also tell you how to avoid the danger.Notes draw att<strong>en</strong>tion to a particular condition or fact, or give information on asubject. The warning symbols are used as follows:Dangerous voltage warning warns of high voltage which can causephysical injury and/or damage to the equipm<strong>en</strong>t.G<strong>en</strong>eral warning warns about conditions, other than those caused byelectricity, which can result in physical injury and/or damage to theequipm<strong>en</strong>t.Electrostatic discharge warning warns of electrostatic discharge whichcan damage the equipm<strong>en</strong>t.Hot surface warning warns of hot surfaces which can cause physicalinjury.Safety instructions
6Installation and maint<strong>en</strong>ance workThese warnings are int<strong>en</strong>ded for all who work on the drive, motor cable or motor.WARNING! Ignoring the following instructions can cause physical injury or death, ordamage to the equipm<strong>en</strong>t:• Only qualified electricians are allowed to install and maintain the drive.• Never work on the drive, the motor cable or the motor wh<strong>en</strong> main power isapplied. After switching off the input power, always wait for 5 min to let theintermediate circuit capacitors discharge before you start working on the drive,the motor or the motor cable.Always <strong>en</strong>sure by measuring with a multimeter (impedance at least 1 Mohm)that:1. voltage betwe<strong>en</strong> drive input phases U1, V1 and W1 and the frame is close to0V2. voltage betwe<strong>en</strong> terminals UDC+ and UDC- and the frame is close to 0 V.• Do not work on the control cables wh<strong>en</strong> power is applied to the drive or to theexternal control circuits. Externally supplied control circuits may causedangerous voltages inside the drive ev<strong>en</strong> wh<strong>en</strong> the main power on the drive isswitched off.• Do not make any insulation or voltage withstand tests on the drive or drivemodules.• Wh<strong>en</strong> reconnecting the motor cable, always check that the phase order iscorrect.Note:• The motor cable terminals on the drive are at a dangerously high voltage wh<strong>en</strong>the input power is on, regardless of whether the motor is running or not.• The brake control terminals (UDC+, UDC-, R+ and R- terminals) carry adangerous DC voltage (over 500 V).• Dep<strong>en</strong>ding on the external wiring, dangerous voltages (115 V, 220 V or 230 V)may be pres<strong>en</strong>t on the terminals of relay outputs RO1 to RO3 or on the optionalAGPS board (Prev<strong>en</strong>tion of Unexpected Start).• The Prev<strong>en</strong>tion of Unexpected Start function does not remove the voltage fromthe main and auxiliary circuits.• At installation sites above 2000 m (6562 ft), the terminals of the RMIO boardand optional modules attached to the board do not fulfil the Protective ExtraLow Voltage (PELV) requirem<strong>en</strong>ts stated in EN 50178.Safety instructions
7GroundingThese instructions are int<strong>en</strong>ded for all who are responsible for the grounding of thedrive.WARNING! Ignoring the following instructions can cause physical injury, death,increased electromagnetic interfer<strong>en</strong>ce and equipm<strong>en</strong>t malfunction:• Ground the drive, motor and adjoining equipm<strong>en</strong>t to <strong>en</strong>sure personnel safety inall circumstances, and to reduce electromagnetic emission and interfer<strong>en</strong>ce.• Make sure that grounding conductors are adequately sized as required bysafety regulations.• In a multiple-drive installation, connect each drive separately to protectiveearth (PE).• In first <strong>en</strong>vironm<strong>en</strong>t (EU EMC Directive): make a 360° high frequ<strong>en</strong>cygrounding of the motor cable <strong>en</strong>try at the cabinet lead-through.• Do not install a drive with EMC filter option +E202 or +E200 on an ungroundedpower system or a high resistance-grounded (over 30 ohms) power system.Note:• Power cable shields are suitable for equipm<strong>en</strong>t grounding conductors onlywh<strong>en</strong> adequately sized to meet safety regulations.• As the normal leakage curr<strong>en</strong>t of the drive is higher than 3.5 mA AC or 10 mADC (stated by EN 50178, 5.2.11.1), a fixed protective earth connection isrequired.Safety instructions
8Mechanical installation and maint<strong>en</strong>anceThese instructions are int<strong>en</strong>ded for all who install and service the drive.WARNING! Ignoring the following instructions can cause physical injury or death,or damage to the equipm<strong>en</strong>t:• Handle the unit carefully.• The drive is heavy. Do not lift it alone. Place the unit only on its back.• Beware of hot surfaces. Some parts, such as heatsinks of powersemiconductors, remain hot for a while after disconnection of the electricalsupply.• Make sure that dust from borings and grindings does not <strong>en</strong>ter the drive wh<strong>en</strong>installing. Electrically conductive dust inside the unit may cause damage ormalfunctioning.• Ensure suffici<strong>en</strong>t cooling.• Do not fast<strong>en</strong> the drive by riveting or welding.Printed circuit boardsWARNING! Ignoring the following instructions can cause damage to the printedcircuit boards:• The printed circuit boards contain compon<strong>en</strong>ts s<strong>en</strong>sitive to electrostaticdischarge. Wear a grounding wrist band wh<strong>en</strong> handling the boards. Do nottouch the boards unnecessarily.Fibre optic cablesWARNING! Ignoring the following instructions can cause equipm<strong>en</strong>t malfunctionand damage to the fibre optic cables:• Handle the fibre optic cables with care. Wh<strong>en</strong> unplugging optic cables, alwaysgrab the connector, not the cable itself. Do not touch the <strong>en</strong>ds of the fibres withbare hands as the fibre is extremely s<strong>en</strong>sitive to dirt. The minimum allowedb<strong>en</strong>d radius is 35 mm (1.4 in.).Safety instructions
9OperationThese warnings are int<strong>en</strong>ded for all who plan the operation of the drive or operatethe drive.WARNING! Ignoring the following instructions can cause physical injury or death,or damage to the equipm<strong>en</strong>t:• Before adjusting the drive and putting it into service, make sure that the motorand all driv<strong>en</strong> equipm<strong>en</strong>t are suitable for operation throughout the speed rangeprovided by the drive. The drive can be adjusted to operate the motor atspeeds above and below the speed provided by connecting the motor directlyto the power line.• Do not activate automatic fault reset functions of the Control Program ifdangerous situations can occur. Wh<strong>en</strong> activated, these functions will reset thedrive and resume operation after a fault.• Do not control the motor with the disconnecting device (means); instead, usethe control panel keys and , or commands via the I/O board of the drive.The maximum allowed number of charging cycles of the DC capacitors (i.e.power-ups by applying power) is five in t<strong>en</strong> minutes.Note:• If an external source for start command is selected and it is ON, the drive (withStandard / Motion Control Program) will start immediately after fault resetunless the drive is configured for 3-wire (a pulse) start/stop.• Wh<strong>en</strong> the control location is not set to Local (L not shown in the status row ofthe display), the stop key on the control panel will not stop the drive. To stopthe drive using the control panel, press the LOC/REM key and th<strong>en</strong> the stopkey .Safety instructions
10Perman<strong>en</strong>t magnet motorThese are additional warnings concerning perman<strong>en</strong>t magnet motor drives. Ignoringthe instructions can cause physical injury or death, or damage to the equipm<strong>en</strong>t.Installation and maint<strong>en</strong>ance workWARNING! Do not work on the drive wh<strong>en</strong> the perman<strong>en</strong>t magnet motor is rotating.Also, wh<strong>en</strong> the supply power is switched off and the inverter is stopped, a rotatingperman<strong>en</strong>t magnet motor feeds power to the intermediate circuit of the drive and thesupply connections become live.Before installation and maint<strong>en</strong>ance work on the drive:• Stop the motor.• Ensure that the motor cannot rotate during work. Prev<strong>en</strong>t the start-up of anydrives in the same mechanical group by op<strong>en</strong>ing the “prev<strong>en</strong>tion of unexpectedstart” switch and padlocking it. Make sure that no other system, like hydrauliccrawling drives, are able to rotate the motor directly or through any mechanicalconnection like felt, nip, rope, etc.• Ensure that there is no voltage on the drive power terminals:Alternative 1) Disconnect the motor from the drive with a safety switch or by othermeans. Measure that there is no voltage pres<strong>en</strong>t on the drive input or outputterminals (U1, V1, W1, U2, V2, W2, UDC+, UDC-).Alternative 2) Measure that there is no voltage pres<strong>en</strong>t on the drive input or outputterminals (U1, V1, W1, U2, V2, W2, UDC+, UDC-). Ground the drive outputterminals temporarily by connecting them together as well as to the PE.Alternative 3) If possible, both of the above.Start-up and operationWARNING! Do not run the motor over the rated speed. Motor overspeed leads toovervoltage which may damage or explode the capacitors in the intermediate circuitof the drive.Controlling a perman<strong>en</strong>t magnet motor is only allowed using the <strong>ACS800</strong> Perman<strong>en</strong>tMagnet Synchronous Motor Drive Control Program, or other control programs inscalar control mode.Safety instructions
11Table of cont<strong>en</strong>ts<strong>ACS800</strong> Single Drive <strong>Manuals</strong> . . . . . . . . . . . . . . . . . . . . . . . . . . . . . . . . . . . . . . . . . . . . . . . . . . . . . 2Safety instructionsWhat this chapter contains . . . . . . . . . . . . . . . . . . . . . . . . . . . . . . . . . . . . . . . . . . . . . . . . . . . . . . . . 5Use of warnings and notes . . . . . . . . . . . . . . . . . . . . . . . . . . . . . . . . . . . . . . . . . . . . . . . . . . . . . . . . 5Installation and maint<strong>en</strong>ance work . . . . . . . . . . . . . . . . . . . . . . . . . . . . . . . . . . . . . . . . . . . . . . . . . . 6Grounding . . . . . . . . . . . . . . . . . . . . . . . . . . . . . . . . . . . . . . . . . . . . . . . . . . . . . . . . . . . . . . . . 7Mechanical installation and maint<strong>en</strong>ance . . . . . . . . . . . . . . . . . . . . . . . . . . . . . . . . . . . . . . . . 8Printed circuit boards . . . . . . . . . . . . . . . . . . . . . . . . . . . . . . . . . . . . . . . . . . . . . . . . . . . . . . . . 8Fibre optic cables . . . . . . . . . . . . . . . . . . . . . . . . . . . . . . . . . . . . . . . . . . . . . . . . . . . . . . . . . . . 8Operation . . . . . . . . . . . . . . . . . . . . . . . . . . . . . . . . . . . . . . . . . . . . . . . . . . . . . . . . . . . . . . . . . . . . . . 9Perman<strong>en</strong>t magnet motor . . . . . . . . . . . . . . . . . . . . . . . . . . . . . . . . . . . . . . . . . . . . . . . . . . . . . . . . 10Installation and maint<strong>en</strong>ance work . . . . . . . . . . . . . . . . . . . . . . . . . . . . . . . . . . . . . . . . . . . . . 10Start-up and operation . . . . . . . . . . . . . . . . . . . . . . . . . . . . . . . . . . . . . . . . . . . . . . . . . . . . . . 10Table of cont<strong>en</strong>tsAbout this manualWhat this chapter contains . . . . . . . . . . . . . . . . . . . . . . . . . . . . . . . . . . . . . . . . . . . . . . . . . . . . . . . 17Compatibility . . . . . . . . . . . . . . . . . . . . . . . . . . . . . . . . . . . . . . . . . . . . . . . . . . . . . . . . . . . . . . . . . . 17Int<strong>en</strong>ded audi<strong>en</strong>ce . . . . . . . . . . . . . . . . . . . . . . . . . . . . . . . . . . . . . . . . . . . . . . . . . . . . . . . . . . . . . . 17Categorization according to the frame size . . . . . . . . . . . . . . . . . . . . . . . . . . . . . . . . . . . . . . . . . . . 17Categorization according to the + code . . . . . . . . . . . . . . . . . . . . . . . . . . . . . . . . . . . . . . . . . . . . . . 17Cont<strong>en</strong>ts . . . . . . . . . . . . . . . . . . . . . . . . . . . . . . . . . . . . . . . . . . . . . . . . . . . . . . . . . . . . . . . . . . . . . 18Installation and commissioning flowchart . . . . . . . . . . . . . . . . . . . . . . . . . . . . . . . . . . . . . . . . . . . . 19Product and service inquiries . . . . . . . . . . . . . . . . . . . . . . . . . . . . . . . . . . . . . . . . . . . . . . . . . . . . . 20Product training . . . . . . . . . . . . . . . . . . . . . . . . . . . . . . . . . . . . . . . . . . . . . . . . . . . . . . . . . . . . . . . . 20Providing feedback on ABB Drives manuals . . . . . . . . . . . . . . . . . . . . . . . . . . . . . . . . . . . . . . . . . . 20Terms and abbreviations . . . . . . . . . . . . . . . . . . . . . . . . . . . . . . . . . . . . . . . . . . . . . . . . . . . . . . . . . 21<strong>ACS800</strong>-<strong>04</strong>/<strong>U4</strong>What this chapter contains . . . . . . . . . . . . . . . . . . . . . . . . . . . . . . . . . . . . . . . . . . . . . . . . . . . . . . . 23Layout . . . . . . . . . . . . . . . . . . . . . . . . . . . . . . . . . . . . . . . . . . . . . . . . . . . . . . . . . . . . . . . . . . . . . . . 23Type code . . . . . . . . . . . . . . . . . . . . . . . . . . . . . . . . . . . . . . . . . . . . . . . . . . . . . . . . . . . . . . . . . . . . 24Main circuit and control . . . . . . . . . . . . . . . . . . . . . . . . . . . . . . . . . . . . . . . . . . . . . . . . . . . . . . . . . . 25Diagram . . . . . . . . . . . . . . . . . . . . . . . . . . . . . . . . . . . . . . . . . . . . . . . . . . . . . . . . . . . . . . . . . 25Operation . . . . . . . . . . . . . . . . . . . . . . . . . . . . . . . . . . . . . . . . . . . . . . . . . . . . . . . . . . . . . . . . 26Printed circuit boards . . . . . . . . . . . . . . . . . . . . . . . . . . . . . . . . . . . . . . . . . . . . . . . . . . . . . . . 26Motor control . . . . . . . . . . . . . . . . . . . . . . . . . . . . . . . . . . . . . . . . . . . . . . . . . . . . . . . . . . . . . 26Planning the cabinet assemblyTable of cont<strong>en</strong>ts
12What this chapter contains . . . . . . . . . . . . . . . . . . . . . . . . . . . . . . . . . . . . . . . . . . . . . . . . . . . . . . . .27Cabinet construction . . . . . . . . . . . . . . . . . . . . . . . . . . . . . . . . . . . . . . . . . . . . . . . . . . . . . . . . . . . . .27Disposition of the devices . . . . . . . . . . . . . . . . . . . . . . . . . . . . . . . . . . . . . . . . . . . . . . . . . . . .27Grounding of mounting structures . . . . . . . . . . . . . . . . . . . . . . . . . . . . . . . . . . . . . . . . . . . . . .27Free space around the unit . . . . . . . . . . . . . . . . . . . . . . . . . . . . . . . . . . . . . . . . . . . . . . . . . . . . . . .28Cooling and degrees of protection . . . . . . . . . . . . . . . . . . . . . . . . . . . . . . . . . . . . . . . . . . . . . . . . . .29Prev<strong>en</strong>ting the recirculation of hot air . . . . . . . . . . . . . . . . . . . . . . . . . . . . . . . . . . . . . . . . . . .30Outside the cabinet . . . . . . . . . . . . . . . . . . . . . . . . . . . . . . . . . . . . . . . . . . . . . . . . . . . .30Inside the cabinet . . . . . . . . . . . . . . . . . . . . . . . . . . . . . . . . . . . . . . . . . . . . . . . . . . . . . .31Cabinet layout example . . . . . . . . . . . . . . . . . . . . . . . . . . . . . . . . . . . . . . . . . . . . . . . . . . . . . .31Cabinet heaters . . . . . . . . . . . . . . . . . . . . . . . . . . . . . . . . . . . . . . . . . . . . . . . . . . . . . . . . . . . . . . . .32Mounting the optional control panel . . . . . . . . . . . . . . . . . . . . . . . . . . . . . . . . . . . . . . . . . . . . . . . . .32Installing the control panel directly on the cabinet door . . . . . . . . . . . . . . . . . . . . . . . . . . . . .32Control panel mounting platform kit (RPMP) . . . . . . . . . . . . . . . . . . . . . . . . . . . . . . . . . . . . . .33EMC requirem<strong>en</strong>ts . . . . . . . . . . . . . . . . . . . . . . . . . . . . . . . . . . . . . . . . . . . . . . . . . . . . . . . . . . . . . .33Mechanical installationUnpacking the unit . . . . . . . . . . . . . . . . . . . . . . . . . . . . . . . . . . . . . . . . . . . . . . . . . . . . . . . . . . . . . .35Delivery check . . . . . . . . . . . . . . . . . . . . . . . . . . . . . . . . . . . . . . . . . . . . . . . . . . . . . . . . . . . . .36Before installation . . . . . . . . . . . . . . . . . . . . . . . . . . . . . . . . . . . . . . . . . . . . . . . . . . . . . . . . . . . . . . .36Requirem<strong>en</strong>ts for the installation site . . . . . . . . . . . . . . . . . . . . . . . . . . . . . . . . . . . . . . . . . . .36Floor . . . . . . . . . . . . . . . . . . . . . . . . . . . . . . . . . . . . . . . . . . . . . . . . . . . . . . . . . . . . . . . .36Installation procedure . . . . . . . . . . . . . . . . . . . . . . . . . . . . . . . . . . . . . . . . . . . . . . . . . . . . . . . . . . . .37Flange mounting . . . . . . . . . . . . . . . . . . . . . . . . . . . . . . . . . . . . . . . . . . . . . . . . . . . . . . . . . . . . . . . .38Planning the electrical installationWhat this chapter contains . . . . . . . . . . . . . . . . . . . . . . . . . . . . . . . . . . . . . . . . . . . . . . . . . . . . . . . .41Motor selection and compatibility . . . . . . . . . . . . . . . . . . . . . . . . . . . . . . . . . . . . . . . . . . . . . . . . . . .41Protecting the motor insulation and bearings . . . . . . . . . . . . . . . . . . . . . . . . . . . . . . . . . . . . .42Requirem<strong>en</strong>ts table . . . . . . . . . . . . . . . . . . . . . . . . . . . . . . . . . . . . . . . . . . . . . . . . . . . . . . . . .43Perman<strong>en</strong>t magnet synchronous motor . . . . . . . . . . . . . . . . . . . . . . . . . . . . . . . . . . . . . . . . . . . . . .46Supply connection . . . . . . . . . . . . . . . . . . . . . . . . . . . . . . . . . . . . . . . . . . . . . . . . . . . . . . . . . . . . . .46Disconnecting device (means) . . . . . . . . . . . . . . . . . . . . . . . . . . . . . . . . . . . . . . . . . . . . . . . .46EEA / Europe . . . . . . . . . . . . . . . . . . . . . . . . . . . . . . . . . . . . . . . . . . . . . . . . . . . . . . . . .47US . . . . . . . . . . . . . . . . . . . . . . . . . . . . . . . . . . . . . . . . . . . . . . . . . . . . . . . . . . . . . . . . .47Main contactor . . . . . . . . . . . . . . . . . . . . . . . . . . . . . . . . . . . . . . . . . . . . . . . . . . . . . . . . . . . . .47Fuses . . . . . . . . . . . . . . . . . . . . . . . . . . . . . . . . . . . . . . . . . . . . . . . . . . . . . . . . . . . . . . . . . . .47Thermal overload and short-circuit protection . . . . . . . . . . . . . . . . . . . . . . . . . . . . . . . . . . . . . . . . .47Thermal overload protection of the drive and the input and motor cables . . . . . . . . . . . . . . .47Thermal overload protection of the motor . . . . . . . . . . . . . . . . . . . . . . . . . . . . . . . . . . . . . . . .48Protection against short-circuit in the motor cable . . . . . . . . . . . . . . . . . . . . . . . . . . . . . . . . .48Protection against short-circuit inside the drive or in the supply cable . . . . . . . . . . . . . . . . . .48Ground fault protection . . . . . . . . . . . . . . . . . . . . . . . . . . . . . . . . . . . . . . . . . . . . . . . . . . . . . . . . . . .49Emerg<strong>en</strong>cy stop devices . . . . . . . . . . . . . . . . . . . . . . . . . . . . . . . . . . . . . . . . . . . . . . . . . . . . . . . . .49Prev<strong>en</strong>tion of Unexpected Start . . . . . . . . . . . . . . . . . . . . . . . . . . . . . . . . . . . . . . . . . . . . . . . . . . . .50Selecting the power cables . . . . . . . . . . . . . . . . . . . . . . . . . . . . . . . . . . . . . . . . . . . . . . . . . . . . . . .51G<strong>en</strong>eral rules . . . . . . . . . . . . . . . . . . . . . . . . . . . . . . . . . . . . . . . . . . . . . . . . . . . . . . . . . . . . . .51Alternative power cable types . . . . . . . . . . . . . . . . . . . . . . . . . . . . . . . . . . . . . . . . . . . . . . . . .52Table of cont<strong>en</strong>ts
13Motor cable shield . . . . . . . . . . . . . . . . . . . . . . . . . . . . . . . . . . . . . . . . . . . . . . . . . . . . . . . . . 52Additional US requirem<strong>en</strong>ts . . . . . . . . . . . . . . . . . . . . . . . . . . . . . . . . . . . . . . . . . . . . . . . . . . 53Conduit . . . . . . . . . . . . . . . . . . . . . . . . . . . . . . . . . . . . . . . . . . . . . . . . . . . . . . . . . . . . . 53Armored cable / shielded power cable . . . . . . . . . . . . . . . . . . . . . . . . . . . . . . . . . . . . . 53Power factor comp<strong>en</strong>sation capacitors . . . . . . . . . . . . . . . . . . . . . . . . . . . . . . . . . . . . . . . . . . . . . . 54Equipm<strong>en</strong>t connected to the motor cable . . . . . . . . . . . . . . . . . . . . . . . . . . . . . . . . . . . . . . . . . . . . 54Installation of safety switches, contactors, connection boxes, etc. . . . . . . . . . . . . . . . . . . . . 54Bypass connection . . . . . . . . . . . . . . . . . . . . . . . . . . . . . . . . . . . . . . . . . . . . . . . . . . . . 54Before op<strong>en</strong>ing a contactor (DTC control mode selected) . . . . . . . . . . . . . . . . . . . . . . . . . . . 55Protecting the relay output contacts and att<strong>en</strong>uating disturbances in case of inductive loads . . . . 55Selecting the control cables . . . . . . . . . . . . . . . . . . . . . . . . . . . . . . . . . . . . . . . . . . . . . . . . . . . . . . 56Relay cable . . . . . . . . . . . . . . . . . . . . . . . . . . . . . . . . . . . . . . . . . . . . . . . . . . . . . . . . . . . . . . 56Control panel cable . . . . . . . . . . . . . . . . . . . . . . . . . . . . . . . . . . . . . . . . . . . . . . . . . . . . . . . . 56Connection of a motor temperature s<strong>en</strong>sor to the drive I/O . . . . . . . . . . . . . . . . . . . . . . . . . . . . . . 57Installation sites above 2000 metres (6562 feet) . . . . . . . . . . . . . . . . . . . . . . . . . . . . . . . . . . . . . . . 57Routing the cables . . . . . . . . . . . . . . . . . . . . . . . . . . . . . . . . . . . . . . . . . . . . . . . . . . . . . . . . . . . . . . 57Control cable ducts . . . . . . . . . . . . . . . . . . . . . . . . . . . . . . . . . . . . . . . . . . . . . . . . . . . . . . . . 58Electrical installationWhat this chapter contains . . . . . . . . . . . . . . . . . . . . . . . . . . . . . . . . . . . . . . . . . . . . . . . . . . . . . . . 59Checking the insulation of the assembly . . . . . . . . . . . . . . . . . . . . . . . . . . . . . . . . . . . . . . . . . . . . . 59Drive . . . . . . . . . . . . . . . . . . . . . . . . . . . . . . . . . . . . . . . . . . . . . . . . . . . . . . . . . . . . . . . . . . . . 59Input cable . . . . . . . . . . . . . . . . . . . . . . . . . . . . . . . . . . . . . . . . . . . . . . . . . . . . . . . . . . . . . . . 59Motor and motor cable . . . . . . . . . . . . . . . . . . . . . . . . . . . . . . . . . . . . . . . . . . . . . . . . . . . . . . 59IT (ungrounded) systems . . . . . . . . . . . . . . . . . . . . . . . . . . . . . . . . . . . . . . . . . . . . . . . . . . . . . . . . 60Power cable connection . . . . . . . . . . . . . . . . . . . . . . . . . . . . . . . . . . . . . . . . . . . . . . . . . . . . . . . . . 61Connecting the power cables . . . . . . . . . . . . . . . . . . . . . . . . . . . . . . . . . . . . . . . . . . . . . . . . . 61Grounding the motor cable shield at the motor <strong>en</strong>d . . . . . . . . . . . . . . . . . . . . . . . . . . . 62Frame sizes R2 to R4 . . . . . . . . . . . . . . . . . . . . . . . . . . . . . . . . . . . . . . . . . . . . . . . . . . 63Frame size R5 . . . . . . . . . . . . . . . . . . . . . . . . . . . . . . . . . . . . . . . . . . . . . . . . . . . . . . . 63Frame size R6: Cable lug installation [16 to 70 mm2 (6 to 2/0 AWG) cables] . . . . . . . 64Power cable protection . . . . . . . . . . . . . . . . . . . . . . . . . . . . . . . . . . . . . . . . . . . . . . . . . . . . . 65Frame size R5 . . . . . . . . . . . . . . . . . . . . . . . . . . . . . . . . . . . . . . . . . . . . . . . . . . . . . . . 65Frame size R6 . . . . . . . . . . . . . . . . . . . . . . . . . . . . . . . . . . . . . . . . . . . . . . . . . . . . . . . 66Warning sticker . . . . . . . . . . . . . . . . . . . . . . . . . . . . . . . . . . . . . . . . . . . . . . . . . . . . . . . . . . . 66Connecting the control cables . . . . . . . . . . . . . . . . . . . . . . . . . . . . . . . . . . . . . . . . . . . . . . . . . . . . . 67Terminals . . . . . . . . . . . . . . . . . . . . . . . . . . . . . . . . . . . . . . . . . . . . . . . . . . . . . . . . . . . . . . . . 67360 degrees grounding . . . . . . . . . . . . . . . . . . . . . . . . . . . . . . . . . . . . . . . . . . . . . . . . . . . . . 69Wh<strong>en</strong> the outer surface of the shield is covered with non-conductive material . . . . . . 69Connecting the shield wires . . . . . . . . . . . . . . . . . . . . . . . . . . . . . . . . . . . . . . . . . . . . . . . . . . 69Cabling of I/O and fieldbus modules . . . . . . . . . . . . . . . . . . . . . . . . . . . . . . . . . . . . . . . . . . . 70Pulse <strong>en</strong>coder module cabling . . . . . . . . . . . . . . . . . . . . . . . . . . . . . . . . . . . . . . . . . . . . . . . . 70Installation of optional modules and PC . . . . . . . . . . . . . . . . . . . . . . . . . . . . . . . . . . . . . . . . . . . . . 71Fibre optic link . . . . . . . . . . . . . . . . . . . . . . . . . . . . . . . . . . . . . . . . . . . . . . . . . . . . . . . . . . . . 71External +24 V power supply for the RMIO board via terminal X34 . . . . . . . . . . . . . . . . . . . . . . . . 71Parameter settings . . . . . . . . . . . . . . . . . . . . . . . . . . . . . . . . . . . . . . . . . . . . . . . . . . . . . . . . . 71Connecting +24 V external power supply . . . . . . . . . . . . . . . . . . . . . . . . . . . . . . . . . . . . . . . 71Prev<strong>en</strong>tion of Unexpected Start, AGPS board . . . . . . . . . . . . . . . . . . . . . . . . . . . . . . . . . . . . . . . . 74Table of cont<strong>en</strong>ts
14Motor control and I/O board (RMIO)What this chapter contains . . . . . . . . . . . . . . . . . . . . . . . . . . . . . . . . . . . . . . . . . . . . . . . . . . . . . . . .77Note on terminal labelling . . . . . . . . . . . . . . . . . . . . . . . . . . . . . . . . . . . . . . . . . . . . . . . . . . . . . . . . .77Note on external power supply . . . . . . . . . . . . . . . . . . . . . . . . . . . . . . . . . . . . . . . . . . . . . . . . . . . . .77Parameter settings . . . . . . . . . . . . . . . . . . . . . . . . . . . . . . . . . . . . . . . . . . . . . . . . . . . . . . . . .77External control connections (non-US) . . . . . . . . . . . . . . . . . . . . . . . . . . . . . . . . . . . . . . . . . .78External control connections (US) . . . . . . . . . . . . . . . . . . . . . . . . . . . . . . . . . . . . . . . . . . . . . .79RMIO board specifications . . . . . . . . . . . . . . . . . . . . . . . . . . . . . . . . . . . . . . . . . . . . . . . . . . . . . . . .80Analogue inputs . . . . . . . . . . . . . . . . . . . . . . . . . . . . . . . . . . . . . . . . . . . . . . . . . . . . . . . . . . .80Constant voltage output . . . . . . . . . . . . . . . . . . . . . . . . . . . . . . . . . . . . . . . . . . . . . . . . . . . . .80Auxiliary power output . . . . . . . . . . . . . . . . . . . . . . . . . . . . . . . . . . . . . . . . . . . . . . . . . . . . . . .80Analogue outputs . . . . . . . . . . . . . . . . . . . . . . . . . . . . . . . . . . . . . . . . . . . . . . . . . . . . . . . . . .80Digital inputs . . . . . . . . . . . . . . . . . . . . . . . . . . . . . . . . . . . . . . . . . . . . . . . . . . . . . . . . . . . . . .80Relay outputs . . . . . . . . . . . . . . . . . . . . . . . . . . . . . . . . . . . . . . . . . . . . . . . . . . . . . . . . . . . . .81DDCS fibre optic link . . . . . . . . . . . . . . . . . . . . . . . . . . . . . . . . . . . . . . . . . . . . . . . . . . . . . . . .8124 V DC power input . . . . . . . . . . . . . . . . . . . . . . . . . . . . . . . . . . . . . . . . . . . . . . . . . . . . . . . .81Installation checklistChecklist . . . . . . . . . . . . . . . . . . . . . . . . . . . . . . . . . . . . . . . . . . . . . . . . . . . . . . . . . . . . . . . . . . . . . .83Maint<strong>en</strong>anceWhat this chapter contains . . . . . . . . . . . . . . . . . . . . . . . . . . . . . . . . . . . . . . . . . . . . . . . . . . . . . . . .85Safety . . . . . . . . . . . . . . . . . . . . . . . . . . . . . . . . . . . . . . . . . . . . . . . . . . . . . . . . . . . . . . . . . . . . . . . .85Maint<strong>en</strong>ance intervals . . . . . . . . . . . . . . . . . . . . . . . . . . . . . . . . . . . . . . . . . . . . . . . . . . . . . . . . . . .85Heatsink . . . . . . . . . . . . . . . . . . . . . . . . . . . . . . . . . . . . . . . . . . . . . . . . . . . . . . . . . . . . . . . . . . . . . .85Fan . . . . . . . . . . . . . . . . . . . . . . . . . . . . . . . . . . . . . . . . . . . . . . . . . . . . . . . . . . . . . . . . . . . . . . . . . .86Fan replacem<strong>en</strong>t (R2, R3) . . . . . . . . . . . . . . . . . . . . . . . . . . . . . . . . . . . . . . . . . . . . . . . . . . . .86Fan replacem<strong>en</strong>t (R4) . . . . . . . . . . . . . . . . . . . . . . . . . . . . . . . . . . . . . . . . . . . . . . . . . . . . . . .87Fan replacem<strong>en</strong>t (R5) . . . . . . . . . . . . . . . . . . . . . . . . . . . . . . . . . . . . . . . . . . . . . . . . . . . . . . .88Fan replacem<strong>en</strong>t (R6) . . . . . . . . . . . . . . . . . . . . . . . . . . . . . . . . . . . . . . . . . . . . . . . . . . . . . . .89Additional fan . . . . . . . . . . . . . . . . . . . . . . . . . . . . . . . . . . . . . . . . . . . . . . . . . . . . . . . . . . . . . . . . . .89Replacem<strong>en</strong>t (R2, R3) . . . . . . . . . . . . . . . . . . . . . . . . . . . . . . . . . . . . . . . . . . . . . . . . . . . . . .89Replacem<strong>en</strong>t (R4, R5) . . . . . . . . . . . . . . . . . . . . . . . . . . . . . . . . . . . . . . . . . . . . . . . . . . . . . .90Replacem<strong>en</strong>t (R6) . . . . . . . . . . . . . . . . . . . . . . . . . . . . . . . . . . . . . . . . . . . . . . . . . . . . . . . . . .90Capacitors . . . . . . . . . . . . . . . . . . . . . . . . . . . . . . . . . . . . . . . . . . . . . . . . . . . . . . . . . . . . . . . . . . . .90Reforming . . . . . . . . . . . . . . . . . . . . . . . . . . . . . . . . . . . . . . . . . . . . . . . . . . . . . . . . . . . . . . . .90LEDs . . . . . . . . . . . . . . . . . . . . . . . . . . . . . . . . . . . . . . . . . . . . . . . . . . . . . . . . . . . . . . . . . . . . . . . . .90Technical dataWhat this chapter contains . . . . . . . . . . . . . . . . . . . . . . . . . . . . . . . . . . . . . . . . . . . . . . . . . . . . . . . .91IEC data . . . . . . . . . . . . . . . . . . . . . . . . . . . . . . . . . . . . . . . . . . . . . . . . . . . . . . . . . . . . . . . . . . . . . .91Ratings . . . . . . . . . . . . . . . . . . . . . . . . . . . . . . . . . . . . . . . . . . . . . . . . . . . . . . . . . . . . . . . . . .91Symbols . . . . . . . . . . . . . . . . . . . . . . . . . . . . . . . . . . . . . . . . . . . . . . . . . . . . . . . . . . . . . . . . .93Sizing . . . . . . . . . . . . . . . . . . . . . . . . . . . . . . . . . . . . . . . . . . . . . . . . . . . . . . . . . . . . . . . . . . .93Derating . . . . . . . . . . . . . . . . . . . . . . . . . . . . . . . . . . . . . . . . . . . . . . . . . . . . . . . . . . . . . . . . . .94Temperature derating . . . . . . . . . . . . . . . . . . . . . . . . . . . . . . . . . . . . . . . . . . . . . . . . . .94Table of cont<strong>en</strong>ts
15Altitude derating . . . . . . . . . . . . . . . . . . . . . . . . . . . . . . . . . . . . . . . . . . . . . . . . . . . . . . 94Cooling characteristics . . . . . . . . . . . . . . . . . . . . . . . . . . . . . . . . . . . . . . . . . . . . . . . . . . . . . . 94Cooling requirem<strong>en</strong>ts for flange mounting . . . . . . . . . . . . . . . . . . . . . . . . . . . . . . . . . . . . . . . 94Fuses . . . . . . . . . . . . . . . . . . . . . . . . . . . . . . . . . . . . . . . . . . . . . . . . . . . . . . . . . . . . . . . . . . . 95Frame sizes R2 to R4 . . . . . . . . . . . . . . . . . . . . . . . . . . . . . . . . . . . . . . . . . . . . . . . . . . 95Frame sizes R5 and R6 . . . . . . . . . . . . . . . . . . . . . . . . . . . . . . . . . . . . . . . . . . . . . . . . 96Calculation example . . . . . . . . . . . . . . . . . . . . . . . . . . . . . . . . . . . . . . . . . . . . . . . . . . . 97gG fuses . . . . . . . . . . . . . . . . . . . . . . . . . . . . . . . . . . . . . . . . . . . . . . . . . . . . . . . . . . 98Ultrarapid (aR) fuses . . . . . . . . . . . . . . . . . . . . . . . . . . . . . . . . . . . . . . . . . . . . . . . . . . 99Quick guide for selecting betwe<strong>en</strong> gG and aR fuses . . . . . . . . . . . . . . . . . . . . . . . . . 100Cable types . . . . . . . . . . . . . . . . . . . . . . . . . . . . . . . . . . . . . . . . . . . . . . . . . . . . . . . . . . . . . 101Cable <strong>en</strong>tries . . . . . . . . . . . . . . . . . . . . . . . . . . . . . . . . . . . . . . . . . . . . . . . . . . . . . . . . . . . . 102Dim<strong>en</strong>sions, weights and noise . . . . . . . . . . . . . . . . . . . . . . . . . . . . . . . . . . . . . . . . . . . . . . 102NEMA data . . . . . . . . . . . . . . . . . . . . . . . . . . . . . . . . . . . . . . . . . . . . . . . . . . . . . . . . . . . . . . . . . . 103Ratings . . . . . . . . . . . . . . . . . . . . . . . . . . . . . . . . . . . . . . . . . . . . . . . . . . . . . . . . . . . . . . . . . 103Symbols . . . . . . . . . . . . . . . . . . . . . . . . . . . . . . . . . . . . . . . . . . . . . . . . . . . . . . . . . . . . . . . . 1<strong>04</strong>Sizing . . . . . . . . . . . . . . . . . . . . . . . . . . . . . . . . . . . . . . . . . . . . . . . . . . . . . . . . . . . . . . . . . . 1<strong>04</strong>Derating . . . . . . . . . . . . . . . . . . . . . . . . . . . . . . . . . . . . . . . . . . . . . . . . . . . . . . . . . . . . . . . . 1<strong>04</strong>Fuses . . . . . . . . . . . . . . . . . . . . . . . . . . . . . . . . . . . . . . . . . . . . . . . . . . . . . . . . . . . . . . . . . . 105Cable types . . . . . . . . . . . . . . . . . . . . . . . . . . . . . . . . . . . . . . . . . . . . . . . . . . . . . . . . . . . . . 106Cable <strong>en</strong>tries . . . . . . . . . . . . . . . . . . . . . . . . . . . . . . . . . . . . . . . . . . . . . . . . . . . . . . . . . . . . 107Dim<strong>en</strong>sions, weights and noise . . . . . . . . . . . . . . . . . . . . . . . . . . . . . . . . . . . . . . . . . . . . 107Input power connection . . . . . . . . . . . . . . . . . . . . . . . . . . . . . . . . . . . . . . . . . . . . . . . . . . . . . . . . . 107Motor connection . . . . . . . . . . . . . . . . . . . . . . . . . . . . . . . . . . . . . . . . . . . . . . . . . . . . . . . . . . . . . . 108Effici<strong>en</strong>cy . . . . . . . . . . . . . . . . . . . . . . . . . . . . . . . . . . . . . . . . . . . . . . . . . . . . . . . . . . . . . . . . . . . . 108Cooling . . . . . . . . . . . . . . . . . . . . . . . . . . . . . . . . . . . . . . . . . . . . . . . . . . . . . . . . . . . . . . . . . . . . . 108Degrees of protection . . . . . . . . . . . . . . . . . . . . . . . . . . . . . . . . . . . . . . . . . . . . . . . . . . . . . . . . . . 108AGPS-11C . . . . . . . . . . . . . . . . . . . . . . . . . . . . . . . . . . . . . . . . . . . . . . . . . . . . . . . . . . . . . . . . . . . 109Ambi<strong>en</strong>t conditions . . . . . . . . . . . . . . . . . . . . . . . . . . . . . . . . . . . . . . . . . . . . . . . . . . . . . . . . . . . . 109Materials . . . . . . . . . . . . . . . . . . . . . . . . . . . . . . . . . . . . . . . . . . . . . . . . . . . . . . . . . . . . . . . . . . . . 110Applicable standards . . . . . . . . . . . . . . . . . . . . . . . . . . . . . . . . . . . . . . . . . . . . . . . . . . . . . . . . . . . 110CE marking . . . . . . . . . . . . . . . . . . . . . . . . . . . . . . . . . . . . . . . . . . . . . . . . . . . . . . . . . . . . . . . . . . 111Definitions . . . . . . . . . . . . . . . . . . . . . . . . . . . . . . . . . . . . . . . . . . . . . . . . . . . . . . . . . . . . . . 111Compliance with the EMC Directive . . . . . . . . . . . . . . . . . . . . . . . . . . . . . . . . . . . . . . . . . . . 111Compliance with the EN 61800-3 (20<strong>04</strong>) . . . . . . . . . . . . . . . . . . . . . . . . . . . . . . . . . . . . . . . 111First <strong>en</strong>vironm<strong>en</strong>t (drive of category C2) . . . . . . . . . . . . . . . . . . . . . . . . . . . . . . . . . . 111Second <strong>en</strong>vironm<strong>en</strong>t (drive of category C3) . . . . . . . . . . . . . . . . . . . . . . . . . . . . . . . . 112Second <strong>en</strong>vironm<strong>en</strong>t (drive of category C4) . . . . . . . . . . . . . . . . . . . . . . . . . . . . . . . . 112Machinery Directive . . . . . . . . . . . . . . . . . . . . . . . . . . . . . . . . . . . . . . . . . . . . . . . . . . . . . . . 112“C-tick” marking . . . . . . . . . . . . . . . . . . . . . . . . . . . . . . . . . . . . . . . . . . . . . . . . . . . . . . . . . . . . . . 113Definitions . . . . . . . . . . . . . . . . . . . . . . . . . . . . . . . . . . . . . . . . . . . . . . . . . . . . . . . . . . . . . . 113Compliance with IEC 61800-3 . . . . . . . . . . . . . . . . . . . . . . . . . . . . . . . . . . . . . . . . . . . . . . . 113First <strong>en</strong>vironm<strong>en</strong>t (drive of category C2) . . . . . . . . . . . . . . . . . . . . . . . . . . . . . . . . . . 113Second <strong>en</strong>vironm<strong>en</strong>t (drive of category C3) . . . . . . . . . . . . . . . . . . . . . . . . . . . . . . . . 114Second <strong>en</strong>vironm<strong>en</strong>t (drive of category C4) . . . . . . . . . . . . . . . . . . . . . . . . . . . . . . . . 114Marine type approvals . . . . . . . . . . . . . . . . . . . . . . . . . . . . . . . . . . . . . . . . . . . . . . . . . . . . . . . . . . 114UL/CSA markings . . . . . . . . . . . . . . . . . . . . . . . . . . . . . . . . . . . . . . . . . . . . . . . . . . . . . . . . . . . . . 115UL . . . . . . . . . . . . . . . . . . . . . . . . . . . . . . . . . . . . . . . . . . . . . . . . . . . . . . . . . . . . . . . . 115Equipm<strong>en</strong>t warranty and liability . . . . . . . . . . . . . . . . . . . . . . . . . . . . . . . . . . . . . . . . . . . . . . . . . . 115Product protection in the US . . . . . . . . . . . . . . . . . . . . . . . . . . . . . . . . . . . . . . . . . . . . . . . . . . . . . 116Table of cont<strong>en</strong>ts
16Dim<strong>en</strong>sional drawingsWhat this chapter contains . . . . . . . . . . . . . . . . . . . . . . . . . . . . . . . . . . . . . . . . . . . . . . . . . . . . . . .117Frame size R2 (with optional control panel) . . . . . . . . . . . . . . . . . . . . . . . . . . . . . . . . . . . . . . . . . .118Frame size R3 (with optional control panel) . . . . . . . . . . . . . . . . . . . . . . . . . . . . . . . . . . . . . . . . . .119Frame size R4 (with optional control panel) . . . . . . . . . . . . . . . . . . . . . . . . . . . . . . . . . . . . . . . . . .120Frame size R5 (with optional control panel) . . . . . . . . . . . . . . . . . . . . . . . . . . . . . . . . . . . . . . . . . .121Frame size R6 (with optional control panel) . . . . . . . . . . . . . . . . . . . . . . . . . . . . . . . . . . . . . . . . . .122Flange mounting kits . . . . . . . . . . . . . . . . . . . . . . . . . . . . . . . . . . . . . . . . . . . . . . . . . . . . . . . . . . .123Flange mounting kit for frame size R2 . . . . . . . . . . . . . . . . . . . . . . . . . . . . . . . . . . . . . . . . .124Flange mounting kit for frame size R3 . . . . . . . . . . . . . . . . . . . . . . . . . . . . . . . . . . . . . . . . .125Flange mounting kit for frame size R4 . . . . . . . . . . . . . . . . . . . . . . . . . . . . . . . . . . . . . . . . .126Flange mounting kit for frame size R5 . . . . . . . . . . . . . . . . . . . . . . . . . . . . . . . . . . . . . . . . .127Flange mounting kit for frame size R6 . . . . . . . . . . . . . . . . . . . . . . . . . . . . . . . . . . . . . . . . .128AGPS board . . . . . . . . . . . . . . . . . . . . . . . . . . . . . . . . . . . . . . . . . . . . . . . . . . . . . . . . . . . . . . . . . .129Resistor brakingWhat this chapter contains . . . . . . . . . . . . . . . . . . . . . . . . . . . . . . . . . . . . . . . . . . . . . . . . . . . . . . .131Availability of brake choppers and resistors . . . . . . . . . . . . . . . . . . . . . . . . . . . . . . . . . . . . . . . . . .131How to select the correct drive/chopper/resistor combination . . . . . . . . . . . . . . . . . . . . . . . . . . . .131Optional brake chopper and resistor(s) . . . . . . . . . . . . . . . . . . . . . . . . . . . . . . . . . . . . . . . . . . . . .132Resistor installation and wiring . . . . . . . . . . . . . . . . . . . . . . . . . . . . . . . . . . . . . . . . . . . . . . . . . . . .134Protection of frame sizes R2 to R5 . . . . . . . . . . . . . . . . . . . . . . . . . . . . . . . . . . . . . . . . . . . . . . . . .135Protection of frame size R6 . . . . . . . . . . . . . . . . . . . . . . . . . . . . . . . . . . . . . . . . . . . . . . . . . . . . . .136Brake circuit commissioning . . . . . . . . . . . . . . . . . . . . . . . . . . . . . . . . . . . . . . . . . . . . . . . . . . . . . .136Table of cont<strong>en</strong>ts
17About this manualWhat this chapter containsCompatibilityInt<strong>en</strong>ded audi<strong>en</strong>ceThis chapter describes the int<strong>en</strong>ded audi<strong>en</strong>ce and cont<strong>en</strong>ts of this manual. Itcontains a flowchart of steps in checking the delivery, installing and commissioningthe drive. The flowchart refers to chapters/sections in this manual and othermanuals.The manual is compatible with <strong>ACS800</strong>-<strong>04</strong>/<strong>U4</strong> (frame sizes R2...R6).This manual is int<strong>en</strong>ded for people who plan the installation, install, commission, useand service the drive. Read the manual before working on the drive. The reader isexpected to know the fundam<strong>en</strong>tals of electricity, wiring, electrical compon<strong>en</strong>ts andelectrical schematic symbols.This manual is writt<strong>en</strong> for readers worldwide. Both SI and imperial units are shown.Special US instructions for installations within the United States that must beinstalled per the National Electrical Code and local codes are marked with (US).Categorization according to the frame sizeSome instructions, technical data and dim<strong>en</strong>sional drawings which concern onlycertain frame sizes are marked with the symbol of the frame size R2, R3... or R6.The frame size is not marked on the drive designation label. To id<strong>en</strong>tify the framesize of your drive, see the rating tables in chapter Technical data.Categorization according to the + codeThe instructions, technical data and dim<strong>en</strong>sional drawings which concern onlycertain optional selections are marked with + codes, e.g. +E202. The optionsincluded in the drive can be id<strong>en</strong>tified from the + codes visible on the typedesignation label of the drive. The + code selections are listed in chapter <strong>ACS800</strong>-<strong>04</strong>/<strong>U4</strong> in section Type code.About this manual
18Cont<strong>en</strong>tsThe chapters of this manual are briefly described below.Safety instructions give safety instructions for the installation, commissioning,operation and maint<strong>en</strong>ance of the drive.About this manual lists the steps in checking the delivery and installing andcommissioning the drive and refers to chapters/sections in this manual and othermanuals for particular tasks.<strong>ACS800</strong>-<strong>04</strong>/<strong>U4</strong> describes the drive.Planning the cabinet assembly guides in planning the installation of a drive moduleinto a user-defined cabinet.Mechanical installation instructs how to place and mount the drive.Planning the electrical installation instructs on the motor and cable selection, theprotections and the cable routing.Electrical installation shows how to wire the drive.Motor control and I/O board (RMIO) shows the external control connections to theI/O board.Installation checklist contains a list for checking the mechanical and electricalinstallation of the drive.Maint<strong>en</strong>ance contains prev<strong>en</strong>tive maint<strong>en</strong>ance instructions.Technical data contains the technical specifications of the drive, e.g. the ratings,sizes and technical requirem<strong>en</strong>ts, provisions for fulfilling the requirem<strong>en</strong>ts for CEand other markings and warranty policy.Dim<strong>en</strong>sional drawings contains the dim<strong>en</strong>sional drawings of the drive.Resistor braking describes how to select, protect and wire brake choppers andresistors. The chapter also contains the technical data.About this manual
19Installation and commissioning flowchartTaskId<strong>en</strong>tify the frame size of your drive: R2, R3, R4, R5or R6.SeeTechnical data: IEC data or NEMA dataPlan the installation.Check the ambi<strong>en</strong>t conditions, ratings, requiredcooling air flow, input power connection, compatibilityof the motor, motor connection, and other technicaldata.Select the cables.Technical dataPlanning the electrical installationOption manual (if optional equipm<strong>en</strong>t isincluded)Unpack and check the units.Check that all necessary optional modules andequipm<strong>en</strong>t are pres<strong>en</strong>t and correct.Only intact units may be started up.Mechanical installation: Unpacking the unitIf the converter has be<strong>en</strong> non-operational formore than one year, the converter DC linkcapacitors need to be reformed. Ask ABB forinstructions.Check the installation site.Mechanical installation: Before installationTechnical dataIf the drive is about to be connected to an IT(ungrounded) system, check that the drive is notequipped with EMC filtering.<strong>ACS800</strong>-<strong>04</strong>/<strong>U4</strong>: Type codeFor instructions on how to disconnect the EMCfiltering, contact ABB.Install the drive in a cabinet.Mechanical installationRoute the cables.Planning the electrical installation: Routing thecablesCheck the insulation of the motor and the motorcable.Electrical installation: Checking the insulation ofthe assemblyAbout this manual
20TaskConnect the power cables.Connect the control and the auxiliary control cables.SeeElectrical installation, Motor control and I/Oboard (RMIO), Resistor braking (optional) andthe optional module manual delivered with themodule.Check the installation.Installation checklistCommission the drive.Appropriate Firmware ManualCommission the optional brake chopper (if pres<strong>en</strong>t).Resistor brakingOperating of the drive: start, stop, speed control etc.Appropriate Firmware ManualProduct and service inquiriesProduct trainingAddress any inquiries about the product to your local ABB repres<strong>en</strong>tative, quotingthe type code and serial number of the unit in question. A listing of ABB sales,support and service contacts can be found by navigating to www.abb.com/drives andselecting Drives – Sales, Support and Service network on the right pane.For information on ABB product training, navigate to www.abb.com/drives and selectDrives – Training courses on the right pane.Providing feedback on ABB Drives manualsYour comm<strong>en</strong>ts on our manuals are welcome. Go to www.abb.com/drives, th<strong>en</strong>select successively Drives – Docum<strong>en</strong>t Library – <strong>Manuals</strong> feedback form on the rightpane.About this manual
21Terms and abbreviationsTerm/AbbreviationCDP312RDDCSEMCFrame (size)IGBTI/OAGPSRDCORDIORFIRINTRMIORPMPExplanationDrive control panelDistributed Drives Communication System; a protocol used in optical fibrecommunication inside and betwe<strong>en</strong> ABB drives.Electromagnetic CompatibilitySize of the frame into which the drive module is assembled. Severalsupply modules with differ<strong>en</strong>t nominal powers may have the same framesize. The term refers to modules that have a similar mechanicalconstruction.To determine the frame size of a drive module, refer to the rating tables inchapter Technical data.Insulated Gate Bipolar Transistor; a voltage-controlled semiconductor typewidely used in inverters due to their easy controllability and high switchingfrequ<strong>en</strong>cy.Input/OutputGate driver Power Supply board. An optional board used to implem<strong>en</strong>t thePrev<strong>en</strong>tion of Unexpected Start function.DDCS communication option moduleDigital I/O Ext<strong>en</strong>sion ModuleRadio-frequ<strong>en</strong>cy interfer<strong>en</strong>ceMain circuit boardMotor control and I/O board. The external I/O control signals areconnected to RMIO.Control panel mounting platform kitAbout this manual
22About this manual
23<strong>ACS800</strong>-<strong>04</strong>/<strong>U4</strong>What this chapter containsThis chapter describes the operating principle and construction of the drive in short.LayoutThe <strong>ACS800</strong>-<strong>04</strong>/<strong>U4</strong> (frame sizes R2 to R6) is an IP20 drive module for controllingAC motors. It is to be installed into a cabinet by the customer with wall fast<strong>en</strong>ing.Control panel CDP312R(optional)Frame size R2Option slotsPower cableterminalPEHeatsinkLocation of the compon<strong>en</strong>ts vary dep<strong>en</strong>ding on the frame size.<strong>ACS800</strong>-<strong>04</strong>/<strong>U4</strong>
24Type codeThe type code contains information on the specifications and configuration of thedrive. The first digits from left express the basic configuration (e.g. <strong>ACS800</strong>-<strong>04</strong>-0016-3). The optional selections are giv<strong>en</strong> thereafter, separated by + signs (e.g.+E202). The main selections are described below. Not all selections are available forall types. For more information, refer to <strong>ACS800</strong> Ordering Information[3AFE64556568 (English)], available on request.SelectionAlternativesProduct series<strong>ACS800</strong> product seriesType <strong>04</strong> Drive module. Wh<strong>en</strong> no options are selected: IP20, no control panel, noEMC filter, Standard Control Program, brake chopper in frame sizes R2,R3, and R4 (only 690 V), boards without coating, one set of manuals.<strong>U4</strong> Drive module (USA). Wh<strong>en</strong> no options are selected: UL op<strong>en</strong> type, nocontrol panel, no EMC filter, Standard Control Program, brake chopper inframe sizes R2, R3, and R4 (only 690 V), boards without coating, one setof manuals.SizeSee Technical data: IEC data or NEMA data.Voltage range(nominal rating in bold)2 208/220/230/240 V AC3 380/400/415 V AC5 380/400/415/440/460/480/500 V AC7 525/575/600/690 V AC+ optionsControl panel J400 Control panel CDP312R assembled on the drive moduleJ414 Control panel holder for frame sizes R2, R3 and R4 (not to be used withoption J400)Construction C132 Marine drive (coated boards included)C135 Flange mounting. Flange mounting plate assembled. IP55 for heat sinkside and IP20 for drive front side.Filter E200 EMC/RFI filter for second <strong>en</strong>vironm<strong>en</strong>t TN (grounded) system, drivecategory C3E202 EMC/RFI filter for first <strong>en</strong>vironm<strong>en</strong>t TN (grounded) system, drive categoryC2. (Not available for 690 V units.)E210 EMC/RFI filter for second <strong>en</strong>vironm<strong>en</strong>t TN/IT (grounded/ungrounded)system, drive category C3 (frame size R6 only)Resistor braking D150 Brake chopper. Included as standard in frame sizes R2, R3 and R4 (only690 V).Safety Q950 Prev<strong>en</strong>tion of Unexpected Start: AGPS board and 3 m connection wire.Fieldbus K... Refer to <strong>ACS800</strong> Ordering Information [3AFE64556568 (English)].I/OL...Control program N...Manual language R...Specialities P901 Coated boardsP9<strong>04</strong> Ext<strong>en</strong>ded warranty<strong>ACS800</strong>-<strong>04</strong>/<strong>U4</strong>
25Main circuit and controlDiagramThis diagram shows the control interfaces and the main circuit of the drive. Locationof terminals vary dep<strong>en</strong>ding on the drive frame size.DriveExternal control viaanalogue/digitalinputs and outputsPrev<strong>en</strong>tion of UnexpectedStart (AGPS board)X41Motorcontrol andI/O board(RMIO)Slot1Slot2X33Optional module 1: RMBA, RAIO, RDIO,RDNA, RLON, RIBA, RPBA, RCAN, RCNA,RMBP, RETA, RRIA or RTACOptional module 2: RTAC, RAIO, RRIA orRDIODDCS communication option module 3:RDCO-01, RDCO-02 or RDCO-03The fibre optic channels provided by theRDCO module can be used for fieldbusconnection (Nxxx fieldbus adapter modules),PC connection (DriveWare® PC tools) orAdvant Fieldbus 100 connection (e.g.AC 800M, AC80)Input power~ = ~ =Output powerBrake chopper in frame sizes R2, R3 and690 V frame R4 (optional in other framesizes).R- UDC+ UDC-R+<strong>ACS800</strong>-<strong>04</strong>/<strong>U4</strong>
26OperationThis table describes the operation of the main circuit in short.Compon<strong>en</strong>tSix-pulse rectifierCapacitor bankIGBT inverterDescriptionConverts the three-phase AC voltage to DC voltage.Energy storage which stabilizes the intermediate circuit DC voltage.Converts the DC voltage to AC voltage and vice versa. The motoroperation is controlled by switching the IGBTs.Printed circuit boardsThe drive contains the following printed circuit boards as standard:• main circuit board (RINT)• motor control and I/O board (RMIO)• EMC filter board (RRFC) wh<strong>en</strong> EMC equipm<strong>en</strong>t is selected or varistor board(RVAR) otherwise.Motor controlThe motor control is based on the Direct Torque Control (DTC) method. Two phasecurr<strong>en</strong>ts and DC link voltage are measured and used for the control. The third phasecurr<strong>en</strong>t is measured for earth fault protection.<strong>ACS800</strong>-<strong>04</strong>/<strong>U4</strong>
27Planning the cabinet assemblyWhat this chapter containsThis chapter guides in planning the installation of a drive module into a user-definedcabinet. The issues discussed are ess<strong>en</strong>tial for safe and trouble-free use of the drivesystem.Note: The installation examples in this manual are provided only to help the installerin designing the installation. The installation must always be designed and madeaccording to applicable local laws and regulations. ABB does not assume anyliability whatsoever for any installation which breaches the local laws and/or otherregulations.Cabinet constructionThe cabinet frame must be sturdy <strong>en</strong>ough to carry the weight of the drivecompon<strong>en</strong>ts, control circuitry and other equipm<strong>en</strong>t installed in it.The cabinet must protect the drive module against contact and meet therequirem<strong>en</strong>ts for dust and humidity (see chapter Technical data).Disposition of the devicesFor easy installation and maint<strong>en</strong>ance, a spacious layout is recomm<strong>en</strong>ded. Suffici<strong>en</strong>tcooling air flow, obligatory clearances, cables and cable support structures allrequire space.For layout examples, see section Cabinet layout example.Grounding of mounting structuresMake sure all cross-members or shelves on which compon<strong>en</strong>ts are mounted areproperly grounded and the connecting surfaces left unpainted.Note: Ensure that the modules are properly grounded through their fast<strong>en</strong>ing pointsto the installation base.Planning the cabinet assembly
28Free space around the unitThe modules can be installed side by side. Recomm<strong>en</strong>ded free space above andbelow the drive to <strong>en</strong>able cooling air flow, service and maint<strong>en</strong>ance is shown belowin millimetres and [inches].The temperature of the cooling air <strong>en</strong>tering the unit must not exceed the maximumallowed ambi<strong>en</strong>t temperature. See section Ambi<strong>en</strong>t conditions in chapter Technicaldata.200 [7.9]300 [12]IP20 (UL op<strong>en</strong> type)Planning the cabinet assembly
29Cooling and degrees of protectionThe cabinet must have <strong>en</strong>ough free space for the compon<strong>en</strong>ts to <strong>en</strong>sure suffici<strong>en</strong>tcooling. Observe the minimum clearances giv<strong>en</strong> for each compon<strong>en</strong>t.The air inlets and outlets must be equipped with gratings that• guide the air flow• protect against contact• prev<strong>en</strong>t water splashes from <strong>en</strong>tering the cabinet.The drawing below shows two typical cabinet cooling solutions. The air inlet is at thebottom of the cabinet, while the outlet is at the top, either on the upper part of thedoor or on the roof.Air outletAir inletArrange the cooling air flow through the modules so that the requirem<strong>en</strong>ts giv<strong>en</strong> inchapter Technical data are met:• cooling air flowNote: The values in Technical data apply to continuous nominal load. If the load is cyclic or lessthan nominal, less cooling air is required.• allowed ambi<strong>en</strong>t temperature• the air inlet and outlet sizes required for the module cooling and recomm<strong>en</strong>dedfilter material (if used).In addition to the above, the heat dissipated by cables and other additionalequipm<strong>en</strong>t must also be v<strong>en</strong>tilated.The internal cooling fans of the modules are usually suffici<strong>en</strong>t to keep the compon<strong>en</strong>ttemperatures low <strong>en</strong>ough in IP22 (UL type 1) cabinets.Planning the cabinet assembly
30In IP54 (UL type 12) cabinets, thick filter mats are used to prev<strong>en</strong>t water splashesfrom <strong>en</strong>tering the cabinet. This <strong>en</strong>tails the installation of additional coolingequipm<strong>en</strong>t, such as a hot air exhaust fan.The installation site must be suffici<strong>en</strong>tly v<strong>en</strong>tilated.Prev<strong>en</strong>ting the recirculation of hot airNormal vertical mountingFlange mountingCabinet (side view)HOTAREAMain air flow outMainairflowoutHOT AREACabinet (side view)Air flow outAir baffleplatesAir baffleplateCOOL AREACOOL AREAMain air flow inMainairflowinAir flow inOutside the cabinetPrev<strong>en</strong>t hot air circulation outside the cabinet by leading the outcoming hot air awayfrom the area where the inlet air to the cabinet is tak<strong>en</strong>. Possible solutions are listedbelow:• gratings that guide air flow at the air inlet and outlet• air inlet and outlet at differ<strong>en</strong>t sides of the cabinet• cool air inlet in the lower part of the front door and an extra exhaust fan on theroof of the cabinet.Planning the cabinet assembly
31Inside the cabinetPrev<strong>en</strong>t hot air circulation inside the cabinet with leak-proof air baffle plates. Nogaskets are usually required.Wh<strong>en</strong> several modules are installed vertically in one cabinet, the hot air from onemodule must not be allowed to <strong>en</strong>ter another module. In a cabinet with multiplemodules, a practical way of achieving this is to install a mounting plate to separatethe cool area (at the front part of the cabinet) from the hot area (back part). Themounting plate can be fast<strong>en</strong>ed to two vertical pillars on both left and right. Since theair outlet at the top of the modules points directly upwards, the air must be guided tothe hot area. See cabinet layout examples below.Cabinet layout exampleVertical mountingAC switch fuseAC fuse basesAC fusesAirflow guidesdu/dt filterHot areaCool areaModulesMountingplatesMotor cable <strong>en</strong>triesFront view of three R2modules in cabinetSide view of three R3modules in cabinetPlanning the cabinet assembly
32Cabinet heatersUse a cabinet heater if there is a risk of cond<strong>en</strong>sation in the cabinet. Although theprimary function of the heater is to keep the air dry, it may also be required forheating at low temperatures. Wh<strong>en</strong> placing the heater, follow the instructionsprovided by its manufacturer.Mounting the optional control panelThe optional control panel CDP312R is factory assembled on the drive module.Thepanel can also be fast<strong>en</strong>ed directly to the cabinet door or to a mounting platform.Installing the control panel directly on the cabinet doorFast<strong>en</strong> the control panel from the back side with two screws of one of the followingtypes:• standard screw with nominal diameter of 4 mm (0.16 in.)• tapping screw with nominal diameter of 4.2 mm (0.17 in.) DIN 7981 C, DIN 7982C, DIN 7983 C or DIN 7976 C• PT screw for thermoplastics with nominal diameter of 4 mm (0.16 in.).View from outside the cabinet doorCabinet door4...8 mm(0.16...0.31 in.)Control panelTight<strong>en</strong>ing torque:1 Nm (0.74 lbf ft)10 mm (0.39 in.)Control panel footprintPlanning the cabinet assembly
33Control panel mounting platform kit (RPMP)For installation of the mounting platform, see Control Panel Mounting Platform Kit(RPMP) Installation Guide [3AFE64677560 (English)].EMC requirem<strong>en</strong>tsG<strong>en</strong>erally, the fewer and smaller the holes in the cabinet, the better the interfer<strong>en</strong>ceatt<strong>en</strong>uation. The maximum recomm<strong>en</strong>ded diameter of a hole in galvanic metalcontact in the covering cabinet structure is 100 mm. Special att<strong>en</strong>tion must be paidto the cooling air inlet and outlet gratings.The best galvanic connection betwe<strong>en</strong> the steel panels is achieved by welding themtogether as no holes are necessary. If welding is not possible, the seams betwe<strong>en</strong>the panels are recomm<strong>en</strong>ded to be left unpainted and equipped with specialconductive EMC strips to provide adequate galvanic connection. Usually, reliablestrips are made of flexible silicon mass covered with a metal mesh. The nontight<strong>en</strong>edtouch-contact of the metal surfaces is not suffici<strong>en</strong>t, so a conductivegasket betwe<strong>en</strong> the surfaces is required. The maximum recomm<strong>en</strong>ded distancebetwe<strong>en</strong> assembly screws is 100 mm.Suffici<strong>en</strong>t high-frequ<strong>en</strong>cy grounding network must be constructed in the cabinet toavoid voltage differ<strong>en</strong>ces and forming of high-impedance radiator structures. A goodhigh-frequ<strong>en</strong>cy grounding is made with short flat copper braids for low inductance.One-point high-frequ<strong>en</strong>cy grounding cannot be used due to the long distances insidethe cabinet.First <strong>en</strong>vironm<strong>en</strong>t EMC compliance *) of the drive requires 360° high frequ<strong>en</strong>cygrounding of the motor cable shields at their <strong>en</strong>tries. The grounding can beimplem<strong>en</strong>ted by a knitted wire mesh scre<strong>en</strong>ing as shown below.Cable tiesBare cable shieldKnitted wire meshLead-through plateCableCabinet bottom plate*) First <strong>en</strong>vironm<strong>en</strong>t EMC compliance is defined in section CE marking in chapter Technical data.Planning the cabinet assembly
34360° high frequ<strong>en</strong>cy grounding of the control cable shields is recomm<strong>en</strong>ded at their<strong>en</strong>tries. The shields can be grounded by means of conductive shielding cushionspressed against the cable shield from both directions:Bare cable shieldShielding cushion(conductive)Cabinet bottom plateCable grommetCablePlanning the cabinet assembly
35Mechanical installationUnpacking the unitThe drive is delivered in a box that also contains:• plastic bag containing: screws (M3), clamps and cable lugs (2 mm 2 , M3) forgrounding the control cable scre<strong>en</strong>s• residual voltage warning stickers• hardware, firmware and other module manuals• delivery docum<strong>en</strong>ts.Unpack the unit of frame sizes R2 to R5 as follows.TearMechanical installation
36Delivery checkCheck that there are no signs of damage. Before attempting installation andoperation, check the information on the type designation label of the drive to verifythat the unit is of the correct type. The label includes IEC rating, C-UL US, CSA,C-tick and CE markings, a type code and a serial number, which allow individualrecognition of each unit. The first digit of the serial number refers to themanufacturing plant. The next four digits refer to the unit’s manufacturing year andweek, respectively. The remaining digits complete the serial number so that thereare no two units with the same serial number.The type designation label is attached to the heat sink and the serial number label tothe upper part of the back plate of the unit.Type designation labelSerial number labelBefore installationCheck the installation site according to the requirem<strong>en</strong>ts below. See Dim<strong>en</strong>sionaldrawings for frame details.Requirem<strong>en</strong>ts for the installation siteSee Technical data for the allowed operation conditions of the drive.FloorThe floor/material below the cabinet should be non-flammable.Mechanical installation
37Installation procedure1. Mark the locations for the four holes. The mounting points are shown inDim<strong>en</strong>sional drawings. With frame sizes R2...R5, use the mounting template cutfrom the package.2. Fix the screws or bolts to the marked locations.3. Position the drive onto the screws on the cabinet wall. Note: Lift the drive by itschassis (R6: by its lifting holes).4. Tight<strong>en</strong> the screws in the cabinet wall securely.1Mechanical installation
38Flange mountingThe flange mounting plate is factory assembled on the drive. With flange mounting,the degree of protection is IP55 for the heat sink side and IP20 for the drive frontside. The drive front side must always be housed in a cabinet.R6 with flange mounting plateConnect a drive with flange mounting plate as follows:1. Make the appropriate mounting and screw holes for the drive into the mountingplate. The sizes and locations of the holes vary according to the frame size. Seechapter Dim<strong>en</strong>sional drawings. Screw holes can be replaced with rivet nuts.Recomm<strong>en</strong>ded type is closed M6 rivet nut, L = 23 mm, code 23351060030 /Rivkle provided by Böllhoff (www.boellhoff.de).2. Lift the drive by its lifting lugs and place it into the mounting hole.3. Fix the washers and screws (M6) delivered with the drive (MRP code 6839<strong>04</strong>19).The tight<strong>en</strong>ing torque is 2 Nm.Note: The flange mounting kit does not ground the drive. The drive needs to begrounded according to instructions giv<strong>en</strong> in chapter Electrical installation.Note: Maximum allowed vibration for the drive has not be<strong>en</strong> tested with flangemounting. If the drive is exposed to vibration, it is recomm<strong>en</strong>ded to fix the drive alsofrom the normal mounting holes located on the heat sink. See section Installationprocedure.Mechanical installation
39R6 flange mounting12Lifting lugMounting plate3WasherScrewMechanical installation
40Mechanical installation
41Planning the electrical installationWhat this chapter containsThis chapter contains the instructions that you must follow wh<strong>en</strong> selecting the motor,cables, protections, cable routing and way of operation for the drive system.Note: The installation must always be designed and made according to applicablelocal laws and regulations. ABB does not assume any liability whatsoever for anyinstallation which breaches the local laws and/or other regulations. Furthermore, ifthe recomm<strong>en</strong>dations giv<strong>en</strong> by ABB are not followed, the drive may experi<strong>en</strong>ceproblems that the warranty does not cover.Motor selection and compatibility1. Select the motor according to the rating tables in chapter Technical data. Use theDriveSize PC tool if the default load cycles are not applicable.2. Check that the motor ratings lie within the allowed ranges of the drive controlprogram:• motor nominal voltage is 1/2 ... 2 · U N of the drive• motor nominal curr<strong>en</strong>t is 1/6 ... 2 · I 2hd of the drive in DTC control and0 ... 2 · I 2hd in scalar control. The control mode is selected by a drive parameter.3. Check that the motor voltage rating meets the application requirem<strong>en</strong>ts:• If no resistor braking is in use, the motor voltage rating is U N .U N = rated input voltage of the drive• If frequ<strong>en</strong>t or long term brake cycles will be used, the motor voltage rating isU ACeq .U ACeq = U DC /1.35whereU ACeq is the equival<strong>en</strong>t AC power source voltage of the drive in V AC.U DC is the maximum DC link voltage of the drive in V DC.For resistor braking: U DC = 1.2 × 1.35 × U N .See note 6 below the Requirem<strong>en</strong>ts table.4. Consult the motor manufacturer before using a motor in a drive system where themotor nominal voltage differs from the AC power source voltage.Planning the electrical installation
425. Ensure that the motor insulation system withstands the maximum peak voltage inthe motor terminals. See the Requirem<strong>en</strong>ts table below for the required motorinsulation system and drive filtering.Example: Wh<strong>en</strong> the supply voltage is 440 V and the drive is operating in motormode only, the maximum peak voltage in the motor terminals can beapproximated as follows: 440 V · 1.35 · 2 = 1190 V. Check that the motorinsulation system withstands this voltage.Protecting the motor insulation and bearingsThe output of the drive comprises – regardless of output frequ<strong>en</strong>cy – pulses ofapproximately 1.35 times the equival<strong>en</strong>t mains network voltage with a very short risetime. This is the case with all drives employing modern IGBT inverter technology.The voltage of the pulses can be almost double at the motor terminals, dep<strong>en</strong>ding onthe att<strong>en</strong>uation and reflection properties of the motor cable and the terminals. This inturn can cause additional stress on the motor and motor cable insulation.Modern variable speed drives with their fast rising voltage pulses and high switchingfrequ<strong>en</strong>cies can g<strong>en</strong>erate curr<strong>en</strong>t pulses that flow through the motor bearings, whichcan gradually erode the bearing races and rolling elem<strong>en</strong>ts.The stress on motor insulation can be avoided by using optional ABB du/dt filters.du/dt filters also reduce bearing curr<strong>en</strong>ts.To avoid damage to motor bearings, the cables must be selected and installedaccording to the instructions giv<strong>en</strong> in the hardware manual. In addition, insulated N-<strong>en</strong>d (non-driv<strong>en</strong> <strong>en</strong>d) bearings and output filters from ABB must be used accordingto the following table. Two types of filters are used individually or in combinations:• optional du/dt filter (protects motor insulation system and reduces bearingcurr<strong>en</strong>ts).• common mode filter (mainly reduces bearing curr<strong>en</strong>ts).Planning the electrical installation
43Requirem<strong>en</strong>ts tableThe following table shows how to select the motor insulation system and wh<strong>en</strong> an optional ABB du/dtfilter, insulated N-<strong>en</strong>d (non-driv<strong>en</strong> <strong>en</strong>d) motor bearings and ABB common mode filters are required. Themotor manufacturer should be consulted regarding the construction of the motor insulation andadditional requirem<strong>en</strong>ts for explosion-safe (Ex) motors. Failure of the motor to fulfil the followingrequirem<strong>en</strong>ts or improper installation may short<strong>en</strong> motor life or damage the motor bearings and voidsthe warranty.ManufacturerABBMotor typeRandomwoundM2_and M3_Form-woundHX_ andAM_Old* formwoundHX_and modularRandomwoundHX_and AM_ **Nominal mainsvoltage (AC linevoltage)MotorinsulationsystemRequirem<strong>en</strong>t forABB du/dt filter, insulated N-<strong>en</strong>d bearing and ABB commonmode filterP N < 100 kWandframe size < IEC315P N < 134 HPand frame size 350 kWorframe size > IEC400P N > 469 HPor frame size >NEMA 580U N < 500 V Standard - + N + N + CMF500 V < U N < 600 V Standard + du/dt + du/dt + N + du/dt + N + CMForReinforced - + N + N + CMF600 V < U N < 690 V Reinforced + du/dt + du/dt + N + du/dt + N + CMF380 V < U N < 690 V Standard n.a. + N + CMF P N < 500 kW: + N+CMFP N > 500 kW: + N+ CMF + du/dt380 V < U N < 690 V Check with themotormanufacturer.0 V < U N < 500 V Enamelled wire + N + CMF500 V < U N < 690 Vwith fibre glasstaping+ du/dt + N + CMF+ du/dt with voltages over 500 V + N + CMFPlanning the electrical installation
44ManufacturerNON-ABBMotor typeRandomwoundandform-woundNominal mainsvoltage (AC linevoltage)MotorinsulationsystemU N < 420 V Standard: Û LL =1300 V420 V < U N < 500 V Standard: Û LL =1300 VorReinforced:Û LL = 1600 V,0.2microsecondrise time500 V < U N < 600 V Reinforced: Û LL= 1600 VorReinforced:Û LL = 1800 V600 V < U N < 690 V Reinforced:Û LL = 1800 VReinforced:Û LL = 2000 V,0.3microsecondrise time ***Requirem<strong>en</strong>t forABB du/dt filter, insulated N-<strong>en</strong>d bearing and ABB commonmode filterP N < 100 kWandframe size < IEC315P N < 134 HPand frame size 350 kWorframe size > IEC400P N > 469 HPor frame size >NEMA 580* manufactured before 1.1.1998** For motors manufactured before 1.1.1998, check for additional instructions with the motormanufacturer.*** If the intermediate DC circuit voltage of the drive will be increased from the nominal level by resistorbraking or by the IGBT Supply Control Program (parameter selectable function), check with themotor manufacturer if additional output filters are needed in the applied drive operation range.Planning the electrical installation
45Note 1: The abbreviations used in the table are defined below.Abbreviation DefinitionU Nnominal voltage of the supply networkÛ LLpeak line-to-line voltage at motor terminals which the motor insulation must withstandP Nmotor nominal powerdu/dt du/dt filter at the output of the drive +E205CMF common mode filter +E208NN-<strong>en</strong>d bearing: insulated motor non-driv<strong>en</strong> <strong>en</strong>d bearingn.a.Motors of this power range are not available as standard units. Consult the motor manufacturer.Note 2: Explosion-safe (Ex) motorsThe motor manufacturer should be consulted regarding the construction of the motor insulation andadditional requirem<strong>en</strong>ts for explosion-safe (Ex) motors.Note 3: High-output motors and IP23 motorsFor motors with higher rated output than what is stated for the particular frame size in EN 50347 (2001)and for IP23 motors, the requirem<strong>en</strong>ts of ABB random-wound motor series M3AA, M3AP, M3BP aregiv<strong>en</strong> below. For other motor types, see the Requirem<strong>en</strong>ts table above. Apply the requirem<strong>en</strong>ts ofrange 100 kW < P N < 350 kW to motors with P N < 100 kW. Apply the requirem<strong>en</strong>ts of rangeP N > 350 kW to motors within the range 100 kW < P N < 350 kW. In other cases, consult the motormanufacturer.ManufacturerABBMotor typeRandomwoundM3AA,M3AP, M3BPNominal mainsvoltage (AC linevoltage)MotorinsulationsystemRequirem<strong>en</strong>t forABB du/dt filter, insulated N-<strong>en</strong>d bearing and ABB commonmode filterP N < 55 kW 55 kW < P N 200 kWP N < 74 HP 74 HP < P N 268 HPU N < 500 V Standard - + N + N + CMF500 V < U N < 600 V Standard + du/dt + du/dt + N + du/dt + N + CMForReinforced - + N + N + CMF600 V < U N < 690 V Reinforced + du/dt + du/dt + N + du/dt + N + CMFNote 4: HXR and AMA motorsAll AMA machines (manufactured in Helsinki) for drive systems have form-wound windings. All HXRmachines manufactured in Helsinki starting 1.1.1998 have form-wound windings.Note 5: ABB motors of types other than M2_, M3_, HX_ and AM_Use the selection criteria giv<strong>en</strong> for non-ABB motors.Note 6: Resistor braking of the driveWh<strong>en</strong> the drive is in braking mode for a large part of its operation time, the intermediate circuit DCvoltage of the drive increases, the effect being similar to increasing the supply voltage by up to 20perc<strong>en</strong>t. The voltage increase should be tak<strong>en</strong> into consideration wh<strong>en</strong> determining the motor insulationrequirem<strong>en</strong>t.Example: Motor insulation requirem<strong>en</strong>t for a 400 V application must be selected as if the drive weresupplied with 480 V.Planning the electrical installation
46Note 7: Calculating the rise time and the peak line-to-line voltageThe peak line-to-line voltage at the motor terminals g<strong>en</strong>erated by the drive as well as the voltage risetime dep<strong>en</strong>d on the cable l<strong>en</strong>gth. The requirem<strong>en</strong>ts for the motor insulation system giv<strong>en</strong> in the tableare “worst case” requirem<strong>en</strong>ts covering installations with 30 metre and longer cables. The rise time canbe calculated as follows: t = 0.8 · Û LL /(du/dt). Read Û LL and du/dt from the diagrams below. Multiplythe values of the graph by the supply voltage (U N ).With resistor braking, the Û LL and du/dt values areapproximately 20 % higher.3.02.5Û LL /U N5.55.<strong>04</strong>.5du/dt------------(1/μs)U N2.<strong>04</strong>.01.51.00.5du/dt------------(1/μs)U N3.53.02.52.01.5Û LL /U N0.0100 200 3001.0100 200 300Cable l<strong>en</strong>gth (m)Cable l<strong>en</strong>gth (m)With du/dt filterWithout du/dt filterNote 8: Sine filters protect the motor insulation system. Therefore, du/dt filter can be replaced witha sine filter. The peak phase-to-phase voltage with the sine filter is approximately 1.5 × U N .Note 9: Common mode filter is available as a separate kit (one box including three rings for one cable).Perman<strong>en</strong>t magnet synchronous motorSupply connectionOnly one perman<strong>en</strong>t magnet motor can be connected to the inverter output.It is recomm<strong>en</strong>ded to install a safety switch betwe<strong>en</strong> the perman<strong>en</strong>t magnetsynchronous motor and the drive output. The switch is needed to isolate the motorduring any maint<strong>en</strong>ance work on the drive.Disconnecting device (means)Install a hand-operated input disconnecting device (disconnecting means) betwe<strong>en</strong>the AC power source and the drive. The disconnecting device must be of a type thatcan be locked to the op<strong>en</strong> position for installation and maint<strong>en</strong>ance work.Planning the electrical installation
47EEA / EuropeIf the drive is used in an application which must meet the European Union MachineryDirective according to standard EN 602<strong>04</strong>-1 Safety of Machinery, the disconnectingdevice must be one of the following types:• a switch-disconnector of utilization category AC-23B (EN 60947-3)• a disconnector that has an auxiliary contact that in all cases causes switchingdevices to break the load circuit before the op<strong>en</strong>ing of the main contacts of thedisconnector (EN 60947-3)• a circuit breaker suitable for isolation in accordance with EN 60947-2.USThe disconnecting means must conform to the applicable safety regulations.Main contactorIf used, dim<strong>en</strong>sion the contactor according to the nominal voltage and curr<strong>en</strong>t of thedrive. The utilization category (IEC 947-4) is AC-1.FusesSee section Thermal overload and short-circuit protection.Thermal overload and short-circuit protectionThermal overload protection of the drive and the input and motor cablesThe drive protects itself and the input and motor cables against thermal overloadwh<strong>en</strong> the cables are dim<strong>en</strong>sioned according to the nominal curr<strong>en</strong>t of the drive. Noadditional thermal protection devices are needed.WARNING! If the drive is connected to multiple motors, a separate thermal overloadswitch or a circuit breaker must be used for protecting each cable and motor. Thesedevices may require a separate fuse to cut off the short-circuit curr<strong>en</strong>t.Planning the electrical installation
48Thermal overload protection of the motorAccording to regulations, the motor must be protected against thermal overload andthe curr<strong>en</strong>t must be switched off wh<strong>en</strong> overload is detected. The drive includes amotor thermal protection function that protects the motor and switches off the curr<strong>en</strong>twh<strong>en</strong> necessary. Dep<strong>en</strong>ding on a drive parameter value, the function either monitorsa calculated temperature value (based on a motor thermal model) or an actualtemperature indication giv<strong>en</strong> by motor temperature s<strong>en</strong>sors. The user can tune thethermal model further by feeding in additional motor and load data.The most common temperature s<strong>en</strong>sors are:• motor sizes IEC180.225: thermal switch (e.g. Klixon)• motor sizes IEC200.250 and larger: PTC or Pt100.See the firmware manual for more information on the motor thermal protection, andthe connection and use of the temperature s<strong>en</strong>sors.Protection against short-circuit in the motor cableThe drive protects the motor cable and motor in a short-circuit situation wh<strong>en</strong> themotor cable is dim<strong>en</strong>sioned according to the nominal curr<strong>en</strong>t of the drive. Noadditional protection devices are needed.Protection against short-circuit inside the drive or in the supply cableArrange the protection according to the following guide lines.Distributionboard1)Circuit diagramInput cableDrive or drivemodule~ ~ M3~Short-circuitprotectionProtect the drive andinput cable with fusesor a circuit breaker.See footnotes 1) and2).2)I >~ ~ M3~1) Size the fuses according to instructions giv<strong>en</strong> in chapter Technical data. The fuses will protect the inputcable in short-circuit situations, restrict drive damage and prev<strong>en</strong>t damage to adjoining equipm<strong>en</strong>t incase of a short-circuit inside the drive.Planning the electrical installation
492) Circuit breakers which have be<strong>en</strong> tested by ABB with the <strong>ACS800</strong> can be used. Fuses must be usedwith other circuit breakers. Contact your local ABB repres<strong>en</strong>tative for approved breaker types andsupply network characteristics.The protective characteristics of circuit breakers dep<strong>en</strong>d on the type, construction and settings of thebreakers. There are also limitations pertaining to the short-circuit capacity of the supply network.WARNING! Due to the inher<strong>en</strong>t operating principle and construction of circuit breakers,indep<strong>en</strong>d<strong>en</strong>t of the manufacturer, hot ionized gases may escape from the breaker<strong>en</strong>closure in case of a short-circuit. To <strong>en</strong>sure safe use, special att<strong>en</strong>tion must be paid tothe installation and placem<strong>en</strong>t of the breakers. Follow the manufacturer’s instructions.Ground fault protectionNote: Circuit breakers must not be used without fuses in the USA.The drive is equipped with an internal ground fault protective function to protect theunit against ground faults in the motor and the motor cable. This is not a personalsafety or a fire protection feature. The ground fault protective function can bedisabled with a parameter, refer to the appropriate <strong>ACS800</strong> Firmware Manual.The EMC filter of the drive includes capacitors connected betwe<strong>en</strong> the main circuitand the frame. These capacitors and long motor cables increase the ground leakagecurr<strong>en</strong>t and may cause fault curr<strong>en</strong>t circuit breakers to function.Emerg<strong>en</strong>cy stop devicesFor safety reasons, install the emerg<strong>en</strong>cy stop devices at each operator controlstation and at other operating stations where emerg<strong>en</strong>cy stop may be needed.Note: Pressing the stop key ( ) on the control panel of the drive does not g<strong>en</strong>eratean emerg<strong>en</strong>cy stop of the motor or separate the drive from dangerous pot<strong>en</strong>tial.Planning the electrical installation
50Prev<strong>en</strong>tion of Unexpected StartThe drive can be equipped with an optional Prev<strong>en</strong>tion of Unexpected Start functionaccording to standards IEC/EN 602<strong>04</strong>-1: 1997; ISO/DIS 14118: 2000 and EN 1037:1996.The Prev<strong>en</strong>tion of Unexpected Start function disables the control voltage of thepower semiconductors, thus prev<strong>en</strong>ting the inverter from g<strong>en</strong>erating the AC voltagerequired to rotate the motor. By using this function, short-time operations (likecleaning) and/or maint<strong>en</strong>ance work on non-electrical parts of the machinery can beperformed without switching off the AC power supply to the drive.The operator activates the Prev<strong>en</strong>tion of Unexpected Start function by op<strong>en</strong>ing aswitch on a control desk. An indicating lamp on the control desk will light, signallingthat the prev<strong>en</strong>tion is active. The switch can be locked out.A Gate Driver Power Supply board (AGPS) and a 3 m connection wire are deliveredwith the Prev<strong>en</strong>tion of Unexpected Start option kit. The Prev<strong>en</strong>tion of UnexpectedStart function complies with EN954-1 categories 1 and 3 wh<strong>en</strong> the followinginstallations are made:The user must install on a control desk near the machinery:• switching/disconnecting device for the circuitry. “Means shall be provided toprev<strong>en</strong>t inadvert<strong>en</strong>t, and/or mistak<strong>en</strong> closure of the disconnecting device.”EN 602<strong>04</strong>-1: 1997.• indicating lamp; on = starting the drive is prev<strong>en</strong>ted, off = drive is operative.• safety relay (type BD5935 has be<strong>en</strong> approved by ABB)(Switching/disconnecting device, indicating lamp and safety relay are not included inthe delivery.)For connections to the drive, see section Prev<strong>en</strong>tion of Unexpected Start, AGPSboard in chapter Electrical installation.WARNING! The Prev<strong>en</strong>tion of Unexpected Start function does not disconnect thevoltage of the main and auxiliary circuits from the drive. Therefore maint<strong>en</strong>ance workon electrical parts of the drive or the motor can only be carried out after isolating thedrive system from the main supply.Note: The Prev<strong>en</strong>tion of Unexpected Start function is not int<strong>en</strong>ded for stopping thedrive. If a running drive is stopped by using the Prev<strong>en</strong>tion of Unexpected Startfunction, the drive will cut off the motor supply voltage and the motor will coast tostop.Planning the electrical installation
51Selecting the power cablesG<strong>en</strong>eral rulesDim<strong>en</strong>sion the mains (input power) and motor cables according to localregulations:• The cable must be able to carry the drive load curr<strong>en</strong>t. See chapter Technicaldata for the rated curr<strong>en</strong>ts.• The cable must be rated for at least 70 °C maximum permissible temperature ofconductor in continuous use. For US, see section Additional US requirem<strong>en</strong>ts.• The inductance and impedance of the PE conductor/cable (grounding wire) mustbe rated according to permissible touch voltage appearing under fault conditions(so that the fault point voltage will not rise excessively wh<strong>en</strong> a ground faultoccurs).• 600 V AC cable is accepted for up to 500 V AC. 750 V AC cable is accepted forup to 600 V AC. For 690 V AC rated equipm<strong>en</strong>t, the rated voltage betwe<strong>en</strong> theconductors of the cable should be minimum 1 kV.For drive frame size R5 and larger, or motors larger than 30 kW (40 HP),symmetrical shielded motor cable must be used (figure below). A four-conductorsystem can be used up to frame size R4 with up to 30 kW (40 HP) motors, butshielded symmetrical motor cable is always recomm<strong>en</strong>ded. The shield(s) of motorcable(s) must have 360° bonding at both <strong>en</strong>ds.Note: Wh<strong>en</strong> continuous metal conduit is employed, shielded cable is not required.The conduit must have bonding at both <strong>en</strong>ds as with cable shield.A four-conductor system is allowed for input cabling, but shielded symmetrical cableis recomm<strong>en</strong>ded. To operate as a protective conductor, the shield conductivity mustbe as follows wh<strong>en</strong> the protective conductor is made of the same metal as the phaseconductors:Cross-sectional area of the phaseconductorsS (mm 2 )S < 16Minimum cross-sectional area of the correspondingprotective conductorS p (mm 2 )S16 < S < 35 1635 < S S/2Compared to a four-conductor system, the use of symmetrical shielded cablereduces electromagnetic emission of the whole drive system as well as the stress onmotor insulation, bearing curr<strong>en</strong>ts and wear.The motor cable and its PE pigtail (twisted shield) should be kept as short aspossible in order to reduce high frequ<strong>en</strong>cy electromagnetic emission, as well asstray curr<strong>en</strong>ts outside the cable and capacitive curr<strong>en</strong>t (relevant in power rangebelow 20 kW).Planning the electrical installation
52Alternative power cable typesPower cable types that can be used with the drive are repres<strong>en</strong>ted below.Recomm<strong>en</strong>dedSymmetrical shielded cable: three phase conductorsand a conc<strong>en</strong>tric or otherwise symmetricallyconstructed PE conductor, and a shieldA separate PE conductor is required if the conductivityof the cable shield is < 50% of the conductivity of thephase conductor.PE conductorand shieldShieldShieldPEPEA four-conductor system:three phase conductorsand a protectiveconductor.PENot allowed for motor cablesShieldNot allowed for motor cables with phaseconductor cross section larger than 10 mm 2[motors > 30 kW (40 HP)].Motor cable shieldTo effectively suppress radiated and conducted radio-frequ<strong>en</strong>cy emissions, theshield conductivity must be at least 1/10 of the phase conductor conductivity. Therequirem<strong>en</strong>ts are easily met with a copper or aluminium shield. The minimumrequirem<strong>en</strong>t of the motor cable shield of the drive is shown below. It consists of aconc<strong>en</strong>tric layer of copper wires with an op<strong>en</strong> helix of copper tape or copper wire.The better and tighter the shield, the lower the emission level and the bearingcurr<strong>en</strong>ts.Insulation jacketCopper wire scre<strong>en</strong>Helix of copper tapeor copper wireInner insulationCable corePlanning the electrical installation
53Additional US requirem<strong>en</strong>tsType MC continuous corrugated aluminium armor cable with symmetrical grounds orshielded power cable must be used for the motor cables if metallic conduit is notused. For the North American market, 600 V AC cable is accepted for up to500 V AC. 1000 V AC cable is required above 500 V AC (below 600 V AC). Fordrives rated over 100 amperes, the power cables must be rated for 75 °C (167 °F).ConduitSeparate parts of a conduit must be coupled together, bridge the joints with a groundconductor bonded to the conduit on each side of the joint. Bond the conduits also tothe drive <strong>en</strong>closure and motor frame. Use separate conduits for input power, motor,brake resistor, and control wiring. Wh<strong>en</strong> conduit is employed, type MC continuouscorrugated aluminium armor cable or shielded cable is not required. A dedicatedground cable is always required.Note: Do not run motor wiring from more than one drive in the same conduit.Armored cable / shielded power cableSix conductor (3 phases and 3 ground) type MC continuous corrugated aluminiumarmor cable with symmetrical grounds is available from the following suppliers (trad<strong>en</strong>ames in par<strong>en</strong>theses):• Anixter Wire & Cable (Philsheath)• BICC G<strong>en</strong>eral Corp (Philsheath)• Rockbestos Co. (Gardex)• Oaknite (CLX).Shielded power cables are available from Beld<strong>en</strong>, LAPPKABEL (ÖLFLEX) andPirelli.Planning the electrical installation
54Power factor comp<strong>en</strong>sation capacitorsPower factor comp<strong>en</strong>sation is not needed with AC drives. However, if a drive is to beconnected in a system with comp<strong>en</strong>sation capacitors installed, note the followingrestrictions.WARNING! Do not connect power factor comp<strong>en</strong>sation capacitors or harmonicfilters to the motor cables (betwe<strong>en</strong> the drive and the motor). They are not meant tobe used with AC drives and can cause perman<strong>en</strong>t damage to the drive orthemselves.If there are power factor comp<strong>en</strong>sation capacitors in parallel with the three phaseinput of the drive:1. Do not connect a high-power capacitor to the power line while the drive isconnected. The connection will cause voltage transi<strong>en</strong>ts that may trip or ev<strong>en</strong>damage the drive.2. If capacitor load is increased/decreased step by step wh<strong>en</strong> the AC drive isconnected to the power line: Ensure that the connection steps are low <strong>en</strong>ough notto cause voltage transi<strong>en</strong>ts that would trip the drive.3. Check that the power factor comp<strong>en</strong>sation unit is suitable for use in systems withAC drives i.e. harmonic g<strong>en</strong>erating loads. In such systems, the comp<strong>en</strong>sation unitshould typically be equipped with a blocking reactor or harmonic filter.Equipm<strong>en</strong>t connected to the motor cableInstallation of safety switches, contactors, connection boxes, etc.To minimize the emission level wh<strong>en</strong> safety switches, contactors, connection boxesor similar equipm<strong>en</strong>t are installed in the motor cable betwe<strong>en</strong> the drive and themotor:• EU: Install the equipm<strong>en</strong>t in a metal <strong>en</strong>closure with 360 degrees grounding for thescre<strong>en</strong>s of both the incoming and outgoing cable, or connect the scre<strong>en</strong>s of thecables otherwise together.• US: Install the equipm<strong>en</strong>t in a metal <strong>en</strong>closure in a way that the conduit or motorcable shielding runs consist<strong>en</strong>tly without breaks from the drive to the motor.Bypass connectionWARNING! Never connect the supply power to the drive output terminals U2, V2and W2. If frequ<strong>en</strong>t bypassing is required, employ mechanically connected switchesor contactors. Mains (line) voltage applied to the output can result in perman<strong>en</strong>tdamage to the unit.Planning the electrical installation
55Before op<strong>en</strong>ing a contactor (DTC control mode selected)Stop the drive and wait for the motor to stop before op<strong>en</strong>ing a contactor betwe<strong>en</strong> theoutput of the drive and the motor wh<strong>en</strong> the DTC control mode is selected. See theappropriate <strong>ACS800</strong> Control Program Firmware Manual for the required parametersettings. Otherwise, the contactor will be damaged. In scalar control, the contactorcan be op<strong>en</strong>ed with the drive running.Protecting the relay output contacts and att<strong>en</strong>uating disturbances in caseof inductive loadsInductive loads (relays, contactors, motors) cause voltage transi<strong>en</strong>ts wh<strong>en</strong> switchedoff.The relay contacts on the RMIO board are protected with varistors (250 V) againstovervoltage peaks. In spite of this, it is highly recomm<strong>en</strong>ded to equip inductive loadswith noise att<strong>en</strong>uating circuits [varistors, RC filters (AC) or diodes (DC)] in order tominimize the EMC emission at switch-off. If not suppressed, the disturbances mayconnect capacitively or inductively to other conductors in the control cable and forma risk of malfunction in other parts of the system.Install the protective compon<strong>en</strong>t as close to the inductive load as possible. Do notinstall protective compon<strong>en</strong>ts at the RMIO board terminal block.230 V AC230 V AC24 VD CVaristorRC filterDiodeRelay outputsX251 RO12 RO13 RO1X261 RO22 RO23 RO2X271 RO32 RO33 RO3RMIOPlanning the electrical installation
56Selecting the control cablesAll control cables must be shielded.Use a double-shielded twisted pair cable (Figure a, e.g. JAMAK by Draka NKCables, Finland) for analogue signals. This type of cable is recomm<strong>en</strong>ded for thepulse <strong>en</strong>coder signals also. Employ one individually shielded pair for each signal. Donot use common return for differ<strong>en</strong>t analogue signals.A double-shielded cable is the best alternative for low-voltage digital signals butsingle-shielded twisted multipair cable (Figure b) is also usable.aA double-shielded twistedpair cablebA single-shielded twistedmultipair cableRun analogue and digital signals in separate, shielded cables.Relay-controlled signals, providing their voltage does not exceed 48 V, can be run inthe same cables as digital input signals. It is recomm<strong>en</strong>ded that the relay-controlledsignals be run as twisted pairs.Never mix 24 V DC and 115/230 V AC signals in the same cable.Relay cableThe cable type with braided metallic scre<strong>en</strong> (e.g. ÖLFLEX by LAPPKABEL,Germany) has be<strong>en</strong> tested and approved by ABB.Control panel cableIn remote use, the cable connecting the control panel to the drive must not exceed3 metres (10 ft). The cable type tested and approved by ABB is used in control paneloption kits.Planning the electrical installation
57Connection of a motor temperature s<strong>en</strong>sor to the drive I/OWARNING! IEC 60664 requires double or reinforced insulation betwe<strong>en</strong> live partsand the surface of accessible parts of electrical equipm<strong>en</strong>t which are either nonconductiveor conductive but not connected to the protective earth.To fulfil this requirem<strong>en</strong>t, the connection of a thermistor (and other similarcompon<strong>en</strong>ts) to the digital inputs of the drive can be implem<strong>en</strong>ted in three alternateways:1. There is double or reinforced insulation betwe<strong>en</strong> the thermistor and live parts ofthe motor.2. Circuits connected to all digital and analogue inputs of the drive are protectedagainst contact and insulated with basic insulation (the same voltage level as thedrive main circuit) from other low voltage circuits.3. An external thermistor relay is used. The insulation of the relay must be rated forthe same voltage level as the main circuit of the drive. For connection, see<strong>ACS800</strong> Firmware Manual.Installation sites above 2000 metres (6562 feet)WARNING! Protect against direct contact wh<strong>en</strong> installing, operating and servicingthe RMIO board wiring and optional modules attached to the board. The ProtectiveExtra Low Voltage (PELV) requirem<strong>en</strong>ts stated in EN 50178 are not fulfilled ataltitudes above 2000 m (6562 ft).Routing the cablesRoute the motor cable away from other cable routes. Motor cables of several drivescan be run in parallel installed next to each other. It is recomm<strong>en</strong>ded that the motorcable, input power cable and control cables be installed on separate trays. Avoidlong parallel runs of motor cables with other cables in order to decreaseelectromagnetic interfer<strong>en</strong>ce caused by the rapid changes in the drive outputvoltage.Where control cables must cross power cables make sure they are arranged at anangle as near to 90 degrees as possible. Do not run extra cables through the drive.The cable trays must have good electrical bonding to each other and to thegrounding electrodes. Aluminium tray systems can be used to improve localequalizing of pot<strong>en</strong>tial.Planning the electrical installation
58A diagram of the cable routing is below.DriveMotor cablePower cablemin 300 mm (12 in.)Input power cablemin 200 mm (8 in.)90°Control cablesMotor cablemin 500 mm (20 in.)Control cable ducts24 V230 V(120 V)24 V230 V(120 V)Not allowed unless the 24 V cable isinsulated for 230 V (120 V) or insulatedwith an insulation sleeving for230 V (120 V).Lead 24 V and 230 V (120 V) controlcables in separate ducts inside thecabinet.Planning the electrical installation
59Electrical installationWhat this chapter containsThis chapter describes the electrical installation procedure of the drive.WARNING! The work described in this chapter may only be carried out by a qualifiedelectrician. Follow the Safety instructions on the first pages of this manual. Ignoringthe safety instructions can cause injury or death.Make sure that the drive is disconnected from the mains (input power) duringinstallation. If the drive is already connected to the mains, wait for 5 min afterdisconnecting mains power.Checking the insulation of the assemblyDriveDo not make any voltage tolerance or insulation resistance tests (e.g. hi-pot ormegger) on any part of the drive as testing can damage the drive. Every drive hasbe<strong>en</strong> tested for insulation betwe<strong>en</strong> the main circuit and the chassis (2500 V rms50 Hz for 1 second) at the factory. Also, there are voltage-limiting circuits inside thedrive which cut down the testing voltage automatically.Input cableCheck the insulation of the input cable according to local regulations beforeconnecting it to the drive.ohmPEMotor and motor cableCheck the insulation of the motor and motor cable as follows:1. Check that the motor cable is disconnected from the drive output terminals U2,V2 and W2.M 2. Measure the insulation resistances of the motor cable and the motor betwe<strong>en</strong>each phase and the Protective Earth by using a measuring voltage of 1 kV DC.The insulation resistance must be higher than 1 Mohm.Electrical installation
60IT (ungrounded) systemsEnsure that the drive is not equipped with optional EMC filter, i.e. type code does notinclude selections +E200 or +E202.However if EMC filters exist, disconnect the EMC filter capacitors of selections+E202 and +E200 before connecting the drive to an ungrounded system. Fordetailed instructions on how to do this, please contact your local ABB distributor.WARNING! If a drive with EMC filter selection +E202 or +E200 is installed on an ITsystem [an ungrounded power system or a high resistance-grounded (over 30 ohms)power system], the system will be connected to earth pot<strong>en</strong>tial through the EMCfilter capacitors of the drive. This may cause danger or damage the unit.Electrical installation
61Power cable connectionPower cable connectionDrive with brake chopper included1)PE2)INPUTU1 V1 W1R-UDC+R+UDC-OUTPUTU2 V2 W2For alternatives, seePlanning the electricalinstallation:Disconnecting device(means).(PE) PE (PE)L1 L2 L3External brakeresistor (360degrees groundingrequired)U1 V13 ~MotorW13)Connecting the power cables• Connect the twisted shield of the cable to the drive grounding terminal. Note:cable lugs are needed in frame sizes R2 and R3.• Supply cable grounding: If shielded cable is used, and the conductivity of theshield is < 50% of the conductivity of the phase conductor, use a separate PEcable (1) or a cable with a grounding conductor (2). With shielded cable 360°grounding of the supply cables is recomm<strong>en</strong>ded.Motor cable grounding: Use a separate grounding cable (3) if the conductivity ofthe cable shield is < 50% of the conductivity of the phase conductor and there isno symmetrically constructed grounding conductor in the cable (see Planning theelectrical installation: Selecting the power cables).360 degrees grounding is required at the cabinet <strong>en</strong>try in first <strong>en</strong>vironm<strong>en</strong>tinstallations. First <strong>en</strong>vironm<strong>en</strong>t EMC compliance is defined in chapter Technicaldata.Note: If there is a symmetrically constructed grounding conductor in the motorcable in addition to the conductive shield, connect the grounding conductor to thegrounding terminal at the drive and motor <strong>en</strong>ds.Note: Do not use an asymmetrically constructed motor cable. Connecting itsfourth conductor at the motor <strong>en</strong>d increases bearing curr<strong>en</strong>ts and causes extrawear.Electrical installation
62• Connect the phase conductors of the mains cable to the U1, V1 and W1 terminalsand the phase conductors of the motor cable to the U2, V2 and W2 terminals.Strip the conductor <strong>en</strong>ds as follows to fit them inside the power cable connectionterminals.Note: Lead the unstripped cable as close to the terminals as possible. Allunstripped parts must be protected against contact.Frame sizeStripping l<strong>en</strong>gthmmin.R2, R3 10 0.39R4, R5 16 0.63R6 28 1.10• Secure the cables outside the unit mechanically.• Ground the other <strong>en</strong>d of the input cable shield or PE conductor at the distributionboard.Grounding the motor cable shield at the motor <strong>en</strong>dFor minimum radio frequ<strong>en</strong>cy interfer<strong>en</strong>ce ground the cable shield 360 degrees atthe lead-through of the motor terminal box360 degrees groundingConductive gasketsor ground the cable by twisting the shield as follows: flatt<strong>en</strong>ed width > 1/5 · l<strong>en</strong>gth.b > 1/5 · aabElectrical installation
63Frame sizes R2 to R4U1 V1 W1 UDC+R- R+ UDC- U2 V2 W2PEPEInput power cableMotor cableFrame size R5PEU1V1W1R-UDC+R+ UDC-U2 V2 W2 PEInput power cableMotor cableElectrical installation
64Frame size R6: Cable lug installation [16 to 70 mm 2 (6 to 2/0 AWG) cables]U1U1UDC+U1 V1 W1 R- R+ UDC- U2 V2 W2Remove the screw terminals.Fast<strong>en</strong> the cable lugs to theremaining bolts with M10nuts.Isolate the <strong>en</strong>ds of the cablelugs with insulating tape orshrink tubePEInput power cableMotor cableElectrical installation
65Frame size R6: Cable terminal installation [95 to 185 mm 2 (3/0 to 2×4/0 AWG)cables]U1U1UDC+U1 V1 W1 R- R+ UDC- U2 V2 W2baPEa. Connect the cable to the terminal.b. Connect the terminal to the drive.WARNING! If the wire size is less than95 mm 2 (3/0 AWG), a cable lug mustbe used. A cable of wire size less than95 mm 2 (3/0 AWG) connected to thisterminal will loos<strong>en</strong> and may damagethe drive.Input power cableMotor cablePower cable protectionFrame size R5Cover the power cable terminals as follows:1. Cut holes for the installed cables into the clear plastic shroud.2. Press the shroud onto the terminals.21 2Electrical installation
66Removal of the shroud with a screw driver:Frame size R6Cover the power cable terminals as follows:1. Cut holes for the installed cables into the clear plastic shroud in cable luginstallations.2. Press the shroud onto the terminals.2View of cable terminalinstallation1Removal of the shroud by lifting up with a screw driver from the corner:Warning stickerThere are warning stickers in differ<strong>en</strong>t languages inside the packing box of the drive.Attach a warning sticker in the language of your choice onto the plastic skeletonabove the power cable terminals.Electrical installation
67Connecting the control cablesConnect the control cables as described below. Connect the conductors to theappropriate detachable terminals of the RMIO board [see chapter Motor control andI/O board (RMIO)]. Tight<strong>en</strong> the screws to secure the connection.TerminalsLocation of terminals vary dep<strong>en</strong>ding on the drive frame size.Frame sizes R2 to R4The control cable connection terminals areexposed wh<strong>en</strong> the control panel mounting platformis turned aside by pulling this knob. Be careful, donot use excess force wh<strong>en</strong> pulling.(control panel is an option)Detachable connection terminals (pull up)X39 for control panel cableTerminal for optionalPrev<strong>en</strong>tion of UnexpectedStartI/O cables: Ground thecontrol cable shields in theholes with screws. Seesection 360 degreesgrounding.X41Optional module 1Optional module 2DDCS communicationoption module 3:RDCOPlace the warningsticker here1234Relay outputsElectrical installation
68Frame sizes R5 and R6View of frame size R6Control panel(optional)X41 for Prev<strong>en</strong>tion ofUnexpected Start (AGPSboard)Optional module 1 Optional module 2Control cablegrounding: seesection 360degreesgroundingX41DDCS communication option module 3: RDCOPlace the warning sticker hereDetachable connection terminals (pull up)Terminal for optionalPrev<strong>en</strong>tion of UnexpectedStartElectrical installation
69360 degrees groundingInsulation1234Double-shielded cableSingle-shielded cableWh<strong>en</strong> the outer surface of the shield is covered with non-conductive material• Strip the cable carefully (do not cut the grounding wire and the shield)• Turn the shield inside out to expose the conductive surface.• Wrap the grounding wire around the conductive surface.• Slide a conductive clamp onto the conductive part.• Fast<strong>en</strong> the clamp to the grounding plate with a screw as close as possible to theterminals where the wires are about to be connected.Connecting the shield wiresSingle shielded cables: Twist the grounding wires of the outer shield and connectthem through the shortest possible route to the nearest grounding hole with a cablelug and a screw. Double shielded cables: Connect each pair cable shield (twistedgrounding wires) with other pair cable shields of the same cable to the nearestgrounding hole with a cable lug and a screw.Do not connect shields of differ<strong>en</strong>t cables to the same cable lug and groundingscrew.Leave the other <strong>en</strong>d of the shield unconnected or ground it indirectly via a fewnanofarads high-frequ<strong>en</strong>cy capacitor (e.g. 3.3 nF / 630 V). The shield can also begrounded directly at both <strong>en</strong>ds if they are in the same ground line with no significantvoltage drop betwe<strong>en</strong> the <strong>en</strong>d points.Keep the signal wire pairs twisted as close to the terminals as possible. Twisting thewire with its return wire reduces disturbances caused by inductive coupling.Electrical installation
70Cabling of I/O and fieldbus modulesAs short as possibleModuleShield1234Note: The RDIO module does notinclude a terminal for cable shieldgrounding. Ground the pair cableshields here.Pulse <strong>en</strong>coder module cabling1234ShieldAs short aspossibleRTACNote1: If the <strong>en</strong>coder is ofunisolated type, ground the <strong>en</strong>codercable at the drive <strong>en</strong>d only. If the<strong>en</strong>coder is galvanically isolatedfrom the motor shaft and the statorframe, ground the <strong>en</strong>coder cableshield at the drive and the <strong>en</strong>coder<strong>en</strong>d.Note 2: Twist the pair cable wires.Wrap copper tape around thestripped part of the cable under theclamp. Be careful. Do not cut thegrounding wire. Clamp as close tothe terminals as possible.Electrical installation
71Installation of optional modules and PCThe optional module (such as fieldbus adapter, I/O ext<strong>en</strong>sion module and the pulse<strong>en</strong>coder interface) is inserted in the optional module slot of the RMIO board (seesection Connecting the control cables) and fixed with two screws. See theappropriate optional module manual for cable connections.Fibre optic linkA DDCS fibre optic link is provided via the RDCO optional module for PC tools,master/follower link, NDIO, NTAC, NAIO and fieldbus adapter modules of type Nxxx.See RDCO User’s Manual for connections. Observe colouring codes wh<strong>en</strong> installingfibre optic cables. Blue connectors go to blue terminals, and grey connectors to greyterminals.Wh<strong>en</strong> installing multiple modules on the same channel connect them in a ring.External +24 V power supply for the RMIO board via terminal X34This section describes how to connect an external +24 V power supply for the RMIOboard via terminal X34. For the curr<strong>en</strong>t consumption of the RMIO board, see chapterMotor control and I/O board (RMIO).Note: External power is easier to supply to the RMIO board via terminal X23, seechapter Motor control and I/O board (RMIO).Parameter settingsIn Standard Control Program, set parameter 16.09 CTRL BOARD SUPPLY toEXTERNAL 24V if the RMIO board is powered from an external supply.Connecting +24 V external power supply1. Break off the tab covering the +24 V DC power input connector with pliers.2. Lift the connector upwards.3. Disconnect the wires from the connector (keep the connector for later use).4. Isolate the <strong>en</strong>ds of the wires individually with insulating tape.5. Cover the isolated <strong>en</strong>ds of the wires with insulating tape.6. Push the wires inside the skeleton.7. Connect the wires of the +24 V external power supply to the disconnectedconnector:if a two-way connector, + wire to terminal 1 and - wire to terminal 2if a three-way connector, + wire to terminal 2 and - wire to terminal 3.8. Plug the connector in.Electrical installation
72Frame sizes R2 to R4Frame sizes R5 and R611X343244Electrical installation
7356 7RMIO boardRMIO board1 2 3 1 2 3X34X34+ -+ -81 21 2 3Connection of a two-wayconnectorConnection of a three-wayconnectorElectrical installation
74Prev<strong>en</strong>tion of Unexpected Start, AGPS boardWARNING! Dangerous voltages can be pres<strong>en</strong>t on the AGPS board ev<strong>en</strong> wh<strong>en</strong> the115...230 V supply is switched off. Follow the Safety instructions on the first pages ofthis manual and the instruction in this section wh<strong>en</strong> working on the AGPS board.Make sure that the drive is disconnected from the mains (input power) and the115...230 V source for the AGPS board is switched off during installation andmaint<strong>en</strong>ance. If the drive is already connected to the mains, wait for 5 min afterdisconnecting mains power.Connect the optional AGPS board as follows:• Remove the <strong>en</strong>closure cover by undoing the fixing screws (1).• Ground the unit via the bottom plate of the <strong>en</strong>closure or via terminal X1:1 of theAGPS board.• Connect the cable delivered with the kit betwe<strong>en</strong> terminal block X2 of the AGPSboard (2) and drive terminal block X41.• Connect a cable betwe<strong>en</strong> connector X1 of the AGPS board (3) and the115...230 V source.• Fast<strong>en</strong> the <strong>en</strong>closure cover back with screws.12X2X1115...230 V3Electrical installation
75Note: Location of the X41 terminal block varies according to the drive frame size,see page 67.Note: Maximum cable l<strong>en</strong>gth betwe<strong>en</strong> AGPS terminal block X2 and drive terminalblock is restricted to 10 m.For technical data see section AGPS-11C in chapter Technical data.Electrical installation
76The following figure pres<strong>en</strong>ts the circuit diagram of the Prev<strong>en</strong>tion of UnexpectedStart.3AFE00374994/<strong>U4</strong>Electrical installation
77Motor control and I/O board (RMIO)What this chapter containsThis chapter shows• external control connections to the RMIO board for the <strong>ACS800</strong> Standard ControlProgram (Factory Macro)• specifications of the inputs and outputs of the board.This chapter applies to <strong>ACS800</strong> units which employ RMIO-01 board from revision Jonwards and RMIO-02 board from revision H onwards.Note on terminal labellingOptional modules (Rxxx) may have id<strong>en</strong>tical terminal designations with the RMIOboard.Note on external power supplyExternal +24 V power supply for the RMIO board is recomm<strong>en</strong>ded if• the application requires a fast start after connecting the input power supply• fieldbus communication is required wh<strong>en</strong> the input power supply is disconnected.The RMIO board can be supplied from an external power source via terminal X23 orX34 or via both X23 and X34. The internal power supply to terminal X34 can be leftconnected wh<strong>en</strong> using terminal X23.WARNING! If the RMIO board is supplied from an external power source viaterminal X34, the loose <strong>en</strong>d of the cable removed from the RMIO board terminalmust be secured mechanically to a location where it cannot come into contact withelectrical parts. If the screw terminal plug of the cable is removed, the wire <strong>en</strong>dsmust be individually insulated.Parameter settingsIn Standard Control Program, set parameter 16.09 CTRL BOARD SUPPLY toEXTERNAL 24V if the RMIO board is powered from an external supply.Motor control and I/O board (RMIO)
78External control connections (non-US)External control cable connections to the RMIO board for the <strong>ACS800</strong> StandardControl Program (Factory Macro) are shown below. For external control connectionsof other control macros and programs, see the appropriate Firmware Manual.X20Terminal block size:1 VREF- Refer<strong>en</strong>ce voltage -10 V DC, 1 kohm < R Lcables 0.3 to 3.3 mm 2 (22 to 12 AWG)2 AGND < 10 kohmTight<strong>en</strong>ing torque:0.2 to 0.4 Nm (0.2 to 0.3 lbf ft)X211 VREF+ Refer<strong>en</strong>ce voltage 10 V DC, 1 kohm < R L 4 AI1- 200 kohm5 AI2+ By default, not in use. 0(4) ... 20 mA, R in =6 AI2- 100 ohm7 AI3+ By default, not in use. 0(4) ... 20 mA, R in =8 AI3- 100 ohmrpm9 AO1+ Motor speed 0(4)...20 mA = 0...motor nom.10 AO1- speed, R L < 700 ohmA11 AO2+ Output curr<strong>en</strong>t 0(4)...20 mA = 0...motor12 AO2- nom. curr<strong>en</strong>t, R L < 700 ohmX221 DI1 Stop/Start1) Only effective if par. 10.03 is set to2 DI2 Forward/Reverse 1)REQUEST by the user.3 DI3 Not in use4 DI4 Acceleration & deceleration select 2)2) 0 = op<strong>en</strong>, 1 = closed5 DI5 Constant speed select 3)DI4 Ramp times according to6 DI6 Constant speed select 3)0 parameters 22.02 and 22.037 +24VD +24 V DC max. 100 mA1 parameters 22.<strong>04</strong> and 22.058 +24VD9 DGND1 Digital ground3) See par. group 12 CONSTANT SPEEDS.10 DGND2 Digital groundDI5 DI6 Operation11 DIIL Start interlock (0 = stop) 4)0 0 Set speed through AI1X231 0 Constant speed 11 +24V Auxiliary voltage output and input, nonisolated,0 1 Constant speed 22 GND24 V DC 250 mA 5)1 1 Constant speed 3X251 RO1 Relay output 1: ready4) See parameter 21.09 START INTRL2 RO1FUNC.3 RO15) Total maximum curr<strong>en</strong>t sharedX26betwe<strong>en</strong> this output and optional1 RO2 Relay output 2: runningmodules installed on the board.2 RO23 RO2X271 RO3 Relay output 3: fault (-1)Fault 2 RO33 RO3Motor control and I/O board (RMIO)
79External control connections (US)External control cable connections to the RMIO board for the <strong>ACS800</strong> StandardControl Program (Factory Macro US version) are shown below. For external controlconnections of other control macros and programs, see the appropriate FirmwareManual.X20Terminal block size:1 VREF- Refer<strong>en</strong>ce voltage -10 V DC, 1 kohm < R Lcables 0.3 to 3.3 mm 2 (22 to 12 AWG)2 AGND < 10 kohmTight<strong>en</strong>ing torque:0.2 to 0.4 Nm (0.2 to 0.3 lbf ft)X211 VREF+ Refer<strong>en</strong>ce voltage 10 V DC, 1 kohm < R L 4 AI1- 200 kohm5 AI2+ By default, not in use. 0(4) ... 20 mA, R in =6 AI2- 100 ohm7 AI3+ By default, not in use. 0(4) ... 20 mA, R in =8 AI3- 100 ohmrpm9 AO1+ Motor speed 0(4)...20 mA = 0...motor nom.10 AO1- speed, R L < 700 ohmA11 AO2+ Output curr<strong>en</strong>t 0(4)...20 mA = 0...motor12 AO2- nom. curr<strong>en</strong>t, R L < 700 ohmX221 DI1 Start ( )1) Only effective if par. 10.03 is set to2 DI2 Stop ( )REQUEST by the user.3 DI3 Forward/Reverse 1)4 DI4 Acceleration & deceleration select 2)2) 0 = op<strong>en</strong>, 1 = closed5 DI5 Constant speed select 3)DI4 Ramp times according to6 DI6 Constant speed select 3)0 parameters 22.02 and 22.037 +24VD +24 V DC max. 100 mA1 parameters 22.<strong>04</strong> and 22.058 +24VD9 DGND1 Digital ground3) See par. group 12 CONSTANT10 DGND2 Digital groundSPEEDS.11 DIIL Start interlock (0 = stop) 4)DI5 DI6 OperationX230 0 Set speed through AI11 +24V Auxiliary voltage output and input, nonisolated,24 V DC 250 mA 5)1 0 Constant speed 12 GND0 1 Constant speed 2X251 1 Constant speed 31 RO1 Relay output 1: ready4) 2 RO1See parameter 21.09 START INTRL3 RO1FUNC.5) X26Total maximum curr<strong>en</strong>t sharedbetwe<strong>en</strong> this output and optional1 RO2 Relay output 2: runningmodules installed on the board.2 RO23 RO2X271 RO3 Relay output 3: fault (-1)Fault 2 RO33 RO3Motor control and I/O board (RMIO)
80RMIO board specificationsAnalogue inputsInsulation test voltageMax. common mode voltagebetwe<strong>en</strong> the channelsCommon mode rejection ratioResolutionInaccuracyWith Standard Control Program two programmable differ<strong>en</strong>tial curr<strong>en</strong>t inputs (0 mA /4 mA ... 20 mA, R in = 100 ohm) and one programmable differ<strong>en</strong>tial voltage input (-10 V / 0 V / 2 V ... +10 V, R in > 200 kohm).The analogue inputs are galvanically isolated as a group.500 V AC, 1 min±15 V DC> 60 dB at 50 Hz0.025% (12 bit) for the -10 V ... +10 V input. 0.5% (11 bit) for the 0 ... +10 V and0 ... 20 mA inputs.±0.5% (Full Scale Range) at 25 °C (77 °F). Temperature coeffici<strong>en</strong>t: ±100 ppm/°C(±56 ppm/°F), max.Constant voltage outputVoltageMaximum loadApplicable pot<strong>en</strong>tiometer+10 V DC, 0, -10 V DC ± 0.5% (Full Scale Range) at 25 °C (77 °F). Temperaturecoeffici<strong>en</strong>t: ±100 ppm/°C (±56 ppm/°F) max.10 mA1 kohm to 10 kohmAuxiliary power outputVoltage24 V DC ± 10%, short-circuit proofMaximum curr<strong>en</strong>t 250 mA (without any optional modules inserted onto slots 1 and 2)Analogue outputsResolutionInaccuracyTwo programmable curr<strong>en</strong>t outputs: 0 (4) to 20 mA, R L < 700 ohm0.1% (10 bit)±1% (Full Scale Range) at 25 °C (77 °F). Temperature coeffici<strong>en</strong>t: ±200 ppm/°C(±111 ppm/°F) max.Digital inputsWith Standard Control Program six programmable digital inputs (common ground:24 V DC, -15% to +20%) and a start interlock input. Group isolated, can be divided intwo isolated groups (see Isolation and grounding diagram below).Thermistor input: 5 mA, < 1.5 kohm “1” (normal temperature), > 4 kohm “0”(high temperature), op<strong>en</strong> circuit “0” (high temperature).Internal supply for digital inputs (+24 V DC): short-circuit proof. An external 24 V DCsupply can be used instead of the internal supply.Insulation test voltage500 V AC, 1 minLogical thresholds < 8 V DC “0”, > 12 V DC “1”Input curr<strong>en</strong>tDI1 to DI 5: 10 mA, DI6: 5 mAFiltering time constant1 msMotor control and I/O board (RMIO)
81Relay outputsSwitching capacityMinimum continuous curr<strong>en</strong>tMaximum continuous curr<strong>en</strong>tContact materialInsulation test voltageThree programmable relay outputs8 A at 24 V DC or 250 V AC, 0.4 A at 120 V DC5 mA rms at 24 V DC2 A rmsSilver Cadmium Oxide (AgCdO)4 kV AC, 1 minuteDDCS fibre optic linkWith optional communication adapter module RDCO. Protocol: DDCS (ABBDistributed Drives Communication System)24 V DC power inputVoltage 24 V DC ±10%Typical curr<strong>en</strong>t consumption 250 mA(without optional modules)Maximum curr<strong>en</strong>t consumption 1200 mA (with optional modules inserted)The terminals on the RMIO board as well as on the optional modules attachable to the board fulfil the Protective ExtraLow Voltage (PELV) requirem<strong>en</strong>ts stated in EN 50178 provided that the external circuits connected to the terminals alsofulfil the requirem<strong>en</strong>ts and the installation site is below 2000 m (6562 ft). Above 2000 m (6562 ft), see page 57.Motor control and I/O board (RMIO)
82Isolation and grounding diagramX201 VREF-2 AGNDX211 VREF+2 AGND3 AI1+4 AI1-5 AI2+6 AI2-7 AI3+8 AI3-Common modevoltage betwe<strong>en</strong>channels ±15 V(Test voltage: 500 V AC)9 AO1+10 AO1-11 AO2+12 AO2-X221 DI12 DI23 DI34 DI4Jumper J1 settings:9 DGND15 DI56 DI67 +24VD8 +24VDJ1All digital inputs share acommon ground. This is thedefault setting.11 DIILGround10 DGND2X231 +24 V2 GNDX251 RO12 RO13 RO1X261 RO22 RO23 RO2X271 RO32 RO33 RO3(Test voltage:4kVAC)orGrounds of inputgroups DI1…DI4 andDI5/DI6/DIIL areseparate (insulationvoltage 50 V).Motor control and I/O board (RMIO)
83Installation checklistChecklistCheck the mechanical and electrical installation of the drive before start-up. Gothrough the checklist below together with another person. Read the Safetyinstructions on the first pages of this manual before you work on the unit.CheckMECHANICAL INSTALLATIONThe ambi<strong>en</strong>t operating conditions are allowed. (See Mechanical installation, Technical data:IEC data or NEMA data, Ambi<strong>en</strong>t conditions.)The unit is fixed properly into the cabinet. (See Planning the cabinet assembly andMechanical installation.)The cooling air will flow freely.The motor and the driv<strong>en</strong> equipm<strong>en</strong>t are ready for start. (See Planning the electricalinstallation: Motor selection and compatibility, Technical data: Motor connection.)ELECTRICAL INSTALLATION (See Planning the electrical installation, Electrical installation.)Drive does not include the EMC filter option (+E202, +E200) or the +E202 and +E200 EMCfilter capacitors are disconnected if the drive is connected to an IT (ungrounded) system.The capacitors are reformed if stored over one year (refer to ACS600/800 CapacitorReforming Guide [3AFE64059629 (English)].The drive is grounded properly.The mains (input power) voltage matches the drive nominal input voltage.The mains (input power) connections at U1, V1 and W1 and their tight<strong>en</strong>ing torques are OK.Appropriate mains (input power) fuses and disconnector are installed.The motor connections at U2, V2 and W2 and their tight<strong>en</strong>ing torques are OK.The motor cable is routed away from other cables.There are no power factor comp<strong>en</strong>sation capacitors in the motor cable.The external control connections inside the drive are OK.There are no tools, foreign objects or dust from drilling inside the drive.Mains (input power) voltage cannot be applied to the output of the drive (with bypassconnection).Motor connection box and other covers are in place.Installation checklist
84CheckModules with prev<strong>en</strong>tion of unexpected start option only (AGPS board): The prev<strong>en</strong>tion ofunexpected start circuit is completed.Installation checklist
85Maint<strong>en</strong>anceWhat this chapter containsSafetyThis chapter contains prev<strong>en</strong>tive maint<strong>en</strong>ance instructions.WARNING! Read the Safety instructions on the first pages of this manual beforeperforming any maint<strong>en</strong>ance on the equipm<strong>en</strong>t. Ignoring the safety instructions cancause injury or death.Maint<strong>en</strong>ance intervalsIf installed in an appropriate <strong>en</strong>vironm<strong>en</strong>t, the drive requires very little maint<strong>en</strong>ance.This table lists the routine maint<strong>en</strong>ance intervals recomm<strong>en</strong>ded by ABB.Maint<strong>en</strong>ance Interval InstructionCapacitor reforming Every year wh<strong>en</strong> stored See Reforming.Heatsink temperature checkand cleaningChange of additional coolingfan.Dep<strong>en</strong>ds on the dustiness ofthe <strong>en</strong>vironm<strong>en</strong>t (every 6 to 12months)Every three yearsSee Heatsink.See Additional fan.Cooling fan change Every six years See Fan.Frame size R4 and up:capacitor changeEvery t<strong>en</strong> yearsSee Capacitors.HeatsinkThe heatsink fins pick up dust from the cooling air. The drive runs intoovertemperature warnings and faults if the heatsink is not clean. In a “normal”<strong>en</strong>vironm<strong>en</strong>t (not dusty, not clean) the heatsink should be checked annually, in adusty <strong>en</strong>vironm<strong>en</strong>t more oft<strong>en</strong>.Clean the heatsink as follows (wh<strong>en</strong> necessary):1. Remove the cooling fan (see section Fan).2. Blow clean compressed air (not humid) from bottom to top and simultaneouslyuse a vacuum cleaner at the air outlet to trap the dust. Note: If there is a risk ofthe dust <strong>en</strong>tering adjoining equipm<strong>en</strong>t, perform the cleaning in another room.3. Replace the cooling fan.Maint<strong>en</strong>ance
86FanThe cooling fan lifespan of the drive is about 50 000 operating hours. The actuallifespan dep<strong>en</strong>ds on the drive usage and ambi<strong>en</strong>t temperature. See the appropriate<strong>ACS800</strong> Firmware Manual for an actual signal which indicates the hours of usage ofthe fan. For resetting the running time signal after a fan replacem<strong>en</strong>t, please contactABB.Fan failure can be predicted by the increasing noise from fan bearings and thegradual rise in the heatsink temperature in spite of heatsink cleaning. If the drive isoperated in a critical part of a process, fan replacem<strong>en</strong>t is recomm<strong>en</strong>ded once thesesymptoms start appearing. Replacem<strong>en</strong>t fans are available from ABB. Do not useother than ABB specified spare parts.Fan replacem<strong>en</strong>t (R2, R3)To remove the fan, release the retaining clips. Disconnect the cable. Install the newfan in reverse order.Bottom viewMaint<strong>en</strong>ance
87Fan replacem<strong>en</strong>t (R4)1. Loos<strong>en</strong> the screws that fast<strong>en</strong> the fan mounting plate to the frame.2. Push the fan mounting plate to the left and pull it out.3. Disconnect the fan power cable.4. Undo the screws that fast<strong>en</strong> the fan to the fan mounting plate.5. Install the new fan in reverse order.211Bottom view3View from above fanplate pulled out4 444Maint<strong>en</strong>ance
88Fan replacem<strong>en</strong>t (R5)1. Undo the fast<strong>en</strong>ing screws of the swing-out frame.2. Op<strong>en</strong> the swing-out frame.3. Disconnect the cable.4. Undo the fast<strong>en</strong>ing screws of the fan.5. Install the new fan in reverse order.Bottom view144123Maint<strong>en</strong>ance
89Fan replacem<strong>en</strong>t (R6)To remove the fan, undo the fixing screws. Disconnect the cable. Install the new fanin reverse order.12Bottom view1Additional fanIn <strong>ACS800</strong>-<strong>04</strong>/<strong>U4</strong> (R2...R6) units there is an additional fan in all types except in-0001-2, -0002-2, -0003-2, -0003-3, -00<strong>04</strong>-3, -0005-3, -00<strong>04</strong>-5, -0005-5 and-0006-5.Replacem<strong>en</strong>t (R2, R3)To remove the fan, release the retaining clip (1). Disconnect the cable (2, detachableterminal). Install the new fan in reverse order.12Air flow upwardsRotation directionView from aboveMaint<strong>en</strong>ance
90Replacem<strong>en</strong>t (R4, R5)The fan is located on the lower right-hand side of the unit (R4) or on the right-handside of the control panel (R5). Lift the fan out and disconnect the cable. Install the fanin reverse order.Replacem<strong>en</strong>t (R6)To remove the fan, release the retaining clips by pulling the back edge (1) of the fanupwards. Disconnect the cable (2, detachable terminal). Install the new fan inreverse order.Air flow upwardsRotation direction2 View from above1CapacitorsThe drive intermediate circuit employs several electrolytic capacitors. Their lifespanis from 45 000 to 90 000 hours dep<strong>en</strong>ding on drive loading and ambi<strong>en</strong>ttemperature. Capacitor life can be prolonged by lowering the ambi<strong>en</strong>t temperature.It is not possible to predict a capacitor failure. Capacitor failure is usually followed bya mains fuse failure or a fault trip. Contact ABB if capacitor failure is suspected.Replacem<strong>en</strong>ts for frame size R4 and up are available from ABB. Do not use otherthan ABB specified spare parts.ReformingReform (re-age) spare part capacitors once a year according to ACS600/800Capacitor Reforming Guide [3AFE64059629 (English)].LEDsThis table describes LEDs of the drive.Where LED Wh<strong>en</strong> the LED is litRMIO board Red Drive in fault stateGre<strong>en</strong>The power supply on the board is OK.Maint<strong>en</strong>ance
91Technical dataWhat this chapter containsIEC dataThis chapter contains the technical specifications of the drive, e.g. the ratings, sizesand technical requirem<strong>en</strong>ts, provisions for fulfilling the requirem<strong>en</strong>ts for CE andother markings and warranty policy.RatingsThe IEC ratings for the <strong>ACS800</strong>-<strong>04</strong> with 50 Hz and 60 Hz supplies are giv<strong>en</strong> below.The symbols are described below the table.<strong>ACS800</strong>-<strong>04</strong> size NominalratingsNo-overloaduseLight-overloaduseHeavy-duty use FramesizeAirflowHeatdissipationI cont.max I maxP cont.max I 2N P N I 2hd P hdAkWAA kW A kW m 3 /h WThree-phase supply voltage 208 V, 220 V, 230 V or 240 V-0001-2 5.1 6.5 1.1 4.7 0.75 3.4 0.55 R2 35 100-0002-2 6.5 8.2 1.5 6.0 1.1 4.3 0.75 R2 35 100-0003-2 8.5 10.8 1.5 7.7 1.5 5.7 1.1 R2 35 100-00<strong>04</strong>-2 10.9 13.8 2.2 10.2 2.2 7.5 1.5 R2 35 120-0005-2 13.9 17.6 3 12.7 3 9.3 2.2 R2 35 140-0006-2 19 24 4 18 4 14 3 R3 69 160-0009-2 25 32 5.5 24 5,5 19 4 R3 69 200-0011-2 34 46 7.5 31 7.5 23 5.5 R3 69 250-0016-2 44 62 11 42 11 32 7.5 R4 103 340-0020-2 55 72 15 50 11 37 7.5 R4 103 440-0025-2 72 86 18.5 69 18.5 49 11 R5 250 530-0030-2 86 112 22 80 22 60 15 R5 250 610-0<strong>04</strong>0-2 103 138 30 94 22 69 18.5 R5 250 810-0050-2 141 164 37 132 37 97 30 R6 405 1190-0060-2 166 202 45 155 45 115 30 R6 405 1190-0070-2 202 282 55 184 55 141 37 R6 405 1440Technical data
92<strong>ACS800</strong>-<strong>04</strong> sizeNominalratingsI maxI cont.maxANo-overloaduseP cont.maxkWLight-overloaduseI 2N P NA kWHeavy-duty useFramesizeAThree-phase supply voltage 380 V, 400 V or 415 V-0003-3 5.1 6.5 1.5 4.7 1.5 3.4 1.1 R2 35 100-00<strong>04</strong>-3 6.5 8.2 2.2 5.9 2.2 4.3 1.5 R2 35 120-0005-3 8.5 10.8 3 7.7 3 5.7 2.2 R2 35 140-0006-3 10.9 13.8 4 10.2 4 7.5 3 R2 35 160-0009-3 13.9 17.6 5.5 12.7 5.5 9.3 4 R2 35 200-0011-3 19 24 7.5 18 7.5 14 5.5 R3 69 250-0016-3 25 32 11 24 11 19 7.5 R3 69 340-0020-3 34 46 15 31 15 23 11 R3 69 440-0023-3 40 46 22 39 18.5 28 15 R3 69 520-0025-3 44 62 22 41 18.5 32 15 R4 103 530-0030-3 55 72 30 50 22 37 18.5 R4 103 610-0035-3 59 72 30 57 30 41 22 R4 103 660-0<strong>04</strong>0-3 72 86 37 69 30 49 22 R5 168 810-0050-3 86 112 45 80 37 60 30 R5 168 990-0060-3 103 138 55 100 55 69 37 R5 168 1190-0075-3 145 170 75 141 75 100 45 R5 405 1440-0070-3 141 164 75 132 55 97 45 R6 405 1440-0100-3 166 202 90 155 75 115 55 R6 405 1940-0120-3 202 282 110 184 90 141 75 R6 405 2310-0135-3 225 326 110 220 110 163 90 R6 405 2810-0165-3 260 326 132 254 132 215 110 R6 405 3260-0205-3 290 351 160 285 160 234 132 R6 405 4200Three-phase supply voltage 380 V, 400 V, 415 V, 440 V, 460 V, 480 V or 500 V-00<strong>04</strong>-5 4.9 6.5 2.2 4.5 2.2 3.4 1.5 R2 35 120-0005-5 6.2 8.2 3 5.6 3 4.2 2.2 R2 35 140-0006-5 8.1 10.8 4 7.7 4 5.6 3 R2 35 160-0009-5 10.5 13.8 5.5 10 5.5 7.5 4 R2 35 200-0011-5 13.2 17.6 7.5 12 7.5 9.2 5.5 R2 35 250-0016-5 19 24 11 18 11 13 7.5 R3 69 340-0020-5 25 32 15 23 15 18 11 R3 69 440-0025-5 34 46 18.5 31 18.5 23 15 R3 69 530-0028-5 38 46 22 37 22 27 18.5 R3 69 590-0030-5 42 62 22 39 22 32 18.5 R4 103 610-0<strong>04</strong>0-5 48 72 30 44 30 36 22 R4 103 810-0<strong>04</strong>5-5 56 72 37 54 37 39 22 R4 103 950-0050-5 65 86 37 61 37 50 30 R5 168 990-0060-5 79 112 45 75 45 60 37 R5 168 1190-0070-5 96 138 55 88 55 69 45 R5 168 1440-0105-5 145 170 90 141 90 100 55 R5 405 2150-0100-5 124 164 75 115 75 88 55 R6 405 1940-0120-5 157 202 90 145 90 113 75 R6 405 2310-0140-5 180 282 110 163 110 141 90 R6 405 2810-0165-5 225 326 132 220 132 163 110 R6 405 3260-0205-5 260 326 160 254 160 215 132 R6 405 3800-0255-5 290 351 200 285 200 234 160 R6 405 4500I 2hdAAirflowHeatdissipationP hdkW m 3 /h WTechnical data
93<strong>ACS800</strong>-<strong>04</strong> sizeAA kWThree-phase supply voltage 525 V, 550 V, 575 V, 600 V, 660 V or 690 V-0011-7 13 14 11 11.5 7.5 8.5 5.5 R4 103 300-0016-7 17 19 15 15 11 11 7.5 R4 103 340-0020-7 22 28 18.5 20 15 15 11 R4 103 440-0025-7 25 38 22 23 18.5 19 15 R4 103 530-0030-7 33 44 30 30 22 22 18.5 R4 103 610-0<strong>04</strong>0-7 36 54 30 34 30 27 22 R4 103 690-0050-7 51 68 45 46 37 34 30 R5 250 840-0060-7 57 84 55 52 45 42 37 R5 250 1010-0070-7 79 1<strong>04</strong> 75 73 55 54 45 R6 405 1220-0100-7 93 124 90 86 75 62 55 R6 405 1650-0120-7 113 172 110 108 90 86 75 R6 405 1960-0145-7 134 190 132 125 110 95 90 R6 405 2660-0175-7 166 245 160 155 132 131 110 R6 405 3470-0205-7 190 245 160 180 160 147 132 R6 405 4180PDM code: 00096931-JSymbolsSizingNominalratingsI maxI cont.maxANo-overloaduseP cont.maxkWLight-overloaduseI 2N P NHeavy-duty useFramesizeAirflowHeatdissipationNominal ratingsI cont.max continuous rms output curr<strong>en</strong>t. No overload capability at 40 °C.I max maximum output curr<strong>en</strong>t. Available for 10 s at start, otherwise as long as allowed by drivetemperature.Typical ratings:No-overload useP cont.max typical motor power. The power ratings apply to most IEC 34 motors at the nominal voltage,230 V, 400 V, 500 V or 690 V.Light-overload use (10% overload capability)I 2N continuous rms curr<strong>en</strong>t. 10% overload is allowed for one minute every 5 minutes.P N typical motor power. The power ratings apply to most IEC 34 motors at the nominal voltage,230 V, 400 V, 500 V or 690 V.Heavy-duty use (50% overload capability)I 2hd continuous rms curr<strong>en</strong>t. 50% overload is allowed for one minute every 5 minutes.P hd typical motor power. The power ratings apply to most IEC 34 motors at the nominal voltage,230 V, 400 V, 500 V or 690 V.The curr<strong>en</strong>t ratings are the same regardless of the supply voltage within one voltage range. To achievethe rated motor power giv<strong>en</strong> in the table, the rated curr<strong>en</strong>t of the drive must be higher than or equal tothe rated motor curr<strong>en</strong>t.Note 1: The maximum allowed motor shaft power is limited to 1.5 · P hd , 1.1 · P N or P cont.max (whichevervalue is greatest). If the limit is exceeded, motor torque and curr<strong>en</strong>t are automatically restricted. Thefunction protects the input bridge of the drive against overload. If the condition exists for 5 minutes, thelimit is set to P cont.max .Note 2: The ratings apply in ambi<strong>en</strong>t temperature of 40°C (1<strong>04</strong>°F). In lower temperatures the ratingsare higher (except I max ).Note 3: Use the DriveSize PC tool for a more accurate dim<strong>en</strong>sioning if the ambi<strong>en</strong>t temperature isbelow 40°C (1<strong>04</strong>°F) or the drive is loaded cyclically.I 2hdAP hdkW m 3 /h WTechnical data
94DeratingThe load capacity (curr<strong>en</strong>t and power) decreases if the installation site altitude exceeds 1000 metres(3300 ft), or if the ambi<strong>en</strong>t temperature exceeds 40 °C (1<strong>04</strong> °F).Temperature deratingIn the temperature range +40 °C (+1<strong>04</strong> °F) to +50 °C (+122 °F) the rated output curr<strong>en</strong>t is decreased by1% for every additional 1 °C (1.8 °F). The output curr<strong>en</strong>t is calculated by multiplying the curr<strong>en</strong>t giv<strong>en</strong> inthe rating table by the derating factor.Example If the ambi<strong>en</strong>t temperature is 50°C (+122 °F), the derating factor is 100% - 1%· 10 °C =90% or 0.90. The output curr<strong>en</strong>t is th<strong>en</strong> 0.90 · I 2N or 0.90 · I 2hd .°CAltitude deratingIn altitudes from 1000 to 4000 m (3300 to 13123 ft) above sea level, the derating is 1% for every 100 m(328 ft). For a more accurate derating, use the DriveSize PC tool. See Installation sites above 2000metres (6562 feet) on page 57.Cooling characteristics<strong>ACS800</strong>-<strong>04</strong>frame sizeMinimum effective area of air inlet Minimum effective area of air outletcm 2 cm 2IP22 cabinet IP54 cabinet IP22 cabinet IP54 cabinetR2 125 250 200 400R3 250 500 400 800R4 375 750 600 1200R5 500 1000 800 1600R6 1000 2000 1600 3200Cooling requirem<strong>en</strong>ts for flange mounting<strong>ACS800</strong>-<strong>04</strong>frame sizeAir flow: drive front sideAir flow: heat sink sidem 3 /h m 3 /hR2 18 35R3 30 69R4 30 103R5 30 168R6 30 405Technical data
95FusesgG and aR fuses for protection against short-circuit in the input power cable or driveare listed below. Either fuse type may be used if it operates rapidly <strong>en</strong>ough.Frame sizes R2 to R4Check from the fuse time-curr<strong>en</strong>t curve that the operating time of the fuse isbelow 0.5 seconds. The operating time dep<strong>en</strong>ds on the supply network impedanceand the cross-sectional area and l<strong>en</strong>gth of the supply cable. The short-circuit curr<strong>en</strong>tcan be calculated as shown below in section Frame sizes R5 and R6.Note 1: See also Planning the electrical installation: Thermal overload and short-circuit protection. ForUL recognized fuses, see NEMA data on page 103.Note 2: In multicable installations, install only one fuse per phase (not one fuse per conductor).Note 3: Larger fuses than the recomm<strong>en</strong>ded ones must not be used.Note 4: Fuses from other manufacturers can be used if they meet the ratings and the melting curve ofthe fuse does not exceed the melting curve of the fuse m<strong>en</strong>tioned in the table.<strong>ACS800</strong>-<strong>04</strong>sizeInputcurr<strong>en</strong>tFuseA A 2 s V Manufacturer Type IEC sizeThree-phase supply voltage 208 V, 220 V, 230 V or 240 V-0001-2 4.4 10 483 500 ABB Control OFAF000H10 000-0002-2 5.2 10 483 500 ABB Control OFAF000H10 000-0003-2 6.7 10 483 500 ABB Control OFAF000H10 000-00<strong>04</strong>-2 9.3 16 993 500 ABB Control OFAF000H16 000-0005-2 12 16 993 500 ABB Control OFAF000H16 000-0006-2 16 20 1620 500 ABB Control OFAF000H20 000-0009-2 23 25 3100 500 ABB Control OFAF000H25 000-0011-2 31 40 9140 500 ABB Control OFAF000H40 000-0016-2 40 50 15400 500 ABB Control OFAF000H50 000-0020-2 51 63 21300 500 ABB Control OFAF000H63 000Three-phase supply voltage 380 V, 400 V or 415 V-0003-3 4.7 10 483 500 ABB Control OFAF000H10 000-00<strong>04</strong>-3 6.0 10 483 500 ABB Control OFAF000H10 000-0005-3 7.9 10 483 500 ABB Control OFAF000H10 000-0006-3 10 16 993 500 ABB Control OFAF000H16 000-0009-3 13 16 993 500 ABB Control OFAF000H16 000-0011-3 17 20 1620 500 ABB Control OFAF000H20 000-0016-3 23 25 3100 500 ABB Control OFAF000H25 000-0020-3 32 40 9140 500 ABB Control OFAF000H40 000-0023-3 38 50 15400 500 ABB Control OFAF000H50 000-0025-3 42 50 15400 500 ABB Control OFAF000H50 000-0030-3 53 63 21300 500 ABB Control OFAF000H63 000-0035-3 56 63 21300 500 ABB Control OFAF000H63 000Technical data
96<strong>ACS800</strong>-<strong>04</strong>sizeInputcurr<strong>en</strong>tFuseA A 2 s V Manufacturer Type IEC sizeThree-phase supply voltage 380 V, 400 V, 415 V, 440 V, 460 V, 480 V or 500 V-00<strong>04</strong>-5 4.7 10 483 500 ABB Control OFAF000H10 000-0005-5 5.9 10 483 500 ABB Control OFAF000H10 000-0006-5 7.7 10 483 500 ABB Control OFAF000H10 000-0009-5 10.0 16 993 500 ABB Control OFAF000H16 000-0011-5 12.5 16 993 500 ABB Control OFAF000H16 000-0016-5 17 20 1620 500 ABB Control OFAF000H20 000-0020-5 23 25 3100 500 ABB Control OFAF000H25 000-0025-5 31 40 9140 500 ABB Control OFAF000H40 000-0028-5 36 50 15400 500 ABB Control OFAF000H50 000-0030-5 41 50 15400 500 ABB Control OFAF000H50 000-0<strong>04</strong>0-5 47 63 21300 500 ABB Control OFAF000H63 000-0<strong>04</strong>5-5 54 63 21300 500 ABB Control OFAF000H63 000Three-phase supply voltage 525 V, 550 V, 575 V, 600 V, 660 V or 690 V-0011-7 12 16 1100 690 ABB Control OFAA000GG16 000-0016-7 15 20 2430 690 ABB Control OFAA000GG20 000-0020-7 21 25 4000 690 ABB Control OFAA000GG25 000-0025-7 24 32 7000 690 ABB Control OFAA000GG32 000-0030-7 33 35 11400 690 ABB Control OFAA000GG35 000-0<strong>04</strong>0-7 35 50 22800 690 ABB Control OFAA000GG50 000PDM code:00096931-JFrame sizes R5 and R6Choose betwe<strong>en</strong> gG and aR fuses according to the table under Quick guide forselecting betwe<strong>en</strong> gG and aR fuses on page 100, or verify the operating time bychecking that the short-circuit curr<strong>en</strong>t of the installation is at least the valuegiv<strong>en</strong> in the fuse table. The short-circuit curr<strong>en</strong>t can be calculated as follows:I k2-ph =U2 · R c 2 + (Z k + X c ) 2whereI k2-ph = short-circuit curr<strong>en</strong>t in symmetrical two-phase short-circuit (A)U = network line-to-line voltage (V)R c = cable resistance (ohm)Z k = = z k · U 2 N /S N = transformer impedance (ohm)z k = transformer impedance (%)U N = transformer rated voltage (V)S N = nominal appar<strong>en</strong>t power of the transformer (kVA)X c = cable reactance (ohm).Technical data
97Calculation exampleDrive:• <strong>ACS800</strong>-<strong>04</strong>-0075-3• supply voltage U = 410 VTransformer:• rated power S N = 600 kVA• rated voltage U N = 430 V• transformer impedance z k = 7.2%.Supply cable:• l<strong>en</strong>gth = 170 m• resistance/l<strong>en</strong>gth = 0.398 ohm/km• reactance/l<strong>en</strong>gth = 0.082 ohm/km.Z k = z k · UN 2= 0.072 ·S N(430 V) 2600 kVA= 22.19 mohmR c = 170 m · 0.082m · 0.398 ohmkm= 67.66 mohmX c = 170ohmkm= 13.94 mohmI k2-ph=410 V= 2.7 kA2 · (67.66 mohm) 2 + (22.19 mohm + 13.94 mohm) 2The calculated short-circuit curr<strong>en</strong>t 2.7 kA is higher than the minimum short-circuit curr<strong>en</strong>t of the drivegG fuse type OFAF00H160 (2400 A). -> The 500 V gG fuse (ABB Control OFAF00H160) can be used.Technical data
98<strong>ACS800</strong>-<strong>04</strong> sizegG fusesInputcurr<strong>en</strong>tMin. shortcircuitcurr<strong>en</strong>t 1)A A A 2 s * V Manufacturer Type IEC sizeThree-phase supply voltage 208 V, 220 V, 230 V or 240 V-0025-2 67 1050 80 34500 500 ABB Control OFAF000H80 000-0030-2 81 1480 100 63600 500 ABB Control OFAF000H100 000-0<strong>04</strong>0-2 101 1940 125 103000 500 ABB Control OFAF00H125 00-0050-2 138 2400 160 200000 500 ABB Control OFAF00H160 00-0060-2 163 2850 200 350000 500 ABB Control OFAF1H200 1-0070-2 202 3300 224 420000 500 ABB Control OFAF1H224 1Three-phase supply voltage 380 V, 400 V or 415 V-0<strong>04</strong>0-3 69 1050 80 34500 500 ABB Control OFAF000H80 000-0050-3 83 1480 100 63600 500 ABB Control OFAF000H100 000-0060-3 100 1940 125 103000 500 ABB Control OFAF00H125 00-0075-3 142 2400 160 200000 500 ABB Control OFAF00H160 00-0070-3 138 2400 160 200000 500 ABB Control OFAF00H160 00-0100-3 163 2850 200 350000 500 ABB Control OFAF1H200 1-0120-3 198 3300 224 420000 500 ABB Control OFAF1H224 1-0135-3 221 3820 250 550000 500 ABB Control OFAF1H250 1-0165-3 254 4510 315 1100000 500 ABB Control OFAF2H315 2-0205-3 286 4510 315 1100000 500 ABB Control OFAF2H315 2Three-phase supply voltage 380 V, 400 V, 415 V, 440 V, 460 V, 480 V or 500 V-0050-5 64 1050 80 34500 500 ABB Control OFAF000H80 000-0060-5 78 1480 100 63600 500 ABB Control OFAF000H100 000-0070-5 95 1940 125 103000 500 ABB Control OFAF00H125 00-0105-5 142 2400 160 200000 500 ABB Control OFAF00H160 00-0100-5 121 2400 160 200000 500 ABB Control OFAF00H160 00-0120-5 155 2850 200 350000 500 ABB Control OFAF1H200 1-0140-5 180 2850 200 350000 500 ABB Control OFAF1H200 1-0165-5 222 3820 250 550000 500 ABB Control OFAF1H250 1-0205-5 256 4510 315 1100000 500 ABB Control OFAF2H315 2-0255-5 286 4510 315 1100000 500 ABB Control OFAF2H315 2Three-phase supply voltage 525 V, 550 V, 575 V, 600 V, 660 V or 690 V-0050-7 52 740 63 28600 690 ABB Control OFAA0GG63 0-0060-7 58 740 63 28600 690 ABB Control OFAA0GG63 0-0070-7 79 1050 80 52200 690 ABB Control OFAA0GG80 0-0100-7 91 1480 100 93000 690 ABB Control OFAA1GG100 1-0120-7 112 1940 125 126000 690 ABB Control OFAA1GG125 1-0145-7 131 2400 160 220000 690 ABB Control OFAA1GG160 1-0175-7 162 2850 200 350000 690 ABB Control OFAA1GG200 1-0205-7 186 3820 250 700000 690 ABB Control OFAA2GG250 2* maximum total I 2 t value for 550 V or 690 VFusePDM code:00096931-J, 005564891) minimum short-circuit curr<strong>en</strong>t of the installationNote 1: See also Planning the electrical installation: Thermal overload and short-circuit protection. ForUL recognized fuses, see NEMA data on page 103.Note 2: In multicable installations, install only one fuse per phase (not one fuse per conductor).Note 3: Larger fuses than the recomm<strong>en</strong>ded ones must not be used.Note 4: Fuses from other manufacturers can be used if they meet the ratings and the melting curve ofthe fuse does not exceed the melting curve of the fuse m<strong>en</strong>tioned in the table.Technical data
99<strong>ACS800</strong>-<strong>04</strong> sizeUltrarapid (aR) fusesInputcurr<strong>en</strong>tMin.shortcircuitcurr<strong>en</strong>t 1)A A A 2 s V Manufacturer Type IEC sizeThree-phase supply voltage 208 V, 220 V, 230 V or 240 V-0025-2 67 400 100 4650 690 Bussmann 170M1567 DIN000-0030-2 81 520 125 8500 690 Bussmann 170M1568 DIN000-0<strong>04</strong>0-2 101 695 160 8500 690 Bussmann 170M1569 DIN000-0050-2 138 1630 315 80500 690 Bussmann 170M1572 DIN000-0060-2 163 1280 315 46500 690 Bussmann 170M3817 DIN1*-0070-2 202 1810 400 105000 690 Bussmann 170M3819 DIN1*Three-phase supply voltage 380 V, 400 V or 415 V-0<strong>04</strong>0-3 69 400 100 4650 690 Bussmann 170M1567 DIN000-0050-3 83 520 125 8500 690 Bussmann 170M1568 DIN000-0060-3 100 695 160 8500 690 Bussmann 170M1569 DIN000-0075-3 142 1630 315 80500 690 Bussmann 170M1572 DIN000-0070-3 138 1630 315 80500 690 Bussmann 170M1572 DIN000-0100-3 163 1280 315 46500 690 Bussmann 170M3817 DIN1*-0120-3 198 1810 400 105000 690 Bussmann 170M3819 DIN1*-0135-3 221 2210 500 145000 690 Bussmann 170M5810 DIN2*-0165-3 254 2620 550 190000 690 Bussmann 170M5811 DIN2*-0205-3 286 2620 550 190000 690 Bussmann 170M5811 DIN2*Three-phase supply voltage 380 V, 400 V, 415 V, 440 V, 460 V, 480 V or 500 V-0050-5 64 400 100 4650 690 Bussmann 170M1567 DIN000-0060-5 78 520 125 8500 690 Bussmann 170M1568 DIN000-0070-5 95 520 125 8500 690 Bussmann 170M1568 DIN000-0105-5 142 1630 315 80500 690 Bussmann 170M1572 DIN000-0100-5 121 1630 315 80500 690 Bussmann 170M1572 DIN000-0120-5 155 1280 315 46500 690 Bussmann 170M3817 DIN1*-0140-5 180 1810 400 105000 690 Bussmann 170M3819 DIN1*-0165-5 222 2210 500 145000 690 Bussmann 170M5810 DIN2*-0205-5 256 2620 550 190000 690 Bussmann 170M5811 DIN2*-0255-5 286 2620 550 190000 690 Bussmann 170M5811 DIN2*Three-phase supply voltage 525 V, 550 V, 575 V, 600 V, 660 V or 690 V-0050-7 52 400 100 4650 690 Bussmann 170M1567 000-0060-7 58 400 100 4650 690 Bussmann 170M1567 000-0070-7 79 520 125 8500 690 Bussmann 170M1568 000-0100-7 91 695 160 16000 690 Bussmann 170M1569 000-0120-7 112 750 200 15000 690 Bussmann 170M3815 1*-0145-7 131 1520 350 68500 690 Bussmann 170M3818 DIN1*-0175-7 162 1520 350 68500 690 Bussmann 170M3818 DIN1*-0205-7 186 1610 400 74000 690 Bussmann 170M5808 DIN2*FusePDM code: 00096931-J, 005564891) minimum short-circuit curr<strong>en</strong>t of the installationNote 1: See also Planning the electrical installation: Thermal overload and short-circuit protection. ForUL recognized fuses, see NEMA data on page 103.Note 2: In multicable installations, install only one fuse per phase (not one fuse per conductor).Note 3: Larger fuses than the recomm<strong>en</strong>ded ones must not be used.Note 4: Fuses from other manufacturers can be used if they meet the ratings and the melting curve ofthe fuse does not exceed the melting curve of the fuse m<strong>en</strong>tioned in the table.Technical data
100Quick guide for selecting betwe<strong>en</strong> gG and aR fusesThe table below is a short cut in selecting betwe<strong>en</strong> gG and aR fuses. Thecombinations (cable size, cable l<strong>en</strong>gth, transformer size and fuse type) in the tablefulfil the minimum requirem<strong>en</strong>ts for the proper operation of the fuse.<strong>ACS800</strong>-01 size Cable type Supply transformer minimum appar<strong>en</strong>t power S N (kVA)Copper Aluminium Maximum cable l<strong>en</strong>gth with gG fuses Maximum cable l<strong>en</strong>gth with aR fuses10 m 50 m 100 m 10 m 100 m 200 mThree-phase supply voltage 208 V, 220 V, 230 V or 240 V-0025-2 3×25 Cu 3×35 Al 33 39 28 28-0030-2 3×35 Cu 3×50 Al 46 56 34 34-0<strong>04</strong>0-2 3×50 Cu 3×70 Al 60 73 42 42-0050-2 3×70 Cu 3×95 Al 75 89 58 71-0060-2 3×95 Cu 3×120 Al 89 110 68 71-0070-2 3×120 Cu 3×185 Al 110 120 84 84Three-phase supply voltage 380 V, 400 V or 415 V-0<strong>04</strong>0-3 3×25 Cu 3×35 Al 56 59 72 50 50 50-0050-3 3×35 Cu 3×50 Al 79 85 110 60 60 60-0060-3 3×50 Cu 3×70 Al 110 120 140 72 72 72-0075-3 3×70 Cu 3×95 Al 130 140 160 99 99 140-0070-3 3×70 Cu 3×95 Al 130 140 170 100 100 140-0100-3 3×95 Cu 3×120 Al 160 170 200 120 120 140-0120-3 3×120 Cu 3×185 Al 180 190 220 150 150 150-0135-3 3×150 Cu 3×240 Al 210 220 260 160 160 160-0165-3 3×185 Cu 3×240 Al 250 270 320 190 190 200-0205-3 3×240 Cu 2×(3×95) Al 232 257 310 134 153 196Three-phase supply voltage 380 V, 400 V, 415 V, 440 V, 460 V, 480 V or 500 V-0050-5 3×25 Cu 3×35 Al 67 70 79 56 56 56-0060-5 3×25 Cu 3×50 Al 95 110 130 68 68 68-0070-5 3×35 Cu 3×70 Al 130 140 160 83 83 83-0105-5 3×70 Cu 3×95 Al 160 170 190 130 130 150-0100-5 3×70 Cu 3×95 Al 160 170 190 110 120 150-0120-5 3×95 Cu 3×120 Al 190 200 220 140 140 150-0140-5 3×95 Cu 3×150 Al 190 200 220 160 160 160-0165-5 3×150 Cu 3×240 Al 250 260 290 200 200 200-0205-5 3×185 Cu 3×240 Al 290 320 360 230 230 230-0255-5 3×240 Cu 2×(3×95) Al 289 312 355 167 185 218Three-phase supply voltage 525 V, 550 V, 575 V, 600 V, 660 V or 690 V-0050-7 3×16 Cu 3×25 Al 65 67 70 63 63 63-0060-7 3×16 Cu 3×25 Al 70 70 70 70 70 70-0070-7 3×25 Cu 3×50 Al 95 95 99 95 95 95-0100-7 3×35 Cu 3×50 Al 130 140 150 110 110 110-0120-7 3×50 Cu 3×70 Al 180 180 190 140 140 140-0145-7 3×70 Cu 3×95 Al 220 220 240 160 160 160-0175-7 3×95 Cu 3×120 Al 260 260 280 200 200 200-0205-7 3×95 Cu 3×150 Al 340 360 390 230 230 230PDM code: 00556489 ANote 1: The supply transformer minimum power in kVA is calculated with a z k value of 6% andfrequ<strong>en</strong>cy 50 Hz.Note 2: The table is not int<strong>en</strong>ded for transformer selection - that must be done separately.Technical data
101The following parameters can effect on the correct operation of the protection:• cable l<strong>en</strong>gth, i.e. the longer the cable the weaker the fuse protection, as the long cable limits thefault curr<strong>en</strong>t• cable size, i.e. the smaller the cable the weaker the fuse protection, as the small cable size limits thefault curr<strong>en</strong>t• transformer size, i.e the smaller the transformer the weaker the fuse protection, as the smalltransformer limits the fault curr<strong>en</strong>t• transformer impedance, i.e. the higher the z k the weaker the fuse protection as high impedancelimits the fault curr<strong>en</strong>t.The protection can be improved by installing a bigger supply transformer and/or bigger cables, and inmost cases by selecting aR fuses instead of gG fuses. Selection of smaller fuses improves theprotection, but may also affect the fuse life time and lead to unnecessary operation of the fuses.In case of any uncertainty regarding the drive protection, please contact your local ABB.Cable typesThe table below gives copper and aluminium cable types for differ<strong>en</strong>t load curr<strong>en</strong>ts.Cable sizing is based on max. 9 cables laid on a cable ladder side by side, ambi<strong>en</strong>ttemperature 30 °C, PVC insulation, surface temperature 70 °C (EN 602<strong>04</strong>-1 andIEC 60364-5-52/2001). For other conditions, size the cables according to localsafety regulations, appropriate input voltage and the load curr<strong>en</strong>t of the drive.Copper cables with conc<strong>en</strong>triccopper shieldMax. load curr<strong>en</strong>tACable typemm 2Aluminium cables with conc<strong>en</strong>triccopper shieldMax. load curr<strong>en</strong>tACable typemm 213 3×1.5 61 3×2518 3×2.5 69 3×3524 3×4 83 3×5030 3×6 107 3×7<strong>04</strong>2 3×10 130 3×9556 3×16 151 3×12071 3×25 174 3×15088 3×35 199 3×185107 3×50 235 3×240137 3×70 274 3 × (3×50)167 3×95 260 2 × (3×95)193 3×120223 3×150255 3×1853BFA 01051905 CTechnical data
102FramesizeCable <strong>en</strong>triesBrake resistor, mains and motor cable terminal sizes (per phase) and tight<strong>en</strong>ingtorques are giv<strong>en</strong> below.U1, V1, W1, U2, V2, W2, R+, R- Earthing PEMaximum wire size Tight<strong>en</strong>ing torque Maximum wire size Tight<strong>en</strong>ing torquemm 2 Nm mm 2 NmR2 up to 16 * 1.2...1.5 up to 10 1.5R3 up to 16 * 1.2...1.5 up to 10 1.5R4 up to 25 2…4 up to 16 3.0R5 6...70 15 6...70 15R6 95...185 ** 20...40 95 8* 16 mm 2 rigid solid cable, 10 mm 2 flexible stranded cable** with cable lugs 16...70 mm 2 , tight<strong>en</strong>ing torque 20...40 Nm. Cable lugs are not included in the delivery.See page 64.Dim<strong>en</strong>sions, weights and noiseFrame size Height Width Depth* Weight Noisemm mm mm kg dBR2 370 165 193...226 8 62R3 420 173 231.5...265 13 62R4 490 240 252.2...271.5 24 62R5 602 265 275.5 32 65R6 700 300 399 64 65* Depth dep<strong>en</strong>ds on the options included in the drive.Technical data
103NEMA dataRatingsThe NEMA ratings for the <strong>ACS800</strong>-<strong>U4</strong> with 60 Hz supplies are giv<strong>en</strong> below. Thesymbols are described below the table. For sizing, derating and 50 Hz supplies, seesection IEC data.<strong>ACS800</strong>-<strong>U4</strong> size I max Normal use Heavy-duty use FramesizeAir flowHeatdissipationAI 2NAP NHPI 2hdAP hdHP ft 3 /min BTU/HrThree-phase supply voltage 208 V, 220 V, 230 V or 240 V-0002-2 8.2 6.6 1.5 4.6 1 R2 21 350-0003-2 10.8 8.1 2 6.6 1.5 R2 21 350-00<strong>04</strong>-2 13.8 11 3 7.5 2 R2 21 410-0006-2 24 21 5 13 3 R3 41 550-0009-2 32 27 7.5 17 5 R3 41 680-0011-2 46 34 10 25 7.5 R3 41 850-0016-2 62 42 15 31 10 R4 61 1150-0020-2 72 54 20 * 42 15 ** R4 61 1490-0025-2 86 69 25 54 20 ** R5 147 1790-0030-2 112 80 30 68 25 ** R5 147 2090-0<strong>04</strong>0-2 138 1<strong>04</strong> 40 * 80 30 ** R5 147 2770-0050-2 164 132 50 1<strong>04</strong> 40 R6 238 3370-0060-2 202 157 60 130 50 ** R6 238 4050-0070-2 282 192 75 154 60 ** R6 238 4910Three-phase supply voltage 380 V, 400 V, 415 V, 440 V, 460 V or 480 V-00<strong>04</strong>-5 6.5 4.9 3 3.4 2 R2 21 410-0005-5 8.2 6.2 3 4.2 2 R2 21 480-0006-5 10.8 8.1 5 5.6 3 R2 21 550-0009-5 13.8 11 7.5 8.1 5 R2 21 690-0011-5 17.6 14 10 11 7.5 R2 21 860-0016-5 24 21 15 15 10 R3 41 1150-0020-5 32 27 20 21 15 R3 41 1490-0025-5 46 34 25 27 20 R3 41 1790-0030-5 62 42 30 34 25 R4 61 2090-0<strong>04</strong>5-5 72 54 40 39 30 R4 61 2770-0050-5 86 65 50 52 40 R5 147 3370-0060-5 112 79 60 65 50 R5 147 4050-0070-5 138 96 75 77 60 R5 147 4910-0105-5 170 141 100 100 75 R5 238 7340-0100-5 164 124 100 96 75 R6 238 6610-0120-5 202 157 125 124 100 R6 238 7890-0140-5 282 180 150 156 125 R6 238 9600-0205-5 326 254 200 215 150 R6 238 12980Technical data
1<strong>04</strong><strong>ACS800</strong>-<strong>U4</strong> size I max Normal use Heavy-duty use FramesizeAir flowHeatdissipationA A HPThree-phase supply voltage 525 V, 575 V or 600 V-0011-7 14 11.5 10 8.5 7.5 R4 61 1050-0016-7 19 15 10 11 10 R4 61 1200-0020-7 28 20 15/20*** 15 15** R4 61 1550-0025-7 38 23 20 20 20** R4 61 1850-0030-7 44 30 25/30*** 25 25** R4 61 2100-0<strong>04</strong>0-7 54 34 30 30 30** R4 61 2400-0050-7 68 46 40 40 40** R5 147 2900-0060-7 84 52 50 42 40 R5 147 3450-0070-7 1<strong>04</strong> 73 60 54 50 R6 238 4200-0100-7 124 86 75 62 60 R6 238 5650-0120-7 172 108 100 86 75 R6 238 6700-0145-7 190 125 125 99 100 R6 238 9100-0175-7 245 155 150 131 125 R6 238 11900-0205-7 245 192 200 147 150 R6 238 14300PDM code: 00096931-J*Overload may be limited to 5% at high speeds (> 90% speed) by the internal power limit of the drive.The limitation also dep<strong>en</strong>ds on motor characteristics and network voltage.**Overload may be limited to 40% at high speeds (> 90% speed) by the internal power limit of thedrive. The limitation also dep<strong>en</strong>ds on motor characteristics and network voltage.*** Higher rating is available with special 4-pole high-effici<strong>en</strong>cy NEMA motor.SymbolsNominal ratingsI max maximum output curr<strong>en</strong>t. Available for 10 s at start, otherwise as long as allowed by drivetemperature.Normal use (10% overload capability)I 2N continuous rms curr<strong>en</strong>t. 10% overload is typically allowed for one minute every 5 minutes.P N typical motor power. The power ratings apply to most 4-pole NEMA rated motors (230 V,460 V or 575 V).Heavy-duty use (50% overload capability)I 2hd continuous rms curr<strong>en</strong>t. 50% overload is typically allowed for one minute every 5 minutes.P hd typical motor power. The power ratings apply to most 4-pole NEMA rated motors (230 V,460 V or 575 V).Note 1: The ratings apply in ambi<strong>en</strong>t temperature of 40°C (1<strong>04</strong>°F). In lower temperatures the ratingsare higher (except I max ).SizingSee page 93.DeratingSee page 94.I 2NP NI 2hdAP hdHP ft 3 /min BTU/HrTechnical data
105FusesUL class T fuses for branch circuit protection are listed below. Fast acting class T orfaster fuses are recomm<strong>en</strong>ded in the USA.Check from the fuse time-curr<strong>en</strong>t curve that the operating time of the fuse isbelow 0.5 seconds for units of frame sizes R2 to R4 and 0.1 seconds for unitsof frame sizes R5 and R6. The operating time dep<strong>en</strong>ds on the supply networkimpedance and the cross-sectional area and l<strong>en</strong>gth of the supply cable. The shortcircuitcurr<strong>en</strong>t can be calculated as shown in section Frame sizes R5 and R6 onpage 96.Note 1: See also Planning the electrical installation: Thermal overload and short-circuit protection.Note 2: In multicable installations, install only one fuse per phase (not one fuse per conductor).Note 3: Larger fuses than the recomm<strong>en</strong>ded ones must not be used.Note 4: Fuses from other manufacturers can be used if they meet the ratings and the melting curve ofthe fuse does not exceed the melting curve of the fuse m<strong>en</strong>tioned in the table.<strong>ACS800</strong>-<strong>U4</strong> Frame size InputFusetypecurr<strong>en</strong>tA A V Manufacturer Type UL classThree-phase supply voltage 208 V, 220 V, 230 V or 240 V-0002-2 R2 5.2 10 600 Bussmann JJS-10 T-0003-2 R2 6.5 10 600 Bussmann JJS-10 T-00<strong>04</strong>-2 R2 9.2 15 600 Bussmann JJS-15 T-0006-2 R3 18 25 600 Bussmann JJS-25 T-0009-2 R3 24 30 600 Bussmann JJS-30 T-0011-2 R3 31 40 600 Bussmann JJS-40 T-0016-2 R4 38 50 600 Bussmann JJS-50 T-0020-2 R4 49 70 600 Bussmann JJS-70 T-0025-2 R5 64 90 600 Bussmann JJS-90 T-0030-2 R5 75 100 600 Bussmann JJS-100 T-0<strong>04</strong>0-2 R5 102 125 600 Bussmann JJS-125 T-0050-2 R6 126 175 600 Bussmann JJS-175 T-0060-2 R6 153 200 600 Bussmann JJS-200 T-0070-2 R6 190 250 600 Bussmann JJS-250 TThree-phase supply voltage 380 V, 400 V, 415 V, 440 V, 460 V or 480 V-00<strong>04</strong>-5 R2 4.1 10 600 Bussmann JJS-10 T-0005-5 R2 5.4 10 600 Bussmann JJS-10 T-0006-5 R2 6.9 10 600 Bussmann JJS-10 T-0009-5 R2 9.8 15 600 Bussmann JJS-15 T-0011-5 R2 13 20 600 Bussmann JJS-20 T-0016-5 R3 18 25 600 Bussmann JJS-25 T-0020-5 R3 24 35 600 Bussmann JJS-35 T-0025-5 R3 31 40 600 Bussmann JJS-40 T-0030-5 R4 40 50 600 Bussmann JJS-50 T-0<strong>04</strong>5-5 R4 54 70 600 Bussmann JJS-70 T-0050-5 R5 63 80 600 Bussmann JJS-80 T-0060-5 R5 77 100 600 Bussmann JJS-100 T-0070-5 R5 94 125 600 Bussmann JJS-125 T-0105-5 R5 138 150 600 Bussmann JJS-150 T-0100-5 R6 121 150 600 Bussmann JJS-150 T-0120-5 R6 155 200 600 Bussmann JJS-200 T-0140-5 R6 179 225 600 Bussmann JJS-225 T-0205-5 R6 243 350 600 Bussmann JJS-350 TTechnical data
106<strong>ACS800</strong>-<strong>U4</strong> Frame size InputFusetypecurr<strong>en</strong>tA A V Manufacturer Type UL classThree-phase supply voltage 525 V, 575 V, 600 V-0011-7 R4 10 20 600 Bussmann JJS-20 T-0016-7 R4 13 20 600 Bussmann JJS-20 T-0020-7 R4 19 30 600 Bussmann JJS-30 T-0025-7 R4 21 30 600 Bussmann JJS-30 T-0030-7 R4 29 45 600 Bussmann JJS-45 T-0<strong>04</strong>0-7 R4 32 45 600 Bussmann JJS-45 T-0050-7 R5 45 70 600 Bussmann JJS-70 T-0060-7 R5 51 80 600 Bussmann JJS-80 T-0070-7 R6 70 100 600 Bussmann JJS-100 T-0100-7 R6 82 125 600 Bussmann JJS-125 T-0120-7 R6 103 150 600 Bussmann JJS-150 T-0145-7 R6 121 200 600 Bussmann JJS-200 T-0175-7 R6 150 200 600 Bussmann JJS-200 T-0205-7 R6 188 250 600 Bussmann JJS-250 TPDM code: 00096931-JCable typesCable sizing is based on NEC Table 310-16 for copper wires, 75 °C (167 °F) wire insulation at 40 °C(1<strong>04</strong> °F) ambi<strong>en</strong>t temperature. Not more than three curr<strong>en</strong>t-carrying conductors in raceway or cable orearth (directly buried). For other conditions, dim<strong>en</strong>sion the cables according to local safety regulations,appropriate input voltage and the load curr<strong>en</strong>t of the drive.Copper cables with conc<strong>en</strong>tric copper shieldCable typeMax. load curr<strong>en</strong>tAAWG/kcmil18 1422 1231 1<strong>04</strong>4 857 675 488 3101 2114 1132 1/0154 2/0176 3/0202 4/0224 250 MCM or 2 x 1251 300 MCM or 2 x 1/0PDM code: 00096931Technical data
107Cable <strong>en</strong>triesBrake resistor, input and motor cable (per phase) terminal sizes and tight<strong>en</strong>ingtorques are giv<strong>en</strong> below.Frame U1, V1, W1, U2, V2, W2, R+, R- Earthing PEsize Maximum wire size Tight<strong>en</strong>ing torque Maximum wire size Tight<strong>en</strong>ing torqueAWG lbf ft AWG lbf ftR2 up to 6 * 0.9…1.1 up to 8 1.1R3 up to 6 * 0.9...1.1 up to 8 1.1R4 up to 4 1.5…3.0 up to 5 2.2R5 10...2/0 11.1 10...2/0 11.1R6 3/0...2×4/0 ** 14.8...29.5 4/0 5.9* 6 AWG rigid solid cable, 8 AWG flexible stranded cable** with cable lugs 6...2/0 AWG, tight<strong>en</strong>ing torque 14.8...29.5 lbf ft. Cable lugs are not included in thedelivery. See page 64.Dim<strong>en</strong>sions, weights and noiseFrame size Height Width Depth* Weight Noisein. in. in. lb dBR2 14.57 6.5 7.6...8.9 18 62R3 16.54 6.81 9.11...10.43 29 62R4 19.29 9.45 9.93...10.69 53 62R5 23.70 10.43 10.85...11.11 71 65R6 27.56 11.81 15.71 141 65* Depth dep<strong>en</strong>ds on the options included in the drive.Input power connectionVoltage (U 1 )Rated conditional shortcircuitcurr<strong>en</strong>t (IEC 6<strong>04</strong>39-1)Short-circuit curr<strong>en</strong>tprotection (UL 508 CCSA C22.2 No. 14-05)Frequ<strong>en</strong>cyImbalanceFundam<strong>en</strong>tal power factor(cos phi 1 )208/220/230/240 V AC 3-phase ±10% for 230 V AC units380/400/415 V AC 3-phase ±10% for 400 V AC units380/400/415/440/460/480/500 V AC 3-phase ±10% for 500 V AC units525/550/575/600/660/690 V AC 3-phase ±10% for 690 V AC units65 kA wh<strong>en</strong> protected by fuses giv<strong>en</strong> in the IEC data fuse tables.US and Canada: The drive is suitable for use on a circuit capable of delivering not morethan 100 kA rms symmetrical amperes at the drive nominal voltage wh<strong>en</strong> protected byfuses giv<strong>en</strong> in the NEMA data fuse table.48 to 63 Hz, maximum rate of change 17%/sMax. ±3% of nominal phase to phase input voltage0.98 (at nominal load)Technical data
108Motor connectionVoltage (U 2 )Frequ<strong>en</strong>cy0 to U 1 , 3-phase symmetrical, U max at the field weak<strong>en</strong>ing pointDTC mode: 0 to 3.2 · f FWP . Maximum frequ<strong>en</strong>cy 300 Hz.f FWP =U NmainsU Nmotor· f NmotorFrequ<strong>en</strong>cy resolutionCurr<strong>en</strong>tPower limitField weak<strong>en</strong>ing pointSwitching frequ<strong>en</strong>cyMaximum recomm<strong>en</strong>dedmotor cable l<strong>en</strong>gthEffici<strong>en</strong>cyCoolingMethodFree space around the unitf FWP : frequ<strong>en</strong>cy at field weak<strong>en</strong>ing point; U Nmains : mains (input power) voltage;U Nmotor : rated motor voltage; f Nmotor : rated motor frequ<strong>en</strong>cy0.01 HzSee section IEC data.1.5 · P hd , 1.1 · P N or P cont.max (whichever value is greatest)8 to 300 Hz3 kHz (average). In 690 V units 2 kHz (average).Sizing methodMax. motor cable l<strong>en</strong>gthDTC controlScalar controlaccording to I 2N and I 2hdaccording to I cont.max atambi<strong>en</strong>t temperatures below30°C (86°F)according to I cont.max atambi<strong>en</strong>t temperatures above30°C (86°F)R2 to R3: 100 m (328 ft)R4 to R6: 300 m (984 ft)R2: 150 m (492 ft)R3 to R6: 300 m (984 ft)R2: 50 m (164 ft) Note: This applies to units with EMC filteralso.R3 and R4: 100 m (328 ft)R5 and R6: 150 m (492 ft)Note: With cables longer than 100 m (328 ft), the EMC Directive requirem<strong>en</strong>ts may not befulfilled. See section CE marking.Approximately 98% at nominal power levelInternal fan, flow direction from bottom to top.See chapter Mechanical installation.Degrees of protectionIP20 (UL op<strong>en</strong> type). See chapter Planning the cabinet assembly.Technical data
109AGPS-11CNominal input voltage 115...230 V AC ±10%Nominal input curr<strong>en</strong>t 0.1 A (230 V) / 0.2 A (115 V)Nominal frequ<strong>en</strong>cy50/60 HzMax. external fuse16 AX1 terminal sizes 3 x 2.5 mm 2Output voltage15 V DC ±0.5 VNominal output curr<strong>en</strong>t 0.4 AX2 terminal block type JST B4P-VHAmbi<strong>en</strong>t temperature 0...50 °CRelative humidityMax. 90%, no cond<strong>en</strong>sation allowedDim<strong>en</strong>sions (with <strong>en</strong>closure) 167 x 128 x 52 mm (Height x Width x Depth)Weight (with <strong>en</strong>closure) 0.75 kgApprovalsC-UL, US listedAmbi<strong>en</strong>t conditionsInstallation site altitudeAir temperatureEnvironm<strong>en</strong>tal limits for the drive are giv<strong>en</strong> below. The drive is to be used in a heated,indoor, controlled <strong>en</strong>vironm<strong>en</strong>t.Operationinstalled for stationary use0 to 4000 m (13123 ft) abovesea level [above 1000 m(3281 ft), see sectionDerating]-15 to +50 °C (5 to 122 °F).No frost allowed. See sectionDerating.Storagein the protective package- --40 to +70 °C (-40 to+158 °F)Transportationin the protective package-40 to +70 °C (-40 to+158 °F)Relative humidity 5 to 95% Max. 95% Max. 95%No cond<strong>en</strong>sation allowed. Maximum allowed relative humidity is 60% in the pres<strong>en</strong>ce ofcorrosive gases.Contamination levels(IEC 60721-3-3, IEC 60721-3-2, IEC 60721-3-1)Atmospheric pressureVibration (IEC 60068-2)*No conductive dust allowed.Boards without coating:Chemical gases: Class 3C1Solid particles: Class 3S2Boards with coating:Chemical gases: Class 3C2Solid particles: Class 3S270 to 106 kPa0.7 to 1.05 atmospheresMax. 1 mm (0.<strong>04</strong> in.)(5 to 13.2 Hz),max. 7 m/s 2 (23 ft/s 2 )(13.2 to 100 Hz) sinusoidalBoards without coating:Chemical gases: Class 1C2Solid particles: Class 1S3Boards with coating:Chemical gases: Class 1C2Solid particles: Class 1S370 to 106 kPa0.7 to 1.05 atmospheresMax. 1 mm (0.<strong>04</strong> in.)(5 to 13.2 Hz),max. 7 m/s 2 (23 ft/s 2 )(13.2 to 100 Hz) sinusoidalShock (IEC 60068-2-29) Not allowed Max. 100 m/s 2 (330 ft./s 2 ),11 msFree fall Not allowed 250 mm (10 in.) for weightunder 100 kg (220 lb)100 mm (4 in.) for weightover 100 kg (220 lb)Boards without coating:Chemical gases: Class 2C2Solid particles: Class 2S2Boards with coating:Chemical gases: Class 2C2Solid particles: Class 2S260 to 106 kPa0.6 to 1.05 atmospheresMax. 3.5 mm (0.14 in.)(2 to 9 Hz),max. 15 m/s 2 (49 ft/s 2 )(9 to 200 Hz) sinusoidalMax. 100 m/s 2 (330 ft./s 2 ),11 ms250 mm (10 in.) for weightunder 100 kg (220 lb)100 mm (4 in.) for weightover 100 kg (220 lb)*Note: For frame sizes R2 to R4 with panel option maximum allowed vibration is 3 m/s 2 . For higher vibration use theRPMP kit. See Control Panel Mounting Platform Kit (RPMP) Installation Guide [3AFE64677560 (English)].Technical data
110MaterialsDrive <strong>en</strong>closure • PC/ABS 2.5 mm, colour NCS 1502-Y (RAL 90021 / PMS 420 C)• hot-dip zinc coated steel sheet 1.5 to 2 mm, thickness of coating 100 micrometres• cast aluminium AlSi (R2 and R3)• extruded aluminium AlSi (R4 to R6)PackageCorrugated cardboard (frames R2 to R5 and option modules), plywood and wood (framesize R6), expanded polystyr<strong>en</strong>e. Plastic covering of the package: PE-LD, bands PP orsteel.DisposalThe drive contains raw materials that should be recycled to preserve <strong>en</strong>ergy and naturalresources. The package materials are <strong>en</strong>vironm<strong>en</strong>tally compatible and recyclable. Allmetal parts can be recycled. The plastic parts can either be recycled or burned undercontrolled circumstances, according to local regulations. Most recyclable parts are markedwith recycling marks.If recycling is not feasible, all parts excluding electrolytic capacitors and printed circuitboards can be landfilled. The DC capacitors (C1-1 to C1-x) contain electrolyte and theprinted circuit boards contain lead, both of which are classified as hazardous waste withinthe EU. They must be removed and handled according to local regulations.For further information on <strong>en</strong>vironm<strong>en</strong>tal aspects and more detailed recycling instructions,please contact your local ABB distributor.Applicable standards• EN 602<strong>04</strong>-1 (2006)• EN 60529: 1991(IEC 60529)• IEC 60664-1 (2007)• EN 61800-3 (20<strong>04</strong>)The drive complies with the following standards. The compliance with the European LowVoltage Directive is verified according to standards EN 61800-5-1 and EN 602<strong>04</strong>-1.Safety of machinery. Electrical equipm<strong>en</strong>t of machines. Part 1: G<strong>en</strong>eral requirem<strong>en</strong>ts.Provisions for compliance: The final assembler of the machine is responsible for installing- an emerg<strong>en</strong>cy-stop device- a supply disconnecting device- the <strong>ACS800</strong>-<strong>04</strong>/<strong>U4</strong> into a cabinet.Degrees of protection provided by <strong>en</strong>closures (IP code)Insulation coordination for equipm<strong>en</strong>t within low-voltage systems. Part 1: Principles,requirem<strong>en</strong>ts and tests.Adjustable speed electrical power drive systems. Part 3: EMC requirem<strong>en</strong>ts and specifictest methods• EN 61800-5-1 (2003) Adjustable speed electrical power drive systems. Part 5-1: Safety requirem<strong>en</strong>ts –electrical, thermal and <strong>en</strong>ergy• UL 508C (2002)UL Standard for Safety, Power Conversion Equipm<strong>en</strong>t, second edition• NEMA 250 (2003)Enclosures for Electrical Equipm<strong>en</strong>t (1000 Volts Maximum)• CSA C22.2 No. 14-05 Industrial control equipm<strong>en</strong>t(2005)Technical data
111CE markingA CE mark is attached to the drive to verify that the unit follows the provisions of the European LowVoltage and EMC Directives (Directive 73/23/EEC, as am<strong>en</strong>ded by 93/68/EEC and Directive 89/336/EEC, as am<strong>en</strong>ded by 20<strong>04</strong>/108EC).DefinitionsEMC stands for Electromagnetic Compatibility. It is the ability of electrical/electronic equipm<strong>en</strong>t tooperate without problems within an electromagnetic <strong>en</strong>vironm<strong>en</strong>t. Likewise, the equipm<strong>en</strong>t must notdisturb or interfere with any other product or system within its locality.First <strong>en</strong>vironm<strong>en</strong>t includes establishm<strong>en</strong>ts connected to a low-voltage network which supplies buildingsused for domestic purposes.Second <strong>en</strong>vironm<strong>en</strong>t includes establishm<strong>en</strong>ts connected to a network not supplying domestic premises.Drive of category C2: drive of rated voltage less than 1000 V and int<strong>en</strong>ded to be installed andcommissioned only by a professional wh<strong>en</strong> used in the first <strong>en</strong>vironm<strong>en</strong>t. Note: A professional isa person or organisation having necessary skills in installing and/or commissioning power drivesystems, including their EMC aspects.Drive of category C3: drive of rated voltage less than 1000 V and int<strong>en</strong>ded for use in the second<strong>en</strong>vironm<strong>en</strong>t and not int<strong>en</strong>ded for use in the first <strong>en</strong>vironm<strong>en</strong>t.Drive of category C4: drive of rated voltage equal to or above 1000 V, or rated curr<strong>en</strong>t equal to or above400 A, or int<strong>en</strong>ded for use in complex systems in the second <strong>en</strong>vironm<strong>en</strong>t.Compliance with the EMC DirectiveThe EMC Directive defines the requirem<strong>en</strong>ts for immunity and emissions of electrical equipm<strong>en</strong>t usedwithin the European Union. The EMC product standard [EN 61800-3 (20<strong>04</strong>)] covers requirem<strong>en</strong>tsstated for drives.Compliance with the EN 61800-3 (20<strong>04</strong>)First <strong>en</strong>vironm<strong>en</strong>t (drive of category C2)The drive complies with the standard with the following provisions:1. The drive is equipped with EMC filter +E202.2. The motor and control cables are selected as specified in the <strong>Hardware</strong> Manual.3. The drive is installed according to the instructions giv<strong>en</strong> in the <strong>Hardware</strong> Manual.4. Maximum cable l<strong>en</strong>gth is 100 metres.WARNING! The drive may cause radio interfer<strong>en</strong>ce if used in a resid<strong>en</strong>tial or domestic <strong>en</strong>vironm<strong>en</strong>t.The user is required to take measures to prev<strong>en</strong>t interfer<strong>en</strong>ce, in addition to the requirem<strong>en</strong>ts for CEcompliance listed above, if necessary.Note: It is not allowed to install a drive equipped with EMC filter +E202 on IT (unearthed) systems. Thesupply network becomes connected to earth pot<strong>en</strong>tial through the EMC filter capacitors which maycause danger or damage the unit.Technical data
112Second <strong>en</strong>vironm<strong>en</strong>t (drive of category C3)The drive complies with the standard with the following provisions:1. Frame sizes R2…R5: The drive is equipped with EMC filter +E200. The filter is suitable for TN(earthed) systems only.Frame size R6: The drive is equipped with EMC filter +E210. The filter is suitable for TN (earthed)and IT (unearthed) systems.2. The motor and control cables are selected as specified in the <strong>Hardware</strong> Manual.3. The drive is installed according to the instructions giv<strong>en</strong> in the <strong>Hardware</strong> Manual.4. Maximum cable l<strong>en</strong>gth is 100 metres.WARNING! A drive of category C3 is not int<strong>en</strong>ded to be used on a low-voltage public network whichsupplies domestic premises. Radio frequ<strong>en</strong>cy interfer<strong>en</strong>ce is expected if the drive is used on suchanetwork.Second <strong>en</strong>vironm<strong>en</strong>t (drive of category C4)If the provisions under Second <strong>en</strong>vironm<strong>en</strong>t (drive of category C3) cannot be met, e.g. the drive cannotbe equipped with EMC filter +E200 wh<strong>en</strong> installed to an IT (unearthed) network, the requirem<strong>en</strong>ts of thestandard can be met as follows:1. It is <strong>en</strong>sured that no excessive emission is propagated to neighbouring low-voltage networks. Insome cases, the inher<strong>en</strong>t suppression in transformers and cables is suffici<strong>en</strong>t. If in doubt, a supplytransformer with static scre<strong>en</strong>ing betwe<strong>en</strong> the primary and secondary windings can be used.Medium voltage networkSupply transformerNeighbouring networkStatic scre<strong>en</strong>Point of measurem<strong>en</strong>tLow voltageEquipm<strong>en</strong>t(victim)Low voltageDriveEquipm<strong>en</strong>tEquipm<strong>en</strong>t2. An EMC plan for prev<strong>en</strong>ting disturbances is drawn up for the installation. A template is availablefrom the local ABB repres<strong>en</strong>tative.3. The motor and control cables are selected as specified in the <strong>Hardware</strong> Manual.4. The drive is installed according to the instructions giv<strong>en</strong> in the <strong>Hardware</strong> Manual.WARNING! A drive of category C4 is not int<strong>en</strong>ded to be used on a low-voltage public network whichsupplies domestic premises. Radio frequ<strong>en</strong>cy interfer<strong>en</strong>ce is expected if the drive is used on suchanetwork.Machinery DirectiveThe drive complies with the European Union Machinery Directive (98/37/EC) requirem<strong>en</strong>ts for anequipm<strong>en</strong>t int<strong>en</strong>ded to be incorporated into machinery.Technical data
113“C-tick” marking“C-tick” marking is required in Australia and New Zealand. A “C-tick” mark is attached to each drive inorder to verify compliance with the relevant standard (IEC 61800-3 (20<strong>04</strong>) – Adjustable speed electricalpower drive systems. Part 3: EMC requirem<strong>en</strong>ts and specific test methods), mandated by theTrans-Tasman Electromagnetic Compatibility Scheme.DefinitionsEMC stands for Electromagnetic Compatibility. It is the ability of electrical/electronic equipm<strong>en</strong>t tooperate without problems within an electromagnetic <strong>en</strong>vironm<strong>en</strong>t. Likewise, the equipm<strong>en</strong>t must notdisturb or interfere with any other product or system within its locality.The Trans-Tasman Electromagnetic Compatibility Scheme (EMCS) was introduced by the AustralianCommunication Authority (ACA) and the Radio Spectrum Managem<strong>en</strong>t Group (RSM) of the NewZealand Ministry of Economic Developm<strong>en</strong>t (NZMED) in November 2001. The aim of the scheme is toprotect the radiofrequ<strong>en</strong>cy spectrum by introducing technical limits for emission from electrical/electronic products.First <strong>en</strong>vironm<strong>en</strong>t includes establishm<strong>en</strong>ts connected to a low-voltage network which supplies buildingsused for domestic purposes.Second <strong>en</strong>vironm<strong>en</strong>t includes establishm<strong>en</strong>ts connected to a network not supplying domestic premises.Drive of category C2: drive of rated voltage less than 1000 V and int<strong>en</strong>ded to be installed andcommissioned only by a professional wh<strong>en</strong> used in the first <strong>en</strong>vironm<strong>en</strong>t. Note: A professional isa person or organisation having necessary skills in installing and/or commissioning power drivesystems, including their EMC aspects.Drive of category C3: drive of rated voltage less than 1000 V and int<strong>en</strong>ded for use in the second<strong>en</strong>vironm<strong>en</strong>t and not int<strong>en</strong>ded for use in the first <strong>en</strong>vironm<strong>en</strong>t.Drive of category C4: drive of rated voltage equal to or above 1000 V, or rated curr<strong>en</strong>t equal to or above400 A, or int<strong>en</strong>ded for use in complex systems in the second <strong>en</strong>vironm<strong>en</strong>t.Compliance with IEC 61800-3First <strong>en</strong>vironm<strong>en</strong>t (drive of category C2)The drive complies with the limits of IEC 61800-3 with the following provisions:1. The drive is equipped with EMC filter +E202.2. The drive is installed according to the instructions giv<strong>en</strong> in the <strong>Hardware</strong> Manual.3. The motor and control cables used are selected as specified in the <strong>Hardware</strong> Manual.4. Maximum cable l<strong>en</strong>gth is 100 metres.WARNING! The drive may cause radio interfer<strong>en</strong>ce if used in a resid<strong>en</strong>tial or domestic <strong>en</strong>vironm<strong>en</strong>t.The user is required to take measures to prev<strong>en</strong>t interfer<strong>en</strong>ce, in addition to the requirem<strong>en</strong>ts for CEcompliance listed above, if necessary.Note: The drive must not be equipped with EMC filter +E202 wh<strong>en</strong> installed to IT (unearthed) systems.The mains becomes connected to earth pot<strong>en</strong>tial through the EMC filter capacitors. In IT systems thismay cause danger or damage the unit.Technical data
114Second <strong>en</strong>vironm<strong>en</strong>t (drive of category C3)The drive complies with the standard with the following provisions:1. Frame sizes R2…R5: The drive is equipped with EMC filter +E200. The filter is suitable for TN(earthed) systems only.Frame size R6: The drive is equipped with EMC filter +E210. The filter is suitable for TN (earthed)and IT (unearthed) systems.2. The motor and control cables are selected as specified in the <strong>Hardware</strong> Manual.3. The drive is installed according to the instructions giv<strong>en</strong> in the <strong>Hardware</strong> Manual.4. Maximum cable l<strong>en</strong>gth is 100 metres.WARNING! A drive of category C3 is not int<strong>en</strong>ded to be used on a low-voltage public network whichsupplies domestic premises. Radio frequ<strong>en</strong>cy interfer<strong>en</strong>ce is expected if the drive is used on suchanetwork.Second <strong>en</strong>vironm<strong>en</strong>t (drive of category C4)If the provisions under Second <strong>en</strong>vironm<strong>en</strong>t (drive of category C3) cannot be met, e.g. the drive cannotbe equipped with EMC filter +E200 wh<strong>en</strong> installed to an IT (unearthed) network, the requirem<strong>en</strong>ts of thestandard can be met as follows for restricted distribution:1. It is <strong>en</strong>sured that no excessive emission is propagated to neighbouring low-voltage networks. Insome cases, the inher<strong>en</strong>t suppression in transformers and cables is suffici<strong>en</strong>t. If in doubt, a supplytransformer with static scre<strong>en</strong>ing betwe<strong>en</strong> the primary and secondary windings can be used.Medium voltage networkSupply transformerNeighbouring networkStatic scre<strong>en</strong>Point of measurem<strong>en</strong>tLow voltageEquipm<strong>en</strong>t(victim)Low voltageDriveEquipm<strong>en</strong>tEquipm<strong>en</strong>tMarine type approvals2. An EMC plan for prev<strong>en</strong>ting disturbances is drawn up for the installation. A template is availablefrom the local ABB repres<strong>en</strong>tative.3. The motor and control cables are selected as specified in the <strong>Hardware</strong> Manual.4. The drive is installed according to the instructions giv<strong>en</strong> in the <strong>Hardware</strong> Manual.WARNING! A drive of category C4 is not int<strong>en</strong>ded to be used on a low-voltage public network whichsupplies domestic premises. Radio frequ<strong>en</strong>cy interfer<strong>en</strong>ce is expected if the drive is used on suchanetwork.See <strong>ACS800</strong>-01/U1/<strong>04</strong>/<strong>U4</strong> Marine Supplem<strong>en</strong>t [3AFE68291275 (English)].Technical data
115UL/CSA markingsULThe <strong>ACS800</strong>-<strong>04</strong> and <strong>ACS800</strong>-<strong>U4</strong> are C-UL US listed and CSA marked.The drive is suitable for use on a circuit capable of delivering not more than 100 kA rms symmetricalamperes at the drive nominal voltage (600 V maximum for 690 V units) wh<strong>en</strong> protected by fuses giv<strong>en</strong>in the NEMA data fuse table. The ampere rating is based on tests done according to UL 508C.The drive provides overload protection in accordance with the National Electrical Code (US). See<strong>ACS800</strong> Firmware Manual for setting. Default setting is off, must be activated at start-up.The drives are to be used in a heated indoor controlled <strong>en</strong>vironm<strong>en</strong>t. See section Ambi<strong>en</strong>t conditionsfor specific limits.Brake chopper - ABB has brake choppers that, wh<strong>en</strong> applied with appropriately sized brake resistors,will allow the drive to dissipate reg<strong>en</strong>erative <strong>en</strong>ergy (normally associated with quickly deceleratinga motor). Proper application of the brake chopper is defined in chapter Resistor braking.Equipm<strong>en</strong>t warranty and liabilityThe manufacturer warrants the equipm<strong>en</strong>t supplied against defects in design, materials andworkmanship for a period of twelve (12) months after installation or tw<strong>en</strong>ty-four (24) months from dateof manufacturing, whichever first occurs. The local ABB office or distributor may grant a warranty perioddiffer<strong>en</strong>t to the above and refer to local terms of liability as defined in the supply contract.The manufacturer is not responsible for• any costs resulting from a failure if the installation, commissioning, repair, alternation, or ambi<strong>en</strong>tconditions of the drive do not fulfil the requirem<strong>en</strong>ts specified in the docum<strong>en</strong>tation delivered withthe unit and other relevant docum<strong>en</strong>tation.• units subjected to misuse, neglig<strong>en</strong>ce or accid<strong>en</strong>t• units comprised of materials provided or designs stipulated by the purchaser.In no ev<strong>en</strong>t shall the manufacturer, its suppliers or subcontractors be liable for special, indirect,incid<strong>en</strong>tal or consequ<strong>en</strong>tial damages, losses or p<strong>en</strong>alties.This is the sole and exclusive warranty giv<strong>en</strong> by the manufacturer with respect to the equipm<strong>en</strong>t and isin lieu of and excludes all other warranties, express or implied, arising by operation of law or otherwise,including, but not limited to, any implied warranties of merchantability or fitness for a particular purpose.If you have any questions concerning your ABB drive, please contact the local distributor or ABB office.The technical data, information and specifications are valid at the time of printing. The manufacturerreserves the right to modifications without prior notice.Technical data
116Product protection in the USThis product is protected by one or more of the following US pat<strong>en</strong>ts:4,920,306 5,301,085 5,463,302 5,521,483 5,532,568 5,589,7545,612,6<strong>04</strong> 5,654,624 5,799,805 5,940,286 5,942,874 5,952,6136,094,364 6,147,887 6,175,256 6,184,740 6,195,274 6,229,3566,252,436 6,265,724 6,305,464 6,313,599 6,316,896 6,335,6076,370,<strong>04</strong>9 6,396,236 6,448,735 6,498,452 6,552,510 6,597,1486,600,290 6,741,059 6,774,758 6,844,794 6,856,502 6,859,3746,922,883 6,940,253 6,934,169 6,956,352 6,958,923 6,967,4536,972,976 6,977,449 6,984,958 6,985,371 6,992,908 6,999,3297,023,160 7,034,510 7,036,223 7,<strong>04</strong>5,987 7,057,908 7,059,3907,067,997 7,082,374 7,084,6<strong>04</strong> 7,098,623 7,102,325 7,109,7807,164,562 7,176,779 7,190,599 7,215,099 7,221,152 7,227,3257,245,197 7,262,577 D503,931 D510,319 D510,320 D511,137D511,150 D512,026 D512,696 D521,466 D541,743S D541,744SD541,745S D548,182 D548,183Other pat<strong>en</strong>ts are p<strong>en</strong>ding.Technical data
117Dim<strong>en</strong>sional drawingsWhat this chapter containsDim<strong>en</strong>sional drawings of the <strong>ACS800</strong>-<strong>04</strong>/<strong>U4</strong>, flange mounting kits and AGPS boardare shown below. The dim<strong>en</strong>sions are giv<strong>en</strong> in millimetres and [inches].Dim<strong>en</strong>sional drawings
118Frame size R2 (with optional control panel)3AFE68347432Dim<strong>en</strong>sional drawings
119Frame size R3 (with optional control panel)3AFE68360544Dim<strong>en</strong>sional drawings
120Frame size R4 (with optional control panel)3AFE68364655Dim<strong>en</strong>sional drawings
121Frame size R5 (with optional control panel)3AFE68365741Dim<strong>en</strong>sional drawings
122Frame size R6 (with optional control panel)3AFE68365945Dim<strong>en</strong>sional drawings
123Flange mounting kitsFlange mounting kit dim<strong>en</strong>sions:Lifting lug7 [0.276]HDWFrame size H W Dmm [in.] mm [in.] mm [in.]R2 476.5 [18.76] 235.5 [9.27] 25 [0.984]R3 530.5 [20.89] 245.5 [9.67] 25 [0.984]R4 595.95 [23.46] 373.6 [14.71] 25 [0.984]R5 700 [27.56] 398.8 [15.70] 25 [0.984]R6 786 [30.94] 433.4 [17.06] 25 [0.984]Dim<strong>en</strong>sional drawings
124Flange mounting kit for frame size R2[2.17] [5.51][5.51]22[0.866][7.54][0.276]98.25[3.87][15.16][0.787][6.69]3AFE68361001Dim<strong>en</strong>sional drawings
125Flange mounting kit for frame size R3[7.09][0.394][2.36] [6.30][6.30]22[0.866] [7.93][0.276]3AFE6837<strong>04</strong>18105.25[4.14][17.32]Dim<strong>en</strong>sional drawings
126Flange mounting kit for frame size R486.8[3.42][4.96]1533AFE68375371142.95[5.63]21[0.827][12.40][0.276][6.53][1.30][3.94][6.02][5.23][20.08][11.81][0.787]Dim<strong>en</strong>sional drawings
127Flange mounting kit for frame size R5[13.39][4.33] [8.66] [8.66][4.33][14.33][3.15][0.276][0.866][24.57][0.787]119.4[4.70]130[5.12]3AFE68371619Dim<strong>en</strong>sional drawings
128Flange mounting kit for frame size R6[8.66][0.787][6.61] [4.84]1816.7[0.787][28.35][0.709][15.75][0.657][0.276][6.61][6.61][3.94][4.84][0.787]116.7100[4.59] [3.94]3AFE68367280Dim<strong>en</strong>sional drawings
129AGPS boardDim<strong>en</strong>sional drawings
130Dim<strong>en</strong>sional drawings
131Resistor brakingWhat this chapter containsThis chapter describes how to select, protect and wire brake choppers and resistors.The chapter also contains the technical data.Availability of brake choppers and resistorsFrame R2 and R3 drives and 690 V units of frame size R4 have a built-in brakechopper as standard equipm<strong>en</strong>t. For other units, brake choppers are optionallyavailable as built-in units, indicated in the type code by +D150.Resistors are available as add-on kits.How to select the correct drive/chopper/resistor combination1. Calculate the maximum power (P max ) g<strong>en</strong>erated by the motor during braking.2. Select a suitable drive / brake chopper / brake resistor combination for theapplication according to the following tables (take account of other factors in thedrive selection also). The following condition must be met:P br > P max3. Check the resistor selection. The <strong>en</strong>ergy g<strong>en</strong>erated by the motor during a 400second period must not exceed the resistor heat dissipation capacity E R .If the E R value is not suffici<strong>en</strong>t, it is possible to use a four-resistor assembly in which two standardresistors are connected in parallel, two in series. The E R value of the four-resistor assembly is fourtimes the value specified for the standard resistor.Resistor braking
132Note: A resistor other than the standard resistor can be used provided that:• its resistance is not lower than the resistance of the standard resistor.• the resistance does not restrict the braking capacity needed, i.e.whereP max
133<strong>ACS800</strong>-<strong>04</strong> type<strong>ACS800</strong>-<strong>U4</strong> typeBraking power of the chopper andthe driveP brcont(kW)Brake resistor(s)400 V units-0003-3 1.1 SACE08RE44 44 210 1-00<strong>04</strong>-3 1.5 SACE08RE44 44 210 1-0005-3 2.2 SACE08RE44 44 210 1-0006-3 3.0 SACE08RE44 44 210 1-0009-3 4.0 SACE08RE44 44 210 1-0011-3 5.5 SACE15RE22 22 420 2-0016-3 7.5 SACE15RE22 22 420 2-0020-3 11 SACE15RE22 22 420 2-0023-3 11 SACE15RE22 22 420 2-0025-3 23 SACE15RE13 13 435 2-0030-3 28 SACE15RE13 13 435 2-0035-3 28 SACE15RE13 13 435 2-0<strong>04</strong>0-3 33 SAFUR90F575 8 1800 4.5-0050-3 45 SAFUR90F575 8 1800 4.5-0060-3 56 SAFUR90F575 8 1800 4.5-0075-3 70 SAFUR80F500 6 2400 6-0070-3 68 SAFUR80F500 6 2400 6-0100-3 83 SAFUR125F500 4 3600 9-0120-3 113 SAFUR125F500 4 3600 9-0135-3 132 SAFUR200F500 2.7 5400 13.5-0165-3 132 SAFUR200F500 2.7 5400 13.5500 V units-00<strong>04</strong>-5 1.5 SACE08RE44 44 210 1-0005-5 2.2 SACE08RE44 44 210 1-0006-5 3.0 SACE08RE44 44 210 1-0009-5 4.0 SACE08RE44 44 210 1-0011-5 5.5 SACE08RE44 44 210 1-0016-5 7.5 SACE15RE22 22 420 2-0020-5 11 SACE15RE22 22 420 2-0025-5 15 SACE15RE22 22 420 2-0028-5 15 SACE15RE22 22 420 2-0030-5 28 SACE15RE13 13 435 2-0<strong>04</strong>0-5 33 SACE15RE13 13 435 2-0<strong>04</strong>5-5 33 SACE15RE13 13 435 2-0050-5 45 SAFUR90F575 8 1800 4.5-0060-5 56 SAFUR90F575 8 1800 4.5-0070-5 68 SAFUR90F575 8 1800 4.5-0105-5 83 SAFUR80F500 6 2400 6-0100-5 83 SAFUR125F500 4 3600 9-0120-5 113 SAFUR125F500 4 3600 9-0140-5 135 SAFUR125F500 4 3600 9-0165-5 160 SAFUR125F500 4 3600 9-0205-5 160 SAFUR125F500 4 3600 9TypeR(ohm)E R(kJ)P Rcont(kW)Resistor braking
134<strong>ACS800</strong>-<strong>04</strong> type<strong>ACS800</strong>-<strong>U4</strong> typeBraking power of the chopper andthe driveP brcont(kW)690 V units-0011-7 8.0 SACE08RE44 44 210 1-0016-7 11 SACE08RE44 44 210 1-0020-7 16 SACE08RE44 44 210 1-0025-7 20 SACE08RE44 44 210 1-0030-7 28 SACE15RE22 22 420 2-0<strong>04</strong>0-7 22 / 33 1) SACE15RE22 22 420 2-0050-7 45 SACE15RE13 13 435 2-0060-7 56 SACE15RE13 13 435 2-0070-7 68 SAFUR90F575 8 1800 4.5-0100-7 83 SAFUR90F575 8 1800 4.5-0120-7 113 SAFUR80F500 6 2400 6-0145-7 160 SAFUR80F500 6 2400 6-0175-7 160 SAFUR80F500 6 2400 6-0205-7 160 SAFUR80F500 6 2400 6PDM code 00096931-JP brcont The drive and the chopper will withstand this continuous braking power. The braking is considered continuous if thebraking time exceeds 30 s.Note: The braking <strong>en</strong>ergy transmitted to the specified resistor(s) in 400 seconds may not exceed E R .R Resistance value for the listed resistor assembly. Note: This is also the minimum allowed resistance for the brakingresistor.E R Short <strong>en</strong>ergy pulse that the resistor assembly withstands every 400 seconds. This <strong>en</strong>ergy will heat the resistorelem<strong>en</strong>t from 40°C (1<strong>04</strong>°F) to the maximum allowable temperature.P Rcont Continuous power (heat) dissipation of the resistor wh<strong>en</strong> placed correctly. Energy E R dissipates in 400 seconds.1)22 kW with standard 22 ohm resistor and 33 kW with 32…37 ohm resistorAll braking resistors must be installed outside the converter module. The SACE braking resistors are built in an IP21 metalhousing. The SAFUR braking resistors are built in an IP00 metal frame. Note: The SACE and SAFUR resistors are not ULlisted.Resistor installation and wiringBrake resistor(s)TypeR(ohm)All resistors must be installed outside the drive module in a place where they willcool.E R(kJ)P Rcont(kW)WARNING! The materials near the brake resistor must be non-flammable. Thesurface temperature of the resistor is high. Air flowing from the resistor is ofhundreds of degrees Celsius. Protect the resistor against contact.Use the cable type used for drive input cabling (see to chapter Technical data) to<strong>en</strong>sure the input fuses will also protect the resistor cable. Alternatively, twoconductorshielded cable with the same cross-sectional area can be used. Themaximum l<strong>en</strong>gth of the resistor cable(s) is 10 m (33 ft). For the connections, see thepower connection diagram of the drive.Resistor braking
135Protection of frame sizes R2 to R5It is highly recomm<strong>en</strong>ded to equip the drive with a main contactor for safety reasons.Wire the contactor so that it op<strong>en</strong>s in case the resistor overheats. This is ess<strong>en</strong>tialfor safety since the drive will not otherwise be able to interrupt the main supply if thechopper remains conductive in a fault situation.Below is a simple example wiring diagram.L1 L2 L3FusesOFF121234561314ON34<strong>ACS800</strong>U1 V1 W1ΘThermal switch (standardin ABB resistors)K1Resistor braking
136Protection of frame size R6A main contactor is not required for protecting against resistor overheating wh<strong>en</strong> theresistor is dim<strong>en</strong>sioned according to the instructions and the internal brake chopperis used. The drive will disable power flow through the input bridge if the chopperremains conductive in a fault situation. Note: If an external brake chopper (outsidethe drive module) is used, a main contactor is always required.A thermal switch (standard in ABB resistors) is required for safety reasons. Thecable must be shielded and not longer than the resistor cable.With Standard Control Program, wire the thermal switch as shown below. By default,the drive will stop by coasting wh<strong>en</strong> the switch op<strong>en</strong>s.RMIO:X22 or X2: X22Resistor thermalswitch (standard inABB resistors)Θ1 DI12 DI23 DI34 DI45 DI56 DI67 +24V8 +24V9 DGND10 DGND11 DIILFor other control programs, the thermal switch may be wired to a differ<strong>en</strong>t digitalinput. Programming of the input to trip the drive by “EXTERNAL FAULT” may b<strong>en</strong>eeded. See the appropriate Firmware Manual.Brake circuit commissioningFor Standard Control Program:• Enable the brake chopper function (parameter 27.01).• Switch off the overvoltage control of the drive (parameter 20.05).• Check the resistance value setting (parameter 27.03).• Frame sizes R6: Check the setting of parameter 21.09. If stop by coasting isrequired, select OFF2 STOP.For the use of the brake resistor overload protection (parameters 27.02...27.05),consult an ABB repres<strong>en</strong>tative.WARNING! If the drive is equipped with a brake chopper but the chopper is not<strong>en</strong>abled by parameter setting, the brake resistor must be disconnected because theprotection against resistor overheating is th<strong>en</strong> not in use.For settings of other control programs, see the appropriate Firmware Manual.Resistor braking
3AFE68372984 Rev E ENEFFECTIVE: 31.03.2008ABB OyAC DrivesP.O. Box 184FI-00381 HELSINKiFINLANDTelephone +358 10 22 211Telefax +358 10 22 22681Internet www.abb.comABB Inc.Automation TechnologiesDrives & Motors16250 West Gl<strong>en</strong>dale DriveNew Berlin, WI 53151USATelephone 262 785-3200800-HELP-365Fax 262 780-5135ABB Beijing Drive Systems Co. Ltd.No. 1, Block D, A-10 Jiuxianqiao BeiluChaoyang DistrictBeijing, P.R. China, 100015Telephone +86 10 5821 7788Fax +86 10 5821 7618Internet www.abb.com