Pitts Special Pitts Special - RC Universe
Pitts Special Pitts Special - RC Universe
Pitts Special Pitts Special - RC Universe

Create successful ePaper yourself
Turn your PDF publications into a flip-book with our unique Google optimized e-Paper software.
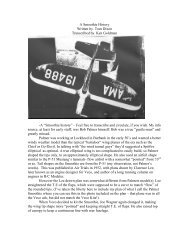
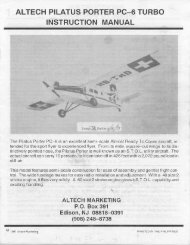
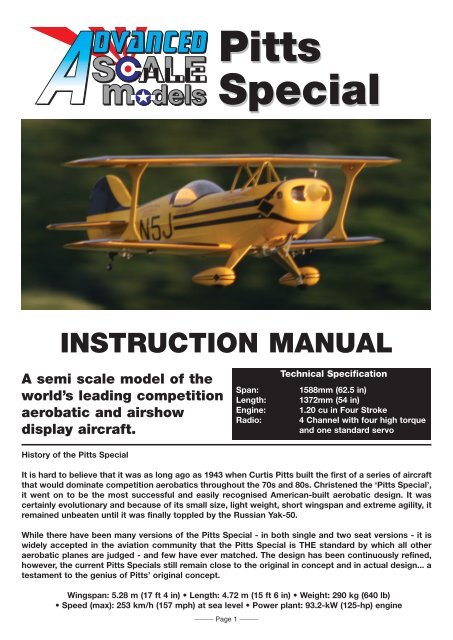
<strong>Pitts</strong><strong>Special</strong>INSTRUCTION MANUALA semi scale model of theworld’s leading competitionaerobatic and airshowdisplay aircraft.Span:Length:Engine:Radio:Technical Specification1588mm (62.5 in)1372mm (54 in)1.20 cu in Four Stroke4 Channel with four high torqueand one standard servoHistory of the <strong>Pitts</strong> <strong>Special</strong>It is hard to believe that it was as long ago as 1943 when Curtis <strong>Pitts</strong> built the first of a series of aircraftthat would dominate competition aerobatics throughout the 70s and 80s. Christened the ‘<strong>Pitts</strong> <strong>Special</strong>’,it went on to be the most successful and easily recognised American-built aerobatic design. It wascertainly evolutionary and because of its small size, light weight, short wingspan and extreme agility, itremained unbeaten until it was finally toppled by the Russian Yak-50.While there have been many versions of the <strong>Pitts</strong> <strong>Special</strong> - in both single and two seat versions - it iswidely accepted in the aviation community that the <strong>Pitts</strong> <strong>Special</strong> is THE standard by which all otheraerobatic planes are judged - and few have ever matched. The design has been continuously refined,however, the current <strong>Pitts</strong> <strong>Special</strong>s still remain close to the original in concept and in actual design... atestament to the genius of <strong>Pitts</strong>’ original concept.Wingspan: 5.28 m (17 ft 4 in) • Length: 4.72 m (15 ft 6 in) • Weight: 290 kg (640 lb)• Speed (max): 253 km/h (157 mph) at sea level • Power plant: 93.2-kW (125-hp) engine_____ Page 1 _____
Additional Items Required to Complete the <strong>Pitts</strong> <strong>Special</strong>:• 2 x Standard size high torque, metal geared servos for aileron control• 2 x Standard size high torque, metal geared servos for rudder and elevator• 1 x Standard servo for throttle• High capacity receiver battery and heavy duty switch harness• 5 and 30 Minute epoxy glue• Medium and thin CA adhesive• Masking and clear tape• 1.20 cu in 4 stroke engine with flexible manifold and 16" x 8 " propellerSafety Warning:This R/C aircraft is not a toy. Serious injury or damage to property can result through misuse and abuse. It isrecommended that this aircraft is flown at a dedicated R/C flying site and that a qualified instructor thoroughlychecks over the model before its first flight.Your local model shop should be able to assist you regarding flying clubs in your area._____ Page 2 _____
STEP 24.Use the closed loop components to complete therudder linkage as shown. The elevators use a preformedY shaped pushrod operated from a single servoas shown. Test the free operation of the elevators andrudder.FINAL ASSEMBLYSTEP 25.Tape the canopy in position on the fuselage, checkingthat the canopy frame is centred. Pilot drill and screwthe canopy in position using the four small self tappingscrews supplied.STEP 26.Locate the undercarriage fairings and attach them tothe aluminium undercarriage legs using five minuteepoxy. Note that they are handed left and right.STEP 27.The most convenient way of mounting the silencer isusing a flexible manifold as shown here. Attach thesilence using a nylon mount screwed to the base of thefuselage in front of the undercarriage or yourpreferred method.STEP 28.Attach the cowl using the moulded captive cowlretainers you fitted to the bulkhead earlier. Trim the cowlas necessary to clear the engine’s cylinder head and foraccess to the glowplug. Extend the needle valveas required._____ Page 8 _____
STEP 29.Mount the switch through the fuselage side and thereceiver on dense foam tie-wrapped to the mountshown, which is screwed into place on the servo trayafter the fuel tank has been fitted. If fitting a highcapacity receiver battery (recommended), you will beable to mount this in the bay behind the fuel tank.STEP 30.Rigging the model is best accomplished by fitting thelower wing first, followed by the interplane struts andthen the top wing. Adjust the interconnecting pushrodsbetween the ailerons ensuring all four ailerons are levelat their neutral position._____ Page 9 _____
Balancing the ModelIt is imperative that the model balances correctly before youattempt to fly. The balance point should be 12mm ahead of theupper wing’s rear mounting bolt. Adjust the position of the receiverbattery to achieve this balance point if necessary.Control ThrowsAilerons: 12mm Up 12mm DownElevator: 40mm Up 40mm DownRudder: 50mm Left 50mm DownFlying TipsJust like the full-size, the <strong>Pitts</strong> <strong>Special</strong> is a highly manoeuvrable and aerobatic biplane. As with any close coupledbiplane it should not be slowed too much on landing until familiar with the model’s characteristics.GuaranteeAdvanced Scale Models guarantees this kit to be free from defects in both material and workmanship at the date ofpurchase. This does not cover any component/parts damaged by use, misuse or modification. In no case shallAdvanced Scale Models’ liability exceed the original cost of the kit.In that Advanced Scale Models has no control over the final assembly or the material used for final assembly, noliability shall be assumed for any damage resulting from the use by the user of the final user-assembled product. Bythe act of using the final user-assembled product, the user accepts all resulting liability.Distributed in the USA by:Distributed in Europe by:Distributed in Australia by:Global Hobby18480 Bandilier Circle,Fountain Valley,CA 92708. USA.Ripmax Ltd.,241 Green Street, Enfield,EN3 7SJ. UK._____ Page 10 _____Model Engines (Aust.) Pty. Ltd.P.O. 828, Noble Park,VIC., 3174www.modelengines.com.au