NEC LCD1720M 17" LCD Monitor Manual - PDF
NEC LCD1720M 17" LCD Monitor Manual - PDF
NEC LCD1720M 17" LCD Monitor Manual - PDF

Create successful ePaper yourself
Turn your PDF publications into a flip-book with our unique Google optimized e-Paper software.
IndexWarning .................................................................................................................... 1Contents ................................................................................................................. 2Quick Start ............................................................................................................. 3Controls .................................................................................................................. 8Recommended Use............................................................................................... 11Specifications ....................................................................................................... 13Features ................................................................................................................ 14Troubleshooting ................................................................................................... 15References ............................................................................................................. 17Limited Warranty .................................................................................................18TCO’95 ..................................................................................................................... 19TCO’99 ..................................................................................................................... 21Avertissement ..................................................................................................... 24Contenu................................................................................................................. 25Mise en marche rapide ...................................................................................... 26Commandes ........................................................................................................... 31Usage recommandé ............................................................................................ 34Fiche technique ................................................................................................... 36Fonctions .............................................................................................................. 37Dépannage ............................................................................................................ 38Références ........................................................................................................... 40Garantie limitée .................................................................................................. 41TCO’95 .................................................................................................................... 42TCO’99 .................................................................................................................... 44
WARNINGTO PREVENT FIRE OR SHOCK HAZARDS, DO NOT EXPOSE THIS UNIT TO RAIN OR MOISTURE. ALSO, DO NOT USETHIS UNIT'S POLARIZED PLUG WITH AN EXTENSION CORD RECEPTACLE OR OTHER OUTLETS UNLESS THE PRONGSCAN BE FULLY INSERTED.REFRAIN FROM OPENING THE CABINET AS THERE ARE HIGH VOLTAGE COMPONENTS INSIDE. REFER SERVICINGTO QUALIFIED SERVICE PERSONNEL.CAUTIONCAUTION: TO REDUCE THE RISK OF ELECTRIC SHOCK, MAKE SURE POWER CORD IS UNPLUGGED FROMWALL SOCKET. TO FULLY DISENGAGE THE POWER TO THE UNIT, PLEASE DISCON<strong>NEC</strong>T THE POWERCORD FROM THE AC OUTLET.DO NOT REMOVE COVER (OR BACK). NO USER SERVICEABLE PARTSINSIDE. REFER SERVICING TO QUALIFIED SERVICE PERSONNEL.This symbol warns user that uninsulated voltage within the unit may have sufficient magnitude to causeelectric shock. Therefore, it is dangerous to make any kind of contact with any part inside this unit.This symbol alerts the user that important literature concerning the operation and maintenance of thisunit has been included. Therefore, it should be read carefully in order to avoid any problems.Canadian Department of Communications Compliance StatementDOC: This Class B digital apparatus meets all requirements of the CanadianInterference-Causing Equipment Regulations.C-UL: Bears the C-UL Mark and is in compliance with Canadian Safety Regulationsaccording to CAN/CSA C22.2 No. 950.FCC Information1. Use the attached specified cables with the MultiSync <strong><strong>LCD</strong>1720M</strong> (LA-17S02 andLA-17S02-BK) color monitor so as not to interfere with radio and television reception.(1) Please use the supplied power cord or equivalent to ensure FCC compliance.(2) Please use the supplied shielded video signal cable.(3) Please use supplied audio cable.2. This equipment has been tested and found to comply with the limits for a Class B digitaldevice, pursuant to part 15 of the FCC Rules. These limits are designed to providereasonable protection against harmful interference in a residential installation. Thisequipment generates, uses, and can radiate radio frequency energy, and, if not installedand used in accordance with the instructions, may cause harmful interference to radiocommunications. However, there is no guarantee that interference will not occur in aparticular installation. If this equipment does cause harmful interference to radio ortelevision reception, which can be determined by turning the equipment off and on, the useris encouraged to try to correct the interference by one or more of the following measures:• Reorient or relocate the receiving antenna.• Increase the separation between the equipment and receiver.• Connect the equipment into an outlet on a circuit different from that to which the receiveris connected.• Consult your dealer or an experienced radio/TV technician for help.If necessary, the user should contact the dealer or an experienced radio/television technicianfor additional suggestions. The user may find the following booklet, prepared by the FederalCommunications Commission, helpful: ”How to Identify and Resolve Radio-TV InterferenceProblems.“ This booklet is available from the U.S. Government Printing Office, Washington,D.C., 20402, Stock No. 004-000-00345-4.1
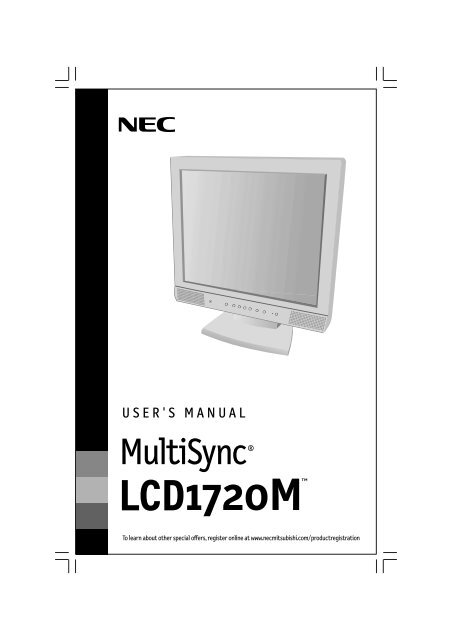
ContentsYour new <strong>NEC</strong> MultiSync ® <strong>LCD</strong> monitor box* should contain thefollowing:• MultiSync <strong><strong>LCD</strong>1720M</strong> monitor with tilt / swivel base• Power Cord• Video Signal Cable• Audio Cable• User’s <strong>Manual</strong>Power CordVideo Signal CableUser’s <strong>Manual</strong>Audio Cable* Remember to save your original box and packing material to transport or ship the monitor.2
Quick StartTo attach the MultiSync ® <strong>LCD</strong> monitor to your system, follow these instructions:1. Turn off the power to your computer.2. For the PC: Connect the 15-pin mini D-SUB of the appropriate signal cable to theconnector of the display card in your system (Figure A.1). Tighten all screws.For the Mac: Connect the MultiSync <strong><strong>LCD</strong>1720M</strong> Macintosh cable adapter to thecomputer (Figure B.1). Attach the 15-pin mini D-SUB end of the appropriate signalcable to the MultiSync <strong><strong>LCD</strong>1720M</strong> Macintosh cable adapter (Figure B.1). Tighten allscrews.NOTE: To obtain the MultiSync <strong><strong>LCD</strong>1720M</strong> Macintosh cable adapter, call <strong>NEC</strong>-MitsubishiElectronics Display of America, Inc. at (800) 632-4662.3. Connect the 15-pin mini D-SUB of the video signal cable to the appropriate connectoron the back of the monitor. (Figure C.1).4. Connect the audio cable to “AUDIO INPUT” on the back of the monitor and the otherend to the “Audio out” terminal of the computer (Figure D.1).5. Headphones may be connected to the “Headphones” output on the front of themonitor’s bezel marked “ ” (Figure E.1). While the headphones are connected, thesound from the speakers will be disabled. Headphones can be purchased from yourlocal electronics store.6. Connect one end of the power cord to the MultiSync <strong>LCD</strong> Series monitor and the otherend to the power outlet (Figure C.1).NOTE: If you use this monitor at AC126-240V, please refer to Recommended Usesection of this manual for proper selection of AC power cord.7. Turn on the monitor with the front power switch (Figure F.1) and the computer.8. To complete the setup of your MultiSync <strong>LCD</strong> monitor, use the following OSM controls:• Auto Adjust Contrast• Auto AdjustRefer to the Controls section of this User ’s <strong>Manual</strong> for a full description of these OSMcontrols.NOTE: For download information on the Windows ® 95/98/Me/2000/XP INF file for your MultiSync<strong><strong>LCD</strong>1720M</strong> monitor, refer to the References section of this User’s <strong>Manual</strong>.NOTE: If you have any problems, please refer to the Troubleshooting section of this User’s <strong>Manual</strong>.3
Quick Start –continuedMacintoshCableAdapter(not included)Note:Some Macintosh systems do notrequire a Macintosh Cable Adapter.Figure A.1Figure B.1Figure C.1Figure D.14
Quick Start –continuedFigure E.1Power SwitchFigure F.15
Quick Start –continuedTilt and swivelGrasp both sides of the monitor screen withyour hands and adjust the tilt and swivel asdesired (Figure TS.1).Remove <strong>Monitor</strong> Stand for MountingTo prepare the monitor for alternate mountingpurposes:1.Disconnect all cables.Figure TS.12.Place monitor face down on anon-abrasive surface. Insert ascrew driver (or similar object)into the hole on the bottom ofstand. As shown in the picture,hold the stand cover in hand andlift up gradually by the stick andthen remove (Figure R.1).3.Remove the 4 screwsconnecting the monitor to thestand and lift off the standFigure R.1assembly (Figure R.2).The monitor is now ready for mounting in an alternate manner.4.Connect the AC cord, signal cable and Audio cable to the back of themonitor (Figure R.3).5. Reverse this process to reattach stand.NOTE: Use only VESA-compatible alternative mounting method.Figure R.2Figure R.3Non-abrasive surface6
Quick Start –continued6. This <strong>LCD</strong> monitor is designed for use with a flexible arm.Please use the attached screws (4pcs) as shown in the picture wheninstalling.To meet the safety requirements, the monitor must be mounted to an armwhich guaranties the necessary stability under consideration of theweight of the monitor.The <strong>LCD</strong> monitor shall only be used with an approved arm (e.g. GSmark).Replace screwsThickness ofbracket (arm)2.0~3.2mm100mmTighten allscrews.100mmSpecifications4-SCREWS (M4)(MAX depth: 10mm)If using other screws thanones included, first checkdepth of the hole.Weight of <strong>LCD</strong> Assembly : 5.5kg (MAX)7
ControlsOSM (On-Screen Manager) control buttons on the front of themonitor function as follows:To access OSM menu, press any of the control buttons ( , , –, +, NEXT ).EXITNOTE: When RESET is pressed in the main and sub-menu, a warning window will appearallowing you to cancel the RESET function by pressing the EXIT button.SoundMenuExits the OSM controls.Exits to the OSM main menu.CONTROL / Moves the highlighted area left/right to select control menus.Moves the highlighted area up/down to select one of the controls.ADJUST –/+NEXTRESET / MUTEMoves the bar left/right to increase or decrease the adjustment.Active Auto Adjust function.Enter the Sub Menu.Moves the highlighted area of main menu right to select one of the controls.Resets the highlighted control to the factory setting.When no OSM menu is shown, the speaker sound will be muted.VolumeControl the sound volume of speakers and headphone.Brightness/Contrast ControlsBRIGHTNESSAdjusts the overall image and background screen brightness.CONTRASTAdjusts the image brightness in relation to the background.AUTOAUTOAdjusts the image displayed for non-standard video inputs.Auto AdjustAutomatically adjusts the Image Position and H. Size settings and Fine settings.Image ControlsLEFT / RIGHTControls Horizontal Image Position within the display area of the <strong>LCD</strong>.DOWN / UPControls Vertical Image Position within the display area of the <strong>LCD</strong>.H.SIZEAdjusts the horizontal size by increasing or decreasing this setting.FINEImproves focus, clarity and image stability by increasing or decreasing this setting.8
Controls –continuedAccuColor ® Control SystemsFive color presets select the desired color setting. Each color setting isadjusted at the factory.R,G,B : Increases or decreases Red, Green or Blue color depending uponwhich is selected. The change in color will appear on screen and the direction(increase or decrease) will be shown by the bars.ToolsLANGUAGE: OSM control menus are available in seven languages.EXPANSION MODE: Sets the zoom method.FULL : The image is expanded to 1280 x 1024, regardless of the resolution.ASPECT: The image is expanded without changing the aspect ratio.OFF: The image is not expanded.OSM POSITION: You can choose where you would like the OSM controlimage to appear on your screen. Selecting OSM Location allows you tomanually adjust the position of the OSM control menu left, right, down or up.OSM TURN OFF: The OSM control menu will stay on as long as it is in use.In the OSM Turn Off submenu, you can select how long the monitor waits afterthe last touch of a button to shut off the OSM control menu. The preset choicesare 10, 20, 30, 45, 60 and 120 seconds.OSM LOCK OUT: This control completely locks out access to all OSM controlfunctions. When attempting to activate OSM controls while in the Lock Outmode, a screen will appear indicating the OSM controls are locked out. Toactivate the OSM Lock Out function, press , then and hold downsimultaneously. To de-activate the OSM Lock Out, press , then and holddown simultaneously.RESOLUTION NOTIFIER: This optimal resolution is 1280 x 1024. If ON isselected, a message will appear on the screen after 30 seconds, notifying youthat the resolution is not at 1280 x 1024.FACTORY PRESET: Selecting Factory Preset allows you to reset all OSM controlsettings back to the factory settings. The RESET button will need to be helddown for several seconds to take effect. Individual settings can be reset byhighlighting the control to be reset and pressing the RESET button.9
Controls –continuedInformationDISPLAY MODE: Indicates the current display resolution and frequency settingof the monitor.MONITOR INFO: Indicates the model and serial numbers of your monitor.OSM Warning: OSM Warning menus disappear with Exit button.NO SIGNAL: This function gives a warning when there is no signal present.After power is turned on or when there is a change of input signal or videois inactive, the No Signal window will appear.RESOLUTION NOTIFIER: This function gives a warning of use with optimizedresolution. After power is turned on or when there is a change ofinput signal or the video signal doesn’t have proper resolution, theResolution Notifier window will open. This function can be disabled inthe TOOL menu.OUT OF RANGE: This function gives a recommendation of the optimizedresolution and refresh rate. After the power is turned on or there is achange of input signal or the video signal doesn’t have proper timing, theOut Of Range menu will appear.CHECK CABLE: This function will advise you to check all Video Inputs on themonitor and computer to make sure they are properly connected.10
Recommended UseSafety Precautions and MaintenanceFOR OPTIMUM PERFORMANCE, PLEASE NOTE THEFOLLOWING WHEN SETTING UP AND USINGTHE MULTISYNC ® <strong>LCD</strong> COLOR MONITOR:• DO NOT OPEN THE MONITOR. There are no user serviceable parts inside andopening or removing covers may expose you to dangerous shock hazards or otherrisks. Refer all servicing to qualified service personnel.• Do not spill any liquids into the cabinet or use your monitor near water.• Do not insert objects of any kind into the cabinet slots, as they may touch dangerousvoltage points, which can be harmful or fatal or may cause electric shock, fire orequipment failure.• Do not place any heavy objects on the power cord. Damage to the cord may causeshock or fire.• Do not place this product on a sloping or unstable cart, stand or table, as the monitormay fall, causing serious damage to the monitor.• When operating the MultiSync <strong>LCD</strong> monitor with its AC 126-240V power supply, use apower supply cord that matches the power supply voltage of the AC power outlet beingused. The power supply cord you use must have been approved by and comply withthe safety standards of your country. (Type H05VV-F should be used in Europe)• In UK, use a BS-approved power cord with molded plug having a black (5A) fuse installedfor use with this monitor. If a power cord is not supplied with this monitor, please contactyour supplier.• Do not place any objects onto the monitor and do not use the monitor outdoors.• The inside of the flourescent tube located within the <strong>LCD</strong> monitor contains mercury.Please follow the bylaws or rules of your municipality to dispose of the tube properly.• Do not bend power cord.• Do not use monitor in high temperatured, humid, dusty, or oily areas.• If glass is broken, handle with care.• Do not cover vent on monitor.• If monitor or glass is broken, do not come in contact with the liquid crystal and handlewith care.Immediately unplug your monitor from the wall outlet and refer servicing to qualified servicepersonnel under the following conditions:• When the power supply cord or plug is damaged.• If liquid has been spilled, or objects have fallen into the monitor.• If the monitor has been exposed to rain or water.• If the monitor has been dropped or the cabinet damaged.• If the monitor does not operate normally by following operating instructions.CAUTION• Allow adequate ventilation around the monitor so that heat can properlydissipate. Do not block ventilated openings or place the monitor near aradiator or other heat sources. Do not put anything on top of monitor.• The power cable connector is the primary means of detaching the systemfrom the power supply. The monitor should be installed close to a poweroutlet which is easily accessible.• Handle with care when transporting. Save packaging for transporting.11
Recommended Use –continuedCORRECT PLACEMENT AND ADJUSTMENT OF THE MONITORCAN REDUCE EYE, SHOULDER AND <strong>NEC</strong>K FATIGUE. CHECK THEFOLLOWING WHEN YOU POSITION THE MONITOR:• For optimum performance, allow 20 minutes forwarm-up.• Adjust the monitor height so that the top of thescreen is at or slightly below eye level. Your eyesshould look slightly downward when viewing themiddle of the screen.• Position your monitor no closer than 16 inchesand no further away than 26 inches from youreyes. The optimal distance is 19 inches.• Rest your eyes periodically by focusing on anobject at least 20 feet away. Blink often.• Position the monitor at a 90° angle to windows and other light sources tominimize glare and reflections. Adjust the monitor tilt so that ceiling lights donot reflect on your screen.• If reflected light makes it hard for you to see your screen, use an anti-glare filter.• Clean the <strong>LCD</strong> monitor surface with a lint-free, non-abrasive cloth. Avoid usingany cleaning solution or glass cleaner!• Adjust the monitor’s brightness and contrast controls to enhance readability.• Use a document holder placed close to the screen.• Position whatever you are looking at most of the time (the screen orreference material) directly in front of you to minimize turning your headwhile you are typing.• Avoid displaying fixed patterns on the monitor for long periods of time to avoidimage persistence (after-image effects).• Get regular eye checkups.ErgonomicsTo realize the maximum ergonomics benefits, we recommend the following:• Use the preset Size and Position controls with standard signals• Use the preset Color Setting• Use non-interlaced signals with a vertical refresh rate between 60-75Hz• Do not use primary color blue on a dark background, as it is difficult to see andmay produce eye fatigue to insufficient contrastFor more detailed information on setting up a healthy work environment, call <strong>NEC</strong> at(888) <strong>NEC</strong>-MITS, <strong>NEC</strong> FastFacts information at (800) 366-0476 and request document#900108 or write the American National Standard for Human Factors Engineering ofVisual Display Terminal Workstations – ANSI-HFS Standard No. 100-1988 – The HumanFactors Society, Inc. P.O. Box 1369, Santa Monica, California 90406.12
Specifications<strong>Monitor</strong> MultiSync ® <strong><strong>LCD</strong>1720M</strong> NotesSpecifications <strong>Monitor</strong><strong>LCD</strong> Module Diagonal: 17.0 inch Active matrix; thin film transistor (TFT)Viewable Image Size: 17.0 inch liquid crystal display (<strong>LCD</strong>); 0.264 mm pixelNative Resolution (Pixel Count): 1280 x 1024 pitch; 200cd/m 2 white luminence;350:1 contrast ratio, typicalInput Signal Video: ANALOG 0.7 Vp-p/75 OhmsSync:Separate sync. TTL LevelHorizontal sync. Positive/NegativeVertical sync. Positive/NegativeDisplay Colors Analog input: 16,777,216 Depends on display card used.Synchronization Horizontal: 31.0 kHz to 81.1 kHz AutomaticallyRange Vertical: 56.0 Hz to 85.0 Hz AutomaticallyResolutions Supported 720 x 400* :VGA text Some systems may not support640 x 480* at 60 Hz to 75 Hz all modes listed.800 x 600* at 56 Hz to 75 Hz832 x 624* at 75 Hz1024 x 768* at 60 Hz to 75 Hz1152 x 900* at 66 Hz <strong>NEC</strong>-Mitsubishi Electronics Display cites1280 x 960* at 60 Hz recommended resolution at 60 Hz for1280 x 1024 at 60 Hz to 76 Hz ................ optimal display performance.Active Display Area Horizontal: 338 mm/13.3 inchesVertical: 270 mm/10.6 inchesSpeakers Proclical Audio Output : 1.0W + 1.0WPower SupplyCurrent RatingDimensionsAC 100 - 240 V @ 50/60 Hz1.0 A @ 100 - 120 V, 0.5 A @ 220 - 240 V407 mm (W) x 431 mm (H) x 208 mm (D)16.0 inches (W) x 16.9 inches (H) x 8.2 inches (D)Weight6.5 kg14.3 lbsEnvironmental ConsiderationsOperating Temperature: 5°C to 35°C/41°F to 95°FHumidity: 30% to 80%Feet: 0 to 10,000 FeetStorage Temperature: -10°C to 60°C/14°F to 140°FHumidity: 10% to 85%Feet: 0 to 31,500 Feet* Interpolated Resolutions: When resolutions are shown that are lower than the pixel count of the <strong>LCD</strong> module, text may appear different. This isnormal and necessary for all current flat panel technologies when displaying non-native resolutions full screen. In flat panel technologies, eachdot on the screen is actually one pixel, so to expand resolutions to full screen, an interpolation of the resolution must be done.NOTE: Technical specifications are subject to change without notice.13
FeaturesReduced Footprint: Provides the ideal solution for environments requiring superior imagequality but with size and weight limitations. The monitor’s small footprint and low weightallow it to be moved or transported easily from one location to another.AccuColor ® Control Systems: Allows you to adjust the colors on your screen and customizethe color accuracy of your monitor to a variety of standards.OSM (On-Screen Manager) Controls: Allow you to quickly and easily adjust all elementsof your screen image via simple to use on-screen menus.ErgoDesign ® Features: Enhance human ergonomics to improve the working environment,protect the health of the user and save money. Examples include OSM controls for quickand easy image adjustments, tilt base for preferred angle of vision, small footprint andcompliance with MPRII and TCO guidelines for lower emissions.Plug and Play: The Microsoft ® solution with the Windows ® 95/98/Me/2000/XPoperating system facilitates setup and installation by allowing the monitor to send itscapabilities (such as screen size and resolutions supported) directly to your computer,automatically optimizing display performance.IPM (Intelligent Power Manager) System: Provides innovative power-saving methodsthat allow the monitor to shift to a lower power consumption level when on but not in use,saving two-thirds of your monitor energy costs, reducing emissions and lowering the airconditioning costs of the workplace.Multiple Frequency Technology: Automatically adjusts monitor to the display card’sscanning frequency, thus displaying the resolution required.FullScan Capability: Allows you to use the entire screen area in most resolutions,significantly expanding image size.VESA Standard Mounting Interface: Allows users to connect their MultiSync monitor toany VESA standard third party mounting arm or bracket. Allows for the monitor to bemounted on a wall or an arm using any third party compliant device.OSM Display Screen Copyright 2001 by<strong>NEC</strong>-Mitsubishi Electronics Display of America, Inc.14
TroubleshootingNo picture• The signal cable should be completely connected to the display card/computer.• The display card should be completely seated in its slot.• Front Power Switch and computer power switch should be in the ON position.• Check to make sure that a supported mode has been selected on the display card or systembeing used. (Please consult display card or system manual to change graphics mode.)• Check the monitor and your display card with respect to compatibility andrecommended settings.• Check the signal cable connector for bent or pushed-in pins.Power Button does not respond• Unplug the power cord of the monitor from the AC outlet to turn off and reset themonitor.Image persistence• Image persistence is when a “ghost ” of an image remains on the screen even afterthe monitor has been turned off or a different image is being displayed.In mostinstances,the image persistence can be reduced by turning the monitor off for aslong as an image was displayed or by displaying the same image in thecomplementary colors.NOTE: As with all personal display devices, <strong>NEC</strong>-Mitsubishi Electronics Display of Americarecommends using a screen saver at regular intervals whenever the screen is idle.Image is unstable, unfocused or swimming is apparent• Signal cable should be completely attached to the computer.• Use the OSM Image Adjust controls to focus and adjust display byincreasing or decreasing the fine total. When the display mode is changed, the OSMImage Adjust settings may need to be re-adjusted.• Check the monitor and your display card with respect to compatibilityand recommended signal timings.• If your text is garbled, change the video mode to non-interlace and use 60Hz refresh rate.LED on monitor is not lit (no green or amber color can be seen)• Power Switch should be in the ON position and power cord should be connected.• Make certain the computer is not in a power-saving mode (touch the keyboard ormouse).Display image is not sized properly• Use the OSM Image Adjust controls to increase or decrease the Coarse total.• Check to make sure that a supported mode has been selected on the display card or systembeing used. (Please consult display card or system manual to change graphics mode.)15
Troubleshooting –continuedSelected resolution is not displayed properly• Use OSM Display Mode to enter Information menu and confirm that the appropriateresolution has been selected. If not, select corresponding option.No Sound• Check to see if speaker cable is properly connected.• Check to see if mute is activated.• Check to see if volume in OSM is set at minimum.16
References• BBS (978) 742-8706<strong>NEC</strong>-Mitsubishi Electronics Display of America Remote Bulletin Board System isan electronic service accessible with your system and a modem. Communicationparameters are: 300/1200/2400/9600/14.4k/28.8k/33.6k bps, noparity, 8-data bits, 1 stop bit• Customer Service/Technical Support (800) 632-4662Fax (978) 742-7049• Electronic Channels:Internet e-mail:tech-support@necmitsubishi.comInternet ftp site:ftp.necmitsubishi.comWorld Wide Web:http://www.necmitsubishi.comProduct Registration:http://www.necmitsubishi.com/productregistrationEuropean Operations: http://www.nec-monitors.comWindows ® 95/98/Me/2000/XP INF File: http://support.necmitsubishi.com/software.htmthen download the file <strong>NEC</strong>MSINF.ZIP• FastFacts Information (800) 366-0476INFORMATION DESCRIPTION DOCUMENT #Glossary Definition of terms related 900203to functions, features andinstallation of theMultiSync ® monitorMore Information Names and addresses of 900204other groups involved instandards and features ofthe MultiSync monitorMacintosh Connection Detailed information on 153006connecting the MultiSyncmonitor to a MacintoshHealthy Work Environment Detailed information on 900108setting up a healthy workenvironment• Literature & Sales Info (800) <strong>NEC</strong>-INFO [(800) 632-4636]• MultiSync Fulfillment (800) 632-4662[For software & accessories]• TeleSales (800) 284-448417
Limited Warranty<strong>NEC</strong>-Mitsubishi Electronics Display of America, Inc. (hereinafter “NMD-A”) warrants thisProduct to be free from defects in material and workmanship and, subject to the conditions setforth below, agrees to repair or replace (at NMD-A’s sole option) any part of the enclosed unitwhich proves defective for a period of three (3) years from the date of first consumer purchase.Spare parts are warranted for ninety (90) days. Replacement parts or unit may be new orrefurbished and will meet specifications of the original parts or unit.This warranty gives you specific legal rights and you may also have other rights, which varyfrom state to state. This warranty is limited to the original purchaser of the Product and is nottransferable. This warranty covers only NMD-A-supplied components. Service required as aresult of third party components is not covered under this warranty. In order to be coveredunder this warranty, the Product must have been purchased in the U.S.A. or Canada by theoriginal purchaser. This warranty only covers Product distribution in the U.S.A. or Canada byNMD-A No warranty service is provided outside of the U.S.A. or Canada. Proof of Purchasewill be required by NMD-A to substantiate date of purchase. Such proof of purchase must bean original bill of sale or receipt containing name and address of seller, purchaser, and theserial number of the product.It shall be your obligation and expense to have the Product shipped, freight prepaid, ordelivered to the authorized reseller from whom it was purchased or other facility authorizedby NMD-A to render the services provided hereunder in either the original package or asimilar package affording an equal degree of protection. All Products returned to NMD-A forservice MUST have prior approval, which may be obtained by calling 1-800-632-4662. TheProduct shall not have been previously altered, repaired, or serviced by anyone other than aservice facility authorized by NMD-A to render such service, the serial number of the productshall not have been altered or removed. In order to be covered by this warranty the Productshall not have been subjected to displaying of fixed images for long periods of time resultingin image persistence (afterimage effects), accident, misuse or abuse or operated contrary tothe instructions contained in the User’s <strong>Manual</strong>. Any such conditions will void this warranty.NMD-A SHALL NOT BE LIABLE FOR DIRECT, INDIRECT, INCIDENTAL, CONSEQUENTIAL,OR OTHER TYPES OF DAMAGES RESULTING FROM THE USE OF ANY NMD-A PRODUCTOTHER THAN THE LIABILITY STATED ABOVE. THESE WARRANTIES ARE IN LIEU OF ALLOTHER WARRANTIES EXPRESS OR IMPLIED, INCLUDING, BUT NOT LIMITED TO, THEIMPLIED WARRANTIES OF MERCHANTABILITY OR FITNESS FOR A PARTICULAR PURPOSE.SOME STATES DO NOT ALLOW THE EXCLUSION OF IMPLIED WARRANTIES OR THELIMITATION OR EXCLUSION OF LIABILITY FOR INCIDENTAL OR CONSEQUENTIAL DAM-AGES SO THE ABOVE EXCLUSIONS OR LIMITATIONS MAY NOT APPLY TO YOU.This Product is warranted in accordance with the terms of this limited warranty. Consumersare cautioned that Product performance is affected by system configuration, software, theapplication, customer data, and operator control of the system, among other factors. WhileNMD-A Products are considered to be compatible with many systems, specific functionalimplementation by the customers of the Product may vary. Therefore, suitability of a Productfor a specific purpose or application must be determined by consumer and is not warrantedby NMD-A.For the name of your nearest authorized <strong>NEC</strong>-Mitsubishi Electronics Display service facility,contact <strong>NEC</strong>-Mitsubishi Electronics Display of America at 1-800-632-4662.18
TCO’95MultiSync <strong><strong>LCD</strong>1720M</strong> Black Model (LA-17S02-BK)Congratulations! You have just purchased a TCO’95 approved andlabeled product! Your choice has provided you with a product developedfor professional use. Your purchase has also contributed to reducing theburden on the environment and also, to the further development ofenvironmentally adapted electronics products.Why do we have environmentally labelled computers?In many countries, environmental labelling has become an established method for encouragingthe adaptation of goods and services to the environment. The main problem, as far ascomputers and other electronics equipment are concerned, is that environmentally harmfulsubstances are used both in the products and during the manufacturing. Since it has not beenpossible for the majority of electronics equipment to be recycled in a satisfactory way, mostof these potentially damaging substances sooner or later enter Nature.There are also other characteristics of a computer, such as energy consumption levels, that areimportant from the viewpoints of both the work (Internal) and natural (external) environments.Since all methods of conventional electricity generation have a negative effect on theenvironment (acidic and climate-influencing emissions, radioactive waste, etc.), it is vital toconserve energy. Electronics equipment in offices consume an enormous amount of energysince they are often left running continuously.What does labelling involve?This product meets the requirements for the TCO’95 scheme which provides for internationaland environmental labelling of personal computers. The labelling scheme was developed asa joint effort by the TCO (The Swedish Confederation of Professional Employees),Naturskyddsforeningen (The Swedish Society for Nature Conservation) and NUTEK (TheNational Board for Industrial and Technical Development in Sweden).The requirements cover a wide range of issues: environment, ergonomics, usability, emissionof electrical and magnetic fields, energy consumption and electrical and fire safety.The environmental demands concern restrictions on the presence and use of heavy metals,brominated and chlorinated flame retardants, CFCs (freons) and chlorinated solvents, amongother things. The product must be prepared for recycling and the manufacturer is obliged tohave an environmental plan which must be adhered to in each country where the companyimplements its operational policy. The energy requirements include a demand that thecomputer and/or display, after a certain period of inactivity, shall reduce its powerconsumption to a lower level in one or more stages. The length of time to reactivate thecomputer shall be reasonable for the user.Labelled products must meet strict environmental demands, for example, in respect of thereduction of electric and magnetic fields, physical and visual ergonomics and good usability.TCO’95 is a co-operative project between TCO (The Swedish Confederation of ProfessionalEmployees), Naturskyddsforeningen (The Swedish Society for Nature Conservation) andNUTEK (The National Board for Industrial and Technical Development in Sweden).Environmental RequirementsBrominated flame retardantsBrominated flame retardants are present in printed circuit boards, cables, wires, casings andhousings. In turn, they delay the spread of fire. Up to thirty percent of the plastic in a computercasing can consist of flame retardant substances. These are related to another group ofenvironmental toxins, PCBs, which are suspected to give rise to similar harm, including19
TCO’95 –continuedreproductive damage in fish eating birds and mammals, due to the bio-accumulative*processes. Flame retardants have been found in human blood and researchers fear thatdisturbances in foetus development may occur.TCO’95 demand requires that plastic components weighing more than 25 grams must notcontain organically bound chlorine and bromine.Lead**Lead can be found in picture tubes, display screens, solders and capacitors. Lead damagesthe nervous system and in higher doses, causes lead poisoning.TCO’95 requirement permits the inclusion of lead since no replacement has yet beendeveloped.Cadmium**Cadmium is present in rechargeable batteries and in the colour generating layers of certaincomputer displays. Cadmium damages the nervous system and is toxic in high doses.TCO’95 requirement states that batteries may not contain more than 25 ppm (parts per million)of cadmium. The colour generating layers of display screens must not contain any cadmium.Mercury**Mercury is sometimes found in batteries, relays, switches, and back-light systems, Mercurydamages the nervous system and is toxic in high doses.TCO’95 requirement states that batteries may not contain more than 25 ppm (parts per million)of mercury. It also demands that no mercury is present in any of the electrical or electronicscomponents concerned with the display unit, except the back-light system.CFCs (freons)CFCs (freons) are sometimes used for washing printed circuit boards and in the manufacturingof expanded foam for packaging. CFCs break down ozone and thereby damage the ozonelayer in the stratosphere, causing increased reception on Earth of ultraviolet light withconsequent increased risks of skin cancer (malignant melanoma).The relevant TCO’95 requirement; Neither CFCs nor HCFCs may be used during themanufacturing of the product or its packaging.*Bio-accumulative is defined as substances which accumulate within living organisms.**Lead, Cadmium and Mercury are heavy metals which are Bio-accumulative.To obtain complete information on the environmental criteria document, order from:TCO Development UnitSE-114 94 StockholmSWEDENFAX Number: +46 8 782 92 07E-mail (Internet): development@tco.seYou may also obtain current information on TCO’95 approved and labelled productsby visiting their website at: http://www.tco-info.com/20
TCO’99MultiSync <strong><strong>LCD</strong>1720M</strong> White Model (LA-17S02)Congratulations! You have just purchased a TCO’99 approved andlabeled product! Your choice has provided you with a product developedfor professional use. Your purchase has also contributed toreducing the burden on the environment and also to the furtherdevelopment of environmentally adapted electronics products.Why do we have environmentally labelled computers?In many countries, environmental labelling has become an established method for encouragingthe adaptation of goods and services to the environment. The main problem, as far ascomputers and other electronics equipment are concerned, is that environmentally harmfulsubstances are used both in the products and during the manufacturing. Since it has not beenpossible for the majority of electronics equipment to be recycled in a satisfactory way, mostof these potentially damaging substances sooner or later enter Nature.There are also other characteristics of a computer, such as energy consumption levels, that areimportant from the viewpoints of both the work (Internal) and natural (external) environments.Since all methods of conventional electricity generation have a negative effect on theenvironment (acidic and climate-influencing emissions, radioactive waste, etc.), it is vital toconserve energy. Electronics equipment in offices consume an enormous amount of energysince they are often left running continuously.What does labelling involve?This product meets the requirements for the TCO’99 scheme which provides for international andenvironmental labelling of personal computers. The labelling scheme was developed as a jointeffort by the TCO (The Swedish Confederation of Professional Employees), SvenskaNaturskyddsforeningen (The Swedish Society for Nature Conservation) and Statens Energimyndighet(The Swedish National Energy Administration).The requirements cover a wide range of issues: environment, ergonomics, usability, emission ofelectrical and magnetic fields, energy consumption and electrical and fire safety.The environmental demands concern restrictions on the presence and use of heavy metals,brominated and chlorinated flame retardants, CFCs (freons) and chlorinated solvents, among otherthings. The product must be prepared for recycling and the manufacturer is obliged to have anenvironmental plan which must be adhered to in each country where the company implements itsoperational policy. The energy requirements include a demand that the computer and/or display,after a certain period of inactivity, shall reduce its power consumption to a lower level in one ormore stages. The length of time to reactivate the computer shall be reasonable for the user.Labelled products must meet strict environmental demands, for example, in respect of the reductionof electric and magnetic fields, physical and visual ergonomics and good usability.Environmental RequirementsFlame retardantsFlame retardants are present in printed circuit boards, cables, wires, casings and housings. In turn,they delay the spread of fire. Up to thirty percent of the plastic in a computer casing can consist offlame retardant substances. Most flame retardants contain bromine or chloride and these arerelated to another group of environmental toxins, PCBs, which are suspected to give rise to severe21
TCO’99 –continuedhealth effects, including reproductive damage in fish eating birds and mammals, due to the bioaccumulative*processes. Flame retardants have been found in human blood and researchers fearthat disturbances in foetus development may occur.TCO’99 demand requires that plastic components weighing more than 25 grams must not containflame retardants with organically bound chlorine and bromine. Flame retardants are allowed inthe printed circuit boards since no substitutes are available.Lead**Lead can be found in picture tubes, display screens, solders and capacitors. Lead damages thenervous system and in higher doses, causes lead poisoning.TCO’99 requirement permits the inclusion of lead since no replacement has yet been developed.Cadmium**Cadmium is present in rechargeable batteries and in the colour generating layers of certaincomputer displays. Cadmium damages the nervous system and is toxic in high doses.TCO’99 requirement states that batteries, the colour generating layers of display screens and theelectrical or electronics components must not contain any cadmium.Mercury**Mercury is sometimes found in batteries, relays and switches, Mercury damages the nervous systemand is toxic in high doses.TCO’99 requirement states that batteries may not contain any Mercury. It also demands that nomercury is present in any of the electrical or electronics components associated with the display unit.CFCs (freons)CFCs (freons) are sometimes used for washing printed circuit boards. CFCs break down ozone andthereby damage the ozone layer in the stratosphere, causing increased reception on Earth ofultraviolet light with consequent increased risks of skin cancer (malignant melanoma).The relevant TCO’99 requirement; Neither CFCs nor HCFCs may be used during the manufacturingand assembly of the product or its packaging.*Bio-accumulative is defined as substances which accumulate within living organisms.**Lead, Cadmium and Mercury are heavy metals which are Bio-accumulative.To obtain complete information on the environmental criteria document, order from:TCO Development UnitSE-114 94 StockholmSWEDENFAX Number: +46 8 782 92 07E-mail (Internet): development@tco.seYou may also obtain current information on TCO’99 approved and labelled products byvisiting their website at: http://www.tco-info.com/22
Declaration of the ManufacturerWe hereby certify that the color monitorMultiSync ® <strong><strong>LCD</strong>1720M</strong> TM (LA-17S02) andMultiSync ® <strong><strong>LCD</strong>1720M</strong> TM (LA-17S02-BK)are in compliance withCouncil Directive 73/23/EEC:– EN 60950Council Directive 89/336/EEC:– EN 55022– EN 61000-3-2– EN 61000-3-3– EN 55024and marked with<strong>NEC</strong>-Mitsubishi Electric VisualSystems Corporation4-13-23, Shibaura,Minato-KuTokyo 108-0023, JapanPower consumption of the monitor is lessthan 3 W when in power-saving mode.23
AVERTISSEMENTAFIN D’ÉVITER TOUT RISQUE D’INCENDIE OU D’ÉLECTROCUTION, NE PAS EXPOSER CET APPAREIL À LA PLUIE OU ÀL’HUMIDITÉ. NE PAS UTILISER LA FICHE D’ALIMENTATION POLARISÉE AVEC UNE PRISE DE CORDON DE RALLONGEOU AUTRE PRISE SAUF SI LES BROCHES PEUVENT ÊTRE ENTIÈREMENT INTRODUITES.NE PAS OUVRIR LE BOÎTIER, LEQUEL CONTIENT DES COMPOSANTS À HAUTE TENSION. CONFIER TOUS TRAVAUXÀ DU PERSONNEL TECHNIQUE QUALIFIÉ.ATTENTIONRISQUE DE DÉCHARGE ÉLECTRIQUE • NE PAS OUVRIRATTENTION : POUR ÉVITER TOUT RISQUE D'ÉLECTROCUTION, NE PAS OUVRIR LE COUVERCLE (L'ARRIÈRE). À L'INTÉRIEUR, AUCUNEPIÈCE NE NÉCESSITE L'INTERVENTION DE L'UTILISATEUR. EN CAS DE PROBLÈME, S'ADRESSER À DU PERSONNEL TECHNIQUE QUALIFIÉ.Ce symbole est une mise en garde contre les risques d'électrocution que présentent certaines parties dépourvuesd'isolation à l'intérieur de l'appareil. Il est donc dangereux d'établir le moindre contact avec ces parties.Ce symbole prévient l'utilisateur que des directives d'utilisation et de maintenance de cet appareil sont fournies avecce guide d’utilisateur. Par conséquent, celles-ci doivent être lues attentivement pour éviter tout incident.Déclaration de conformité – Département des Communications du CanadaDOC : Cet appareil numérique de classe B respecte toutes les exigences du Règlementsur le matériel à l'origine d'interférences du Canada.C-UL : Ce produit porte la marque «C-UL» et est conforme aux règlements de sécuritécanadiens selon CAN/CSA C22.2 No. 950.Informations FCC1. Utiliser les câbles spécifiés fournis avec les moniteur couleur MultiSync <strong><strong>LCD</strong>1720M</strong> MC (LA-17S02 et LA-17S02-BK) afin de ne pas provoquer d'interférences avec la réception radio et télévision.(1) Prière d'utiliser le câble d'alimentation fourni ou équivalent pour assurer la conformité FCC.(2) Veuillez utiliser le câble de signal vidéo blindé fourni.(3) Prière d’utiliser le câble d’audio.2. Cet appareil a été testé et s’avère conforme avec les spécifications d'équipements de Classe B, section 15de la réglementation FCC. Ces spécifications ont été établies pour garantir une protection raisonnablecontre les interférences nuisibles dans une installation résidentielle. Cet appareil génère, utilise et peutémettre des fréquences radio et, s'il n'est pas installé et utilisé selon les directives de ce guide, il peutperturber les communications radio. Cependant, il n'est pas garanti qu'aucune interférence ne se produiradans une installation donnée.Si cet appareil provoque des interférences nuisibles à la réception radio ou télévision, ce que vous pouvezdéterminer en allumant et en éteignant l'appareil, essayez de remédier au problème en prenant une ouplusieurs des mesures suivantes :• Réorienter ou repositionner l'antenne de réception.• Augmenter la distance entre l'appareil et le récepteur.• Connecter l'appareil à une prise de courant sur un circuit différent de celui sur lequel le récepteurest connecté.• Consulter son revendeur ou un technicien radio/TV pour obtenir de l'aide.Si nécessaire, l'utilisateur doit contacter le revendeur ou un technicien radio/TV afin d'obtenir desinformations supplémentaires. L'utilisateur peut se procurer le livret utile suivant, préparé par la FederalCommunications Commission : «How to Identify and Resolve Radio-TV Interference Problems» (Commentcerner et résoudre les problèmes d’interférences radio/TV). Ce livret est disponible auprès du U.S.Government Printing Office, Washington, D.C., 20402, Stock No. 004-000-00345-4.24