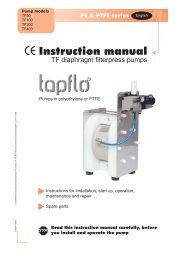
TF PE englisch - Steinle Industriepumpen GmbH
TF PE englisch - Steinle Industriepumpen GmbH
TF PE englisch - Steinle Industriepumpen GmbH

Create successful ePaper yourself
Turn your PDF publications into a flip-book with our unique Google optimized e-Paper software.
3 MAINTENANCE<br />
CHAPTER<br />
5) Press carefully on the other air valve rear end in the same direction. The main piston and air valve<br />
housing will slowly come out. Observe that the brass is soft material and changes figure easy. If<br />
those details are deformed they must be changed, so handle thoose with care.<br />
The pump is now completely dismantled. Check all components for wear or damage and replace if<br />
necessary.<br />
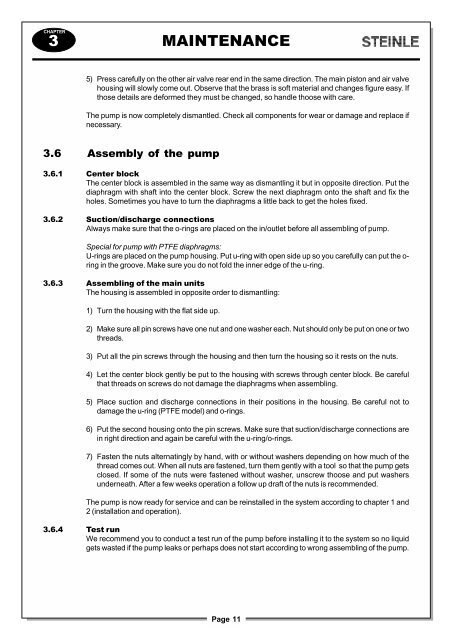
3.6 Assembly of the pump<br />
3.6.1 Center block<br />
The center block is assembled in the same way as dismantling it but in opposite direction. Put the<br />
diaphragm with shaft into the center block. Screw the next diaphragm onto the shaft and fix the<br />
holes. Sometimes you have to turn the diaphragms a little back to get the holes fixed.<br />
3.6.2 Suction/discharge connections<br />
Always make sure that the o-rings are placed on the in/outlet before all assembling of pump.<br />
Special for pump with P<strong>TF</strong>E diaphragms:<br />
U-rings are placed on the pump housing. Put u-ring with open side up so you carefully can put the oring<br />
in the groove. Make sure you do not fold the inner edge of the u-ring.<br />
3.6.3 Assembling of the main units<br />
The housing is assembled in opposite order to dismantling:<br />
1) Turn the housing with the flat side up.<br />
2) Make sure all pin screws have one nut and one washer each. Nut should only be put on one or two<br />
threads.<br />
3) Put all the pin screws through the housing and then turn the housing so it rests on the nuts.<br />
4) Let the center block gently be put to the housing with screws through center block. Be careful<br />
that threads on screws do not damage the diaphragms when assembling.<br />
5) Place suction and discharge connections in their positions in the housing. Be careful not to<br />
damage the u-ring (P<strong>TF</strong>E model) and o-rings.<br />
6) Put the second housing onto the pin screws. Make sure that suction/discharge connections are<br />
in right direction and again be careful with the u-ring/o-rings.<br />
7) Fasten the nuts alternatingly by hand, with or without washers depending on how much of the<br />
thread comes out. When all nuts are fastened, turn them gently with a tool so that the pump gets<br />
closed. If some of the nuts were fastened without washer, unscrew thoose and put washers<br />
underneath. After a few weeks operation a follow up draft of the nuts is recommended.<br />
The pump is now ready for service and can be reinstalled in the system according to chapter 1 and<br />
2 (installation and operation).<br />
3.6.4 Test run<br />
We recommend you to conduct a test run of the pump before installing it to the system so no liquid<br />
gets wasted if the pump leaks or perhaps does not start according to wrong assembling of the pump.<br />
Page 11