SD08 4 / 8 Channels DVR User Manual - Best-china-security ...
SD08 4 / 8 Channels DVR User Manual - Best-china-security ...
SD08 4 / 8 Channels DVR User Manual - Best-china-security ...
- No tags were found...

You also want an ePaper? Increase the reach of your titles
YUMPU automatically turns print PDFs into web optimized ePapers that Google loves.
Stand-alone <strong>DVR</strong> user manual<strong>SD08</strong>4 / 8 <strong>Channels</strong> <strong>DVR</strong><strong>User</strong> <strong>Manual</strong>Ver. 3.0www.best-<strong>china</strong>-<strong>security</strong>-supplies.com0
Stand-alone <strong>DVR</strong> user manual1.1 CautionChapter1 Specifications and connector definition■ Power supply◎ The applicable power supply for this machine is 19V 3A, Please use our special powersupply come with the machine。◎ Please keep the power plug away from socket if you don’t use this machine for long timeSafety。◎ As indoor equipment, this machine shouldn’t be put it in moist or dusty place In order toprevent from danger of short circuit and electric shock。◎ Once any solid or liquid come into the machine, please cut off power immediately,And then ask the technician to inspect it before you use it again。◎ If there is any malfunction with the machine, you should ask the technician to examine andrepair or contact with the dealer, please don’t ever mend it by your self。■ Installation place◎ You should select the right place where the air can circulate over the machine, thus canprevent the machine from overheating。◎ This machine shouldn’t be installed in hot places near radiator or vent-pipe, or some otherplaces where is insolated or dusty and moist, as well as those places with strong magneticfield or with mechanical shake and strike。■ Copyright protection◎ Please don’t infringe the related right of the third party when you make image recordingprogram。◎ Any change or modification on this machine without our permission might destroy themachine and cause many inconvenience to the user。1.2 Package checkingAfter unpack the carton, please check whether the host and spare parts are in goodcondition, if anything wrong, please stop using and contact your supplier immediately. Alsoplease check whether the following items are complete:◎ <strong>User</strong> manual X 1pcs◎ IR remoter X 1pcs◎ Remoter batteries X 2pcs◎ QC Certificate X 1pcs◎ After sales guarantee card X 1pcs◎ HDD data line: SATA date cable severalwww.best-<strong>china</strong>-<strong>security</strong>-supplies.com◎ DC19V adaptor X 1pcs◎ HDD bracket and screws X 1set◎ Client player software CD X 1pcs1
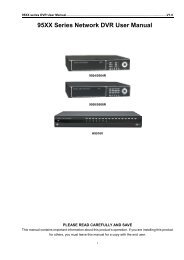
Stand-alone <strong>DVR</strong> user manual1.3product parameterparameterVideoAudioModel4CH Digital Video Recordercompression H.2648CH Digital Video RecorderTotal resource 100frame(25fps/ch) 200frame(25fps/ch)Live pic. resolutionPlayback resolutionD1(704×576)CIF(352×288)input 4ch BNC 8ch BNCoutputVideo standard1ch BNC,1ch VGA(Max. resolution1024×768)PAL、NTSC adjustableAudio input 4ch 8chAudio output 1ch 1chcompression G.722Rec. Rec.mode <strong>Manual</strong>,schedule,motion detect,alarm recordingStorageandBackupI/ONetworkControlOthHDDHDD volumeBackupNetProtocolInternet viewingMobile surveillance2X SATAHDD,You can put one HDD in <strong>DVR</strong> case.1TUSB backup device,Remote backup,Local HDD backupEthernet 10/100Base-T,RJ45UDP/IP,TCP/IP,IGMP(multicast),DNS&DHCP client,PPOE,DDNSIE browsingSupport 1CH 3G mobile surveillanceAlarm input 4ch 8chAlarm output 1ch 1chRS485RS232USBRemoterMousePanelNetwork controlDimension(mm)Power1X RS4851X RS2322X USB for USB mouse and other USB deviceSupportSupport USBmouseSupportSupport275mm×230mm×60mmDC19V,5Awww.best-<strong>china</strong>-<strong>security</strong>-supplies.com2
Stand-alone <strong>DVR</strong> user manualWorking conditionHumidity 20%-95%,temperature-10~50℃1.4 Function◎ Realtime surveillance:Equipped with BNC outgoing interface,see the live picture onmonitor。◎ Recording:Record the live picture into HDD instantly。◎ Backup:Support flash disk, movable HDD and Local HDD backup via <strong>DVR</strong> or internet。◎ Playback:Support single channel classified inquiry and playback on <strong>DVR</strong> or internet。◎ Internet viewing:Support the long-distance client side visiting。◎ Alarm:Support HDD and video input alarm management, and support outer alarm signalinput。◎ Mouse control:Support USB mouse control。◎ PTZ:Support the decoder which communicate via RS485, can expand two kind of decodingprotocol, easy to control PTZ and speed dome camera。1.5 Feature:◎ Friendly GUI interface, semitransparent menu interface;◎ Support flash disk / Movable HDD and internet backup;◎ Support 3G mobile surveillance;◎ Support affair assort and exactitude timing playback;◎ Triplex operation, playback simultaneously;◎ Support instantly lock the shortcut menu when be off;◎ Support timing auto system maintenance;◎ Variety recording modes:<strong>Manual</strong>, boot-strap auto recording, motion detection, alarm andschedule recording;◎ Support shortcut reconvert default setting;◎ Support USB mouse control;www.best-<strong>china</strong>-<strong>security</strong>-supplies.com3
Stand-alone <strong>DVR</strong> user manual1.6 Product appearance1.6.1 Front Panel and button definition1 Power2 Indicator light1 2 3 4 5 6 7 8 9POW:Power indicator lightHDD:Harddisk indicator lightREC:Recording indicator lightIR:Remote control indicator light1.6.2 Rear panel and connector definition3 Menu/Return1 2 3 4 5 6 7 81 Power(DC19V)2 USB PORT3 Alarm 1~8:Alarm inputGNDNO/COM: Alarm output485A/B:PTZ control +/-232TX/RR:RS232,connect PC4 Picture switch5678 Up/Down/Left/Right9 Enter94 Ethernet PORT5 Audio output6 VGA output7 BNC Video output8 8CH audio input9 8ch video input+12V:for DC relay power source,current100mA,can't short circle.www.best-<strong>china</strong>-<strong>security</strong>-supplies.comNote: There are only 4CH video audio and alarm input for 4CH <strong>DVR</strong>。4
Stand-alone <strong>DVR</strong> user manual1.7 Remote ControllerFigure(0~9)Figure0Power:ON/OFF systempowerInput figure and letter. Inpreview model, figures 1~9are used to switch 1-9channel.Return 9 pictures displayQuit shortcut menu/pageupShortcut menu/pagedownDirectionkeySwitch display modeMoving the cursorup/down/left/rightEnterMain menuReturnwww.best-<strong>china</strong>-<strong>security</strong>-supplies.com5
Stand-alone <strong>DVR</strong> user manual2.1 Host ConnectionChapter2 System Installation2.1.1 Video connectionA、Video input connection:System support 4/8CH CVBS input, input resistance is75Ω,BNC connector.B、Video output connection:a) System support 1CH CVBS output,output resistance is75Ω,BNC connector.b) System support 1CH VGA output,resolution 1024x768 60Hz / 800x600 60Hz / 640x480 60Hzoptional.2.2 Alarm input and outputA、Sensor connection:a) Sensor adopt NC. output contactb) Sensor adopt N.O. output contactPic.2-1 Alarm input connection1-N.C.www.best-<strong>china</strong>-<strong>security</strong>-supplies.com6
Stand-alone <strong>DVR</strong> user manualB、 Alarm output connection:2.3 RS485/RS232 connectionPic.2-2 Alarm input connection 1-N.O.Pic.2-3 Alarm output connectionHost have one standard RS-485/232 port, pin definition please refer to Pic.3. RS485 is used to control PTZdecoder and camera, RS232 is used to debugging software and other communications expanding.Host builds in many PTZ/camera protocols, it can connect 4 PTZ decoders/cameras at the same time, and eachchannel corresponds to one. Default PTZ decoder/camera decoder is same as its channel numberwww.best-<strong>china</strong>-<strong>security</strong>-supplies.com7
Stand-alone <strong>DVR</strong> user manual2.4 HDD installation<strong>DVR</strong> can only installs 1pcs SATA HDD in it (support2pcs SATA HDD),HDD max. volume 1TB,and setthe jumper on SATA I(Limit to 1.5Gb/s Operation )mode. After that, use bracket to fix the HDD in the <strong>DVR</strong>,connect the power cable and date cable3.1 Mouse OperationChapter3 System startBesides uses on the panel and remote control's pressed key control, but may also use the mouseto operate systemClick left keyIf user interface locked, Click right key once to popup shortcut menu and clinkany menu options to popup login interface, input the host ID and password;ifnot locked, in live surveillance picture, click right key once in shortcut menu tooperate the menu directly.In main menu, clink once to enter any sub-menu,you can do same operation inbasic setup and advance setup; In detailed file menu, clink to playback.Change check box or motion detect area statusIn check box, click left key to ball out down-pull menu.In detailed file menu, click left key to playback.Choosing the options in edit box ordown-pull menu or file list,Besides figurewww.best-<strong>china</strong>-<strong>security</strong>-supplies.comand letter button on soft keyboard, there are Return 、Backspace 。Support8
Stand-alone <strong>DVR</strong> user manualClick right keyDouble clickleft keyMouse moveMouse dragfigure input:Capital/small letter input:Chinese input:3.2 System start upspecial character input:Click the right key on the live view to pop-up the shortcut menu:As Pic.5-1。Clink left key on the menu to enter the operation.In main menu and its sub-menu, exit the present menu.In live picture or playback picture, to maximal display or return to normal;Move the cursor on the menu。In the Motion Detection setting interface, you can use the left key to drag theframe to set the motion detection areaSystem initialize:Connect the DC19V/3A adapter to <strong>DVR</strong>. When start up the <strong>DVR</strong>, 【POW】LED will be on and 4 images will be display on the screen. If it has setup ignition recording or timerecording, the system will record automatically and the corresponding LED will be on, the system worknormally。3.3 Main interfaceAfter initialization, system will enter the main interface,Pic. 3-1 shows the main interfacewithout video input. In video input is normal, there will be corresponding channel picture on mainmenu. Double clink any channel on main menu to maximal display and double clink again to return toquad display; Clink right mouse key to pop up shortcut menu on main interface, clink left key to chooseoption or clink right key on other area outside of the menu to quit the shortcut menu.www.best-<strong>china</strong>-<strong>security</strong>-supplies.com9
Stand-alone <strong>DVR</strong> user manual3.4 Shortcut menuPic.3-1After system start up,clink right key on main interface to bob up shortcut menu, you can setup orcontrol the main menu, lock the system, search the recording, PTZ control and recording setting.Shortcut menu interface as Pic.3-2:Pic.3-23.4.1 Menu lockClink right key on surveillance interface to bob up the menu and choose“lock” to lock thesystem interface immediately. You should input the password to unlock. The re-login interfaceafter locked as Pic.3-3.www.best-<strong>china</strong>-<strong>security</strong>-supplies.comPic.3-3Remark:For first usage,set "ON" on the user password ,you can set the user's password and10
Stand-alone <strong>DVR</strong> user manualadministrator password. The user only has the right to enter record search menu but theadministrator have all operation right.3.4.2 Record searchClink right key on surveillance interface to bob up the menu and choose“record search” to searchand playback the recording. Please go to chapter 4 to check detailed operation.3.4.3 PTZ controlClink right key on surveillance interface to bob up the menu and choose“PTZ” to enter PTZcontrol interface. PTZ setting method is in chapter4 and PTZ control interface as Pic.3-4.Dragthe nonius to adjust the PTZ moving speed. Direction keys are used to move the PTZup/down/left/right. Press“+”“-” to adjust the zoom, focus and aperture.Pic.3-43.4.4 <strong>Manual</strong> recordingClink right key on surveillance interface to bob up the menu and choose“<strong>Manual</strong> recording”. Thepriority of "manual recording" are lowest than alarm recording and schedule recording. You canonly start the manual recording after the alarm recording and schedule recording stopped.3.4.5 Stop recordingClink right key on surveillance interface to bob up the menu and choose“Stop recording”to stopthe manual recording.Note:This operation can only stop the manual recording.Chapter4 Main menuRemark:You must after pressing “APPLY” to make the setting for submenu valid. After the “save success”box bob up, press exit to quit the menu. If pressing “exit” directly, the setting for submenu willunavailable. Press the “default” button on the bottom of menu to recover the system default setting.Press the “default” button on the sub-menu means recover this sub-menu setting to system defaultsetting. System default setting is the <strong>DVR</strong> initial parameter when they are in factory.In the main interface,Clink right mouse key once to bob up shortcut menu and press "main menu"to open the main menu. If the system interface is locked, you should input the password to unlock it.System main menu is as following Pic4-1.www.best-<strong>china</strong>-<strong>security</strong>-supplies.com11
Stand-alone <strong>DVR</strong> user manual4.1 Record searchPic.4-1In main menu,press "Record search" to enter the search interface,as follows:Time playback:Pic.4-2Input number directly to setup playback time,press“search” and then press“playback”,to playthe video file in this time;Search playback:Input number directly to setup playback date,press“search” to show the recording file list in thisday,Every 30 minutes for a display unit, Double clink the time box to playback this kinescope, orpress "file list" to show the detailed file list and choose the right one to play..Remark:Green means normal recording, Red means alarm recording, Grounding means norecording.File listSetup the searching date, after pressing “Search”, move the cursor to “File list” and press ”Apply”to enter into the video file list of this date,as Pic.4-3.Press it to play or choose it to backup. Afterenter the file list interface, you can choose channel and recording type to check the affair, Thewww.best-<strong>china</strong>-<strong>security</strong>-supplies.comdisplay page of result as follow:12
Stand-alone <strong>DVR</strong> user manualInstruction:Pic.4-31.“Channel” is the recording file which belong to which channel, “Size” is display the size ofthis file(Unit:MB),“Type” is display the type of recording file,there are two types: normaland alarm,press “Backup” button can export the selected files to USB storage.2. After moving the cursor up and down and select the files, and press "Apply" to enter intoplayback interface。If the all channels have recording files, it will playback all windows at thesame time;3. If setup as “on” in the "Record time" in "Basic setup",it will show the date/time whenplayback record file;If setup as “off” it will not display time;4. When playback,can press "Slow" to play slowly;press "Forward"、"Reverse" to speed、reverseplay;also can press "Pause/step" to pause and frame by frame play;Press "Exit" to exit fromplayback and return to the former menu;5. When finished playback files, it will return to the file list interface.Backup:You can select the recording file by direction keys and press "Enter" means selected OK(Thereis a “√” at the end of the selected recording files)and press "Enter" again the “√” will disappearthat means cancel the select, we can start export the recording files after selecting, and press"Backup" to start to backup, as follow Pic 4-4,After finished, there is a prompt box to showbackup finished, as Pic.4-5。Note:The copied file is in AVI format, you can use any media player which supports this fileformat to play it!www.best-<strong>china</strong>-<strong>security</strong>-supplies.com13
Stand-alone <strong>DVR</strong> user manualPic.4-4Pic.4-5Log search:Enter“record search” interface, press "log search" button to enter log search menuinterface,as follow Pic.4-6.Pic.4-6Choosing the log date and type, press "start" to check the log recording.www.best-<strong>china</strong>-<strong>security</strong>-supplies.com4.2 Record modeIn main menu, press“record mode”to enter the record mode setup interface, as follows:14
Stand-alone <strong>DVR</strong> user manualPic.4-7CHANNEL:"ON" means the channel enable for recording, OFF means disable for recording.Data rate:Set the recording data rate: Select“best” to set the best recording quality and theVideo data on hard disk space occupied by the corresponding increaseAudio:ON: Means enable the audio recording for all channels, OFF: Means disable audiorecordingREC.MODE:POWER UP: Means the device will start recording when it startup.TIME: Recording as the schedule, you can setup the schedule as you want as follow.Pic.4-8CHANNEL:You can select all channel or just one channel(blue means has selected)WEEKLY:You can select all everyday, weekend, workday or each day (blue means hasselected)DAILY:There are ALARM, NORMAL, NO REC three modes, if you select this, that means allthe day will record as this mode, and if you don’t want some period to record, you canwww.best-<strong>china</strong>-<strong>security</strong>-supplies.comcancel it via "Enter" button, grounding means don’t record, different color meansdifferent record mode: Red means alarm record, green means normal record, groundingmeans no record.15
Stand-alone <strong>DVR</strong> user manualPress "APPLY" and press "ENTER" to save the new settings.RECORD SIZE:There are 15min, 30min, 45min, 60min four options, that means it will pack asthe mode you selected4.3 HDD managementIn main menu, press“HDD”to enter to HDD management interface,as following picture:Pic.4-9HDD Status:There are three statuses available, normal, unformatted, No HDD. If HDD can notSize:HDD volume;run normally(including unformatted and no HDD), there is a 【H】display onvideo live view. If the HDD status is “unformatted”, you can press “HDDformat” to format the HDD.Free Space:The HDD current free space;Available time:The HDD can store so long video under this picture quality.Overwrite:ENABLE: means when HDD space less than 4G, it will delete HDD earliest recording file, and itwill stop deleting when the space is 10G; DISABLE:Means when HDD space less than 500M itwill stop recording, and an prompt will display in live view “please shutdown and replace HDD”Format:IF the HDD is first using, move cursor there to select device and press ”APLLY” tostart format.USB format:Format the flash disk.“Default” button is used to recover factory set.Remark:For the date safety on <strong>DVR</strong> HDD,we suggest you to format the HDD before the firstrecording.4.4 Basic setupIn main menu, press“Basic”to enter to HDD management interface,as following picture:www.best-<strong>china</strong>-<strong>security</strong>-supplies.com16
Stand-alone <strong>DVR</strong> user manualPic.4-104.4.1 System language setupFrom“Main Menu”——>“Basic”——>“System Language”to enter the system language settinginterface:Pic.4-11This <strong>DVR</strong> support Chinese and English. It will reboot automatically after change the systemdisplay language.4.4.2 Date/Time setupFrom“Main menu” >“Basic” >“Date/Time setup” to enter into the date/time setup interface:www.best-<strong>china</strong>-<strong>security</strong>-supplies.comPic.4-12You can set the date, time and time zone under this mode, include the Daylight Saving Time status.After the setting, press “apply” to save it.17
Stand-alone <strong>DVR</strong> user manual4.4.3 SecurityFrom“Main menu”——>“Basic”——>“Security” to enter the user password setup interface, asPic.4-13,After setting the device ID and system password switch, press “Apply” to save.Pic.4-13When “Password” is set on “Enable” as Pic.4-13,you can set the user password andadministrator password. If you input the user password when login, you can only enter the“Search record” to playback and back the video. Other operation will not allow.4.4.4 Display setupFrom“Main menu”——>“Basic”——>“Display setup” to enter the display setup interface,asPic.4-14:Pic.4-14Name:Set the channel name, support letter, figure and Chinese character input.Position:Set the channel name display locationColor:Refer to Pic.4-15,set the chromaticity, luminosity, contrast and saturationPreview:ON: Means the channel is allowed to view the live mode, OFF means not.Preview time:ON: Means insert clock in live view, OFF means notRecord time:ON: Means insert clock in record file, OFF means not.www.best-<strong>china</strong>-<strong>security</strong>-supplies.com18
Stand-alone <strong>DVR</strong> user manualPic.4-154.4.5 Video/Audio SetupFrom“Main menu”——>“Basic”——>“Video/Audio”to enter the video/audio setup interface,asPic.4-16:Pic.4-16VGA resolution include 800*600、600*480、1024*768, System support PAL and NTSC signal,if VGA resolution and signal format changed, the system will reboot automatically. If you want toadjust the volume, press “Volume setup” button and drag the volume cursor to adjust it, asPic.4-17.4.5 Advance setupPic.4-17From “Main menu”——>“Advance” to enter the advance setup interface,as Pic.4-18:www.best-<strong>china</strong>-<strong>security</strong>-supplies.com19
Stand-alone <strong>DVR</strong> user manualPic.4-184.5.1 Alarm setupFrom“main menu”——>“Advance”——>“Alarm setup”to enter the alarm setup interface, asPic.4-19:Pic.4-19I/O Alarm:Each channel has three statuses for choosing: N.O.; N.C.; close.HDD loss:ON means it will trigger an alarm if there is no HDD, HDD unformatted orunavailable, and it will display an “H” in the live view. OFF means it will displayan “H” in the live view, but no alarm if no HDD, HDD unformatted or unavailable.HDD space:ON:If the HDD lost or it is full, there will be an alarm.OFF: If HDD is not enough, there will not be any alarm.Video loss:ON:When one channel has no video input, it will display “video loss” in live viewand make alarm sound.OFF: When one channel has no video input, it will display “video loss” in live view but noalarm sound.Alarm mange:There are alarm output, buzzer and post REC three items.OUTPUT:when an alarm triggered, the alarm output time will be:www.best-<strong>china</strong>-<strong>security</strong>-supplies.com0 second、10 seconds,20 seconds,40 seconds and 60 seconds● BUZZER:buzzer calling time setup when alarm triggered: 0 second,10 seconds,20seconds,40 seconds and 60 seconds20
Stand-alone <strong>DVR</strong> user manual● POST REC.:post recording time setup: 30 seconds,1 minute,2 minutes and 5minutes● PRE REC:Pre-recording time is fixed as10 secondsEMAIL setup please checks attachment.4.5.2 System InfoFrom “Main menu”——>“Advance”——>“System info” to enter the system info interface, asPic.4-20:Pic.4-20This interface mainly display system hardware features and firmware version, include : softwareversion, MAC address、serial number.。4.5.3 Motion detectFrom“Main menu”——>“Advance”——>“Motion detect” to enter motion detect set upinterface, as Pic.4-21:Pic.4-21Each channel has “ON/OFF” switch to activate or close motion detect function. Sensitivitysetting including four standards: high, higher, medium and low. Motion detect area setting asPic.4-22,Each channel has 12*15 small panes,red area means it have activated motiondetection, transparent block means it have not activated motion detection. After the setting,www.best-<strong>china</strong>-<strong>security</strong>-supplies.comclink right key once to return and press “Apply” to save and activate the setting.21
Stand-alone <strong>DVR</strong> user manualPic.4-224.5.4 MobilFrom“Main menu”——>“Advance”——>“Mobile”to enter the mobile surveillance settinginterface, as pic.4-23:Channel: select the channel for mobile viewMobile network: Select different mobile network from the options of 3G, 2.5G and 2.75GThe transport speed in 2.5G mobile network is 3FPS, picture resolution is 160*120.The transport speed in 2.75G is 10FPS and 15FPS in 3G mobile network.Detailed setting method please checks attachment.Pic.4-234.5.5 System maintainFrom“Main menu”——>“Advance”——>“System maintain” to enter the system maintaininterface, as Pic.4-24:www.best-<strong>china</strong>-<strong>security</strong>-supplies.comPic.4-2422
Stand-alone <strong>DVR</strong> user manualSystem update:Copy the update file to the root directory of the flash disk, and insert it intoUSB port, then press “Enter” to upgrade the firmware, and it will displaythe process of the system upgrading, as following:Default settings:Press “Default setting” and press “OK” to bob up the system prompt box:“will lost current parameter, backup to factory set?” ,press “OK” torecover the factory setting.Restart:System re-boots.When “Auto reset” is on, the system will automatically restart at scheduled time everyday.4.5.6 PTZ setupFrom “Main menu”——>“Manage”——>“PTZ set” to enter the PTZ setting interface, youcan setup the parameters for each channel separately.Channel: The channel of PTZ connected.Protocol: select the protocol of different PTZ, there are two protocols to switch, and thedefault is Pelco-DBaud rate: select the different baud rate for your PTZ, there are 1200, 2400, 4800, and 9600Data bit: there are 5,6,7,8 options to select, default setting is 8.Stop bit: there are 1and 2 to select, the default setting is 1.Verify: there are None/Odd/Even/Mark/Space to select, the default setting is none.Address: Fill the code of respective PTZAbove parameter should same as PTZ parameter, or you can not control the PTZ.Pic.4-254.5.7 Network setupEnter “Main Menu”——>“Network”,the interface as following Pic.4-26:www.best-<strong>china</strong>-<strong>security</strong>-supplies.com23
Stand-alone <strong>DVR</strong> user manualTYPE: There are PPPOE, DHCP & Static three option.Select the DHCP,DHCP server will be automatically allocated IP address for the <strong>DVR</strong>.Select “Static” in the type, and set the <strong>DVR</strong> IP, Netmask, gateway and Media port, web port.As Pic.4-26。Select the PPPOE,you should fill the username and password of the internet service offer, andapply it and reboot the system. After rebooting, the device will save it and set the PPPOE asdefault network type. If succeed, the IP address will be automatically config as dynamic IP ofWAN. As Pic.4-27。Pic.4-27If you apply DDNS serve, you can remote access the <strong>DVR</strong> via input the domain name in IEbrowser after setting the DDNS parameters in <strong>DVR</strong>, as Pic.4-28.Pic.4-28System support 3 services: 3322, dyndns, perfecteyes.If the <strong>DVR</strong> connect with the internet via router, and you want to access the <strong>DVR</strong> via internet,you should forward the media port and web port on router. As Pic.4-29: 9000is media port,8080 is web port,The <strong>DVR</strong> I is 192.168.1.101,mapping these two ports to this IP,and inputhttp:// Router ip:8080 in IE browser address blank to visit the <strong>DVR</strong>.www.best-<strong>china</strong>-<strong>security</strong>-supplies.comPic.4-2924
Stand-alone <strong>DVR</strong> user manualChapter 5 IE operation5.1 Download and install the ActiveXInput the <strong>DVR</strong> IP and port(for example: http://172.18.6.202:8080/ ) in IE address blank and press“Enter” to connect the <strong>DVR</strong> and ht e PC will download and install the ActiveX automaticallysetting.Remark: If ActiveX download is not successful, please check the IE <strong>security</strong> Level and firewall5.2 <strong>User</strong> login5.2.1 LoginInput the <strong>DVR</strong> local IP in IE browser, when changed the port, you should add the port numberafter IP address, e.g. if <strong>DVR</strong> local IP is 192.168.3.97 (LAN) and the port is 8088, you should inputhttp:// 192.168.3.97:8088. The default port is 8088, and directly input http:// 192.168.3.97 toaccess the <strong>DVR</strong>. After downloading and installing the ActiveX, you can see the login interface asfollowing, as Pic.5-1, Select English interface in the top left side. Input username and password toenter into the system. The username and passport is same as the ones set in <strong>DVR</strong>.Pic.5-15.2.2 LiveAfter successful login, you can enter into real time preview interface and the software will connectvideo and audio automatically. Interface is as follow:Play control::Open or close window; :Capture picture; ;Remote recording(Save route referto “System setting”).www.best-<strong>china</strong>-<strong>security</strong>-supplies.com: 1、4、9、16 Multi-screen display; :Volume。25
Stand-alone <strong>DVR</strong> user manualPTZ control:Control the PTZ up/down/left/right move and 360 degree automatic rotation. And control zoon,focus and aperture.Pic.5-25.2.3 PlaybackPress “Play back” to enter playback interface, as Pic.5-3:Pic.5-3Choosing the date, channel and record type first, press“Search” to list all eligible file, please referto Pic.5-3,choose the relevant file that you want to playback and press“Playback” to play it.Press“Backup” to save the documents in the specified directory,(Save route please refer toPic.5-8).5.2.4 SetupNote:Setup method is same as host menu setup method, please check chapter 4 when renewwww.best-<strong>china</strong>-<strong>security</strong>-supplies.comthe system setting.。Press “setup” to enter into setup interface, this interface include record, alarm, PTZ, network,setting and system information six menus, as following Pic.5-4:26
Stand-alone <strong>DVR</strong> user manualPic.5-45.2.4.1 RecordClick “Record” to enter into setup interface; you can check the parameter settings as in GUIof <strong>DVR</strong>.Note: “resolution”setting is provisionally unavailable5.2.4.2 AlarmClick “Alarm” to enter into setup interface; you can check the parameter settings as in GUI of<strong>DVR</strong>., as following Pic.5-5:www.best-<strong>china</strong>-<strong>security</strong>-supplies.comPic.5-527
Stand-alone <strong>DVR</strong> user manual5.2.4.3 PTZPress “PTZ” to enter into PTZ setup interface,as Pic.5-6:Setting method please refer to chapter4.Pic.5-65.2.4.4 NetworkPress “Network” to enter into network setup interface,as Pic.5-7:Setting method please refer to chapter4.www.best-<strong>china</strong>-<strong>security</strong>-supplies.comPic.5-728
Stand-alone <strong>DVR</strong> user manual5.2.4.5 SettingPress “Network” to enter into network setup interface,as Pic.5-8:Pic.5-8Bandwidth:Set the amount of bandwidth in kbps (128k、192k、256k、384k、512k、1024k) that you want toallocate for traffic that matches internet,this bandwidth not include audio .File save path:capture picture and recording video save path.IE login password and DST settings you can check as <strong>DVR</strong> setting5.2.4.6 Host infoPress “Host info” to enter into the interface as Pic.5-9 to check the HDD status, remain recordtime, firmware version, MAC Address.www.best-<strong>china</strong>-<strong>security</strong>-supplies.comPic.5-929