DS Surface Mount - Community Professional Loudspeakers
DS Surface Mount - Community Professional Loudspeakers
DS Surface Mount - Community Professional Loudspeakers

You also want an ePaper? Increase the reach of your titles
YUMPU automatically turns print PDFs into web optimized ePapers that Google loves.
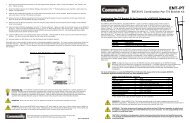
Distributed Design Series <strong>Surface</strong> <strong>Mount</strong> <strong>Loudspeakers</strong>Installation and Operation ManualModel Driver Diameter Description<strong>DS</strong>5 5.0" 127 mm full-range<strong>DS</strong>8 8.0" 203.2 mm full-range<strong>DS</strong>8SUB 8.0" 203.2 mm subwoofer
Introduction & Product DescriptionThank you for your choice of <strong>Community</strong>'sDistributed Design Series <strong>Surface</strong> <strong>Mount</strong><strong>Loudspeakers</strong>. This series is comprised of thefollowing models:Model<strong>DS</strong>5<strong>DS</strong>8<strong>DS</strong>8SUBDescription5" 2-way surface-mount*8" 2-way surface-mount*8" subwoofer surface-mount**All models are available in black or white.The <strong>Surface</strong> <strong>Mount</strong> Series have a unique,modern-looking streamlined architecturaldesign. Their black or white cabinets are easyto customize since they accept a wide variety ofpaints. For durability and improved sonic quality,the cabinets have thick-wall, internally-reinforcedABS plastic construction. This high-impactstrength construction reduces resonances,and the rounded surfaces further reduce theresonances that occur in flat-sided cabinets.Table of ContentsIntroduction & Product Description .....2Packing List & Feature Identification ...3Important Safety Instructions .........4Infin-A-Ball <strong>Mount</strong>ing System .......6Installation & Wiring ................7Optional Wall Box <strong>Mount</strong>ing .........10Painting the Loudspeaker ...........10Specifications ....................11Warranty and Servicing Notes .......11Each model is shipped as a matched pair ofcompletely assembled loudspeakers, includingeverything needed for standard installations.The <strong>DS</strong>5 and <strong>DS</strong>8 are full-range models, eachwith high and low frequency drivers and builtincrossover networks. The <strong>DS</strong>8SUB subwooferincludes a built-in low pass filter and can beused in conjunction with either of the full-rangemodels in applications benefitting from extendedlow frequency enhancement.You can use 8-ohm or constant voltagedistribution with the built-in 70/100 voltautoformer. Power is easy to adjust using afront-accessible power tap switch.We urge you to read these instructions carefullyand familiarize yourself with the features andinstallation methods before you begin the job.If you have any questions or concerns, pleasecontact <strong>Community</strong>.Copyright © 2013 by<strong>Community</strong> <strong>Professional</strong> <strong>Loudspeakers</strong>, Chester, Pennsylvania, USA. All Rights Reserved.Distributed Design Series Installation and Operation Manual Page 2<strong>Surface</strong> <strong>Mount</strong> <strong>Loudspeakers</strong>
Packing List and Feature Identification<strong>Community</strong> Distributed Design Series <strong>Surface</strong><strong>Mount</strong> <strong>Loudspeakers</strong> are engineered andmanufactured to be rugged and they arecarefully packed in sturdy cartons. However,it is wise to thoroughly inspect each unit afterit has been removed from the packaging, asdamage could occur during shipping.Please note that once the shipment has leftyour dealer or the <strong>Community</strong> factory, theresponsibility for damage is always borne bythe freight company. If damage has occurredduring shipping, you must file a claim directlywith the freight company. It’s very importantto contact the freight company as soon aspossible after receiving your shipment, as mostfreight companies have a short time limit withinwhich they will investigate claims. Make sure tosave the carton and the packing material, asmost claims will be denied if these materials arenot retained.Although we illustrate a single loudspeakerbelow to show the included parts, in fact theseloudspeakers are shipped in pairs. For a givenmodel, this is what’s included:• <strong>Surface</strong> <strong>Mount</strong> Loudspeaker Cabinets (Qty 2)• Grille Assembly (Qty 2)• Infin-A-Ball <strong>Mount</strong>ing Brackets (Qty 2)• Hex Wrench (Qty 1)• Small Flat screwdriver (Qty 1)(Your wiring-to4-pole Euroblock in baseof IAB bracket)Logo / power tapswitch accessGrille assemblyLoudspeaker CabinetInfin-A-Ball (IAB)<strong>Mount</strong>ing BracketPre-wired Euroblockmale connector withprotective IP56 coverDistributed Design Series Installation and Operation Manual Page 3<strong>Surface</strong> <strong>Mount</strong> <strong>Loudspeakers</strong>
Important Safety InstructionsAlways follow these basic safety precautionswhen using or installing Distributed DesignSeries <strong>Surface</strong> <strong>Mount</strong> <strong>Loudspeakers</strong> andaccessories:• Read these instructions.• Keep these instructions.• Heed all warnings.• Follow all instructions, particularly thosepertaining to rigging, mounting, hangingand electrical connections.• Do not use this apparatus near water.• Clean only with dry cloth.• Do not block any ventilation openings.Install in accordance with the manufacturer’sinstruction.• Do not install near any heat sources suchas radiators, heat registers, stoves, orother apparatus (including amplifiers) thatproduce heat.• Only use attachments/accessoriesthat are specified and approved by themanufacturer.• Refer all servicing to qualified servicepersonnel. Servicing is required whenthe apparatus has been damaged in anyway, such as power-supply cord or plug isdamaged, liquid has been spilled or objectshave fallen into the apparatus, the apparatushas been exposed to rain or moisture, doesnot operate normally, or has been dropped.The terms caution, warning, and danger maybe used in this manual to alert the reader toimportant safety considerations. If you have anyquestions or do not understand the meaning ofthese terms, do not proceed with installation.Contact your local dealer, distributor, or call<strong>Community</strong> directly for assistance. Theseterms are defined below:CAUTION: describes an operatingcondition or user action that may exposethe equipment or user to potential damageor danger.WARNING: describes an operatingcondition or user action that will likely causedamage to the equipment or injury to theuser or to others in the vicinity.DANGER: describes an operating conditionor user action that will immediately damagethe equipment and/or be extremelydangerous or life threatening to the user orto others in the vicinity.WARNING: To reduce the risk of fireor electric shock, do not expose thisapparatus to rain or moisture.These servicing instructions are for use byqualified service personnel only. To reducethe risk of fire or electric shock do not performany servicing other than that contained in theoperating instructions unless you are qualifiedto do so.The loudspeakers described in this manualare designed to be ‘flown’ or suspended formaximum acoustical performance usinga variety of rigging hardware, means, andmethods in some applications. It is essentialthat all installation work involving the suspensionof these loudspeaker products be performedby competent, knowledgeable persons whounderstand safe rigging practices. Severeinjury and/or loss of life may occur if theseproducts are improperly installed. Pleaseread the section on Installation and Wiring foradditional information.Distributed Design Series Installation and Operation Manual Page 4<strong>Surface</strong> <strong>Mount</strong> <strong>Loudspeakers</strong>
L’information de Sûreté ImportantePRÉCAUTION: Veuillez toujours suivent cesmesures de sécurité de base lors de l’utilisationou lors de l’installation des haut-parleursDistributed Design Series <strong>Surface</strong> <strong>Mount</strong> et deces accessoires :• Lisez et Gardez les instructions.• Observez tous les avertissements.• Suivez toutes les instructions,particulièrement ceux concernant lecalage, support, montage et raccordementsélectriques.• Ne pas utiliser cet appareil près de l’eau.• Nettoyez seulement avec un tissu sec.• Ne pas bloquer les ouvertures deventilation. Installer conformément auxinstructions du fabricant.• Ne pas installer près des sourcesde chaleur comme les radiateurs, lescuisinières, foyers ou autres appareils (ycompris les amplificateurs) qui peuventproduire de la chaleur.• Utilisez seulement les accessoires quisont spécifiés et approuvés par le fabricant.• Référez tout entretient au personnel qualifiéde service. Ceci est exigé quand l’appareil aété endommagé de quelque façon, incluantle fil d’alimentation et ou l’embout du fil a étéendommagé, des liquides ont été renversésou des objets sont tombé à l’intérieur del’appareil, l’appareil a été exposé à la pluieou l’humidité, l’appareil ne fonctionne pasnormalement ou a été échappé.Les termes attention, avertissement, et dangerpeut être utilises dans ce manuel pour alerterle lecteur aux considérations importantesde sûreté. Si vous avez des questions ou necomprenez pas la signification de ces termes,ne procédez pas à l’installation. Contactezvotre detaillant, distributeur, ou <strong>Community</strong>directement pour assistance. Les termes sontdéfinies ci-dessous:ATTENTION: décrit une condition defonctionnement ou une action d’utilisateur quipeuvent exposer l’équipement ou l’utilisateuraux dommages potentiels ou au danger.AVERTISSEMENT: décrit une condition defonctionnement ou une action d’utilisateur quipeuvent causer des dommages probable àl’équipement et/ou à l’utilisateur et à ceux setrouvant à proximité.DANGER: décrit une condition defonctionnement ou une action d’utilisateur quiendommageront immédiatement l’équipementet/ou seront extrêmement dangereuses etqui peut représenter un danger pour la vie àl’utilisateur et à ceux se trouvant à proximité.AVERTISSEMENT: Pour réduire lerisque de feu ou de déchargeélectrique, ne pas exposer cetappareil à la pluie ou l’humidité.Ces instructions d’entretient sont pour l’usaged’un personnel de service qualifié seulement.Pour réduire le risque de feu ou de déchargeélectrique n’exécutez aucun entretientautrement que ce qui est contenu dans lesinstructions d’opérations à moins que vous êtesqualifié pour le faire.Les haut-parleurs décrits en ce manuel sontconçus pour être accroché ou suspendus afind’atteindre une exécution acoustique maximumen utilisant une série de différents matériaux,moyens, et méthodes de calage dans certainesapplications. Il est essentiel que tout le travaild’installation impliquant la suspension de cesproduits de haut-parleur soit effectué de faconsécuritaire par des personnes compétentes etbien formées dans les méthodes de calage.Des blessures graves et/ou des perteshumaines peuvent se produire si ces produitssont incorrectement installés. Veuillez lire lasection sur le câblage et l’installation pour desinformations supplémentaires.Distributed Design Series Installation and Operation Manual Page 5<strong>Surface</strong> <strong>Mount</strong> <strong>Loudspeakers</strong>
Installation and Wiring1. Connect incoming input wires (andoptional loop-thru wires) from wallto 4-pole Euroblock screw terminalsconcealed in the base of the Infin-A-Ballbracket.**Note: Check local codesto determine if a wall boxor metal plate is requiredfor the integrated wiring.See page 10.Input Wires(not included)Loop-Thru Wires(optional)Infin-A-Ball bracketTerminal Block2. Secure the Infin-A-Ball bracket to the wallusing your screws or other fasteners accordingto local building and safety codes.3. Insert the hex wrench into the socket nearthe rear of the loudspeaker cabinet, and turncounterclockwise to loosen the clamp setscrew.4. Fit the cabinet onto the IAB bracket’s ballend,then tighten the clamp sufficiently tohold the loudspeaker in place, but allowing forpositional adjustment.LoosenTightenDistributed Design Series Installation and Operation Manual Page 7<strong>Surface</strong> <strong>Mount</strong> <strong>Loudspeakers</strong>
Vertical mounting5. Adjust the cabinet position by rotating andtilting as desired. Then firmly tighten the lockingscrew with the provided hex wrench.Horizontal mounting6. Using a small slot-blade screwdriver (like theone provided) you can pry the logo plate out afew millimeters, then rotate it 90° and press itback in place so it reads correctly for horizontalor vertical mounting.Horizontal <strong>Mount</strong> Maximum Aiming Angle<strong>DS</strong>5<strong>DS</strong>8A 8° 8°B 20° 11°C 64° 59°7. Once you have connected the wiring (nextpage), you can also remove the logo plate foraccess to the recessed tap-adjustment screwwhich you can use to set the power level for theindividual loudspeaker as shown below.Vertical <strong>Mount</strong> Maximum Aiming Angle<strong>DS</strong>5<strong>DS</strong>8A 39° 39°B 39° 39°C 31° 33°Note: This enlarged label shows the70-volt/100-volt and 8-ohm power tap settingsfor the <strong>DS</strong>8. With 100-volt distribution, donot use the N.C. setting.Note: The tap switch can onlybe adjusted using a flat-bladescrewdriver such as the one providedwith the loudspeaker.Distributed Design Series Installation and Operation Manual Page 8<strong>Surface</strong> <strong>Mount</strong> <strong>Loudspeakers</strong>
8. Insert the 2-pole male Euroblock connectorthat is pre-wired to the Infin-A-Ball bracket intothe mating female connector on the back of theloudspeaker cabinet.9. Then press the IP56 protective cover intoplace to weather seal the connection. No toolis needed for the cover; just snap it in place.Infin-A-Ball bracketMale EuroblockIP56 Cover10. A safety cable attachment loop is built intothe rear of the loudspeaker cabinet as shownhere. You can use this to attach a suitable safetycable as may be required by local buildingand safety codes or in accordance with bestinstallation practices.Safety cable attachment loopNote: All electrical and mechanical installation connections for loudspeaker linesare subject to all applicable governmental building and fire codes. The selection ofappropriate electrical and mounting hardware to interface with Distributed Design Series<strong>Surface</strong> <strong>Mount</strong> <strong>Loudspeakers</strong> lies solely with the installation professional. <strong>Community</strong>recommends that an appropriately licensed engineer, electrician, or other professionalidentify and select the appropriate conduit, fittings, wire, etc. for the installation.Distributed Design Series Installation and Operation Manual Page 9<strong>Surface</strong> <strong>Mount</strong> <strong>Loudspeakers</strong>
Wall Box <strong>Mount</strong>ing(optional)While <strong>Community</strong> does not require orinclude a wall box or mounting plate with theloudspeakers, local building and safety codesmay specify these items. If necessary, you canmount the IAB bracket approximately as shownhere. The <strong>DS</strong>-WMP wall mount plate shownmay be ordered as an option from <strong>Community</strong>.Use appropriate mounting hardware andfasteners, and secure per the steps below,making sure the installation is in accordancewith the applicable codes.Infin-A-Ball (IAB)<strong>Mount</strong>ing BracketSeenotebelow1. Pull the wires though the cutout in the wallplate.2. Attach the wall plate to the box using theprovided screws.3. Secure the wires to the connector in thebase of the IAB bracket.4. Attach the IAB bracket to the wall using anappropriate mounting method.*Wall Plate(optional)*Note: The fasteners thatsecure the IAB bracket areto be specified and providedby the installer.Painting the LoudspeakerWall board(e.g.., drywall,paneling, etc.)Type of PaintThese loudspeakers’ ABS plastic cabinetsaccept almost any type of latex or enamel (oilbased) paint. We recommend application oftwo coats. Note however that painting the grillerequires spray painting.Painting ProcessFollow this procedure to obtain the best results:1. Remove the grille.2. Clean the grille assembly and the loudspeakercabinet by rubbing them with a lightly dampenedcloth. Do not use abrasives such as sandpaperor steel wool.Caution: NEVER use abrasives,gasoline, kerosene, acetone, methylethyl ketone (MEK), paint thinner,harsh detergents or other chemicals.These chemicals and agents maypermanently damage the finish. Someare also toxic and highly flammable.3. Mask the loudspeakers so that the surrounds,cones and center areas will not receive anypaint. We advise against using conventionalmasking tape and NEVER use duct tape in thisapplication; these kinds of tape generally leaveadhesive residue that can be difficult to removeand that may actually cause damage. Painterstape is best.4. After cleaning, apply two or more thin coatsof either latex or oil-based paints. Latex paintwill adhere better if an oil-based primer is usedfirst. Apply the paint with a roller or brush, orspray it on, except as noted below.5. Use ONLY spray paint on the grille assembly;using a roller or brush to paint the grille is aptto cause its metal perforated holes to becomeclogged with paint. The grille should be paintedseparately, when it is not in place on theloudspeaker.Distributed Design Series Installation and Operation Manual Page 10<strong>Surface</strong> <strong>Mount</strong> <strong>Loudspeakers</strong>
SpecificationsModel <strong>DS</strong>5 <strong>DS</strong>8 <strong>DS</strong>8SUBLoudspeaker Type Full Range Coax Full Range Coax SubwooferDescription 5.0" Standard 8.0" Standard 8.0" SubwooferOperating Range (±10 dB) 65 Hz - 22 kHz 60 Hz - 22 kHz 42 Hz - 200 HzMax Input Power Rating 100W / 250W 150W/375W 2 0 0 W / 5 0 0 WContinuous/ProgramSensitivity (1 W/1 meter) 93 dB SPL 95 dB SPL 88 dB SPLAvailable 70 V Taps (watts) 60-30-15-7.5 120-60-30-15 2 0 0 - 1 0 0 - 5 0 - 2 5Available 100 V Taps (watts) 60-30-15 120-60-30 200-100-50Nominal Impedance 8 ohms 8 ohms 8 ohmsEnclosure FinishMatte finish ABS, available in white or blackInput Connections4-pole Euroblock connector for two pair of 2-wire leads,uninterrupted whether loudspeaker is connected or not.Concealed IAB wiring to snap-seal connection on cabinet.2-pole Euroblock connector for connection directly to enclosure.Dimensions: H 12.9" (328 mm) 18.5" (470 mm) 18.5" (470 mm)(Excluding IAB bracket) W 6.3" (160 mm) 9" (230 mm) 9" (230 mm)D 7.5" (191 mm) 10.1" (257 mm) 10.1" (257 mm)EnvironmentalConforms to Mil Spec 810 for humidity, salt spray, temperature and UV.IP55 rated loudspeakers - IP56 rated connector cover.Note: See specification sheet for further details.Transferable Warranty "(Limited)"Distributed Design Series <strong>Surface</strong> <strong>Mount</strong> <strong>Loudspeakers</strong> are designed and backed by <strong>Community</strong><strong>Professional</strong> <strong>Loudspeakers</strong>. For complete <strong>Community</strong> warranty information within the USA,please refer to the Warranty Card enclosed with the product. In other areas of the world pleasecontact your local <strong>Community</strong> distributor.Field Service Station:Please call (610) 876-3400 for the nearest Authorized Field Service Station.For Factory Service:Please call (610) 876-3400 and obtain a Return Authorization (R/A) number before shipping anyproduct to us.Distributed Design Series Installation and Operation Manual Page 11<strong>Surface</strong> <strong>Mount</strong> <strong>Loudspeakers</strong>
<strong>Community</strong> <strong>Professional</strong> <strong>Loudspeakers</strong>333 East Fifth Street, Chester, PA 19013-4511 USAPhone: (610) 876-3400 • Fax: (610) 874-0190www.communitypro.com©2013 <strong>Community</strong> <strong>Professional</strong> <strong>Loudspeakers</strong>All Rights Reserved.v: 9MAY2013