Super Tradeline S8910U Universal Hot Surface Ignition ... - Honeywell
Super Tradeline S8910U Universal Hot Surface Ignition ... - Honeywell
Super Tradeline S8910U Universal Hot Surface Ignition ... - Honeywell

You also want an ePaper? Increase the reach of your titles
YUMPU automatically turns print PDFs into web optimized ePapers that Google loves.
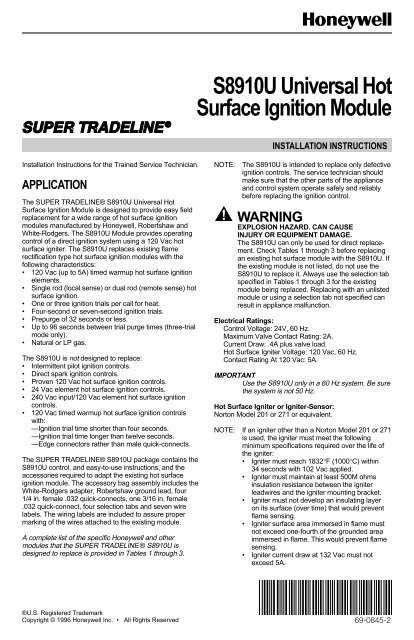
<strong>S8910U</strong> UNIVERSAL HOT SURFACE IGNITION MODULETable 2. Robertshaw Control to <strong>Honeywell</strong> <strong>S8910U</strong> Cross Reference.NOTE: Robertshaw product information was obtained from the 1993-1994 Robertshaw Uni-Line Catalog (2–064).ModelNumbersSelectionTab<strong>S8910U</strong>RemoveBlackJumperLocal (L) orRemote (R)SensingLockoutTime(sec)<strong>Ignition</strong>TrialsPrePurge(sec)IgniterWarmup(sec)BetweenTrial Purge(sec)<strong>S8910U</strong> A — Local or 4 1 32 34 NASpecifications B Remote 3 96C 7 1 NAD 3 96HS780-17NL-104A A No L 4 1 0 17 NAHS780-17NL-108A C No L 8 a 1 0 17 NAHS780-17NL-304A B No L 4 3 0 17 17HS780-17NL-308A D No L 8 a 3 0 17 17HS780-17NR-104A A Yes R 4 1 0 17 NAHS780-17NR-306A D Yes R 6 a 3 0 17 17HS780-17NR-308A D Yes R 8 a 3 0 17 17HS780-34NL-108A C No L 8 a 1 0 34 NAHS780-34NL-304A B No L 4 3 0 34 34HS780-34NL-306A D No L 6 a 3 0 34 34HS780-34NL-308A D No L 8 a 3 0 34 34HS780-34NL-312A D No L 12 b 3 0 34 34HS780-34NR-104A A Yes R 4 1 0 34 NAHS780-34NR-306A D Yes R 6 a 3 0 34 34HS780-34NR-308A D Yes R 8 a 3 0 34 34HS780-34NR-312A D Yes R 12 b 3 0 34 34HS780-34PL-308A D No L 8 a 3 34 34 34a The <strong>S8910U</strong> and the original control lockout times are different. The <strong>S8910U</strong> lockout time is within the design tolerancelockout time of the original control.b The lockout time of the <strong>S8910U</strong> is shorter than the original control. Be sure to observe the appliance operation under avariety of input conditions to assure reliable operation.69-0845—2 4
<strong>S8910U</strong> UNIVERSAL HOT SURFACE IGNITION MODULEModelNumbersTable 3. <strong>Honeywell</strong> Control to <strong>Honeywell</strong> <strong>S8910U</strong> Cross Reference.SelectionTab<strong>S8910U</strong>RemoveBlackJumperLocal (L) orRemote (R)SensingLockoutTime(sec)<strong>Ignition</strong>TrialsPrePurge(sec)IgniterWarmup(sec)BetweenTrial Purge(sec)<strong>S8910U</strong> A — Local or 4 1 32 34 NASpecifications B Remote 3 96C 7 1 NAD 3 96S89C1004 C No L 6 a 1 0 34 NAS89C1012 C No L 6 a 1 0 34 NAS89C1046 A No L 4 1 0 34 NAS89C1087 C No L 6 a 1 0 34 NAS89C1103 A No L 4 1 0 34 NAS89D1002 C Yes R 6 a 1 0 34 NAS89G1005 B No L 4 3 0 34 30S89G1013 D No L 6 a 3 0 34 30S89G1021 D No L 11 b 3 0 34 30S89G1047 D No L 6 a 3 0 34 30S89H1003 B Yes R 4 3 0 34 30S89H1011 D Yes R 6 a 3 0 34 30S89H1029 D Yes R 11 b 3 0 34 30S89J1008 C No L 6 a 1 0 34 NAS890C1007 C No L 6 a 1 30 34 NAS890D1006 C Yes R 6 a 1 30 34 NAS890G1003 B No L 4 3 30 34 30S890G1011 D No L 6 a 3 30 34 30S890G1029 D No L 11 b 3 30 34 30S890G1037 D No L 6 a 3 30 34 30S890H1002 B Yes R 4 3 30 34 30S890H1010 D Yes R 6 a 3 30 34 30S890H1028 D Yes R 11 b 3 30 34 30a The <strong>S8910U</strong> and the original control lockout times are different. The <strong>S8910U</strong> lockout time is within the design tolerancelockout time of the original control.b The lockout time of the <strong>S8910U</strong> is shorter than the original control. Be sure to observe the appliance operation under avariety of input conditions to assure reliable operation.REVIEW THE INSTALLATIONWARNINGFIRE OR EXPLOSION HAZARD.CAN CAUSE PROPERTY DAMAGE,SEVERE INJURY, OR DEATH.Follow these warnings exactly:1. Review the installation as outlined in thissection.2. Plan for frequent maintenance as described inthe Maintenance section.When hot surface ignition systems are used on centralheating equipment in barns, greenhouses, and commercialproperties and on heating appliances such as commercialcookers, agricultural equipment, industrial heatingequipment and pool heaters, heavy demands are made onthe controls. Special steps can be required to preventnuisance shutdowns and control failure due to frequentcycling, severe environmental conditions related tomoisture, corrosive chemicals, dust or excessive heat.These applications require <strong>Honeywell</strong> Home and BuildingControl Engineering review; contact your <strong>Honeywell</strong> SalesRepresentative for assistance.Review the following conditions that can apply to yourspecific installation and take the precautionary stepssuggested.Frequent CyclingThese controls are designed for use on appliances thattypically cycle only three to four times an hour during theheating season. In year-round applications with greatercycling rates, the control can wear out more quickly.Perform a monthly checkout.Water or Steam CleaningIf a module or gas control gets wet, replace it. If theappliance is likely to be cleaned with water or steam, coverthe controls and wiring to protect from water or steam flow.569-0845—2
<strong>S8910U</strong> UNIVERSAL HOT SURFACE IGNITION MODULEMount the controls high enough above the bottom of thecabinet to avoid getting wet during normal cleaningprocedures. NEMA 4 enclosure is recommended for theignition module; see the Electronic <strong>Ignition</strong> ServiceManual, form 70-6604.High Humidity or Dripping WaterDripping water can cause the module to fail. Never installan appliance where water can drip on the controls.In addition, high ambient humidity can cause the gascontrol to corrode and fail.If the appliance is in a humid atmosphere, make sure aircirculation around the controls is adequate to preventcondensation. Also, regularly check out the system. NEMA4 enclosure is recommended for the ignition module; seethe Electronic <strong>Ignition</strong> Service Manual, form 70-6604.Corrosive ChemicalsCorrosive chemicals can attack the module and gascontrol, eventually causing a failure. If chemicals are usedfor routine cleaning, avoid contact with the controls. Wherechemicals are suspended in air, for some industrial oragricultural applications, a NEMA 4 enclosure is recommendedfor the ignition module; see the Electronic <strong>Ignition</strong>Service Manual, form 70-6604.Dust or Grease AccumulationHeavy accumulations of dust or grease can cause controlsto malfunction. Where dust or grease can be a problem,provide covers for the module and the gas control to limitcontamination. A NEMA 4 enclosure is recommended forthe ignition module; see the Electronic <strong>Ignition</strong> ServiceMan-ual, form 70-6604.HeatExcessively high temperatures can damage controls.Make sure the maximum ambient temperature at thecontrol does not exceed the rating of the control. If theappliance operates at very high temperatures, useinsulation, shielding, and air circulation as necessary toprotect the controls. Proper insulation or shielding shouldbe provided by the appliance manufacturer; verify properair circulation is maintained when the appliance is installed.INSTALLATIONWhen Installing this <strong>Ignition</strong> System…1. Read these instructions carefully. Failure to followthem could damage the components or cause ahazardous condition.2. Check Tables 1 through 3 to confirm that the<strong>S8910U</strong> is a direct replacement for the existingmodule.3. Installer must be a trained, experienced servicetechnician.4. After installation is complete, check out componentand appliance operation as provided in theseinstructions.WARNINGFIRE OR EXPLOSION HAZARDCAN CAUSE PROPERTY DAMAGE,SEVERE INJURY, OR DEATH.1. If the ignition module gets wet, it can malfunction,leading to accumulation of explosive gas.• Never install where water can flood, drip orcondense on the module.• Never use a module that has been wet.Replace it.2. Liquefied petroleum (LP) gas is heavier than airand will not vent upward naturally.• Do not light the pilot or operate electricswitches, lights or appliances until you aresure the appliance area is free of gas.3. Do not attempt to disassemble or clean themodule. Improper reassembly and cleaning cancause unreliable operation.CAUTION1. Disconnect the power supply before beginningwiring to prevent electrical shock or equipmentdamage.2. If a new gas control is to be installed, turn offthe gas supply before starting the installation.After the gas control is installed, conduct a GasLeak Test according to the gas control manufacturerinstructions.3. If a module must be mounted where it can beexposed to moisture or water, provide asuitable waterproof enclosure.4. Using the wire labels provided, label all thewires before disconnecting. Wiring errors cancause improper appliance operation anddangerous conditions such as bypassing safetyfeatures.Perform Preinstallation Safety InspectionA preinstallation safety check of the appliance and ventingsystem must be done before the replacement module isinstalled. If a condition is detected that could result inunsafe operation, shut off the appliance and advise theowner of the unsafe condition. Correct any potentiallyunsafe condition before proceeding with the installation.Remove Old ModuleDisconnect the power supply before doing any work on theunit. Disconnect and tag the wires from the old moduleusing the wire labels provided. Remove the old modulefrom its mounting location.Mount New <strong>Ignition</strong> ModuleMount the <strong>S8910U</strong> Module in the same location as the oldmodule. Protect the module from exposure to water,moisture, corrosive chemicals and excessive dust andgrease. Assure that ambient temperature at the module iswithin the range listed in the Application section.Mount the module with the terminals down to protect fromdripping water and dust. The module can also be mountedwith terminals on either side. Do not mount with theterminals pointing up. Refer to Fig. 1 for mounting recommendations.When it is necessary to drill new mountingholes, use the <strong>S8910U</strong> as a template to mark the mount-69-0845—2 6
<strong>S8910U</strong> UNIVERSAL HOT SURFACE IGNITION MODULEing hole pattern. Drill new holes as required. Fastensecurely with four No. 6-32 machine or No. 8 sheet metalscrews.Install selection tabFour selection tabs are included with the <strong>S8910U</strong>. SeeTables 1 through 3. Select the correct tab for the systemand separate the tab from the other three tabs. Install thetab on the module. Be sure the selection tab is properlypositioned and firmly inserted. See Fig. 2. Discard allunused selection tabs at a remote location so an incorrecttab cannot be used in the future. Without a selection tab,the module operates at four-second trial time and oneignition trial.WARNINGEXPLOSION HAZARD. CAN CAUSEINJURY OR EQUIPMENT DAMAGE.Only trained professional gas appliance servicetechnicians should install and check out the<strong>S8910U</strong> and selection tabs. Use only the selectiontab specified in Tables 1 through 3 for the existingmodule being replaced. Always remove all unusedselection tabs from the job site and discard them ata remote location. Improper use of the selectiontabs can result in appliance malfunction.(A) (B) (C) (D)MOUNT IN ONE OF THESE POSITIONSSELECTION TABTERMINALS FACING DOWN<strong>S8910U</strong>HOT SURFACEIGNITION CONTROLM8434Fig. 2. Separating and installing selection tab.Wire the ModuleTERMINALS FACING LEFTTERMINALS FACING RIGHTDO NOT MOUNTWITH TERMINALS FACING UPM2647Fig. 1. Module mounting recommendations.CAUTION1. Check the wiring diagram furnished by theappliance manufacturer, if available, andcompare with Table 4. Carefully follow anyspecial instructions affecting the generalprocedures outlined in this section.2. Disconnect the power supply before makingwiring connections to prevent electrical shock orequipment damage.IMPORTANT1. All wiring must comply with applicableelectrical codes and ordinances.2. <strong>Hot</strong> surface igniter leadwires should not beallowed to rest against grounded metalsurfaces.3. A common ground is required for the <strong>S8910U</strong>and the main burner. The 24V (GND) terminalinternally grounds one side of the transformer.Any auxiliary controls or limits must not be inthe grounded leg. In addition, the applianceshould be earth-grounded.769-0845—2
<strong>S8910U</strong> UNIVERSAL HOT SURFACE IGNITION MODULE4. Make sure the transformer has adequate VA.The ignition module requires 0.4A at 24 Vac.Add the current draws of all other devices inthe control circuit, including the pilot and mainvalves in the gas control, and multiply by 24 todetermine the total VA requirement of thesecomponents. Add this total to 9.6 VA (for theignition module). The result is the minimumtransformer VA rating. Use a Class II transformerwhen replacement is required.5. Check that L1 (hot) and L2 (neutral) are wiredto the proper terminals.1. Connect the wires to the <strong>S8910U</strong> <strong>Ignition</strong> Module asshown in Table 4. Make sure that adequate systemground is provided as indicated in the wiring table.See Fig. 3 through 5. Where a change in quickconnectis required, cut off the original quickconnect,strip the leadwire and firmly crimp in placethe proper quick-connect supplied.2. Verify the thermostat anticipator setting as explainedin the preceding IMPORTANT, item 4.Table 4. Replacement Wiring Terminals.Replacement ControlOriginal ControlTerminal Function<strong>S8910U</strong>Terminal<strong>Honeywell</strong>S89/S890 TerminalWhite Rodgers50E/F47 TerminalRobertshawHS780 TerminalBurner Ground Connection GND (BURNER) GND (BURNER) a GND TR (GND CLIP) bTranformer Secondary(unswitched leg)24V (GND) 24V (GND) a TR GNDMain Valve Common VALVE (GND) VALVE (GND) a MV a (next toTR terminal)Transformer Secondary(switched leg)24V 24V a TH THMain Valve Operator VALVE VALVE MV d VALVE d120 Vac Neutral LegPower Supply120 Vac <strong>Hot</strong> Leg PowerSupplyL2 120V NEUTRAL e L2 120V NEUTRAL — L2L1 120V HOT L1 120V HOT L f L1<strong>Hot</strong> <strong>Surface</strong> Igniter Element HSI 120V NEUTRAL e HSI 120V — IGN<strong>Hot</strong> <strong>Surface</strong> Igniter Element HSI 120V HOT HSI 120V IGN g IGNFlame Sensor SENSE h SEN h FP i RS ha Remove quick-connect and replace with the included 1/4 in. quick-connect.b Use green adapter cable (provided) to connect <strong>S8910U</strong> GND (BURNER) terminal to chassis ground.c Do not use the <strong>S8910U</strong> VALVE (GND) terminal. VALVE (GND) and 24V (GND) are interconnected in the appliancewiring.d Remove quick-connect and replace with the included 3/16 in. quick-connect.e Do not use this terminal if model being replaced does not have 120V neutral power supply connection.f Use the black wire on the included adapter cable.g Use the orange wire on the included adapter cable.h On remote sense models, remove jumper quick-connect from <strong>S8910U</strong> sense terminal, cut jumper wire at circuit boardand discard. On local sense models, leave black jumper connected.i Remove jumper from <strong>S8910U</strong> sense terminal, cut jumper wire at circuit board and discard.— c69-0845—2 8
<strong>S8910U</strong> UNIVERSAL HOT SURFACE IGNITION MODULETERMINAL CROSSREFERENCE<strong>S8910U</strong>GND(BURNER)24V (GND)VALVE (GND)24VVALVEL250E/F47GNDTRMV (NEXT TO TR)THMV—L1HSIHSISENSE44L—IGNFPBURNERGROUND!WARNINGExplosion hazard. Can causeserious injury or death.This device can malfunction ifit gets wet. Never try to use adevice that has been wet -- replace it.GND(BURNER)24V(GND)VALVE(GND)5<strong>S8910U</strong> HOT SURFACE IGNITER CONTROL24VLED570A0056<strong>S8910U</strong> HOT SURFACE IGNITIONINPUT VOLTAGES = 120 & 24 VAC, 60HZHSI = 120V, 6.5A MAXVALVE = 24V, 1A MAX TOTAL 24V LOAD = 0.2 + VALVE LOADSTATUS LED:1. Flash-<strong>Ignition</strong> Lockout2 Flash-Weak Flame Signal3 Flash-Internal Error-Replace ControlPulsing "Heartbeat"-Normal OperationTRIAL TIME,NUM. OF TRIALSCONFIGURATIONPLUGVALVEMPLS., MN 554226120VACNEUTRALL2HSIPrepurge Time = 30 SecIgniter Warmup Time = 34 sec4120VACHOTL1HSISEEINSTRUCTIONSFOR REMOTESENSE/DUALRODAPPLICATIONSAUTO IGNITIONSYSTEMSANSI Z21.20SENSEORANGE3FLAMESENSORCOMBINATIONGAS CONTROLMVMVBLACKADAPTER4HOTSURFACEIGNITERLIMITCONTROLLERTHERMOSTAT ORCONTROLLER2L1(HOT)L21123456POWER SUPPLY. PROVIDE DISCONNECT MEANS AND OVERLOAD PROTECTION AS REQUIRED.MAKE SURE L1 AND L2 ARE NOT REVERSED.ALTERNATE LIMIT CONTROLLER LOCATION.REMOVE JUMPER QUICK-CONNECT FROM <strong>S8910U</strong>. CUT WIRE AT CIRCUIT BOARD AND DISCARD.USE ADAPTER PLUG WITH BLACK AND ORANGE WIRES (SUPPLIED).CUT 3/16 IN. QUICK-CONNECT OFF WIRE AND REPLACE WITH 1/4 IN. QUICK-CONNECT (SUPPLIED).CUT 3/16 IN. QUICK-CONNECT OFF WIRE AND REPLACE WITH 3/16 IN. QUICK-CONNECT (SUPPLIED).M8528BFig. 3. Typical hookup when <strong>S8910U</strong> replaces White-Rodgers 50E/F47.969-0845—2
<strong>S8910U</strong> UNIVERSAL HOT SURFACE IGNITION MODULETERMINAL CROSSREFERENCE<strong>S8910U</strong>HS780GND(BURNER) 6 TR (GND CLIP)24V (GND) GNDVALVE (GND) —24VTHVALVEVALVEL2L2L1L1HSIIGNHSIIGNSENSERS6BURNERGROUND!WARNINGExplosion hazard. Can causeserious injury or death.This device can malfunction ifit gets wet. Never try to use adevice that has been wet -- replace it.GND(BURNER)24V(GND)VALVE(GND)<strong>S8910U</strong> HOT SURFACE IGNITER CONTROL24VLED570A0056<strong>S8910U</strong> HOT SURFACE IGNITIONINPUT VOLTAGES = 120 & 24 VAC, 60HZHSI = 120V, 6.5A MAXVALVE = 24V, 1A MAX TOTAL 24V LOAD = 0.2 + VALVE LOADSTATUS LED:1. Flash-<strong>Ignition</strong> Lockout2 Flash-Weak Flame Signal3 Flash-Internal Error-Replace ControlPulsing "Heartbeat"-Normal OperationTRIAL TIME,NUM. OF TRIALSCONFIGURATIONPLUGVALVEMPLS., MN 554225120VACNEUTRALL2HSIPrepurge Time = 30 SecIgniter Warmup Time = 34 sec120VACHOTL1HSISEEINSTRUCTIONSFOR REMOTESENSE/DUALRODAPPLICATIONSAUTO IGNITIONSYSTEMSANSI Z21.20SENSE4FLAMESENSOR3COMBINATIONGAS CONTROLMVMVTHERMOSTAT ORCONTROLLER2LIMITCONTROLLERHOTSURFACEIGNITERL1(HOT)L211 POWER SUPPLY. PROVIDE DISCONNECT MEANS AND OVERLOAD PROTECTION AS REQUIRED.MAKE SURE L1 AND L2 ARE NOT REVERSED.23456ALTERNATE LIMIT CONTROLLER LOCATION.SENSE ROD WILL BE PRESENT IF REMOTE SENSE HS780 MODEL. SEE TABLE 3.WHEN HS780 IS A REMOTE SENSE MODEL, REMOVE JUMPER QUICK-CONNECT FROM <strong>S8910U</strong>. CUT WIRE AT CIRCUITBOARD AND DISCARD. CONNECT FLAME ROD LEAD WIRE TO SENSE. SEE TABLE 2.CUT 1/4 IN. QUICK-CONNECT OFF WIRE AND REPLACE WITH 3/16 IN. QUICK-CONNECT (SUPPLIED).USE GREEN GROUND ADAPTER (SUPPLIED) TO CONNECT <strong>S8910U</strong> GND (BURNER) TO APPLIANCE CHASSIS.M8529BFig. 4. Typical hookup when <strong>S8910U</strong> replaces Robertshaw HS780.69-0845—2 10
<strong>S8910U</strong> UNIVERSAL HOT SURFACE IGNITION MODULETERMINAL CROSSREFERENCE<strong>S8910U</strong>GND(BURNER)24V (GND)VALVE (GND)24VVALVEL2L1HSIHSISENSES89/S890GND (BURNER)24V (GND)VALVE (GND)24VVALVEL2L1HSIHSISENBURNERGROUND!WARNINGExplosion hazard. Can causeserious injury or death.This device can malfunction ifit gets wet. Never try to use adevice that has been wet -- replace it.GND(BURNER)24V(GND)VALVE(GND)5 5 5 5<strong>S8910U</strong> HOT SURFACE IGNITER CONTROL24VLED570A0056<strong>S8910U</strong> HOT SURFACE IGNITIONINPUT VOLTAGES = 120 & 24 VAC, 60HZHSI = 120V, 6.5A MAXVALVE = 24V, 1A MAX TOTAL 24V LOAD = 0.2 + VALVE LOADSTATUS LED:1. Flash-<strong>Ignition</strong> Lockout2 Flash-Weak Flame Signal3 Flash-Internal Error-Replace ControlPulsing "Heartbeat"-Normal OperationTRIAL TIME,NUM. OF TRIALSCONFIGURATIONPLUGVALVEMPLS., MN 55422120VACNEUTRALL2HSIPrepurge Time = 30 SecIgniter Warmup Time = 34 sec120VACHOTL1HSISEEINSTRUCTIONSFOR REMOTESENSE/DUALRODAPPLICATIONSAUTO IGNITIONSYSTEMSANSI Z21.20SENSE4FLAMESENSOR3COMBINATIONGAS CONTROLMVMVTHERMOSTAT ORCONTROLLER2LIMITCONTROLLERHOTSURFACEIGNITERL1(HOT)L211 POWER SUPPLY. PROVIDE DISCONNECT MEANS AND OVERLOAD PROTECTION AS REQUIRED.MAKE SURE L1 AND L2 ARE NOT REVERSED.23ALTERNATE LIMIT CONTROLLER LOCATION.SENSE ROD WILL BE PRESENT IF REMOTE SENSE S89/S890 MODEL. SEE TABLE 3.45WHEN S89/S890 IS A REMOTE SENSE MODEL, REMOVE JUMPER QUICK-CONNECT FROM <strong>S8910U</strong>. CUT WIRE AT CIRCUITBOARD AND DISCARD. CONNECT FLAME ROD LEAD WIRE TO SENSE. SEE TABLE 3.M8530BCUT QUICK-CONNECTS OFF WIRES AND REPLACE WITH 1/4 IN. QUICK-CONNECTS (PROVIDED).Fig. 5. Typical hookup when <strong>S8910U</strong> replaces <strong>Honeywell</strong> S89/S890.STARTUP AND CHECKOUTCheck out the gas control system:• At initial installation of the appliance.• As part of regular maintenance procedures.• At maintenance intervals determined by the application.• As the first step in troubleshooting.• Any time work is done on the system.Maintenance frequency must be determined individuallyfor each application; see Maintenance section.WARNINGFIRE OR EXPLOSION HAZARDCAN CAUSE PROPERTY DAMAGE,SEVERE INJURY, OR DEATH.1. If you smell gas or suspect a gas leak, turn offgas at the manual service valve and evacuatethe building. Do not try to light any appliance;do not touch any electrical switch or telephonein the building until you are sure no spilled gasremains.2. Gas leak test must be done as described infollowing steps 1 and 6 for initial installation andany time work is done involving the gas piping.Step 1: Perform visual inspection.a. With power off, make sure all wiring connections areclean and tight.b. Turn on the power to the appliance and the <strong>S8910U</strong>.c. Open the manual shutoff valves in the gas line to theappliance.d. Test for a gas leak upstream of the gas control ifpiping has been disturbed.GAS LEAK TEST: Paint the gas control gasket edges andall the pipe connections upstream of the gas control with arich soap and water solution. Bubbles indicate gas leaks.Tighten the joints and screws or replace the component tostop a gas leak. Recheck with soap and water solution.Step 2: Verify control system ground.The ignition module must share a common ground withthe main burner. The burner serves as the commongrounding area to assure reliable flame detection. Ifthere is not good metal-to-metal contact between theburner and ground, run a lead from the burner toground.Step 3: Review normal operating sequence and modulespecifications. See Operation and Application sections.1169-0845—2
<strong>S8910U</strong> UNIVERSAL HOT SURFACE IGNITION MODULEStep 4: Reset the ignition module.a. Turn the thermostat or controller to the lowestsetting.b. Turn on the system power.c. Wait one minute.As you do Steps 5 and 6, watch for points where operationdeviates from normal. Refer to Troubleshooting section tocorrect problem.Step 5: Check safety lockout operation.a. Turn off the gas supply.b. Set the thermostat or controller above the roomtemperature to call for heat.c. Watch for igniter warmup following prepurge. Igniterstarts to glow several seconds after it is powered.d. Time the length of time the gas control is energized;measure the time by connecting a voltmeter acrossthe gas valve terminals:Selection tabs A and B—4 seconds.Selection tabs C and D—7 seconds.e. When using a three-trial ignition selection tab (tabsB or D), watch for the start of 96-second betweentrialpurge, followed by 34-second igniter warmupand second try for ignition. After a third purge,warmup and trial for ignition sequence, the <strong>S8910U</strong>should lock out. LED goes into one flash mode afterlockout.f. Open the manual gas control knob and make sureno gas is flowing to the burner.g. Set the thermostat below the room temperature andwait one minute before continuing.Step 6: Check normal operation.a. Set the thermostat or controller above the roomtemperature to call for heat.b. Observe the lightoff sequence and make sure themain burner lights smoothly without flashback.c. Make sure the burner operates smoothly withoutfloating, lifting, or flame rollout to the furnacevestibule or heat buildup in the vestibule.d. Test for a gas leak downstream of the gas control ifpiping has been disturbed.GAS LEAK TEST: Paint the gas control gasket edges andall pipe connections downstream of the gas control with arich soap and water solution. Bubbles indicate a gas leak.Tighten the joints and screws or replace component tostop a gas leak. Recheck with soap and water solution.e. Check the burner flame condition. The igniter-sensoror sensor must be constantly immersed in flame.Check the burner flame condition as shown in Fig. 6.Do not relocate the hot surface igniter or flame rod.f. Turn the thermostat or controller below the roomtemperature. Make sure the main burner and pilotflames go out.WARNINGFIRE OR EXPLOSION HAZARDCAN CAUSE PROPERTY DAMAGE,SEVERE INJURY, OR DEATH.Improper location of the 120 Vac hot surfaceigniter or any flame sensing rod can result inappliance malfunction.1. Never attempt to relocate the 120 Vac hotsurface igniter or the flame sensing rod from theoriginal position established by the appliancemanufacturer.2. Be sure the 120 Vac hot surface igniter or theflame sensing rod is replaced in exactly theoriginal position after removal for inspection,service or replacement.BURNEROPERATIONCHECK BURNER FLAME CONDITIONNOISYLIFTINGFLAMEWAVINGFLAMESMALLBLUEFLAMELAZYYELLOWFLAMEGOODRECTIFYINGFLAME3/4 TO 1 IN. (19 TO 25 MM)CHECK FOR:• HIGH GAS PRESSURE• EXCESS PRIMARY AIROR DRAFTCHECK FOR:• POOR DRAFT• EXCESS DRAFT• HIGH VELOCITY ORSECONDARY AIRINSTALL SHIELD IF NECESSARYCHECK FOR:• CLOGGED PORTS ORORIFICE FILTER• WRONG SIZE ORIFICECHECK FOR LACK OFAIR FROM:• DIRTY PRIMARYAIR OPENING• LARGE PORTSOR ORIFICES1/4 TO 1/2 IN. (6 TO 13 MM) M8446Fig. 6. Check burner flame condition.The <strong>S8910U</strong> is a direct ignition control used with a120 Vac timed warmup hot surface igniter. The controlprovides operating control and shuts off all gas flow onignition failure or loss of main burner flame in central heatfurnaces and other heating appliances.Module operation is in three phases—prepurge/igniterwarmup, trial for ignition and burner operation. The<strong>S8910U</strong> provides one or three trials for ignition, dependingon which selection tab is installed. Fig. 7 shows the normaloperating sequence.69-0845—2 12
<strong>S8910U</strong> UNIVERSAL HOT SURFACE IGNITION MODULEPurge/PrepurgeWhen the <strong>S8910U</strong> is used in a fan-assisted combustionsystem, the combustion air blower starts on a call for heatfrom the thermostat. On proof of airflow, the air provingswitch closes and energizes the <strong>S8910U</strong>. When the<strong>S8910U</strong> is used in an atmospheric system, the call for heatenergizes the module.In either case, the <strong>S8910U</strong> first initiates a 32-second delayto allow system prepurge.Igniter WarmupAfter prepurge, the <strong>S8910U</strong> energizes the igniter to startthe igniter warmup. The module energizes the hot surfaceigniter for a 34-second warmup period, during which thegas control is closed.STARTPREPURGE/IGNITERWARMUPCALL FOR HEAT (24VTERMINAL POWERED)INTERNAL SAFE STARTCHECK BEGINS.FLAMESIMULATINGFAILURESYSTEM WILLNOT STARTNO FLAMESIMULATINGFAILUREPREPURGEIGNITER WARMS UPBETWEENTRIALPURGETRIAL FORIGNITIONGAS CONTROL OPENSFOR TIMED TRIALFOR IGNITION.ONE TRIAL(TABS AAND C).LOCKOUT OCCURS;SYSTEM MUST BERESET.IGNITER OFF;FLAME SENSING BEGINS.FLAMEPRESENTNOFLAMEGASCONTROLCLOSESLESSTHANTHREEONE TRIAL(TABS A AND C)THREE TRIALS(TABS B AND D)MAIN BURNEROPERATIONGAS CONTROL STAYSOPEN (MAIN BURNERRUNS).CALL FOR HEATIS SATISFIED.FLAMEFAILUREGASCONTROLCLOSESTHREE TRIALS(TABS B AND D)HOW MANY IGNITIONTRIALS COMPLETED THISCALL FOR HEAT?THREEENDGAS CONTROL CLOSES(MAIN BURNER OFF).LOCKOUT OCCURS;SYSTEM MUST BERESET.M8527AFig. 7. <strong>S8910U</strong> normal operating sequence.1369-0845—2
<strong>S8910U</strong> UNIVERSAL HOT SURFACE IGNITION MODULETrial for <strong>Ignition</strong>At the end of the warmup period, the gas control opens forthe ignition trial time determined by the selection tab. Thehot surface igniter stays powered for an ignition activationperiod of one second if the four-second trial time is used orfour seconds if the seven-second trial time is used. Theigniter turns off after the ignition activation period. Near theend of the ignition trial time, the flame rectification sensingcircuit determines if the main burner flame is present. If so,the gas control remains open and the burner operationphase begins.Burner OperationWhen the main burner is lit, a flame rectification circuit iscompleted between the flame sensor (igniter on localsense systems or flame rod on remote sense systems)and the main burner (burner ground). The <strong>S8910U</strong> flamesensing circuit detects the flame current and holds openthe gas control. The main flame is monitored continuouslyduring the call for heat.Safety ShutdownOne Trial Selection Tabs (A and C)If flame is not sensed by the end of the timed trial forignition, the gas control closes and the module locks out. Itmust be manually reset by removing power or setting thethermostat below the room temperature for at least 30seconds.If the burner lights and flame is proved but goes out duringthe run cycle, the gas control closes and the moduleinitiates a warmup period followed by one trial for ignition.If flame is not established, the gas control closes and themodule locks out, requiring manual reset.Three Trial Selection Tabs (B and D)If flame is not sensed by the end of the first timed trial forignition, the gas control closes and the module initiates asecond 96 seconds between trial purge cycle, followed byigniter warmup and a second trial for ignition. If flame is notestablished, the between trial purge, warmup, trial forignition cycle is repeated a third time. If flame is still notestablished following the third trial, the gas control closesand the module locks out. It must be manually reset byremoving power or setting the thermostat below the roomtemperature for at least 30 seconds.If the burner goes out during the run cycle, the gas controlcloses and the module checks for the number of ignitiontrials performed during the current call for heat. If thenumber is less than three, the module initiates a betweentrial purge, warmup and trial for ignition. After the third trialduring a single call for heat, the module locks out. Themodule must be manually reset following the lockout.MAINTENANCEWARNINGFIRE OR EXPLOSION HAZARDCAN CAUSE PROPERTY DAMAGE,SEVERE INJURY, OR DEATH.Do not attempt to take apart the module or to cleanit. Improper assembly and cleaning can causeunreliable operation.Regular preventive maintenance is important in applicationsthat place a heavy load on system controls such asthose used in the commercial cooking and agricultural andindustrial industries because:• In many such applications, particularly commercialcooking, the equipment operates 100,000 to 200,000cycles per year. Such heavy cycling can wear out thegas control in one to two years.• Exposure to water, dirt, chemicals and heat candamage the gas control and shut down the controlsystem. A NEMA 4 enclosure can reduce exposure toenvironmental contaminants. See Electronic <strong>Ignition</strong>Service manual, form 70-6604.The maintenance program should include regular checkoutof the system as outlined in the Startup and Checkoutsection, and checkout of the control system as describedin the appliance manufacturer literature.Maintenance frequency must be determined individuallyfor each application. Some considerations are:• Cycling frequency. Appliances that may cycle 20,000times annually should be checked monthly.• Intermittent use. Appliances that are used seasonallyshould be checked before shutdown and again beforethe next use.• Consequence of unexpected shutdown. Where the costof an unexpected shutdown would be high, the systemshould be checked more often.• Dusty, wet, or corrosive environment. Because theseenvironments can cause the gas control to deterioratemore rapidly, the system should be checked moreoften.Any control should be replaced if it does not performproperly on checkout or troubleshooting. In addition,replace any module if it is wet or looks like it has ever beenwet. Protective enclosures, as described in the Planningthe Installation section, are recommended regardless ofcheckout frequency.TROUBLESHOOTINGIMPORTANT1. The following service procedures are providedas a general guide. Follow appliance manufacturerservice instructions if available.2. Meter readings between gas control andignition module must be taken within the trialfor ignition period. Once the ignition moduleshuts off, wait for retry or reset at the thermostat.3. If any component does not function properly,make sure it is correctly installed and wiredbefore replacing it.69-0845—2 14
<strong>S8910U</strong> UNIVERSAL HOT SURFACE IGNITION MODULE4. The ignition module cannot be repaired. If itmalfunctions, replace it.5. Only trained, experienced service techniciansshould service hot surface ignition systems.6. After servicing, verify proper system operation.Perform the checkout steps in the Startup and Checkoutsection as the first step in troubleshooting. Then check thetroubleshooting sequence (Fig. 8) to pinpoint the cause ofthe problem.After troubleshooting, perform the checkout procedureagain to be sure the system is operating normally.Status LED used to TroubleshootThe LED can be used to check the appliance status. Adescription of the LED signals follows.IMPORTANTThe LED shows system status for the current callfor heat. When the call for heat is interrupted(thermostat satisfied or system power switchedoff), the LED goes off and the status informationis lost.• Pulsing heartbeat is the normal operating mode duringa call for heat (24V terminal is powered). The systemcan be in any of the normal operating modes includingprepurge, warmup, ignition trial, between trial purge, ornormal run.• One flash indicates the <strong>S8910U</strong> is in an ignition lockoutmode. The most probable cause is the main burnerfailing to light or failure to detect the flame. Run theappliance through a call for heat and if the burner doesnot light, check the:— gas supply— input voltage— hot surface igniter— gas control— wiringIf the main burner lights, but goes out at the end of ignitiontrial, check the:— igniter/sensor— flame rod— burner ground connections— wiring• Two flashes indicates the flame rectification signal isweak. The most probable causes are:— contaminated or mislocated igniter/sensor orflame rod— poor flame sense leadwire insulation orconnections— poor gas pressureIf the flame rectification signal is strong when the appliancelights, but weak while heat is being delivered, check foroverheating of the igniter/sensor, flame rod ceramic orflame sense leadwires.• Three flashes indicate an internal error. The mostprobable cause is an <strong>S8910U</strong> logic failure. Start a newcall for heat and if the three-flash signal returns, replacethe <strong>S8910U</strong>.15<strong>Ignition</strong> System ChecksStep 1: Check the igniter wire harness.Make sure:a. <strong>Ignition</strong> cable does not run in contact with any metalsurfaces.b. Connections to the ignition module and to the igniteror igniter-sensor are clean and tight.c. <strong>Ignition</strong> cable provides good electrical continuity.Step 2: Check the ignition system grounding. Nuisanceshutdowns are often caused by a poor or erraticground.a. A common ground is required for the module,igniter, flame sensor and main burner.• Check for good metal-to-metal contactbetween the igniter bracket and the mainburner.• Check the ground path from the GND(BURNER) terminal on the module to themain burner. Make sure the connections areclean and tight. If the wire is damaged ordeteriorated, replace it by following theappliance manufacturer instructions. Atemporary leadwire connection between theGND (BURNER) terminal and the main burnercan help confirm a ground path problem.• Check the temperature at the igniter ceramicor flame sensor insulator. Excessive temperaturepermits leakage to ground. Contact theappliance manufacturer if the temperatureexceeds the rating of the igniter or sensor.• If the flame sensor or bracket is bent out ofposition, restore to the correct position.• Replace the igniter and sensor or ignitersensorwith an identical unit if the insulator iscracked.STEP 3: Check the flame sensing circuit.a. Make sure the burner flame is capable of providing agood rectification signal. See Fig. 6.b. Make sure about 3/4 to 1 in. of the flame sensor origniter-sensor is continuously immersed in the flamefor the best flame signal. See Fig. 6.c. Check for excessive (higher than 1000°F [538°C])temperature at the ceramic insulator on the flamesensor. Excessive temperature can cause a short toground.d. Check for a cracked igniter-sensor or a sensorceramic insulator, which can cause short to ground,and replace unit if necessary.• Make sure the electrical connections are cleanand tight. Replace damaged wire withmoisture-resistant No. 18 wire rated forcontinuous duty up to 221°F (105°C).e. If the igniter is other than a Norton 201 or 271, makesure it meets the following specifications:• Igniter must reach 1832°F (1000°C) within34-seconds with 102 Vac applied.• Igniter must maintain at least 500M ohminsulation resistance between the igniterleadwires and the igniter mounting bracket.• Igniter must not develop an insulating layer onits surface (over time) that would preventflame sensing.• Igniter surface area immersed in flame mustnot exceed one-fourth of the grounded areaimmersed in flame. This would prevent flamesensing.• Igniter current draw at 132 Vac must notexceed 5A.69-0845—2
<strong>S8910U</strong> UNIVERSAL HOT SURFACE IGNITION MODULESTARTTURN THERMOSTAT TOCALL FOR HEATNOTE:BEFORE TROUBLESHOOTING, BECOME FAMILIAR WITH STARTUPAND CHECKOUT PROCEDURES.DOES <strong>S8910U</strong> GET POWER(24 VAC NOMINAL)?YES30 SECOND MINIMUMPURGEYESNONO• CHECK LINE VOLTAGE POWER.• CHECK LOW VOLTAGE TRANSFORMER.• CHECK LIMIT CONTROLLER.• CHECK AIR PROVING SWITCH (IF USED).• CHECK THERMOSTAT.• CHECK WIRING.• CHECK AIR PROVING SWITCH.• REPLACE <strong>S8910U</strong>.IGNITER WARMS UP ANDGLOWS REDNOCONFIRM THAT 120V HOT LEADCONNECTS TO L1, AND 120V NEUTRALLEAD CONNECTS TO L2.NOCHECK AND CORRECT WIRING FUSEOR CIRCUIT BREAKER.YESCHECK FOR 120 VAC ACROSS HOTSURFACE IGNITER TERMINALS.NOREPLACE <strong>S8910U</strong>.YESYESCHECK WIRES TO IGNITER.IF OK, REPLACE IGNITER.MAIN BURNER LIGHTSYESNO• CHECK FOR 24 VAC ACROSS VALVE TERMINALS ON <strong>S8910U</strong> DURING TRIAL FOR IGNITIONTIMING. IF NO VOLTAGE, REPLACE <strong>S8910U</strong>.• CHECK ELECTRICAL CONNECTIONS BETWEEN <strong>S8910U</strong> AND GAS CONTROL.IF OK, REPLACE GAS CONTROL.• CHECK IGNITER POSITION.• CHECK GAS PRESSURE TO MAIN BURNER.MAIN BURNER REMAINSPOWERED AND LITYESNONOTE: IF <strong>S8910U</strong> GOES INTO LOCKOUT, RESET SYSTEM.• CHECK CONTINUITY OF GROUND WIRE AND GROUND PATH FROM MAIN BURNER TOGND (BURNER) TERMINAL OF <strong>S8910U</strong>.• CONFIRM THAT 120 VAC HOT LEAD IS CONNECTED TO L1 AND 120 VAC NEUTRAL LEADIS CONNECTED TO L2.• CHECK THAT BURNER FLAME COVERS IGNITER/SENSOR OR SENSOR.• CHECK INSULATION ON IGNITER/SENSOR LEADS.• CHECK IGNITER/SENSOR OR FLAME ROD FOR CONTAMINATION OR DAMAGE. REPLACE,IF NECESSARY.• CHECK INSULATION ON SENSOR LEADS AND CHECK SENSOR POSITION.IF CHECKS ARE OK, REPLACE <strong>S8910U</strong> MODULE.NOTE: SYSTEM FAILURE AFTER MAIN FLAME LIGHTS HAS A LOW PROBABILITYOF BEING THE <strong>S8910U</strong>.SYSTEM RUNS UNTIL CALLFOR HEAT ENDSYESCALL FOR HEAT ENDS,SYSTEM SHUTS OFFYESNONONOTE: IF <strong>S8910U</strong> GOES INTO LOCKOUT, RESET SYSTEM.• CHECK CONTINUITY OF GROUND WIRE.NOTE: IF GROUND IS POOR OR ERRATIC, SHUTDOWNS CAN OCCUR OCCASIONALLYEVEN THOUGH OPERATION IS NORMAL AT THE TIME OF CHECKOUT.• CHECK FOR EXCESSIVE HEAT AT IGNITER OR FLAME ROD CERAMIC BASE(TEMPERATURE ABOVE 1000°F (538°C) CAUSES SHORT TO GROUND).• IF CHECKS ARE OKAY, REPLACE <strong>S8910U</strong> MODULE.NOTE: SYSTEM FAILURE DURING A RUN CYCLE HAS A LOW PROBABILITY OFBEING THE <strong>S8910U</strong>.• CHECK FOR PROPER TEMPERATURE CONTROLLER OPERATION.• REMOVE VALVE LEAD AT <strong>S8910U</strong>; IF VALVE CLOSES, RECHECK TEMPERATURE CONTROLLERAND WIRING; IF NOT, REPLACE GAS CONTROL.TROUBLESHOOTING ENDSREPEAT PROCEDURE UNTIL TROUBLE-FREE OPERATION IS OBTAINED.M8531AFig. 8. <strong>S8910U</strong> troubleshooting sequence.Home and Building Control<strong>Honeywell</strong> Inc.<strong>Honeywell</strong> PlazaP.O. Box 524Minneapolis, MN 55408-0524Home and Building Control<strong>Honeywell</strong> Limited-<strong>Honeywell</strong> Limitée155 Gordon Baker RoadNorth York, OntarioM2H 2C9Helping You Control Your World69-0845—2 J. S. Rev. 7-96 Printed in U.S.A16