Chapter 8 Manual System Control - Rain Master Control Systems
Chapter 8 Manual System Control - Rain Master Control Systems
Chapter 8 Manual System Control - Rain Master Control Systems

You also want an ePaper? Increase the reach of your titles
YUMPU automatically turns print PDFs into web optimized ePapers that Google loves.
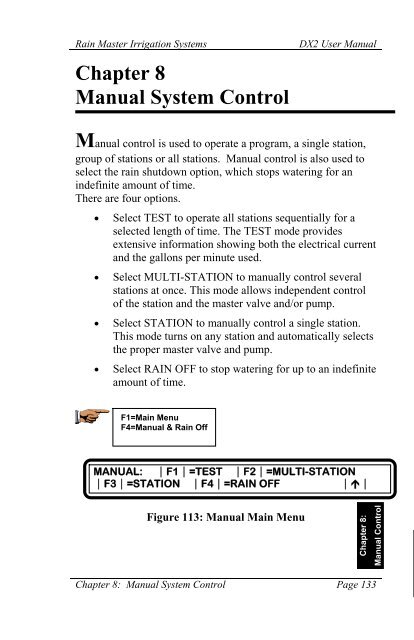
<strong>Rain</strong> <strong>Master</strong> Irrigation <strong>System</strong>s<strong>Chapter</strong> 8<strong>Manual</strong> <strong>System</strong> <strong>Control</strong>DX2 User <strong>Manual</strong><strong>Manual</strong> control is used to operate a program, a single station,group of stations or all stations. <strong>Manual</strong> control is also used toselect the rain shutdown option, which stops watering for anindefinite amount of time.There are four options.• Select TEST to operate all stations sequentially for aselected length of time. The TEST mode providesextensive information showing both the electrical currentand the gallons per minute used.• Select MULTI-STATION to manually control severalstations at once. This mode allows independent controlof the station and the master valve and/or pump.• Select STATION to manually control a single station.This mode turns on any station and automatically selectsthe proper master valve and pump.• Select RAIN OFF to stop watering for up to an indefiniteamount of time.F1=Main MenuF4=<strong>Manual</strong> & <strong>Rain</strong> OffMANUAL: |F1|=TEST |F2|=MULTI-STATION|F3|=STATION |F4|=RAIN OFF||Figure 113: <strong>Manual</strong> Main Menu<strong>Chapter</strong> 8:<strong>Manual</strong> <strong>Control</strong><strong>Chapter</strong> 8: <strong>Manual</strong> <strong>System</strong> <strong>Control</strong> Page 133
<strong>Rain</strong> <strong>Master</strong> Irrigation <strong>System</strong>sDX2 User <strong>Manual</strong>The test starts with the following display:TEST STATION 1 0:01:00 I=0.25 GPM=50|F1|=NEXT |F2|=PREVIOUS ||Figure 115: Program TestingThe screen displays:• Test Station Number• Count-down of the specified run time• Electrical current in amps (I=X.XX) drawn bythe field valve solenoid• Flow in Gallons Per Minute (GPM)When completed, the controller is incremented to thenext station and the test is repeated. The completionof the last station returns to the <strong>Manual</strong> Main Menuscreen.Step 3Press F1=NEXT anytime during the test routine toturn off the current station and turn on the nextsequential station, if any.Step 4Press F2=PREVIOUS anytime during the testroutine to turn off the current station and turn on theprevious station, if any.<strong>Chapter</strong> 8: <strong>Manual</strong> <strong>System</strong> <strong>Control</strong> Page 135
<strong>Rain</strong> <strong>Master</strong> Irrigation <strong>System</strong>sDX2 User <strong>Manual</strong>F1 Main MenuF4 <strong>Manual</strong> & <strong>Rain</strong> OffF2Multi-StationMulti-Station<strong>Manual</strong> multi-station mode allows any single station or output tobe turned on individually or in combination with any otherstation(s). Valve solenoid electrical current is displayed.Use Multi-Station to manually control several stations at once.Multi-Station can also be used to operate stations independent ofany <strong>Master</strong> Valve or Pump.Multi-Station is additionally useful in analyzing problems bylocating defective stations or devices (refer to Multi-StationDiagnostics procedure, page 8-9).ProcedureStep 1 Proceed to the Multi-Station option display asfollows:F1=Main MenuF4=<strong>Manual</strong> & <strong>Rain</strong> OffF2=Multi-Station|F1|=STATION ON CONCURRENTLY|F2|=STATION ON SEQUENTIALLY||Figure 116: Multi-Station Options<strong>Chapter</strong> 8: <strong>Manual</strong> <strong>System</strong> <strong>Control</strong> Page 137
<strong>Rain</strong> <strong>Master</strong> Irrigation <strong>System</strong>sDX2 User <strong>Manual</strong>Step 2Step 3Step 4Step 5Step 6The screen displays two options:• Select STATION ON CONCURRENTLY tooperate several stations at the same time or torun a station independent of any <strong>Master</strong> Valveand/or Pump.• Select STATION ON SEQUENTIALLY tooperate each station in sequential order.Select F1=STATION ON CONCURRENTLY.Enter the Run Time, then press ENTER. Run timemust be between 0 and 59 minutes.Enter the station number. The number must bebetween 1 and 48, then press ENTER. The stationwill turn on.Enter zero (0X) to select the master valve/pump.01 = MV102 = MV203 = N.O. MV04 = PumpEnter additional station numbers as necessary.Stations selected are shown on the display.Note:Stations may be alternately turned On/Off (toggled)by re-entering the station number followed by theENTER key.At the end of the run time, the Multi-Station Optionmenu is displayed, or presses the Up Arrow key todisplay the previous menu.Step 7Page 138<strong>Manual</strong>ly Entered ProgramAllows user to enter a one-time program to be runimmediately or scheduled for later in the day. The<strong>Chapter</strong> 8: <strong>Manual</strong> <strong>System</strong> <strong>Control</strong>
<strong>Rain</strong> <strong>Master</strong> Irrigation <strong>System</strong>sDX2 User <strong>Manual</strong>manual program is independent of automaticprograms and will start only one time.To manually enter a consecutive list of stations tosequentially run one after the other:Select F2=STATION ON SEQUENTIALLY.|F1|=STATION ON CONCURRENTLY|F2|=STATION ON SEQUENTIALLY||Figure 117: Station on SequentiallyNote:This one-time program will execute eitherimmediately or at a future time. Once executed, thestations must be re-entered in order to operateagain.Four options are given:• Select ENTER STATIONS to enter the stationnumbers to be turned on.• Select CLEAR ALL to remove all stations fromsequential manual control.• Select START NOW to start manual operationimmediately.• Select START LATER to enter a time for thestations to be operated.Step 8Select F1=ENTER STATIONS.Enter the station number. The number must bebetween 1 and 48. Then press the ENTER key.<strong>Chapter</strong> 8: <strong>Manual</strong> <strong>System</strong> <strong>Control</strong> Page 139
<strong>Rain</strong> <strong>Master</strong> Irrigation <strong>System</strong>sDX2 User <strong>Manual</strong>Note:The maximum number of stations is determined bythe total stations installed in the associated satellitecontroller. The maximum number will appear onthe Station Number Entry Display screen.Step 9Enter the Run Time. Run time must be in Hour:Minutes (HH:MM) format, then press the ENTERkey.STATION RUN TIME: :ENTER TIME(HH:MM)||Figure 118: Station Run TimeStep 10Step 11Enter additional station numbers and run times, asnecessary.You may enter up to 10 stations. If the station is notused by a program or ISC, you are then prompted toselect whether the <strong>Master</strong> Valve is to be used withthe station.If required; choose a selection from the four <strong>Master</strong>Valve options:F1=MV1F2=MV2F3=N.O.F4=NoneIf a <strong>Master</strong> Valve is selected, select one of the twoPump options:F1=PumpF2=NoneStep 12Press the Up Arrow key to return to the Station OnSequentially menu.Page 140<strong>Chapter</strong> 8: <strong>Manual</strong> <strong>System</strong> <strong>Control</strong>
<strong>Rain</strong> <strong>Master</strong> Irrigation <strong>System</strong>sDX2 User <strong>Manual</strong>Clear All- If a programming error is made, select:F2=CLEAR ALL.All station numbers and run times are cleared.Return to F1= ENTER STATIONS and re-enter thecorrect stations and run times.Step 13The Start Now option immediately executes theentered stations.Select F3=START NOW. The stations selected arerun in numerical order.When completed, the screen returns to the previousmenu.Step 14Start Later postpones or delays the manualexecution.Select F4=START LATER.START TIME: : AMENTER TIME (HH:MM) |F1|=AM/PM ||Figure 119: Start Later TimeStep 15Enter the start time.Enter times in 12 hour or 24 hour format.If 12 hour time format is selected, use theF1=AM/PM toggle key to select AM or PM.To change time format, go to Setup <strong>Control</strong>ler, UserOptions, Time/Date.Press ENTER. The base menu is displayed.The stations will turn on at the specified time in asequential fashion.<strong>Chapter</strong> 8: <strong>Manual</strong> <strong>System</strong> <strong>Control</strong> Page 141
<strong>Rain</strong> <strong>Master</strong> Irrigation <strong>System</strong>sDX2 User <strong>Manual</strong>Multi-Station DiagnosticsUsing Multi-Station for diagnostics is an effective tool inlocating station field wiring problems. Detected problems thatproduce warning messages may be checked and isolated throughmanual testing. Warning messages displaying failures instations, <strong>Master</strong> Valves/Pump, etc. will indicate the specificstations and devices that were running at the time of failure. TheMulti-Station feature exercises the stations or devices whichisolates the specific problem area.Example: Assume a warning condition occurred as the resultof running an automatic program. The warningappears in the display as follows:WARNING = SHORT CIRCUIT 06/27/96 12:05AMSTA = PUMP, MV, 1, 5|‣|||Figure 120: Warning, Short CircuitThe warning indicates that the Pump, <strong>Master</strong> Valve 1, station 1and station 5 were all running at the time of failure. A shortcircuit condition may exist in any of the listed items. Thefollowing procedure provides a way to isolate which output isshorted:Diagnostic ProcedureStep 1 Examine the warning message to identify stationnumbers, <strong>Master</strong> Valves/Pump, etc. Record allidentified items.If multiple short circuit warnings appear, theproblem is most likely a short in the <strong>Master</strong> Valveand/or Pump circuit.Page 142<strong>Chapter</strong> 8: <strong>Manual</strong> <strong>System</strong> <strong>Control</strong>
<strong>Rain</strong> <strong>Master</strong> Irrigation <strong>System</strong>sDX2 User <strong>Manual</strong>Step 2Advance to the Multi-Station option display asfollows:F1=Main MenuF4=<strong>Manual</strong> & <strong>Rain</strong> OffF2=Multi-Station|F1|=STATION ON CONCURRENTLY|F2|=STATION ON SEQUENTIALLY||Figure 121: Multi-Station OptionsStep 3Select F1=STATION ON CONCURRENTLY. Thefollowing screen is displayed:RUN TIME: 10ENTER TIME (0 – 59 MINUTES)||Figure 122: Run Time EntryStep 4To run for 10 minutes, enter 10 then press ENTER.The following screen is displayed:ON:ENTER STATION NUMBER (1-48, OX=MV)||Figure 123: Station/Device EntryStep 5The <strong>Master</strong> Valve/Pump is selected by any numberbetween 1 and 4 which is preceded by a 0 (zero).The <strong>Master</strong> Valve/Pump selections are:• MV1=01<strong>Chapter</strong> 8: <strong>Manual</strong> <strong>System</strong> <strong>Control</strong> Page 143
<strong>Rain</strong> <strong>Master</strong> Irrigation <strong>System</strong>sDX2 User <strong>Manual</strong>• MV2=02• N.O.=03• Pump=04Enter the station or device numbers from thewarning display, one at a time. Press the ENTERkey after each entry. As each entry is made, theresult appears on the display, as depicted in Figure8-12.ON: PUMP, MV1, 1, 5ENTER STATION NUMBER (1-49, OX=MV) ||Figure 124: Station/Device EntryExample: Enter the following short circuit warnings:04 (pump)01 (MV1)1 Station 15 Station 5When a problem is detected in a station or device,the Multi-Station operation is immediately abortedand the display returns to the base menu. The basemenu will then display the warning.Step 6Step 7Page 144The station or device is now identified and can becorrected accordingly.IMPORTANT: To clear all warnings from the basescreen, select the F2=WARNING to display the firstproblem in the list. Continue to press the DownArrow to display any additional warnings, if present.After the last warning is displayed, pressF1=CLEAR REPORT MESSAGES to Clear ReportMessages. All problems in the list are erased.<strong>Chapter</strong> 8: <strong>Manual</strong> <strong>System</strong> <strong>Control</strong>
<strong>Rain</strong> <strong>Master</strong> Irrigation <strong>System</strong>sDX2 User <strong>Manual</strong>This completes the Multi-Station Diagnostic procedure.Press the QUIT key to return to the base menu.F1 Main MenuF4 <strong>Manual</strong> & <strong>Rain</strong> OffF3StationStation<strong>Manual</strong> station feature turns on any station for a specified timeand automatically selects usage of the proper <strong>Master</strong> Valveand/or Pump for this station. The valve solenoid electricalcurrent is displayed.Use Station to manually control a single station and/or sequencethrough the stations using the next/previous station key prompts.ProcedureStep 1 Advance to the station Number Entry screen asfollows:F1=Main MenuF4=<strong>Manual</strong> & <strong>Rain</strong> OffF3=StationSTATION OR ISC NUMBER:ENTER STATION NUMBER (1-12)||Figure 125: Station Number EntryStep 2Enter the station or ISC number then press ENTER.The following option screen is displayed:<strong>Chapter</strong> 8: <strong>Manual</strong> <strong>System</strong> <strong>Control</strong> Page 145
<strong>Rain</strong> <strong>Master</strong> Irrigation <strong>System</strong>sDX2 User <strong>Manual</strong>|F1|=TURN ON STATION|F2|=CANCEL ISC STATION||Figure 126: Station OptionsStep 3There are two options.• Select TURN ON STATION to turn on theselected station.• Select CANCEL ISC STATION to canceloperation of an Individual Station <strong>Control</strong> (ISC)station.Select F1=TURN ON STATION.Enter the run time in Hour: Minutes (HH:MM)format. Then press ENTER.STATION 1 RUN TIME:ENTER TIME (HH:MM)||Figure 127: Run Time EntryThe station will start. The screen displays thefollowing information:• Station Number• Station On/Off Status• Count-down of Run Time• <strong>Master</strong> Valve/Pump (if applicable)• Electrical current in amps (I=X.XX)Page 146<strong>Chapter</strong> 8: <strong>Manual</strong> <strong>System</strong> <strong>Control</strong>
<strong>Rain</strong> <strong>Master</strong> Irrigation <strong>System</strong>sDX2 User <strong>Manual</strong>STATION 1=ON 0:04:25 I=0.05|F1|=ON/OFF |F2|=NEXT |F3|=PREVIOUS||Figure 128: Station Run StatusNote:Prior to a station turning on, the station is analyzedby the controller to determine if the station is usedin an existing program.If the station is used in a program and the programincludes a <strong>Master</strong> Valve or Pump, the controller willactivate the <strong>Master</strong> Valve or Pump with the station.If the station is not used by any program, no <strong>Master</strong>Valve or Pump will be activated for that station.Step 4F1=ON/OFFThe F1=ON/OFF toggle key alternately turns thestation on and off.Press F1=ON /OFF and verify that the station statuschanges accordingly.The run time will continue to count down whetherthe station is on or off.Step 5F2=NEXTThe F2=NEXT key turns off the current station andturns on the next station. The process continuesuntil the last station of the controller is reached.Press the F2=NEXT key and verify that the nextstation turns on.The Run Time will continue to count downregardless of station number.<strong>Chapter</strong> 8: <strong>Manual</strong> <strong>System</strong> <strong>Control</strong> Page 147
<strong>Rain</strong> <strong>Master</strong> Irrigation <strong>System</strong>sDX2 User <strong>Manual</strong><strong>Control</strong>lers are equipped with station configurationsthat range from 6 to 48 in increments of six stations.If the last station is displayed, the F2=NEXT keyadvances to station 1.Step 6F3=PREVIOUSThe F3=PREVIOUS key turns off the current stationand turns on the previous station. If currently atstation 1, the F3=PREVIOUS key decrements to thelast station in the controller configuration.The Run Time will continue to count downregardless of the station number.Step 7Press the Up Arrow to return to the <strong>Manual</strong> On/Offmenu options.MANUAL: |F1|=TEST |F2|=MULTI-STATION|F3|=STATION |F4|=RAIN OFF ||Figure 129: <strong>Manual</strong> Operations MenuThis completes the <strong>Manual</strong> Operations procedure.Press the QUIT key to return to the base menu.Page 148<strong>Chapter</strong> 8: <strong>Manual</strong> <strong>System</strong> <strong>Control</strong>
<strong>Rain</strong> <strong>Master</strong> Irrigation <strong>System</strong>sDX2 User <strong>Manual</strong>F1 Main MenuF4 <strong>Manual</strong> & <strong>Rain</strong> OffF4<strong>Rain</strong> Off<strong>Rain</strong> OffUse the <strong>Rain</strong> Off mode to stop watering for either a programmedamount of days or to turn off the controller for an indefiniteamount of time.ProcedureStep 1 Proceed to the <strong>Rain</strong> Off Option menu as follows:F1=Main MenuF4=<strong>Manual</strong> & <strong>Rain</strong> OffF4=<strong>Rain</strong> Off|F1|=RAIN SHUTDOWN |F2|=NO WATER WINDOW|F3|=PROGRAMMABLE RAIN SHUTDOWN ||Figure 130: <strong>Rain</strong> OffThere are three options:• Select RAIN SHUTDOWN to stop all wateringindefinitely until manually returned to theautomatic mode.• Select NO WATER WINDOW to enter a periodof time (up to 23 hours and 59 minutes) toestablish a time period during the day whenwatering is not allowed.• Select PROGRAMMABLE RAINSHUTDOWN to stop watering from one toseven days.<strong>Chapter</strong> 8: <strong>Manual</strong> <strong>System</strong> <strong>Control</strong> Page 149
<strong>Rain</strong> <strong>Master</strong> Irrigation <strong>System</strong>sDX2 User <strong>Manual</strong>Step 2Select F1=RAIN SHUTDOWN.RAIN SHUTDOWN: OFF|F1|=ON |F2|=OFF (AUTOMATIC MODE)||Figure 131: <strong>Rain</strong> ShutdownPress F1=ON to place the controller in rainshutdown mode.Warning:When rain shutdown is ON, No Wateringwill occur (assuming the program has rainshutdown enabled. See Setup, Program,<strong>Rain</strong> Shutdown, <strong>Chapter</strong> 4).Note:During rain shutdown, the base screen displays"RAIN SHUTDOWN" in place of the validprograms list.To start automatic watering operations again, rainshutdown mode must be turned Off.Step 3Step 4Press F2=OFF to return the controller to automaticmode.If a no water window is desired, select F2=NOWATER WINDOW.NO WATER WINDOW selects a period of time (upto 23 hours and 59 minutes) to establish a timeperiod during the day when watering is not allowed.Page 150<strong>Chapter</strong> 8: <strong>Manual</strong> <strong>System</strong> <strong>Control</strong>
<strong>Rain</strong> <strong>Master</strong> Irrigation <strong>System</strong>sDX2 User <strong>Manual</strong>Enter the start time for when the no wateringperiod is to occur in Hour: Minutes (HH:MM)format.If 12 hour time format is selected for thecontroller, use F1=AM/PM toggle key to selectAM or PM, and then press ENTER.START TIME FOR WINDOW: 5:00 PMENTER TIME (HH:MM) |F1|=AM / PM ||Figure 132: No Water Window TimeEnter the end time for no watering period to occur inHour: Minutes (HH:MM) format, then pressENTER.Note:Any scheduled start times which occur during theno water window period will be ignored. Also,attempting to start a program with the PROGRAMON/OFF key will have no effect.Step 5Programmable <strong>Rain</strong> Shutdown allows a controller tobe off for a specified number of days.Select F3=PROGRAMMABLE RAINSHUTDOWN.NUMBER OF RAIN SHUTDOWN DAYS: 3ENTER NUMBER OF DAYS (1-7)||Figure 133: Programmable <strong>Rain</strong> ShutdownEnter the number of days for no watering (rainshutdown), then press ENTER.<strong>Chapter</strong> 8: <strong>Manual</strong> <strong>System</strong> <strong>Control</strong> Page 151
<strong>Rain</strong> <strong>Master</strong> Irrigation <strong>System</strong>sDX2 User <strong>Manual</strong>The <strong>Manual</strong> On/Off menu options are displayed.Press the QUIT key to return to the base menu.Once programmable rain days have been entered, the base menushows RAIN SHUTDOWN DAYS LEFT=X, where X is thenumber of programmed days entered.This number automatically decrements at 12:00 AM each day.Note:Non irrigation programs are not affected by rainshutdown and will continue to operate asprogrammed.This completes the procedure for <strong>Manual</strong> <strong>Rain</strong> Off.Page 152<strong>Chapter</strong> 8: <strong>Manual</strong> <strong>System</strong> <strong>Control</strong>