op guide - Sabine, Inc.
op guide - Sabine, Inc.
op guide - Sabine, Inc.

You also want an ePaper? Increase the reach of your titles
YUMPU automatically turns print PDFs into web optimized ePapers that Google loves.
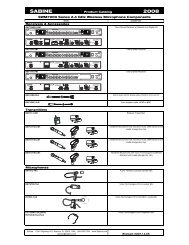
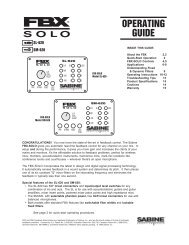
Op e r a t i n g Gu i d eSMARTFILTERSFBX2810Dual Feedback ExterminatorContentsSECTION one — Front & Back Panels 21.1. FBX2810 Front Panel Controls & LED Indicators 21.2. FBX2810 Back Panel Controls & Connections 2SECTION two — APPLICATIONS 32.1. FBX Setup for Monitors 32.2. FBX Setup for Entire Mix 32.3. FBX Setup for Single Insert Point 32.4. FBX Setup for Insert Send & Return 3SECTION THREE — ENGINEERING SPECIFICATIONS 3SECTION FOUR — OPERATING INSTRUCTIONS 44.1. Before You Begin 44.2. How To Operate your FBX2810 5SECTION FIVE — How to use FBX Features 65.1. Gain 65.2. FBX Filter Control 65.3. Important Operating Considerations 6SECTION SIX — TROUBLESHOOTING TIPS 7SECTION seven — FBX Theory & Practice 87.1. Introduction to FBX® 87.2. The Advantages of FBX Filters 87.3. Parametric Filters and FBX 9SECTION EIGHT — Cautions & Warranty 10Quick Start Setup on back page
SECTION two — APPLICATIONSMonitor Mix 12.1. FBX Setup for MonitorsMonitor Mix 2Ch. BINCh. AINPOWER INPUT230 VAC 50/60HZ 0.06A 10WCh. BOUTCh. AOUT2.2. FBX Setup for Entire MixRight Main SendLeft Main SendCh. BINCh. AINAll other SignalProcessingPOWER INPUT230 VAC 50/60HZ 0.06A 10WCh. BOUTCh. AOUT2.3. FBX Setup for Single Insert PointTS "Y" ConnectorPOWER INPUT230 VAC 50/60HZ 0.06A 10WCh. 1 Ch. 2< Low Z >< High Z >< Insert >TRS ConnectorCh. B OUT Ch. A OUT Ch. B IN Ch. A INTS "Y" ConnectorTRS ConnectorY Insert Cords (TRS to TS + TS)2.4. FBX Setup for Insert Send & ReturnCh. 1TS or TRS ConnectorsInsert> Return600 Ohms• Input Impedance: Balanced or unbalanced>40K Ohms, PIN 2 high• Output Impedance: Balanced or unbalanced150 Ohms nominal, PIN 2high• Bypass: True power off bypass• Headroom: +14 dB peak @ 4 dBVnominal input, balanced• I/O Connectors: XLR-3 and 1/4"TRSPERFORMANCE***• Frequency response: 20 Hz – 20KHz +/- 0.3 dB• Gain matching: +/- 0.2 dB• Spectral Variation: + .25 dB, 20 Hzto 20 KHz• SNR - Dynamic Range: >108 dB• THD: .005% at 1 KHz< 0.01% 20 Hz – 10 KHz< 0.025% 10 KHz – 20 KHz• Dynamic Range: >105 dBPOWER INPUT• 230 VAC: 200 – 240 VAC 50/60 HzTests performed using an Audio PrecisionSystem One model 322 or equal.FUSE• 230 VAC, 0.1A, 10 W, 0.160 A SB fuseDIMENSIONS• 1-U rack mount; 19 x 1.75 x 6.25 in.nominal (rack mountable); 48.3 x 4.5x 15.9 cm nominalWEIGHT• 8.0 lbs. (3.6 kg) nominalOPERATING TEMPERATURE• Safe <strong>op</strong>erating temperature: -15 to+50 degrees centigrade ambienttemperature (5 to 122F)LIT-FBX2810-OP-EN-110112.indd3© 2011 <strong>Sabine</strong>, <strong>Inc</strong>.
SECTION FOUR — OPERATING INSTRUCTIONS4.1. Before You BeginYour FBX Feedback Exterminator will improve any sound reinforcement system. The instructionspresume that you are familiar with the fundamentals of sound reinforcement.4.1.1. Where the FBX fits in your sound system:The most common patch point is between the output of the mixer and the input of a poweramp. In this position, the FBX can sense and eliminate feedback occurring in any channel ofthe mixer. An even better solution is on a mixer insert point for a single channel, or a subgroup(see application diagrams in Section Two — Applications). This targets the feedback controlto the mics that need it.Note: If you’re using a mixer with unbalanced 1/4" outputs, you must use standard unbalancedcables and connectors when connecting it to the FBX. Similarly, if your mixer is wired for balanced1/4" Tip-Ring-Sleeve (TRS) outputs, you must use that type of connector. If you don’t,you may experience a loss of gain (up to 6 dB) when using the FBX. This can occur if eitherside of the balanced output is grounded at any point (or when mixing balanced and unbalancedinputs and outputs).4.1.2. A note about graphic equalizers:The FBX is designed to replace the graphic equalizer’s function for eliminating feedback. Inmany applications, such as churches, auditoriums or small acoustic ensembles, the mixingboard provides all the tonal control that is necessary. The FBX can replace the graphic EQaltogether in some applications; however, a graphic equalizer may be beneficial to shape asystem's total performance. If you do want to use an equalizer, place the FBX after the EQ inthe signal path. Use the EQ’s controls to shape the tonal response of the sound system, butDO NOT NOTCH FOR FEEDBACK.4.1.3. Understanding FIXED and DYNAMIC filtersBefore <strong>op</strong>erating the FBX, you need to understand the two types of FBX filters: FIXED andDYNAMIC. FIXED FILTERS retain their frequency center-points until the unit is reset by theuser. The system’s gain before feedback is limited primarily by the number of fixed filters; i.e.,increasing the number of fixed filters increases the system’s gain before feedback. In addition,you can LOCK the fixed filters so they do not get any deeper. Locked fixed filters are no longeradaptive. The FBX's DYNAMIC FILTERS control intermittent feedback that comes and goesthroughout the program. They are continually reset automatically to different frequencies as newfeedback occurs during the program. For most applications, the <strong>op</strong>timal setting is elevenFIXED and three DYNAMIC FILTERS. This is the factory default.4.1.4. Setup & ReadyYour FBX Feedback Exterminator is either in Setup mode or in Ready mode.Setup Mode: It’s quick and quiet, but use this mode for setup only – do not use the FBX for yourprogram while in Setup mode. Think of Setup mode as your key to achieving one of the mainbenefits of the FBX: getting more gain before feedback. In Setup mode you will be raising thegain of your system so the FBX can place transparent filters (Fixed Filters) that will allow youto get all the gain you need for a loud and clear show. In Setup the FBX is very sensitive sodo not talk into the mics during setup, and try to keep room noise to a minimum. If the roomis noisy, then go into Ready mode and raise your gain while the fixed filters are still unlocked(flashing Ready LED).Ready Mode: Let the show begin. Your fixed filters are eliminating feedback and giving youextra gain, and your dynamic filters are ready to jump on any new feedback during the show.In this mode your fixed filters are either locked (red LEDs) or unlocked (amber LEDs). We recommendlocking your fixed filters for the show. But if you don’t have time for the Setup mode,or if the room is just too noisy during setup, then you can start off by unlocking the fixed filters.Leaving the fixed filters unlocked allows them to get deeper if needed, which can be handy ifyou need to get more gain before feedback. But once your system stabilizes we recommendyou lock the fixed filters for the duration of the show!4
4.2. How To Operate your FBX28101Follow these procedures to get maximum gain before feedbackPlace equipment & make connections.a. Patch your FBX2810 into system and make all connections (refer t<strong>op</strong>ages 2 and 3 for connection <strong>op</strong>tions).b. Place speakers and micr<strong>op</strong>hones in performance positions.c. Set Input and Output levels on FBX back panel (see Section 5.1.1.for details). Start with all buttons pushed in.d. If you are using a graphic EQ, adjust only for the desired tonal qualities,but DO NOT NOTCH FOR FEEDBACK.e. Adjust the level for each mixer channel, and set the sound system’smaster volume to minimum.Power Tipsa. Set up one FBX channel at a time.b. DO NOT TALK INTO YOUR SYSTEMwhile in Setup mode.c. See Section 5.2. FBX Filter Controlfor information on:• Changing the number of Fixedvs. Dynamic filters• Selecting and mixing 1/10- &1/5-octave filters2Push SETUP button until all LEDs st<strong>op</strong> flashing and the SETUPlight flashes on its own. Setup mode clears all Fixed & Dynamic filters.Do not use Setup mode during your performance.3Slowly raise the gain on the mixer or amp until the FBXeliminates the first few feedback tones.DO NOT TALK INTO THE MICS. The FBX will quickly begin to find and removefeedback. The first Fixed filter set will be heard as a quiet feedback chirp andshown as an amber LED. As you slowly raise the gain, more feedback chirpswill be heard, and more amber LEDs will light.a. If you are using stationary micr<strong>op</strong>hones:Continue raising the gain until all filter LEDs cycle back and forth in sequence.This is your indication that the FBX is exiting setup mode.IMPORTANT: Reduce gain slightly. You are now in READY (performance)mode, with the Fixed filters locked and the blue Ready lighton. Begin the show!Front panel filter LEDslighting as gain is raisedand Fixed filters are set.4b. If you are using wireless micr<strong>op</strong>hones:You can get more gain in a variety of locations. To do this, lower the systemgain after the first few filters are set, then move the micr<strong>op</strong>hone to another areawhere it will be used and raise the gain slowly as before. Repeat this processwhile you continue raising the gain until all filter LEDs cycle back and forthin sequence. This is your indication that the FBX is exiting setup mode.IMPORTANT: Reduce gain slightly. You are now in READY (performance)mode, with the Fixed filters locked and the blue Ready lighton. Begin the show!c. You may quit Setup mode at any time prior to its automatic exit by simplypressing the READY button (blue READY LED will flash). Press it again at anytime to lock the Fixed filters (blue READY LED stays on). Whether locked orunlocked, pressing the READY button before Setup mode automatically finisheswill enable ready-to-<strong>op</strong>erate status, but with fewer fixed FBX filters in place.Dynamic FBX filters are still available to eliminate new feedback, regardlessof how or when SETUP mode is exited. Begin the show!If you do not have time to use Setup Mode:Push Setup button until all LEDs st<strong>op</strong> flashing and the SETUP light flashes onits own, then press the READY button -- the blue LED flashes indicating thefixed filters are unlocked. Begin your show, and once several fixed filters areset we recommend you lock them by pushing ready again (blue LED stays lit).You won't get all the potential benefit of increased gain before feedback, butyou will get automatic feedback control during your performance.FILTER COLOR KEYFBX Filters LEDs Ready LEDFixed, Locked RED Steady BLUEFixed, Unlocked AMBER Flashing BLUEDynamic GREEN EitherFixed & Dynamic FiltersSee Section 4.1.3. for details onthe differences between Fixed andDynamic FBX filters, and Section5.2.2. for instructions on changingthe balance of Fixed versus Dynamicfilters.© 2011 <strong>Sabine</strong>, <strong>Inc</strong>.LIT-FBX2810-OP-EN-110112.indd5
SECTION FIVE — How to use FBX Features5.1. GainThere is no gain control on the the FBX2810. For best results adjust the mixer or channel output that is patched into the FBXso at least two of the LEDs on the FBX2810's input meters are lighting up steadily. Do not exceed the clipping level, indicatedby the red LED in the input meter. The FBX is a unity gain device, so the output level of the unit will be virtually identical tothe input level.5.2. FBX Filter Control5.2.1. Selecting Filter WidthIf you’re using the FBX for a music application, the standard 1/10-octave constant “Q” filter is most effective. However, inspoken word applications, such as lectures or teleconferencing, we recommend using the wider 1/5-octave filter for morerobust feedback control. You may enable the 1/5-octave filters by pressing the FIFTH OCTAVE button, and the built-in LEDwill light. Only filters set after pressing the button in will be 1/5-octave. Press the button again to set subsequent filters tostandard 1/10-octave filters.5.2.2. Setting Number of Fixed vs. Dynamic FiltersTo change the number of Fixed filters from the factory default of 11 Fixed and 3 Dynamic per channel, push the NUMBERFIXED button for 4 seconds. The filters LEDs will flash 4 times and then go out. Release the NUMBER FIXED button, andthe LEDs will begin to light in sequence. When the LED corresponding to the desired number of Fixed filters lights, press theNUMBER FIXED button again.IMPORTANT TIP: You can mix 1/10- and 1/5-octave filters in the same channel. If you have an especially bad feedback problem,try making the first few filters 1/5-octave filters.5.2.3. Resetting FBX FiltersAll FBX filters: To reset all FBX filters, follow the directions in Section4.2.Dynamic FBX filters only: To reset only Dynamic filters, press RESETDYNAMICS until the current Dynamic filter LEDs flash and then turn off.Release the button.Dynamic FBXfilters: Factory default of 3 Dynamic filters flashingjust before reset.5.3. Important Operating Considerations5.31. Power-Off MemoryThe FBX stores the positions and depths of the filters in nonvolatile internal memory when the unit is turned off or during apower failure. The unit will return all filters to their previous frequencies and depths when it is turned back on.5.3.2. Bypass ModeThe FBX has a true power-off bypass. The signal is unaffected in Bypass mode even if the unit is turned off.5.3.3. Setup ModeNOTE: Setup mode is for pre-performance audio setup only, and will cause distortion in your audio program if left on duringperformance. You must follow the setup procedure outlined in the previous section, and do not play program during Setupmode. Otherwise the FBX will clip and filters may be set impr<strong>op</strong>erly. (Clip level is set to the lowest level so the feedback clipsquickly; therefore, your program will also be clipped in setup mode. Be sure a dynamic filter is set, and if one isn’t, press theREADY button before your program begins.) You’ll know the FBX2810 is in setup mode when the SETUP button is lit.NOTE: You can manually override Setup mode if necessary.5.3.4. Mobile vs. Stationary Micr<strong>op</strong>honesOne significant advantage offered by the <strong>Sabine</strong> family of FBX Feedback Exterminator products is their ability to adapt to changingacoustical relationships involving sound system components in various applications. One major source of potential feedback problemsarises in situations with wireless micr<strong>op</strong>hones, when the user of the wireless mic is moving around the performance area. As amicr<strong>op</strong>hone moves in a sound space, with varying degrees of proximity to the speakers and varying acoustic responses, feedbackfrequencies may shift. In such a situation, feedback-free mobility may be more important a concern than maximum system gain.For this reason we recommend setting FBX filters for mobile micr<strong>op</strong>hones by moving to the various possible micr<strong>op</strong>hone locationsand setting filters for those locations. As the Setup instructions show, raise the system gain and set the FBX filters in each predictablelocation.In some situations, increasing the number of dynamic filters (versus fixed FBX filters) may allow a second layer of defense againstnew feedback from new locations. This technique is recommended if you cannot predict where the performer may roam. But fixedFBX filters placed in the setup procedure are still your best bet because the feedback filters are already set.6
SECTION SIX — TROUBLESHOOTING TIPSQ. Can I place the FBX in the mixer’s EQ lo<strong>op</strong>?A. Yes.Q. Can I place the unit in the mixer effects lo<strong>op</strong>?A. Avoid this configuration. You can configure the system this wayonly if each effects send of each mixer channel is set so thatall of the signal is routed completely through the effects lo<strong>op</strong>.You cannot mix dry signal with effects signal and still controlfeedback.Q. The signal input LEDs do not light. The unit will not catchfeedback. Why?A. The unit is not in the signal path. Check the connections. Besure that the program is interrupted when the input is disconnectedfrom the back of the unit.Q. Can I mix balanced and unbalanced inputs and outputs?A. Yes. An unbalanced input and balanced output is compatible.Refer to section 5.3. for more details.Q. Why does one of the FILTER ACTIVITY LEDs blink?A. The last filter to be automatically updated blinks. During normal<strong>op</strong>eration, the blinking will move from filter to filter as they arereset. This gives the user a visual confirmation that the unit isresponding to new feedback and is functioning pr<strong>op</strong>erly.Q. Sometimes during the initial setup, the first filter LED willblink before any feedback has been introduced into thesystem. Why?A. The FBX will set a filter if the system has a hum. Check forbad grounds. Try resetting the filters and/or the Ground switchon the rear panel.Q. Why does my system sound thin and muffled?A. Place the FBX in BYPASS MODE. If the system still soundsthin, your problem is probably impr<strong>op</strong>er use of a graphic EQ.If the problem is really the FBX, re-initialize the system andmake sure the READY button LED is on steadily.Q. Why does my program sound clipped and distorted?A. Make sure you are not in Setup mode. Setup mode turnsoff automatically after the first dynamic filter is set, or youcan turn it off manually by pressing the READY button. SeeSection 4.2 for information on Setup mode.Q. Can I patch two FBX channels together for twice thefilters?A. Yes; connect the output of one FBX channel to the input ofthe other channel. Place the FBX between the output of themixer and the input of a power amp, and set up the channelssequentially. When combining channel A with channel B onan FBX2810, bypass channel B while setting up channel A,then lock channel A’s fixed filters (all channel A’s filters shouldbe fixed) by pressing channel A’s READY button on the frontpanel after setup. The blue READY LED should remain lit.Q. Why doesn't the FBX2810 filter feedback immediately?A. Four possible reasons:1. Lower frequencies may take longer than higher ones.2. Check input level of signal at the unit and set gain so thesignal level LED's on the unit light up.3. It may be patched in an "effects lo<strong>op</strong>", not directly in thesignal path. This WILL NOT WORK.4. You may have used all 14 filters. Dynamic filters will continueto <strong>op</strong>erate by notching feedback frequencies as theyoccur, but ultimately, gain will exceed filter capacity.© 2011 <strong>Sabine</strong>, <strong>Inc</strong>.LIT-FBX2810-OP-EN-110112.indd7
SECTION seven — FBX Theory & Practice7.1. Introduction to FBX®WHY FBX? Feedback is certainly the most pervasive challenge to the audio industry. Thepotential appearance of sudden, loud, out-of-control feedback is every sound engineer’sand musician’s nightmare. Unlike more subtle audio quality problems or shortcomings,feedback is embarrassingly obvious — it disturbs the performer, the audience, and thetechnician, and can damage equipment and just generally ruin your day.Feedback is a potential problem in any amplified sound system that places a micr<strong>op</strong>honeor pickup in proximity to a loudspeaker. Poor acoustical conditions or mis<strong>guide</strong>d use byuns<strong>op</strong>histicated sound system <strong>op</strong>erators only aggravate the situation. To make matters stillworse, a non-<strong>Sabine</strong> variety of wireless micr<strong>op</strong>hone adds yet another level of feedbackdanger to the picture. Since feedback erupts whenever the distance, location, and gainrelationships between a speaker and a micr<strong>op</strong>hone reach a critical combination, a micthat can move anywhere results in an ever changing potential for feedback. A step in thewrong direction may change a clear sound to a piercing shriek in less than a second.This enhanced potential for feedback with a wireless system gets worse if lavalier micr<strong>op</strong>honesare used. Such micr<strong>op</strong>hones are usually placed farther from the mouth thanhandheld or head set micr<strong>op</strong>hones, thus requiring more gain. Also, the polar patternof a lavalier micr<strong>op</strong>hone is frequently omnidirectional. Thus, the likelihood of feedbackincreases, due to the micr<strong>op</strong>hone’s increased off-axis sensitivity to the sound emanatingfrom the loudspeakers.The <strong>Sabine</strong> FBX2810 systems solve feedback problems by precise attenuation of verynarrow bands of feedback-prone frequencies. The process is automatic, simple to use,adaptable to changing acoustical conditions and relationships, powerful in its application,and has minimal consequences to the audio fidelity of the signal. We call this automaticfilter an FBX Feedback Exterminator® filter, or FBX filter for short.7.2. The Advantages of FBX FiltersBefore the invention of FBX, the most common device for controlling feedback was the31-band graphic EQ. However, an FBX filter offers three distinct advantages over graphicfilters.1. First and most obvious is the automatic nature of FBX filters. When feedback occurs,FBX responds more quickly than even the most experienced engineer. AutomaticFBX placement works even in the presence of audio program material, intelligentlydistinguishing feedback from music or speech.2. A second advantage is that FBX micro-filters are precisely placed anywhere feedbackoccurs (with 1 Hz resolution), while graphic EQ filters are limited to 31 fixed centerpoints. An FBX filter represents a direct hit on feedback! In contrast, a graphic EQfilter can only approximate the exact frequency of the feedback, and the filter (or filters)with the closest center frequency must be pulled down. Such filters are deepest attheir centers, and such imprecise attenuation takes a big (and unnecessary) chunkout of your sound (see figure 7a).3. <strong>Inc</strong>reased clarity and gain-before-feedback are further accomplished by the third andmost important advantage of FBX: <strong>Sabine</strong>’s micro-filters are ten times narrower than31-band EQ filters. Using FBX micro-filters will return up to 90 percent of the powerremoved by EQ filters.Here’s a good place to make a very important distinction. Graphic EQ filters are typicallycalled “1/3-octave,” but it’s important to understand that this term refers to the spacing ofthe filter centers (1/3-octave apart), and not the width of the filter (usually a full octave).Graphic filters thus overlap one another, and affect frequencies well above and belowthe center point frequency, including frequencies of adjacent bands. This makes graphicequalizers very practical tools for shaping sound “with broad strokes,” such as dialing inoverall system EQ, but results in destructive audio quality overkill when they are usedto eliminate feedback. A graphic equalizer would need more than 10,000 narrow-bandsliders to be as precise and powerful as your FBX.As an example of the power of FBX, figure 7b shows test results measured with a PA setup consisting of a micr<strong>op</strong>hone, mixer, FBX Feedback Exterminator®, power amp and twospeakers. The system’s gain was first raised until the FBX removed nine feedback points.Next, the FBX was replaced with a graphic EQ. The EQ was adjusted while the systemgain was raised to the same level achieved with the FBX. The frequency response curvesof each device were then plotted and are compared in figure 7b. Note how much moreof the program (the “good audio”) is eliminated using an EQ — whereas only feedbackis eliminated using FBX filters.-10 dB cut at 500, 630, 1K, 1.25K, 1.6K & 2K HzIf the graphic EQ really had 1/3 octavefilter widths, the frequency response curvewould vary 6 dB between sliders. Thiswould ruin the sound.Fig. 7a.Graphic EQs usually use one-octavewideoverlapping filters that provide muchsmoother frequency response curves.Notice that the overlapping filters addtogether to cut -16 dB when the slidersare only pulled down -10 dB.8
7.3. Parametric Filters and FBXOf course, many savvy sound engineers, realizing the limitations ofgraphic equalizers in removing problem feedback, prefer to use adifferent type of equalizer, called a parametric EQ, for such applications.If you’re one such audio engineer, you’ll be comforted to knowthat FBX filters share much in common with parametrics.Compared to graphic filters, parametrics allow more precise adjustments— specifically, control of filter width, the amount of boost orcut, and the mid-band frequency of the filter. This greater precision,however, comes at a price, as parametric filters are not nearly asintuitive or simple to use as graphic equalizers.Nothing, however, is easier to use than an FBX filter, which enjoysthe precision of a parametric filter, yet deploys instantly and automaticallywhenever feedback is detected. Effectively, an FBX filter isa parametric filter set to a tenth-octave width, restricted to cut-onlyactivity, and automatic in its choice of frequency band.Fig. 7b.7.3.1. Dynamic FBX FiltersDynamic FBX filters also set automatically, but can change frequency, on a rotating basis,as the need arises. To help distinguish dynamic from fixed filters, consider the exampleof a speaker using a wireless lavalier micr<strong>op</strong>hone, who walks under a ceiling speaker forthe first time. In so doing, he enters a location-specific feedback zone, where it’s possiblethat a problem frequency may have escaped detection and notching by a fixed filter. Ifall fixed filters have been deployed, a dynamic filter will be set automatically as soon asfeedback appears, solving the problem. Great! But what happens when the speaker thenmoves away from the ceiling speaker, and close to a floor monitor? Feedback from theceiling speaker is no longer a problem, but a new frequency starts to squeal. If all fixedand dynamic FBX filters are already set, a dynamic filter will change, to adjust to the newlocation. An FBX dynamic filter thus stands guard if new problem feedback arises afterall available filters have been set, providing a deeper and more flexible level of protectionagainst the dreaded surprise of feedback. Other than the ability to change frequency, adynamic filter is equivalent to a fixed filter.7.3.2. Balancing Fixed & Dynamic FiltersEach channel of your FBX2810 offers a total of 14 FBX filters (combined fixed and dynamic),which can be used as needed to exterminate feedback. After years of experienceand experimentation, <strong>Sabine</strong> has settled upon a default balance of 10 fixed and 4 dynamicfilters, set at the factory. This default condition can be changed to any combination yourequire.If you follow setup instructions for setting FBX filters, your FBX2810 will automaticallyexit SETUP mode (enter READY status) after all fixed filters, and the first dynamic filter,have set. In the default condition, this means you will have set ten filters (nine fixed andone dynamic), with two dynamic filters still not set and remaining on standby alert. If youwish to set fewer filters, press the READY button before SETUP automatically exits, afteryou have set enough filters to safely achieve your desired gain level. In that case, in thefactory default condition, you will reserve three available dynamic filters for standby.7.3.3. FBX Filter Width<strong>Sabine</strong>’s experience and testing with filters and sound quality alone led us to decideupon a default FBX filter width of .10 (one-tenth) octave as the <strong>op</strong>timal notch width, ableto eliminate feedback without affecting music programs. If, with all filters pr<strong>op</strong>erly set,feedback is still a problem, FBX filters may be set to .20 (one-fifth) octave width. Thiswider filter setting will help to better eliminate feedback trouble areas, but may also affectmusic programs slightly. Therefore, the wider setting is generally considered to beappr<strong>op</strong>riate where speech (less demanding than music) is the primary application. Youcan globally change FBX filter width by pressing the FIFTH button on the front panel.The width of any set filter will always be determined by the position of the switch at thetime the filter is created.7.3.4. Who Benefits from FBX?Virtually every sound system will be improved with the <strong>Sabine</strong> feedback control. Singersand speakers who do not have sound technicians can now increase their monitor or housesystem volume so they can hear themselves clearly and with full fidelity, without worryingif their micr<strong>op</strong>hones will suddenly squeal if they move to the wrong place.Auditoriums and churches of all sizes will enjoy reliable feedback control. Hotels andconference centers around the world can offer meeting rooms with micr<strong>op</strong>hones that won’thowl during programs. <strong>Sabine</strong> FBX systems can be installed in theaters, schools, sportsarenas, courtrooms, teleconferencing rooms, intercoms or interactive remote classrooms— anywhere one or multiple micr<strong>op</strong>hones are used.© 2011 <strong>Sabine</strong>, <strong>Inc</strong>.LIT-FBX2810-OP-EN-110112.indd9