a b a b c d a b
a b a b c d a b
a b a b c d a b

You also want an ePaper? Increase the reach of your titles
YUMPU automatically turns print PDFs into web optimized ePapers that Google loves.
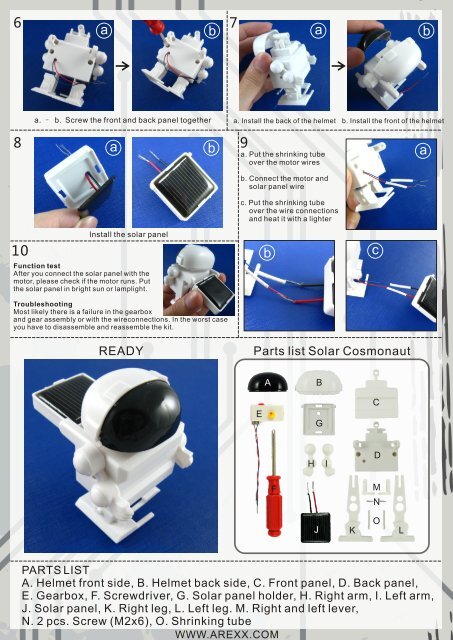
a b a ba. – b. Screw the front and back panel together a. Install the back of the helmet b. Install the front of the helmeta b aa. Put the shrinking tubea. over the motor wiresb. Connect the motor anda. solar panel wirec. Put the shrinking tubea. over the wire connectionsa. and heat it with a lighterInstall the solar panelFunction testAfter you connect the solar panel with themotor, please check if the motor runs. Putthe solar panel in bright sun or lamplight.TroubleshootingMost likely there is a failure in the gearboxand gear assembly or with the wireconnections. In the worst caseyou have to disassemble and reassemble the kit.bcREADYParts list Solar CosmonautABEGCHIDFMNOJ K LPARTS LISTA. Helmet front side, B. Helmet back side, C. Front panel, D. Back panel,E. Gearbox, F. Screwdriver, G. Solar panel holder, H. Right arm, I. Left arm,J. Solar panel, K. Right leg, L. Left leg. M. Right and left lever,N. 2 pcs. Screw (M2x6), O. Shrinking tubeWWW.AREXX.COM