THE SATO TH2 RETAIL LABEL PRINTER USER GUIDE
THE SATO TH2 RETAIL LABEL PRINTER USER GUIDE
THE SATO TH2 RETAIL LABEL PRINTER USER GUIDE

You also want an ePaper? Increase the reach of your titles
YUMPU automatically turns print PDFs into web optimized ePapers that Google loves.
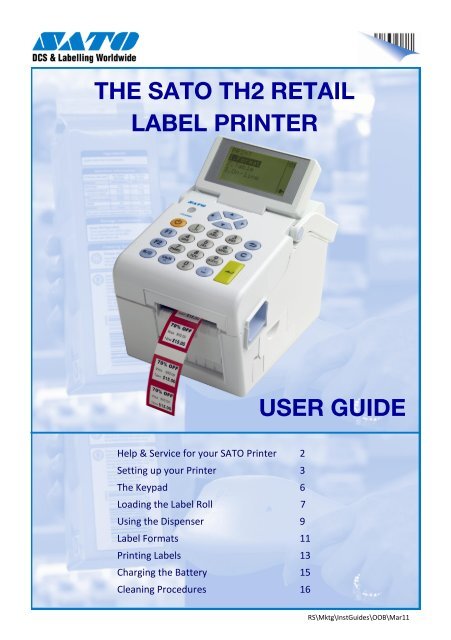
<strong>THE</strong> <strong>SATO</strong> <strong>TH2</strong> <strong>RETAIL</strong><strong>LABEL</strong> <strong>PRINTER</strong><strong>USER</strong> <strong>GUIDE</strong>Help & Service for your <strong>SATO</strong> Printer 2Setting up your Printer 3The Keypad 6Loading the Label Roll 7Using the Dispenser 9Label Formats 11Printing Labels 13Charging the Battery 15Cleaning Procedures 16RS\Mktg\InstGuides\OOB\Mar11
Assistance for your <strong>SATO</strong> PrinterYou should find that your <strong>SATO</strong> printer is straightforward to operate. However, ifyou should experience any difficulty, please contact our Helpdesk for assistance:Call: 01255 252828ore-mail: techsupport@satouk.comOrdering more labelsThe high quality <strong>TH2</strong> labels are manufactured by <strong>SATO</strong> in the UK and have beenespecially developed to give the best results in the <strong>TH2</strong> printer. These labels arerelied upon by many household name stores in UK retail.YellowLabel TypeSize45 X 34.925mm<strong>SATO</strong> ProductCodeP70011017451Permanent AdhesiveWhiteRed & WhiteReducedRed & WhiteSale32x 25.4mm28 x 33mm28 x 33mmP70010101601Peel adhesiveP70010109921Peel adhesiveP70010109961Peel adhesiveOrangeRedWhite40mm circular23mm circular45 X 47.625mmP70011014331Peel adhesiveP70010144861Peel adhesiveP70010101571Peel adhesive2
Setting up your <strong>SATO</strong> Printer (1)Inside the box:- <strong>TH2</strong> Retail Label Printer- Quick Guide- Mains AC Adaptor- Mains CableBatteryCharge LEDLCD DisplayTop coverCarrying HandleLabel OutDispenserLabel OutPrinter PartsTop CoverOpen LatchBattery CoverScannerConnector coverDC Inputfrom PowerAdaptorPower connectorDispenserSensorPrint headPrint head coverMedia compartmentLabel roll guidesPlaten RollerDispenser plateDispenser frame3Cover Open Parts
Power ConnectionSetting up your <strong>SATO</strong> Printer (2)Mains Power CableAC Adaptor1. Plug the Mains Power Cable into the ACAdaptorFlat of theplug to top!2. Plug the DC Output plug into it’s socket at therear of the printer.THIS PLUG ONLY FITS ONE WAY ROUND! The flatarea of the plastic plug should be upwards.AC AdaptorDC inputconnector3. Plug the Mains Power Cable into theMains supply socket.4
Notes:5
The Printer KeypadPowerPower On:Power Off:Menu/Page UpMenu:Up 1 level:DeleteSelect Dispense ModePause/FeedIn Print Mode:Feed Mode:Select AlphanumericsFull Stop/Space6
Loading the Label RollSELECT <strong>THE</strong> TYPE OF <strong>LABEL</strong> THAT YOU WISHTO PRINT AND INSTALL INTO <strong>THE</strong> <strong>PRINTER</strong>AS FOLLOWS:1. Push the handle fully back. Press the CoverOpen Latch (1) and lift up the cover (2).Ensure that the cover is in the “up” position.12MediaGuides2. Adjust the spacing of the Media Guides tothe widest position.3. Place the new label roll into the MediaCompartment. Labels upwards.Adjust the Media Guides inwards until theGuides press lightly against the roll.7
4. Position the edges of the labels under theLabel Guides and pull the end of the roll outof the front of the printer.5. Close the top cover until it clicks intoposition.6. Press the Power key for 1 second if theprinter is turned off.Press then the key to feedand align the first label.PowerFeed8
Using the Label DispenserThis feature will print and dispense a single label. As soon as the label is removed theprinter will issue the next label. This procedure will set up the printer for dispenseruse.1. SWITCH TO <strong>THE</strong> DISPENSE MODE:- Press the key.- Select 2. Profile and press .- Select 1. Dispense and Press toreturn to the Format menu .- The printer is now set to Label dispensing2. Open the printer Top Cover.Place two fingers at the top of the DispenserCover and pull forward to release the cover.DispenserCoverLabelGuides3. Fit the label roll into the printer and removethe first few labels from the backing paper.Position the edges of the roll underneath thetwo label guides.9
4. Thread the label backing paper underneaththe black rollers and out of the front of theprinter.5. Close the Dispenser Cover until it locks intoposition.Tighten the label roll if it is slack.DispenserCover6. Firmly close the Top Cover until it clicks intoposition.Switch the printer on and press the key until the first label is dispensed.You are now ready to print your labels.To return to Normal label mode1. SWITCH TO <strong>THE</strong> NORMAL MODE:- Press the key.- Select 2. Profile and press .- Select 2. Normal and Press toreturn to the Format menu .- The printer is now set to output labels onthe backing paperENSURE THAT <strong>THE</strong> <strong>LABEL</strong>S ARE LOADED ASSHOWN ON PAGES 8 & 910
Printing LabelsThere are 13 common label formats provided with your <strong>TH2</strong> printer. Select the functionand label required from the table below.Label FormatsLabelFormat No.FunctionLabel TypeLabel ReorderCode1Price, VAT & 1 xDescription fieldP7001010160132x252Price, VAT &2 x Item CodeP7001010157145x473Price, VAT & ItemCodeP7001101745145x354 Price OnlyP7001010160132x255Price Only,rotatedP7001010157145 x 476 Price OnlyP7001101745145x3511
Printer FormatNo.FunctionLabel TypeLabel ReorderCode7Price, Description& BarcodeP70010101601 32 x 258Price, Description& BarcodeP7001010157145 x 479Price, Description& BarcodeP7001101745145x3510Was/NowpricingP7001014471128X3311Was/NowpricingP7001010996128X3312 Price OnlyP7001014486123X2313Was/NowpricingP7001101433140X4012
1Printing LabelsPrinting labels is done by selection of the required label format and following the onscreenprompts. Label Format 9, text, price and barcode is used in this example.1. Ensure that the printer is switched ON.(Hold the Power key for 1 second).Select the required label format number byscrolling the list or by entering the Formatnumber.Press 2. Input the first line of text as requested. This maybe a code or a description etc. The maximum numbersof characters is 10.Use the key to choose eitherupper or lower case letters, or numbers. The type ofcharacter selected is shown in the top right corner ofthe display.Press ENTER>IndicatesSelection:3. Enter the article price using the key to input the decimal point.Press 13
14. Input the Barcode data. The standard EAN13code requires 12 digits. Press The 13th digit is calculated automatically.5. Enter the required number of labels andpress .Your labels will be printed immediately.NOTE that for safety reasons, there is noserrated edge to tear your labels.Tear off the labels using a downwards andsidewards motion.6. The printer will returns to screen 1 of theselected format. If you wish to select a newlabel format press the keyto return to the Label Format selection screen.PAGE UP key14
1Cleaning ProceduresRegular cleaning will ensure that your <strong>SATO</strong> printer always produces highquality labels. Please follow the procedure below each month.1212Switch off the printer.Press the Cover Open Latch (1).Lift up the cover fully (2).Ensure that the cover is in the“up” position.Remove the label roll.34Using a new cleaning wipe, carefullyclean the surface of the print headremoving any adhesive or label debris.The product code for <strong>SATO</strong> cleaningwipes is Y70190103786Clean the Label Sensor cover using awipe.Continued on next page 16
1Cleaning Procedures continued56Clean the length of the rubber PlatenRoller. Rotate the roller to clean thewhole surface.Install the label roll and position thesides of the labels under the LabelGuides. Close the Top Cover and theprinter is ready for use.For effective cleaning use <strong>SATO</strong> Cleaning wipes,Product Code Y70190103786Assistance for your <strong>SATO</strong> PrinterCall: 01255 252828ore-mail: techsupport@satouk.com17