Model No. SG-WAC-05SM - SoleusAir
Model No. SG-WAC-05SM - SoleusAir
Model No. SG-WAC-05SM - SoleusAir

Create successful ePaper yourself
Turn your PDF publications into a flip-book with our unique Google optimized e-Paper software.
ELECTRICAL REQUIREMENTSThe electrical ratings for your air conditioner are listed on the model and serialnumber label located on the front left side of the unit (when facing the front).Specific electrical requirements are listed in the chart below. Follow therequirements below for the type of plug on the power supply cord.Wiring RequirementsPower Supply CordElectrical Shock HazardPlug into a grounded 3 prong outlet.Do not remove the ground prong.Do not use an adapterDo not use an extension cord.Failure to follow these instructions can result in death,fire, or electrical shock• 115 volt (103.5 min.—126.5max)• 0-12 amps• 15-amp time-delay fuse orcircuit breaker• Use on single outlet circuit onlyRecommended Ground MethodFor your personal safety, this air conditioner must be grounded. This air conditioner is equipped with a 3 prong powersupply cord with a grounded plug. To minimize the possibility of electrical shock, the cord must be plugged into a 3 prongoutlet and grounded in accordance with all local codes and ordinances. If a 3 prong outlet is not available, it is the customer’sresponsibility to have a properly grounded 3 prong outlet installed by a qualified electrician.It is the customer’s responsibility:• To contact a qualified electrician• To assure that the electrical installation is adequateand in conformance with the National Electrical Code,ANSI/NFPA 70 - latest edition, and all local codes andordinances.Copies of the standards listed may be obtained from:National Fire Protection AssociationOne Batterymarch ParkQuincy, Massachusetts 02269LCDI Power Cord and PlugThis air conditioner is equipped with an LCDI (Leakage Current Detection and Interruption) power cord and plug asrequired by US National Electric Code 440.65. This cord consists of a length of shielded flexible cord with no terminationon the load side and a LCDI attachment plug on the line side.The LCDI power cord and plug will remove the supply source via electrical disconnect (circuit trip) if the nominal currentleakage between the cord shield and either load conductor exceeds a predetermined value. The cord will remain deenergizeduntil the devise has been manually reset. This is intended to reduce the risk of a fire in the power cord orcombustible materials nearby. The cord shields are not grounded and they must be considered a shock hazards ifexposed. The cord shield must not be connected to ground or to any exposed metal.The test and reset buttons on the LCDI Plug are used to check ifthe plug is functioning properly. To test the plug:1. Plug power cord into a wall outlet2. Press the TEST Button, the circuit should trip and cut allpower to the air conditioner3. Press the RESET button for useIf a test is performed and the indicator light remains ON, thecurrent leakage has been detected. Do not use the airconditioner or attempt to reset the LCDI Plug. Contact CustomerService for troubleshooting recommendations.3
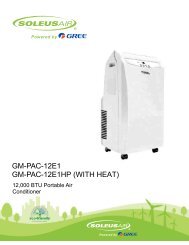
PACKING LIST• Window Air Conditioner• Top Mounting Rail• Top Mounting Rail Seal Strip• 3/8” Screw for Top Mounting Rail (4)• Accordion Panels (2)• Window Locking Bracket• Window Sash Seal• 3/4” Screw for Window Locking Bracket and Accordion Panels (5)• Foam Top Window Gasket• Owner’s ManualSPECIFICATIONS• <strong>No</strong>ise level is measured at a distance of 3.28 ft away from the front of the unit in cooling mode.• Power consumption is measured when the fan runs at the highest speed setting.• These specifications are for reference only. For actual data, please refer to the rating label on the back of the unit.<strong>Model</strong>Power Supply (Ph/V/Hz)<strong>SG</strong>-<strong>WAC</strong>-<strong>05SM</strong>1/115/60HzDehumidifying Capacity (Pints/Day) 38.4Rated Cooling Capacity (BTU/h) 5,000Rated Heating Capacity (BTU/h) /Cooling Power Input (Watts) 515Heating Power Input (Watts) /Rated Current Cooling (Amperage) 4.9Rated Current Heating (Amperage) /EER/C.O.P9.7 EER<strong>No</strong>ise Level db (A) H/L 55/62CFM 120Design Pressure (PSIG) (H/L) /Dimensions (W” x H” x D”) 16.125 x 13.25 x 12Package Dimensions (W” x H” x D”) 17.875 x 14.375 x 15.25Net/Gross Weight (Lbs) 40Refrigerant Charge (Oz) 44DISCLAIMERALL INFORMATION AND THE TECHNICAL SPECIFICATIONS PRESENTED IN THIS USER’S MANUAL ARE THEPRESENTATION OF THE MANUFACTURER. SOLEUS INTERNATIONAL HAS NOT CONDUCTED INDEPENDENTTEST TO THE INFORMATION AND THE SPECIFICATIONS PRESENTED HEREWITHIN.4
INSTALLATION & ASSEMBLY INSTRUCTIONSSome assembly is required for your new air conditioner. Please read and follow these instructions carefully.1. This air conditioner is designed to be installed in astandard double-hung window with a window width FIG. 1between 23” and 36” (584 mm - 914 mm).2. The air conditioner can be installed without theaccordion panels to fit in a narrow window opening.See the window dimensions.3. The Lower Sash (the lower part of the window thatmoves up and down) must allow for 14.5” of verticalclearance when open. (See FIG. 1).4. All supporting parts must be secured to firm wood,masonry, or metal.5. The electrical outlet must be within reach of the powercord.NOTE: Save the product packaging and installation instructionsfor future reference. Store the air conditioner in theproduct box when not in use for an extended period of time.Top Rail AssemblyThe top rail must be assembled prior to installing the air conditioner in the windowTools Needed: Phillips Screw DriverTop RailTop Rail HardwareQTY3/8”ScrewTopPanel41BoxFIG. AFIG. BAttaching the Top Rail to the Air Conditioner1. Remove the air conditioner from the boxand place on a hard flat surface.2. Remove top rail from the bottom of thepackaging material as shown in FIG. A3. Align the hole in the top rail with those inthe top of the unit as shown in FIG. B4. Secure the top rail to the unit with the 3/8"Screws as shown in FIG. CFIG. CWhen handling the unit, be careful to avoid cuts fromthe sharp metal edges and aluminum fins on the frontand rear coils.5NOTE: For safety reasons, all 4screws must be used to attachthe top rail.
ASSEMBLY & INSTALLATION (CONT.)Accordion Panel Installation<strong>No</strong>w that you have installed the top rail, you can now installthe accordion panels on each side.1. Place the air conditioner on a hard flat surface.2. Locate the accordion panels in the box.3. Gently pull the free end of the accordion panel (SeeFIG. 2). Do this for both panels.FIG. 2Storm Window RequirementsA storm window frame will not allow the air conditioner totilt properly which in turn will keep it from draining properly.To adjust for this, attach a board or piece of wood to thesill. The board or wood piece should have a depth of atleast 1 1/2”. Make sure the board or piece of wood is approximately1/2” higher than the storm window frame. Thiswill allow the air conditioner to tilt enough for proper drainage.(See FIG. 2).FIG. 2SASH4. Slide the free end of the accordion panel into the sidepanel of the air conditioner (See FIG. 3). Do this foreach side.STORMWINDOWFRAME1 1/2” MIN(38 mm)Board or woodpiece must beapproximately1/2” higherthan the stormwindow framefor properdrainageFIG. 35. Once the accordion panels are slid into place adjustthe top and bottom rails of the accordion panels intothe top and bottom rails of the air conditioner (See FIG.4).Placing the Unit Inside a Window1. Place the air conditioner on the sill with the bottommounting rail against its back edge. Center the air conditionerand close the window securely behind the topmounting rail. The air conditioner should be slightlytilted to the outside area. Use a level; about a 1/3 bubblewill be the correct case slant to the outside. (SeeFIG. 5 & FIG. 6)FIG. 6FIG. 4FIG. 52. Once the air conditioner is placed, extend both the leftand right accordion panels to the width of the window.FIG. 76
ASSEMBLY & INSTALLATION (CONT.)Frame Lock, Sash Lock, and Foam SealInstallation3. To secure the lower sash into place, use the sash lockand a 3/4” screw as shown below (See FIG. 12)MOUNTING HARDWARE3/4” ScrewsQty7Frame Lock2Sash Lock1Tools Needed:Phillips Screw DriverDrill (if plot holes are needed)1. Place the frame lock between the extended accordionpanels and the window sill as show in FIG. 8. Screw a3/4” (19 mm) locking screw through the frame lock andinto the window sill (FIG. 9).4. For added insulation, cut the supplied insulation foam tothe width of the window. Insert the foam between thewindow sashes to prevent air and objects from gettinginto the room. (See FIG. 13)FIG. 132. Drive 1/2” screws into the top of the accordion panelframe and the top rail to securely attach the window airconditioner to the lower sash. (See FIG. 11/12)Removing the Air Conditioner from theWindow1. Turn the air conditioner off, and disconnect the powercord.2. Remove the sash seal from between windows, andunscrew sash lock.3. Remove the screws installed through the frame andframe lock.4. Close (slide) the side panels into frame.5. Keeping a firm grip on air conditioner, raise the sashand carefully “rock” air conditioner backward to drainany condensate water in base of unit. Be careful not tospill any remaining water while lifting unit from window.6. Store parts WITH the air conditioner in the box7
USING YOUR AIR CONDITIONERManual Control PanelOperating Your Air Conditioner1. Power: Turn on the unit by rotating theMODE dial to the desired setting.2. Cooling Mode: For maximum cooling set theMODE dial to “HIGH COOL”. In HIGH COOLmode, the fan will automatically go to high.This will help circulate the cool air throughoutthe room. The fan will operate on low in “LOWCOOL” mode3. Fan Mode: For fan only modes, chooseeither HIGH FAN or LOW FAN. The airconditioner will not cool the room when in fanmode.4. Thermostat: Turn the TEMP dial to set thedesired room temperature. For maximumcooling turn the TEMP dial to 7 (coolest).5. Directional Louvers: To direct the airflow,rotate the small vertical louver wheel next tothe air vent on the front of the air conditionerLOUVER WHEELNOTE: To minimize wear and tear on the airconditioner, always wait at least 3 minutes beforechanging modes. This will help prevent thecompressor from overheating and the circuitbreaker from tripping.<strong>No</strong>rmal Operating Sounds• You may hear a pinging noise caused by water hittingthe condenser, on rainy days, or when the humidity ishigh. This design feature helps remove moisture andimprove efficiency.• You may hear the thermostat click when the compressorcycles on and off.• Water will collect in the base pan during rain or days ofhigh humidity. The water may overflow and drip fromthe outside part of the unit.• The fan may run even when the compressor is not on.8
CARE AND CLEANINGClean your air conditioner to keep it looking newand to minimize dust build up.Air Filter CleaningThe air filter should be checked at least onceevery month to see if it needs cleaning. Trappedparticles and dust can build up in the filter andmay decrease airflow as well as cause thecooling coils to accumulate frost. To clean the airfilter:1. Remove the filter by sliding it out from thefront right side of the air conditioner. (SeeFIG. 13)2. Wash the filter using liquid dish soap andwarm water. Rinse the filter thoroughly. Gentlyshake the filter to remove excess water.3. Let the filter dry completely before placing itinto the air conditioner.4. If you do not wish to wash the filter, you mayvacuum the filter to remove the dust andother particles.Cabinet CleaningTo clean the air conditioner cabinet:• Unplug the air conditioner to prevent shock ora fire hazard. The cabinet and front panel ofthe air conditioner may be dusted with an oilfreecloth or washed with a cloth dampened ina solution of warm water and mild liquid soap.Rinse thoroughly with a damp cloth and wipedry.• Never use harsh cleaners, wax or polish onthe cabinet front.• Be sure to wring excess water from the clothbefore wiping around the controls. Excesswater in or around the controls may causedamage to the air conditioner.Winter StorageTo store the air conditioner when it is not in usefor an extended period of time, remove it carefullyfrom the window according to the installationinstructions and cover it with plastic or place it inthe original box.FIG. 139
TROUBLESHOOTINGPROBLEMThe Air Conditioner will not startThe Air Conditioner does not coolas it shouldThe Air Conditioner is freezing upThe Remote Control is not working(if included with your air conditioner)POSSIBLE CAUSESThe air conditioner is unpluggedThe fuse is blown/circuit breaker istripped.Power FailureThe current interrupter device istripped.Airflow is restrictedThe temperature control may not beset correctly.The air filter is dirtyThe room may be too warmCold air is escapingThe Cooling Coils are frozenIce blocks the air flow and stops the airconditioner from cooling the roomThe batteries are inserted incorrectlyThe batteries may be deadSOLUTIONS• Make sure the air conditioner isplug is pushed completely into theoutlet• Check the house fuse/circuitbreaker box and replace the fuseor reset the breaker.• The unit will automatically re-startwhen power is restored.• There is a protective time delay(approx. 3 minutes) to preventtripping of the compressoroverload. For this reason, the unitmay not start normal cooling for 3minutes after it is turned back on.• Press the RESET button locatedon the power cord plug.• If the RESET button will not stayengaged, discontinue use of theair conditioner and contact aqualified service technician.• Make sure there are no curtains,blinds, or furniture blocking thefront of the air conditioner• Turn the TEMP dial to a highernumber• Clean the filter. See the Cleaningand Care Section of the manual.• Please allow time for the room tocool down after turning on the airconditioner.• Check for open furnace registersand cold air returns• See “Air Conditioner Freezing Up”below.• Set the MODE dial to HIGH FA<strong>No</strong>r HIGH COOL and set the TEMPdial to 1 or 2• Check the position of the batteries.• Replace the batteries10
TROUBLESHOOTING (CONT.)PROBLEMWater is dripping outsideWater is dripping inside the roomPOSSIBLE CAUSESHot and Humid weather.The air conditioner is not correctlytilted outside.SOLUTIONS• This is normal• For proper water drainage, makesure the air conditioner is slightlytilted downward from the front ofthe unit to the rear.Water collects in the base panMoisture removed from the air isdraining into the base pan.• This is normal for a short period inareas with low humidity and normalfor a longer period in areaswith high humidity.11
WARRANTYOne Year Limited WarrantySoleus International, Inc. warrants the accompanying Soleus Air Powered by Gree Air Conditioner to be free of defectsin material and workmanship for the applications specified in its operation instruction for a period of ONE (1) yearfrom the date of original retail purchase in the United States.If the unit exhibits a defect in normal use, Soleus International will, at its option, either repair or replace it, free ofcharge within a reasonable time after the unit is returned during the warranty period.As a condition to any warranty service obligation, the consumer must present this Warranty Certificate along with acopy of the original purchase invoice.THIS WARRANTY DOES NOT COVER:• Damage, accidental or otherwise, to the unit while in the possession of a consumer not caused by a defect inmaterial or workmanship.• Damage caused by consumer misuse, tampering, or failure to follow the care and special handling provisionsin the instructions.• Damage to the finish of the case, or other appearance parts caused by wear.• Damage caused by repairs or alterations of the unit by anyone other than those authorized by Soleus InternationalInc.• Freight and Insurance cost for the warranty service.• Filter and AccessoriesALL WARRANTIES, INCLUDING ANY IMPLIED WARRANTY OF MERCHANT ABILITY ARE LIMITED TOONE-YEAR DURATION OF THIS EXPRESS LIMITED WARRANTY. SOLEUS INTERNATIONAL INC.DISCLAIMS ANY LIABILITY FOR CONSEQUENTIAL OR INCIDENTAL DAMAGES AND IN NO EVENTSHALL SOLEUS INTERNATIONAL INC’S LIABILITY EXCEED THE RETAIL VALUE OF THE UNIT FORBREACH OF ANY WRITTEN OR IMPLIED WARRANTY WITH RESPECT TO THIS UNIT.This warranty covers only new products purchased from our authorized dealers or retailers. It does not cover used, salvaged,or refurbished products.As some states do not allow the limitation or exclusion of incidental or consequential damages, or do not allowlimitation on implied warranties, the above limitations and exclusions may not apply to you. This warranty gives youspecific legal rights, and you may also have other rights that vary from state to state.For Technical Support and Warranty ServicePlease Call (888) 876-5387Or Write To:Soleus International, Inc.20035 E. Walnut Dr. N.City of Industry, CA 91789www.soleusair.comwww.soleusgreen.com12