SPRAY-GUN WASHER IWK H2O Mod. H20 - Anest Iwata
SPRAY-GUN WASHER IWK H2O Mod. H20 - Anest Iwata
SPRAY-GUN WASHER IWK H2O Mod. H20 - Anest Iwata

You also want an ePaper? Increase the reach of your titles
YUMPU automatically turns print PDFs into web optimized ePapers that Google loves.
Instruction Manual<strong>SPRAY</strong>-<strong>GUN</strong> <strong>WASHER</strong> <strong>IWK</strong> <strong>H2O</strong><strong>Mod</strong>. <strong>H20</strong>For manual washing with waterBefore use, adjustment or maintenance, it is important toGB read this instruction manual very carefully. The manualmust be stored in a safe place for any future reference that maybe necessary.ANEST IWATA Europe S.r.l.46, Corso Vigevano10155 Torino - ItaliaTel. +39 011-22 74 408/2Fax +39 011-22 74 406www.anest-iwataeu.come-mail: info@anest-iwataeu.com
<strong>SPRAY</strong>-<strong>GUN</strong> <strong>WASHER</strong> <strong>IWK</strong> <strong>H2O</strong> <strong>Mod</strong>. <strong>H2O</strong>TABLE OF CONTENTS1. INTRODUCTION..................................................................................................................................................................31.1 GUARANTEE ......................................................................................................................................................................31.2 APPLICATION ....................................................................................................................................................................41.2.1 WASHING PRODUCTS ......................................................................................................................................................51.3 DESCRIPTION ....................................................................................................................................................................61.4 IDENTIFICATION ................................................................................................................................................................81.5 TECHNICAL SPECIFICATIONS ........................................................................................................................................81.6 SOUND LEVEL....................................................................................................................................................................91.7 DANGER SIGNS AND WARNING SIGNALS ....................................................................................................................92. GENERAL SAFETY AND ACCIDENT-PREVENTION REGULATIONS ..........................................................................102.1 LEVELS OF DANGER AND TERMINOLOGY ..................................................................................................................102.2 CLOTHING ........................................................................................................................................................................112.3 ECOLOGY AND POLLUTION ..........................................................................................................................................112.4 STANDARDS FOR SAFE OPERATION............................................................................................................................122.5 DEMOLITION AND DECOMISSIONING ..........................................................................................................................133. SHIPMENT AND UNLOADING ........................................................................................................................................134. POSITIONING....................................................................................................................................................................134.1 CHECKS BEFORE INSTALLATION ................................................................................................................................144.2 INSTALLATION..................................................................................................................................................................145. INSTRUCTIONS FOR USE ..............................................................................................................................................156. SEPARATING THE PAINT FROM THE WATER................................................................................................................157. HYDROPNEUMATIC SYSTEM ........................................................................................................................................167.1 OPERATION ......................................................................................................................................................................168. MAINTENANCE AND PERIODICAL CHECKS ................................................................................................................178.1 CLEANING THE SMALL VENTURI PUMP ......................................................................................................................188.2 CLEANING THE NEBULIZER ..........................................................................................................................................189. LIST OF SPARE PARTS ..................................................................................................................................................19ANEST IWATA EUROPE reserves the property of the following manual. Any reproduction or disclosure of this manualwithout prior approval by the owner is expressly prohibited.For any claims, accidents or the like, the legally approved text will be one in the manufacturer's language.ANEST IWATA EUROPE WAIVES any and all liabilities for damages by misinterpretations or incorrect use caused by imperfector imprecise translations.2
<strong>SPRAY</strong>-<strong>GUN</strong> <strong>WASHER</strong> <strong>IWK</strong> <strong>H2O</strong> <strong>Mod</strong>. <strong>H2O</strong>1. INTRODUCTIONThis manual contains instructions for the installation, use and maintenance of the <strong>IWK</strong> <strong>H2O</strong>. In the following manual, the<strong>IWK</strong> <strong>H2O</strong> will be referred to as Spray-gun washer. This manual is an integral part to the product and should be kept with duecare in order to allow for its use and consultation during the life of the Spray-gun washer.The regular operation, economy and safety of the Spray-gun washer depends on the compliance with the instructions given in thismanual. It is mandatory to follow the procedures as described in this manual.This manual must be read and understood perfectly prior to installing, using or performing any type ofoperation or maintenance on the machine. The Spray-gun washer must be used exclusively for thewashing of spray-guns or small parts, using water or water-based solvents with specific characteristics.Use of the Spray-gun washer for processing other than the type indicated in this manual is consideredimproper use and is therefore prohibited. ANEST IWATA EUROPE declines any and all responsibilitiesfor damages caused by the Spray-gun washer to persons, animals or property, due to use other than theuse described herein, or for damages due to negligence or failure to observe the instructions containedin this manual.The Spray-gun washer is manufactured according to the provisions contained in the following European Directives:- Directive 98/37/CE (Machine Safety).- Directive 94/9/CE (Equipment to be used in potentially explosive environments).With reference to the Directive 94/9/CE (“ATEX” directive) the Spray-gun washer is a machine designed and built to work in compliancewith the operating parameters fixed by ANEST IWATA EUROPE and guarantees a normal level of protection in regard tothe appliances group II, category 2. The machine supplied is accompanied by the following documents:- CE Declaration of conformity.- CE Mark.- Manual for use and maintenance.1.1 GUARANTEEUpon delivery of the Spray-gun washer, it is necessary to make sure that no damages have occurred during shipment and the supplyof accessories is complete and undamaged. Claims must be filed within 8 days of delivery. The buyer is eligible for the guaranteecoverage only when he has complied with the guarantee conditions listed below.ANEST IWATA EUROPE guarantees its products under the following conditions:a) The Spray-gun washer is guaranteed for a period of two years from the date of purchase as certified by a delivery documentissued by the Dealer. When the customer requests guarantee service, he must specify the model, serial number and year ofmanufacture of the appliance.b) The guarantee covers free replacement or repair of the appliance component parts which are recognized to have manufacturingdefects without any charge for labour.c) Guarantee services are performed at the manufacturer's factory or at authorized service centres. The appliance must be sentalready prepaid to them and shall be returned to the customer at his own expense and risk. If any intervention by technicians isrequested under guarantee coverage at the customer's installation site, then the customer shall be charged for the transfertime, for mileage and for all board and lodging expenses according to the valid fees applied by the Service Centre. No chargeis made for the time required to repair and replace parts.d) The manufacturer waives all liability for any damage that may directly or indirectly be caused to persons or property resultingfrom failure to comply with all the provisions in the instruction manual. In particular, this regards failure to comply with warningsabout placing, installing, operating and maintaining the appliance. The present guarantee does not cover any reimbursement fordirect or indirect damage due to appliance down-time. Guarantee coverage is only valid when payments are all in due order.e) This agreement is governed by current law in the Republic of Italy. Any controversy deriving from this agreement shall be settledby the Court in Turin, Italy.3
<strong>SPRAY</strong>-<strong>GUN</strong> <strong>WASHER</strong> <strong>IWK</strong> <strong>H2O</strong> <strong>Mod</strong>. <strong>H2O</strong>In addition to the cases stated above, guarantee coverage is waived in the following cases:- Whenever the Spray-gun washer has been handled or operated incorrectly by the operator.- Whenever the damage is due to insufficient maintenance.- Whenever the Spray-gun washer has been damaged by modifications following repairs done without the consent ofANEST IWATA EUROPE or the installation of non-original spare parts.- Whenever the owner/operator fails to comply with the instructions given in this manual.- Whenever corrosive solvents are used that do not correspond to legal standards or included among those listed byANEST IWATA EUROPE.1.2 APPLICATIONThe Spray-gun washer was designed and built exclusively to wash spray-guns or small-sized pieces, using clean water or specialwater-based solvents. The Spray-gun washer can be used only to wash parts that have been soiled with paint. Pieces must bemade of metal, preferably steel or anti-static material, and must have a weight that does not exceed 10 kg. Ensure that the pH ofthe water-based solvent ranges between 6.5 and 12 when used instead of water to wash parts. The fluid solvent mixture should notcontain inflammable components; if such components are present, the concentration must not exceed 8%.PROHIBITED USES OF THE <strong>SPRAY</strong>-<strong>GUN</strong> <strong>WASHER</strong>:All washing operations of objects or products that are not included in this manual, or of objects approved (spray-gun and small components)but with solvents with specifications other than those indicated in this manual, are expressly forbidden:WARNINGThe Spray-gun washer must be used exclusively for the purpose for which it was designed and built. Allother uses not covered by this manual are to be considered inappropriate and are strictly forbidden.ANEST IWATA EUROPE declines any and all responsibility for damage to persons, animals and propertyderiving from improper use of the Spray-gun washer and/or from failure to observe the instructions inthis manual.The Spray-gun washer has been designed and built by ANEST IWATA EUROPE in order to guarantee a high level of protection,efficient operations and conformity with the working parameters provided for devices group II, category 2 in explosive atmospherescaused by gas, vapour or mist in compliance with Directive 94/9/CE (ATEX).The Spray-gun washer is fitted with protection systems that guarantee the required level of protection also when recurring troublesor working faults of the appliance itself are expected.Thanks to such design and manufacture, the Spray-gun washer can be used in environments where the atmosphere is potentiallyexplosive which are classified according to the following risk areas (Directive 1999/92/CE).• ZONE 1 : Area in which - during normal working activities - an occasional explosive atmosphere is to be expected which consistsof a composition of air and flammable substances in form of gases, vapours or mists.The device can always be used in areas where there is a lower risk of explosion, such as in zone 2.Since the Spray-gun washer was built to wash spray-guns using clean water or water-based solvents devoid of inflammable components,there are no restrictions with respect to the installation of other machines near the Spray-gun washer.4
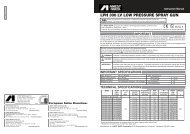
<strong>SPRAY</strong>-<strong>GUN</strong> <strong>WASHER</strong> <strong>IWK</strong> <strong>H2O</strong> <strong>Mod</strong>. <strong>H2O</strong>1.2.1 WASHING PRODUCTSSpray guns and accessories can be washed with:• Clean water.• Water-based solvent. In this case, the mixture must have the following characteristics: pH between 6.5 and 12; absenceof inflammable components; if present, their concentration must not exceed 8%.The above washing products must comply with the anti-pollution legal requirements as provided for by the laws in force in theCountry where the Spray-gun washer is being usedWARNINGIt is prohibited to use solvent to wash spray guns.5
1.3 DESCRIPTION<strong>SPRAY</strong>-<strong>GUN</strong> <strong>WASHER</strong> <strong>IWK</strong> <strong>H2O</strong> <strong>Mod</strong>. <strong>H2O</strong>The Spray-gun washer basically consists of a steel container (see fig.1) housing:• A stainless steel tank to collect the used water (pos.2 fig.1).• A grill (pos. 6G fig 1) positioned on the stainless steel tank.• A nebulizer (pos.22 fig.1).• A small pump (pos. 21 fig.1).• A brush connected to the water mains (pos.36 fig.1).• An air distributor to mix the water with the flocculant powder (pos. 35 fig.1).• A washing tank drain valve (pos.30 fig.1).• A kit to separate the paint from the water (pos. W50 - W51 - W52 - W53 - fig.1).• A hose (pos.23 fig.1) for the intake of water for the nebulizer.• A hose (pos.24 fig.1) for the intake of water for the small pump.• A lower door.From the upper control panel, the operator can control:• The clean water pump (pos.19 fig.1)• The clean water nebulizer (pos. 18 fig.1),• The clean water from the water supply of the company (pos.18C fig.1).• The air regulator to mix the used water with the flocculant powder (pos.1 fig.1).<strong>SPRAY</strong>-<strong>GUN</strong> <strong>WASHER</strong> DESCRIPTION ( See figure 1 ):1 Flow regulator2 Stainless steel tank3 Lower door magnet4 Blow gun supply hose.4A Blow gun.6G Stainless steel grill.10 Compressed air outlet fitting for air gun.11A Lower door.12 Air inlet fitting with filter.18 Nebulizer control lever.18C Water control lever to the main water supply.19 Small pump control lever.21 Small pump22 Nebulizer.22C Water outlet fitting.23 Nebulizer supply hose.23C Main water supply inlet fitting.23R Water throttle valve (to be connected to the 23C fitting and the main water supply).24 Pump supply hose.30 Wash tank drain valve.35 Air distributor .36 Washing brush74 Earthing cable.W-50 Pre-filter bag.W-51 Filter bag.W-52 Small perforated container.W-53 Large container for regenerated water.6
<strong>SPRAY</strong>-<strong>GUN</strong> <strong>WASHER</strong> <strong>IWK</strong> <strong>H2O</strong> <strong>Mod</strong>. <strong>H2O</strong>Figure 1NB. When ordering spare parts, always indicate the:<strong>Mod</strong>el, Serial Number and Construction Year.7
<strong>SPRAY</strong>-<strong>GUN</strong> <strong>WASHER</strong> <strong>IWK</strong> <strong>H2O</strong> <strong>Mod</strong>. <strong>H2O</strong>1.4. IDENTIFICATION (See fig. A).Every Spray-gun washer has a CE identification plate that showsA - Manufacturer's brand.B - Manufacturer's name and address.C - CE Mark.D - Danger Group, Class, Type in compliance with the “ATEX” DirectiveE - Amount of washing product.F - Year of manufacture.G - Serial numberH - <strong>Mod</strong>el.I - Maximum Pressure.N.B.: The H - G - F data listed in the identification plate must be always specified when calling for service and/or supply of spareparts.Figure A1.5 TECHNICAL SPECIFICATIONSDescription Measuring unit QuantityMass (Weight). kg 44Height mm 1335Width mm 450Depth mm 660Maximum operating pressure bar 10Feeding air operating pressure. bar 6÷10Recommended pressure when the spray-gun washer is working. bar 8Air consumption (average) at 8 bar. Nm3/h 16Capacity of the washing tank (pos.2 fig.1). dm3 (litres) 50Lower container capacity (pos.W53 fig.1). dm3 (litres) 708
<strong>SPRAY</strong>-<strong>GUN</strong> <strong>WASHER</strong> <strong>IWK</strong> <strong>H2O</strong> <strong>Mod</strong>. <strong>H2O</strong>1.6. SOUND LEVELThe sound level emitted by the Spray-gun washer has been measured under working conditions using a sound level meterwith integrator.Measures were taken by a skilled laboratory technician in accordance with EN ISO standard 3746: 1995. Results are as follows:• Acoustic pressure equivalent average level:LpAm = 74,5 dB (A)• Acoustic pressure level at the operating post: LpA = 83,8 dB (A)• Conventional Acoustic pressure level: LwA = 89,4 dB (A)1.7 DANGER SIGNS AND WARNING SIGNALSThe Spray-gun washer carries the manufacturer's identification plate as well as pictograms (labels) that warn against residual riskspresent on the machine.Figure 2 indicates the danger signs and signals and shows where the Manufacturer's identification plate is normally placed.These warning signals have the following meanings:1. Manufacturer's brand. CE Mark, <strong>Mod</strong>el, Serial number and Year of Manufacture, Maximum pressure, Danger Group, Class,Type in compliance with the “ATEX” Directive Group, Amount of washing product.2. Generic hazard.3. Read the instruction manual carefully before starting work with the Machine.4. The use of open flames and smoking near the machine is prohibited.5. Put on a protective mask before working with the machine.6. Put on solvent-proof rubber gloves before starting work.7. Put on protective eyewear before starting work.8. Disconnect the compressed air supply before starting any maintenance or repair operations in the machine.9. Ensure that the hoses are well fitted in the drum.10. Check the water level in the drum periodically to avoid overflows.Figure 29
<strong>SPRAY</strong>-<strong>GUN</strong> <strong>WASHER</strong> <strong>IWK</strong> <strong>H2O</strong> <strong>Mod</strong>. <strong>H2O</strong>2.4 STANDARDS FOR SAFE OPERATION• The Spray-gun washer was designed and built to be used in an environment in which an explosive atmosphere, consisting of amixture of air and flammable substances in the form of gas, vapour or mist, is likely to occur in normal operation occasionally: theSpray-gun washer guarantees a normal level of protection in conformity with equipment group II, category 2, in accordancewith EC directive 94/9.• The Spray-gun washer must be exclusively used for the purpose for which it was designed and built, i.e. to wash spray-gunsand small containers and objects dirty with paint.• It is prohibited to use solvents or products that are not in conformity with the specifications indicated in this manual, or which donot comply with legal norms.• It is prohibited to use solvents that have a pH value of less than 6.5 or greater than 12 for washing operations. If the mixture containsflammable substances, the concentration must not exceed 8%.• It is strictly forbidden to let the Spray-gun washer be used by persons who have not fully read, understood and perfectly graspedthe contents of this instruction manual.• The use of the Spray-gun washer by incompetent or inadequately trained personnel or by persons not in perfect health is strictlyforbidden.• Do not punch and scratch metal parts on the Spray-gun washer walls: this might cause sparks.• It is forbidden to rest objects over 10 kg weight on the Spray-gun washer grill (pos. 6G fig. 1).• It is forbidden to connect and disconnect too often the air supply hose from the fitting (pos. 12 fig. 1).• It is forbidden to place nylon, plastic, glass wool, fiberglass or similar over or next to the Spray-gun washer to prevent theformation of electrostatic charges.• It is forbidden to use plastic drums (pos.27 and 28 fig.1).• It is forbidden to use welders or open flame appliances and handle incandescent materials in the area where the Spray-gunwasher is installed.• Make sure all safety devices are in perfect operating condition before starting to use the Spray-gun washer.• You must make sure not to splash and spill their contents on the workshop floor when loading and unloading.• It is obbligatory that the operator intending to use the Spray- gun washer is sure to have eliminated any eventual eletrostaticcharges accumulated accidentally, before starting work.• Before using the Spray-gun washer it is obbligatory to connect the external earthing cable (pos. 74 fig. 1) to the workshopplant.• Before using the Spray-gun washer, you must ensure that the supply and discharge hoses (pos.23-24 fig.1) are well insertedin their containers; be careful to avoid hose bending; make sure that they are not damaged.• It is mandatory that you check periodically that the water level inside the drums (pos.2 fig.1) is not too high to avoid overflow.• It is recommended that you become familiar with controls and their functions before starting to work.• It is recommended that you replace the dirty water whenever necessary, recovering the water by using the specific Kit, or bydelivery to a specialised waste treatment company.• It is recommended that before draining the dirty water from the tank (pos.2 fig.1) you make sure that the two containers(pos. W52-W53 fig.1) and the pre-filter (pos. W50 fig.1) and the filter (pos. 51 fig. 1) are positioned under the valve(pos.30 fig.1). Open the valve (pos.30 fig.1). Let the dirty water drain slowly to avoid overflows.• It is recommended that you replace the prefilter (pos.W50 fig.1) at each discharge operation and that when the dirty water isfiltered from the tank (pos.2 fig.1).• If the machine is not used for a long period, it is recommended that you drain the tank (pos. 2 fig 1) and rinse with cleanwater. When the tank has drained completely, remove the air supply.• If the washing product comes into contact with eyes or skin, wash the contaminated parts with abundant fresh water.12
<strong>SPRAY</strong>-<strong>GUN</strong> <strong>WASHER</strong> <strong>IWK</strong> <strong>H2O</strong> <strong>Mod</strong>. <strong>H2O</strong>DANGERIt is forbidden to spray and/or blow with the gun aimed at the operator or other persons:THIS COULD CAUSE SERIOUS DAMAGE TO HEALTH.Before using the Spray-gun washer, ensure that the following measures are taken:• It is forbidden to use water to extinguish fires. If the materials come in contact with water, it could generate noxious or flammablegases or greatly increase in temperature.• Suitable fire extinguishing systems, including portable fire extinguishers for first aid purposes, must be installed depending onthe conditions in which they will be used. These appliances must be kept in working order and inspected at least every sixmonths by an expert.• It is mandatory that in case of an emergency that personnel get easily and quickly away from danger zones.2.5 DEMOLITION AND DECOMISSIONING.Upon demolition or decommissioning of the Spray-gun washer, we recommend that you take the necessary precautions to avoiddanger to exposed persons and the risk of environmental pollution:• Disconnect the Spray-gun washer from the pneumatic energy source and discharge the residual energy accumulated.• Residual liquid possibly left in the sink and hoses of the equipment must be carefully drained.• The other parts of the Spray-gun washer must be treated in accordance with the regulations for special waste. Proceed by disassemblingthe machine: group the various units and parts into homogeneous lots and provide for their disposal separately, in accordancewith environmental protection laws in the country where the machine is installed.In general, please bear in mind that:• Plastic or rubber parts are special waste.• Ferrous scrap and carpentry are special waste.3. SHIPMENT AND UNLOADINGThe Spray-gun washer is shipped in a carton with the markings < fragile > and < keep upright >. With the use of a cart, move theSpray-gun washer near to where it is to be installed, take it out of the carton and pallet and make sure that no damages have occuredduring shipment.4. POSITIONINGIt is obligatory to place the Spray-gun washer on a smooth, horizontal surface, in an environment with a temperature between0° C and 60° C. The Spray-gun washer was designed and built to be used in an environment in which an explosive atmosphere,consisting of a mixture of air and flammable substances in the form of gas, vapour or mist, is likely to occur in normal operation occasionally:the Spray-gun washer guarantees a normal level of protection in conformity with equipment group II, category 2, inaccordance with EC directive 94/9.WARNINGThe air pressure must be limited to not more than 10 bar. If the air supply is at a higher pressure, installa filter-regulator-reducer unit with a pressure gauge and adjust the pressure to 8 bar.13
<strong>SPRAY</strong>-<strong>GUN</strong> <strong>WASHER</strong> <strong>IWK</strong> <strong>H2O</strong> <strong>Mod</strong>. <strong>H2O</strong>4.1 CHECKS BEFORE EQUIPMENT INSTALLATIONBefore installation, check that the air supply pressure to the Spray-gun washer is at least 8 bar. If not, install a storage tank to ensuresufficient autonomy for the Spray-gun washer.WARNINGAll the following operations of installation, adjustment and testing must be carried out exclusively byqualified and responsible personnel who can guarantee application of safety standards in the mechanicaland compressed air fields.4.2 INSTALLATIONComply with the following instructions when installing the Spray-gun washer:• Remove the cardboard packing. Two persons can use a hand trolley to move the appliance to the desired installation site and toa perfectly flat area. Connect the earthing cable (supplied, yellow and green) to the bolt near the compressed air inlet fitting(pos.12 fig.1) and to ground.• Using Teflon tape, install the air-gun fitting (pos.4A fig.1).• Connect the blowing gun supplying hose (pos. 4 fig 1) to the air outlet fitting (pos. 10 fig 1).• Connect the external ground cable (pos. 74 fig.1) to the workshop system.• Install the flow regulator valve (pos.23R fig1) to the water inlet valve (pos.23C fig.1) and connect it to the water mains.• Pour approximately 10 litres of water into the tank (pos.2 fig.1) and approximately 30 litres into the tank (pos. W53 fig.1). Insertthe hoses (pos.23 and 24 fig.1) in the tank itself.• Adjust the fresh water flow by means of the valve (pos.23R fig.1).• Before use, we suggest a peelable paint be applied to the inside walls of the tank to facilitate periodical cleaning.• Connect the filtered air delivery hose to the fitting (pos.12 fig.1). The hose shall have an inside diameter of at least 8-mm. Werecommend that you use a fast-connecting fitting for air delivery in order to facilitate the periodical lubrication (3-4 times a year)with nebulizer oil.14
5. INSTRUCTIONS FOR USERemove the spray gun cover, empty the remaining contents in an external recipient, remove the paint cup and set the parts on thegrill (pos.6G fig.1).Operate as follows:<strong>SPRAY</strong>-<strong>GUN</strong> <strong>WASHER</strong> <strong>IWK</strong> <strong>H2O</strong> <strong>Mod</strong>. <strong>H2O</strong>• Wash the parts with a brush employing the used water in the tank (pos.2 fig.1)• Wash the parts again using the nebulizer (pos.22 fig.1).• Use the small pump (pos.21 fig.1) to take water from the tank and spray the parts.• Last, wash the parts with the washing brush (pos.36 fig.1).• Pull the trigger of the spray gun to be cleaned and using the air gun (pos.4A fig.1) blow in the paint channel and blow off allthe outside of the spray gun for final drying.WARNINGBE CAREFUL to avoid the water dirty with paint in the tank (pos.2 fig.1) exceeding the level of the grill(pos.6G fig.1).6. SEPARATING THE PAINT FROM THE WATEROperate as follows:• Remove the grill (pos.6G fig.1) from the tank, pour the flocculant in the dirty water and mix by hand until wet.• Adjust the airflow with the regulator (pos. 1 fig.1), to avoid water overflow from the tank. After 8-10 minutes mixing, close the airand check that the paint is well coagulated. If not repeat the operation.• Open the regulator (pos.1 fig.1) again with the water and coagulated paint still moving, open the valve (pos. 30 fig 1) to pourthe mixture in the pre-filter bag (pos. W50 fig.1).• Open the water regulating valve (pos. 23R fig. 1) as much as possible, open the valve (pos. 18C fig. 1) and, with the brush(pos. 36 fig.1) rinse the washing tank (pos. 2 fig 1).• After filtering the water, pour the sludge from the filter in an outside container and deliver to a specialised waste treatment company.The water in container (W53) can be re-used.• Before starting again with the Spray-gun washer, pour with the brush (pos. 36 fig. 1) approximately 10 litres of water in thewash tank (pos. 2 fig 1) and approximately 30 litres in container (pos. W53 fig.1).• Replace the grill (pos. 6G fig 1).N.B. : For an ideal coagulation, do not add water and paint with other products (ex. solvent, detergent, additives, etc) inthe washing tank. (pos.2 fig.1)15
<strong>SPRAY</strong>-<strong>GUN</strong> <strong>WASHER</strong> <strong>IWK</strong> <strong>H2O</strong> <strong>Mod</strong>. <strong>H2O</strong>7. HYDROPNEUMATIC SYSTEM (see fig 3)1. Air filter. 8. Clean water tank.2. Bottle neck.(1.8 mm) 9. Control ball valve.3. Air gun. 10. Nebulizer.4. Flow regulator. 11. Control ball valve.5. Air distributor. 12. Small pump.6. Wash tank. 15. Ball valve (water control).7. Water discharge ball valve. 16. Water throttle valve.17. Brush with fresh water outlet.Figure 37.1 OPERATIONThe compressed air inlet passes through the filter (1) and feeds the bottle neck (2), the air gun (3), the flow regulator (4) and theball valves (9) and (11). Valve (9) supplies the nebulizer (10). Valve (11) supplies the small pump (12). The flow regulator (4) suppliesthe distributor (5). The ball valve (15) controls the water supply of the company, which is regulated by the valve (16) and is connectedto the brush (17). Valve (7) drains the dirty water from tank (6) to the recovered water tank (8).16
<strong>SPRAY</strong>-<strong>GUN</strong> <strong>WASHER</strong> <strong>IWK</strong> <strong>H2O</strong> <strong>Mod</strong>. <strong>H2O</strong>8. MAINTENANCE AND PERIODICAL CHECKSThe following ordinary maintenance procedures must be performed. Extraordinary maintenance (repair of basic machine components)must be carried out by qualified personnel only, according to the listed instructions in this manual.• Disconnect the compressed air supply before carrying out any repair or maintenance work.• Check periodically that safety devices are in good repair and work satisfactorily.• Never remove or tamper with any safety devices.• The pictograms (labels) applied to the Spray-gun washer provide suitable indications for the avoidance of accidents. Thesepictograms must be kept clean and replaced immediately if even partly missing or damaged. The use of the Spray-gun washeris absolutely prohibited if even one only of the diagrams is missing from the point where it was placed by the manufacturer.• During repair and maintenance use only original spare parts.• Check that the machine is always connected with the earthing cable.• Remove any encrustation from the grill (pos.6G fig.1).• Check and clean periodically the air inlet filter, which is inside the fitting (pos.12 fig.1), if possible without removing the fittingitself.• Check that the water level in the wash tank (pos.2 fig.1) is not over the grill placed above (pos.6G fig.1).• Check that the hoses (pos. 23 and 24 fig.1) are not bent, worn or broken and that they are well inserted in tank (W53 fig. 1).• Clean and rinse the wash tank, when removing the dirty water (pos.2 fig.1).• Replace the pre-filter bag (pos.W50 fig.1) after each filtration.• Clean or replace the filter bag (W51).17
<strong>SPRAY</strong>-<strong>GUN</strong> <strong>WASHER</strong> <strong>IWK</strong> <strong>H2O</strong> <strong>Mod</strong>. <strong>H2O</strong>8.1 CLEANING THE SMALL VENTURI PUMP1. Ensure that the discharge hose A is not obstructed.2. Unscrew the nut B.3. Dismantle the hose C.4. Dismantle the fitting D.5. Clean the nozzle E with an iron thread.8.2 CLEANING THE NEBULIZER1. Dismantle the fitting A.2. Dismantle the hose B.3. Dismantle the fitting C4. Clean the nozzle D with an iron thread.18
<strong>SPRAY</strong>-<strong>GUN</strong> <strong>WASHER</strong> <strong>IWK</strong> <strong>H2O</strong> <strong>Mod</strong>. <strong>H2O</strong>9. LIST OF SPARE PARTSWhen ordering spare parts, cite as well as the code number, the CE plate data:<strong>Mod</strong>el - Serial Number - Year of Manufacture.CodeDescription1 Flow regulator3 Lower door magnet4 Air blow gun supply hose4A Air blow gun6G Stainless steel grill10 Compressed air outlet fitting11A Lower door12 Air inlet fitting with filter18K Control panel kit with lever18L Control levers only18C-K Control valve kit with lever18C-L Control lever only21 Small pump22 Nebulizer22C Spray nozzle23 Nebulizer supply hose24 Small pump supply hose30 Wash tank drain valve35 Air distributor36 Washing brushW-50 5 prefilter bags kitW-51 Filter bagW-52 Small and perforated containerW-53 Large regenerated water tank19
ME<strong>H2O</strong>E00-19.09.06ANEST IWATA Europe S.r.l.46, Corso Vigevano 10155, Torino ItalyDirect Tel. +39 011 - 24 80 868Fax +39 011 - 22 74 406info@anest-iwataeu.comwww.anest-iwataeu.comANEST IWATA Italia S.r.l.46, Corso Vigevano 10155, Torino (Italy)Tel. diretto +39 011 - 24 80 868 - Fax +39 011 - 85 19 44info@anest-iwataeu.comwww.anest-iwata.itANEST IWATA Europe S.r.l.SUCURSAL ESPAÑA Y PORTUGALAvda.del Maresme, 44-46 Planta 2 OF. 25 / 08918 - Badalona (Barcelona)Tel.:+34 933 20 59 93 - Fax.:+34 933 20 55 64 - info@anest-iwata.esANEST IWATA Europe S.r.l.NIEDERLASSUNG DEUTSCHLANDDorfäckerstr. 25, 74248 EllhofenTelefon: +49 (0)7134- 917368 - Fax: +49 (0)7134 - 917378Handy: +49 (0)172 - 62 74 542f.e.anest-iwata@t-online.dewww.anest-iwata.deEuropean Sales Branches:ANEST IWATA Scandinavia AB.Ögärdesvägen 6C, 433 30 PARTILLETel. +46 (0)31 - 340 28 60 - Fax +46 (0)31 - 340 28 69info@anest-iwata.sewww.anest-iwata.seANEST IWATA France S.A.25 rue de Madrid - BP 7405 38074 St Quentin FallavierTél. +33 (0)4 - 74 94 59 69 - Fax +33 (0)4 - 74 94 34 39info@anest-iwata.frwww.anest-iwata.frANEST IWATA U.K. Ltd.Unit 10 Little End Road - Eaton SoconSt. Neots - CAMBRIDGESHIREPE19 8JHTel.: +44 (0) 1480 405419 Fax: +44 (0) 1480 217610enquiries@anest-iwata.co.uk www.anest-iwata.co.uk