VS-R StroboRackâ„¢ User Manual - Peterson Tuners
VS-R StroboRackâ„¢ User Manual - Peterson Tuners
VS-R StroboRackâ„¢ User Manual - Peterson Tuners

Create successful ePaper yourself
Turn your PDF publications into a flip-book with our unique Google optimized e-Paper software.
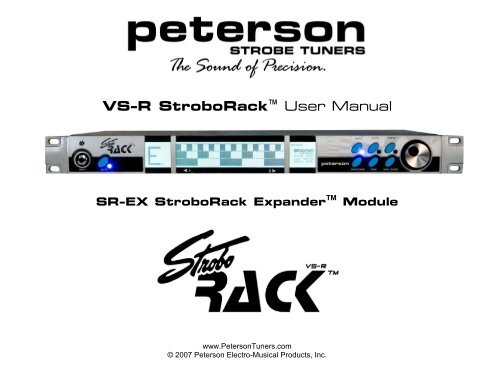
<strong>VS</strong>-R StroboRack <strong>User</strong> <strong>Manual</strong>SR-EX StroboRack Expander TMModulewww.<strong>Peterson</strong><strong>Tuners</strong>.com© 2007 <strong>Peterson</strong> Electro-Musical Products, Inc.
CONTENTSSafety Instructions_____________________________________________________________________4Introduction ___________________________________________________________________________5Using Your New StroboRack TM ____________________________________________________________5Front Panel Features____________________________________________________________________7Rear Panel Features ____________________________________________________________________8Rear Panel with SR-EX Expander Module ___________________________________________________9StroboRack TM Rear Panel Features (With SR-EX TM Module Installed) _____________________________10StroboRack TM Front Panel Screens _______________________________________________________11StroboRack TM Front Panel Controls _______________________________________________________12Menu Button _________________________________________________________________________13Cents Button _________________________________________________________________________18Preset Button_________________________________________________________________________18Sweetener Button _____________________________________________________________________18Drop Tuning Button____________________________________________________________________19Save Button _________________________________________________________________________ 19Audio Tones_________________________________________________________________________ 19<strong>Peterson</strong> Sweeteners ________________________________________________________________ 20A Word About <strong>Peterson</strong> Sweeteners_______________________________________________________21A Word About Temperaments____________________________________________________________22Setting up Presets on the <strong>Peterson</strong> StroboRack______________________________________________23Recalling Presets _____________________________________________________________________ 24Setting Guitar & Bass Intonation Using Your <strong>Peterson</strong> StroboRack _______________________________25<strong>User</strong>-Programmable Sweeteners_________________________________________________________ 26Rear Panel Lamp _____________________________________________________________________ 26Optional StroboRack Accessories ________________________________________________________ 26Remote Control Options ________________________________________________________________26StroboRack SR-EX Pro Expander Module _________________________________________________ 27Tips To Keep Your Instrument In Tune_____________________________________________________28StroboRack TM Signal Routing____________________________________________________________ 30Frequently Asked Questions_____________________________________________________________40Warranty & Specifications_______________________________________________________________413
IMPORTANT SAFETY INSTRUCTIONS• READ, FOLLOW, HEED, AND KEEP ALL INSTRUCTIONS AND WARNINGS.• DO NOT OPERATE NEAR ANY HEAT SOURCE AND DO NOT BLOCK ANY VENTILATION OPENINGS ON THIS APPARATUS.• DO NOT USE THIS APPARATUS NEAR SPLASHING, FALLING, SPRAYING, OR STANDING LIQUIDS.• CLEAN ONLY WITH A LINT-FREE, DAMP CLOTH AND DO NOT USE CLEANING AGENTS.• ONLY CONNECT POWER CORD TO A POLARIZED, SAFETY-GROUNDED OUTLET WIRED TO CURRENT ELECTRICAL CODES.• PROTECT THE POWER CORD FROM DAMAGE DUE TO BEING WALKED ON, PINCHED, OR STRAINED.• UNPLUG THE APPARATUS DURING LIGHTNING STORMS OR WHEN UNUSED FOR LONG PERIODS OF TIME.• ONLY USE ATTACHMENTS AND ACCESSORIES SPECIFIED BY THE MANUFACTURER FOR SAFE OPERATION AND TO AVOID INJURY.• WARNING: TO REDUCE THE RISK OF ELECTRICAL SHOCK OR FIRE, DO NOT EXPOSE THIS UNIT TO RAIN OR MOISTURE.• SERVICE MUST BE PERFORMED BY QUALIFIED PERSONNEL.CAUTIONRISK OF ELECTRIC SHOCK.DO NOT OPEN.WARNING: TO REDUCE THE RISK OF FIRE OR ELECTRICALSHOCK, DO NOT EXPOSE THIS APPARATUS TO RAIN OR MOISTURE.TO REDUCE THE RISK OF ELECTRIC SHOCK, DO NOTREMOVE COVER. NO USER-SERVICEABLE PARTS INSIDE.PRECAUCIONRIESGO DE CORRIENTAZO.NO ABRA.PRECAUCION: PARA REDUCIR EL RIESGO DE INCENDIOS O DESCARGASELECTRICAS, NO PERMITA QUE ESTE APARATO QUEDE EXPUESTO A LALLUVIA O LA HUMEDAD. PARA DISMINUOIR EL RIESGO DE CORRIENTAZO.NO ABRA LA CUBIERTA. NO HAY PIEZAS ADENTRO QUE EL USARIO PUEDOREPARAR DEJE TODO MANTENIMIENTO A LOS TECHNICOS CALIFICADOS.ATTENTIONRISQUE D'ELECTROCUTION.NE PAS OUVRIR.ATTENTION: PROTÉGEZ CET APPAREIL DE LA PLUIE ET DE L'HUMIDITÉ.AFIN D'ÉVITER TOUT RISQUE D'INCENDIE OU D'ÉLECTROCUTION. POURREDUIRE D'ELECTROCUTION NE PAS ENLEVER LE COUVERCLE. AUCUNEPIECE INTERNE N'EST REPRABLE PAR L'UTILISATEUR. POUR TOUTEREPARATION, S'ADRESSER A UN TECHNICIEN QUALIFIE.Note: This equipment has been tested and found to comply with the limits for a Class B digital device, pursuant to part 15 of the FCC Rules. These limits are designed to provide reasonable protectionagainst harmful interference in a residential installation. This equipment generates, uses and can radiate radio frequency energy and, if not installed and used in accordance with the instructions, may causeharmful interference to radio communications. However, there is no guarantee that interference will not occur in a particular installation. If this equipment does cause harmful interference to radio or televisionreception, which can be determined by turning the equipment off and on, the user is encouraged to try to correct the interference by one or more of the following measures:-- Reorient or relocate the receiving antenna.-- Increase the separation between the equipment and receiver.-- Connect the equipment into an outlet on a circuit different from that to which the receiver is connected.-- Consult the dealer or an experienced radio/TV technician for help.Unauthorized changes or modifications to this system can void the user’s authority to operate this equipment.4
IntroductionThe <strong>Peterson</strong> StroboRack TM <strong>VS</strong>-R is a unique rack mount tuner with an unequalled real-time display and accuracy of 0.1 cent using <strong>Peterson</strong>’s exclusive VirtualStrobe Technology. It has a full complement of exclusive Sweetened Tunings TM for guitar, bass, steel guitar and Dobro ® and a wide range of classicaltemperaments for other instruments. It is also a programmable tuner, allowing you to program up to eight of your own tempered tunings as well as giving you accessto 33 other preset temperaments and Sweeteners TM . The StroboRack is the first tuner to offer inputs for instruments with mono, stereo and balanced signals (withoptional SR-EX module installed).We strongly advise you to read this manual thoroughly to get the most out of your new StroboRack.Using Your New <strong>Peterson</strong> StroboRack TMThe StroboRack accepts any voltage between 95 and 250VAC automatically; no adjustment is needed for operation with most global voltage standards. Simply usea power cable with the correct power plug for your country or location.Basic OperationUsing the included power cable, connect your StroboRack to a grounded A/C power outlet.Connect a ¼” patch cord between the output jack of the StroboRack and the input jack of your amp or FX unitUsing a ¼” cord connect your instrument to the front input…or rear input of the StroboRack. The front input overrides the rear input.Remember to first activate the mute function to avoid possible noise while plugging in your instrument.5
Switch on the unit using the power switch located beside the A/C receptacle on the rear panel.Play a note on your instrument, then observe the note displayed on the note screen.After noting the note name and octave, observe the Virtual Strobe TM screen.A movement of the image to the left indicates that the instrument’s note is flat; a movement to the right indicates that the note is sharp.When the strobe image hovers or becomes immobile, the note is in tune to within 0.1 cent.Strobe Newbie?If you’re new to strobe tuners, you will notice that they are much more sensitive and accurate than your previous tuner. This may mean that initially you’ll need toadjust your “touch“ when you pluck a string to tune.Instead of a plectrum, use your finger or thumb to gently pluck the string.You can also use this short cut – simply reduce the volume of your instrument, until you become accustomed to tuning accurately.The StroboRack’s TM superior accuracy makes it the ideal intonation tool; use it to regulate your instrument’s intonation to your own personal taste.6
StroboRack TM Front Panel in Depth1 2 3InputJackTSMuteButtonNote/OctaveDisplayVirtualStrobeDisplayStroboRack Front Panel Features:Menu ScreenPresetSWTDropHzCents4 5 6A B C D E F GMenu Buttons1= MENU2= CENTS3= PRESET4= SWEETENER5= DROP6= SAVEDataWheelA. Input Jack – ¼” metal chassis-mounted jack. When engaged, overrides rear combo jack input.B. Mute Button - backlit when pressed; mutes all active outputs, inactive if footswitch is engaged (LED will indicate status in either case).C. Note Display - constantly on; displays note octave and sharp/flat sign.D. Strobe Display - constantly on or only on when tuning; selectable in menu.E. Menu Screen - constantly on; displays current settings.F. Menu Buttons - backlit when pressed; gives the Data Wheel control over its parameter’s value.G. Data Wheel - rotation changes the value of the backlit menu button’s parameter, pressing selects the value.7
StroboRack TM Rear Panel FeaturesA/CPowerON/OFFA/CPowerINLampON/OFFSwitchBNC Goose-NeckLampSocketToneOut(AudioTones)MuteFootswitchInputTSOutputTSInputTSH I J KL M N OH. A/C Power Switch – rocker type switch.I. Screw-In A/C Power Fuse Receptacle - chassis-mounted.J. Lamp Power On/Off Rocker Switch - chassis-mounted.K. BNC Power Socket 12V - chassis-mounted for gooseneck light.L. Mono Output - ¼” chassis mounted metal jack on rear panel of StroboRack for audio reference tone output.M. ¼” TS* Socket - mutes with single TS* footswitch.N. Mono Output - ¼” chassis mounted metal jack on rear panel of StroboRack. This is the audio output jack.O. Mono Input Jack – ¼” metal chassis-mounted jack. Active unless input A is engaged, overrides this jack input.8
StroboRack TM Rear Panel (With SR-EX TM PRO Expander Module Installed)A/CPowerON/OFFA/CPowerReceptacleLampON/OFFSwitchChannelSelectorFootswitchInput(TRS)Mute/PresetFootswitchInput(TRS)#1Output(TS)#2Output(TS)ComboInput(XLRTRSTS)H I JMNR S TKLO P QGoose-NeckLight Socket(BNC)AudioTonesOutGND/LIFTSWITCHDIOutput(XLR)DIInput(TS)9
StroboRack TM Rear Panel Features (With SR-EX PRO Expander Module Installed)H. A/C ON/OFF Power Switch – rocker.I. A/C Power Receptacle - chassis-mounted.J. Lamp Power On/Off Rocker Switch - chassis-mounted.K. BNC Power Socket 12V - chassis-mounted for gooseneck lamp.L. Audio Tones Output - ¼” chassis mounted metal jack on rear panel of StroboRack for audio reference tone output.M. ¼” TRS** Socket - AA/BB channel select with TRS dual latching footswitch stereo Input ¼” chassis mounted metal jack socket on rear panel of StroboRack.This is an input for a dual stomp switch which is routed as follows: Tip=Output #1, Ring = Output #2, Sleeve = Ground.N. ¼” TRS** Socket - mute with single TS* latching footswitch, or mute/preset switch with TRS latching dual footswitch stereo input ¼” chassis mounted metaljack socket on rear panel of StroboRack. This is an input for a single or dual footswitch which is routed as follows: Tip=Mute, Ring = Preset Change, Sleeve= Ground.O. Three Position Slider Switch - position 1 = DI GND, position 2 = Auto GND Detect, position 3 = DI GND LIFT.P. Male XLR*** Socket – DI/ balanced signal output. This output accepts signal from inputs A & T, except when DI input jack Q is engaged, in which case thesignal from Q takes precedence.Q. Mono Input - ¼” chassis mounted metal jack on rear panel of StroboRack. This jack is linked directly to the DI output P, and enables the user to connect oneof the outputs with the DI using a patch cord or use the DI for another instrument besides the one being tuned by StroboRack.R. Mono Output - ¼” chassis mounted metal jack on rear panel of StroboRack. This is the main audio output jack.Both this output and output S are wired respectively to tip & sleeve of combo input T, in order to facilitate stereo in/out operation. If mono input A is engaged,combo input T is overridden/ disengaged and input A tip feeds signal to R output only, output S is muted.S. Mono Output - ¼” chassis mounted metal jack on rear panel of StroboRack connected to ring of combo input T. This output jack is a second output to feed asecond amp or can be patched to DI input jack R, and can also be selectable using a footswitch. If M engages with a dual TRS footswitch, one or bothoutputs can be selected (R or S or both).T. Combo input female XLR, TRS & TS jack - chassis mounted with two Philips screws on rear panel of StroboRack. This jack will function only if front panelinput A is not engaged. This input accepts a regular mono signal, a stereo signal or a balanced signal.*TS = ¼” Tip-Sleeve - Tip carries signal and Sleeve is ground.**TRS = ¼” Tip-Ring-Sleeve - Tip and Ring carry two mutually independent signals and Sleeve is common ground.***XLR = Three Pin Balanced - pin 1 = ground, pin 2 = + and pin 3 = - .10
StroboRack TM Front Panel ScreensThere are three screens on the front panel:1. Note ScreenThis screen displays the note currently being tuned/ tracked by the tuner and its octave represented by a number. Please note that if nothing is plugged into the inputjacks, the StroboRack’s built-in mic is automatically enabled and will pick up whatever sounds are in the vicinity.2. Strobe ScreenThis screen displays the stroboscopic tuning image.If the image moves to the left, the note being tuned is flat; if it moves to the right, the note is sharp. To get the note in tune, make adjustments to the tuningmechanism of the instrument to be tuned until the strobe image is hovering or completely immobile.3. Info ScreenThis screen displays the settings that are currently active in the tunerThese settings include concert pitch, drop tuning, Sweetener TM / temperament, cents and preset.11
StroboRack TM Front Panel ControlsThere are seven buttons on the front panel of the StroboRack. One is on the left, which mutes the tuner’s output(s).The adjacent blue LED indicates the status of the mute function. When this LED is lit, the tuner’s output(s) are muted for silent tuning; when the LED is off, theoutputs are un-muted and the instrument signal passes through the tuner unhindered.Connecting an optional mute pedal to the rear mute pedal jack socket disables the front panel mute button, but the status LED operates in either case.On the right hand side of the StroboRack, six buttons and a data wheel offer complete control over the tuner’s operation and programming features.After pressing one of the buttons,- the parameters on the info screen can be highlighted by rotating ...- or edited by gently pressing the data wheel. Holding the Data wheel down for 2 seconds returns the currently selected parameter (Drop, SWT, cents, A4) back todefault.12
MENU BUTTONWhen pressed, a list of parameters appears. Rotating the data wheel can individually highlight each one.The parameters under the MENU button include:AUTO – Controls whether the tuner or the user selects notes to be tuned (AUTOmatically or MANually). AUTO is the default.1. Highlight the parameter 2. Select by pressing the data wheel ; 3. Edit to <strong>Manual</strong> operation by once againby rotating data wheel ;rotating the data wheel.13
A440.0 – Controls the concert pitch in 0.5Hz increments. The adjustment range is 390.0Hz to 490.0Hz. The default value is 440.0Hz.1. Highlight the parameter 2. Select by pressing data wheel ; 3. Edit the concert pitch by onceby rotating the data wheel ; again rotating the data wheel .Press the SAVE button if you wish to save the new value to memory.PROG SWT – Allows the programming of user-defined Sweeteners.1. Highlight the parameter 2. Select by pressing data wheel and 3. Press the data wheel to start programming the firstby rotating the data wheel; rotate wheel to select the desired patch; note and rotate the wheel to adjust its cent value;4. Press the data wheel to start programming the next 5. Continue through the entire scale until 6. Program each E in EADGBEnote and rotate the wheel to adjust its cent value; all required notes have new cent values. separately. E means high E.14
7. When all notes are programmed 8. Give the Sweetener TM a custom name. Rotate the data wheel to scroll through letters and numbers.press the SAVE button to save When the desired character is displayed, press the wheel to advance to the next space: 8 spaces are available.to the StroboRack’s memory OR; When naming is complete, press the SAVE button.CLR SWTS – Allows the deleting of user-defined Sweeteners, the cent value of all 8 programmable Sweeteners will return to zero and any custom names will bereturned to factory default names (Note: factory presets cannot be deleted).Use the Data Wheel to highlight CLR SWTS, then press the Data Wheel to select it. Press the Data Wheel again to confirm that you wish to delete or clear allprogrammable Sweeteners.15
SCRN SVR. - Controls the StroboRack’s built-in Screen-Saver/ Marquee that appears when the tuner is bypassed.Preset static, scrolling and flashing marquees are selectable as well as the ability to create a custom user marquee to display a band name, a website or a song.An immobile logo can be used to avoid distracting an audience whereas a scrolling or flashing message can call their attention to the name of the band, the next gig,a nickname etc. This is a unique feature among rack equipment and means that the StroboRack is always performing a useful function as a “digital billboard” evenwhen the owner is not using it or indeed even present on stage. Below are examples of a scrolling message and a flashing message.The factory default is to have no message, the signal is tracked whether muted or unmuted. If the tuner is connected to an instrument, but receives no signal, it willautomatically display the static StroboRack logo. This disappears again in favor of the moving strobe image when signal is received again.16
CHOOSING A PRESET MESSAGE FOR THE MARQUEE/SCREEN SAVER1, Rotate the data wheel to 2. Press the wheel to view choices. The first is the strobe image. Selecting this means the image will track whether the tuner ishighlight the parameter. muted or not. “STROBO” causes an immobile StroboRack logo to appear when the tuner is bypassed. “PRE NAME” causes thecurrent preset name to appear. “CUSTOM” causes whatever message the owner has programmed to appear .Rotate the data wheel to highlight the desired image, then press to choose.The scroll/ flash screen then appears. Rotate the wheel to choose between scrolling and flashing and press the SAVE button to save your choice to memory.To view the result, ensure that the StroboRack TM is unmuted (in bypass mode).PROGRAMMING A CUSTOM MESSAGE FOR THE MARQUEEAfter pressing the MENU button, rotate the data wheel clockwise to highlight “SCRN SVR” and press the wheel to reveal the SCRN SVR page. Rotate the wheel tohighlight “CUSTOM” and press the wheel to select it. The default factory setting “STROBE TUNING BY PETERSON” appears.Now, as described in the section about naming Sweeteners TM , rotate the wheel to select letters, numbers or spaces and press it to advance to the nextletter/number/space. Use the “” character when you want the space after your message to truncate and loop back to the start immediately. When finished, pressthe SAVE button. To activate the new message see CHOOSING A PRESET MESSAGE FOR THE MARQUEE above.17
CENTS BUTTONWhen this button is pressed, the cent value is highlighted (default is 00.0 cents).Use the data wheel to enter a plus value (clockwise), or a minus value. This value is active only as long as the tuner is switched on. This feature may be used toquickly (temporarily) align the StroboRack TM to an out-of-tune piano in order to allow subsequent tuning of other instruments to match. It can also be used tomeasure an existing tuning or temperament whose values are unknown by playing each note and adjusting the cent control to steady the image. The resulting centoffset is displayed to 0.1 cent resolution on the menu screen. When measuring a tuning, ensure that the tuner is set to EQU, otherwise the measurement will not beuseable.This control can also be used to quickly (temporarily) align the StroboRack to a recording that is slightly out of tune with standard pitch. Reasons for this are varied,from altered tape/ playback speeds to instruments which, at the time of recording, were in-tune internally but differ from standard pitch.PRESET BUTTONThis button controls which preset is active at any one time. A StroboRack Preset is a combination of a Sweetener (SWT) and a DROP value which can beprogrammed in any sequence by the user and quickly changed by rotating the data wheel or remotely using a footswitch*.*With SR_EX Expander installed only. Footswitch is available as an accessory from www.petersontuners.com/storeSWEETENER TM BUTTONThis allows the user to choose a Sweetener (see pages10 & 11).Using the data wheel (G), the individual Sweeteners can be selected.18
DROP TUNING BUTTONThis allows the user to drop-tune the present tuning to anywhere.Use the data wheel to enter the drop tune value; -1 means one half-step (semitone) down, -2 means two half-steps down etc.SAVE BUTTONThe SAVE button gives the user access to the SAVE page. The data wheel allows the active parameters to be saved, deleted, replaced, added, or no action taken(Quit).AUDIO TONESAudio reference signals are available from the Sound Out jack on the rear panel of the StroboRack TM . Plugging a cord with a ¼ inch (6.3mm) jack into the socketactivates the tone, which can then be plugged into any amplifier via the other end of the cord. Set the Auto/Man control to MAN and scroll through the notes usingthe data wheel. Always set the amplifier’s volume to zero before plugging in. This signal can also be used to calibrate a software tuner like <strong>Peterson</strong> StroboSoft TM ,thus eliminating computer sound card errors.19
<strong>Peterson</strong> Sweeteners TMNAME SWEETENERS NAME HISTORIC TEMPERAMENTS01 EQU Equal Temperament JMA Just Intonation - Major02 GTR Sweetened Guitar JMI Just Intonation - Minor03 ACU Acoustic Guitar 4MT Quarter Comma Meantone04 DAD Sweetened DADGAD 6MT Sixth Comma Meantone05 G12 12 String (Standard Strings) PYT Pythagorean06 G12 12 String (Octave Strings) WRK Werckmeister07 BRT Sweetened Baritone Guitar KRN Kirnberger08 BAS Sweetened Bass Guitar KLN Kellner09 BFE Buzz Feiten ® Electric Guitar YNG Young10 BFE IN Buzz Feiten ® Electric Guitar Intonation VAL Vallotti11 BFB Buzz Feiten ® Bass Guitar RAM Rameau12 BFB IN Buzz Feiten ® Bass Guitar Intonation13 BFA Buzz Feiten ® Acoustic Guitar14 BF12Buzz Feiten ® 12 String (Std. Strings)15 BF12Buzz Feiten ® 12 String (Octave Strings)16 SE9 E9 Tuning for Steel Guitar (Sharp Es) NAME PROGRAMMABLE SWEETENERS17 SC6 C6 Tuning for Steel Guitar S-1 <strong>User</strong> Programmable Temperament18 OE9 E9 Tuning for Steel Guitar (E 0.0 cent) S-2 <strong>User</strong> Programmable Temperament19 U12 Tuning for Universal Steel Guitar S-3 <strong>User</strong> Programmable Temperament20 DBO Perfect Thirds for Dobro ® S-4 <strong>User</strong> Programmable Temperament21 DB Half Tempered Thirds for Dobro ® S-5 <strong>User</strong> Programmable Temperament22 VLN Perfect Fifths for Violin S-6 <strong>User</strong> Programmable Temperament23 VLA Perfect Fifths for Viola S-7 <strong>User</strong> Programmable Temperament24 CLO Perfect Fifths for Cello S-8 <strong>User</strong> Programmable Temperament20
A Word About <strong>Peterson</strong> SweetenersA “Sweetener” is a group of twelve or fewer notes, which are precisely and individually adjusted in degrees of sharpness and flatness to sweeten the tuning ofinstruments using a <strong>Peterson</strong> tuner.Many musicians are familiar with having to tweak their instrument’s tuning after using a digital tuner. <strong>Peterson</strong>’s Sweeteners make this unnecessary.The Sweetener’s names are simply a guide; for example, the Dobro ® settings can be used for tuning any guitar to open A, D or G.Sweeteners are available only in <strong>Peterson</strong> <strong>Tuners</strong>.EQUUnsweetenedGTR (GTR TM ) <strong>Peterson</strong> guitar Sweetener, which makes 4 th & 5 th intervals (as well as the G to B third) more consonant.ACOUST (ACU TM ) <strong>Peterson</strong> acoustic guitar Sweetener, a unique stretch tuning which compensates for capo application.DADGAD (DAD TM ) <strong>Peterson</strong> Sweetened Tuning for guitars tuned to DADGAD.G12 (G12 STD TM ) <strong>Peterson</strong> Sweetened Tuning for the 6 standard strings of 12-string guitars.G12 (G12 OCT TM ) <strong>Peterson</strong> Sweetened Tuning for the 6 octave strings of 12-string guitars.BARITONE (BRT TM ) <strong>Peterson</strong> Sweetened Tuning for Baritone guitars.Bass (BAS TM ) <strong>Peterson</strong> bass guitar-specific Sweetener for use when playing with piano.B F -Elec (B F E) Special tuning for electric guitars featuring the Buzz Feiten Tuning System ® *.B F -Elec IN (B F E IN ) Intonation offsets for electric guitars featuring the Buzz Feiten Tuning System ® .B F -Bass (B F B) Special tuning for bass guitars featuring the Buzz Feiten Tuning System ® .B F- Bass IN (B F B IN ) Intonation offsets for bass guitars featuring the Buzz Feiten Tuning System ® .B F -Acoustic (B F A) Special tuning for acoustic guitars featuring the Buzz Feiten Tuning System ® .B F -12STD (B F 12) Special tuning for the 6 standard strings of 12-string guitars using the Buzz Feiten Tuning System ® .B F -12OCT (B F -12) Tempered tuning for the 6 octave strings of 12-string guitars using the Buzz Feiten Tuning System ® .PSG-SE9 (SE9) Sweetened tuning derived from the Jeff Newman system for steel guitar tuned to E9. E’s are 9.8 cents sharp.PSG-SC6 (SC6) Sweetened tuning derived from the Jeff Newman system for steel guitar tuned to C6.PSG-OE9 (OE9) Sweetened tuning derived from the Jeff Newman system for steel guitar tuned to E9. E’s are at 0.0 cents.PSG-U12 (U12) Universal Tuning for 12 String Pedal Steel (E9/B6).DOBRO ® **(DB○) Sweetened Dobro R Tuning (Pure 3rds for Open A, D or G tunings) - Tune in playing position.DOBR ® (DB ) Sweetened Dobro R Tuning (Half Tempered 3rds for Open A, D or G tunings) – Tune in playing position.VIOLIN (VLN) (C)GDAE in perfect 5 th intervals for violin tuning (4 & 5 string violins). Tuning should be done by bowing.VIOLA (VLA) CGDA in perfect 5 th intervals for viola tuning. Please note: Tuning should be done with a bow.CELLO (CLO) CDGA perfect 5 th intervals for cello tuning. Please note: Tuning should be done with a bow.21
A Word About TemperamentsMusical temperaments are systems used to determine where each note in the octave (12 notes) is to be placed in relation to the others. The most commonly usedtemperament in modern music is the Equal Temperament, in which the “space” or interval between each note and its immediate neighbor is always 100.0 cents.However, there are many other methods used to divide the octave. These temperaments are called Unequal. Press the Temp button and use the data wheel to scrollthrough the different temperaments:Equal (EQU): All semitone intervals are exactly 100.0 cents wide.Just Major (JMA): Just intonation is possibly the oldest known way of dividing the octave. The Just Major version features beatless major thirds, used to tune brass& woodwind ensembles.Just Intonation is often called “Natural” tuning, because of its consonant intervals. It is usually used by brass players to enhance the sound of ensemble playing.Elements of this are also used in choral intonation.Just Minor (JMI): Beatless minor thirds, see above.Quarter (¼) Comma Meantone* (4MT): Meantone temperament, used for harpsichord.One Sixth (1/6 th ) Comma Meantone* (6MT): Meantone temperament used for early music instruments such as lute, viol, viola da gamba etc.Pythagorean (PYT): Beatless fifths, introduced by Greek mathematician Pythagoras (569 – 475 BC).Werckmeister III* (WRK): Introduced by German organist Andreas Werckmeister (1645 - 1706), for tuning organ and harpsichord. Flexible tuning by which somedistant keys are playable. Each key retains a particular color.Kirnberger III* (KRN): Composer, theoretician and student of Bach, Johann Philipp Kirnberger (1721-1783) conceived the Kirnberger temperament. It is oftenreferred to as the simplest of temperaments, having no pure thirds except the C-E interval, thus lending itself to music written in C Major. Avoid pieces in B, F# or Dbwhich were rare at the time of inception. For tuning organ and harpsichord.Kellner (KLN): The original “wohltemperirte Clavier” (well tempered) tuning introduced by Bach in the early 1700s and rediscovered by Professor Herbert AntonKellner in the 1970s. The well-tempered fifths are almost all equal, being reduced by 1/5 of a Pythagorean comma (4.7 cents).Young* (YNG): Thomas Young (1773 – 1829) introduced the original RGB theory of color. Following that, he applied similar thought to musical temperament. C & Fare stable and there are some particularly smooth sounding 3rds, 4ths and 5 th scattered among the keys. Used widely in forte piano tuning and harpsichord.Vallotti* (VAL): Francesco Antonio Vallotti’s (1697-1780) well temperament for harpsichord is very close to Equal temperament. It is one of the mildest of the classicwell temperaments.Rameau* (RAM): This late French Baroque temperament by Jean-Philippe Rameau (1683 - 1764) is also known as “Temperament Ordinaire” and contains threebeatless major thirds.*Temperaments marked with an asterisk are often tuned using a Concert A setting of A=415Hz or A=392Hz depending on the period the music to be played was written in.**Buzz Feiten Tuning System is a registered trademark of Buzz Feiten Design and has no affiliation with <strong>Peterson</strong> Electro-Musical Products, Inc.*** Dobro is a registered trademark of the Gibson Guitar Corp. and has no affiliation with <strong>Peterson</strong> Electro-Musical Products, Inc.22
Setting up Presets on the <strong>Peterson</strong> StroboRackIn the StroboRack, a preset is a combination of a choice of Sweetener and Dropped tuning value. It’s possible to create a list of these presets which can be namedand recalled by hand or with the remote footswitch* in any sequence.When a preset is activated, its name flashes briefly on the large center strobe display before reverting to the strobe image and tuning can commence.To program a preset:1. Press the Sweetener button and select the desired Sweetener. This can be one of the <strong>Peterson</strong> Sweeteners or a user-defined Sweetener setting.2. Press the Drop button and Select the desired Drop Tuning setting (if required).3. Press the Save button.4. The Preset window appears showing the choices Delete (applies to last selected Preset), QUIT (to end the process without saving the preset), REPLACE(applies to last selected Preset) and ADD to add the new preset to the list of existing ones.5. Rotate the data wheel to highlight ADD.23
6. Press the data wheel to proceed to the renaming page.7. Rotate the data wheel to name the preset (if not required, skip this step and proceed to step 8)8. Press the Save button to save the preset and name.*With optional SR-EX Expander onlyRecalling PresetsPress the Preset button and use the data wheel to scroll through the presets.If the SR-EX Expander is installed, connect a dual latching footswitch to the rear panel socket marked MUTE/PRESET. Engaging the right hand footswitch (orwhichever switch is connected to ring of plug) will advance the presets. When the footswitch is engaged, the name of the preset flashes briefly on the strobe screenbefore reverting back to the strobe image.24
Setting Guitar & Bass Intonation Using Your <strong>Peterson</strong> StroboRackAfter deciding on string gauge, setting string height (nut & bridge), neck relief, and all other factors that affect the guitar’s intonation considerably, the individual stringlengths need to be adjusted. For this task, use Equal temperament in the StroboRack’s SWT menu.Lower the pickups away from the strings to avoid "doubling" and electromagnetic pull.Lay the guitar flat on a bench to adjust it, but always check the intonation with the instrument in the playing position, as the readings will be visibly (and lateraudibly) different. You should always aim to freeze or "cage" the image on the strobe tuner display; the less movement the more accurate the results.A common technique in setting the intonation is the 12th fret & flageolet comparison method. In this method, the flageolet or "harmonic" of the 12th fret is comparedto the fretted string at the 12th fret, and saddle position is adjusted as follows:If the fretted note is flat compared to the flageolet note, move the bridge saddle forward to shorten the string.If the fretted note is sharp compared to the flageolet note, move the bridge saddle back to lengthen the string.Adjust until both fretted note and flageolet are identical in pitch.While this is a common system, it is not always the most satisfactory.One popular alternative is to adjust each string so that it is in tune at two points an octave apart from each other on the fret board using a strobe tuner. Using the 5thand 17th fret as an example:Tune a string at the 5th fret.Check the string at the 17th. If sharp, move the saddle back, thus lengthening the string. If flat, shorten the string by moving the saddle forward. Rememberto fret the string using the pressure that you would normally apply while playing.Keep repeating this process until each string is in tune as much as possible at both the 5th and 17th frets.This method takes time, and has to be repeated if you change string gauges, but if properly executed, it yields very satisfactory results.Now, depending on your own taste, tune your guitar using one of the StroboRack’s many Sweeteners TM . Find out how your instrument can really sound!The methods described above are within anybody's reach. All you need are your ears and your peterson strobe tuner!Please note that we have not referred to any method involving structural changes to the instrument. These are best discussed with a professional instrument technician.25
<strong>User</strong>-Programmable SweetenersThere are eight user-programmable Sweetener settings in the StroboRack TM (S-1 to S-8). The user can specify a Sweetener and program it into the StroboRack forrecall anytime.Rear Panel LampLampON/OFFSwitchBNCLampSocketA BNC socket and ON/OFF switch allows the adding of an optional gooseneck lamp to the rear panel of the StroboRack TM . This lamp can be useful as a work light oras additional lighting to prevent accidents on dark stages. 12V LED, halogen and incandescent lamps are supported.Optional StroboRack AccessoriesStroboRack SR-EX PRO Expander ModuleMute Footswitch (Single footswitch) for use with StroboRack or StroboRack SR-EX Expander TMMute/Preset Select Footswitch (Dual Footswitch) for use with StroboRack SR-EX Expander only.Channel Select Footswitch (Dual Footswitch) for use with StroboRack SR-EX Expander only.Gooseneck Lamp for use with StroboRack or StroboRack SR-EX Expander.TP-2 Clip-on Tuner PickupRemote Control OptionsStroboRack <strong>VS</strong>-R TMUse a <strong>Peterson</strong> single latching footswitch (Part# 403086) inserted into the Mute jack on therear panel to remotely mute the StroboRack’s output signal for silent tuning.Remote single latching footswitch (Part# 403086) is available from your <strong>Peterson</strong> dealer or from www.petersontuners.com .26Mute FootswitchInput
StroboRack SR-EX PRO Expander ModuleINSTALLATIONInstall the SR-EX PRO Expander according to the included instructions.GENERALWith the Expander installed, the StroboRack’s input, routing and patching possibilities are vastly increased, but the operation of the tuner remains the same as do allfront panel functions and procedures.SIGNAL ROUTINGThe rear panel combo (¼” Stereo/XLR) input recognizes automatically whether a ¼” mono, ¼” stereo or XLR type plug is inserted and routes the signal as follows:¼” mono input to Output 1.¼“ stereo input to Output 1 (Tip) & Output 2 (sleeve). (Either of these inputs can be patched to the DI Input if required)XLR input to XLR Output, the StroboRack SR-EX features high quality THAT Corporation’s OutSmart balanced line receivers and drivers for optimal sound quality.(Note: With the SR-EX Expander installed, the front panel mono input is sent to Outputs 1 only).DI INPUT JACKThis can be used to patch Output 1 or 2 to the built-in active DI, or alternatively as a completely independent DI for a separate instrument.GROUND SWITCHThis switch controls the signal ground (NOT the electrical ground). The DI circuit features a switch, which allows the choice of Ground connected/Auto/Ground lifted.Factory default position is AUTO, this means that the StroboRack detects whether or not there is already a ground present and switches automatically.The StroboRack is one of the first audio products to feature auto-ground, but as other manufacturers incorporate it in the future, remember that in a system withmultiple rack units featuring Auto-ground, only one can be the master, otherwise, constant switching will occur, therefore disable Auto-Ground in all but one rack unit.REMOTE FOOTSWITCH OPERATION (Dual footswitch 403087)Use a <strong>Peterson</strong> dual latching footswitch pedal (Part# 403087) inserted into the Preset/Mute jack on the rear panel to remotely 1) advance the StroboRack’s presetsand 2) mute the StroboRack’s output signal for silent tuning.Use a second <strong>Peterson</strong> dual footswitch pedal (Part# 403087) inserted into the Output Select jack on the rear panel to remotely activate and deactivate each of theExpander’s dual mono outputs.Remote dual footswitch pedal 403087 is available from your <strong>Peterson</strong> dealer or from www.petersontuners.com .Channel SelectDual FootswitchInputPreset/MuteDual FootswitchInput27
Tips To Keep Your Instrument In Tune1 Wash your hands before playing2 Allow the instrument to reach room temperature before tuning3 Always tune up to the target pitch, never down4 Keep the instrument at a constant temperature while playing5 Check your tuning frequently6 Wipe down your instrument with a cloth after playing7 Change strings as frequently as your budget allows8 If changing string type/gauge, re-intonate/ regulate the instrument9 On fretted instruments, check for fret wear10 Clean your instrument regularly and thoroughly11 On stringed instruments, keep bearing edges lubricated12 On wind instruments, keep keys/ valves lubricated, check pads.Tuning Guitars<strong>Peterson</strong> tuners are the most sensitive and accurate tuners in the world. They differ completely from digital/needle tuners, so you need to interact differently withthem.Brush the string lightly with the flesh of your thumb; the StroboRack TM requires very little signal to perform optimally. Pluck the string once, not repeatedly.The StroboRack’s superior sensitivity means that the image of the string’s signal appears IMMEDIATELY (without the time-lag common in digital tuners) andremains on the display longer. Always tune in the playing position, even when setting intonation.If you’re a 12 string guitar player, you can choose to use EQU to tune all 12 strings or assign a separate sweetener to both the standard and octave strings.Tuning Pedal Steel Guitars<strong>Peterson</strong> tuners are the first and only tuners to contain specific tempered tunings for pedal steel similar to the settings popularized by Jeff Newman.Generally speaking, these tunings should be executed with both A & B pedals depressed unless the guitar has minimal cabinet drop.These presets are chromatic and are designed to cover both open strings, pedals and levers.SE9 is a non-Equal temperament in which the E notes are 9.8 cents sharp0E9 is a non-Equal temperament in which the E notes are at 00.0 centsSC6 is a non-Equal temperament for steel guitars using the C6th tuning.U12 is a non-Equal temperament for steel guitars using E9/B6 tuning.Tuning Lap Steel GuitarsMany specially tempered lap steel tunings are available on our forum & website www.petersontuners.com .Tuning Dobro ® * or Resonator GuitarsThe StroboRack contains the first and only presets with pure and half tempered third tunings for resonator guitars. The following tunings are possible using either ofthe two presets:Open A (A-C#-E-A-C#-E )Open D (D-A-D-F#-A-D)Open G (G-B-D-G-B-D)Remember to tune with your instrument in the playing position.* Dobro® is a registered trademark of the Gibson Guitar Corporation.28
Tuning Violin, Viola or CelloThe StroboRack TM contains the first and only preset pure fifths for violin, viola and cello. Tune using the bow, as plucking the strings does not allow for stringdeflection due to the weight of the bow.For quick tuning in adverse conditions, plug a <strong>Peterson</strong> TP pickup into the StroboRack and attach the pickup to the instrument to be tuned.Tuning “Early Music” instrumentsThe StroboRack’s long list of classical temperaments can be put to good use for instruments such as harpsichord, lute, and viola da gamba. Remember to changethe concert pitch to suit the relevant instrument or period of music. Common Early Music concert pitch is A=415Hz, but 392Hz and 430Hz are also widely used. TheStroboRack’s concert pitch reference is adjustable in 0.5Hz increments from 390Hz all the way to 490Hz. The Meantones (1/4 & 1/6) are widely used for theseinstruments.Tuning Brass & Woodwind InstrumentsUse the StroboRack’s built-in microphone to pick up the instrument’s sound. In noisy environments, attach the TP tuning pickup to your instrument’s lead pipe or belland plug the other end into the tuner. Try a few locations on the instrument to get the best results.Tuning BagpipesFor Great Highland Bagpipes, set the base note & root to A, change the Concert A reference to 476Hz (or whatever the Pipe Major’s standard is) and select the JustMajor preset (JMA). Attach the <strong>Peterson</strong> TP pickup to the drones and then to the chanter to tune.For Uilleann, Border, Welsh & Biniou Pipes, set the base note to A, the root to D, change the Concert A reference to 440Hz and select the Just Major preset. Attachthe TP tuning pickup first to the drones and then to the chanter to tune.Tuning acoustic instruments in generalUnamplified acoustic instruments can be tuned using the StroboRack’s built-in mic or alternately the <strong>Peterson</strong> TP clip-on tuning pickup, which senses theinstrument’s vibration.An external microphone with a ¼” plug can also be used.Instruments tuned to an unknown or fixed Concert A setting.Play a note on the instrument that is central relative to the complete range of notes playable. While the note is sounding, adjust the StroboRack’s Concert A Hz valueuntil the Strobe image stops moving.The StroboRack is now correctly calibrated to the instrument in question and can be used to tune other instruments so that they are also in tune with this instrument.29
StroboRack TM Signal Routing1: Instrument – StroboRack - 1 Amp (Example: Electric Guitar/Bass/Steel)Notes:Input Signal: Input A or B (A overrides B) - Mono (TS unbalanced)*Output Signal: MonoFootswitch (or Mute button) mutes signal for silent tuningSignal FromFront or RearPanel InputJackTS*TS MuteSwitchToAmp/FX*Input: Standard cable with mono (TS) ¼” plug30
StroboRack TM Signal Routing with Optional SR-EX Expander1: Instrument – StroboRack - 1 Amp (Example: Electric Guitar/Bass/Steel)Notes:Input Signal: Input A or B (A overrides B) Mono (TS unbalanced)*Output Signal: MonoDual Footswitch mutes output for silent tuning and remotely controls presets.SignalFrom FrontPanel InputJack ATS*TRS MuteSwitchToAmp/FX*Input: Standard cable with mono (TS) ¼” plug31
2: Instrument - StroboRack TM - 2 Amps (Example: Electric Guitar/Bass/Steel)Notes:Input Signal: Input B only Mono signal on bridged ¼ TRS plug*Output Signals: 2 MonoDual Footswitch - 1. mutes all outputs for silent tuning 2. Remotely controls presets.*Input: Mono cable bridged to stereo ¼” plugTRSMuteSwitchToAmp/FX1TSToAmp/FX2TSSignalFromRearPanelInputJack B3: Instrument TRS* –32
StroboRack TM - 2 Amps Switchable (Example: Electric Guitar)Notes:Input Signal: Input B only - Mono to bridged ¼” TRS plug*Output Signals: 2 MonoDual Footswitch selects output channelsSecond Dual footswitch mutes all outputs for silent tuning and remotely controls presets.*Input: Mono cable bridged to stereo ¼” plugOutputSelectSwitchTRSMuteSwitchToAmp/FX1TSToAmp/FX2TSSignalFromRearPanelInputJack BTRS*33
4: Instrument – StroboRack TM - Amp – PA (Example: Electric Bass)Notes:Input Signal: Input A or B (A overrides B) Mono (TS)*Output Signals: 1 Mono (TS unbalanced), 1 Balanced (XLR)Footswitch/Mute Button mutes output 1 and DI output for silent tuningSignalFrom FrontPanel InputJack ATS*TRSMuteSwitchTo PAConsoleXLRToAmp/FXTSSignalFromRearPanelInputJack BTS**Input: Standard cable with mono (TS) ¼” plug34
5: Instrument - StroboRack TM - PA (Example: Electro-Acoustic Guitar)Notes:Input Signal: Input A or B (A overrides B) Mono (TS)*Output Signals: 1 Balanced (XLR), 1 MonoDual Footswitch mutes all outputs for silent tuning and remotely controls presetsSignalFrom FrontPanel InputJack ATS**Input: Standard cable with mono (TS) ¼” plugTRSMuteSwitchTo PAConsoleXLRToacousticampSignalFromRearPanelInputJack BTS*35
6: Instrument - StroboRack- 2 Amps – PA (Example: Electric Bass)Notes:Input Signal: Input B only - Mono to bridged TRS jack plug*Output Signals: 1 Mono (TS unbalanced), 1 Balanced (XLR)Dual Footswitch mutes all outputs for silent tuning and remotely controls presets*Input: Mono cable bridged to stereo ¼” plugTRSMuteSwitchTo PAConsoleXLRToAmp/FX1TSToAmp/FX2TSSignalFromRearPanelInputJack BTRS*36
7: Stereo Instrument - StroboRack TM - 1 Amp – PA (Example: Hybrid Guitar/Bass)Notes:Input Signal: Input B only - Stereo (TRS Unbalanced)* Tip to output 1, Ring to output 2Output Signals: 2 Mono (TS unbalanced), 1 Balanced (XLR)The two input signals are kept separate throughout the tuner.Dual footswitch: 1. Mutes all outputs and 2. Allows remote control of presets.Second dual footswitch selects outputs 1 & 2<strong>User</strong> can patch Output 2 to DI externally using a patch cord to DI Input, this automatically disengagesOutput 1’s internal connection to the DI.*Input: Stereo cable with stereo ¼” plugOutputSelectSwitchTRSMuteSwitchTo PAConsoleXLRToAmp/FXTSSignalFromRearPanelInputJack BTRS37
8: Dual Mono Instrument - StroboRack- 2 Amps - (Ex: Stick/Tap/Touch Instr.)Notes:Input Signals: Input B only - 2 Mono (TRS Unbalanced)* Tip to output 1, Ring to output 2Output Signals: ¼” Mono unbalanced x 2, XLR balancedThe two input signals are kept separate throughout the tuner.TRS Footswitch mutes all outputs and allows remote control of presets.Second dual footswitch selects outputs 1 & 2.If required, connect Output 2 to DI externally using a patch cord (see Example 7).*Input: Stereo cable with stereo ¼” plugOutputSelectSwitchTRSMuteSwitchTo PAConsoleXLRToAmp/FXTSToAmp/FX2TSSignalFromRearPanelInputJack 9: BTRS*38
Microphone/Balanced Instrument - StroboRack TM – PA (Example: Studio)Notes:Input Signal: Input B only Balanced XLR*Output Signal: BalancedDI circuitry is disabled automatically as the signal is already balanced.Footswitch or mute button mutes balanced output for silent tuning.*Input: Balanced line cable with male XLR plugTRSMuteSwitchTo PAConsoleXLRSignalFromRearPanelInputJack BXLR*39
Frequently Asked QuestionsQ. I’m a guitar player who tunes to low C (4 half steps down). Can I still use the Sweeteners TM (like GTR)?A. Yes. Select GTR and use the DROP control at –4.Q. I play a 5-String violin, does the VLN preset allow for that?A. Yes, low C is pre-programmed to be a perfect fifth below G.Q. I play pedal steel guitar, how do I get the tuner to always power up with the E9 Sweetener active?A. Choose either S-E9 or 0-E9 and assign that sweetener to a preset.Q. What Sweetener should I use when I set the intonation on my guitar?A. It is recommended that Equal temperament be used for setting intonation. After the intonation has been set, choose a Sweetener to tune the guitar.Q.Why are there only two Dobro R /Resonator Sweeteners for three tunings and what is the difference between them?A. Each Sweetener contains the relevant altered thirds for all three tunings. All other notes are unaffected, so you don’t need to adjust the tuner even if you switch fromopen G to open D.The difference between the two Sweeteners is that in DBO, all thirds are pure but in the other setting, they are half-tempered.Q. How do I use this tuner to tune piano?A. You can use StroboRack to tune the temperament octave (C4 to C5)However, aside from electric pianos like the Wurlitzer or Rhodes pianos, full piano stretch tuning functionality is available only on the <strong>Peterson</strong> AutoStrobe TM 490ST.Q. Will the StroboRack hold its memory when I unplug it?A. Yes, the StroboRack requires no “battery back-up” to hold its memory indefinitely.Q. Can the StroboRack TM be used for Tap-tuning?A. You can try, but we generally recommend our true mechanical spinning disc strobe tuners for this application. They are traditionally the most favored tuners for taptuning.Q. Sometimes I see an arrow beside the note E on the display, what does it mean?A. The arrow denotes the “High” E on a guitar.Q. I’m tuning my guitar and I can’t seem to get the strobe image to stop moving.A. If you’re someone who has never used a strobe tuner before, here are a few tips:1.)As you may have figured out, the display scrolls to the right when the string is sharp, and to the left when it is flat.2.)The individual vertical bands represent different octave ranges. There are 3, and ideally you will focus on making the lowest band stand still, although you will noticethe others slow to a stop as well.3.) It is best to not use a pick. Use the fleshy side of your thumb and gently pluck the string.4.) Unlike needle and LED tuners, you do not need to pluck the string repeatedly. You can generally pluck the string once every 5-7 seconds or until you can no longerhear the sustain of the note.5.) Sometimes it helps to turn the guitar's volume pot down to about 1/4 to 1/2 of it's full potential. Not much signal is required to get a very accurate reading.6.) Make very slight adjustments to your tuning pegs until the strobe display stops moving. There will be random shifts every once in awhile; this is normal. The tuner ishearing everything that your pickups are giving it... noises and all. When you have the display standing still, or extremely close to standing still, you are within 1/10th of acent.Remember, this tuner is about 30 times more accurate than other tuners, so your adjustments need to be that much more precise.40
peterson<strong>VS</strong>-R STROBORack WarrantyWe warrant this product to be free of defects in materials or workmanship for a period of one year after delivery to the original purchaser. Our obligation under this warranty is limited to the replacement or repair of any part or parts which prove upon ourexamination to be defective.This warranty does not apply to damage resulting from transportation, misuse, abuse, or alteration. The complete unit must be returned to our factory, transportation charges prepaid. In order to speed the return of the unit to you, it is recommended thatfor all repairs, other than those required as a result of shipping damage, you deal directly with our factory. In case of damage in shipment, a claim should be filed with the carrier. Be sure to include a brief description of the difficulty you are experiencingand your return address.The above warranty is contingent upon registration within 10 days of the date of receipt of the product by the original purchaser. The warranty conveys specific legal rights to the purchaser, other rights vary from state to state and internationally.Warranty registration is online at http://www.petersontuners.com/support/register/index.cfmManufacturer:<strong>Peterson</strong> Electro-Musical Products, Inc.<strong>VS</strong>-R STROBORack SPECIFICATIONSPhone/Fax +1 708-388-3311 / 708-388-3341Website:E-Mail:Accuracy:www.<strong>Peterson</strong><strong>Tuners</strong>.cominfo@<strong>Peterson</strong><strong>Tuners</strong>.com0.1 cent or within 1/1000 th of one semitone (1/10 th of one cent) over the entire range.Range: 16Hz to 3.6KHz .Sensitivity: + 1mV to 5V.Power:TemperamentsSweeteners:95~250VAC11 Classic temperaments.24 Sweeteners, (+ 8 user programmable).Concert A range: 390Hz to 490Hz (adjustable in 0.5Hz increments).Features:Weight:Exclusive Virtual Strobe Technology - Real-Time Operation.6.66 lbs. / 3.02 kg.Dimensions:19" x 1 3/4" x 8" (48.2cm x 4.5cm x 20.3cm).Note: Specifications and features subject to change without notice© 2007 <strong>Peterson</strong> Electro-Musical Products, Inc.All rights reserved R1“StroboRack“,“Virtual Strobe”, “Sweeteners“, “Sweetened Tunings” and the linear & concentric strobe patterns are trademarks/registered trademarks of:<strong>Peterson</strong> Electro-Musical Products, Inc. U.S. Patent # 6,580,02441
NOTES42________________________________________________________________________________________________________________________________________________________________________________________________________________________________________________________________________________________________________________________________________________________________________________________________________________________________________________________________________________________________________________________________________________________________________________________________________________________________________________________________________________________________________________________________________________________________________________________________________________________________________________________________________________________________________________________________________________________________________________________________________________________________________________________________________________________________________________________________________________________________________________________________________________________________________________________________________________________________________________________________________________________________________________________________________________________________________________________________________________________________________________________________________________________________________________________________________________________________________________________________________________________________________________________________________________________________________________________________________________________________________________________________________________________________________________________